
72 Olds Cutlass

Thread Starter
Registered User
Joined: Oct 2009
Posts: 209
From: Idaho
Hood lovers and trunk molding
Way to go Richeyb!
Looking really good. I just noticed - you've got cruise on that car. Nice option. Other thing I wanted to know is about the hood louvers. You've done them right matching the color of the car. That's how it was done in 72 on these cars. What is the process you used? Paint and light sanding for the highlights after?
My car also got the "deluxe" treatment with 3 coats of clear coat over top. I was looking at the picture of the trunk area. You've got the quarter panel trim piece taped off. I assume you're putting the trunk stainless back on. When I started dry fitting mine I found that the "extra layers" of paint and clear make the deck lid "too thick" to accept the molding as is. I'm debating whether to expand the trim or lightly sand down the edge of the deck and polish it again before the molding goes back on. Can you check with your friend and find out the best thing to do. If you've already put your trim back on, I'd love to hear back from you on this.
You really have a gorgeous car, and I love the color. That is going to really pop in the bright sunshine. Only thing I don't like about dark colors is trying to keep them clean.
As you've probably already found out, these cars are absolutely wonderful to drive. You'll have plenty to do over the winter doing the detail work inside and under the hood. Great photo story also btw.
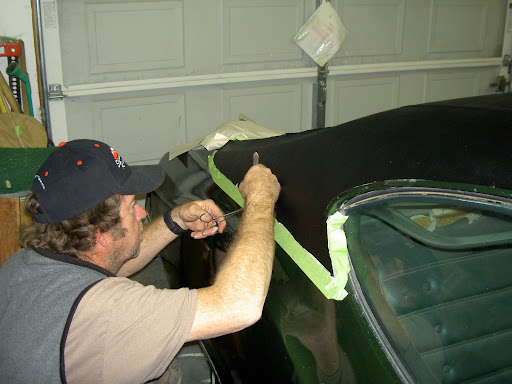
The hood louvers were prepped --cleaning, scrubbing with green scruber, washed with solvent to remove hand oils and sprayed with one coat of paint... while it was wet Aussie had taken a sanding block and taped a rag tight and poured thinners on it. He then wiped the chrome trim top edges, he then did same with his finger and a rag wet with thinners and wiped the slanted portion of the louvers.. He called it feathering...came out great.
For the Trunk (Boot) trim I ended up filing the under edge and priming it and adding fish oil to prevent rust and then tapped on the trim fit nice and sunggly...
Thanks for the comments--can't wait for snow to melt and move it out in the sun to get some Hot pictures....

Next come th vinyl top....
Richey
Thread Starter
Registered User
Joined: Oct 2009
Posts: 209
From: Idaho
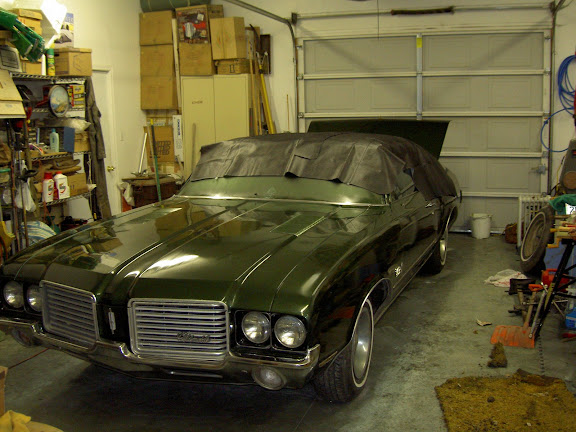
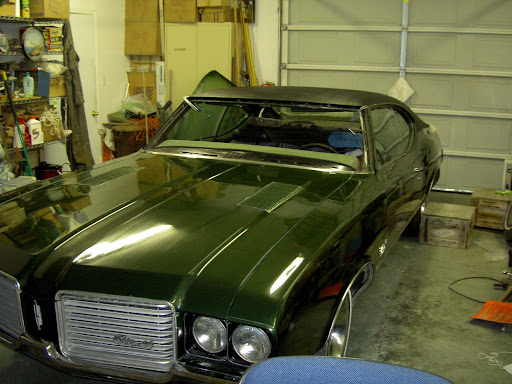
Sunshine
Richey
Last edited by richeyb; Dec 10, 2009 at 04:39 PM.
Registered User
Joined: Jan 2009
Posts: 1,565
From: Dallas Texas
Fantastic job!!!! Your thread on the restoration process is inspring to us all! Keep up the good work, and keep us informed (w/the great pictures)! Allocades and Kudos to you and whomever is assisting you!
Thread Starter
Registered User
Joined: Oct 2009
Posts: 209
From: Idaho
Thanks Cutlassgal and OLD SKL 69, getting the original color was a real chore of searching the internet of how to find the color code and and then decode it. In my case the color code was under the hood, driver side.
once I found it:
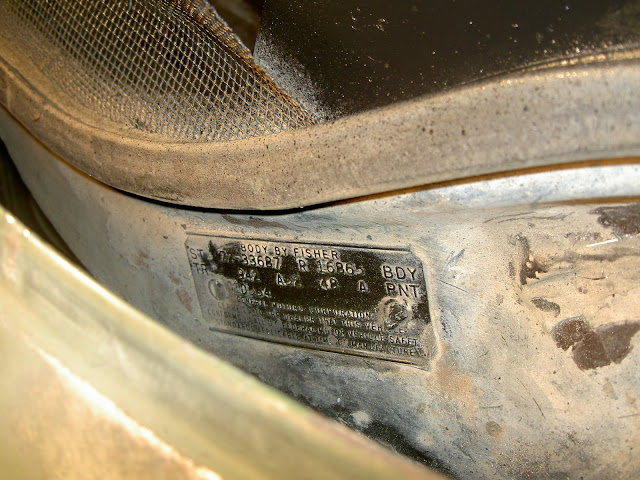
I found the2nd line, 48 A PNT to decode on the AutoColor Library to be Sequoia Green with a vinyl top... That led me to the store with that number, 48 and it came out about as close to original as possible... I think the modern paints are even deeper and more glossy than when we bought her in 1972..
once I found it:
I found the2nd line, 48 A PNT to decode on the AutoColor Library to be Sequoia Green with a vinyl top... That led me to the store with that number, 48 and it came out about as close to original as possible... I think the modern paints are even deeper and more glossy than when we bought her in 1972..
Registered User
Joined: Feb 2008
Posts: 11,798
From: Plano, TX
Awesome job done in record time - you guys sure mke it look easy... Great color of green with nice metallic.
The under-windscreen rust is pretty common withthese body styles.
I would recommend an upholstery shop to do your vinyl top. I would be too scared to mess it up and have to buy a new piece afterward. I like the looks of the soft tops. You painted the roof, live in a dryer area, and if you keep the car out of the rain, rust should not be an issue under it (at least in your lifetime.
Post some in the sun pics!
You will enjoy the interior resto - I did with mine.
PS - I notice your car has cruise control...
Tony, what area in Dallas are you at? I am in East Plano.
Thread Starter
Registered User
Joined: Oct 2009
Posts: 209
From: Idaho
More work planned
Things seem to have slowed, I have only added a coat of wax on the paint job and now waiting on my new vinyl top to arrive. I decided on black and then add some tinting to the windows to go along with the top. After talking to Tom (tomcotops.com) and searching the internet for various tips I'm going to install it myself. I'll keep everyone posted on how that goes and add in some pics of that action.. Next will be a shot at the interior--ordered a set of restoration seat covers from Legendary that should be arriving after the new year... Haven't taken the old ones off but hoping the rubber cushions are in good shape, but I'll findout once I dig in. Have not done that before either so That wil lbe a learning experience....more pics to follow that project... Of course the overall plan calls for carpet, and roof liner, etc... I did pick up a new windshield to put in after the vinyl top goes on.. found the best deal at windshildstogo.com. Hope everyone has a Merry Christmas. I think my Santa's list maybe too long for this year, but I have been good...maybe next year..
Richey
Richey
Last edited by richeyb; Dec 20, 2009 at 08:52 AM.
Just an Olds Guy
Joined: Jul 2008
Posts: 24,528
From: Edmonton, AB. And "I am Can 'eh' jun - eh"
you have been a verrrry good boy. Not everyone would go out of their way to rescue and preserve memories of the past. You're definitely on my list for this year and next....

Know anyone who needs a load of coal?

Thread Starter
Registered User
Joined: Oct 2009
Posts: 209
From: Idaho
molding and emblem fasteners hunt
I'm trying to find the 3 small clips that hold on the Trunk script emblem on a 72 Cutlass S? I have good emblem and have found that in the Fusick catalog SE57T and it says fasteners are included. Anyone know how or who I order only the 3 fasteners from. (The fastener pushes into the trunk lid and the emblem then pushes into the fastener)
I am also looking for a similar fastener, but larger diameter, that plugs. into the body to hold on the front portion of the molding that holds down the edge of the vinyl top between the rear window and the back window..
I am also looking for the molding fasteners that are for the 7/8 inch side molding that is on the door and panel just behind the door. I had orders a dozen off ebay and of course they are 1/8 in too big? They look like part # 10220 molding fastener in Fusick's catalog but I can not tell from the description if that would be the correct fastener.
I'm also looking for the Glove box Lock retainer
Anyone have any ideas on these items for a "72 Cutlas S 2 door hartop"?
Merry Christmas!
Richey
Just an Olds Guy
Joined: Jul 2008
Posts: 24,528
From: Edmonton, AB. And "I am Can 'eh' jun - eh"
I'm trying to find the 3 small clips that hold on the Trunk script emblem on a 72 Cutlass S? I have good emblem and have found that in the Fusick catalog SE57T and it says fasteners are included. Anyone know how or who I order only the 3 fasteners from. (The fastener pushes into the trunk lid and the emblem then pushes into the fastener)
I am also looking for a similar fastener, but larger diameter, that plugs. into the body to hold on the front portion of the molding that holds down the edge of the vinyl top between the rear window and the back window..
I am also looking for the molding fasteners that are for the 7/8 inch side molding that is on the door and panel just behind the door. I had orders a dozen off ebay and of course they are 1/8 in too big? They look like part # 10220 molding fastener in Fusick's catalog but I can not tell from the description if that would be the correct fastener.
I'm also looking for the Glove box Lock retainer
Anyone have any ideas on these items for a "72 Cutlas S 2 door hartop"?
Merry Christmas!
Richey
richeyb, those are "barrel fasteners". you put a template on the trunk drill the holes, and put in the barrels. The emblem studs just slide into the barrels. Makes for easy application and removal.
Those fasteners that hold the vinyl trim are secured from inside the sail panel and are commonly called "speed nuts". For them and the others you are looking for, you can search ebay, but theres a company called FLORIDA FASTENERS that will have all this stuff. Since you're going to have the interior out for redoing, that' s a good time to do any of the fasteners that get hidden by the inside panels.
I'm also looking for the Glove box Lock retainer
I think you're going to need to find a donor car for this. Anyone on ebay thats parting out a car (could be any model of cutlass 442 from 70-72) should be able to dig one up for you.
Merry Christmas!
Richey
Thread Starter
Registered User
Joined: Oct 2009
Posts: 209
From: Idaho
Laying out Vinyl Top
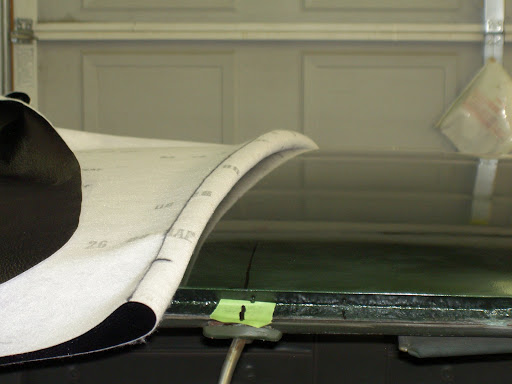
My vinyl top arrived and I'm committed to have patiience and let it lay out flat for a week before I give it a try at putting it on..(hard to wait )
)
I've cranked up the heat to about 90 degrees to help smooth out the top.. I also added a couple large "C" clamps on each side to add some weight to help it smoothout.
After searching the internet for different techniques I think I'll try the techniques from the MOPAR Mucle car article http://www.moparmusclemagazine.com/t.../photo_01.html
It suggest using brush on contact cement versus spraying... Has anyone tried this? It would seem a little easier to control where the contact cement is, but I'll need to keep it thin and smooth. I would assume any big globs would show through? Is thin and smooth possible with brush?
Any thoughts?
I'll probably be committed next weekend when I can round up a couple freinds to help hold it up and spread it out..... etc.....
That will make for a Happy New Year!!
Richey
)I've cranked up the heat to about 90 degrees to help smooth out the top.. I also added a couple large "C" clamps on each side to add some weight to help it smoothout.
After searching the internet for different techniques I think I'll try the techniques from the MOPAR Mucle car article http://www.moparmusclemagazine.com/t.../photo_01.html
It suggest using brush on contact cement versus spraying... Has anyone tried this?
It would seem a little easier to control where the contact cement is, but I'll need to keep it thin and smooth. I would assume any big globs would show through? Is thin and smooth possible with brush?Any thoughts?
I'll probably be committed next weekend when I can round up a couple freinds to help hold it up and spread it out..... etc.....
That will make for a Happy New Year!!
Richey
Just an Olds Guy
Joined: Jul 2008
Posts: 24,528
From: Edmonton, AB. And "I am Can 'eh' jun - eh"
Good luck on the installation Richey. The rule of thumb with friends helping out is make sure they help out b4 you feed em the booze. Your car is really starting to look sharp! I'll be watching your vinyl install carefully because I'm doing the roof on mine this year too. Don't have heated garage though so it'll be in the summer. That was a really interesting pictorial of the vinyl going on that Dodge. Who did you get your vinyl top from?
Thread Starter
Registered User
Joined: Oct 2009
Posts: 209
From: Idaho
Good luck on the installation Richey. The rule of thumb with friends helping out is make sure they help out b4 you feed em the booze. Your car is really starting to look sharp! I'll be watching your vinyl install carefully because I'm doing the roof on mine this year too. Don't have heated garage though so it'll be in the summer. That was a really interesting pictorial of the vinyl going on that Dodge. Who did you get your vinyl top from?
Registered User
Joined: May 2008
Posts: 651
From: Dallas
If I was doing a vinyl top I would get a wall paper roller and brush, or a stiff pool table brush to help with smoothing the top after the glue is put on. Start in the middle and work the glue out to the sides. The glue will probable shrink, I would also watch for air bubbles. I don't know if the articles state any of this just trying to help.
It always helps to have someone that knows what they are doing, or at least wanting to help do a good job.
It always helps to have someone that knows what they are doing, or at least wanting to help do a good job.
Thread Starter
Registered User
Joined: Oct 2009
Posts: 209
From: Idaho
top
Good luck on the installation Richey. The rule of thumb with friends helping out is make sure they help out b4 you feed em the booze. Your car is really starting to look sharp! I'll be watching your vinyl install carefully because I'm doing the roof on mine this year too. Don't have heated garage though so it'll be in the summer. That was a really interesting pictorial of the vinyl going on that Dodge. Who did you get your vinyl top from?
Thread Starter
Registered User
Joined: Oct 2009
Posts: 209
From: Idaho
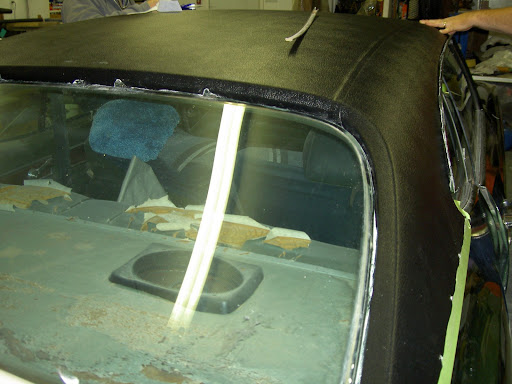
Progess has slowed but continues as I wait to put on the top. Cleaned out the boot/trunk and found a lot of rust. More sanding and cleaning and then treated with rust stop and primer...


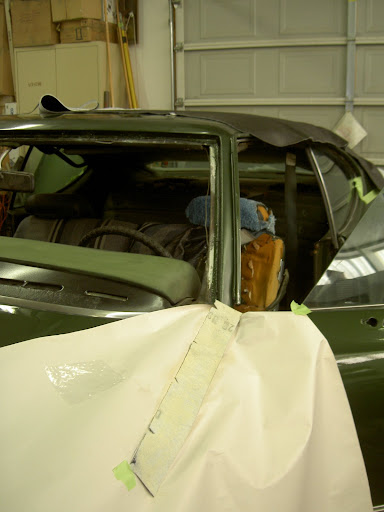
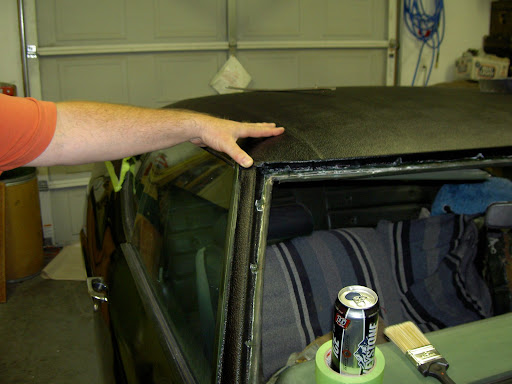
Pulled out the old weahterstripping and found a little rust at the top and had to treat that area also
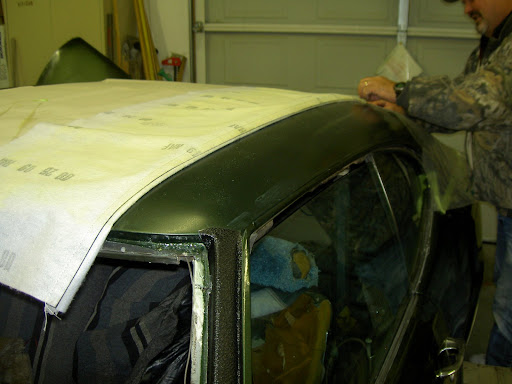
After laying out the top for about a week, I have started prepping it to put on. I started by removing the vinyl and scrubbing down the top with a dubbie scrubber, enough to take off the gloss. Then I have measured the center and marked a line down the center of the top, plus a line on each side marking where the seams will line up. I then folded the top inside out and lined up the seams and marked the center fold, marking the center... Plan will be to line up these lines as I start gluing on the top ,starting at the center....
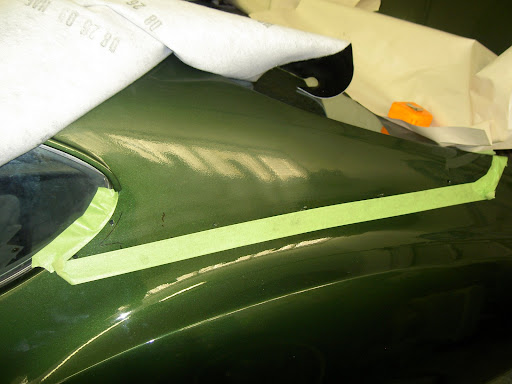
I also have masked off the sides leaving the area where I will apply the glue.
Just waiting on a good day to hook in my freinds and give it a try. Wish me luck.
Richey
Pulled out the old weahterstripping and found a little rust at the top and had to treat that area also
After laying out the top for about a week, I have started prepping it to put on. I started by removing the vinyl and scrubbing down the top with a dubbie scrubber, enough to take off the gloss. Then I have measured the center and marked a line down the center of the top, plus a line on each side marking where the seams will line up. I then folded the top inside out and lined up the seams and marked the center fold, marking the center... Plan will be to line up these lines as I start gluing on the top ,starting at the center....
I also have masked off the sides leaving the area where I will apply the glue.
Just waiting on a good day to hook in my freinds and give it a try. Wish me luck.
Richey
Just an Olds Guy
Joined: Jul 2008
Posts: 24,528
From: Edmonton, AB. And "I am Can 'eh' jun - eh"
Good luck on your fishin trip Richey. Hope you can hook a few big ones! BTW you can get the right color "splatter" paint if you're looking to redo the trunk interior afterwards. It would really freshen up the trunk. Also, if you need new trunk or door rubber let us know. There's a lot of suppliers for new rubber parts out there and the quality is really quite good.
In addition to the regular suppliers like Fusicks, Parts Place, Tamraz, Year One, also check out Supercars Unlimited has a good range of rubber and prices: http://www.supercarsunlimited.com/Ca...epartmentID=23
Steele Rubber products might be able to help you out too: https://secure.steelerubber.com/search_frameset.php
Registered User
Joined: Dec 2009
Posts: 25
From: San Jose, CA
This car is looking amazing. I normally don't like green cars, but the paintjob on that is fantastic, you may have changed my mind when it comes to that color! I can't wait to see more of the work you will do.
Ben
Ben
Thread Starter
Registered User
Joined: Oct 2009
Posts: 209
From: Idaho
Splatter paint
Good luck on your fishin trip Richey. Hope you can hook a few big ones! BTW you can get the right color "splatter" paint if you're looking to redo the trunk interior afterwards. It would really freshen up the trunk. Also, if you need new trunk or door rubber let us know. There's a lot of suppliers for new rubber parts out there and the quality is really quite good.
In addition to the regular suppliers like Fusicks, Parts Place, Tamraz, Year One, also check out Supercars Unlimited has a good range of rubber and prices: http://www.supercarsunlimited.com/Ca...epartmentID=23
Steele Rubber products might be able to help you out too: https://secure.steelerubber.com/search_frameset.php
In addition to the regular suppliers like Fusicks, Parts Place, Tamraz, Year One, also check out Supercars Unlimited has a good range of rubber and prices: http://www.supercarsunlimited.com/Ca...epartmentID=23
Steele Rubber products might be able to help you out too: https://secure.steelerubber.com/search_frameset.php
New rubber for doors and trunk were my first purchase and have just been waiting to finish painting everything before installing it... Can't remembeer who I ordered it through, Have not taken the door rubber off but the replacment rubber has small plastic studs to hold in place. I'm assuming wiill just be a remove and replace with a little adhesive to help hold it...Richey
Thread Starter
Registered User
Joined: Oct 2009
Posts: 209
From: Idaho

I'll let you know how it does. Thanks for the suggestion though..
Richey

Registered User
Joined: Feb 2009
Posts: 2,257
Why did the body guy leave the moldings on?
Also, you should have removed the trunk weatherstripping and painted that area.
Fixing the windshield/pillar rust with fiberglass will not hold up. New metal is the only answer.
Also, you should have removed the trunk weatherstripping and painted that area.
Fixing the windshield/pillar rust with fiberglass will not hold up. New metal is the only answer.
Thread Starter
Registered User
Joined: Oct 2009
Posts: 209
From: Idaho
My442 ?
All the molding was removed before bodywork and paint... and then repalced. Still looking for 4 fastners for the last piece to go on...
[/quote]Also, you should have removed the trunk weatherstripping and painted that area..[/quote]
Should have, would have, could have on the trunk weatherstripping--now I'm force to go back and repair and paint befor putting in the weatherstripping... good idea to check if, if, if I ever start another one.
[/quote]Fixing the windshield/pillar rust with fiberglass will not hold up. New metal is the only answer.[/quote]
Fiberglass repair was for plate below windshiled that holds the windshield wipers.. It appeared there was still enough metal that the fiberglass will hold and definitley not rust.... I'll let my great grand kids worry about its failure over the next 40 years. It should be an easy remove and replace if needed...
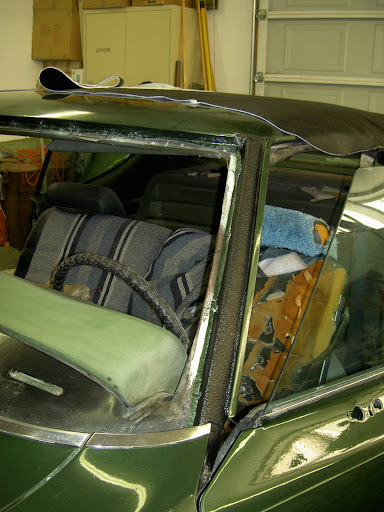
Windshiled pillars had some rust that was cleaned up and then repaired with bondo...looks great and appears to be hard a rock.... I'll be covering it with vinyl...
Still progressing--Thanks
Richey
and then repalced. Still looking for 4 fastners for the last piece to go on...[/quote]Also, you should have removed the trunk weatherstripping and painted that area..[/quote]
Should have, would have, could have on the trunk weatherstripping--now I'm force to go back and repair and paint befor putting in the weatherstripping... good idea to check if, if, if I ever start another one.
[/quote]Fixing the windshield/pillar rust with fiberglass will not hold up. New metal is the only answer.[/quote]
Fiberglass repair was for plate below windshiled that holds the windshield wipers.. It appeared there was still enough metal that the fiberglass will hold and definitley not rust.... I'll let my great grand kids worry about its failure over the next 40 years. It should be an easy remove and replace if needed...
Windshiled pillars had some rust that was cleaned up and then repaired with bondo...looks great and appears to be hard a rock.... I'll be covering it with vinyl...
Still progressing--Thanks
Richey
Thread Starter
Registered User
Joined: Oct 2009
Posts: 209
From: Idaho
Vinyl Top Success
Vinyl Top Success
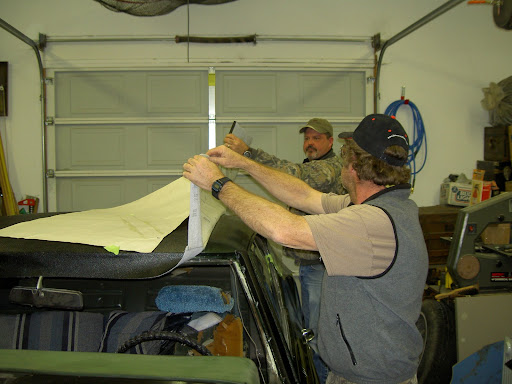
I finally got the courage and a couple friends to help and we tackled the vinyl top. After reading 4-5 internet articles and chatting with Tom of Tomcotops… I made a plan using bits and pieces of the best or what I guessed to be the best. Planned, gather supplies and then just did it, all it took was 3 guys, a case of beer, a plastic pizza roller, a 6 inch mimi roller, a disposable roller pan, 1- 1 inch paint brush, plastic sheeting, masking tape, one marking pen, scissors, razor knife, scalpel, and 2 quarts of Welders Contact Cement. Plus more beer in house…
1st mistake—bought 1 can of original and one can of gel Contact Cement—thought I had 2 cans of regular, but in the end they both worked great no problem brushing or rolling..
Why did I choose brush and roller—I thought it was easier to put it where I wanted it and not get it all over the cars paint. Also wanted to do the top in 1/3s plus I had no large place to spray the vinyl and top at same time…
Started as noted above by laying out top a couple weeks to rest packing wrinkles—worked just fine..
1st step masked bottom line of glue, bottom third of molding strip.
Measured centerline of top and vinyl top, drew line with black sharpie. (did tend to fade when cement applied but did not show through black top)
Re-measured when help arrived to guarantee accuracy of center(found to be inch off at back..)
Also marked line on car top to match seams on vinyl, for glue application area…
Measured and cut Windshield Pillar material to start, long enough go from fender bolt to above top of windshield. Loosened fender bolt and stuck vinyl behind washer, lined it up, ready for glue and locked it in place tighten the bolt. Measured and cut wedge out for molding fastener tabs
Then laid out vinyl on paper to apply cement to vinyl and pillar.
I then just rolled the vinyl into the drip rail (pizza roller)and press it tight against pillar. Went on so smooth it really gave us confidence on doing the top!! Trimmed off about � inch above top line windshield. Other side same action…
Now ready for top and awaiting on 3rd person—
Laid out vinyl with centerline showing about 4 inches and off set from centerline and applied about 2 inch strip of cement on both lines from to back, also note I had marked a line where front of vinyl would meet top of windshield opening..
Centerline cured, about 20 minutes to set up to a dull sheen. and we had our team of 3 rookies ready to stick them together. We placed a plastic sheeting strip over the roof line and then spread out the vinyl over the top with Randy in front and Ray in the back holding it tight then we decided to lay it on the plastic and just hold the front off and line up our lines exactly and then press about 6 inches of vinyl and roof together. Once we established on center we remover about � the3 plastic and found the center again and then final pulling out all the plastic making sure the back was on line and then panicked because all the top was bubbly and really funky looking from the cement…but pulling, stretching and finally rolling with a bakers rolling pin (my wife does not know) We got it looking just OK. We agreed after that panic it needed to cure and we need a beer. At last.
After about 10 minutes of the 20 minute wait we push ahead and rolled back the vinyl and started applying cement on the vinyl and roof out to seam and seam line.. 1st use 1 inch brush to get crease and area the roller would not reach and then used a painters roller and rolled the roof and vinyl. Now we had another 20 minutes to cure, so another beer and watched the Packers make a come back…the breaks are murder…
Once it cured to dull sheen and dry to touch we had Randy on the front corner and Ray on the back corner while I was on the other side of the car and just started press and pushing from the middle out and worked my way forward and to the other side, crawling on the roof it was fairly easy to see where to push to holler pull harder in one direction or the other…probably not technique in book, but it went on smooth… No pictures of me on top, sorry..we then did the other side the same way, but after applying the cement we decided we need a break from the fumes, so we went in the house to have a beer and watch the game. Once we finished pressing down the other third we folded both edges, last third, toward the middle and applied the cement and let it cure one more time, Your right one, more beer and over time watching the Cardinals cover the fumble and win the game. Same technique with the three of us 2 pulling and me pressing, smoothing it out almost to the edge. Ops but not to the back, we had placed some plastic sheeting on the back pillar to allow us to only work the top along the drip rail.
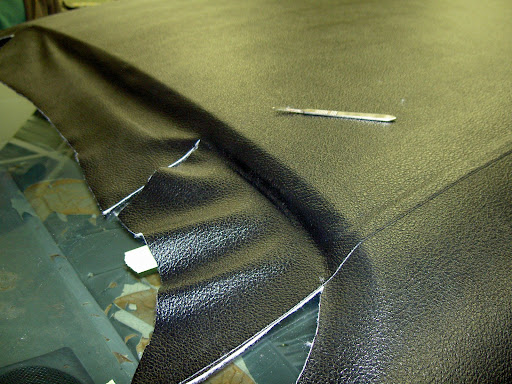
Once it was smoothed out we cut the edge just out side the drip rail, using it as our guide and then used the pizza roller to roll the vinyl into the rail. Once we had the rail done we remove the plastic and the finished off smoothing out the pillar and then trimming it along the masking tape.
We then trimed all the edges, and front and back windshield areas, slicing a notch at each of molding fastener tabs and trimmed the vinyl to fit at the bottom of the window frame.
We than had another beer and applied final round of cement to all the windshield edges and let it cure. Once we finished our beer…. Cement was cured and just press all the vinyl tight into the windshield frame.
Looking pretty good, I then folding the top vinyl under about � inch and glued it with an all purpose, bond anything , all weather adhesive and had the guys hold while I finished pressing the windshield areas.
Mission complete and we still have some beer left!!!
Next day I’ll added some clear adhesive to the drip rails and next I'll put on the molding and it will be ready to go. Almost, just a few more projects to go, interior, seats, package tray, painting the trunk, painting the rims, got to stop and have a beer… later
Richey
Does it ever end??
I finally got the courage and a couple friends to help and we tackled the vinyl top. After reading 4-5 internet articles and chatting with Tom of Tomcotops… I made a plan using bits and pieces of the best or what I guessed to be the best. Planned, gather supplies and then just did it, all it took was 3 guys, a case of beer, a plastic pizza roller, a 6 inch mimi roller, a disposable roller pan, 1- 1 inch paint brush, plastic sheeting, masking tape, one marking pen, scissors, razor knife, scalpel, and 2 quarts of Welders Contact Cement. Plus more beer in house…
1st mistake—bought 1 can of original and one can of gel Contact Cement—thought I had 2 cans of regular, but in the end they both worked great no problem brushing or rolling..
Why did I choose brush and roller—I thought it was easier to put it where I wanted it and not get it all over the cars paint. Also wanted to do the top in 1/3s plus I had no large place to spray the vinyl and top at same time…
Started as noted above by laying out top a couple weeks to rest packing wrinkles—worked just fine..
1st step masked bottom line of glue, bottom third of molding strip.
Measured centerline of top and vinyl top, drew line with black sharpie. (did tend to fade when cement applied but did not show through black top)
Re-measured when help arrived to guarantee accuracy of center(found to be inch off at back..)
Also marked line on car top to match seams on vinyl, for glue application area…
Measured and cut Windshield Pillar material to start, long enough go from fender bolt to above top of windshield. Loosened fender bolt and stuck vinyl behind washer, lined it up, ready for glue and locked it in place tighten the bolt. Measured and cut wedge out for molding fastener tabs
Then laid out vinyl on paper to apply cement to vinyl and pillar.
I then just rolled the vinyl into the drip rail (pizza roller)and press it tight against pillar. Went on so smooth it really gave us confidence on doing the top!! Trimmed off about � inch above top line windshield. Other side same action…
Now ready for top and awaiting on 3rd person—
Laid out vinyl with centerline showing about 4 inches and off set from centerline and applied about 2 inch strip of cement on both lines from to back, also note I had marked a line where front of vinyl would meet top of windshield opening..
Centerline cured, about 20 minutes to set up to a dull sheen. and we had our team of 3 rookies ready to stick them together. We placed a plastic sheeting strip over the roof line and then spread out the vinyl over the top with Randy in front and Ray in the back holding it tight then we decided to lay it on the plastic and just hold the front off and line up our lines exactly and then press about 6 inches of vinyl and roof together. Once we established on center we remover about � the3 plastic and found the center again and then final pulling out all the plastic making sure the back was on line and then panicked because all the top was bubbly and really funky looking from the cement…but pulling, stretching and finally rolling with a bakers rolling pin (my wife does not know) We got it looking just OK. We agreed after that panic it needed to cure and we need a beer. At last.
After about 10 minutes of the 20 minute wait we push ahead and rolled back the vinyl and started applying cement on the vinyl and roof out to seam and seam line.. 1st use 1 inch brush to get crease and area the roller would not reach and then used a painters roller and rolled the roof and vinyl. Now we had another 20 minutes to cure, so another beer and watched the Packers make a come back…the breaks are murder…
Once it cured to dull sheen and dry to touch we had Randy on the front corner and Ray on the back corner while I was on the other side of the car and just started press and pushing from the middle out and worked my way forward and to the other side, crawling on the roof it was fairly easy to see where to push to holler pull harder in one direction or the other…probably not technique in book, but it went on smooth… No pictures of me on top, sorry..we then did the other side the same way, but after applying the cement we decided we need a break from the fumes, so we went in the house to have a beer and watch the game. Once we finished pressing down the other third we folded both edges, last third, toward the middle and applied the cement and let it cure one more time, Your right one, more beer and over time watching the Cardinals cover the fumble and win the game. Same technique with the three of us 2 pulling and me pressing, smoothing it out almost to the edge. Ops but not to the back, we had placed some plastic sheeting on the back pillar to allow us to only work the top along the drip rail.
Once it was smoothed out we cut the edge just out side the drip rail, using it as our guide and then used the pizza roller to roll the vinyl into the rail. Once we had the rail done we remove the plastic and the finished off smoothing out the pillar and then trimming it along the masking tape.
We then trimed all the edges, and front and back windshield areas, slicing a notch at each of molding fastener tabs and trimmed the vinyl to fit at the bottom of the window frame.
We than had another beer and applied final round of cement to all the windshield edges and let it cure. Once we finished our beer…. Cement was cured and just press all the vinyl tight into the windshield frame.
Looking pretty good, I then folding the top vinyl under about � inch and glued it with an all purpose, bond anything , all weather adhesive and had the guys hold while I finished pressing the windshield areas.
Mission complete and we still have some beer left!!!
Next day I’ll added some clear adhesive to the drip rails and next I'll put on the molding and it will be ready to go. Almost, just a few more projects to go, interior, seats, package tray, painting the trunk, painting the rims, got to stop and have a beer… later
Richey
Does it ever end??
Thread Starter
Registered User
Joined: Oct 2009
Posts: 209
From: Idaho
Just an Olds Guy
Joined: Jul 2008
Posts: 24,528
From: Edmonton, AB. And "I am Can 'eh' jun - eh"
I have tons of patience. I could sit and watch you guys work for hours!!!
Moderator
Joined: Jun 2008
Posts: 18,050
From: Atlanta, Georgia
Registered
Joined: Jul 2006
Posts: 4,430
From: Northeast Ohio
Looks good.
I think it's upside down and the seams are supposed go the other direction though?
Serious non-amateur pro beer drinking is for after the job is done or that can really happen, or worse....")
I think it's upside down and the seams are supposed go the other direction though?
Serious non-amateur pro beer drinking is for after the job is done or that can really happen, or worse....
Thread Starter
Registered User
Joined: Oct 2009
Posts: 209
From: Idaho
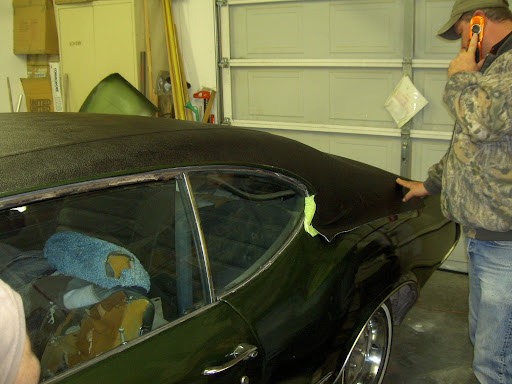
Life has been busy and have not had a chance to make a lot of progress or hit the forum. I have got the turnk finished and all the side molding back on. Still have not finished the seal of the drip rail...I dug out the original seal that did not dry and have tried some seal made for the drip rail, but it has not gone so smooth... seems to be a little thicker and did not flow on. ended up pushing it in with a stick... still not happy but once I get it looking good, I'll put a coat of paint over it and pop on the chrome edges. Hope to put in the windshiled tomorrow. Plus still need to do some more wet sanding and poilishing to finish up the paint job....Thanks for asking... May be I'll get some free time in the next week or so....
Thread Starter
Registered User
Joined: Oct 2009
Posts: 209
From: Idaho
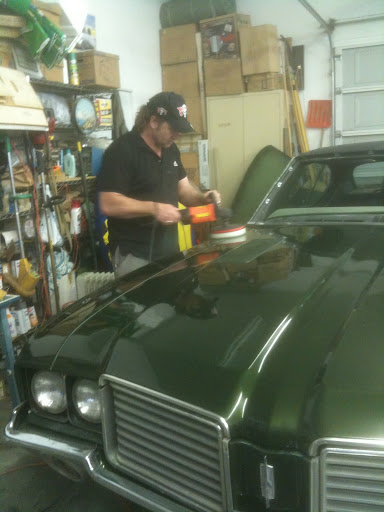
More progress
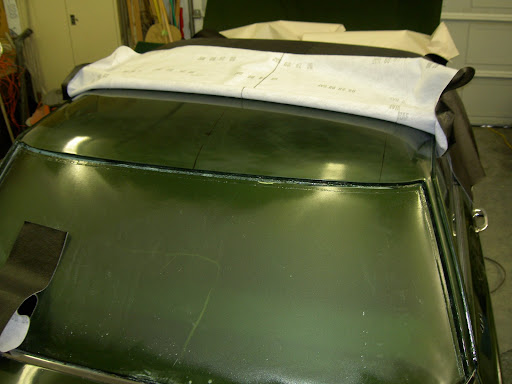
Finally got to spend a couple hours with friends and made some progress. Aussy put the final polish on the bonnet (hood) wet sanding and polishing with a wool and then puttinga glaze of McQuires Wax on with a foam pad... looking good..
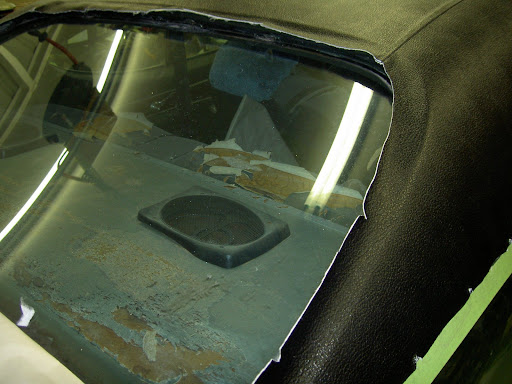
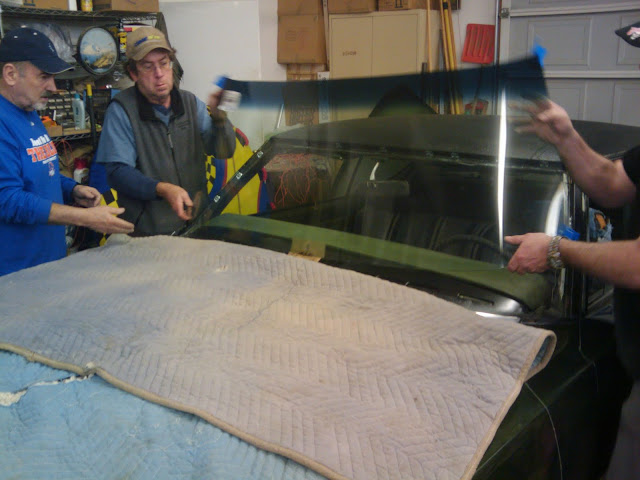
We also ins talled the windshield.. fitting it
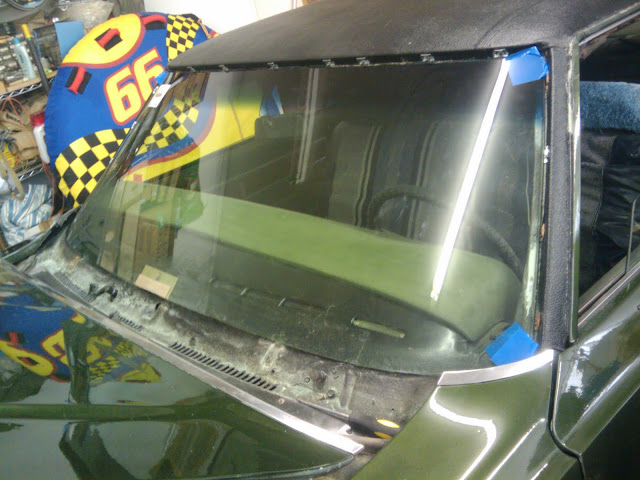
laying it on a pad on the bonnet...
cleaned the glass with windex..
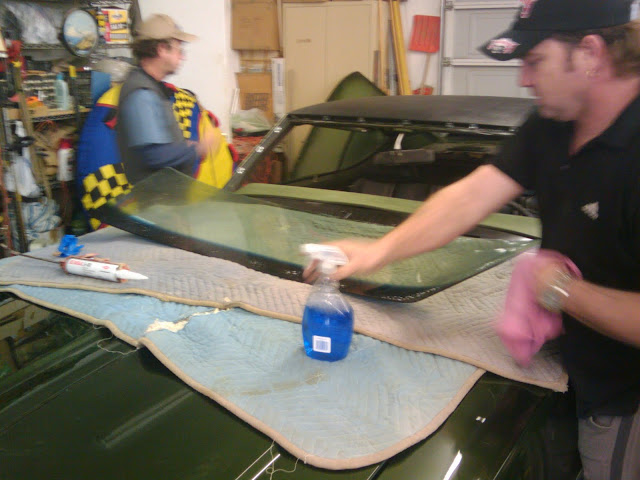
applied urethene sealant....
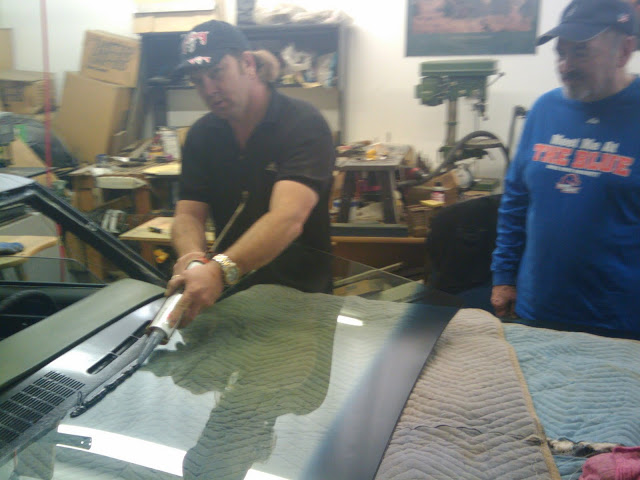
we then rolled the window up setting it on the bottom stops, and then reaching inside to balance it
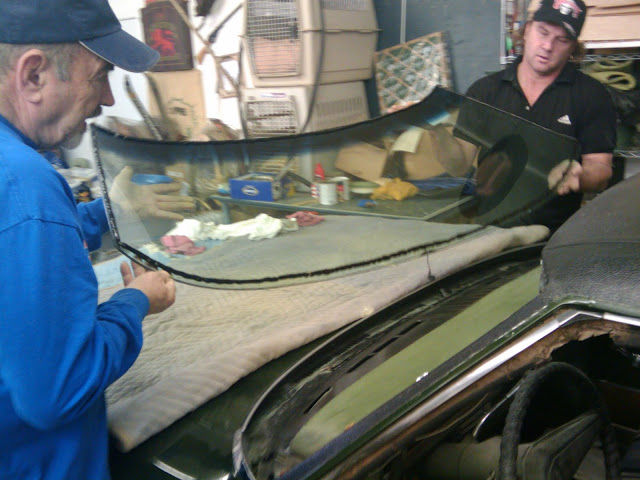
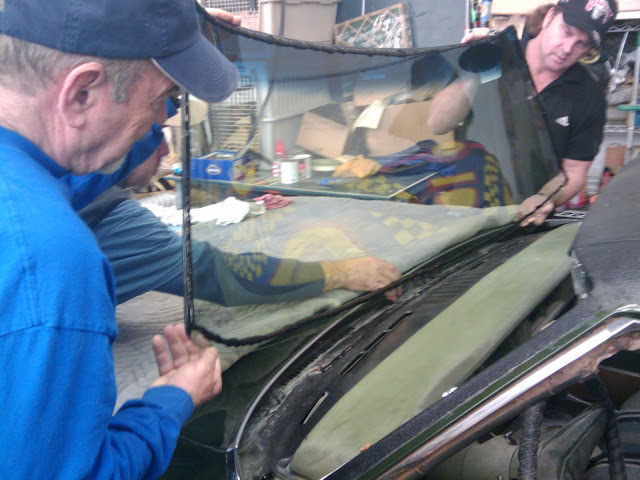
connecting antenna that is inside windshield....
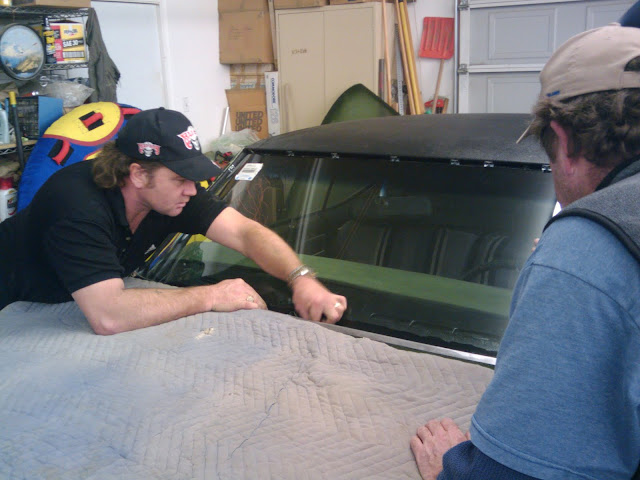
I'll let it cure for 24 hours an then put on the molding strips, windshield wipers and then tackle the drip rails... time to watch the Olympics...
We also ins talled the windshield.. fitting it
laying it on a pad on the bonnet...
cleaned the glass with windex..
applied urethene sealant....
we then rolled the window up setting it on the bottom stops, and then reaching inside to balance it
connecting antenna that is inside windshield....
I'll let it cure for 24 hours an then put on the molding strips, windshield wipers and then tackle the drip rails... time to watch the Olympics...


