When you click on links to various merchants on this site and make a purchase, this can result in this site earning a commission. Affiliate programs and affiliations include, but are not limited to, the eBay Partner Network.
Once again thanks Rod, I had just the bolt loosely holding the floating bow to the top frame, no bushing or anything when I removed mine! So this setup will be much better than I had, I am getting a replacement floating bow as well so I think I will run into the same thing, I kind of like the idea of the bushing screwing on that way it isn't sliding out of place or wobbling around when trying to line it up, we will see I guess. I have not heard that about the different lubricants I know the petroleum based will eat away at rubber materials never heard that on plastic, I will stick to the silicone based, I use a lubricant called CRC industrial Extreme Duty Silicone it is a spray I have good luck using.
Speedy:
Hey, what's your given name? I kinda hate the forum aliases and prefer to address people by their real names (if you're OK with that). Since you're building your own part here using the longer bolt and the nylon spacer; you could use a bronze bushing like this one on eBay and skip the INL part. The bronze construction is overkill for what is needed and the load on the bow pivot but this bushing is nearly identical to the shoulder bolt that Inline Tube includes in their kit; ID 3/8", OD 1/2", 1/4" with a 5/8" OD flange. The flange is thicker than the INL part but I don't see that as a problem.
I may order 2 of these bushings myself just in case the threaded bushing from Inline is too difficult to assemble in the car. This one will more easily slide on & off the mounting bolt.
My name is Adam, Thanks. I also have seen these referred to as flanged bearings, I have found the hillman group has a variety of these, I was trying to find one that matched up with a 3/4 nylon spacer, the closest I have found was 3/8 I.D. with 5/8 O.D. at the flange that seems pretty close, Thanks again I am still looking.
Adam:
These bronze bushings are usually described by ID, OD, OAL (overall length) and FOD (flange OD). Make sure you have the correct 3/8" ID and 1/2" OD. Here's a little trick If you get some that are too long. Clamp a 3/8" bolt in a vise to hold the bushing, place the bushing on the bolt, flange side down, using a flat file file down the shaft until the overall length is what you need. Pretty easy work if the bushing is nylon or plastic, a bit more effort will be required if they're bronze.
I've started sourcing and cleaning up some of the interior pieces. I bought I nice pair of A-pillar pads from Nick (442crzy); they're not perfect as there is a small dent in one of the pads but as these came from a northern car they are in much better condition than the ones I removed from my car. There is a yin & yang to these southern cars: because we don't have much snow and don't salt the road, the bodies and chassis age much better than the northern cars, but the sun down here kills most plastic & vinyl interior pieces.
I'm a big fan of Evaporust after learning about it in Jim's thread (JCMC64). I have 4.5 gal bucket with a snap-on lid filled with the stuff for soaking rusty parts but sometimes the part is too big or too long to fit in the bucket. The interior, windshield header pieces won't fit in the bucket, so I glued up some PVC pipe to make a long tube to soak these parts. After removing the rust I'll spray them with SEM Landau black interior paint. Here's some pics.
Rodney
These are the A-pillar pads I bought from Nick (442crzy).
Usually the foam deteriorates exposing the metal insert which will get rusty. These are in really nice condition. Thanks Nick!
These are the interior header pieces that install along the top of the windshield on either side of the rearview mirror.
Mine are a bit rusty on the back sides.
I'm soaking them overnight in a 4" pvc tube filled with Evaporust. I'll lightly sand blast them at low pressure to remove any remaining original paint before re-spraying with SEM Landau Black interior paint.
Excuse my ignorance if this is a silly question; but are the stainless steel trim parts anodized for Cutlass/442 cars? I'm specifically asking about the wide trims that flank the windshield on convertibles and also the pinch weld molding that wraps around the convertible top well. The original pieces that came off my car have lots of fine scratches that could be polished out with some extra fine (1000-1500 grit) sand paper. Several years ago, I tired to restore some B85 beltline moldings from a '71 Cutlass Supreme but all I did was remove the anodizing in the areas that I sanded - which pretty much ruined the parts. I don't want to mess up again if these stainless parts are also anodized.
The general consensus is it's OK to aggressively polish trim parts if they are stainless steel; anodized aluminum parts, on the other hand, cannot be wet sanded to remove deep scratches the way stainless parts can. I started my polishing experiment with 800 grit wet/dry sandpaper dipped in water. I added just a drop of dish soap to the water to prevent galling of the metal, not sure if this was really needed but it sounded like a good idea. I lightly sanded the entire part with 800 being careful to only sand in the direction of the grain; a circular motion will leave visible sanding marks. I worked the deeper scratches more aggressively until they could not be seen.
I progressed to 1000 & 1500 grits until the part had a mostly consistent finish. It's important to periodically wipe down the part to remove the residual sanding dust as this will mask the finer scratches and is more abrasive than the finer 1000 & 1500 grit sandpaper, defeating the purpose of the finer grits. After sanding, I hand polished with the water spot remover which is a very fine polish designed for glass. Again, wipe in the direction of the grain. You can still see a few finer scratches in just the right lighting but overall, the part is so much better compared to the 50-year old patina I started with. Here's some pics.
Rodney
These are my polishing tools; and alot of elbow grease. You should wear some gloves to protect your skin; the waterspot remover can irritate your skin and the metal sanding residue will stain your hands & fingers.
These are the convertible pinch weld moldings; the restored molding is the bottom one in the pic.
Here is a close-up comparing the finished product to what I started with.
I have about 2.5 hours worth of work in these two moldings.
They came out really nice. I bought a polishing kit from Eastman for SS but haven't gotten into using it but wonder if it would make any difference once you've gotten to the point you have? It doesn't look like it could be any better. The water spot remover is an actual polish?
The water spot remover is a super-fine polish and I use it on the part two times. It has just a little grit to it which you can feel with the first application. The second time around it�s much more smooth and I can�t feel the drag from the polish.
I want to put speakers for the backseat passengers where the window cranks would normally be located. I'm also installing power windows (they make life so much easier in a convertible) so I needed to relocate the window switches to the armrests. I'm using an aftermarket window controller from Directed Electronics (DEI) which will add "one-touch" up and down capability. The window controllers can also be integrated into an alarm system that could program a bottom on the remote to "vent" the windows, or if the alarm is triggered it can roll up the windows. I probably won't use these features but the "one-touch" capability will be a nice, modern addition to this 50 year old car.
I'm using switches from an '82-88 Cutlass for the rear window switches. These switches were used in many GM cars from this era and can be found in Buick LeSabre, & Electras; and Cadillac Eldorado, Fleetwood & Sevilles. It's important to note that these switches will not work with a factory window system. The OEM window motors have 2 windings (one for UP and one for DN) and ground through the door/chassis; the later model window motors have a single winding that is not grounded through the door/chassis and the polarity of the motor is reversed for UP and DN. Because I'm using the aftermarket window controllers I needed late model window motors and the switches. I selected new switches from Dorman (PN901-009) and fitted them into the armrests by cutting square holes with a little extra clearance for the vinyl that will fold into the cutouts.
One issue I had to overcome was the switch protruded too far through the opening and would be too high above the armrest. To remedy this problem, I used two 8-32 square nuts as stand-offs to hold the switch down a little bit. Using my MIG welder, I put a quick tack around the nuts (that sounds painful) and tacked them into the armrests. The switches will be screwed to these stand-offs. Here's some pics.
Rodney
This is what started it all! I want to put speakers where the window switches would be normally so the switches had to be relocated to the armrests.
These are the two 8-32 nuts tack welded together.
They will hold the switch down just a bit so they don't stick up too far.
This pic show the stand-offs tacked onto the bottom of the armrest.
I mocked up the switch to make sure everything centered up nicely in the cutouts. The switch mounting tabs are slotted so there is a little front-back adjustment but the side-side adjustment is tightly controlled by mounting tabs.
Once the padding and armrest covers are installed, the switch should be just a little proud above the vinyl. I'll need to get some shorter screws to prevent them from poking through the vinyl (I'm using 1/2" long screws in this mock-up picture).
I started assembling the rear armrests and piston covers. I bought a complete interior set from a CO member many years ago, he had mistakenly ordered the wrong color and put everything up for sale. It was a pretty good deal at the time (even more so today with the supply chain delays, and price increases) but the down side is some of the pieces have been previously installed so there were some nicks and cuts that I can't remove but overall I happy with the end result. I also have bucket seat covers and the side skirts as well as the rear seat covers that I will not be using so will probably put these up for sale at some point. The seat covers are made by PUI and the color is Pearl White.
I decided to omit the ashtrays and tack welded in a metal patch to close up the hole. Then I had a thought, wouldn't it be nice to have cup holders where the ashtrays used to be located. I located some stainless steel cup holders that are designed to fit a poker tables. With an outside diameter of 3-3/4" the standard size was too large to fit into the Olds armrest, but then I discovered some companies made a smaller version with a diameter of 3-1/8" OD. The smaller size will fit a soda can or water bottle bottle but most drive-thru cups won't fit.
Here's some pics.
Rodney
These are the stainless cup holders I bought on Amazon; they are 3.15" OD (lip-to-lip), 2.13" ID and fit into a 2.75" dia. hole. I used a Milwaukee hole saw to make the cutouts.
I used 3M #80 spray adhesive to mount the padding to the metal armrests and the piston covers. It is specifically made to bond vinyl to metal or plastic.
I used the 3M#80 to glue down the padding. I only used it to secure the vinyl to the back of the armrest. Don't try to glue the vinyl to the padding as you need the vinyl to be loose so you can stretch it tight.
I finished LH side tonight. The other side has some lines in the vinyl from being stored in a folded position, so I'll lay it out in the sun tomorrow to soften it up before covering the RH side.
Today marked a significant milestone; I selected the primary paint color for my car. I still have to choose the white color for the stripes. Believe it or not, these 2 custom paint samples use the same base color, but the tint, metallic & pearl additive package is what makes the difference between the two colors. I choose the darker color on the right, the color on the left is too true-blue, electric for my taste.
The stripes will be an off-white shade, not bright white. My body shop guy is going to make 4 samples to show custom options for the stripes; two different solid color off-whites, one with a pearl additive, and the last one will be "ghosted" (not sure what this will look like, but the body guy wants me to see it). I plan to stay true to the original 442 stripe pattern (not going the wide W-30 route) but want to make the stripes more subtle than the factory look. Here's some pics of the paint samples.
I stopped by the body shop this morning to check on progress and was surprised to see some color on my car! They tinted the epoxy sealer coat to the base color for my paint before they start block sanding. They're off for the 4th, but Tuesday they'll start blocking it. The body man said they expect to block sand for 2-3 days then they'll take the front clip apart to prep for the base coat. To say I'm excited would be a huge understatement.
The color is bit on the electric side. The epoxy doesn't have the metallic and pearl additives which will tone things down a bit.
This is the color I'm going for with off-white 442 stripes (the narrow stripes not the wider w-30 stripes).
Beautiful color, what is it? I totally get the thrill of seeing paint go on. I'm glad to hear they are planning on spending that kind of time on blocking it out. It makes a world of difference. I learned the hard way. Had my car stripped, some minor body work done, and painted. Is was so unhappy with it I spent a few days blocking it out and had them shoot it again. All the waves and imperfections were in the primer that they just went over quickly with a DA. Time and Money well spent.
Steve
Steve:
The color is a custom mix based on a Valspar color called Aqua Blue Metallic. It has alot of metallic and pearl additives (which were not mixed into the epoxy sealer coat currently on the car). I kind of freaked a little when I saw it in just the base color but my body guy calmed me down to explain the additives will tone down the color quite a bit. I hope to see it in paint next week.
I've been cleaning and polishing parts while the car is in the body shop; one of the things I've worked on is the instrument panel. I like the rally pack gauges that the factory installed, but the accuracy of the factory gauges leaves alot of room for improvement. I considered the Dakota Digital VHX setup but never cared for the style of the gauge faces. Speed Hut makes individual gauges in several sizes and for a modest fee, they will customize the faces and add logos. I chose the 4-1/2" revolution series of gauges with a quad gauge to display temp, volts, oil psi & fuel; a 120mph programmable speedo that can set service reminders for oil change and tire rotation; and an 8,000rpm tach. The 4-1/2" diameter will fits nicely into the stock gauge bezel but depth of the stock bezel piece was too thick and had to be sanded down just a little to fit the new gauges.
Speed Hut uses a simple, threaded ring for mounting so I fabricated a plate out of 16ga steel which I notched and indexed to the stock dash insert, and cut 3 holes for the gauges. The entire assembly installs as a unit. The gauges come with several 3-pin connectors for each function, i.e. connectors for temp, oil, fuel, etc. This makes for a spiderweb mess of wires and connectors behind the dash. I consolidated these multiple connectors into a single connector for easy plug-n-play convenience using Mate-n-Lok connectors similar the the ones that Speed Hut uses. Here's some pics.
Rodney
I made a cardboard template which I transferred to the sheetmetal. Dremel tool and jigsaw were used to cut and shape the sheetmetal plate.
The wiring is consolidated into 2 connectors per gauge; the smaller connector is for the backlighting.
The holes for the gauges are just a little oversized which allows a bit of wiggle room to center each gauge into the stock bezel openings.
Here is the trial fit behind the factory gauge bezel (without the wood grain insert). The turn signal and high beam indicators are in the center speedo gauge. I may mount 2 additional indicators in the bezel for parking brake and cruise. In hindsight, I wish I would have added the Olds logo to the speedo and tach gauge faces.
I was out running a few business errands today so I stopped by the body shop and the upholstery shop to check on progress. The first round of block sanding is complete, now they are working a few areas that need some additional attention. I sooooo wish the car was finished, I'm ready to have it back in my garage so I can begin reassembly. Miguel, the owner of Extreme Customs, told me to expect 3 months to complete the body and paint. I dropped off the car on March 1st so we're only a month and a half over the time estimate; should probably be finished in 6 months. I really shouldn't complain as I know others have had their cars stuck in "paint jail" for much longer, even years.
The upholstery shop has recreated the Olds seat pattern on the BMW M3 seats; other than a little issue with the side bolsters, I couldn't be happier with the results. I purchased the two vinyl patterns from SMS Auto Interiors. The factory seats were covered in 2 different grain patterns: Elk grain has rugged veins that run through the material, the Madrid grain is less rugged and more consistent. Rene at Southwest Upholstery suggested I embroider the headrests with the 442 logo, so I pulled a computer screen capture of the 442 glovebox emblem and the shop used this file to embroider 442 onto the headrest fabric. This car is gonna look sweet when I get it back together! Here's some pics.
Rodney
The hood needed a little more attention after block sanding.
The rear quarters were repaired with quarter panel skins; here Luis is fitting the quarter caps to the skins as there were some irregular gaps.
Big picture shot.
The front seats are from a 2001 BMW M3 convertible; I chose these seats because of the integrated, 3-point seat belts. The upholstery shop recovered them with Pearl White vinyl in the spirit of the factory buckets. There are a few wrinkles to be smoothed out but still looking pretty good!
The side bolsters are too bulky and square. The upholstery shop will take the bottom cover back apart and make it curve slightly to eliminate the hard corner.
This is the 442 logo embroidery for the seat headrests.
This car was left for the termites. The love that you have given that car a life that it never could have imagined is what Oldsmobile love is.
Thanks for your kind words. It does feel good to have saved this wreck from rusting to death in a Texas corn field. I really considered parting out the car after I started taking things apart and found it to be in worse shape than it appeared. My daughter (who was 7-8 at the time and was/still is very aware of car makes and models) nearly had a melt down when she heard me talking about cutting up "the blue car" as she called it, to sell off the good parts. She is the one who helped me to realize what I really wanted was not a concourse, trailer queen car, but a resto-mod, driving car and this car was a good candidate for the many non-stock modifications I have worked into the restoration.
Here is a list of a few of the modifications I've done to the car so far:
• FiTech throttle body EFI
• RIck's EFI gas tank w/Camaro LS3 fuel pump module
• Derale electric fans w/PWM fan controller
• 375cid Olds stroker engine
• TH200-4r 4-spd overdrive transmission
• 13" Corvette disc brakes on the front
• 11.6" Blazer disc brakes on the rear
• SPC upper control arms
• Tall upper & lower ball joints
• 18" Bandit wheels from US Mags w/stock SSI center caps
• BMW M3 convertible bucket seats
• Speedhut gauges
• Rostra cruise control
• One-touch power window controller w/late model window motors
• 8-speaker audio system w/8" subwoofer mounted behind the rear seat
I bought some stainless capped bumper bolts form Inline Tube, but was disappointed in the quality of the parts. The stainless caps were scratched and dull, so I decided to see if they could be polished up bit.
This is how they looked right out of the bag. Pretty lackluster finish.
I chucked each bolt into my cordless drill and polished them with fine compound.
I squirted a little polishing compound onto a damp sponge and squeezed the trigger.
This is the final result; LH is unpolished RH is after polishing. Much better!
I stopped by the body shop this morning to check on progress as I have done at least once a week since I dropped off the car. it's good to make your presence known when your car is locked up in paint jail, it lets the shop owner know that you know when things aren't moving along as they should. They started spraying the final color yesterday afternoon and will continue spraying paint all day until everything is in color. Here's some pics.
Rodney
They've sprayed the underside of the deck lid and the edges of the doors with the base color and 2 coats of clear.
Front fenders have epoxy primer on the back and the base coat on the outside.
The body shop will lightly sand the color coat before spraying 2 coats of clear.
The car is in the spray booth now and the guys were masking off getting ready to spray the base coat.
This is a little teaser shot of the final color. We pulled one of the doors out into the sun to see how it looks. The color really pops in the daylight, can't wait to see the whole car in this color!
The body shop will color sand the clear before spraying the stripes, then 2 more coats of clear on top of the stripes. After the last 2 coats of clear have cured about a week, they will reassemble the hood, doors and fenders and then cut & buff the entire car. Then I get to bring it home and restart the wiring and reassemble all the interior pieces.
Rodney
Painted the stripes this week followed by 3 more coats of clear for a total of 5 coats. After few days in the sun they will cut and buff it and I can bring it home.
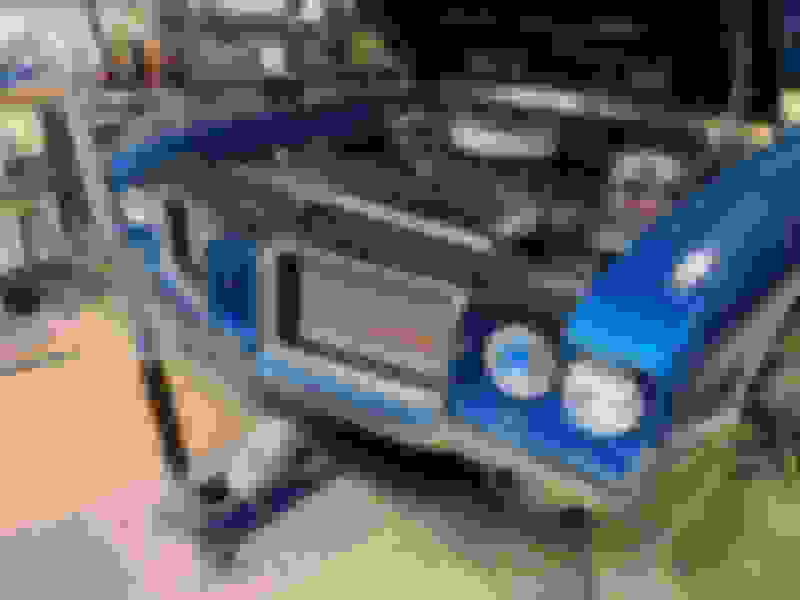
Tomorrow marks a major milestone for my project: it's coming home from the paint shop. After 10-1/2 years it's nearly finished! The first photo is how I found it 10 years ago in a west Texas cow pasture. The second picture was taken at the body shop after cutting & buffing the new paint job. Now comes the reassembly phase.
April 1, 2012; in a west Texas cow pasture.
At the body shop after they cut & buffed the paint.
I've been super busy with my remodeling business and family commitments on the weekends so work on the car has been sporadic. I've mostly been working on rear body wiring; finished the rear power window harnesses for the one-touch window modules, got the door switches wired into the courtesy light harness and the alarm system, ran all the signal & speaker wires for the 8-speaker stereo system (I know, I have an audio addiction), mounted the 8-channel stereo amp in the trunk, and installed an AC inverter & 12v outlet in the trunk.
I moved on to the front end and adjusted the hood to fender gaps a bit. I'm kind of disappointed that the body shop didn't keep track of the all the body shims. I got the car back with generic shims and spacers and none of the original shims. I spent sooo much time fitting the front fenders to the doors and the hood before dropping the car at the body shop, seems like a waste of my time, as I'm having to do some of this again. I've run into a significant issue with the front sheetmetal alignment. Those that have been following the thread for a while may remember I had difficulty getting the core support centered with the body tub. I slotted the mounting points in the core support a bit to allow me to slide it a bit further to the LH side while measuring diagonally across the engine bay. Well... this alignment issue has reared it's ugly head again as I fitted the grilles and front bumper. The bumper is way too tight at the LH fender and I'm wondering if the front frame horns are bent as the car had some front end damage when I bought it. I carefully measured the frame and took several diagonal measurement to check for straightness before sending to the powder coater, but I'm thinking the frame may be bent. I need to shift the bumper about 3/8" to get it centered to the core support with equal gaps at the front fenders. I cleaned up a very nice used bumper with good chrome, but it looks like it may be a bit tweaked in the middle (as many are). The center tongue looked a bit pushed, so I've ordered a repop bumper to see it I can get a better fit, but I'm fairly certain the frame horns are bent and will need to be pulled to the left to get the correct bumper gaps. Here's some pics of my progress.
Rodney
Mounted the grilles, stone shield and headlight buckets.
This is the used bumper. I used left over carpet padding from one of my remodeling jobs to protect the fenders while positioning the bumper.
The used bumper didn't fit as nicely as I expected. This pic clearly shows the center tongue is pushed back just a little as the stone shield and headlight housings don't track the bumper. You can also see in this pic that the bumper is very tight to the fender on the LH side.