When you click on links to various merchants on this site and make a purchase, this can result in this site earning a commission. Affiliate programs and affiliations include, but are not limited to, the eBay Partner Network.
Good job on the mirror! I retrofitted a Rostra mirror with compass and homelink. No lights though. Took the mount shoe out of a repop mirror and grafted it into the back case of the Rostra.
Sadly, that Rostra mirror is discontinued.
Thanks for the compliments. I looked at several mirrors that were still available new. The Rostra kept popping up in my searches but I could never find one actually for sale. I thought about the temp/compass/homelink features but decided it wasn't worth the effort and I found the brand new NOS, Alero mirror on eBay for $50 so couldn't pass it up. Most of the used mirrors for sale on eBay had issues (hazy glass, de-silvering, missing connectors, etc.).
Door jamb shims are 1/8" apart, they should be touching to be effective. This is the LH side, quarter panel is on the LH side, the door is the RH side in the pic.
Rod are you talking about the anti rattle plates that are particular to convertibles? I believe they are suppose to touch ? That fender oatch looks like a 68-69 piece
Eddie:
Thanks for the props! I'm frantically trying to get the front fenders and doors mounted and gapped. I've selected a body shop to paint the car and he will install the quarter panel skin as well. He is ready to take it next week to start on the metal work. I don't want to miss his window or I may get pushed to the back of the line. I see some late nights ahead of me to meet this deadline.
Yes, I was talking about the "anti-rattle" plates in the door jambs. Mine are not touching and pretty far apart; probably the result of the Frankenstein nature of my project. My car is a Lansing-built convertible, the front fenders are from an Arlington-built '71 Cutlass Supreme, the RH door came from a Cutlass S and bought from a North Texas guy (not sure where that car was assembled), the LH door and the deck lid are about the only original body parts that came with the car in 1972. I'm having a hell of a time getting the door-to-fender and door-to-quarter gaps even and consistent. I may have to pay the body man to weld in some filler to close up the more offensive gaps. For the "anti-rattle" plates (there must be a more official name for these parts) I think I'll fab up some 1/8" aluminum shims to mount behind the plates so they will actually touch.
Pretty sure my RH fender patch panel was for 70-72 (it didn't have the wheel opening recess found on the '68-'69 fenders) I just couldn't find a vendor with a better patch panel, everyone was selling the same part number. I'll post up some pics of my adventure patching the RH fender, it didn't turn out as well as the LH side and (I was hoping the second time would better) but I'm glad I took the brace out and addressed all the hidden rust that was behind it. I've got to much time & money in this car to have rust eat thru a new paint job 5 years down the line. Gotta eat some dinner and get out to the garage!
Rodney
Last edited by cdrod; January 31st, 2022 at 03:19 PM.
I was not happy with the quality of the RH patch panel I purchased so I tried to "recycle" some metal that I cut out of the LH fender instead of doing a full patch replacement. I thought if I preserved the leading edge where the fender meets the rocker panel, I couldn't screw it up too much. Well, I the "recycled" metal was not as good as the pictures make it look. The backside was very pocked from rust making it thin. I kept blowing through the metal as I tried to tack it in place and the final result was twisted so badly I could not get the fender brace to fit properly; and there was a huge recessed valley at the butt joint. So I reluctantly cut out the twisted metal and used the patch panel that I disliked so much.
I cut out the rusty area preserving the perimeter and the lower flange that bolts to the bottom of the cowl. The patch panel had a very narrow flange for the bottom cowl mount, so my idea was to retain the original metal.
This is the "recycled" sheet metal that was removed from the LH fender. It looked good on the outside but was very pocked from rust on the backside. When I started tacking it into place the MIG kept blowing through the thin metal.
My second attempt at patching the RH fender turned out much better.
When doing patches with a MIG, the patch must fit tightly and the 2 pieces of metal must be touching for best results.
This is after 3 passes of tacks. I spaced the tacks about 1.5" apart, then cooled the metal with an air hose, followed by more tacks in between the first; etc. etc.
I drilled out the spot welds with this special drill bit that has a small pilot point and a flat profile where a regular drill bit has a 60-degree point. This bit allows you to drill only deep enough to separate the 2 panels.
I used holes from the spot weld drill bit to realign the inner fender brace I then used the MIG to plug weld the 2 pieces back together.
Aligning the fender brace to the lower flange.
These fenders are from a '71 Supreme which has the wide chrome molding. My car is a '72 so I used the MIG to plug weld these holes.
Last edited by cdrod; February 17th, 2022 at 04:27 PM.
After patching and reassembling both front fenders, I turned my attention to drilling holes in the fenders to mount the 442 numbers (emblems). I did a layout using a CAD program on my laptop to work out the spacing. I wanted to have clear and repeatable dimensions rather than a trial & error approach. I printed the dimensioned layouts on my printer, glued them to 1/8" plywood then drilled the holes in the plywood to test the spacing. After a few iterations I ended up with the spacing below. The next step was to determine the correct placement on the fender. I had an old '70 442 LH fender (rusty beyond repair) behind the garage; I took measurements from this fender for the LH side and transposed them to come up with dimensions for the RH fender.
This is the printout from my CAD file.
I taped this to the fender.
Used a center punch to mark the locations of the mounting posts. I drilled a small 1/16" pilot hole followed by a larger hole to fit the studs. I oversized the holes just a little to allow for paint thickness.
The deck lid had a rusty spot on the inside where the trunk latch bolts to the deck lid. It was in a place that would not really be seen, but the rust was between 2 pieces of sheetmetal where it could grow undetected and possibly become an issue in a few years. The rust damage was also structural in nature so I decided the prudent thing was to fix it. I've been working on this car for nearly 10 years now, and I'm just now starting to feel like I know what I'm doing with the welder. This patch was a bit intimidation because of the the contours in the metal, but I'm very satisfied with the final results. I will post a pic of the finished patch when I get the chance.
You can see the cancerous hole! I carefully cut out the outer layer of 22ga. sheetmetal to gain access to the thicker structural metal behind it.
This inner metal is heavier 16ga.
Carefully cut out the rot.
Fabricated a patch out of some 16ga. scrap metal.
Trial fit and ready for the MIG.
Tacked into place.
Ground down the tack welds and ready for the outer, finish patch.
I carefully fabricated a replacement patch from some 22ga. sheetmetal. It was very difficult to cut the slots and the large hole as the thin sheetmetal wanted to bend & twist. What you see here is my second attempt and looked much better than the first try.
Here is the outer patch ready to be tacked into place. The gold paint is a weld-thru primer to seal the metal from the elements. I primed both pieces before welding and put 2 small plug welds where you see the smaller holes to bond the 2 pieces of metal together. The factory used a spot weld in these places.
Last edited by cdrod; February 17th, 2022 at 06:04 PM.
If you guys haven't tried EvapoRust to clean up your rusty parts, you're probably working way too hard, wire brushing, scotchbrite pads, sand/media blasting, etc. The door latch mechanisms in my car were very rusty, to the point that the latching part that engages the striker bolts would not always spring back without a little assistance. So I soaked them for a few days in EvapoRust then lightly brushed them wire a brass wire brush followed by a generous coat of Boeshield spray. I am amazed at the results and they work so much better. I did have a hell of a time getting the bolts loose from the door shell. I resorted to cutting an extended slot across the face of the bolts so I could use a large blade, flat screw driver for better leverage (and lots of PB blaster spray). Here's some pics of the latches post EvapoRust!
Rodney
I cut a slot in the old to get better leverage to remove it (Old bolt on the left, new bolt on the right).
Pair of latches after EvapoRust and Boeshield.
Latch with new bolts.
My striker bolts have seen better days. I think I should order some replacements.
Last edited by cdrod; February 19th, 2022 at 08:08 AM.
Nice fabrication work Sir, fine attention to detail. I also had a hard time removing my bolts for the lock mechanism. I ended up using a tool the has bits in it and uses a hammer to shock and free them. I know it has a simple name but I'm having a senior moment today. Impact hammer?
Really nice work, patience and attention to detail make for great results. I lack a bit of both and end up doing the jobs over again just so I can stop looking at it.
Steve
I've been fighting with the front end of my car most of the day trying to reattach the front fenders. I've managed to get the correct gaps at the doors but the radiator support seems like it is off center. When I measure diagonally across the engine compartment I don't get the same measurements. Is 1/4" difference too much?
Yes, 1/4 is too much. Your goal should be the same to at least 1/16" if not better. What is the width at the front vs. the back between the fenders? If you put the hood on, the side gaps will show where your problems are. From there, you will be able to decide what you can "live with".
Well...I'm pretty sure the body is misaligned relative to the frame such that the front is shifted to the right. This evening after work, I'm going loosen all the body mount bolts and all the fender bolts to try to shift it a little. I'm hoping I don't have to remove the hood and fenders to do this. I started another thread to discuss these problems; hoping I get some sound advice about the best way to resolve this.
It turns out there are indexing holes in the frame rails with corresponding holes in the body tub that were used to align the body and frame by the factory. If I understand it correctly, the line workers used a tapered dowel or pin that was inserted through these holes in the frame and guided the body tub into proper alignment as the it was lowered onto the frame. Who knew? So I've pulled off all the front sheetmetal (AGAIN!) and tonight will loosen all the body mounts, locate these indexing holes and see if I can get the body tub pointed in the right direction! I sure hope this works!
I knocked off work a little early on Friday so I could mess around with the car. The indexing hole in the LH torque box is aligned to the frame, so I lifted the body in the rear with my engine hoist and gave her a good shove. I was able to move the back end over to the right only about 1/8": not as much as I'd hoped for. But, the rocker to frame measurements are very consistent at all 4 corners so I feel like the body is properly aligned to the frame. This meant the rest of the alignment issues will need to be resolved at the front frame horns/core support area. The car was pretty banged up in the front so I wondered if some of my alignment issues were the result of the front frame horns being pushed to the right. I had to straighten the LH frame horn because it was "folded" over to the right. So I decided to extend the slotted mounting holes in the core support to resolve the rest of my alignment problems. For those of you following my other thread, this will be a repeat of photos and info.
Here's some photos:
This is how I found the car when I towed it home. The car definitely took a hit in the left front.
This is the LH frame horn before I powder coated the frame. I heated it with a MAP gas torch and hammered it back straight.
I loosened all the body mount bolts but left them in place so I couldn't over-correct when shoving the body around.
I extended the slotted mounting holes in the cores support to allow it to slide further to the driver side of the car
I put bolts in the fender mount holes in the cowl and measured diagonally to the hood bumpers to check the squareness of the core support to the body tub.
I reassembled the front sheetmetal today, and got the hood mounted and gapped. I'm pretty satisfied with the results although in the back of my mind I'm wondering that if the front frame horns are bent or pushed to the RH side of the car, that I might have more issues ahead when I go to mount the front bumper. I guess I'll have to cross that bridge when the time comes. For now, the car is ready to go to paint jail, where they will weld on the quarter panel skins and then take the car back apart to paint everything. I would have liked to install the quarter panel skins myself but I've been at it for nearly 10 years and I'm just ready to get the car finished and drive-able so I can start to enjoy it. The car will go to the body shop on Tuesday. To say that I'm excited about this major milestone would be the understatement of the year, ecstatic is probably a better word!
Here's some more pics of the final results:
This is the RH gap
And this is the LH gap
Starting to look like a complete car. The body shop will install the rear quarter panel skins before blowing the car apart for paint.
Last edited by cdrod; February 27th, 2022 at 03:12 PM.
Hood gaps look great. There is a lot of adjustment in the bumper brackets side to side where they bolt on to the bumper and you can always make the slots larger if you need more room. So it may take several rounds of putting the bumper on and off the car, but you should be fine. Are you planning to have an original bumper re-plated or will you buy a repop? I have a repop on the front of my wagon and I am not all that happy with the fit. If I ever find a nice straight core I might replace it with an original, or at some point I might just by one from Tri City and give them a core.
My car only had 1 alignment hole in the driver side torque box and it was pretty closely aligned to the frame when all the body mount holes are lined up. I also think for my car, the front frame horns are a bit tweaked from a front collision, and most of the sheet metal is mix-n-match replacements from other cars. There are definitely differences between the assembly plants. I don't think this process would be as difficult if you're restoring a car using the 'born-with' sheet metal. To anyone reading this thread for guidance with their own project, I would say the best technique is to install 2 bolts in the top of the cowl where the fenders attach and measure diagonally to the hood bumper locations on the radiator support. This method really helped me it dial-in. Thanks to everyone who contributed to this thread, it really helped to have the insights from others who have gone before!
Well she's off to the body shop now. The flatbed tow truck picked up on Tuesday morning! I was so excited, I forgot to document the occasion with a photo. It's a very strange combination of feelings; I'm super excited to have reached this major milestone (even if it's about 5 years later than my original timeline), but on the other hand, in the 10 years long project the car has never been out of my possession. The body shop is telling me they will have the car for 3 months. I have heard all the "paint jail" horror stories but I'm really hoping I can have it back 3 or 4 months. Fingers crossed!
Lol your baby has left the nest �lol she�ll be fine my friend! Pretty awesome seeing your progress and your problem solving ! Well done ! Now�s the time to clear the decks, and get the parts ready for the the next phase , I�ll go back and check but how was the interior?
Eddie:
I have collected most of the interior parts: door panels, seat covers, carpet, arm rests, etc. I need to restore (paint) the dash pad, the dash plastic pieces and the header panels at the top of the windshield. I'm considering reworking the ash tray and cigarette lighter in the dash and making this space large enough to hold an iphone with a USB charging jack somewhere behind the ash tray door. I would really like to fit some cup holders somewhere as I plan to drive this car as much as possible, but short of building a custom console (which I may do) I don't see any way for this to happen.
This next comment will probably ruffle some feathers, but I modded the dash for a single DIN radio and moved it to the left so it's centered under the ash tray door. Moving the radio made a space in the dash under the map light to add a more accessible 12v outlet (maybe using the original cig. lighter parts). I ordered a "radio delete" woodgrain dash insert set from H&H. The "radio delete" set has no cutouts for the radio so I can cut in the new radio location; unfortunately, the radio delete set also doesn't have the cruise and conv. top switch cutouts so I'll have to cut these myself.
I put the e46 BMW convertible seats in the front which will need to be recovered to match the rest of the interior. I'm hoping that a good upholstery shop can rework the strato seat covers that I have to fit, but I'll probably need additional vinyl material to make this work. I've also been looking for a more modern, foam-based seat alternative for the back seat as the original spring seat is pretty bouncy, but I'm starting to think just recovering the original seat is the simpler option.
Things I'm working on while the car is in paint jail:
• Intermittent (delay) wiper solution, more info coming soon
• Would like to move the headlight dimmer switch to the column, not sure if this is possible
• Ash tray-to-iphone holder dash modification
• Cup holders???
• Paint the dash pad & plastic parts and the kick panels
• Cleaning up all the chrome parts, inside & outside door handles, hood & fender chrome pieces, trunk stainless pieces
• Clean up the front bumper, polish the chrome and paint the backside to prevent further deterioration
• Restore the tail light buckets and fit brighter LED bulbs, clean and polish the tail light lenses
• Find a shop to recover the BMW bucket seats
• Recover the back seat, I have the vinyl seat covers but need the foam and padding materials
• Recover the rear seat armrests and piston covers, I have the pads and the vinyl covers should be a simple task
Last edited by cdrod; March 6th, 2022 at 12:53 PM.
Rodney,
Given the cost of something like this, I would not fool around with trying to reuse your lighter as a 12 volt outlet. I grafted the base plate of one of these into the map light area on my wagon dash.
You can find a lot of similar items on Amazon and ebay to make pulgs in the ash tray area as well. One tip for the ash tray door. It is a little hard to explain, but on my vista and my hardtop, I used a small drill bit and drilled into the "pins" that slide in the groves in the dash. Then with the door in, I used small self-threading screws and slightly larger washers to hold the door in and center it in the opening. The factory used spring loaded spacers to put enough tension on the door that it will stay open, but after 50 years the dashes often warp and the door will fall out. For the vista, I glued a small rare-earth magnet on the back of the dash at the top of each slot to "catch" the screw. On the hardtop, I just tightened the the screws to the point that there is enough tension on the door that it stays up (like the factory spacers but instead of pressing between the door and dash, it is pulling the dash into the door). Hopefully that makes sense as both dashes are installed and I don't think I have any pics of the back sides.
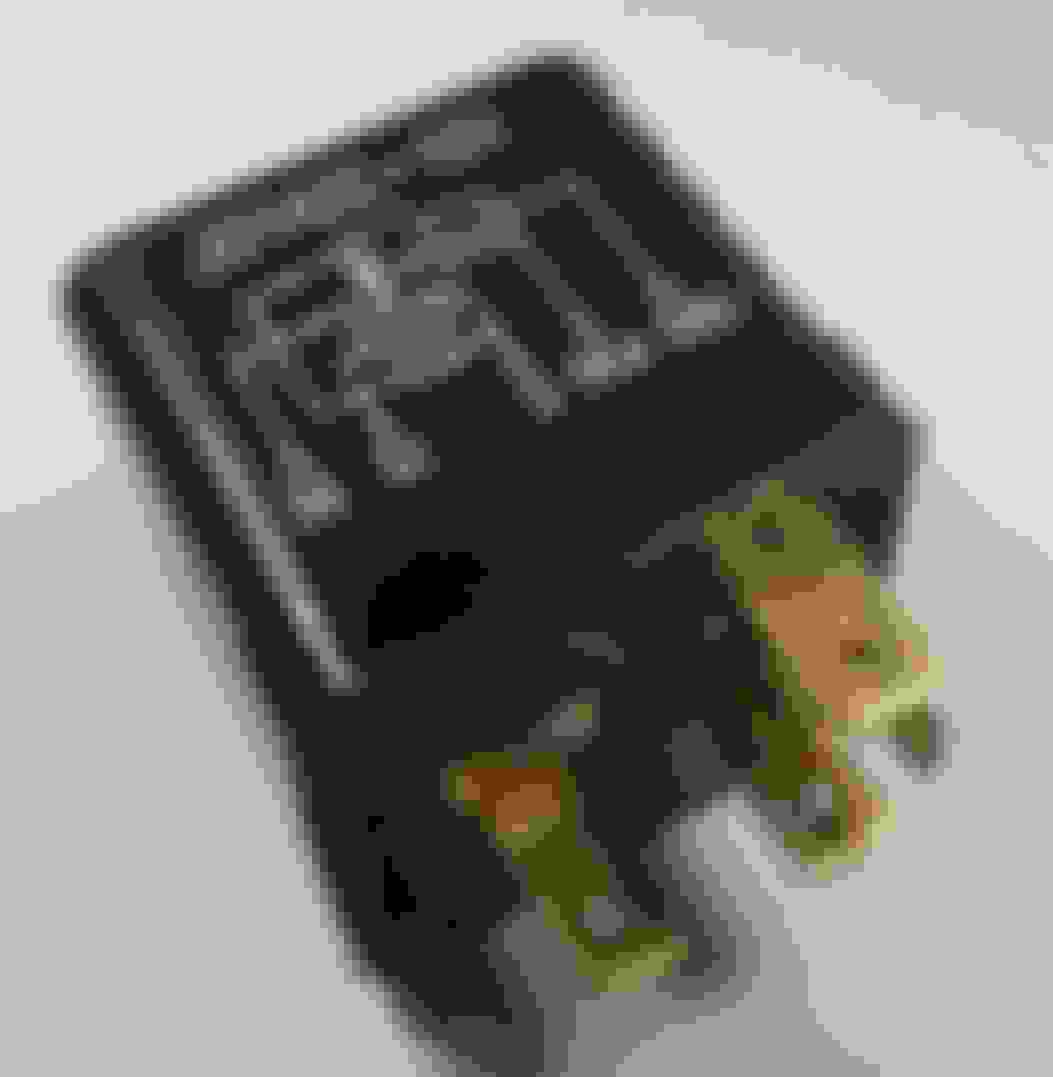
For the dimmer switch, you will need to find a momentary switch (factory cruise contol lever, turn signal or tilt lever from Ron Francis Wiring, etc.). Then, you will need one of these: https://www.ebay.com/itm/17382793454...0AAOSw~nBgJo-B
This is a flip-flop relay for a VW dimmer. You will run the three wires that would go to your old dimmer switch to this (power from headlight switch, power to high beams, power to low beams) and you will also run a ground signal trigger (from momentary switch on column). The ground trigger causes the relay to flip back and forth between the high and low pins. Unlike a regular relay, when it loses power it does not revert to a standard position. It stays at the position you set it to until you trigger it again. I have one of these running my dimmer switch (Ron Francis turn signal mounted switch) and another allowing me to activate the Halo's when the car is off with a momentary switch.
wow. props to you for sticking with this project for so long. i look forward to following your progress as you finish. i am about to embark on the restoration of 67 convertible myself.
Tom:
Thanks for the info about the flip-flop headlight relay; I will save that info for later if I decide to put the dimmer switch in the column.
65droptop:
Thanks for the props, it has been a long journey that's for sure! Long enough that I have forgotten some of the work I did years ago (thank the Lord for digital pictures and good notes). In the process I've learned so many things that I have to fight the urge to go back and "redo" something in a different way. My biggest "redo" regret is not spending more time on the frame while the body was off the car. I'm running a more modern 18" wheel & tire package that will put more stress on the suspension points. If I ever do this again I would re-weld many of the frame joints and reinforce the frame in a few critical areas. I would also send the frame to a frame shop to be checked for straightness as I ran into some issues with my front sheetmetal alignment that has now planted a seed of lingering doubt and concern.
Eddie:
Anything is possible with a little hard work, dedication & practice. Look at a challenging task as an opportunity to learn something new. Ten years ago I didn't know how to weld, I had never done a frame-off restoration, I had never replaced an entire floor pan, never replaced control arm bushings myself, and never overhauled an engine. Each of these activities required practice and experimentation and sometimes I broke things or had to do them more than once before I got it right. Never stop learning or trying new things, and Classicoldsmobile.com is a fantastic source of information and encouragement. My restoration journey would have been much more difficult without the support and advice I received from CO. In a time where people use social media and internet forums to bully and ridicule, this place has mostly been just the opposite.
I stopped by the body shop this week to check on progress. They have stripped both doors down to bare metal and installed the LH quarter skin. I'm pretty satisfied with the work although the body shop had not back primed the weld joints from the quarter skin install and there were a few pin holes in the sheetmetal at the butt welds. I addressed these concerns with the body shop owner and will check back with him next week. Here's a few progress pics.
Rodney
Stripped the doors and front fenders to bare metal.
The body shop has finished installing the passenger side quarter skin and have stripped the fenders and doors to bare metal, prepped and primed with epoxy primer. They will start straightening and blocking the body next. I started working on some of the interior items while the body work is underway. I interview several trim shops to install the convertible top and to recover the BWM bucket seats with the factory correct white vinyl. It seems a little backwards to remove the black napa leather and replace it with vinyl but I want everything to match.
I found a small shop that has excellent reviews and quoted competitive prices so I'm ordering the correct vinyl from SMS Auto Fabrics and will drop off the seats when the material arrives. I also started cleaning up and polishing miscellaneous trim pieces; door handles, armrest moldings, trunk moldings etc. I want to be fully ready to reassemble the car once it gets back from the body shop. Next on my list is the convertible top frame. I ordered new hydraulic parts for the convertible top mechanism. The header bow is very rusty, I have a second header that is in better shape but has other issues that will need attention. I plan to disassemble the top frame to have it sandblasted and painted. I'm thinking of powder coating the tack rails and the intermediate bows for better durability, but I'm afraid powder coat would be too thick if applied to the frame rails.
Here's a pic of my polishing efforts.
Last edited by cdrod; March 26th, 2022 at 04:07 PM.

 January 31st, 2022, 12:43 PM