When you click on links to various merchants on this site and make a purchase, this can result in this site earning a commission. Affiliate programs and affiliations include, but are not limited to, the eBay Partner Network.
New member here... See my intro in the "Newbies" forum...
I just got the big block Olds of my dreams...
Not really... a 70 442 is out of my league, now.
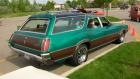
So I settled for a Vista Cruiser that I got for really cheap.
It's engine had been rebuilt, has new shocks, radiator, and headers, and Flowmasters.
Someone put some effort into it before abandoning it.
I'm in the process of putting new brakes all around, and getting it roadworthy, but snow and col weather is making that a long process.
I also started a Youtube playlist where I'll be posting updates.
Please check it out, like, subscribe, etc... for updates,
Could be a cool build. I owned a 72. I like others are curious of your plans. Looking at the dash it was a factory red/dark red car? The starting video says carburetor rebuild and ignition work to me. Looks like a great starting place. I am a big wagon fan. Bounce around this site and see other Vistas that have been done.
Plan is to get the brakes finished, and do a tune-up and whatever else is needed to make it a safe, reliable driver. Not sure if carb is electric choke, or not. Been too cold to really get in there and investigate everything.
Then will work on getting the floor pan patched up, working my way from the front to the back and get some seats, carpet and headliner put in so that my wife and kids can (will) ride in it.
Somewhere in there, I need to pull the Vista roof glass and check for rust and reseal them. I think I have a little leak in the drivers side.
I don't mind the patina, but wife would at least like it all one color if it's going to be parked in our driveway.
So I'll likely find a rattle can paint that is close, and at least get it all one color. Then I'll work my way around the body gradually getting that work done.
I'm also eyeing the tubular a-arms, and rear control arms, and brake upgrades that are out there for these cars... but that's way down the road...
I don't plan on making it a show car. Going for the "ratty muscle car / driver / haul parts to the swap meet / not afraid to get sideways in gravel" type of car.
I am going to mostly keep it drivable while I'm working on it, so it doesn't end up a "10 year in the garage torn apart on jackstands" project.
I have an 85 Mustang SVO in the garage that's been completely torn down, rebuilt and repainted, and honestly, I enjoyed it more before I got it painted.
It's kind of cool having a faded, beat up old 4cyl. Mustang that can hang with a newer Cobra on the backroads of southern Indiana.
I should not have started looking at that here at work... I'll have to read the rest later.
That's way above and beyond anything I plan on doing, but there are definitely some cool ideas on his build.
Thanks for the compliments guys. David, when I got my car it came with a new roll of wood grain vinyl that the previous owner never used. It is still in the box, and it is yours if you want it. There is supposed to be enough to do the whole car, but I have not unrolled it to see how many feet are on the roll. No1 olds fan, that vista is pretty cool. Any idea of when that pic was taken or what the car ran in the quarter?
Thanks for the compliments guys. David, when I got my car it came with a new roll of wood grain vinyl that the previous owner never used. It is still in the box, and it is yours if you want it. There is supposed to be enough to do the whole car, but I have not unrolled it to see how many feet are on the roll. No1 olds fan, that vista is pretty cool. Any idea of when that pic was taken or what the car ran in the quarter?
Not sure I'll be putting the woodgrain back on, but I'll keep that in mind. Thanks.
I saw earlier you mentioned using spray bombs to paint/ spot in the car. Here is a little more inspiration. This 72 holiday coupe came with my vista when I bought it. It had been sitting outside in red primer since then until I started working on it a couple of months ago. I have been gathering parts and options for the car since I got it with the intention of making it nice. I finally decided that if I start making it nice I will go overboard and not want to drive it, So I am trying to create a patina finish on it as if the paint is original and has been rubbed through down to the primer over the years. If you are willing to put in the time, I think you will be amazed at what you can do with spray paint.
This is the car as I got it/ as it had been sitting since.
Here it is with the quarters and jambs painted. I used a satin white to avoid a lot of dry spray and then wet sanded an buffed to what you see in the pics.
Spent most of Saturday cleaning out the interior, tailgate, and "trunk"... lots of nastiness.
Took video, but my JVC video camera uses an odd format, and I can't get my Moviemaker software to recognize it.
Still sourcing correct brake parts for it. Got the wrong rear wheel cylinders again. Ordered another set, from Napa, this time, and they appear to be correct.
Also got some insperation from a couple of the pics above for the direction I want to go with "the look"...
I'm thinking "old faded racing support vehicle". I'm pretty artistic, and think, with some help from my also artistic daughter, we can pull it off.
No real exciting updates...
Got some correct seats for it now, and got them bolted in. They're blue, but will do for now. Also got a not rusty spare tire cover, and less rusty drivers side rear panel. Also blue...
Got all of the correct brake parts on it, but someone crushed the rear hardlines on the axle, and I broke the first front line when replacing the hose.
I think at this point, I'm going to take to a shop, and have them run all new hard lines for it.
Will also have them move the front distribution block up where it doesn't hit the header.
Also replaced all of the headlights, and drilled out the old broken springs and replaced them all, including the adjuster bolts...
Little steps...
Maiden voyage.
Picked Crusty up from the shop at lunch today. Had them put all new brake lines in after I replaced everything else brake related.
I just didn't want to spend the next threee weekends underneath bending lines.
Installed a Wilwood block with adjustable proportioning valve now, so I won't have to do it again when I go to disk brakes later.
First pull from a stoplight, and this thing just took off. Made me forget about what I spent for the new brake lines...
Biggest issue so far... Whoever swapped steering columns didn't orient the steering wheel.
Goes straight down the road, but steering wheel is upside down.
Major pet peeve of mine.
That, and the booster is bad, so I have manual brakes, for now....
Looking forward to fixing all the little things to make it a fun driver, and then tackling the bigger things, like the floorpan and body work.
So far. No regrets on buying him.
While swapping out some of the interior rear panels with some less rusty ones, I realized the side glass is loose.
I'll have to remove the glass, and reseal it before driving much more. Don't want to have my window fall out and shatter all over the road.
I'm also going to remove and reseal the vista glass, as it has a couple leaks.
And, while I'm at it, I'll do the windshield too, because... It leaks too. LOL
I did take the doors apart and reattached the windows to the regulators, and lubes everything up good. Windows go up and down easily, now.
Got new booster installed, and have been fighting a stumble under acceleration.
Chased down and got all the vacuum hoses hooked up correctly.
Checked that all cylinders were firing.
We had a cruise-in, and a swap meet in town this weekend, and a few older timers told me to get some carb cleaner and spray the sh!@#t out of the carb.
Did that, and this thing perked right up.
On the test drive after this, I accidently spun the tires from a stop light, and I barely had my big toe in it.
So, now I can finally move on and get the header gasekt leak fixed ( couple broken bolts) and get some more exhaust put on to route the fumes out from under the car.
BTW...
Now that it's running good...
I was told it "had a cam".
Trying to determine if that is true.
Would a stock 455 Vista Cruiser with only long tube headers be able to light these big Good Year Wrangler tires up at barely any throttle?
Does it seem like it has significantly more power than stock to be able to do this?
Can't wait to get somewhere I can really open it up and get into the secondaries!
Here's a pic from the cruise-in.
My daughter was almost embarrassed to ride with me, because most of the cars were all shiny and pretty.
She was surprised with how many people stopped to check Crusty out and ask about him.
Wonderful David, half the battle is getting them safe and roadworthy, from there you can do things at your own pace. When we got our own Vista Cruiser in 2006, it was very weathered and had, as my Mother-in-Law said, the most sorry looking interior she had ever seen in a car I got! At the first cruise, folks were all over the car, as many had never seen one except on television! PS, let this mess of a picture I included help to encourage you! Enjoy Crusty!
So I've done a lot of work to Crusty...
Turned out the carb was not only incorrect for the car, but really dirty.
Cleaned the crap out of it, and it's running way better.
Have driven it to a couple local cruise-ins.
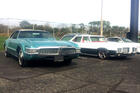
Just happened to run into Scott Winn, and had to park them next to each other.
Advantage of a crusty car. We can sit on the hood, and not worry about scratching it.
I have sealed the windshield leak, and have the rear drivers side glass out now. Need to weld up a couple small holes, and re-install the glass. Hope to have that done in the morning.
This car gets more attention and comments than my shiney red Mustang ever did. LOL
Been driving Crusty daily for the last week, or so.
I think I need to drop the gas tank and clean it and seal it.
I've been chasing down all the electrical issues, which mostly have been dirty, corroded connections. I now have all of the headlights, brake lights and turn signals working reliably, in addition to the wipers.
Heater controls are temperamental, but I'm sure I just need to pull them out, and clean the contacts.
Got the drivers side side window and vista glass removed, a couple rust holes repaired, and reinstalled.
I used windshield adhesive out of a caulk tube.
The bead wasn't as thick as it was supposed to be, so the glass sits tighter to the body, and creates a gap between the glass and chrome trim.
I'll probably redo it and use the 3/8" butyl adhesive that comes in a roll.
The caulk stuff was really a pain, and messy.
Making progress a little bit at a time...
Replaced all of the tail light bulbs and cleaned all the sockets out.
Removed gauges last night and cleaned all the sockets out, and installed LED bulbs...
Much brighter now.
It was dark, and the car was running when I took these this morning, so pics are a little blurry.
I've not been very good at taking pics.
Got my fuel tank out and taking it to get repaired today.
Made a road trip this weekend and bought a Performer intake, and some chrome valve covers.
Figured out my gas guage not working is the black flat wire going down the length of the pickup tube.
If I put a jumper wire between the points, my multimeter needle moves with the float.
New sending units aren't available for Vistas, so I'll have to replace this wire, somehow.
.
If you're crafty, you can get a Bosch universal sender, then rob the resistance winding out of it. They're about $20 on Amazon. Or, you might get lucky and find a used OEM unit.
When I pulled my VC gas tank for repair the fuel gauge was not functional. It turned out to be the connection through the sending unit. We tested the flat back wire from the pivot area attachment to the bottom of the sender and it was good there but not at the top of the sender where the gauge plug connects. A little elbow grease to clean those connections up and it works again.
Hope it helps as finding the senders and tanks is not easy (or you pay top $ for someone else's junk).
Got Crustys fuel tank off to the shop to be repaired.
They'll likely have it a couple weeks.
Figured I'd take the opportunity to pull the head and get the broken bolts out so I can bolt my header up and get it to seal proporly.
Also picked up a Performer intake, and will be ordering up a carb from either Everyday Performance, or Cliffs... whichever can get me one soonest.
Didn't realize the turnaround time was so far out for some of the carb rebuilders.
Also wanted to peek inside the engine and see just what kind of "rebuild" the former owner did.
It doesn't look like much. I'm thinking they did a back yard rebuild. Maybe new bearings and seals. Doesn't look like anything has been hot tanked or machined.
One of the lifter circlips has come out. I'll get that fixed.
So I've got the intake off, and will get the passenger side head off tonight, probably.
Then the fight to get the broken bolts out.
I think I also rattle canned the bottom half to at least get it all one color since my last pictures.
Just got a picture of my rebuilt carb from Ken at Everyday Performance.
Will you look at that? Just look at it!
It's a beauty!
He gave it a "street performance" tune to match the mods I have, and leave a little on the table for future mods.
Turnaround time is amazing. He's planning on testing it and shipping it tomorrow.
Less than a week from payment to shipping.
Haven't made as much progress as I'd liked...
Had the engine apart to pull the broken exhaust manifold bolts out.
Got it all back together, but have been fighting trying to get the distributor set in properly, and it turned out the igniition wire wasn't making a good connection, which was complicating the issues.
I did pick up some Olds 15" rally wheels, and had new tires mounted and we got them on this past weekend. 255-60-15's
Converting over to HEI this weekend.
We're selling one of the Mustangs in the garage, so Crusty will have a garage space.
I'll be able to get a lot more done on him then.
Bought a cheap daily driver for my daughter, and have had to work on it rebuilding the suspension and steering, so haven't worked on Crusty much.
I did get out there this weekend and installed the HEI, and got him started up.
Something is off, though...
I set the #1 piston at TDC on the compression stroke and the groove on the harmonic balancer lined up with the zero on the timing tab.
I had the valve cover off, so could confirm both intake and exhaust valves were closed. Lined up rotor with #1 plug wire.
I started it up (vacuum advance not hooked up yet) and when I tried checking the timing, the mark was clear over at about 10:00...
It runs, and revs fine, but I'm not sure why the mark ended up over there.
I ran the wire for the HEI clear to the IGN plug in the fuse block.
This wagon used to sit in a junkyard very close to my home, it was always my dream to buy it, fix it up in the yard, and drive it out from where it sat, however somebody beat me to it. I still have pictures from when I used to go look at it (I knew the owner). Owning/fixing this car was always a dream of mine but it was never attainable (I was in high school at the time, and needed a more reliable car to drive), so it’s awesome to see somebody else putting in the time and effort the car deserves. Keep up the good work! I enjoy seeing the progress.