When you click on links to various merchants on this site and make a purchase, this can result in this site earning a commission. Affiliate programs and affiliations include, but are not limited to, the eBay Partner Network.
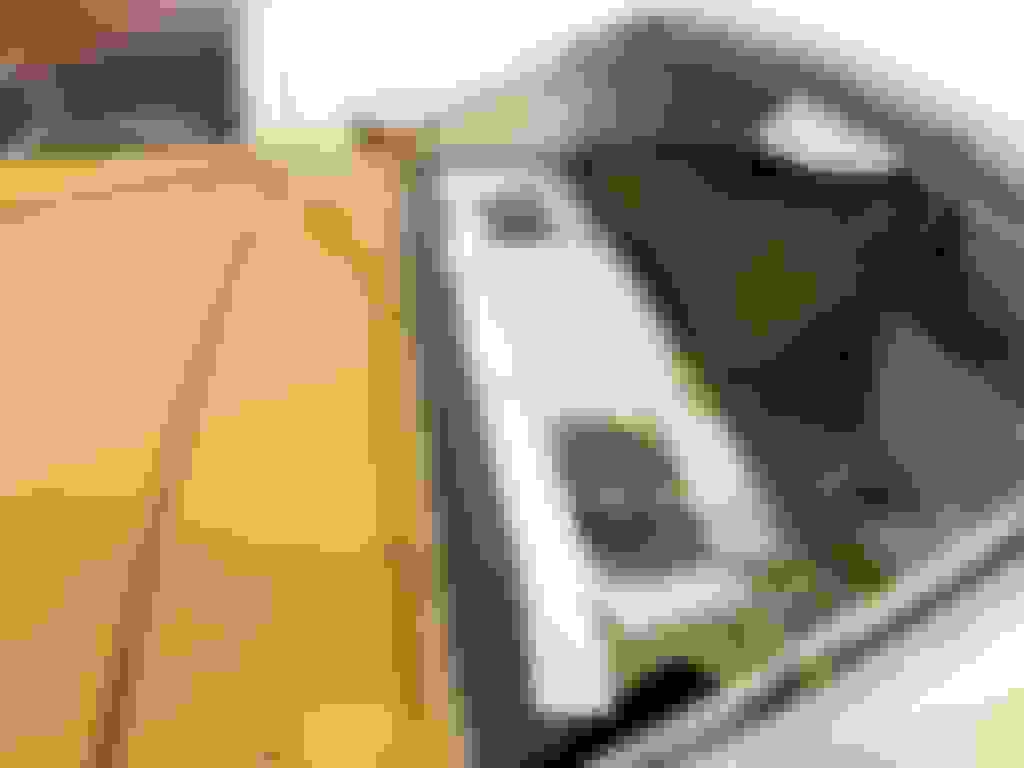
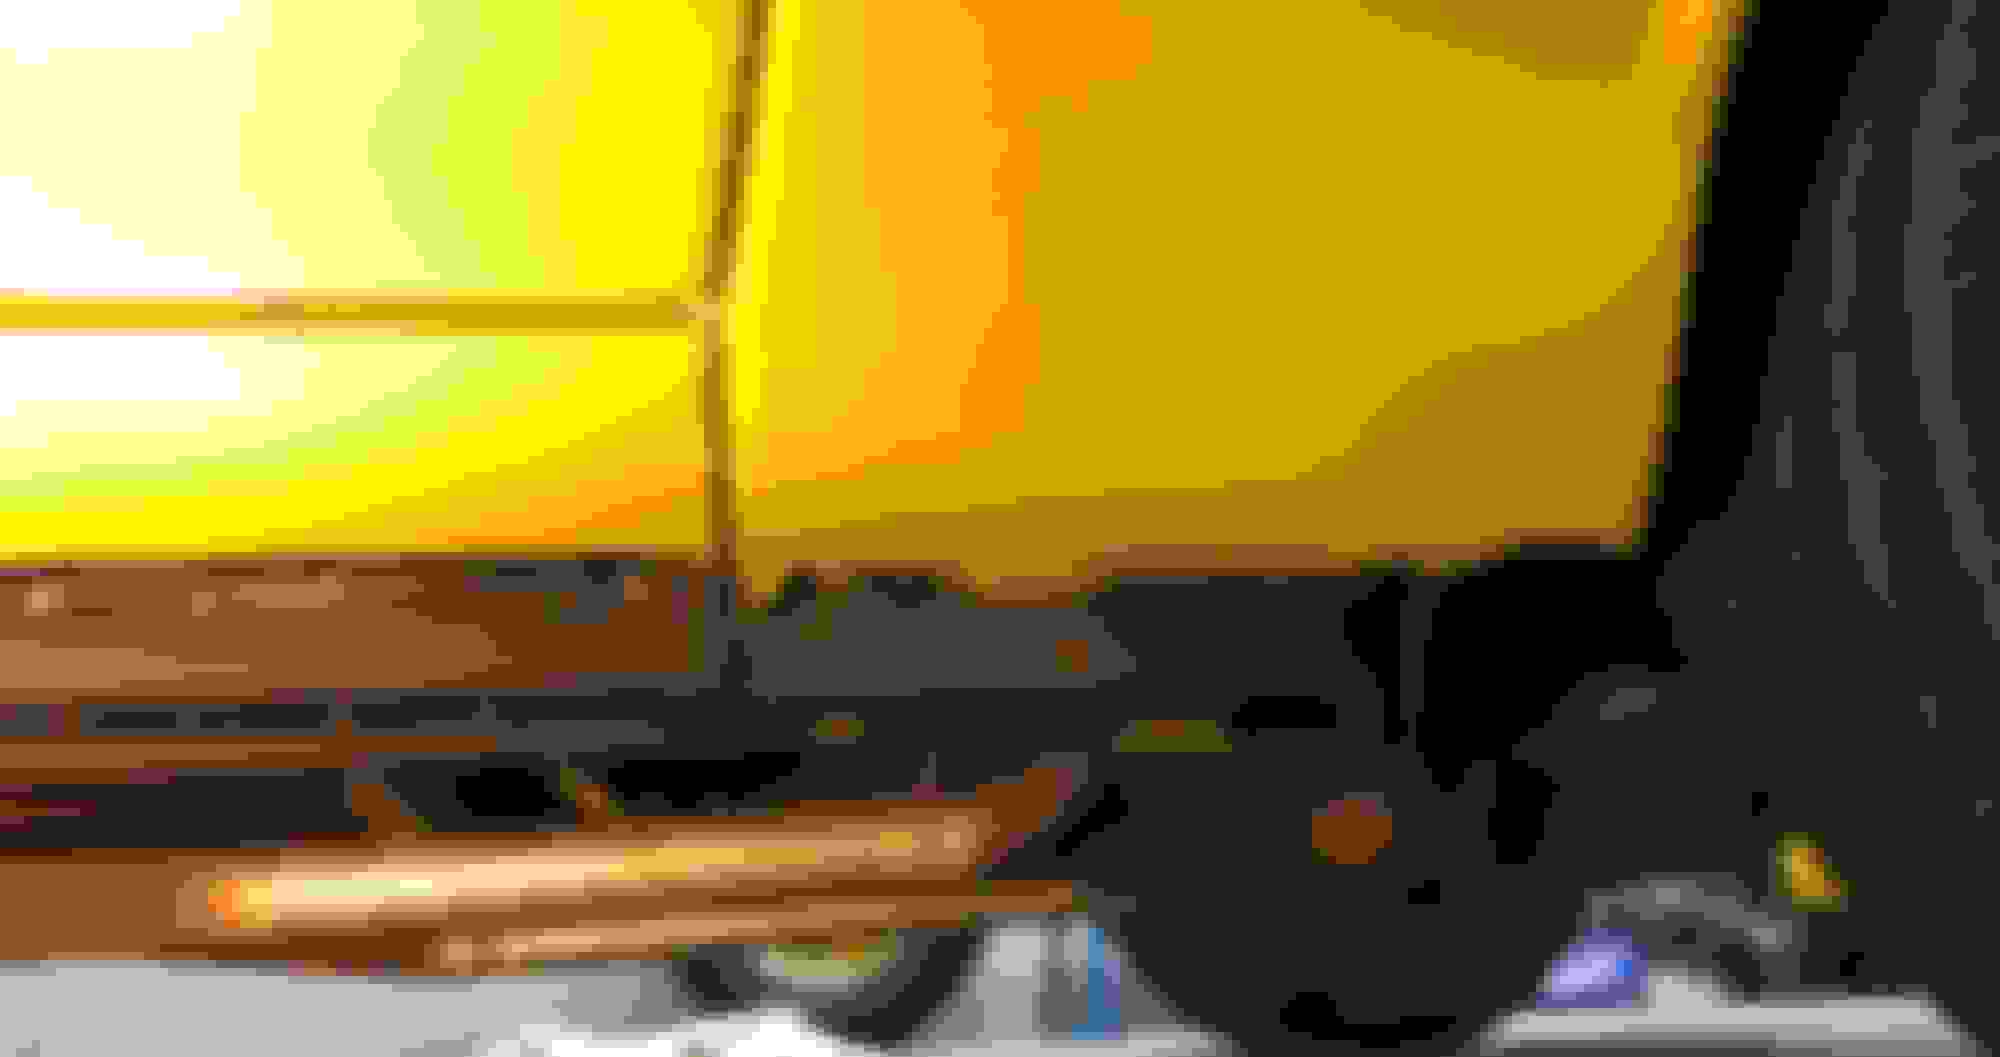
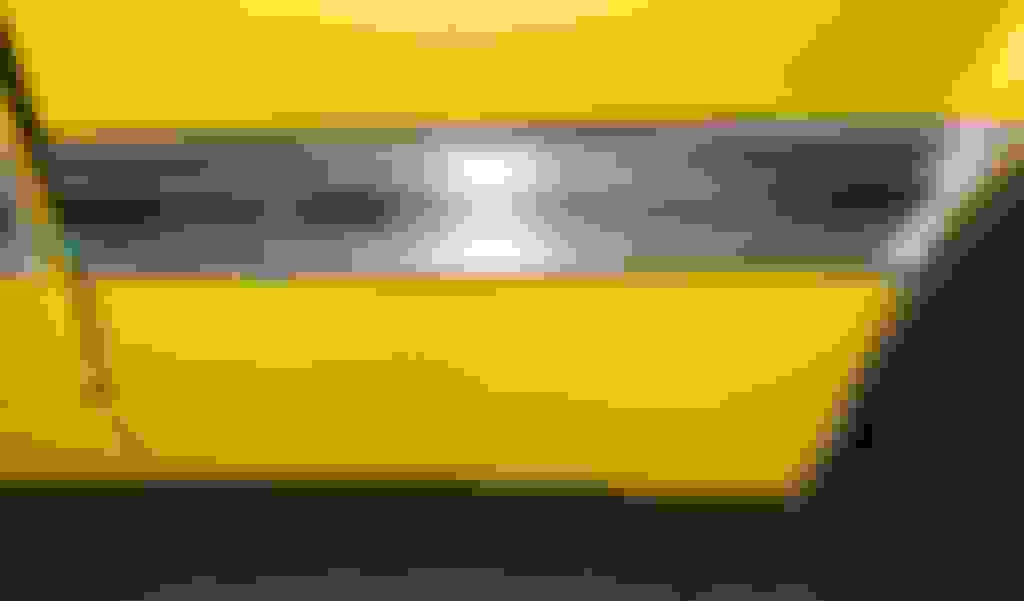
I have been talking to the shop trying to find a way to install a Drain for the rear-window rain gutter.
We are trying to find an easy way to attach a drain pipe to each corner of the rain gutter.
I may attached a box under the gutter and weld, and then drill a hole from the gutter into the drain-box.
A small hose will then feed into the fender below the rear side window.
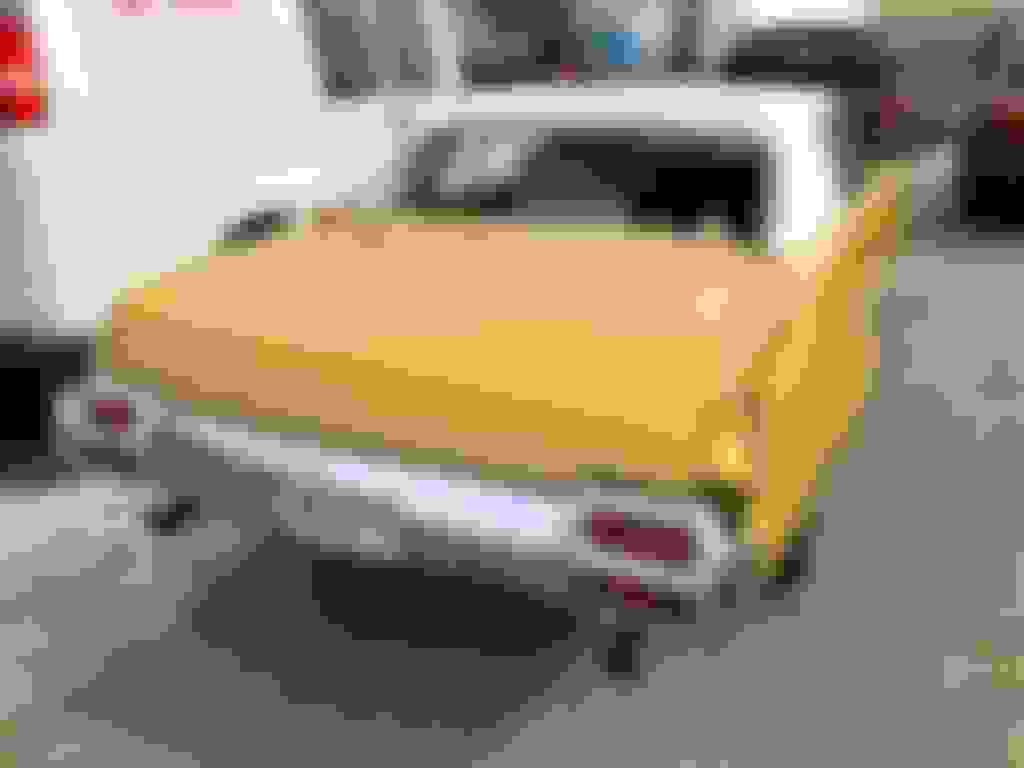
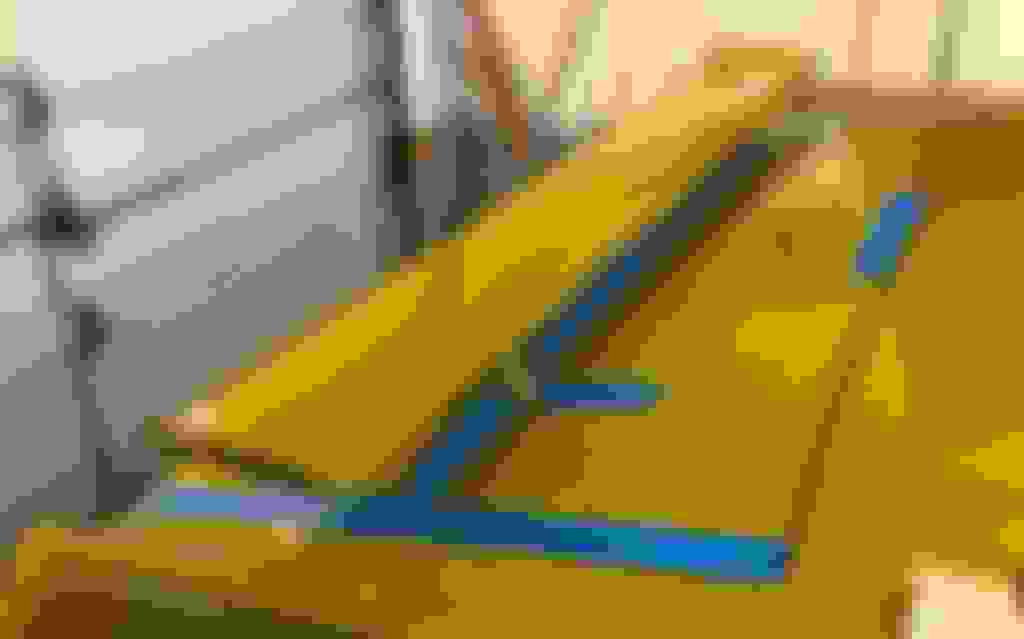
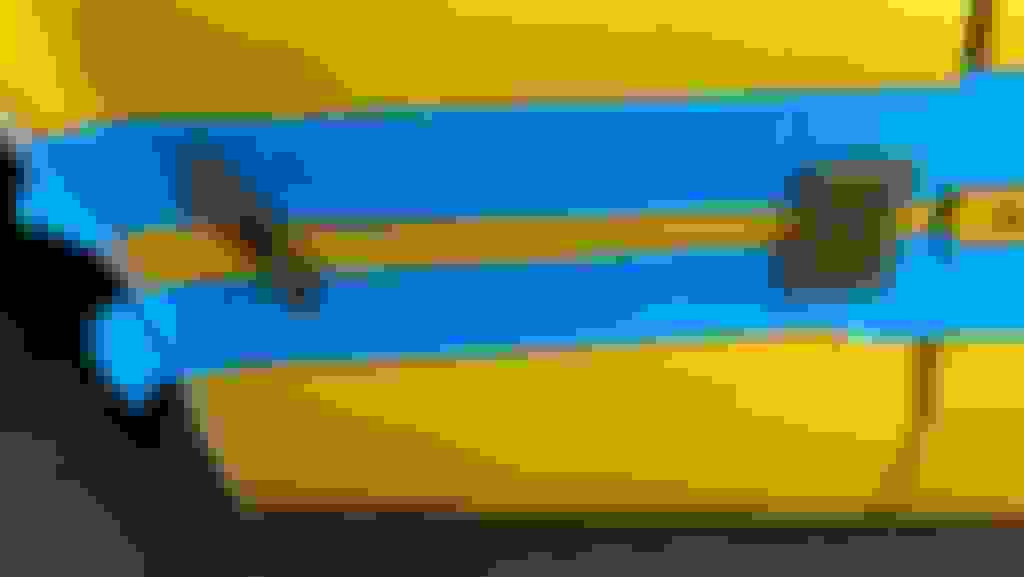
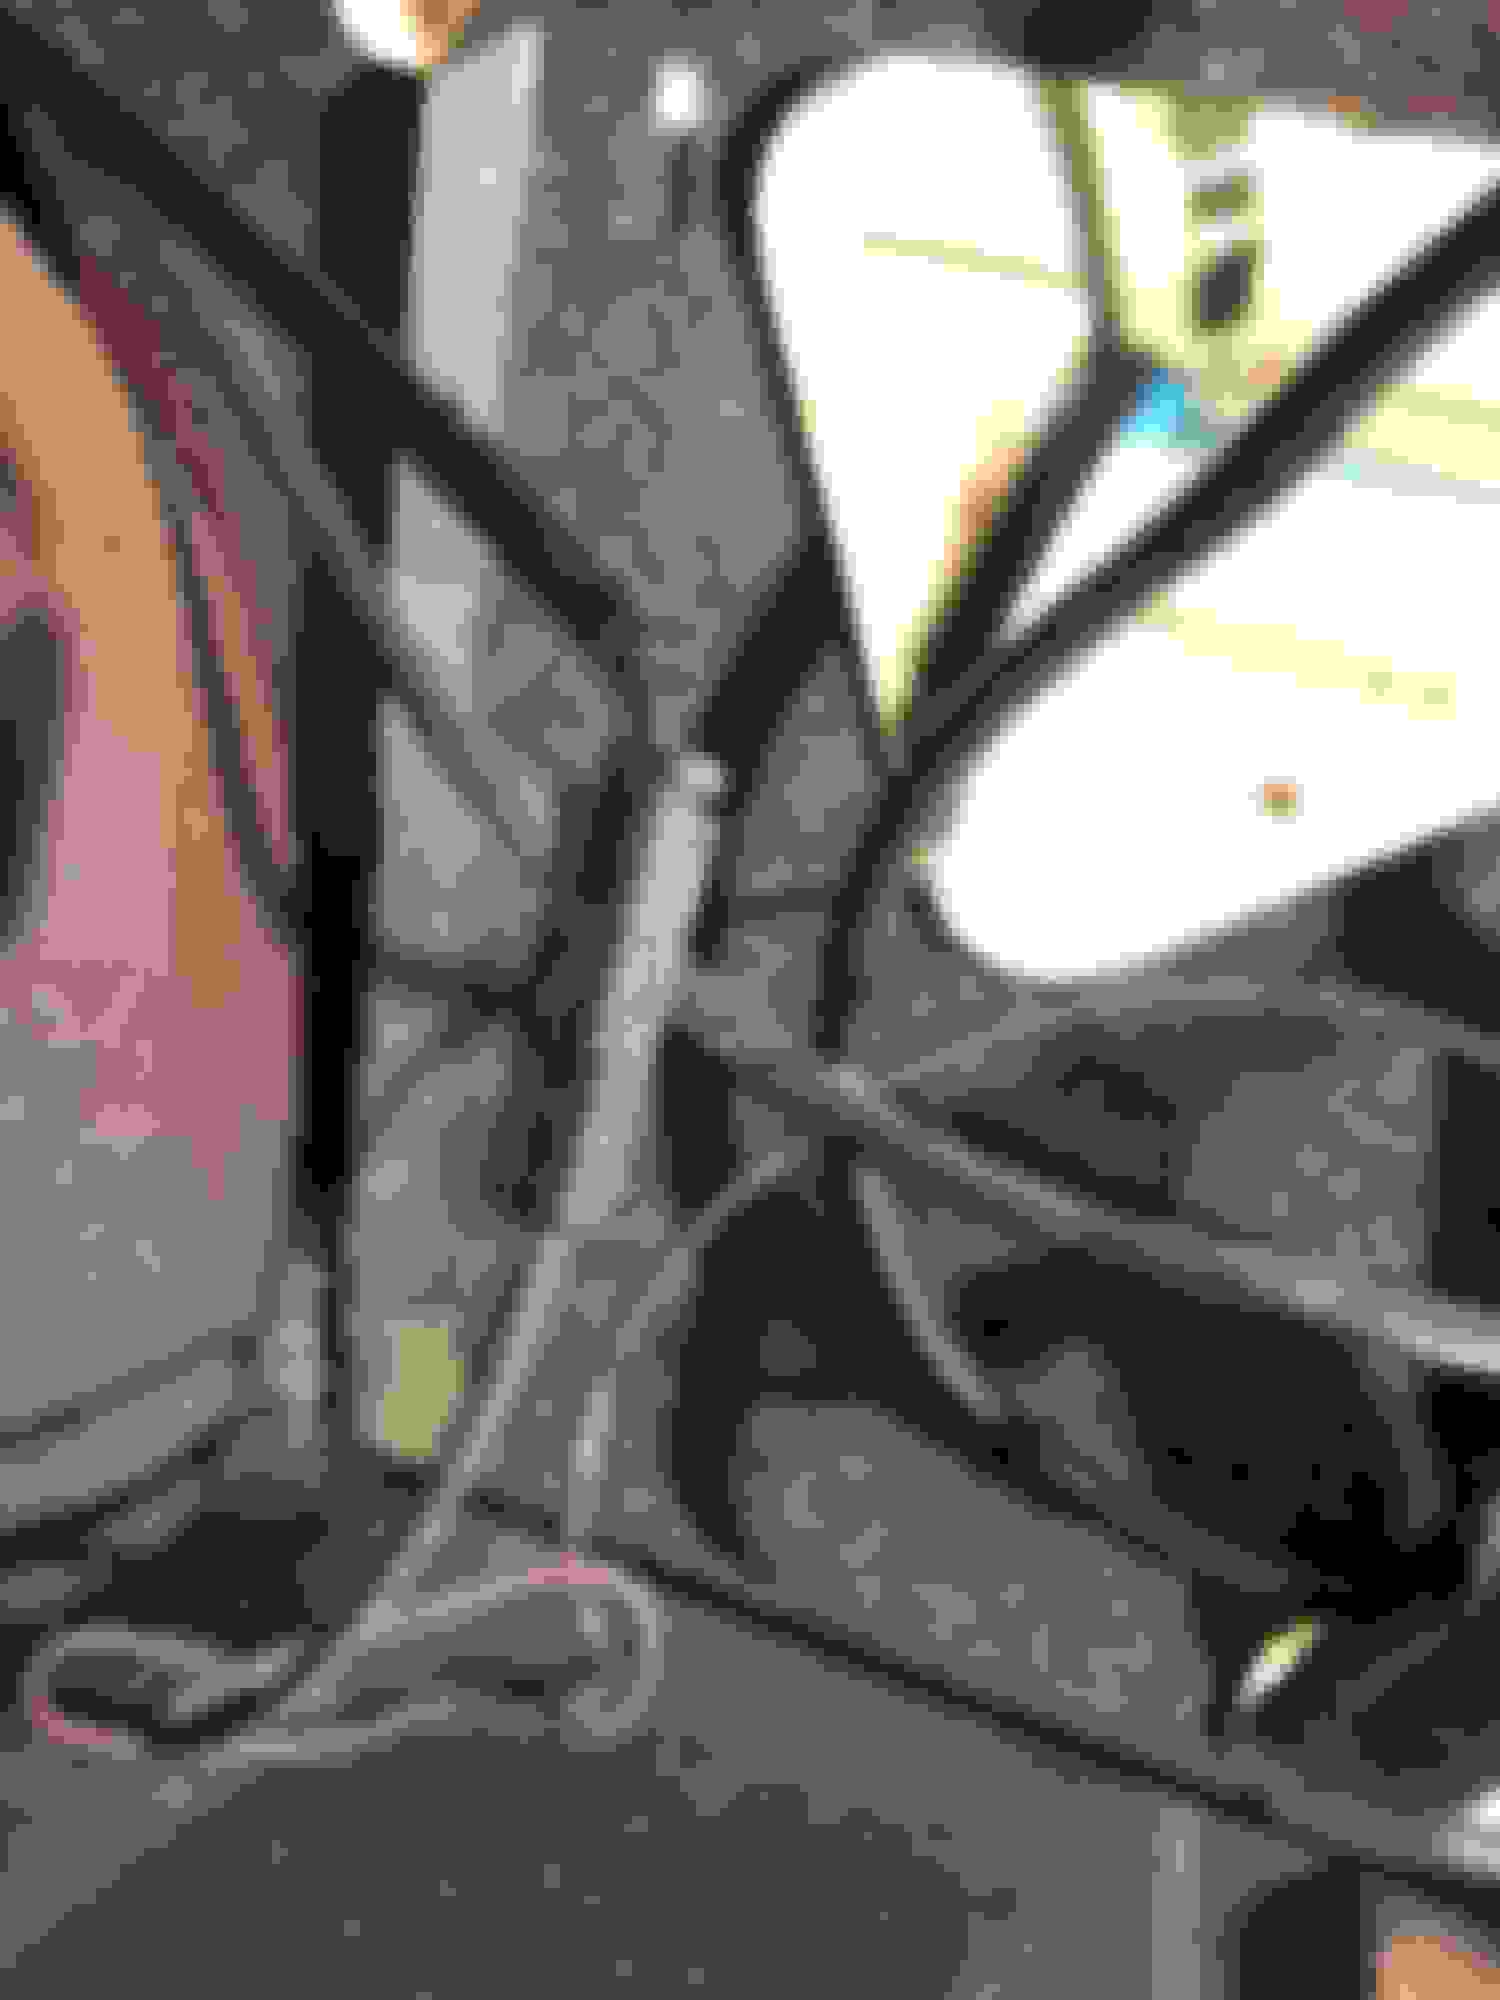
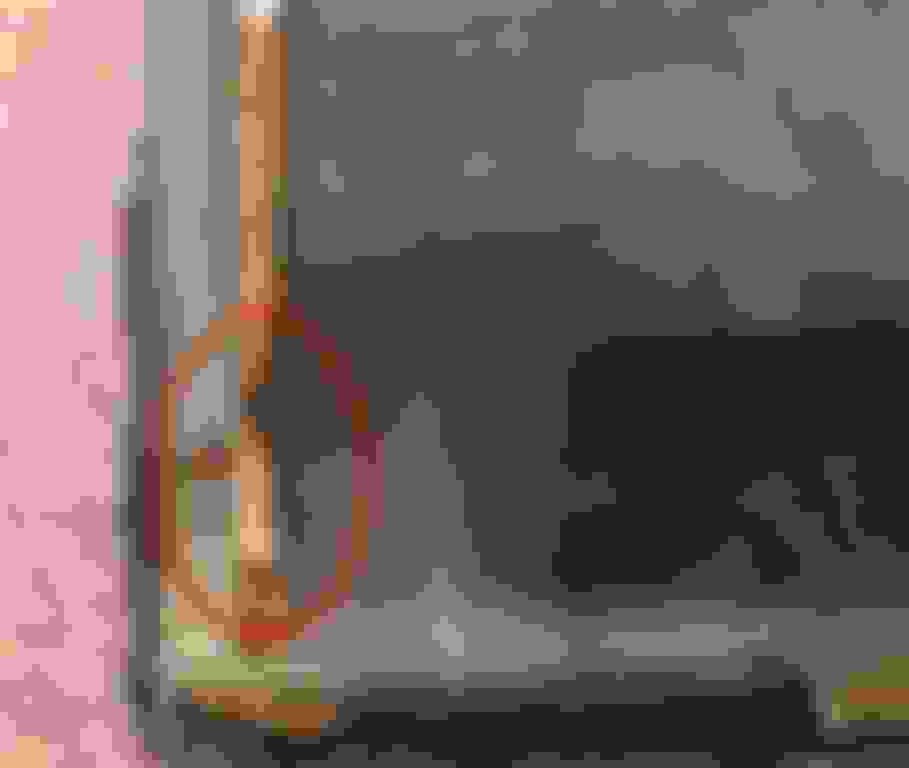
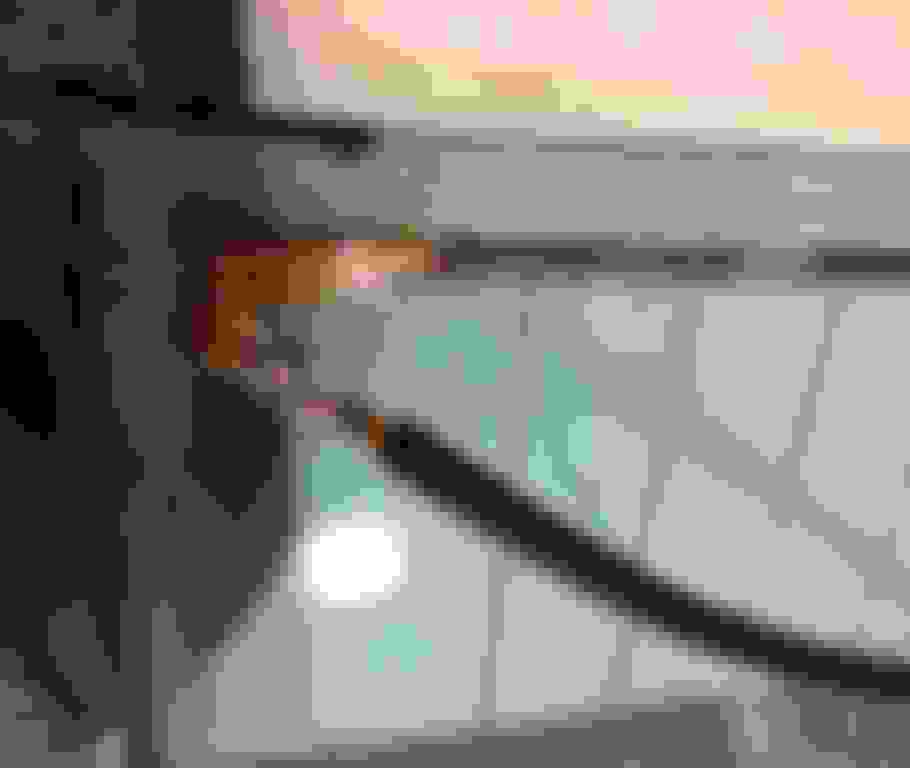
The Red circle shows the broken positive wire for the Grid-Defogger.
I will need to fix this after the window is re-installed.
The pending water drain hole may be located near the blue circle
Red circle, broken Grid-defogger wire. Blue circle, possible location for the water drain.
Finally got some paint on the main body.
I had to give up on the idea of getting water drains installed in the rear-window gutter.
The metal guy just did not want to do it.
I think the color match came out great. I only had a few minute to look it over.
They still have to finish the trunk paint.
It looks like I will get car home next week.
I told the shop to Not install the rear window grid defogger at this time.
I think it will be easier for me to re-seat the vinyl roof with the window out.
Also, one of the wires for the grid defogger broke at the connector wire.
It's best if I do the wire repairs myself.
I do plan on Photo documenting the wire routing for the Grid-Defogger, when I start the repairs to that circuit.
The body and the wheel color seems close.
The tail cones were painted separately.
My original front bumper as been at the chrome shop for 4 months. Still waiting.
Last edited by Miles71; March 5th, 2021 at 12:51 PM.
It was supposed to take 2 months at the paint shop. This time it took 3 months.
A week of the slowdown was caused when I asked the shop to build in a water drain for the rear window gutter.
The metal guy said it did not feel comfortable with the job.
They also decided not to install the stripes because they did not think they would do it correctly.
The bill was adjusted accordingly.
Somehow they forgot to paint the Radiator frame support.
The trunk speckle paint looked very poor.
The shop agreed to repaint both at a later date.
Picking up the car took two days. The fuel gauge got unplugged and indicated a FULL tank.
The tank was empty.
I changed the plugs because the shop stared the car a few times a week for 3 months. Since the engine ran for only a few minutes for each start, the plugs were just clogged with crud.
After I discovered the empty tank, a few gallons of gas got the car running. The shop said they were very impressed with its ability to start in very cold weather.
Over all appearance.
I am still examining the paint and finish.
So far I am very pleased with the color.
It's a perfect match.
Tomorrow I will get out the garden hose and leaf blower and start the process of getting all of the sanding dust out of the car.
Last edited by Miles71; March 10th, 2021 at 02:47 PM.
It does look very nice. It looks like it has a very nice gloss. It just glows. Looks better in my opinion without the stripes. It is really gonna be a sharp Oldsmobile.
It does look very nice. It looks like it has a very nice gloss. It just glows. Looks better in my opinion without the stripes. It is really gonna be a sharp Oldsmobile.
I agree. I love the color. Would be very hard to cover the paint with stripes. Thin factory hood and trunk stripe would pop on there. Good for you doing things your way. I LOVE white interior cars by the way. Nice nice car.
the color looks very good miles. I think its good the shop didnt do work they werent comfortable with, its a PITA for you but ultimately your better off than if they had done it and ended up w poor results. hopefully you can either DIY or finding someone who is better versed at the task.
no spoiler ?
I think black hood stripes would look great on it IMO
Last edited by RetroRanger; March 10th, 2021 at 05:20 PM.
Spoiler?
I now have 2 Spoilers, one Plastic and one Cracked-Fiberglass.
UPS came and took the Cracked Fiberglass Spoiler and it came back to me a few weeks later. I called the sales company and told them, but they have not said what to do with the cracked fiberglass spoiler.
I plan on installing the ABS-Plastic Spoiler myself this week, before I take the car to the Stripe shop.
That way, if I make any scratches on the trunk, the stripes will cover the scratches.
To Stripe or Not to Stripe, that is the question.
46 years ago I got my first 1970 Cutlass Supreme [Galleon Gold, Gold vinyl top].
My 70-CS did not have any stripes.
I always thought it would look good with the Wide stripes on the hood.
Now after 46 years I am going to see what it really looks like.
Oldsmobile Color #53.
In 1970 this color [#53] was called Nugget Gold. In 1971 [#53] was called Saturn Gold.
I am going to assume it is the same color.
A Puzzle of a 1,000 pieces starts with the first piece.
I installed the Rocket Logo, in the Stone Shield.
This is what happens to your plugs when you start the car 20 times and only let it run for 5 minutes. The Plugs never get up to operating temperature to cook off the carbon deposits.
I placed blue tape along the edges of the trunk lid to allow me to write my measurements onto the tap. I followed the measurements listed in the CS 1970 service manual.
I also verify some of the measurements by also measuring the Spoiler stud mounting holes in the support stands.
I eventually identified and marked the locations of the 4 holes that I need to drill.
The last big step, I installed the studs into the Spoiler stands and then placed the sharp studs on top of the taped trunk lid and lined up the studs with the marked future holes.
This was the most important measurement!
I discovered the center of the trunk was not the center of the car.
The Spoiler needed to be moved 1/4 inch to the passenger side of the car.
I measured the distance between the outside edge of the Spoiler to the center line of the Left and right fenders top ridge line.
After a few more adjustments I had the Spoiler perfectly centered Left/Right.
Next came the 1/16 drill bit, followed by increasing larger drill bits until the final 1/4 drill bit.
Then came the moment of truth.
I install the Spoiler and carefully aligned the 4 studs.
Each stud slid into its assigned hole on the first try.
Awesome.
Blue Tape used to protect from scratches and allowed Measurement markings.
Underside showing the stud mounts. One is inside the factory hole.
Finally bolted on. [Retro-Ranger, Thanks for the Spoiler.]
Last edited by Miles71; March 12th, 2021 at 05:47 AM.
Yowza thats nerve racking just reading it. Im all thumbs i get near something nicely painted and for sure something is getting scratched.
i know people either like or dislike the spolier on the supreme, im in the like camp, i think it looks nice and adds a ‘sportier’ look
well done miles that looks great, i look forward to seeing pics w the whole car back together.
Your welcome on spoiler, i was going to put it on my car eventually, but when i saw you were in a bind on yours, i knew it would be better off w you than kicking around my garage for another 5 years
Appears to be a slight difference. Old color chips can be deceiving though. There a different code number however..23211 vs 2339
Nugget gold in 1970 was an entirely different color than Saturn gold used in 1971 and 1972, even though they had the same body tag number. Using different colors under the same body tag code happened regularly from year to year. 71 was the first year for Saturn gold.
Hi RocketBrian & 44210, thanks for the update on the Paint code 53.
Now I have more accurate talking points about the body color background.
Hi 68442,
I am using New England Chrome Plating in Hartford Connecticut.
I dropped off the bumper in November 2020, its now march 2021 still waiting.
The front bumper will be one of the last items to be installed.
I need to install most of the grill parts, before the bumper.
Reassembly updated March 13, 2021
Besides the Spoiler, Nothing too exiting. I have installed about 60 parts over the last few days.
Since I need to take the car back to repaint the trunk and radiator frame, I need to carefully select what I am going to install.
The Interior will be last!
Since the front bumper is still off, I plan on re-painting the exposed metal frame parts.
What should I use for glue on the vinyl Roof?
I had to lift up the section of roof around the rear window.
The vinyl is still intact and I now need to re-glue it down.
The vinyl roof must be fully seated with trim before the rear window is installed.
I also need to find and repair the broken rear-window grid defogger positive wire.
Any suggestion on a Good glue?
Need to re-install bottom section of vinyl
Last edited by Miles71; March 14th, 2021 at 07:03 PM.
Hey Dean, I think ill just stop calling Fusick and Year-One and just visit your place every few months
Thanks for the offer.
My original Front bumper should be ready any day. Its only a 90 minute drive each way.
And I do need to call Fusick's for a few parts.
Some of the 50 year old gaskets [door handles, etc] came off ok, but designated when I tried to reinstall.
I am planing on replacing most of the door gaskets too.
PS, My Cutlass turned 50 this Month, It was born in Framingham Mass, March 1971.
Painted Frame:
The shop got a lot of over-spray on the frame. Now I have a gold frame.
I decided to paint the frame and Pinch-Weld flat black.
I think it looks much better that way.
Installed the PS Side inner fender and the 4 chrome wheel openings trim sections.
Most of the underside was painted gold.
The Pinch-weld and frame have been painted flat black.
Last edited by Miles71; March 23rd, 2021 at 05:34 AM.
March 21,2021
The weather in Boston has been cold 12F - 14F in the mornings.
My progress has been limited to what I can install wearing gloves.
The Front bumper will not be back from the chrome shop until April 7th.
The repaint of the Trunk and Radiator support, will not happen until the end of April.
I am tempted to Sand/Prime the radiator support myself and just have the shop spray the top coat.
Installed Windshield trim, all hood related trim and front fender Eyebrows.
Passenger door new weather strips installed.
Ordered a bunch of weather stripping and gaskets from Fusicks.
There was much more Over-spray than expected. It is all over the engine compartment. I spent hours repainting the engine compartment. Later this spring, I will need to repaint the Rear wheel wells.
I Reinstalled both front plastic fenders and restored wires to their original locations. The battery needs to stay out for a while longer to allow access to re-installing the Headlight accessories.
Some 1971 cars came with plastic grills. My car has the original heavy Metal grills. There is a support bracket attached to the radiator support. This bracket is designed to support the Plastic grills, not the Metal grills. The bracket is 1/4+ inch too short to reach the Metal grills.
I am going to try some spacers to make it fit.
Piece by Piece, Need to be careful to not scratch anything.
Need to work on a mounting solution for the metal grills.
This stuff came in handy to clean the engine compartments before painting. water based, low Oder.
Last edited by Miles71; March 23rd, 2021 at 05:34 AM.
Grill support bracket:
I always noticed that the metal grills were a bit loose at the bottom and wobbles a bit.
The wobbling caused cracks in the plastic stone guards.
Now I know it was because of the Unattached bracket.
My grill is for the model 4200, metal grills 408806-RH and 408807-LH.
The assembly manual shows the bracket and screws etc.
There is also a vague references to "Shim as required-max, 4 per car".
It does not say where to put the shims.
It looks like I will need 0.6" of shims and a longer bolt.
The test fitting of the grill was successful.
I will delay the final installation of the grills until after I get back the bumper
Test fit of metal grill, with rear bracket attached.
The grill alignment looks good.
Bracket attached. Note the bolt threads. I needed a longer bolt and spacers 0.6 inches.
Front Fender Trim:
Finally had some warm weather. This weekend I put-in about 12 hours in the garage over two days.
This piece of trim was a real pain. It requires two special clamps that screw into barrel nuts. The nut for the Square bracket had popped out, so I replaced it with a new barrel nut.
After installing the two clamps, they did not seat properly.
The trim appears to be installed, but there is a gap between the body and trim. The trim is also a bit looses.
Now I know why I have seen some other cars that use Sheet-Metal screws for this trim section.
The bad thing about this chrome-trim part is that I have to do it again for the passenger side.
Lights are working:
Cleaned up the engine compartment wiring and got all of the lights back on [some of the grounds were getting worn.]
Last edited by Miles71; March 23rd, 2021 at 05:35 AM.
The trim piece looks nice miles, i recall that same piece on my dads 71 vert had the woodscrew thru it, looked real nice lol.
on the grills i think the spacer will work fine, but i wonder if yours originally had a longer part there at some point inits life? If it were mine I might be tempted to either extend the part to the grill or make a part to replace that part and the spacer.
I tackled the Passenger side chrome part #2 [The hard one].
After much struggling the results were better, because I intentionally installed it the wrong way, and it worked much better.
Normally you install both barrel nuts first [similar to #10-24 screw].
Then screw in the two special mounting clamps into the barrel nuts [Spring version and Rectangle].
This time I installed the front spring bracket and barrel nut as usual.
But, I did not install the barrel nut for the rectangle bracket.
I installed the nut onto the shaft of the rectangle bracket.
I mounted the bracket to the Trim and then Hammered the Trim/Bracket and barrel nut into its hole.
It work! Nice snug fit. I did not have to resort to a Sheet-Metal screw.
The rest of the trim is easy.
A second person is helpful with the long door trim. Install screw by door locks first.
Then have your assistant lift up trim so you can find the section screw hole near the hinges.
This trim is seated firmly. Now I need to go back to DS side and try for a better fit.
I use a lot of blue tape. I also used a rubber hammer to lightly tap the plastic clips into place.
The trim alignment is OK. I ran out of speed-nuts. The rear side trim will have to wait until after the trunk re-painting.
Grid Defogger:
When the glass guy removed the extremely-rare Grid-Defogger, he broke off the two "Pig-tail" wires that are permanently connected to the rear window.
Each Grid defogger comes from the factory with two 22-inch wires attached, one to each side of the window.
The Passenger side window end with a Lug-terminal connector that screws onto the rear-seat frame.
The Driver side cable has a male plug-in connector that mates with the connector attached to a purple wire, in the trunks wiring harness.
Since both wires were snapped off, I will need to re-solder the wires back on.
The overall condition of the rear window looks good. I plan on bringing home the window this week to effect the repairs to the pig-tail wires.
The Pig-tails, can only be attached safely when the window has been removed.
I will also use this time to test and repair any of the 17 resistor wires that may be broken.
The test is simple, just apply 12 volt to the grid [I will use a motorcycle battery for the test".
Then with a Digital volt meter, measure the voltage of each resistor-wire.
The initial measure point with the center of the window, going top to bottom and writing down the voltage of each wire.
If we assume the average voltage is 8 volts at the center, the all 17 wires should read the same or similar voltage.
If any wire shows Zero or 12 volts, than that wire is BAD!
The auto shops sell a "resistor patch conduction glue" that can be used for simple wire cracks.
Other details
The Negative wire is a stiff 12-gauge wire that screws onto the passenger side rear seat support for a good ground.
The wire then goes behind the cardboard behind the vinyl sail trim [Below the side interior light] to the bottom corner of the window, where it connects to a pad attached to the window.
The Positive wire is a stiff 12-gauge purple wire that is in the wire-channel on the driver side under the carpet.
The purple wire then connects to a 22-Inch black 12-gauge wire inside the trunk.
The black wire then feeds into a square hole back into the passenger compartment on the driver side.
The black wire runs under the cardboard and vinyl trim sail to the base of corner of the rear window.
Both black power wires transition into a flexible braided cable for flexibility.
This is where the Spade connector is attached.
Positive Purple wire Driver side. Here is changes to a black 22-inch wire that connects to the window.
Negative black wire connected to the passenger side rear frame.
The Top wire is the Negative wire. Middle wire is the Positive wire. Both wires have a protective plastic sleeve covering the high-current wire.
The hole used by the positive wire to feed from the trunk into the passenger compartment on the driver side.
Closeup of the PS side, where the pigtail wires was broken off. I will need to re-solder the broken pig-tail wire.
Last edited by Miles71; March 28th, 2021 at 09:19 AM.
Reason: Added more details
Vinyl Roof repair:
A section of the vinyl roof needed to be lifted, to allow access to repair some window rust.
My attempts to re-glue the vinyl seems to have worked. It should last a year two. May be next year i will get a new vinyl roof.
I used a 3M spray glue to attach the roof. To be safe, I covered the car with paper and tape.
The repairs look ok.
Now the hard part, trying to install all of the roof chrome trim. This will take a few days.
Many of the plastic clips broke during the removal process. The first batch of replacement clips were too small. I need to buy some more of a different size.
Lots of paper and tape, just in case I miss with the glue. [ I always save the packing paper from OPGI, it really comes in handy]
Looks good from a distance.
Last edited by Miles71; March 28th, 2021 at 09:38 AM.
The two pig-tail cables had been broken off at the braid section.
I added on two more inches of #10 gauge braid to each cable. I just happened to have some extra braid laying around after installing a 200 watt satellite transmitter in my other car. The 10-gauge wire was needed to support the 30 amp current load. I am guessing the Grid-Defogger is using at least 10 amps.
Then I soldered on the two cables to the existing brad strip on each side of the window.
I needed a 150 watt soldering Iron to bond the two braids together.
I should have just enough flexibility and length to match the original cables.
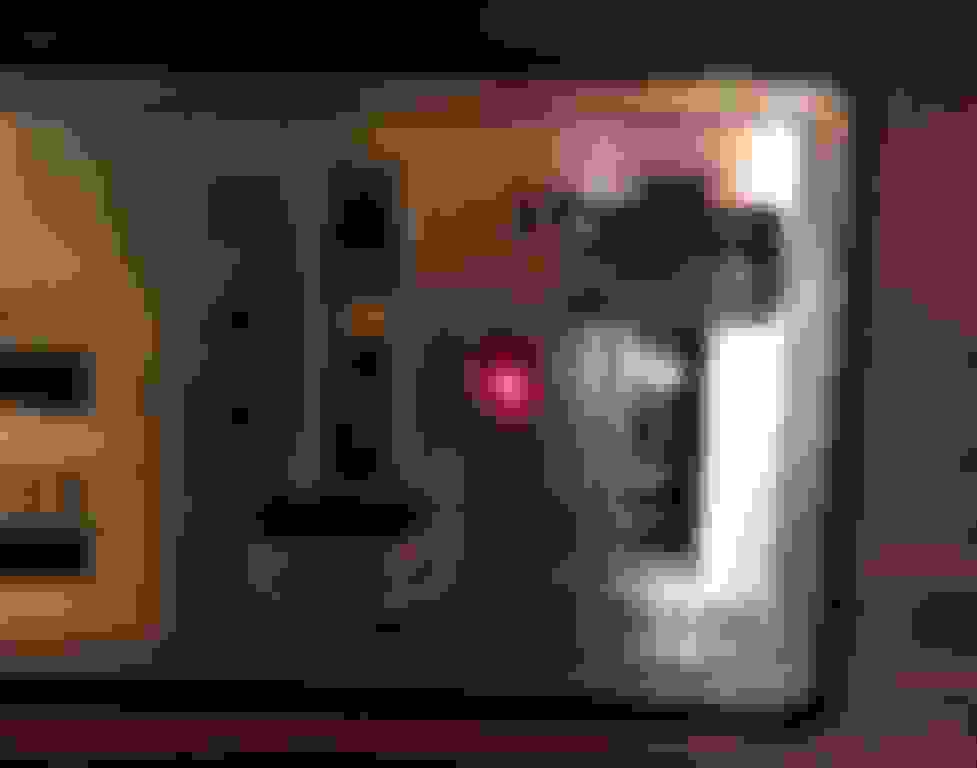
The first test is to check the grid resistance. It measured at 1.4 ohms.
I need to figure out if any of the existing 15-Resistor wires are bad. They can only be tested when you apply power.
I hooked up a motorcycle battery directly to the Grid, then began to measure the voltage at the center of each of the 15 wires.
Sure enough wire #9 was bad. The rest of the wires showed between 4-6 volts at the center point. Wire #9 showed 11.5 volts.
This means that #9 is broken somewhere between center and the passenger side.
After a few more voltage checks I found the very tiny break in the wire.
Tomorrow Ill visit the auto stores to see if the still carry the Grid wire repair kits.
After wire #9 is fixed, I will check the total resistance again.
I expect it will be lower, since it's like adding another parallel resistor to the circuit.
In this picture you can see the 12-volt motorcycle batter connected to the grid.
The blue tape in the middle of the grid marks the bad wire, that I will fix tomorrow.
Test setup. Grid powers up. Have one Grid wire to fix.
I attached 4-inches of braid and then trimmed back to about 2-inches during the installation process.
PS side all fixed. Should be enough slack. More Insulation will be added later to prevent any shorting issues.
Last edited by Miles71; March 30th, 2021 at 04:40 AM.
10 years ago when I first bought this car, I discovered I had two bad resistor wires [#9 and #14].
I bought the kit Permatex, Rear Window Defogger Repair. It has enough stuff to fix 1 wire, so I fixed wire #14 and said I'll do #9 someday.
The wire I fixed in 2012 is still working.
Today is "someday" and I fixed wire #9.
The kit is easy, just place a stencil over the bad section of wire and then paint on their magic junk and let it dry.
I need to wait 24 hours before I can apply power.
Only then will I know if the fix worked.
Remember, according to OHM's law, you cannot measure the resistance of a resistor that is part of a Parallel resistor circuit.
Note: When you touch the fragile wires with you meters probe, use a very light touch, you can easily sever the fragile wires!
The only way to really test a broken wire on the Grid-Defogger, is by applying voltage!
Here are the voltage values you will typically see in a working Grid defogger.
Assume your Driver Side braid voltage is 14.0 Volts DC.
As you measure the voltage of the wire from the Driver side to the Passenger side, you will see the voltage gradually get lower from 14 to near zero.
The window is 54 inches wide.
Driver side will be Inch Zero. Passenger side will be inch 54.
The center will be inch 27.
Inch #1 should be 13-14 vcd.
Center inch #27 4-8 vdc
Passenger side inch #50 1-2 vdc.
This is the stencil with the magic conducting paint.
Before This is the After, when the stencil is removed. The brown/orange color will fad a bit over time. No know has ever noticed the patch.
Last edited by Miles71; March 30th, 2021 at 12:10 PM.
The shop forgot the to paint the trunk and radiator frame.
The car is back in the shop for those issues and two big chips in the front edge of the hood that will need some extensive work to fix.
I am also waiting on the repairs for the rear window too.
The painter screwed up!
He never sanded the Trunk or the Radiator support.
He just painted over the crack and peeling paint on the radiator support.
And painted over the carpet stuck to the trunk floor!
I had given Written instructions about the sanding to the shop.
The shop owner and I are both in agreement.
Now the painter has even more sanding to do.
The shop owner said, He just can't make enough money on the old cars and he is not going to do any more.
He said My car was the exception since it was 98% rust fee.
As I looked over some of the cars in his lot, I could see at least 6 cars older than 1980 waiting for work, including a 1968 Chevy Impala, 79 Oldsmobile, Chevy Vega, and others.
My guess, is the 68 Impala could be fixed for $20-25k
I am really starting to get worried about the pending repairs to the rear window.
And Cruise Nights have finally begun in Massachusetts. Looks like Ill have to drive the backup car for a while [95 Vett convertible]
The shop got the Rear window grid defogger installed. I do not see any cracks! GREAT
As you can see from the picture the car is sitting Outside in the rain.
Upon close examination, the shop got the order Wrong!
The welding for the rain gutter at the bottom of the window had not been finished!
Weld first, install window last.
Fortunately the known hole can be access with the window installed.
On Monday they plan to sand the trunk, radiator support frame and repair paint chips on hood. Then move back to paint booth.
Trunk Flat-Black, Radiator support Satin-Black and Hood chips Saturn-gold.
Window Installed. I will re-test Grid Defogger when the car comes home.
I am glad I deiced to hold off on the stripes until Last.
Last edited by Miles71; April 17th, 2021 at 07:37 PM.
All of the hard work and preparation worked. The Rear-Window Grid defogger is working.
Here is a picture of the Rare-option, R.DEFOG.
The Red-Light only comes on if the engine is running "AND" both Defogger relays are active.
The voltage at the positive braid [driver side] was about 12.5 volts. The voltage of each of the 15 resistor wires was about 6.0 volts [Measured at the horizontal center of the window].
If you test your window and see a voltage at the center of 0 or 12 volts, that means you have a broken resistor wire!
Ohms-Law, "You can only test for a broken wire when power is applied to a parallel circuit."
The repaired pig-tail braid wires were covered with plastic wrap and tape.
The wires then were tucked behind the cardboard sail material. The sharp looking metal in the picture is not a problem. It gets covered by the inside rear rubber trim and will not touch the cables.
The trunk paint came out OK. The shop gave-up on speckled paint. I think the Satin-color is good enough for now.
They also washed the car for me and detailed the tires.
The guy with the garden hose did not noticed the Trunk Side marker lights had been removed. This allowed water to get into the trunk.
Soon, I will get into my trunk with a flashlight and have someone hose-down the Trunk so I can check for leaks.
There are two screw studs mounted in the vinyl trim at the base of the rear window.
I think one of these studs is leaking and will need some sealant.
In theory, all of the rain-gutter leaks should have been welded.
I found two big paint chips and a Full-Thumbprint.
The shop has offered to Re-spray the whole hood.
They will take off the hood and paint it separately. I think I will take them up off their offer.
This nose chip may have occurred when the car ran out-of-gas at the shop and was being jump started, etc.
I am going to keep the Thumbprint. If you see me at a car show, I will show it to you.
Over the winter, the shop would start the car every few days and drive it to a new work station area. The shop said the car was very reliable and stared up every time all cold winter long.
The gas-gauge was accidentally unplugged during trunk painting.
After 4 months, the car ran out of gas.
When the gauge is Unplugged, the gauge will read "FULL".
This part of the hood did not get a Full-Spray. The shop assumed this part was covered by chrome and did not need paint.
Side story:
On a few days the shop parked my car out front of the shop [to get it out of the way].
Many new and prospective customers coming into the shop were very impressed with my car.
Also, as least one New customer came to the shop after seeing the work the shop did on my 69-442.
I know this is not a high-end shop, but some days you do get quality work. And it's the best I could afford.
Last edited by Miles71; April 25th, 2021 at 02:38 PM.
The Radiator supports Satin paint looks OK. Much better than the chipping old glossy paint that was on there before.
Now I need to replaced the engine timing sticker.
Painting status:
I found two big paint chips and a Full-Thumbprint.
The shop has offered to Re-spray the whole hood.
They will take off the hood and paint it separately. I think I will take them up off their offer.
This nose chip may have occurred when the car ran out-of-gas at the shop and was being jump started, etc.
This part of the hood did not get a Full-Spray. The shop assumed this part was covered by chrome and did not need paint.
Sorry to hear the brain damage with the paint. What kind of shop let's a full repaint go out the door like that?? That sucks. You will get it handled and it will be worth all steps.
Re-chroming my original front bumper cost $700 with tax. It came out great.
The shop guy said I had a really solid "Core". Even the back side of the bumper is very shiny.
The shop suggested I paint the back side with Rustolm paint. I have tentative plans on a light gray color for the back.
Here is the first test fit. All looks good.
The Grill parts need to go on before the bumper.
I bought a new set of bumper mounting hardware.
The Chrome-shop said, that I should use Nylon locking nuts for the bumper bolts.
You are less likely to crack the chrome with the Nylon Nuts.
He also said, do not torque too tight.
In the picture below, the nut on the lower Left, is the Nylon nut [$1.79 each].
The Bag of OPGI Bumper mounting hardware will work, but it's not identical to the original parts I removed from my original factory bumper.
In the picture below, the Shiny hardware is the new hardware. The rusty and black hardware is the original hardware from this all original car.
Row #1, Three different lengths of mushroom bolts were used. The shortest is the bolt used just behind the front license plate.
Row #2, The longest bolt is used to attached the two support bars to the car frame.
The shorter bolt is used to attach the Single support bar to the car frame.
Row #3, These 1 1/4" serrated washers are used with the support bar to frame mounts.
Row #4, These 1" washers are used where the support bars attached to the bumper, license plate area.
The washers from OPGI kit, were about 7/8"
I will use the old bigger bolts/washers for the frame bar supports.
Original Mushroom bolt lengths.
Longest = 38 millimeters
Middle = 30 mm
Smallest = 91 mm
Last edited by Miles71; May 19th, 2021 at 01:26 PM.
Reason: Added more details
Front Bumper Installed:
The front bumper is installed and all of the related grill parts too.
I change my mind about using the Nylon Locking bolts.
If the Nylon bolts ever get rusted, it would very hard to remove the nuts, without damaging the Square bolt section that Slots into the bumper. Instead, I just used the lock washers, regular nuts and torqued to only 15 pounds.
This should be enough to keep the bumper firm and not too tight to crack the Chrome finish.
All of the lights work and the car is legal again. I need to get a Massachusetts State inspection this month.
Grill Bracing:
The radiator support frame "L-Braces" were never connected to the metal grills from the factory.
I added a longer bolt, screws and spacers to complete the attachment.
Now, when I grab the grill and shake it, its solid.
Even the Inside of the bumper is shiny.
Stone Guard Test fit:
The two metal Grills are bolted to the plastic stone guard first.
I used grease on the metal to plastic bolt attachments to reduce the chances of cracking the delicate plastic.
It takes two people to safely install the assembly.
Note the Assembly manual on top of the radiator.
Bumper Bolts above License Plate:
The Assembly manual says to put these two bolts with the treads pointing to the Ground.
That is not as pretty as the other-way around.
I installed the threads pointing up, and the Shiny round cap visible.
Last edited by Miles71; May 6th, 2021 at 08:49 AM.
Reason: replaced picture

 February 10th, 2021, 12:25 PM