
70 Cutlass S Build
 August 28th, 2013, 06:53 PM
#281
wait.... what....
Thread Starter
Join Date: Mar 2009
Location: London Ont Canada
Posts: 817
 September 4th, 2013, 11:57 AM
#284
wait.... what....
Thread Starter
Join Date: Mar 2009
Location: London Ont Canada
Posts: 817
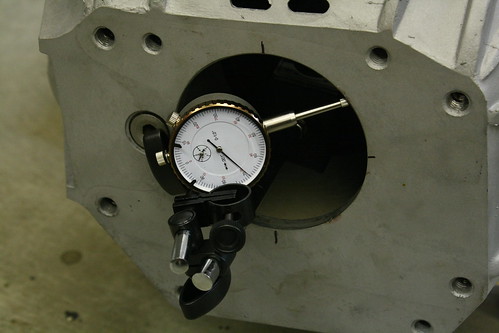
Got a bit frustrated working on the car as of late. I had to dial in the bell housing for the new TKO600 and i am allowed .005" tolerance. Well wouldn't ya know it, i am over tolerance by .0005! So now i have to get the dowel pins out and by offset ones.
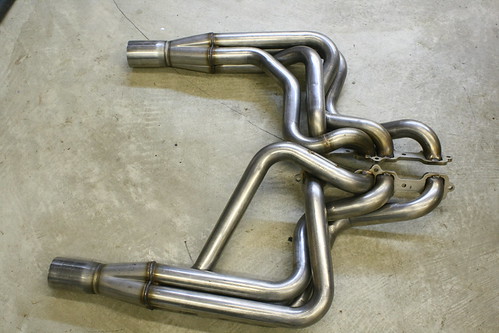
My second dilemma was that my headers don't clear my oil filter adapter. I'm hoping that i just received BB headers instead of the small block ones. I am just waiting on a reply from Smitty.
My second dilemma was that my headers don't clear my oil filter adapter. I'm hoping that i just received BB headers instead of the small block ones. I am just waiting on a reply from Smitty.
September 9th, 2013, 11:17 AM
#285
wait.... what....
Thread Starter
Join Date: Mar 2009
Location: London Ont Canada
Posts: 817
Well some good news anyway, i called Hurst Driveline tech support, and Jim (the tech guy) said the amount that i am out is no problem and not to even worry about it! So i have the green light to install the motor and trans now!
 September 22nd, 2013, 03:43 AM
#289
wait.... what....
Thread Starter
Join Date: Mar 2009
Location: London Ont Canada
Posts: 817
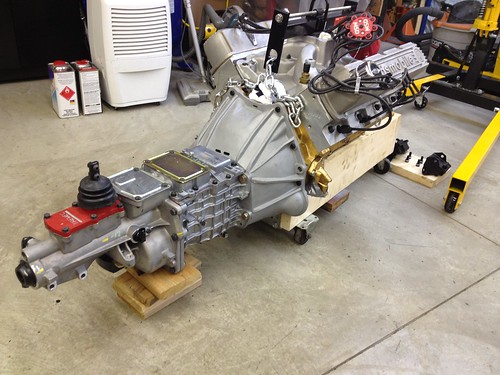
It's finally in! I had to make a new and longer extension arm for my engine hoist so that it wouldn't hit my rad support when putting the motor in. When i did the mock up for the trans, i just used a bare block, and we had to push the block a few inches to get the distance we needed. I didn't want to do that with a complete motor.
September 22nd, 2013, 02:15 PM
#291
wait.... what....
Thread Starter
Join Date: Mar 2009
Location: London Ont Canada
Posts: 817
September 22nd, 2013, 05:12 PM
#293
wait.... what....
Thread Starter
Join Date: Mar 2009
Location: London Ont Canada
Posts: 817
For sure i will! I did post a video of it on the dyno in that thread, but i'm looking forward to hearing it through the mufflers that i bought, even though as a friend of mine says, "those things aren't going to muffle anything!"


 October 10th, 2013, 02:55 PM
#298
Registered User

Join Date: Jan 2012
Location: Dallas TX
Posts: 26
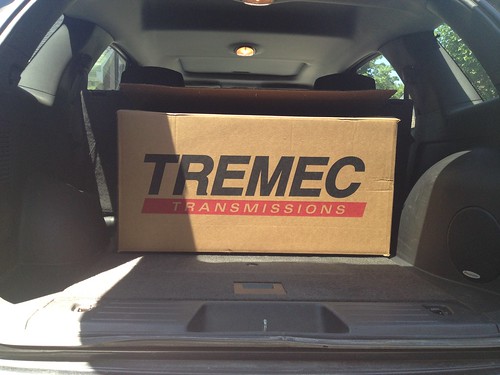
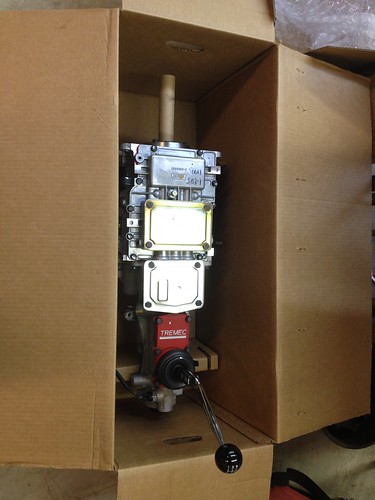
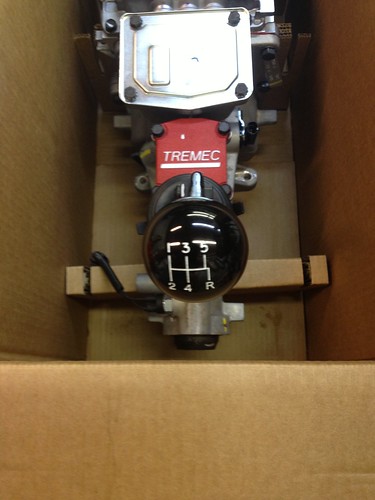
Thats a TKO600 right? I am looking at the same tranny for mine was wondering who you decided to buy it from?
and did you go with hydraulic clutch? any of the other options?
I only hope that my car is going to come out as clean as yours. have really enjoyed looking at your build
and did you go with hydraulic clutch? any of the other options?
I only hope that my car is going to come out as clean as yours. have really enjoyed looking at your build
October 10th, 2013, 03:31 PM
#299
wait.... what....
Thread Starter
Join Date: Mar 2009
Location: London Ont Canada
Posts: 817
Thats a TKO600 right? I am looking at the same tranny for mine was wondering who you decided to buy it from?
and did you go with hydraulic clutch? any of the other options?
I only hope that my car is going to come out as clean as yours. have really enjoyed looking at your build
and did you go with hydraulic clutch? any of the other options?
I only hope that my car is going to come out as clean as yours. have really enjoyed looking at your build
Last edited by oldzzy; October 10th, 2013 at 04:41 PM.
October 13th, 2013, 08:28 AM
#300
Registered User

Join Date: Jul 2013
Posts: 53
Hey nice build.I have a rallye 350 that's getting the same things done to it and I need the measurements on the bodymount holes.I fixed all of them but 2 and they are so rusted I don't know where to weld the hole back.Would you happen to have a measurement for the mount holes behind the front tires like from the next hole back and from the edge of the frame in?thanks
October 16th, 2013, 04:43 PM
#301
wait.... what....
Thread Starter
Join Date: Mar 2009
Location: London Ont Canada
Posts: 817
Sorry i don't have the measurements. I went out and looked, but since the body is back on the frame i probably couldn't get an accurate measurement. You'd probably be better off asking someone that's in the middle of a frame off, and can get you the proper measurements.
November 9th, 2013, 09:04 PM
#302
Registered User
Join Date: Jul 2012
Location: Vancouver BC
Posts: 2,848
Awesome build!
Great detail and prep work the tunnel fab work looks great top shelf work all the way.
Only one question why did you stay with the stock bell housing?
I like the look of the stock one its just the safety issue if the clutch lets go under spirited driving.
Great detail and prep work the tunnel fab work looks great top shelf work all the way.
Only one question why did you stay with the stock bell housing?
I like the look of the stock one its just the safety issue if the clutch lets go under spirited driving.
November 10th, 2013, 02:49 AM
#303
wait.... what....
Thread Starter
Join Date: Mar 2009
Location: London Ont Canada
Posts: 817
Awesome build!
Great detail and prep work the tunnel fab work looks great top shelf work all the way.
Only one question why did you stay with the stock bell housing?
I like the look of the stock one its just the safety issue if the clutch lets go under spirited driving.
Great detail and prep work the tunnel fab work looks great top shelf work all the way.
Only one question why did you stay with the stock bell housing?
I like the look of the stock one its just the safety issue if the clutch lets go under spirited driving.
November 15th, 2013, 08:17 AM
#305
wait.... what....
Thread Starter
Join Date: Mar 2009
Location: London Ont Canada
Posts: 817
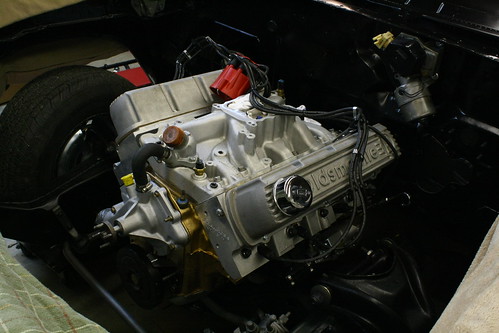
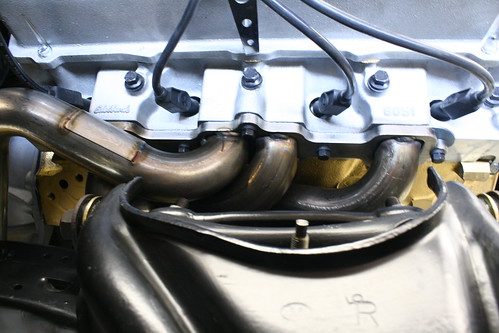
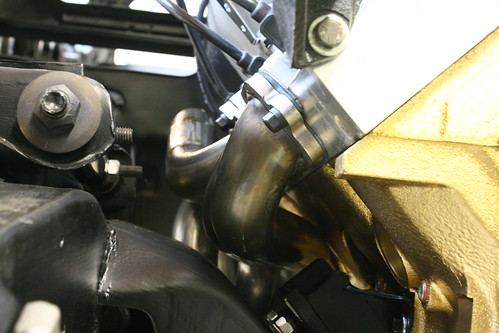
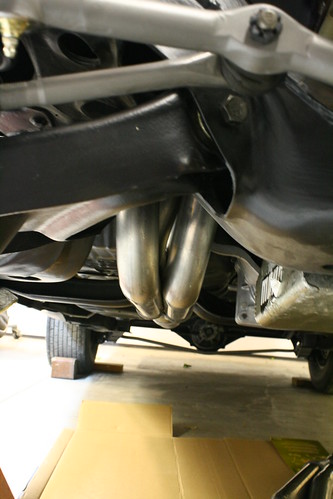
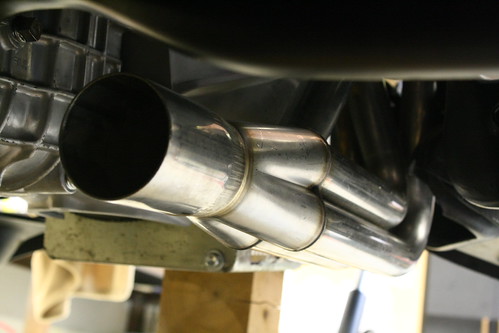
After finally getting the right headers, again big thnx to Nick @ American Racing Headers, i started installing them. I started with the pass side first, and it was pretty straight forward. I just had to remove the oil filter adapter, and put them up through the bottom. They look and fit great on that side. I then tried to install the drivers side, and they hit the top of the motor mount. I'm not sure if i should try and clearance the mount or maybe buy a solid mount. I just don't want to clearance the header if i can help it.
December 7th, 2013, 10:00 AM
#308
wait.... what....
Thread Starter
Join Date: Mar 2009
Location: London Ont Canada
Posts: 817
Thnx! I bought the engine hoist from Princess Auto. I wasn't happy that when i went to install the engine, the hoist didn't reach far enough into the engine bay with the rad support in the car. I ended up getting a new piece of steel that made it a little longer. The problem with the new piece of steel was, the engine hoist was made in China, and the arm was a size that the chinese have a patent to, and you can't buy that size tubing. So i ended up getting a piece of tubing and welding flat stock on the bottom and top to make up the difference.
December 10th, 2013, 06:11 PM
#309
Registered User

Join Date: Jun 2010
Location: Lebanon, Ohio
Posts: 226
Well, this is some awesome build! I just have to join the others and watch it all happen. Just read the whole thing. Great job, Shane!
My poor baby will have to wait a while for her facelift. I'm working on a '55 brand "C" truck for the wife right now.
Keep the chin up and the movement forward!
My poor baby will have to wait a while for her facelift. I'm working on a '55 brand "C" truck for the wife right now.
Keep the chin up and the movement forward!
March 25th, 2014, 11:52 AM
#310
wait.... what....
Thread Starter
Join Date: Mar 2009
Location: London Ont Canada
Posts: 817
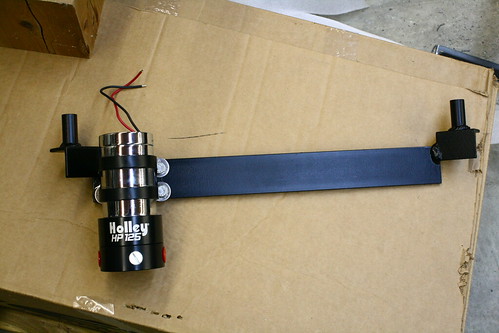
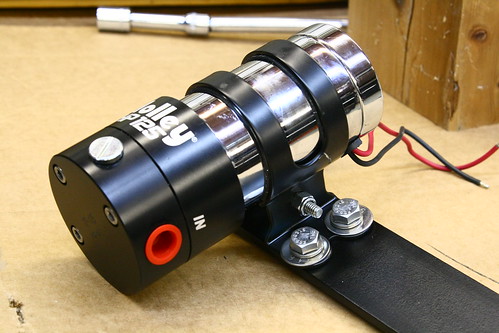
For those of you that don't look at the racing thread on this site, i posted some pics of my fuel pump mock up in someone's thread on fuel pump installation. I also got the drivers side header installed, and the fuel tank put in.
March 26th, 2014, 08:39 AM
#314
Lance
Join Date: Oct 2009
Location: YUKON, OK.
Posts: 742
May 22nd, 2014, 09:59 PM
#315
wait.... what....
Thread Starter
Join Date: Mar 2009
Location: London Ont Canada
Posts: 817
I've been doing lots of little stuff lately. I pulled the tank, and installed the tank pad, and the fuel sending unit wire. I also put the fuel pump bracket in for good. The rear bumper had to be pulled off to install the trim on the rear edge of the 1/4's, and then i could reinstall the bumper and adjust it to fit good. The rear tail light harness got re taped, cleaned up, and installed. While i was working on the rear of the car, the trunk weatherstrip also got installed.
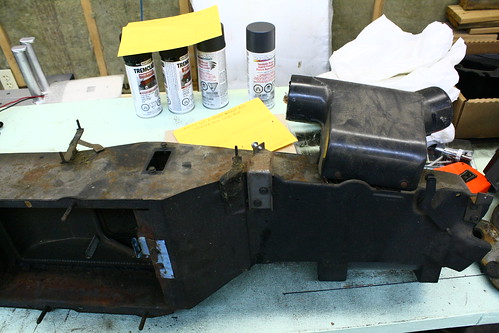
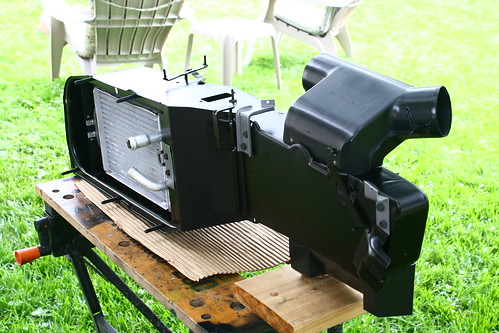
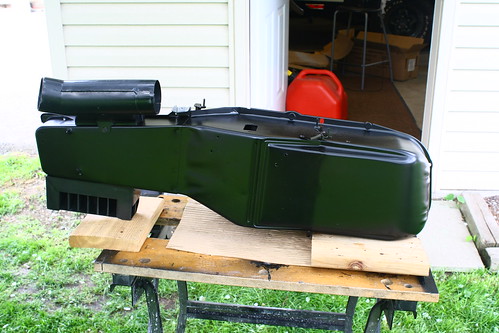
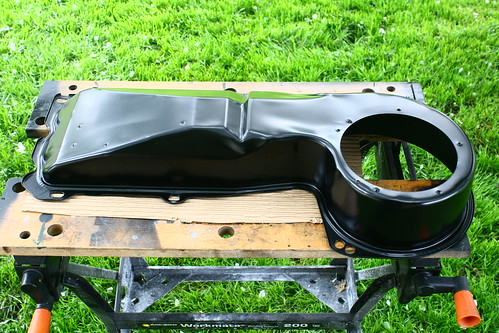
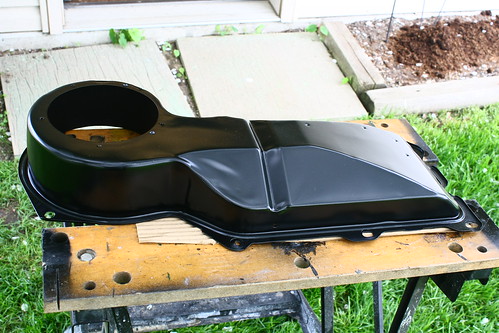
Next on my list was the heater box. It was to big to fit into my blast cabinet, so i took it all apart and sanded the hole thing. The inside i couldn't get at very well, so i sprayed it with a rust convertor, and that seemed to work well. I replaced the foam that went on the flapper door, and that was a real pain to install. I also did the cover that goes on the firewall at the same time, but still have to do the blower motor.
My Mopar buddy that helps me out always has a hard time opening the doors with no handles, so i thought i would help him out and put the handles on, and the key locks in as well. The little bracket on the back of the key lock also got the full bead blast and paint treatment. No one will ever see parts like this, but i just can't seem to put dirty or rusted parts back on.
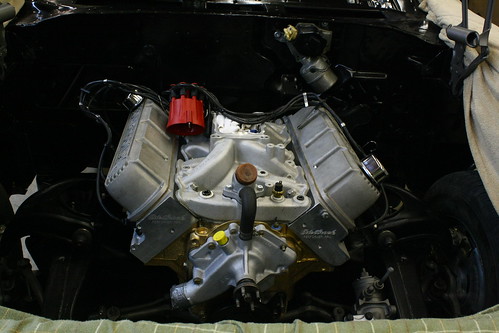
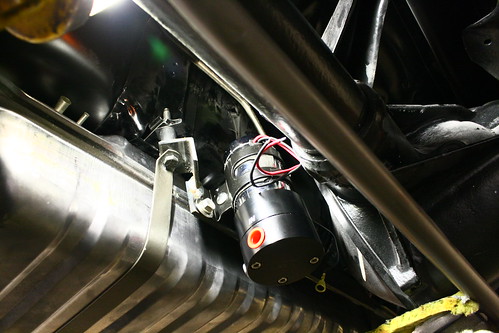
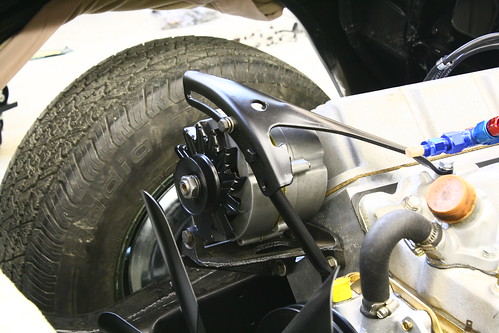
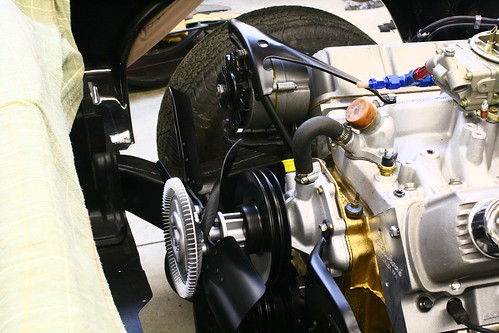
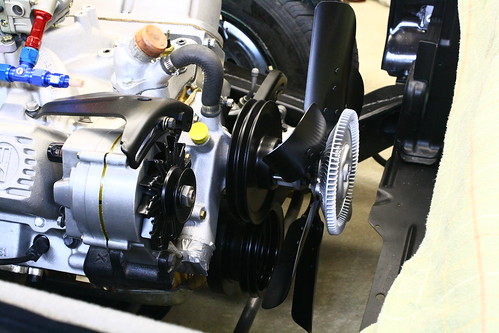
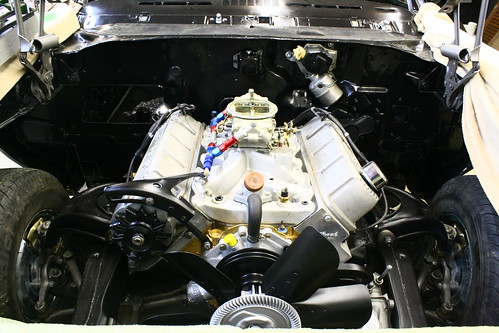
Some accessories have started to make their way back onto the engine. I bead blasted the altenator brackets, painted them, and installed them along with the altenator. I redid the altenator a long time ago. The pulley on the balancer went on next followed by the pulley for the water pump, spacer, fan, and clutch for the fan. The power steering pump brackets were also done, but i still have to clean up the pump itself. The voltage regulator got the full cleanup treatment, and installed. The engine harness had some dry brittle wires, plus had the the connection for the points distributor, and the auto trans, so i order a painless engine harness with MSD, and manual trans. I also opted to get a new headlight harness as well, just waiting for them to arrive.
I have the B85 trim on my car, so i ordered the special weatherstrip for the B85. Patton had told me that Steele had the "best" repro of these, so i ordered them. when i opened them up they look to be pretty good, but i haven't actually tried to install them yet. I needed a new pass side door glass, because mine had a deep scratch in it. When i got the new glass, i started to take the hardware off the old glass, and you guessed it.... bead blast, and paint before i install it on the new glass. I dug the 1/4 glass out of the attic and had to clean off the Ziebart undercoating off of them, and let me tell ya, it was on there thick!
I will try and post pics tomorrow of some of the stuff.
Next on my list was the heater box. It was to big to fit into my blast cabinet, so i took it all apart and sanded the hole thing. The inside i couldn't get at very well, so i sprayed it with a rust convertor, and that seemed to work well. I replaced the foam that went on the flapper door, and that was a real pain to install. I also did the cover that goes on the firewall at the same time, but still have to do the blower motor.
My Mopar buddy that helps me out always has a hard time opening the doors with no handles, so i thought i would help him out and put the handles on, and the key locks in as well. The little bracket on the back of the key lock also got the full bead blast and paint treatment. No one will ever see parts like this, but i just can't seem to put dirty or rusted parts back on.
Some accessories have started to make their way back onto the engine. I bead blasted the altenator brackets, painted them, and installed them along with the altenator. I redid the altenator a long time ago. The pulley on the balancer went on next followed by the pulley for the water pump, spacer, fan, and clutch for the fan. The power steering pump brackets were also done, but i still have to clean up the pump itself. The voltage regulator got the full cleanup treatment, and installed. The engine harness had some dry brittle wires, plus had the the connection for the points distributor, and the auto trans, so i order a painless engine harness with MSD, and manual trans. I also opted to get a new headlight harness as well, just waiting for them to arrive.
I have the B85 trim on my car, so i ordered the special weatherstrip for the B85. Patton had told me that Steele had the "best" repro of these, so i ordered them. when i opened them up they look to be pretty good, but i haven't actually tried to install them yet. I needed a new pass side door glass, because mine had a deep scratch in it. When i got the new glass, i started to take the hardware off the old glass, and you guessed it.... bead blast, and paint before i install it on the new glass. I dug the 1/4 glass out of the attic and had to clean off the Ziebart undercoating off of them, and let me tell ya, it was on there thick!
I will try and post pics tomorrow of some of the stuff.
 . Awesome !!
May 23rd, 2014, 06:21 PM
. Awesome !!
May 23rd, 2014, 06:21 PM
#319
wait.... what....
Thread Starter
Join Date: Mar 2009
Location: London Ont Canada
Posts: 817
Well here are some pics of some of the things i am working on.
The heater box before:

After:

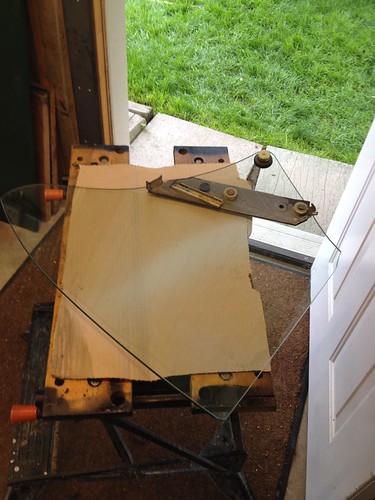
The 1/4 glass with all the Ziebart undercoating on the bottom of it.
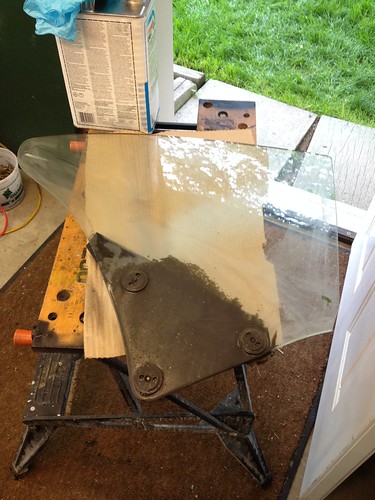
Cleaned:
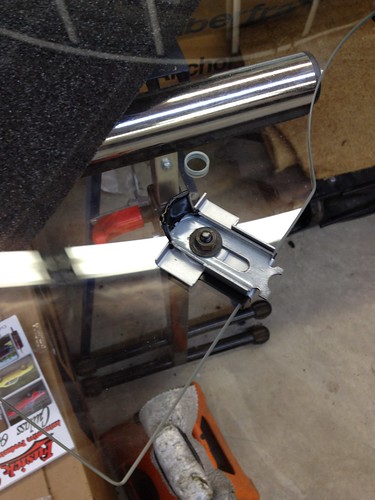
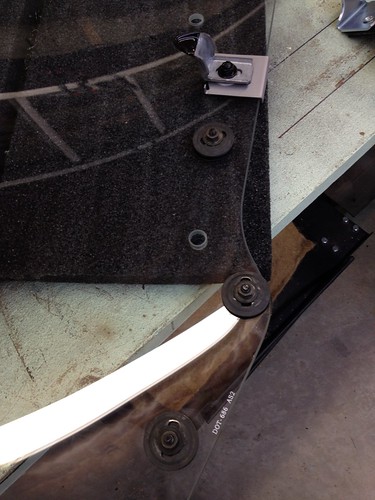
The passenger window hardware:
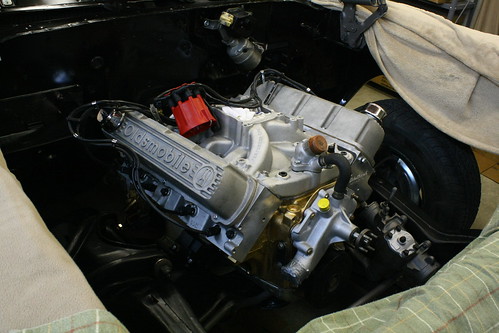
Some of the accessories on the engine:
The heater box before:
After:
The 1/4 glass with all the Ziebart undercoating on the bottom of it.
Cleaned:
The passenger window hardware:
Some of the accessories on the engine:


