When you click on links to various merchants on this site and make a purchase, this can result in this site earning a commission. Affiliate programs and affiliations include, but are not limited to, the eBay Partner Network.
I am getting ready to take the body off the frame and put it on my rotisserie to complete all the body work that needs to be done. If any one has any tips or tricks in this area it would be much appreciated. I have had to cut all 6 body bolts do to rust. I have both doors on it to ensure the body does not twist on me while it is off. I have the steering column disconnected, the parking break and all the wires are cut.
Am I forgetting anything? Pictures might be posted once on the rotisserie if I remember!!
Thank you in advance!!!
I am at the same point with my 69. I dont have the luxury of the rotisserie and wish I did. Be sure to post some photos.
It also came with the 400 but my father cracked that block. it also had the bench seat and column shifter. Since I do not have the numbers matching motor, I see no reason to stick with the bench seat since I do not for see selling this beast. I am going with bucket seats, a 455 tricked out, a munci 4 speed close ratio and all in the original black interior color.
So its been over a year since my last post on here but had some progress the Olds. Now have it on the rotisserie and have taken everything off the firewall except the master cylinder bolts and throttle cable. Dash is most of the way disassembled. Have removed the inner and outer wheel well along with the quarter panel obviously. getting it ready to all be replaced wit new metal and then on to the trunk.
So its been over a year since my last post on here but had some progress the Olds. Now have it on the rotisserie and have taken everything off the firewall except the master cylinder bolts and throttle cable. Dash is most of the way disassembled. Have removed the inner and outer wheel well along with the quarter panel obviously. getting it ready to all be replaced wit new metal and then on to the trunk.
Looks like it's coming along nicely, can't wait to see the end result. Love the color scheme idea.
So it has been forever since I have posted anything about my project. Its also been a while since I have been able to do any work thanks to a work injury to my lower back that has resulted in surgery and then four months later the surgery failed and I am right back where I was before. I have also moved since my last post, while it is a better garage now it is hard to get anything done with the current status of my back.
I am starting on the easy stuff this winter and going after my fenders, I have started to take the trim off and noticed a few dents and some awesome amount of bondo on the front corner lol. I also know the car was built in October of 68' but badged as a 69', but it has 68' stripes on the fenders? I am wondering if anyone knows if this was something done at factory or jsut something an owner had repainted? I have no documentation from the car as it was my dad's and he was the second owner. He said it was like that when he bought the car back in the mid 70's.
I am also missing the bottom part of the fender as normal for the GM rot. Anyone have any links to where I can find the brace that is behind the fender or a way to repo/fab a new one for this portion?
Definitely a '68 fender. Should be able to verify if it has 2 original holes for the '68 hinges. The 442 emblems are located in a unique location for the vertical stripes (W-36) and would not be correct for a '69. They do make patches for the heal, but not the inner fender brace.
Definitely a '68 fender. Should be able to verify if it has 2 original holes for the '68 hinges. The 442 emblems are located in a unique location for the vertical stripes (W-36) and would not be correct for a '69. They do make patches for the heal, but not the inner fender brace.
For the inner brace, try contacting Connecticut Classic Car Company at 203-631-0184. They repair fenders including the brace and I believe they will sell them separately as well. They did some 1970 fenders for me and you cannot tell they were ever repaired.
Let me know if you find braces... I am also working on my 1969 and as you have also found out they don't make that part here is my post looking for same but it also shows some work around
You wouldn't happen to have an clear pictures of the trunk pan drop off? I am going to be working on my trunk once the weather changes here in Maryland and am still wearing about getting that in the right spot.
You wouldn't happen to have an clear pictures of the trunk pan drop off? I am going to be working on my trunk once the weather changes here in Maryland and am still wearing about getting that in the right spot.
I should... the drop off sits on top of the trunk pan it takes some finagling LOL...
You wouldn't happen to have an clear pictures of the trunk pan drop off? I am going to be working on my trunk once the weather changes here in Maryland and am still wearing about getting that in the right spot.
You can almost not mess that up, depending on where you got the piece it will be missing the drain hole though. but the top of your trunk pan will give you good indication where everything goes..
Looking at the picture from the link you posted and what my fenders loo like, it should not be that much of a fab for the brace that I need. I got lucky and only a little bit of my fender is missing at the bottom. The hardest part I see is getting the bends right in the bottom and the rear channel of the brace.
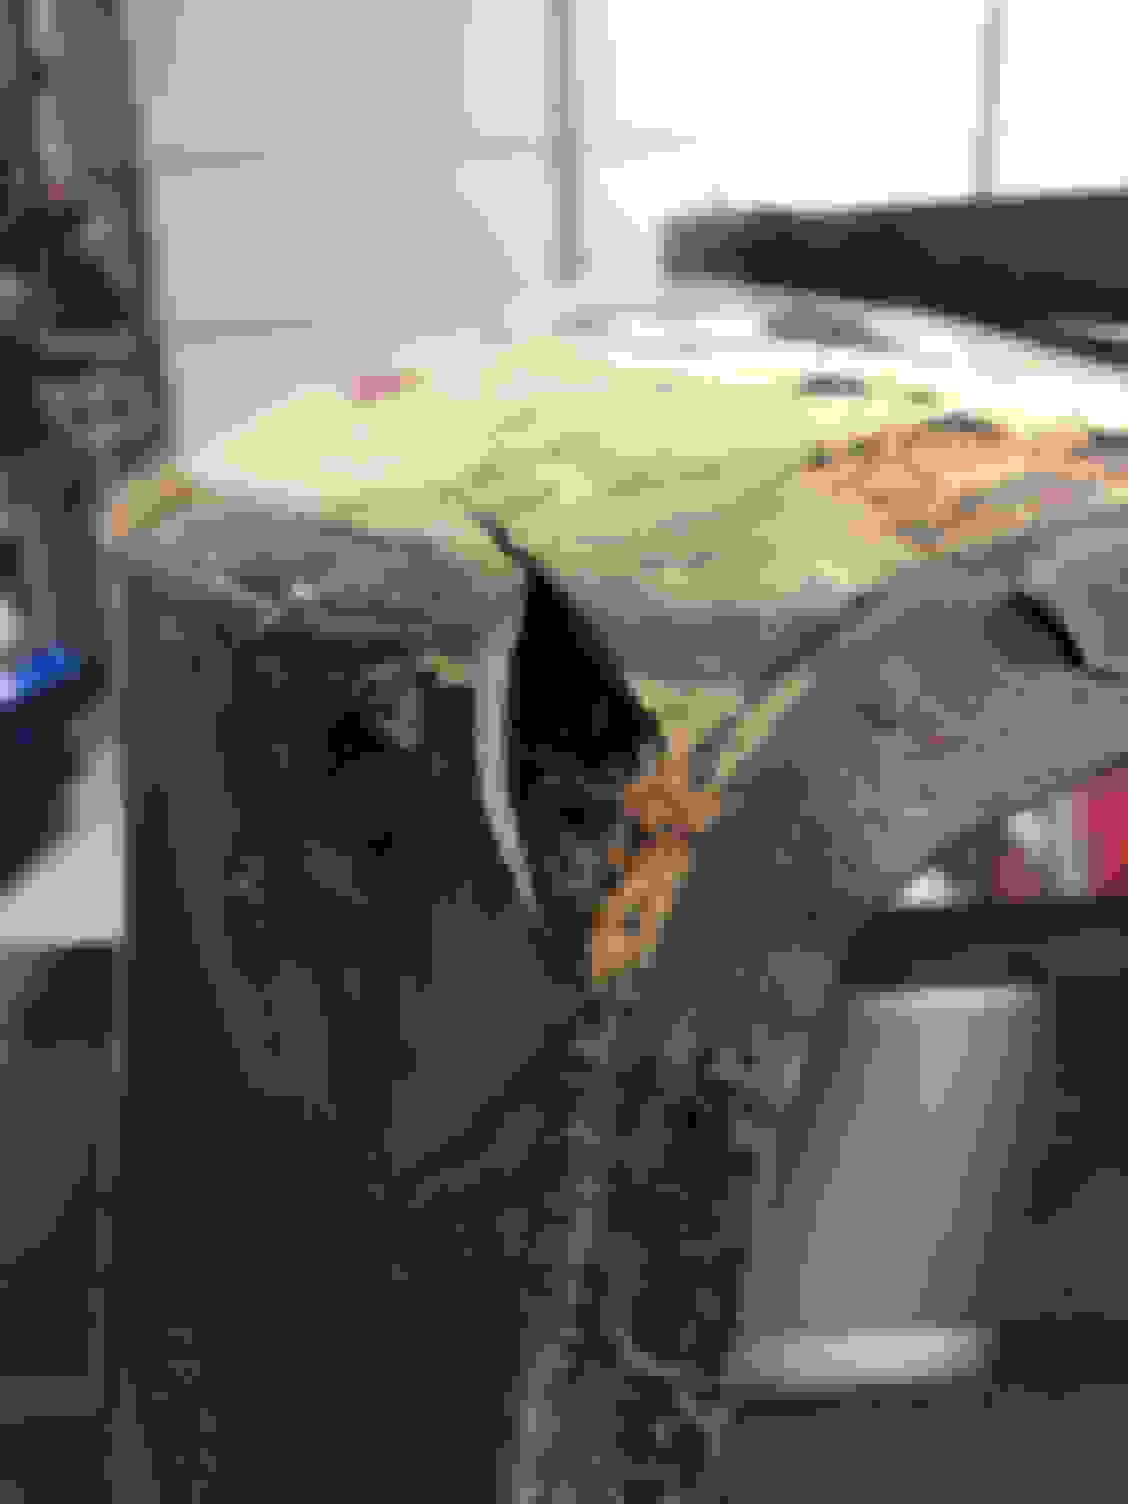
Taking the undercoating off, what little there was is a pain in the but with an orbital sander. Found 3 different paint layers all with their own primer!! The dent in the front where all the bondo was You can really see the dent in this picture, got some more sanding to do and then working on the dent and there is one on the ridge where the molding attaches as well.
An update from the last couple days of light work on the drivers side fender. Found a nice dent and a few spots of bondo that were covering some quick fixes. I also found that this fender has been painted 3 different times!!
Also a quick question, my 442 was built in Canada in October of 68 but marked a 69 on the VIN. Is it possible they just used the left over 68" fenders and doors to build the car? I have post doors with the vent windows and the fenders had the 68" stripe down the sides.
After looking at the close up photos, the fenders appear to be '69 not '68. A past owner must have liked the vertical stripe and added it. Was there any evidence that there were ever any other holes for emblems on the fenders. Also, those doors are correct for a '69 post coupe. Notice the three bolt holes on the fender.
No there are no other holes that can be identified and the b ody work on these things is very shotty so I am sure I would find it. Also there are two extra holes by the hood hinge mount on one fender and not on the other any idea why that would be?
It was a regular cutlass trunk lid. Had to make a patch and fill in some holes and fix a dent to make it match the 442, but the top is finished. I know the holes for the 442 emblem are wrong. Once I get the emblems I will make the right holes before finale body work and paint.
Trying to replace the little holes all around the dash/firewall/a pillar. New piece in and sanded some, now to the next one. Started sanding the body down to bare metal and primed to keep the rust away on the east coast. Limited time when I got to get my girl from the bus.
Getting things done with this nice warm weather we are having on the East coast!!! Slowly but surely it will get done. This has been 10 years in the making getting to work everyday on my dream!!!! Under that bondo was this monstrosity!!! Didn�t even fill the hole with metal. Just put bondo right over them. Front to rear view How far back the dent went from with they tried to fix the rot before I got the car. More sanding to get to bare metal, passenger roof today, did find two small dents but not deep or major. Primed and waiting for the other side to get done maybe tomorrow!!!
You are making great progress...!! how did you make out with the inner fender brace? The warm weather definitely is a helper, been in the shop since January 1 trying to get over the hump...
Eddie, I haven�t had time to get on fab In the inner brace, kind of dreading it actually. I have been busy doing other tedious work that needs done and small holes that need patching. Finished the roof Found some rot in the a pillar that needed fixed. Done, a little filler to smooth it out but turned out good I think and it was easier than I thought being that tight.
The replacement piece will cover all of that , drill out the remaining spot welds, there might be repairs underneath you will need to fix, mine was as bad if not worse
I went searching as soon as I found it. Glad it will cover it all. It is hard to tell by the pictures they put up if the parts. Found a new one on eBay for $65!!!