
DIY Package tray $25 (waaaay better then OER junk)


Thread Starter
Registered User
Joined: May 2009
Posts: 2,212
From: USA
DIY Package tray $25 (waaaay better then OER junk)
Well, since I'm stuck at work in this Feb 2nd blizzard in Chicago, I might as well keep myself occupied. 
So I see many people still buy those craptastic OER package trays.
I've been through 2 of them for my 442 tribute in 2 years.
I've been through 2 of them in my 78 z28 in 4 years.
Both styles in each I've tried, solid and mesh. Both were junk.
So I made my own. Materials you'll need:
Jigsaw, Marker, &
$8 - 1/8" 4' x 8' Hardboard available at any hardware store like Home Depot. (Found in lumber)
$8 - A linear foot or two of premium vinyl at your local fabric store (Make sure it's wide enough)
$13 - 3M 80 or 90 spray adhesive, not 3M Super77, it doesn't stick properly in humidity
#1. 1st if you have a solid package tray you can remove it, and do the measurements from it.
If not, grab an OER one and return it after using it for a stencil. Parts vendors are local for me.
#2. Buy the hardboard @ Home Depot because they have a wall saw they do free cuts.
You'll get 3 full package tray slices out of a 4x8' sheet.
#3. Take your first rectangular hardboard and outline the package tray onto it with a marker.
#4. Use the jigsaw to cut and shape your package tray base.
2010SubwooferInstall1.jpg
#5. If you want speakers, put the hardboard into the actual car package tray slot, and fit it EXACTLY.
Then go in the trunk, and outline with a marker your speaker locations.
2010SubwooferInstall2.jpg
#6 Cut them out with the jigsaw.
2010SubwooferInstall4.jpg
#7 Do another test fit to ensure the slots are perfectly cut. 9 times out of 10 you'll need to trim more.
2010SubwooferInstall5.jpg
#8 Lay the Vinyl over the hardboard formed package tray. This is to test fit it and make sure it's good.
(BTW this is the wrong hardboard in this pic and DO NOT use the spray glue here in this pic)
NewPackageTray3.jpg
#9. Use your professional spray glue to adhere the vinyl to the package tray.
Starting in the middle, and do one side outward. Use something as a squeegee to
get the bubbles out. CUT and FOLD the window edges UNDER the hardboard and glue them.
#10. Cut the vinyl around the rear edges, leave enough to curl under and glue.
On the end where the upper rear seat goes, leave 4-5 inches of excess because this is the flap.
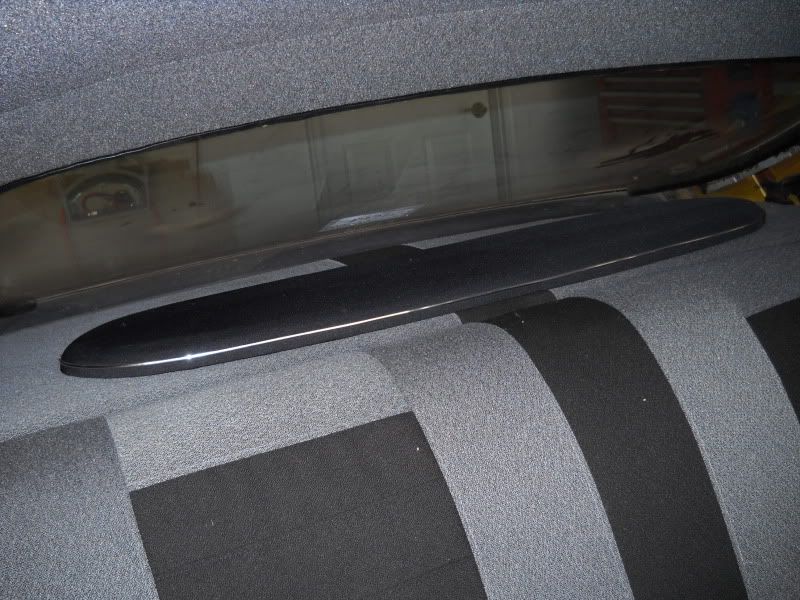
This is my 1978 Camaro's home made package tray with built in subwoofer like Dale Earnhardts.
Built waaaaay stronger and better materials for the same cost as those cheap OER turds.
This thing won't curl. You can even seal it with Polypropylene if you're worried.
2010CustomPackageTray.jpg
So I see many people still buy those craptastic OER package trays.
I've been through 2 of them for my 442 tribute in 2 years.
I've been through 2 of them in my 78 z28 in 4 years.
Both styles in each I've tried, solid and mesh. Both were junk.
So I made my own. Materials you'll need:
Jigsaw, Marker, &
$8 - 1/8" 4' x 8' Hardboard available at any hardware store like Home Depot. (Found in lumber)
$8 - A linear foot or two of premium vinyl at your local fabric store (Make sure it's wide enough)
$13 - 3M 80 or 90 spray adhesive, not 3M Super77, it doesn't stick properly in humidity
#1. 1st if you have a solid package tray you can remove it, and do the measurements from it.
If not, grab an OER one and return it after using it for a stencil.
Parts vendors are local for me. #2. Buy the hardboard @ Home Depot because they have a wall saw they do free cuts.
You'll get 3 full package tray slices out of a 4x8' sheet.
#3. Take your first rectangular hardboard and outline the package tray onto it with a marker.
#4. Use the jigsaw to cut and shape your package tray base.
2010SubwooferInstall1.jpg
#5. If you want speakers, put the hardboard into the actual car package tray slot, and fit it EXACTLY.
Then go in the trunk, and outline with a marker your speaker locations.
2010SubwooferInstall2.jpg
#6 Cut them out with the jigsaw.
2010SubwooferInstall4.jpg
#7 Do another test fit to ensure the slots are perfectly cut. 9 times out of 10 you'll need to trim more.
2010SubwooferInstall5.jpg
#8 Lay the Vinyl over the hardboard formed package tray. This is to test fit it and make sure it's good.
(BTW this is the wrong hardboard in this pic and DO NOT use the spray glue here in this pic)
NewPackageTray3.jpg
#9. Use your professional spray glue to adhere the vinyl to the package tray.
Starting in the middle, and do one side outward. Use something as a squeegee to
get the bubbles out. CUT and FOLD the window edges UNDER the hardboard and glue them.
#10. Cut the vinyl around the rear edges, leave enough to curl under and glue.
On the end where the upper rear seat goes, leave 4-5 inches of excess because this is the flap.
This is my 1978 Camaro's home made package tray with built in subwoofer like Dale Earnhardts.
Built waaaaay stronger and better materials for the same cost as those cheap OER turds.
This thing won't curl. You can even seal it with Polypropylene if you're worried.
2010CustomPackageTray.jpg
Last edited by Aceshigh; Feb 22, 2012 at 05:31 PM.
Registered User
Joined: Feb 2008
Posts: 11,798
From: Plano, TX
Good DIY article.
TO those in the HOT southern states, 3M 08090 adhesive is recommended.
Most of the other popular adhesives become gooey and let go at about 110*, and then refuse to stick again. I learned this through trial and error.
140* in a closed car in the sun is easily possible here in TX. The package tray will see even hotter temps from direct sunlight.
Thread Starter
Registered User
Joined: May 2009
Posts: 2,212
From: USA
Yes, I am ripping out my piece of crap 1 year old OER package tray in the 442 as well.
I have a $2,000 stereo setup going in the 442 as well.
Boston Acoustics 12" sub in the package tray for the 442 with Kenwood X693's.
Custom MDF sealed box I am making for that one as well that hangs from the package tray
and has support underneath, PLUS it doubles as 2 amp racks.
2010CustomSubBox.jpg
It will look like this inside the trunk.
Subboxintrunkview.jpg
I have to finish the Camaro's first this Spring.
Getting custom door pods made for my 6.5" components.
Here's Dale Earnhardt's 2nd gen Camaro DSE designed and built with the sub in the package tray.

Awesome, I was looking for more input on this.
I'll have to investigate this 3M stuff for the 2nd package tray.
I have a $2,000 stereo setup going in the 442 as well.
Boston Acoustics 12" sub in the package tray for the 442 with Kenwood X693's.
Custom MDF sealed box I am making for that one as well that hangs from the package tray
and has support underneath, PLUS it doubles as 2 amp racks.
2010CustomSubBox.jpg
It will look like this inside the trunk.
Subboxintrunkview.jpg
I have to finish the Camaro's first this Spring.
Getting custom door pods made for my 6.5" components.
Here's Dale Earnhardt's 2nd gen Camaro DSE designed and built with the sub in the package tray.
I'll have to investigate this 3M stuff for the 2nd package tray.
Last edited by Aceshigh; Feb 22, 2012 at 05:31 PM.
Thread Starter
Registered User
Joined: May 2009
Posts: 2,212
From: USA
Nope, not yet. Just a DIY tutorial for now.
Trying to save people from wasting money on package tray OER junk.
In 2 more months I'll be gutting my OER package tray out and
redesigning one for the Olds as well. So ask back in the Spring.
Trying to save people from wasting money on package tray OER junk.
In 2 more months I'll be gutting my OER package tray out and
redesigning one for the Olds as well. So ask back in the Spring.

Registered User
Joined: May 2009
Posts: 1,452
Registered User
Joined: Nov 2009
Posts: 251
From: Nelson BC Canada
I just cut out my pattern on a piece of door skin (8 bucks) from the hardware store. I'm going to varnish it for a seal this week and then I'll glue the insulation on first then put in the skin and then the vinyl (12 bucks enough for 3 trays) on top of that. The door skin has to bow to get it into place first then I'll glue the vinyl down. I'll try and shoot some pics tomorrow

Registered User
Joined: Nov 2010
Posts: 904
From: St Louis, MO
Thanks for the inspiration.
I made mine this morning. I still need to finish the big black oval grill.
DSCN0284.jpg
And the grill....finished it watching Daytona.
DSCN0291.jpg
I made mine this morning. I still need to finish the big black oval grill.
DSCN0284.jpg
And the grill....finished it watching Daytona.
DSCN0291.jpg
Last edited by garys 68; Feb 20, 2011 at 12:25 PM.
Thread Starter
Registered User
Joined: May 2009
Posts: 2,212
From: USA
Nice guys.
So did you use the hardboard as the base and the right spray glue ???
The spray glue is so important because the weak one's bubble up in the summer heat.
Been there done that......kinda sucks having to take it all back out.
So did you use the hardboard as the base and the right spray glue ???
The spray glue is so important because the weak one's bubble up in the summer heat.
Been there done that......kinda sucks having to take it all back out.
 cheers
Thread Starter
Registered User
Joined: May 2009
Posts: 2,212
From: USA
Registered User
Joined: Nov 2010
Posts: 904
From: St Louis, MO
I used trim adhesive for 1/4" scrim foam and cloth to the hardboard. When I removed the headliner and package tray the old adhesive looked to be 3M 1357. Tested the trim adhesive vs 1357, the 1357 was a better bond. So I've been using it for bonding the tray and headliner to the car.
The grill is just a couple pieces of plywood glued together to get it thick enough. I rounded the top edge, painted it flat black, then stapled grill cloth over it. The chrome is just the Auto parts self adhesive stuff.
I'll attach it with threaded insrts from the underside.
The grill is just a couple pieces of plywood glued together to get it thick enough. I rounded the top edge, painted it flat black, then stapled grill cloth over it. The chrome is just the Auto parts self adhesive stuff.
I'll attach it with threaded insrts from the underside.

Registered User
Joined: Sep 2015
Posts: 102
From: Western Mass
My thoughts exactly!
I keep skipping the aftermarket package trays....I figured I would do the same thing and use the hardboard, possibly not even covering it in vinyl and only painting it. But vinyl is cheap enough, so I'll take your advice in regards the type of adhesive to use. I need to get that for headliner/sail panels anyway. I have leftover hardboard, a jigsaw so I guess I'll give it a try. Thanks for the advice/tutorial!

Thread
Thread Starter
Forum
Replies
Last Post
justinpba
Big Blocks
5
Mar 10, 2014 07:21 PM
Aceshigh
General Discussion
1
Mar 11, 2012 02:12 PM


