
Time for a change...of color
 June 4th, 2015, 07:27 PM
#121
Registered User
Thread Starter
Join Date: Aug 2013
Location: Central Illinois
Posts: 3,900
Headliner is trimmed and the A-pillars are done. The front speakers/kick panels are installed and look good (can't wait to hear them). Of course I found a couple small pieces of trim I hadn't painted so I did that.
I also ran speaker wire, patch cables, etc, for the stereo.
[IMG]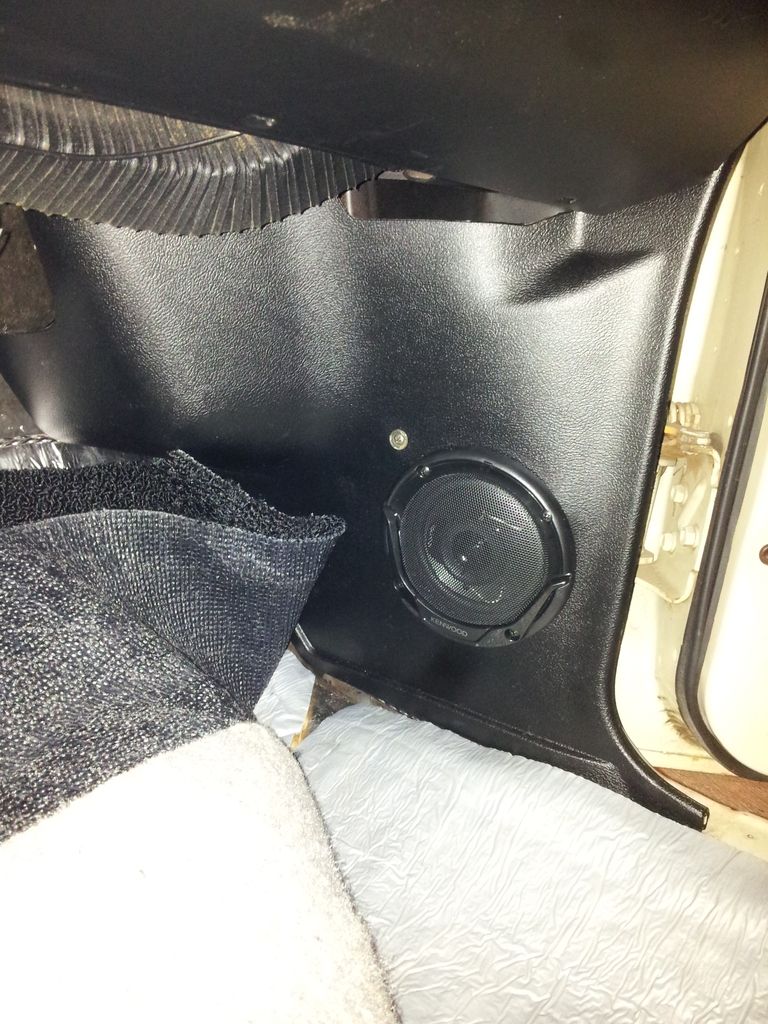 [/IMG]
I started the carpet install. I have the rear piece in; it seemed to make sense to start with that one since the placement was obvious and it was a little easier to trim to fit. I'll get to the front piece tomorrow but I can already tell alignment is going to be a pain. In order to get the hump where it needs to be the rubber foot-mat will be too far forward; enough to start climbing the firewall by a few inches. Odd. But since it will be covered by the floor mat, I'm not too worried about it.
I saw a neat trick on YouTube about using a soldering iron to burn the bolt holes. I didn't see it until I was done for today but I will definitely try it tomorrow.
[IMG]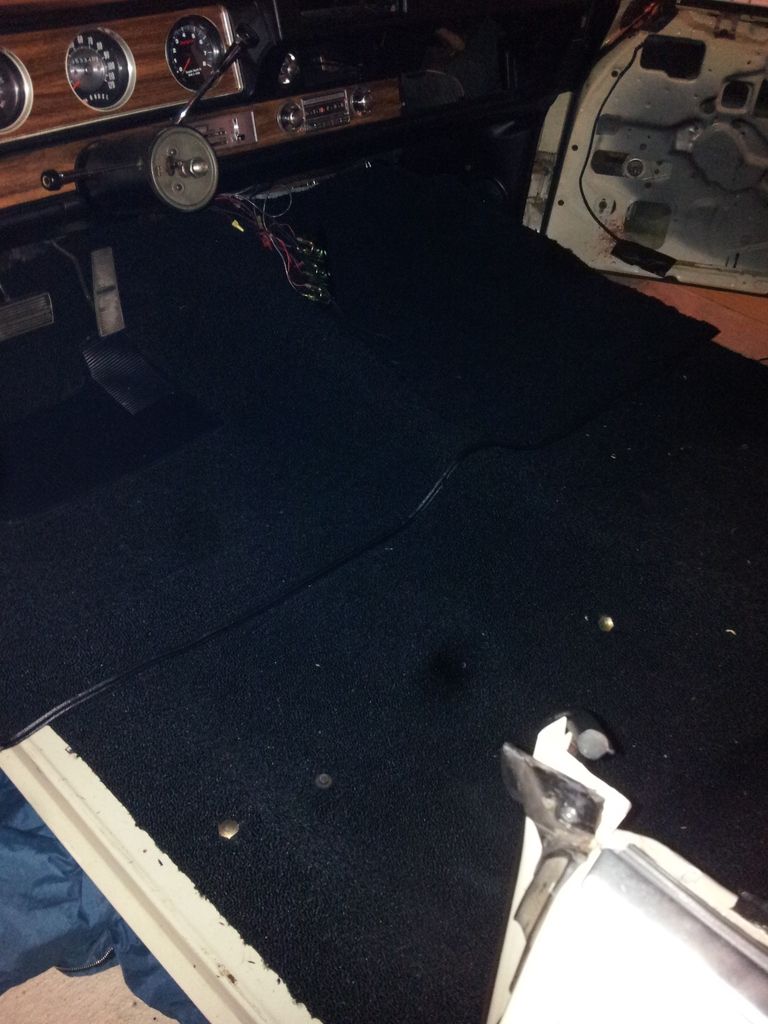 [/IMG]
I also ran speaker wire, patch cables, etc, for the stereo.
[IMG]
 [/IMG]
I started the carpet install. I have the rear piece in; it seemed to make sense to start with that one since the placement was obvious and it was a little easier to trim to fit. I'll get to the front piece tomorrow but I can already tell alignment is going to be a pain. In order to get the hump where it needs to be the rubber foot-mat will be too far forward; enough to start climbing the firewall by a few inches. Odd. But since it will be covered by the floor mat, I'm not too worried about it.
I saw a neat trick on YouTube about using a soldering iron to burn the bolt holes. I didn't see it until I was done for today but I will definitely try it tomorrow.
[IMG]
 [/IMG]
 June 5th, 2015, 06:19 PM
#122
Registered User
Thread Starter
Join Date: Aug 2013
Location: Central Illinois
Posts: 3,900
Today I finished the carpet install. It's not perfect but better than I thought I could do. The soldering iron works great. I thought I had the same problem with the trans hump as Rob but I just needed to trim the front of the carpet. I must have taken ten inches off the front before I got it where it needed to be.
[IMG]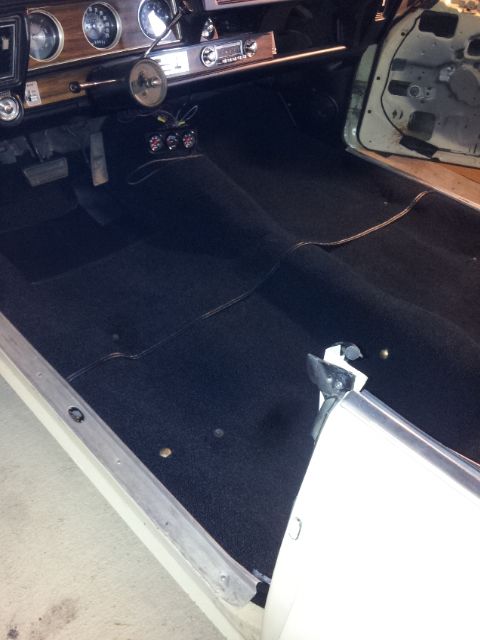 [/IMG]
I also installed a toggle switch for the stereo amp, reran the stereo wiring, ran new wire for the front speakers, hooked it all up in the trunk (where I took a five minute nap), installed the lower vent housing and sunpro gauges, the visors and rear view mirror, some of the trim, the dome light, the package tray....and......well, I gues that's it for today.
[IMG] [/IMG]
[IMG]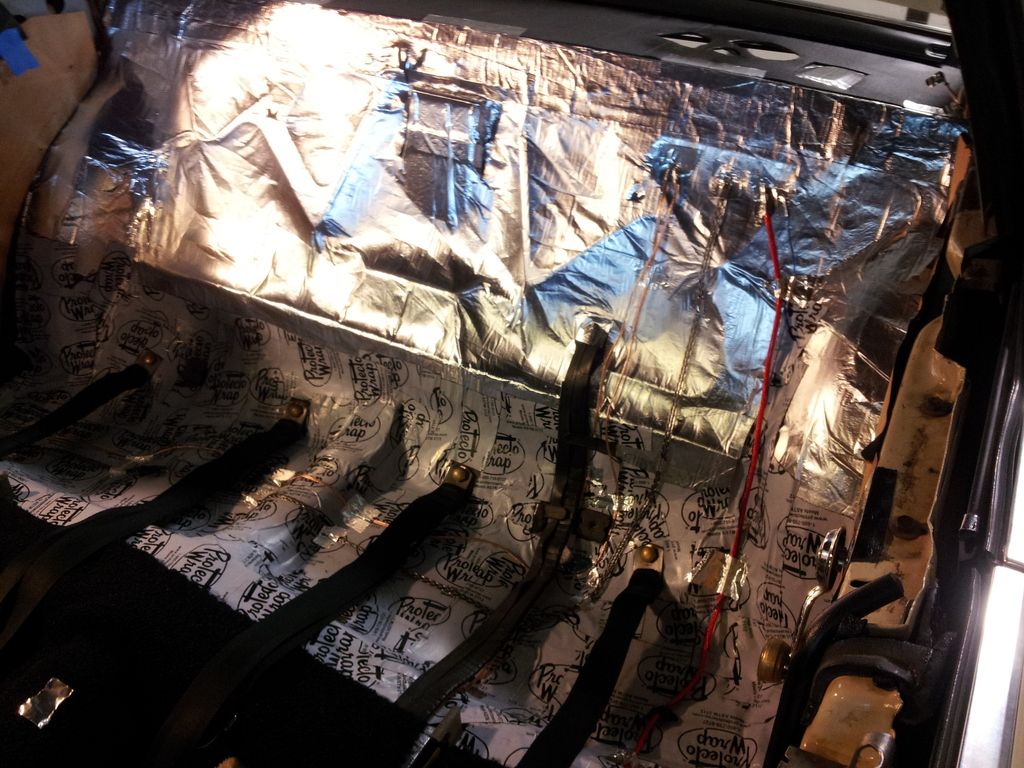 [/IMG]
[IMG]
 [/IMG]
I also installed a toggle switch for the stereo amp, reran the stereo wiring, ran new wire for the front speakers, hooked it all up in the trunk (where I took a five minute nap), installed the lower vent housing and sunpro gauges, the visors and rear view mirror, some of the trim, the dome light, the package tray....and......well, I gues that's it for today.
[IMG]
 [/IMG]
[IMG]
 [/IMG]
Last edited by Macadoo; June 5th, 2015 at 06:25 PM.
 June 6th, 2015, 06:42 AM
#127
Registered User
Join Date: May 2014
Location: Mokena, IL
Posts: 256
I also installed a toggle switch for the stereo amp, reran the stereo wiring, ran new wire for the front speakers, hooked it all up in the trunk (where I took a five minute nap), installed the lower vent housing and sunpro gauges, the visors and rear view mirror, some of the trim, the dome light, the package tray....and......well, I gues that's it for today.
 . Especially after you get the Bluetooth stereo
  June 6th, 2015, 07:07 AM
#128
Registered User
Thread Starter
Join Date: Aug 2013
Location: Central Illinois
Posts: 3,900
Great progress Mac and awesome results! Got a suggestion for ya. I wound up running a switched 12v wire to what will be a dual USB outlet that I'm putting into the back armrest area on my bench seat. Something to think about . Especially after you get the Bluetooth stereo
. Especially after you get the Bluetooth stereo Lol, seriously, that's pretty cool. I think sometime [soon?] I'm going to get one of those stereo/gauge housings from that dude on CO that hand makes them. That way I can have CDs instead of just my phone. But again, it's that abstract, nebulous thing called a budget.
June 6th, 2015, 05:37 PM
#130
Registered User
Thread Starter
Join Date: Aug 2013
Location: Central Illinois
Posts: 3,900
Another full day of work. I finished cutting holes in my new headliner  Shoulder belts, shoulder belt holders, clothing hangers, etc.
EDIT: all those spots are on my camera lens.
[IMG]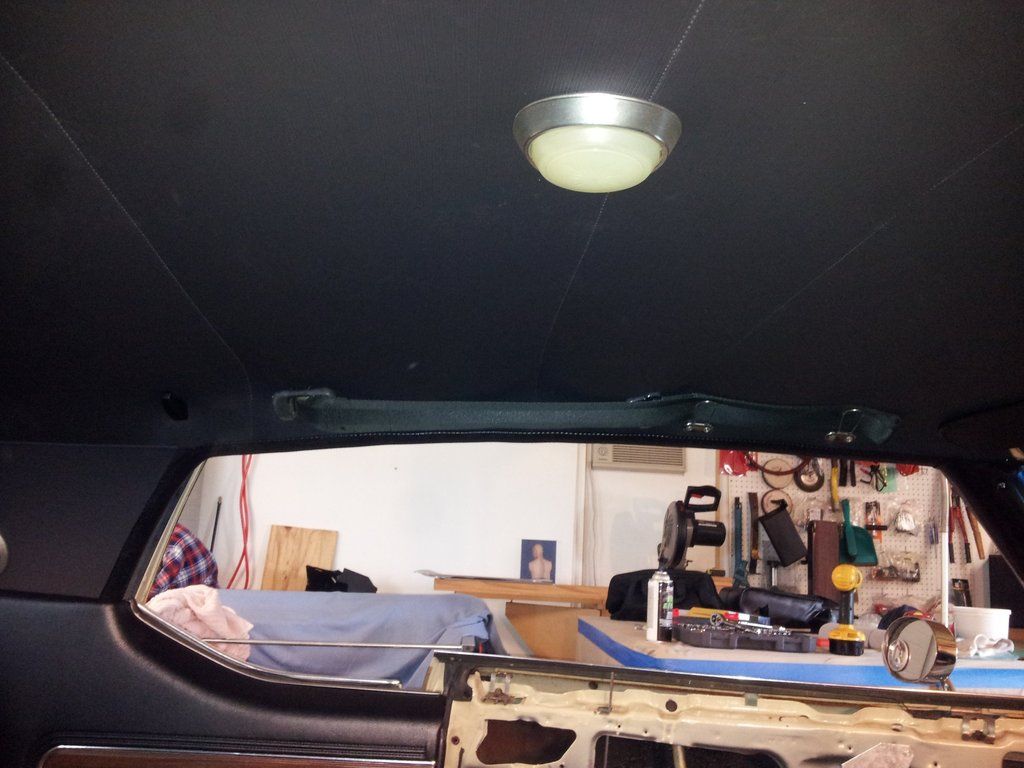 [/IMG]
Then I trimmed and readied the new sail panels. The holes for the courtesy lights were pre-scored but were offset from the originals about an inch so I used the old panels to trace the hole locations and cut them out.
I was really on a roll by this point but ran into a major problem. One of those [it should have taken five minutes but took two and half hours instead] incidents. The black vinyl I purchased from Joanne's Fabrics was cut too short. It was just the strip that runs along the edge of package tray. I asked for a four inch strip and what I got narrowed to about 2.5 inches. I didn't see it until I was gluing it on and thought maybe it would be okay but it wasn't. It wouldn't fold down behind the rear seat low enough. I fudged it for now but will eventually need to cut and sew some pieces that will bridge those gaps. My fault for not watching close enough when she cut it.
But anyway, I got the A-pillars, sail panels, window trim, rear door panels, courtesy lights, rear armrests, ash trays, and rear seats installed. With the front seats still out it was pretty easy to put my back against the seat bottom with my feet on the dash and give it a good shove to anchor the seat bottoms.
[IMG]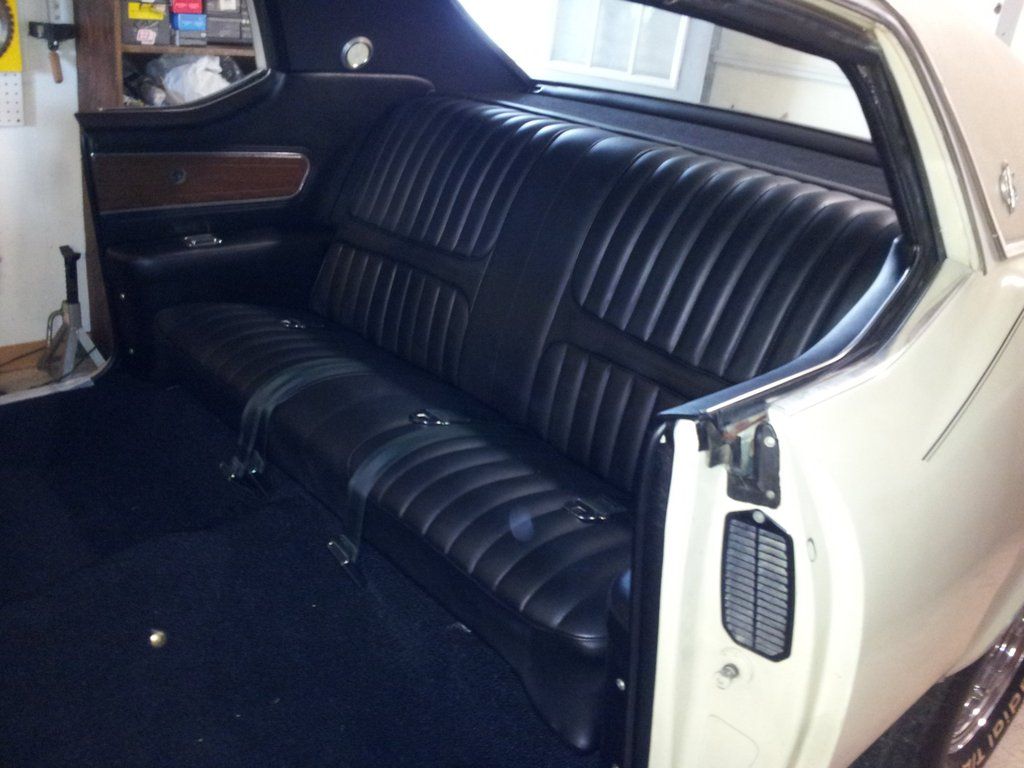 [/IMG]
Truth be told, the schmudget didn't allow for new rear seat covers [yet] so I used the Duplicolor on those. Doesn't look too bad but it did make them even more stiff than they already were. But it's good enough for now since no one ever sits back there.
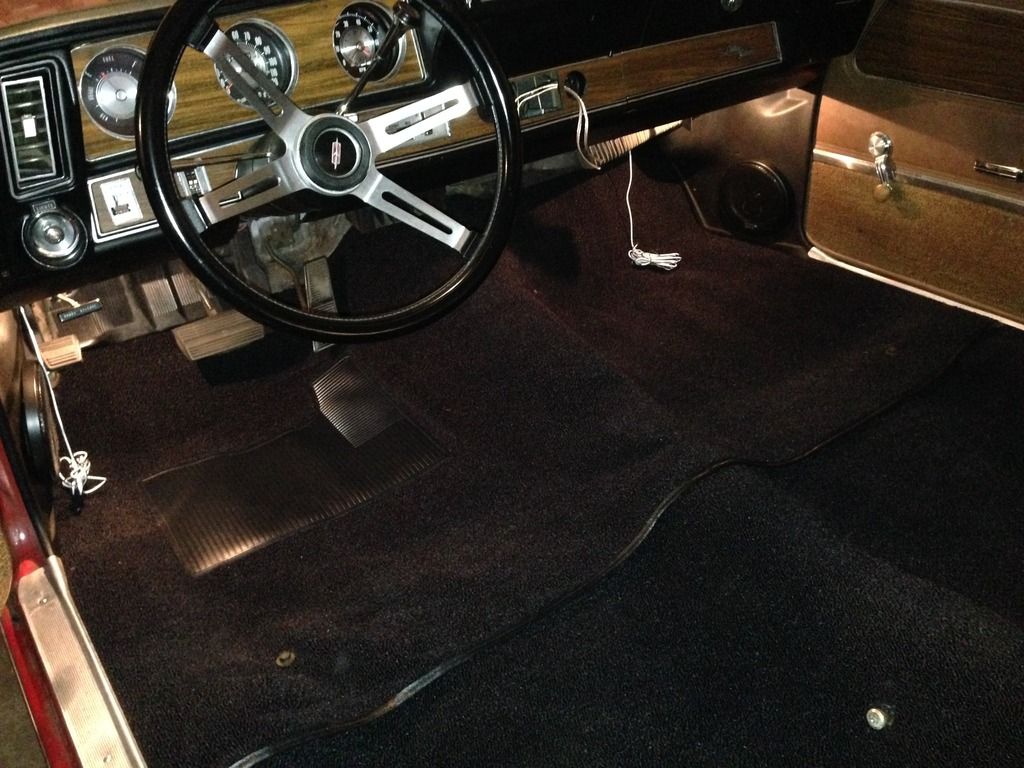
SO what's left? Uhhh.....glove box reinstall, front ashtray cover, reassemble and install the front bench seat, umm.......install new steering wheel (I bought the cheap, cheesy thing from eBay). I think that may be it! Getting close. Then I have to drop the fuel tank and get that gas gauge working before our summer road trip.
Shoulder belts, shoulder belt holders, clothing hangers, etc.EDIT: all those spots are on my camera lens.
[IMG]
 [/IMG]
Then I trimmed and readied the new sail panels. The holes for the courtesy lights were pre-scored but were offset from the originals about an inch so I used the old panels to trace the hole locations and cut them out.
I was really on a roll by this point but ran into a major problem. One of those [it should have taken five minutes but took two and half hours instead] incidents. The black vinyl I purchased from Joanne's Fabrics was cut too short. It was just the strip that runs along the edge of package tray. I asked for a four inch strip and what I got narrowed to about 2.5 inches. I didn't see it until I was gluing it on and thought maybe it would be okay but it wasn't. It wouldn't fold down behind the rear seat low enough. I fudged it for now but will eventually need to cut and sew some pieces that will bridge those gaps. My fault for not watching close enough when she cut it.
But anyway, I got the A-pillars, sail panels, window trim, rear door panels, courtesy lights, rear armrests, ash trays, and rear seats installed. With the front seats still out it was pretty easy to put my back against the seat bottom with my feet on the dash and give it a good shove to anchor the seat bottoms.
[IMG]
 [/IMG]
Truth be told, the schmudget didn't allow for new rear seat covers [yet] so I used the Duplicolor on those. Doesn't look too bad but it did make them even more stiff than they already were. But it's good enough for now since no one ever sits back there.
SO what's left? Uhhh.....glove box reinstall, front ashtray cover, reassemble and install the front bench seat, umm.......install new steering wheel (I bought the cheap, cheesy thing from eBay). I think that may be it! Getting close. Then I have to drop the fuel tank and get that gas gauge working before our summer road trip.
Last edited by Macadoo; June 6th, 2015 at 05:44 PM.
June 7th, 2015, 02:27 PM
#134
Registered User
Thread Starter
Join Date: Aug 2013
Location: Central Illinois
Posts: 3,900
As promised, a couple pics of the armrest backing plate.
[IMG]
 [/IMG]
[IMG]
 [/IMG]
Today I got to the front door panels, the glove box felt and door, some more trim, and the door weatherstripping.
[IMG]
 [/IMG]
[IMG]
 [/IMG]
I suppose it was the same person (PO?) that repaired the radiator hose with a tin can that saw the passenger weatherstripping coming loose and instead of replacing it, put some screws where the plastic posts once were. Of course they rusted solid to the metal. That took a while to make right.
A couple of questions if I may...
1. How bad is it that I forgot to replace the moisture barrier (brown paper) on the door before putting the door panel back on ?
Something to come back to or get my butt out there and redo it tomorrow?2. I bought a couple of replacement window cranks at Napa, "early GM" I think is what they said. They look very correct but the teeth inside that engage the crank are too deep in and too short so they slip. They were only $5 each so I didn't have too high of hopes but is there somewhere else to go for these?
3. The new weather stripping went on just fine and I used adhesive the same place the factory did (on the big ends) but this part grabs the glass as it comes up through and wants to roll. Can I use some silicone spray on the inside of this rubber? Another, better solution?
[IMG]
 [/IMG]
Fingers crossed that I'll "finish" this redo tomorrow. (Nothing's ever finished, really. Is it? I hope not)

Last edited by Macadoo; June 7th, 2015 at 02:31 PM.
June 7th, 2015, 02:57 PM
#136
Registered User
Join Date: Apr 2012
Location: New Mexico
Posts: 2,972
Hmm, I thought the moisture barrier was made of plastic. Main purpose is to route water that gets in to the door away from the door panel and down to the drip holes in the bottom of the doors. But - my only experience is with 66's..........
June 7th, 2015, 05:16 PM
#137
Registered User
Thread Starter
Join Date: Aug 2013
Location: Central Illinois
Posts: 3,900
[IMG]
 [/IMG]
June 8th, 2015, 06:59 PM
[/IMG]
June 8th, 2015, 06:59 PM
#139
Registered User
Thread Starter
Join Date: Aug 2013
Location: Central Illinois
Posts: 3,900
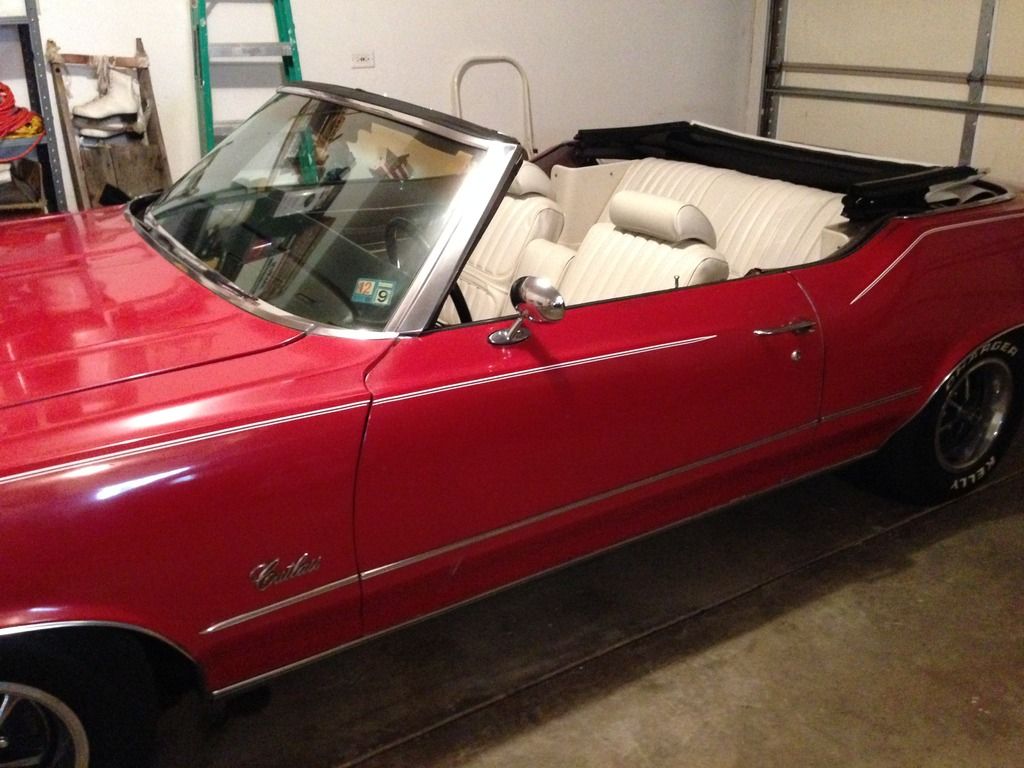
It's done! Well, done enough for now. I goofed and forgot to put the seat side chrome on before attaching the tops to the bench but I need new retainers anyway. And I'm still looking for decent window cranks with decent metal clips. I picked up a silver paint pen for the faux-chrome trim on the dash and I need to install the new plastic chrome trim in the dash channel. But I think that's about it.
The seats are SO much firmer and the black makes it a totally different car. I' very happy with the result.
Before:
[IMG]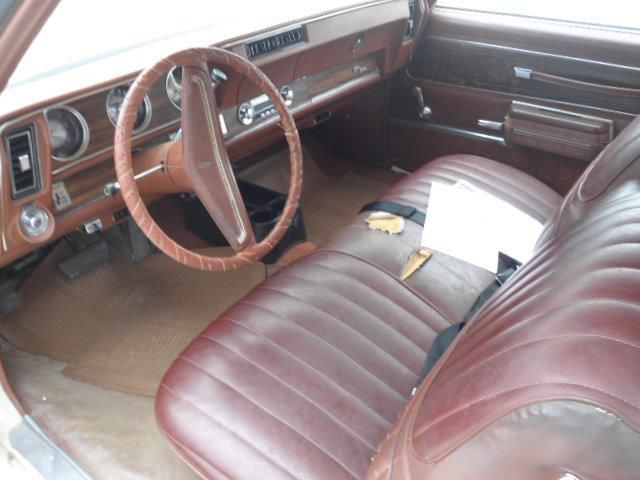 [/IMG]
After:
[IMG]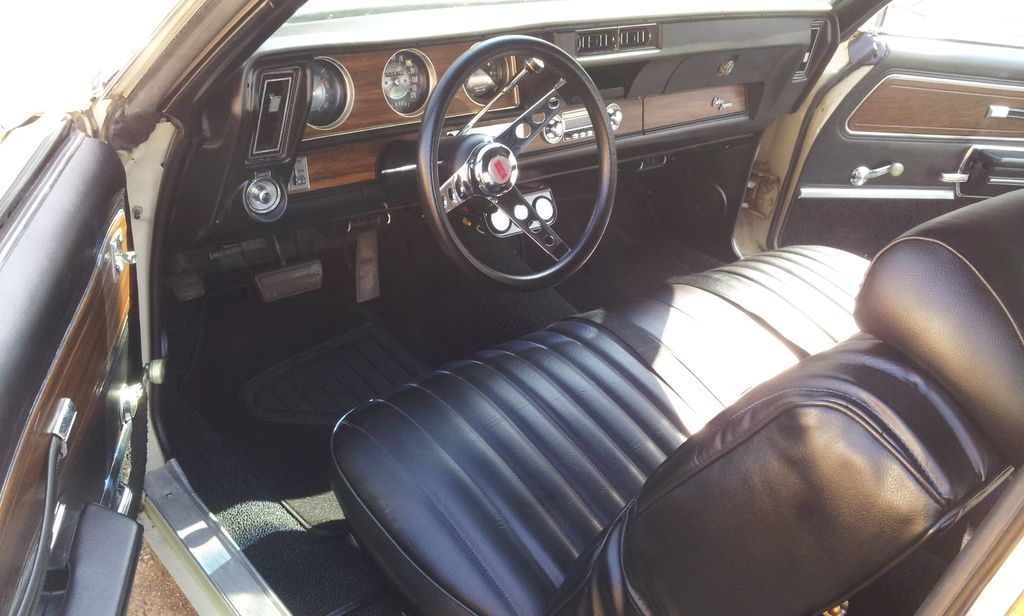 [/IMG]
I still need to take a hair dryer to these wrinkles. I did on the passenger side and they almost completely disappeared
[IMG]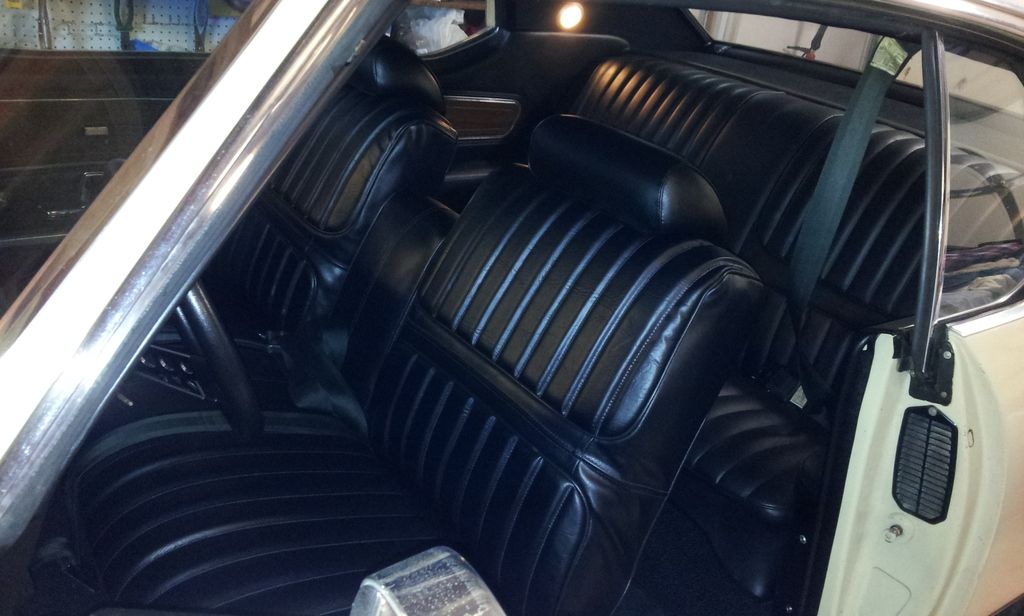 [/IMG].
I'll get some outdoor pics as soon as it stops raining/haling/thunder-storming.
The seats are SO much firmer and the black makes it a totally different car. I' very happy with the result.
Before:
[IMG]
 [/IMG]
After:
[IMG]
 [/IMG]
I still need to take a hair dryer to these wrinkles. I did on the passenger side and they almost completely disappeared
[IMG]
 [/IMG].
I'll get some outdoor pics as soon as it stops raining/haling/thunder-storming.
 June 9th, 2015, 05:35 AM
#146
Registered User
Thread Starter
Join Date: Aug 2013
Location: Central Illinois
Posts: 3,900
Thanks fellas. This is one of those times when I step back and say, "Did I really do that?"
Well crap, my daughter was saying the same thing last night.")
Well crap, my daughter was saying the same thing last night.
June 9th, 2015, 06:06 PM
#149
Registered User
Thread Starter
Join Date: Aug 2013
Location: Central Illinois
Posts: 3,900
Thanks dali, it's a labor of love, right? How's yours going?
I'm SO not telling her that you guys agree. There'd be no living with her
I had a few minutes today to play with the silver paint pen from walmart. It's not the Elmer's that I read about here on CO but I think it looks great. It definitely takes a steady hand. I just had time to do the glove box door.
[IMG]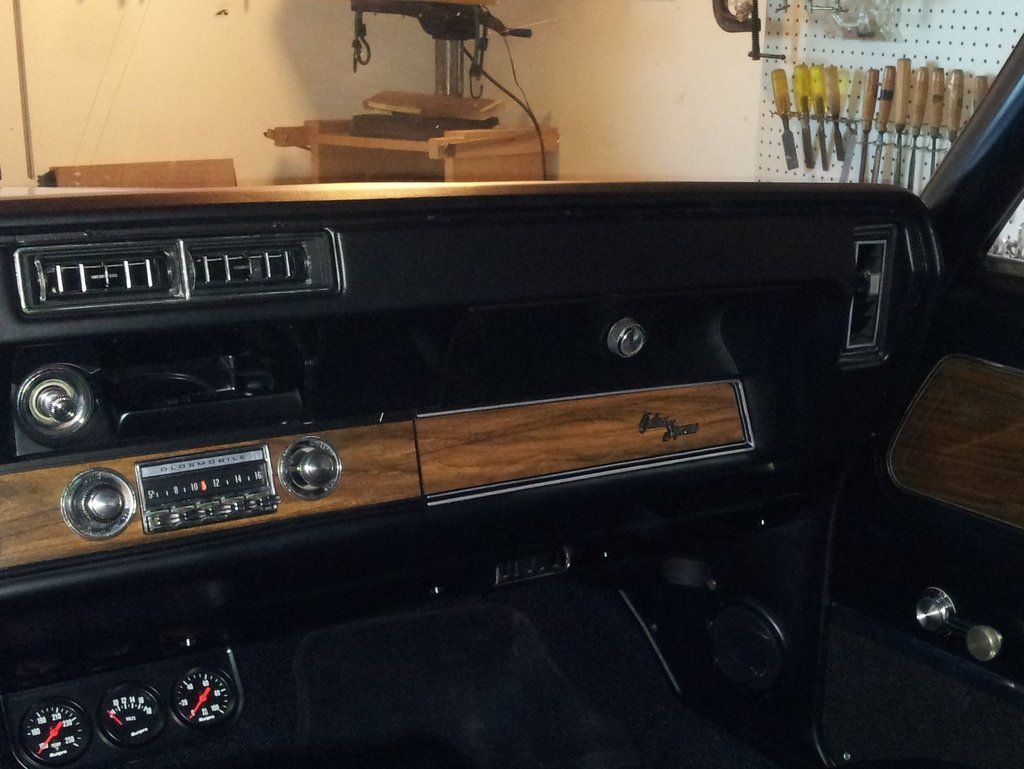 [/IMG]
I'm SO not telling her that you guys agree. There'd be no living with her
I had a few minutes today to play with the silver paint pen from walmart. It's not the Elmer's that I read about here on CO but I think it looks great. It definitely takes a steady hand. I just had time to do the glove box door.
[IMG]
 [/IMG]
June 10th, 2015, 08:19 PM
[/IMG]
June 10th, 2015, 08:19 PM
#150
Registered User
Join Date: May 2014
Location: Mokena, IL
Posts: 256
Hey Mac - I'm catchin up to you! Got my carpet down (a bit of a PITA) and got my kick panels in with my 6.5" low profile speakers. Next for me is to get going on the seats - new seat covers. Still waiting on my new front and rear door panels too..
IMG_1595_zpshewu1efm.jpg
IMG_1595_zpshewu1efm.jpg
June 10th, 2015, 08:49 PM
#151
Registered User
Thread Starter
Join Date: Aug 2013
Location: Central Illinois
Posts: 3,900
Looking fine dude, real fine! Yeah, the carpet's a bit of a PITA but not too bad. I goofed up my headlight dimmer switch hole a little but nothing too major. Also, after burning the seat bolt holes with my soldering iron, I slotted the holes, kind of like an H pattern (cut with scissors), so the carpet could lay over the seat feet. If that makes sense.
I'm still looking for decent window crank handle repops. OPGI has some but the reviewers had the same complaint I have with the ones I got at Napa. The interior teeth are too shallow and the clips are crap.
Keep at it bud. You're getting close!
I'm still looking for decent window crank handle repops. OPGI has some but the reviewers had the same complaint I have with the ones I got at Napa. The interior teeth are too shallow and the clips are crap.
Keep at it bud. You're getting close!
Last edited by Macadoo; June 10th, 2015 at 09:15 PM.
June 10th, 2015, 09:13 PM
#152
Registered User
Thread Starter
Join Date: Aug 2013
Location: Central Illinois
Posts: 3,900
Still waiting on your RetroSound stereo?
 June 22nd, 2015, 07:24 PM
#155
Registered User
Join Date: May 2014
Location: Mokena, IL
Posts: 256
Hi Mac,
Here's another change of color coming to a close on a vert.
I finished up the seats late last week, installed the RetroSound radio and speakers (kick panels only - I chickened out on chopping up the rear armrests, but I ran the wires just in case I got brave). I also fabricated some brackets to move my bench seat back 2 inches - what a difference. I'm 6' 3" and I feel I can breathe now. So here's how I'm looking:
Before:
IMG_1084_zpsuj686o5i.jpg
After:
IMG_1634_zpsowhhfbou.jpg
I'm still waiting for my side and rear door panels to be built but I am pretty much set. Got a nice sunburn cruising around yesterday The RetroSound radio sounds good and it was nice to have Bluetooth tunes blasting. My wife had to hear her country music, so I had her set up her phone and she was set.
So my hands are aching from the upholstery work and my back is kinda sore from twisting into weird positions getting everything installed but I'm smiling! Time to hit the shows!
June 23rd, 2015, 07:36 AM
#157
Registered User
Join Date: May 2014
Location: Mokena, IL
Posts: 256
.


