
Time for a change...of color
 May 6th, 2015, 05:57 AM
#41
Registered User
Join Date: Aug 2010
Location: Economy, Nova Scotia
Posts: 987
Ah, didn't know that. I had also ordered the drivers door remote control escutheon (bezel) at the same time. It was $29.00 so I was covered. Might as well order those arm rest backing plates, nothing can duplicate new chrome. Ha.
 May 6th, 2015, 06:00 AM
#42
Registered User
Join Date: May 2014
Location: Mokena, IL
Posts: 256
Neither one Mac - I was at The Parts Place a few weeks ago and the OEM part guys and I got to talking about my job and actually sprayed SEM Landau Black and their private label "Restoration Paint" Satin Black on a sample and I liked their brand better. Slightly less sheen. Used 3 - 4 cats as you did. Here a pic of the kick panels (original on bottom).
May 6th, 2015, 02:55 PM
#43
Registered User
Thread Starter
Join Date: Aug 2013
Location: Central Illinois
Posts: 3,900
Looks good dali, hard to know for sure from a photo but the sheen looks good.
I got the retainer off. It wasn't that difficult. Granted, the cap had already mostly separated from the washer. I just pushed back on the chrome/hinge to release the tension, tapped a (sharpened on the belt sander) small screwdriver under one of the tabs and carefully lifted up, bending the tab. It came right off after that. Then I tapped the tab back down (too far, maybe).
[IMG] [/IMG]
Hopefully the other side will go as well. Do the inner hinges have the same deal?
I got the retainer off. It wasn't that difficult. Granted, the cap had already mostly separated from the washer. I just pushed back on the chrome/hinge to release the tension, tapped a (sharpened on the belt sander) small screwdriver under one of the tabs and carefully lifted up, bending the tab. It came right off after that. Then I tapped the tab back down (too far, maybe).
[IMG]
 [/IMG]
Hopefully the other side will go as well. Do the inner hinges have the same deal?
May 7th, 2015, 05:22 AM
#44
Registered User
Thread Starter
Join Date: Aug 2013
Location: Central Illinois
Posts: 3,900
How was it pulling all the little fiddly bits like the wiper switch backing plate, etc.? I was hoping to pull all that stuff and leave my dash in for painting.
May 11th, 2015, 01:12 PM
#45
Registered User
Thread Starter
Join Date: Aug 2013
Location: Central Illinois
Posts: 3,900
Started hijacking one of Mak's threads so I'm copying and pasting here to continue discussion.
Macadoo
Registered User
Macadoo's Avatar
Join Date: Aug 2013
Location: Central Illinois
Posts: 2,238
The 80 mil is a little pricey for me but IIRC it's non-asphalt. I'm not so sure about the 50 mil. I think that one is asphalt. I did find this and asked for a free sample.
http://www.ebay.com/itm/371247777469...%3AMEBIDX%3AIT
Sorry Mak, didn't mean to rush you, lol. I know what it's like (as many of us do) having boxes laying around with awesome stuff in them that you just can't find the time to deal with.
__________________
-Mac
'71 Cutlass Supreme. Couldn't have gotten this far without the CO community.
Macadoo is online now Report Post Edit/Delete Message Reply With Quote Multi-Quote This Message Quick reply to this message
Unread Today, 12:47 PM #34
RandyS
L69 Track Pack
RandyS's Avatar
Join Date: Apr 2012
Location: Treasure Valley, Idaho
Posts: 1,308
I bought a 100 sq. ft. roll of 'Fatmat' for $140.00 and it is enough to do two complete floors in a 66. Easy to work with and no odor after install.
__________________
66 442 Track Pack
Timing has an awful lot to do with the outcome of
a rain dance.
RandyS is offline Report Post Reply With Quote Multi-Quote This Message Quick reply to this message
Old Today, 03:05 PM #35
Macadoo
Registered User
Macadoo's Avatar
Join Date: Aug 2013
Location: Central Illinois
Posts: 2,240
This begs the question; what are the most important spots to cover? Honestly, I hadn't thought about the ceiling. Is it important? I'm trying to hush my exhaust as much as possible. I can't hear the stereo very well. So I was thinking floor, behind back seat, under the package tray, and both doors. And speaking of doors; some folks cover the the inside skin, others behind the door panels, and yet some do both. I might be adding speakers to my doors and so should do something there.
Randy, I know $140 isn't much but after the new carpet, seat covers, and headliner (not to mention needing about 10 more cans of the Duplicolor), any more and we won't be hitting the road this summer, ya know? Was your $140 Fatmat the 50 mil and was it asphalt based? Mary has asthma and the asphalt would be b.a.d.
__________________
-Mac
'71 Cutlass Supreme. Couldn't have gotten this far without the CO community
Macadoo
Registered User
Macadoo's Avatar
Join Date: Aug 2013
Location: Central Illinois
Posts: 2,238
The 80 mil is a little pricey for me but IIRC it's non-asphalt. I'm not so sure about the 50 mil. I think that one is asphalt. I did find this and asked for a free sample.
http://www.ebay.com/itm/371247777469...%3AMEBIDX%3AIT
Sorry Mak, didn't mean to rush you, lol. I know what it's like (as many of us do) having boxes laying around with awesome stuff in them that you just can't find the time to deal with.
__________________
-Mac
'71 Cutlass Supreme. Couldn't have gotten this far without the CO community.
Macadoo is online now Report Post Edit/Delete Message Reply With Quote Multi-Quote This Message Quick reply to this message
Unread Today, 12:47 PM #34
RandyS
L69 Track Pack
RandyS's Avatar
Join Date: Apr 2012
Location: Treasure Valley, Idaho
Posts: 1,308
I bought a 100 sq. ft. roll of 'Fatmat' for $140.00 and it is enough to do two complete floors in a 66. Easy to work with and no odor after install.
__________________
66 442 Track Pack
Timing has an awful lot to do with the outcome of
a rain dance.
RandyS is offline Report Post Reply With Quote Multi-Quote This Message Quick reply to this message
Old Today, 03:05 PM #35
Macadoo
Registered User
Macadoo's Avatar
Join Date: Aug 2013
Location: Central Illinois
Posts: 2,240
This begs the question; what are the most important spots to cover? Honestly, I hadn't thought about the ceiling. Is it important? I'm trying to hush my exhaust as much as possible. I can't hear the stereo very well. So I was thinking floor, behind back seat, under the package tray, and both doors. And speaking of doors; some folks cover the the inside skin, others behind the door panels, and yet some do both. I might be adding speakers to my doors and so should do something there.
Randy, I know $140 isn't much but after the new carpet, seat covers, and headliner (not to mention needing about 10 more cans of the Duplicolor), any more and we won't be hitting the road this summer, ya know? Was your $140 Fatmat the 50 mil and was it asphalt based? Mary has asthma and the asphalt would be b.a.d.
__________________
-Mac
'71 Cutlass Supreme. Couldn't have gotten this far without the CO community
Last edited by Macadoo; May 11th, 2015 at 01:14 PM.
May 11th, 2015, 05:43 PM
#46
Registered User
Thread Starter
Join Date: Aug 2013
Location: Central Illinois
Posts: 3,900
I went ahead and bought this stuff. I made an offer and got 50 sq ft for $60. The ad says it doesn't smell and is very sticky. The feedback was very positive with some folks saying it looked just like Dynamat and others saying it worked great and had no smell. Hoping for the best. I'll report back.
http://www.ebay.com/itm/371247777469...%3AMEBIDX%3AIT
http://www.ebay.com/itm/371247777469...%3AMEBIDX%3AIT
May 12th, 2015, 05:29 PM
#47
Registered User
Thread Starter
Join Date: Aug 2013
Location: Central Illinois
Posts: 3,900
Picked up some stuff for the package tray this afternoon. I had cut holes for my three-way speakers but did't like the grills showing. I didn't hack away any metal for the speaker install, they simply mount underneath. I've been looking at different alternatives for cloth to cover the tray and the speaker holes but not muffle the sound. Tonight I tried some black burlap. I wanted to replicate the original wire-screen texture as best I could. So I made a test tile tonight; black burlap laid on 1/8 th inch plywood tile with 3M 90, then spray painted with the Duplicolor to harden and color match. It doesn't look bad and after shaving it with the wife's sweater shaver, it's not too hairy. But I'm concerned that it would be difficult to clean.
Thoughts?
Pic is before shaving
[IMG]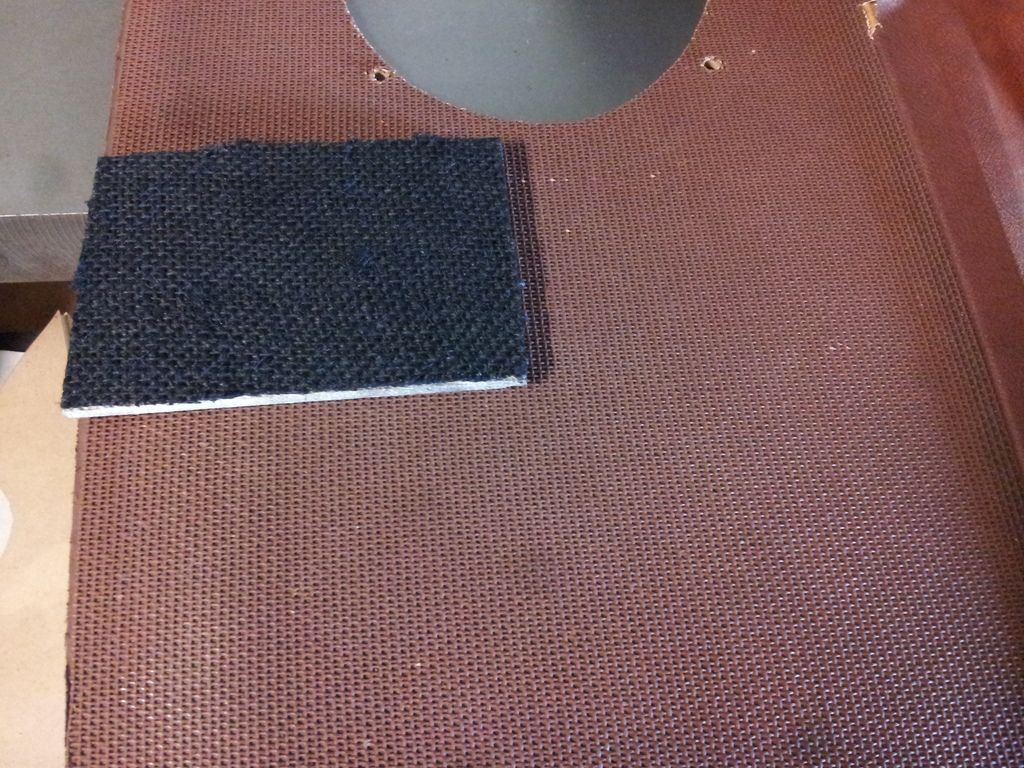 [/IMG]
Thoughts?
Pic is before shaving
[IMG]
 [/IMG]
May 13th, 2015, 06:42 AM
[/IMG]
May 13th, 2015, 06:42 AM
#50
Registered User
Join Date: Apr 2012
Location: New Mexico
Posts: 2,972
Sorry, not trying to cause you extra work. Have you considered using 'Grille Cloth'? I haven't shopped for it for eons, but it used to be available in several styles and patterns at your local 'Stereo Shop'. It is heavy enough to cover well but doesn't affect sound quality.
May 13th, 2015, 10:44 AM
#51
Registered User
Thread Starter
Join Date: Aug 2013
Location: Central Illinois
Posts: 3,900
So, here is the after shaving. Not much different.
[IMG] [/IMG]
I did look for grill/acoustic cloth but couldn't find any locally. BUT I didn't look at the fabric shop....derp. I'll bet they have it. It'll be smoother looking but does that really matter?
[IMG]
 [/IMG]
I did look for grill/acoustic cloth but couldn't find any locally. BUT I didn't look at the fabric shop....derp. I'll bet they have it. It'll be smoother looking but does that really matter?
 )
May 13th, 2015, 01:39 PM
)
May 13th, 2015, 01:39 PM
#53
Beer Connoisseur
Join Date: Aug 2008
Location: Daly City, California
Posts: 2,091
damn it Mac, every time I read one of your threads gets me into another project. Now I am about take my interior apart and spray it black.
I ended up ordering a black mesh package tray perforated for speakers from OPGI along with couple of other things.
BTW Good job.
I ended up ordering a black mesh package tray perforated for speakers from OPGI along with couple of other things.
BTW Good job.
May 13th, 2015, 03:06 PM
#54
Registered User
Thread Starter
Join Date: Aug 2013
Location: Central Illinois
Posts: 3,900
Lol, I know what you mean. I thought about trying some fiberglass screen-wire (the stuff for window screens) but wasn't sure it would hide the speakers very well.
Thanks man. I said the same thing about Rob (Lady-n-Rob). I'm really just a half-assed Rob ")
So far, I've been doing the easy/fun stuff. Door panels, seats, etc. Not sure I'm looking forward to the headliner.
So far, I've been doing the easy/fun stuff. Door panels, seats, etc. Not sure I'm looking forward to the headliner.
May 13th, 2015, 04:45 PM
#55
Registered User
Thread Starter
Join Date: Aug 2013
Location: Central Illinois
Posts: 3,900
Gonna' take a peek at grill covering material tomorrow after work. But how do folks add speakers to the doors? I think I have the grills figured out but are they cutting into the door metal or just getting tiny little drivers? There's an opening at the front, lower part of the door where one of the window gears can be seen but it's not very large.
May 13th, 2015, 05:31 PM
#57
Registered User
Thread Starter
Join Date: Aug 2013
Location: Central Illinois
Posts: 3,900
Either way, there would need to be the proper opening in the door, yes? I just don't want to do any cutting, ya know? I'll look around for a driver that will fit the existing opening.
May 13th, 2015, 05:58 PM
#58
Beer Connoisseur
Join Date: Aug 2008
Location: Daly City, California
Posts: 2,091
May 13th, 2015, 06:29 PM
#59
Registered User
Thread Starter
Join Date: Aug 2013
Location: Central Illinois
Posts: 3,900
Oh, I'd never seen these. Very cool...and very pricey. And a rather low priority right now. I had pulled a couple of Bose drivers from our retired Intrigue and thought they may be small enough but no. Do those kick panels just sit on top of the existing door panel or maybe just slips up under the corner?
May 15th, 2015, 02:45 PM
#62
Registered User
Thread Starter
Join Date: Aug 2013
Location: Central Illinois
Posts: 3,900
I ended up going with the burlap. I made a little write-up here if anyone is interested:
https://classicoldsmobile.com/forums...tml#post821336
https://classicoldsmobile.com/forums...tml#post821336
May 15th, 2015, 06:20 PM
#63
Registered User
Join Date: May 2014
Location: Mokena, IL
Posts: 256
FYI I got my dashboard finished - just waiting for my RetroSound Model 2 to come in. A couple of scuffs during the installation of the dash I'll need to touch up. Also had a weak moment and wound up picking up a Tic Toc Tach repro at The Parts Place when I went out there for a few minor things
 . Pulling the seats and carpet out and doing the FatMat thing this weekend.
May 16th, 2015, 01:02 PM
. Pulling the seats and carpet out and doing the FatMat thing this weekend.
May 16th, 2015, 01:02 PM
#64
Registered User
Thread Starter
Join Date: Aug 2013
Location: Central Illinois
Posts: 3,900
Oh man, that looks great! Really goes well with your sport steering wheel. And thanks for the props on my package tray. It really was pretty easy to do. I just hope my dash turns out as good as yours.
I'm starting my Dynamat [clone] install today as well, but just the package tray area and the rear wall behind the seat. A lot of stuff to work around back there and I'll need to unhook my amp (in the trunk) and rerun the wiring through the deadener.
I was at Home Depot earlier and found something, I'll have to go out and get the name, but it's an odorless peel and seal that says it's a butyl "hybrid". Not sure what that means but there really is no odor and seems pretty sticky. I haven't measured it for thickness but it's 37 square feet for $20. I'm going to use it in easily accessible areas in case it doesn't work. Doors maybe?
Prepping to paint the metal trim along the back window.
[IMG] [/IMG]
Using the shop vac to remove excess paint and fumes.
[IMG] [/IMG]
The sound deadener is much thinner than the original insulation that was under the tray so I picked up this rubber non-slide stuff I think they make for silverware drawers. I had to splice two pieces together. This will go over the sound deadener but under the package tray.
[IMG]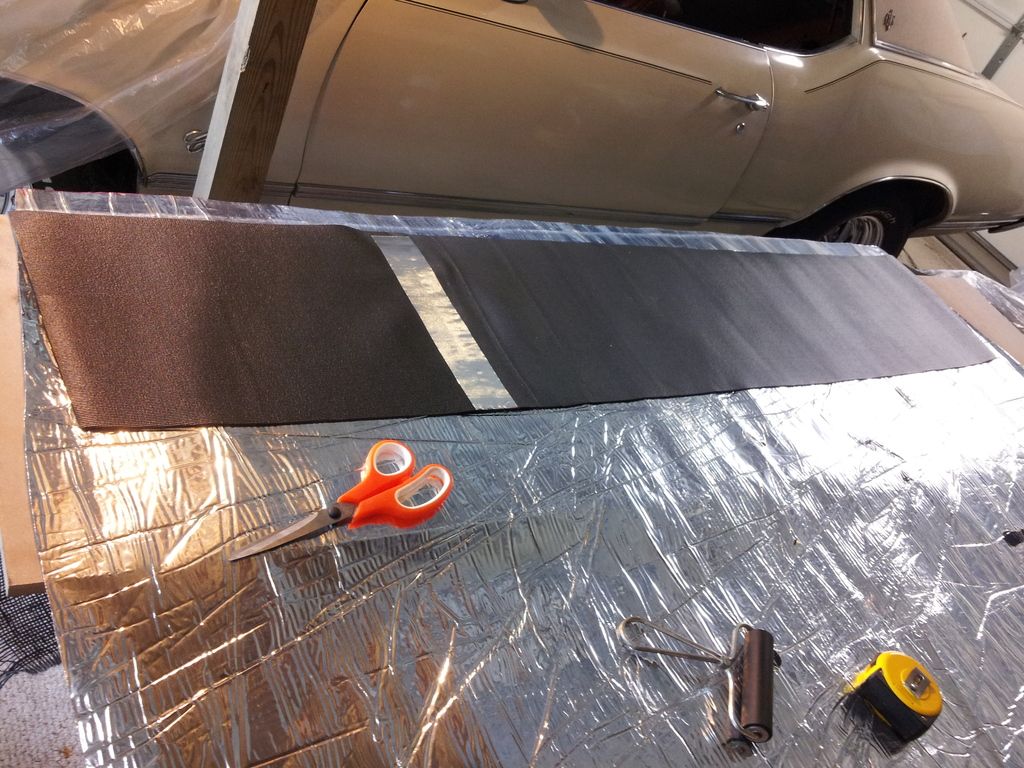 [/IMG]
I'm starting my Dynamat [clone] install today as well, but just the package tray area and the rear wall behind the seat. A lot of stuff to work around back there and I'll need to unhook my amp (in the trunk) and rerun the wiring through the deadener.
I was at Home Depot earlier and found something, I'll have to go out and get the name, but it's an odorless peel and seal that says it's a butyl "hybrid". Not sure what that means but there really is no odor and seems pretty sticky. I haven't measured it for thickness but it's 37 square feet for $20. I'm going to use it in easily accessible areas in case it doesn't work. Doors maybe?
Prepping to paint the metal trim along the back window.
[IMG]
 [/IMG]
 Using the shop vac to remove excess paint and fumes.
[IMG]
 [/IMG]
The sound deadener is much thinner than the original insulation that was under the tray so I picked up this rubber non-slide stuff I think they make for silverware drawers. I had to splice two pieces together. This will go over the sound deadener but under the package tray.
[IMG]
 [/IMG]
May 16th, 2015, 05:36 PM
[/IMG]
May 16th, 2015, 05:36 PM
#66
Registered User
Thread Starter
Join Date: Aug 2013
Location: Central Illinois
Posts: 3,900
Thanks Justin.
The peel and seal is called Protecto Wrap. I haven't tried it yet but will definitely report back when I do.
[IMG]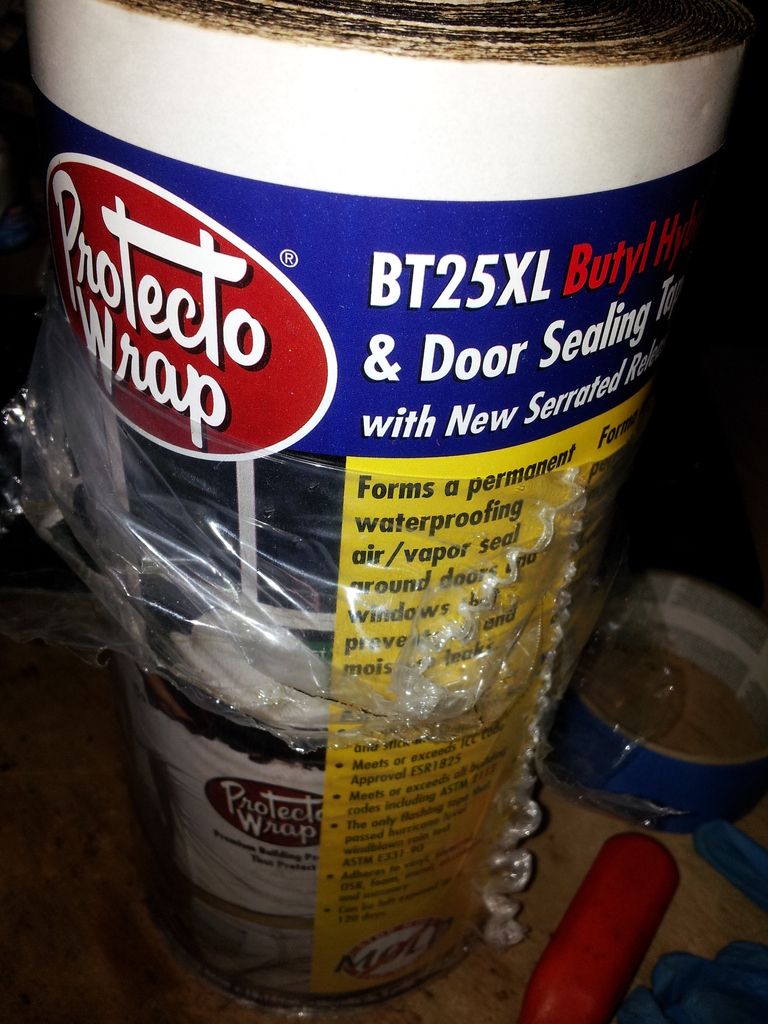 [/IMG]
Some sound deadener installed and the drawer liner padding cut and placed. The no-name dynamat definitely has a smell but it's not petrol or tar-ish. It smells VERY similar to the drawer liner. Rubbery.
[IMG]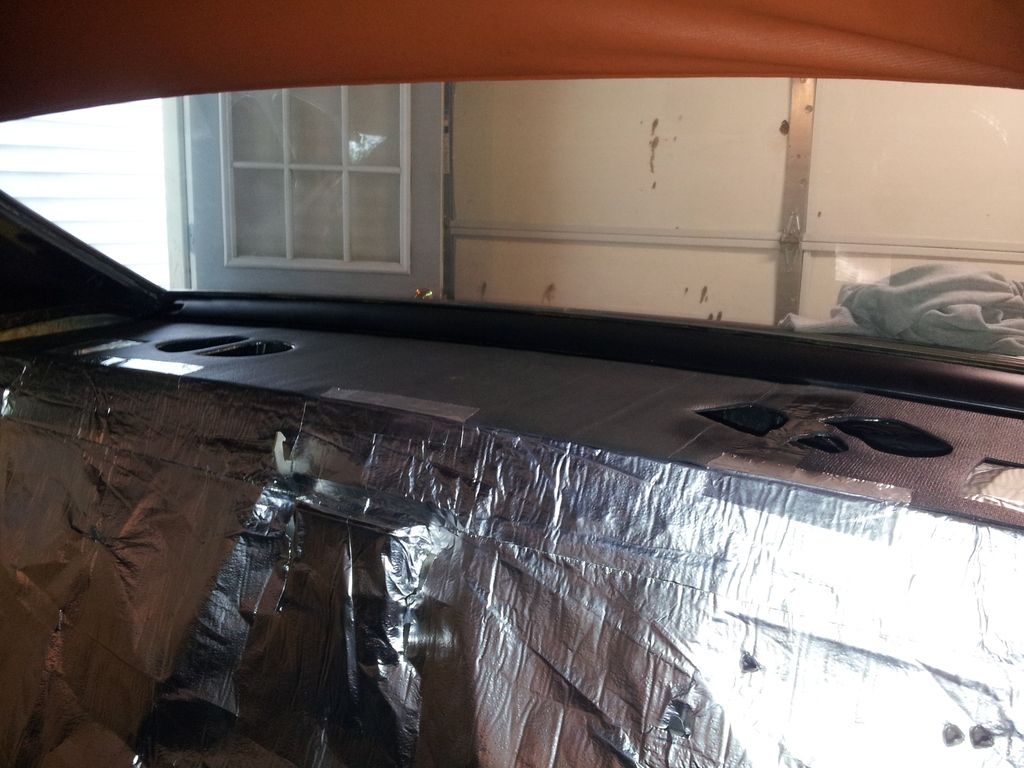 [/IMG]
Had to do it. I had to jam that puppy in there to see what it looks like. I love it!
[IMG]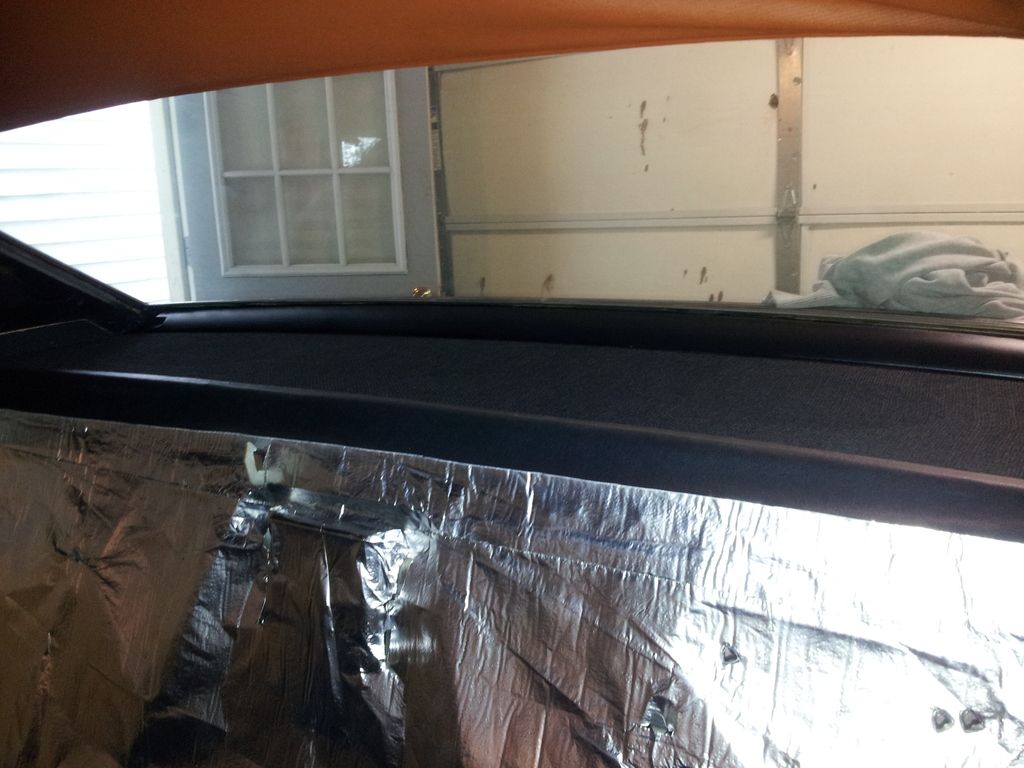 [/IMG]
Slowly making progress.
The peel and seal is called Protecto Wrap. I haven't tried it yet but will definitely report back when I do.
[IMG]
 [/IMG]
 Some sound deadener installed and the drawer liner padding cut and placed. The no-name dynamat definitely has a smell but it's not petrol or tar-ish. It smells VERY similar to the drawer liner. Rubbery.
[IMG]
 [/IMG]
Had to do it. I had to jam that puppy in there to see what it looks like. I love it!
[IMG]
 [/IMG]
Slowly making progress.
Last edited by Macadoo; May 16th, 2015 at 05:39 PM.
May 17th, 2015, 01:01 PM
#67
Registered User
Thread Starter
Join Date: Aug 2013
Location: Central Illinois
Posts: 3,900
Progress....with a few questions.
[IMG] [/IMG]
Are the front and back pieces of the carpet supposed to have this gap between them?
[IMG]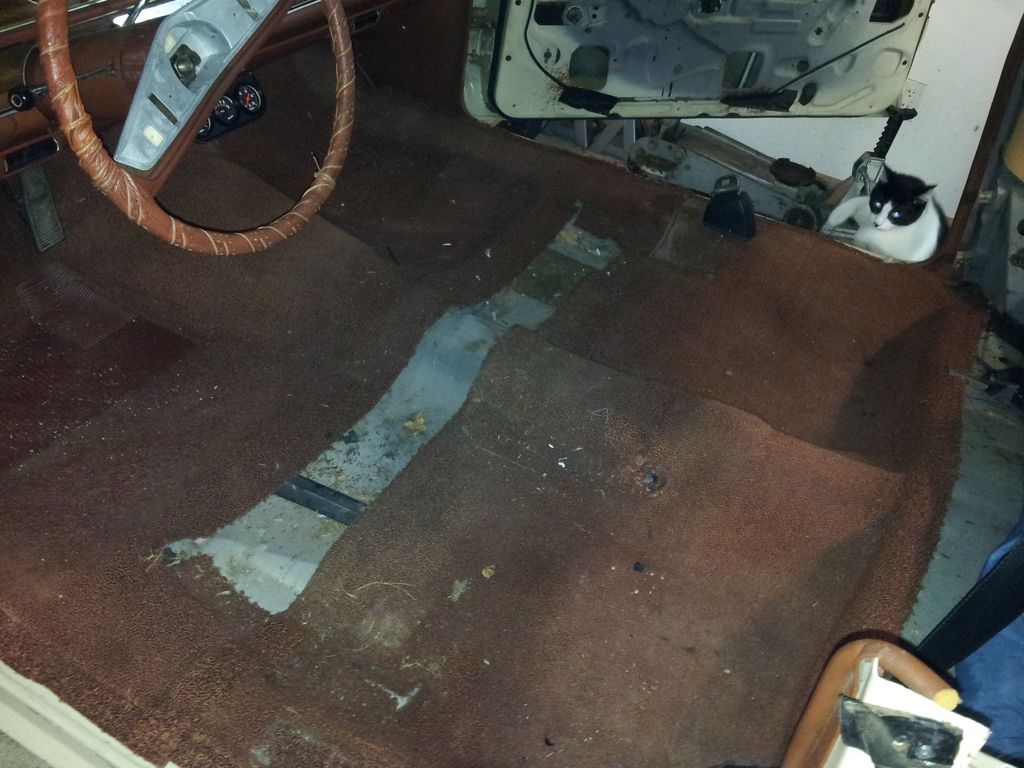 [/IMG]
I also want to pull the steering wheel. I removed the two screws on each end (from the back of the wheel) but don't see how to remove the third screw in the middle (for the horn mechanism). It doesn't appear to be accessible from the back, like the others.
The bench springs are all there and intact but seem a little weak, at least I think. When I sit on it it's nice and soft but I feel like I sink down a wee bit more than I'm supposed to. I bought a slab of 1/2" foam for bolstering if needed but could it be the springs too? I've replaced z-springs in a couch and I know what a pain that is. Can I bind them all together with a horizontal steel rod running the entire length?
[IMG] [/IMG]
This mat under the front carpet seems to be dry and intact. Reuse over the dynamat [clone]?
[IMG] [/IMG]
[IMG]
 [/IMG]
Are the front and back pieces of the carpet supposed to have this gap between them?
[IMG]
 [/IMG]
I also want to pull the steering wheel. I removed the two screws on each end (from the back of the wheel) but don't see how to remove the third screw in the middle (for the horn mechanism). It doesn't appear to be accessible from the back, like the others.
The bench springs are all there and intact but seem a little weak, at least I think. When I sit on it it's nice and soft but I feel like I sink down a wee bit more than I'm supposed to. I bought a slab of 1/2" foam for bolstering if needed but could it be the springs too? I've replaced z-springs in a couch and I know what a pain that is. Can I bind them all together with a horizontal steel rod running the entire length?
[IMG]
 [/IMG]
This mat under the front carpet seems to be dry and intact. Reuse over the dynamat [clone]?
[IMG]
 [/IMG]
Last edited by Macadoo; May 17th, 2015 at 01:06 PM.
May 17th, 2015, 04:04 PM
#69
Registered User
Join Date: May 2014
Location: Mokena, IL
Posts: 256
Progress....with a few questions.
...
I also want to pull the steering wheel. I removed the two screws on each end (from the back of the wheel) but don't see how to remove the third screw in the middle (for the horn mechanism). It doesn't appear to be accessible from the back, like the others.
...
I also want to pull the steering wheel. I removed the two screws on each end (from the back of the wheel) but don't see how to remove the third screw in the middle (for the horn mechanism). It doesn't appear to be accessible from the back, like the others.
Last edited by dalilama; May 17th, 2015 at 04:08 PM.
May 17th, 2015, 04:21 PM
#70
Registered User
Thread Starter
Join Date: Aug 2013
Location: Central Illinois
Posts: 3,900
Thanks dali. I just discovered that....when I found my assembly manual I just assumed the contact plate needed to come off first. I was wrong. Didn't realize I have the DELUXE steering wheel, lol.
I just assumed the contact plate needed to come off first. I was wrong. Didn't realize I have the DELUXE steering wheel, lol.
May 17th, 2015, 04:24 PM
#71
Registered User
Thread Starter
Join Date: Aug 2013
Location: Central Illinois
Posts: 3,900
Thanks Justin, just wanted to make sure. This car was so not molested I just couldn't believe someone messed with the carpet. But it seemed really odd, just gap with exposed floor.


 May 20th, 2015, 06:46 AM
#75
Registered User
Thread Starter
Join Date: Aug 2013
Location: Central Illinois
Posts: 3,900
May 20th, 2015, 01:40 PM
#78
Registered User
Thread Starter
Join Date: Aug 2013
Location: Central Illinois
Posts: 3,900
Alrighty then, that was fun.
This first pic is to show my air scrubber jammed in between the door and jam. It's a window fan with a pleated furnace filter on both sides and a cardboard box attached on the inlet side. The box really creates the suction needed. It works great and I use it for painting small parts too. I have another one hanging from my ceiling that I also run.
[IMG] [/IMG]
Just a couple pre-tape removal pics. I'm not taking the tape off until I quadruple check for missed spots.
[IMG]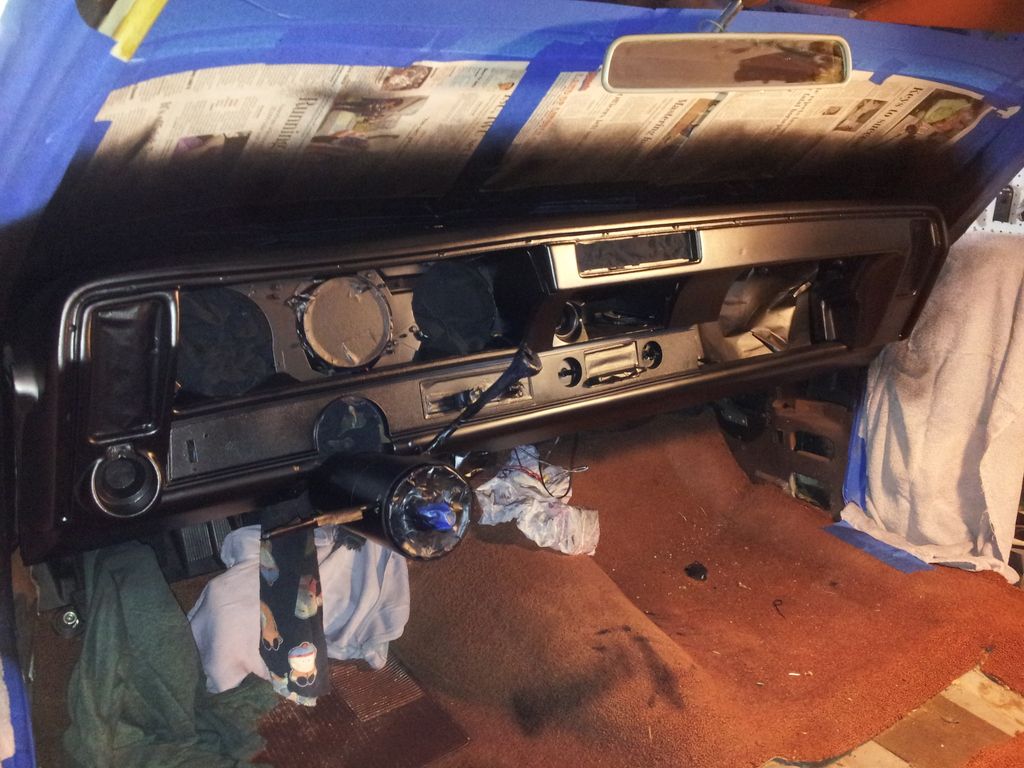 [/IMG]
It went pretty well. Three cans of paint. I found a couple sags on the very underneath of the metal part of the dash. But they may have been there before. I know I saw a sag and a run in the original paint.
I was worried about getting the paint down against the bottom of the windshield but discovered that by turning the paint nozzle I could change the spray pattern to horizontal instead of vertical and I'm HOPING that helped. I won't know until I pull the tape and can see the dash from the outside. If it didn't go as well as planned, I need to replace the front glass anyway...eventually.
[IMG]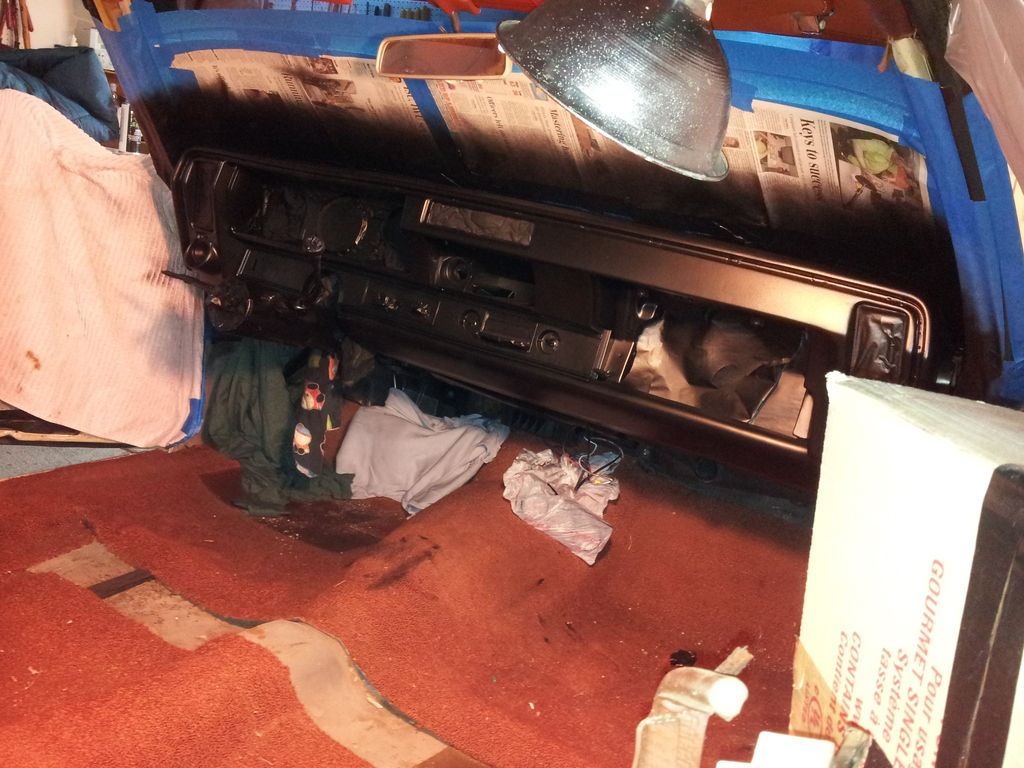 [/IMG]
Thanks go out to dalilama for his input on the painting process.
This first pic is to show my air scrubber jammed in between the door and jam. It's a window fan with a pleated furnace filter on both sides and a cardboard box attached on the inlet side. The box really creates the suction needed. It works great and I use it for painting small parts too. I have another one hanging from my ceiling that I also run.
[IMG]
 [/IMG]
Just a couple pre-tape removal pics. I'm not taking the tape off until I quadruple check for missed spots.
[IMG]
 [/IMG]
It went pretty well. Three cans of paint. I found a couple sags on the very underneath of the metal part of the dash. But they may have been there before. I know I saw a sag and a run in the original paint.
I was worried about getting the paint down against the bottom of the windshield but discovered that by turning the paint nozzle I could change the spray pattern to horizontal instead of vertical and I'm HOPING that helped. I won't know until I pull the tape and can see the dash from the outside. If it didn't go as well as planned, I need to replace the front glass anyway...eventually.
[IMG]
 [/IMG]
Thanks go out to dalilama for his input on the painting process.
May 20th, 2015, 02:11 PM
#79
Registered User
Join Date: May 2014
Location: Mokena, IL
Posts: 256
Looking great Mac! I like the scrubber system. Sure beats floating that spray all over the garage.
The dash will look great in black. I am now looking into my crystal ball and I see....a sport steering wheel in your future
The dash will look great in black. I am now looking into my crystal ball and I see....a sport steering wheel in your future
May 20th, 2015, 03:55 PM
#80
Registered User
Thread Starter
Join Date: Aug 2013
Location: Central Illinois
Posts: 3,900
Besides, mine is cracked pretty bad on the back and on both sides. Not sure that's safe.Is this a decent wheel and a decent price?
http://www.ebay.com/itm/360956096815...%3AMEBIDX%3AIT


