When you click on links to various merchants on this site and make a purchase, this can result in this site earning a commission. Affiliate programs and affiliations include, but are not limited to, the eBay Partner Network.
Getting ready to finally tackle the engine detailing on the 67 Vista Cruiser.
Current engine state. Someone painted it silver at some time. I'm hoping the valve covers are not too pitted. Will see after they are stripped.
So I've got the engine paint and will be removing and restoring all of the accessories. One question I have is the what do people do with the graphics on the air cleaner? See next image.
This doesn't seem to be a decal. Was this screen printed? If so I assume it is not replaceable when repainted?
Thanks, I looked at their site and didn't see it. I went back and found it. Cool.
Another decal question. My vista Cruiser is the 330 4 barrel version. Should it have the valve cover decal? If so, where does it go? The research I've done looking at engine bays, I don't really see them on the valve covers.
My vista Cruiser is the 330 4 barrel version. Should it have the valve cover decal? If so, where does it go? The research I've done looking at engine bays, I don't really see them on the valve covers.
Jim
There were no valve cover decals .
The engine size , etc was on the "pie plate " decal on the top of the air cleaner .
Here's a page from the Fusick catalog ; http://www.fusickautomotiveproducts....s.asp?dept=982
Last edited by Charlie Jones; May 1, 2019 at 07:36 PM.
Thanks, I saw this on Fusick's site which is why I asked.Thought maybe mine had it at one time but was removed when they painted it silver. Valve Cover Decal From Fusick
Cool if I don't need it. One less thing to have to get.
So I have a couple of questions about the engine detailing.
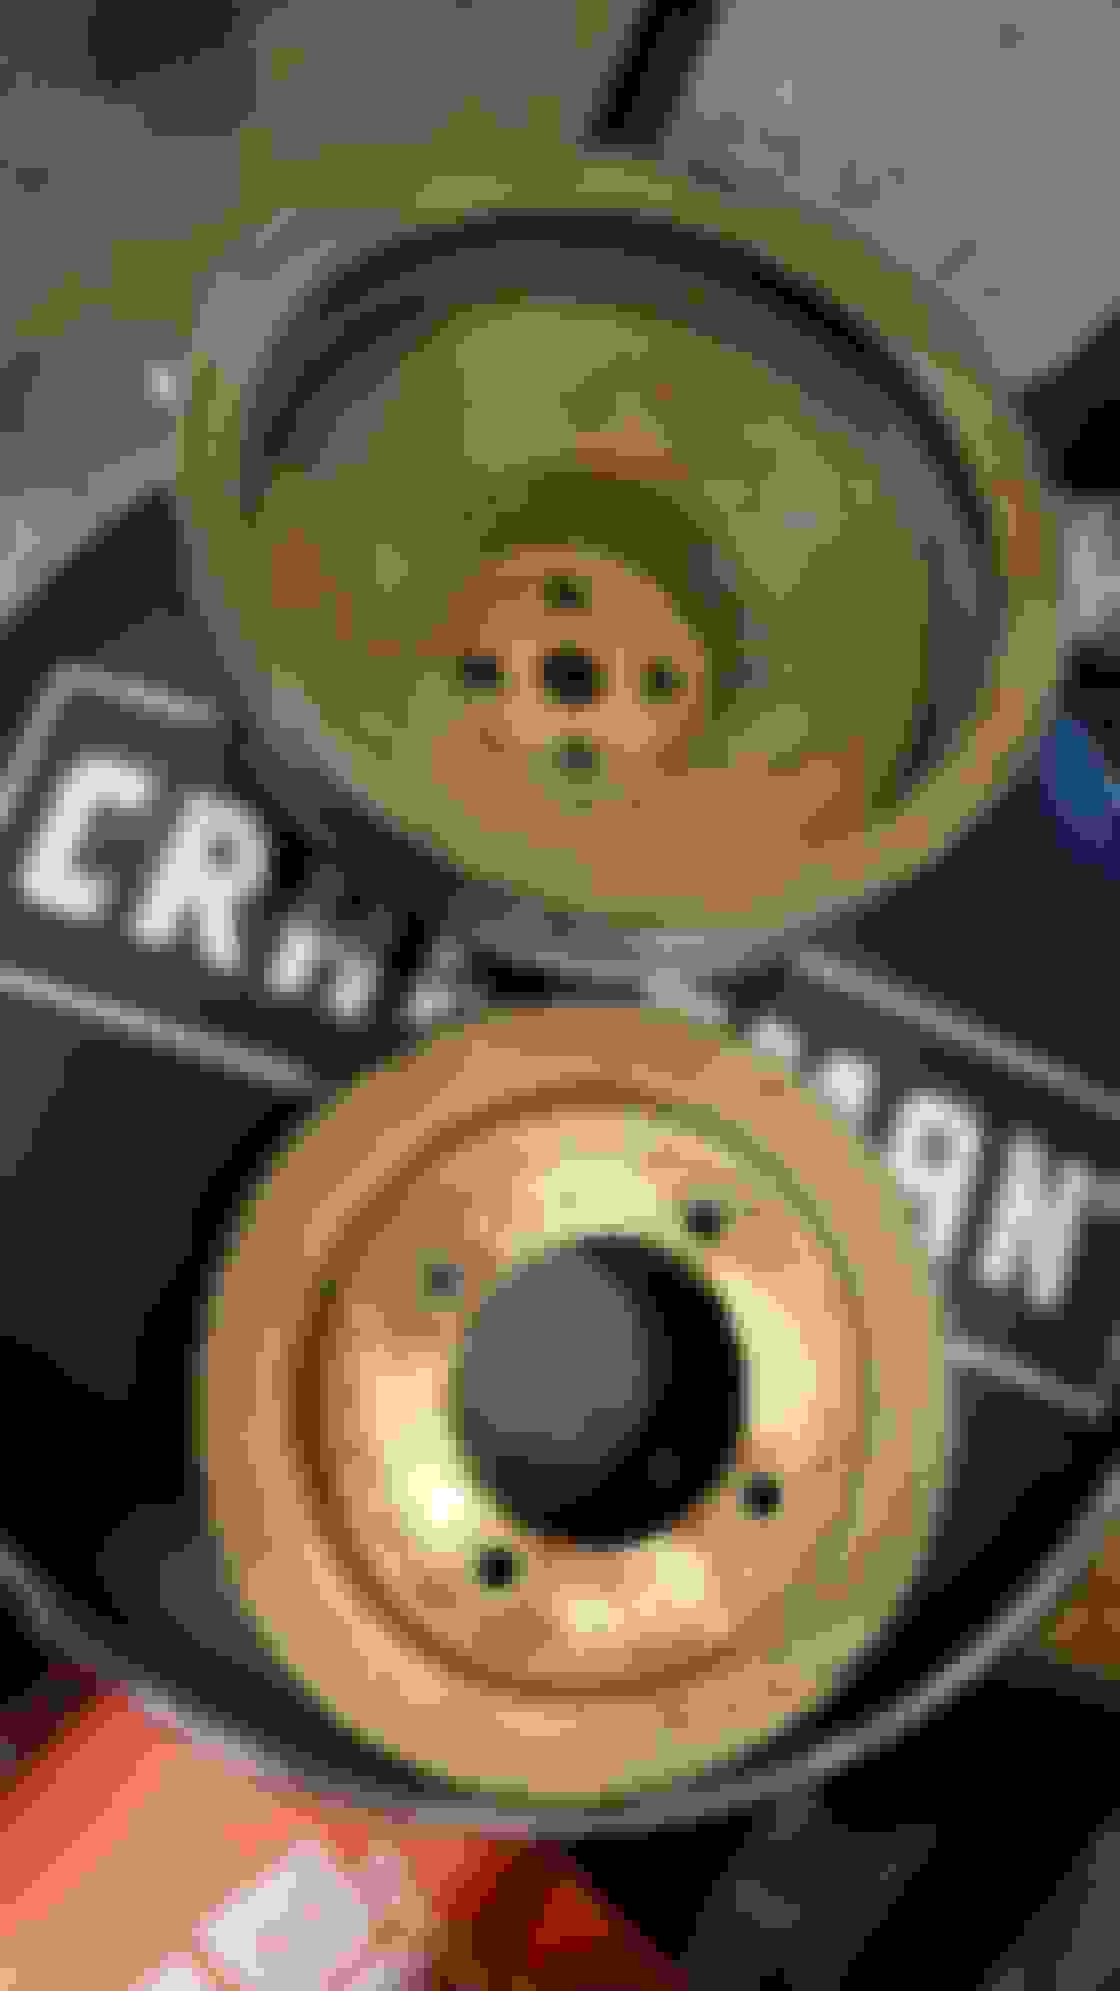
The research I've done says that the crank and fan pulleys should were not on the engine during painting so they should be black. But look at my pulleys.
You can definitely see the bronze paint on the contact surfaces. So what's the verdict? Black or bronze?
Also, does anyone have a source for these plugs/caps? It is under the hood near the fire wall. There is one on each side. I am missing the one on the right side.
Here's an image of the one I have.
Last question for now. I bought this clamp kit.
So I know that the large clamps are for. Are the smaller band clamps for the bypass hose? I assume the black spring clamps are for the long heater hose and the smaller steel looking spring clamps are for the short hose by the fire wall. Am I right?
I only sand blasted the outside since one, no one will see it and two, it wasn't all rusted. I didn't show it, but I also sandblasted the air cleaner tray (outside only also).
I did not paint the inside for the same reasons. Just didn't see the need.
As for primer, the paint I used (Dupli-Color DE1632 Dupli-Color Engine Paint With Ceramic ) said to not use any so I didn't and it worked out fine.
So I know that the large clamps are for. Are the smaller band clamps for the bypass hose? I assume the black spring clamps are for the long heater hose and the smaller steel looking spring clamps are for the short hose by the fire wall. Am I right?
Thanks,
Jim
Jim,
Yes, indeed the smaller double wire clamps are for the T-Stat bypass hose. The constant-tension AKA spring clamps are for the heater and other small OD lines.
Do you have the J shaped bypass hose or the metal line with the two jumper hose pieces?
Keep in mind on the single J shaped hose the double wire OEM style clamps will bottom out before the hose is tight. The repro supplier used the thick wall hose dimension to make the clamps and yet only offers the thinner junk bypass hose.
The original hoses had a larger OD. These repro hoses are much smaller on the OD. They also swell when you throttle up the engine(new hose!). Not good on either account. Country of origin...likely...ummm...shocker!
I was forced to dig through my parts hoard to find a good serviceable pliable used hose. Someone needs to repro the correct OD thick wall hose. Chineasium won't cut it here...or anywhere on American Muscle IMO!
Thanks for the information. I have the "J" shaped hose. I bought a new one from Fusick. I will check to make sure it is clamped correctly. What do people do to mke the clamps work if they bottom out? is there anything special to do when installing the constant tension spring clamps?
Thanks for the information. I have the "J" shaped hose. I bought a new one from Fusick, Me too thats when I found the problem. I told them about this they even sent another hose same results. I will check to make sure it is clamped correctly. What do people do to make the clamps work if they bottom out? Don't use them. Use worm gear clamps. Or find a thicker hose.
is there anything special to do when installing the constant tension spring clamps?
Spread clamp slightly using proper spring clamp pliers. Slide clamp on to the hose. Fit the hose to the nipple. Install the spring clamp just over the flare. You want the clamp to butt up close to the flare. Once you have it where you like it actuate the "spring" a couple of times to seat it well. With the spring tension on the hose give the hose a little twist to feel if it's tight enough. A gentile twist on the heater core nipples. Make sure you have a restrictor feeding the heater core. You don't want full cooling system flow & PSI going at the core. It will blow the core.
Thanks, In my book, engine detailing is one of the more fun things to do on a car. You don't need a loot of special tools and it's always cool to see the pieces all come together. Now the trick is to keep it this way.
Completed the air cleaner restoration for my 66 Cutlass vert. Had the air cleaner blasted removing all of the old paint and seal. The blaster also primed it nicely for me. Painted with paint I prchased from Fusick at Homecoming. I installed the new seal correctly applying it to the top part. Installed new 'pie pan' decal and the new side decal. It's nested nicely on the engine aging so I can cruise this saturday. I think it turned out nice. Thank you to all of those on OC and others for their help. Couple pictures attached.
Wayne
First thanks for everyone's advice on my engine issues.
I decided to not do the rebuild but instead took the whole engine bay apart leaving the engine intact. With everything out, I was able to clean the engine, remove the exhaust flapper in the driver side manifold and go through all of the wiring. On my detailing, I made sure both ground straps to the engine were reestablished. New battery cables and all new radiator hoses.
After getting everything back together, I checked the timing and it was about 6 to 8 degrees. The car ran ok, but continually kept getting worse. It started to really hesitate on acceleration. Ughhhh!
After getting the engine good and hot, I wanted to check timing and vacuum and I saw this by cylinder 5.
A little pool of oil and with the engine off, I noticed a little bubble at the the intake/head gasket in this area. I checked the vacuum and it held 21 inches steady. I checked the intake bolts and I was able to tighten about three of them around #5 cylinder. I checked vacuum and timing again and adjusted the timing a little to get 7.5 degrees. Went out for a drive and major hesitation on acceleration still happened. The only good news was that the intake oil issue disappeared. Frustrated I gave in and gave the car to my mechanic friend.
He felt the hesitation and checked timing. He told me it was way off. I told him that I had just checked it and it was at 7-8 degrees. He told me when he tried to bring it into correct timing, it would barely run. He also noticed that the harmonic balancer seemed to have a little wobble to it. So he decided to find TDC and the the balancer mark was no where near zero. He set the timing by ear and the car ran great.
So there you have it. The ring on my balancer must be loose and has spun out of TDC. God only knows how long I've been running with the timing off thinking if was set. So I got a new balancer from Speedway
Here is the new balancer. Not an exact reproduction unit, but all the major dimensions are the same.
Here they are on top of each other with the key-ways matched and you can see that the timing marks do not match. So I installed it and knock on wood, it is running better than I have ever had it.
So, this is one to remember, check TDC when timing!