
How to get to gauge lights


Moderator
Joined: Jun 2006
Posts: 514
You have to go in from the back of the dash. So if you have extra joints in your arm... and your hand is very small... it will be a piece of cake! To pull the pods out you would still need to go in from the back and remove two small screws. Somewhere I've got a picture of the back side of a 1968-69 dash. If I can come up with it I'll post it so you can see what it looks like back there. John
GM Enthusiast
Joined: Jan 2007
Posts: 3,982
From: Long Island, New York
Seat all the way back, tilt wheel, if equipped, all the way up, remove the air vent tube below the dash to gain access. You should be able to see the back of the gauge, turn the bulb holder counterclockwise and it should come out pretty easy. Hope that helps.

Registered User
Joined: May 2009
Posts: 2,212
From: USA
Here's my .02
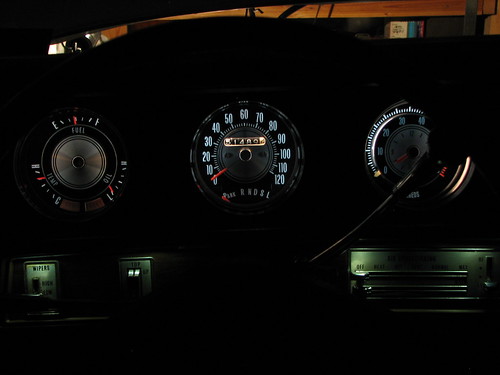
I just put 194 SMT LED's in there to IMPROVE the illumination.
Either www.superbrightleds.com or Ebay for $2 a pop.
Regular incandescents just didn't work for me anymore.
One of the members here did an excellent write up on removing your gauges,
cleaning them, and restoring the reflective paint in them. The end result was
unbelievable with minimal wallet bleeding.
Here it is. https://classicoldsmobile.com/forums...rally-pac.html
I still want to do this myself to get EVEN MORE improvement.
Her end result is just amazing.
Last edited by Aceshigh; Jan 10, 2011 at 08:24 PM.
Moderator
Joined: Jun 2006
Posts: 514
Here's a couple pictures of the back of the gauges. This has the speedo head removed. But to take out a pod you have to remove the two small screws at about 4:00 and 8:00 O'clock. I believe the bulbs take about a quarter turn to remove, so if you can reach them it would be best to try and change them without removing the pods. In the top picture you can see one blue, two black and three grey round pieces, these are the back of the blub sockets. John
P1010193.jpg
P1010192.jpg
P1010193.jpg
P1010192.jpg
Registered User
Joined: May 2009
Posts: 2,212
From: USA
Same socket style bulbs, but they have different watt ratings.
161, 168, 194 - Clocks have a different bulb in them.
194_Bulb.jpg&t=1
161, 168, 194 - Clocks have a different bulb in them.
194_Bulb.jpg&t=1
Last edited by Aceshigh; Jan 11, 2011 at 04:35 AM.

Registered Loser
Joined: Mar 2010
Posts: 132
Light blue sockets carry the 168 (3cp)
Gray sockets carry the 194 (2cp)
Black sockets carry the 161 (1cp)
Be careful with those lt.blue sockets as they easily crumble into nothingness due to the heat generated by the 168 bulb.
Gray sockets carry the 194 (2cp)
Black sockets carry the 161 (1cp)
Be careful with those lt.blue sockets as they easily crumble into nothingness due to the heat generated by the 168 bulb.
Registered User
Joined: Feb 2008
Posts: 11,798
From: Plano, TX
One of the members here did an excellent write up on removing your gauges,
cleaning them, and restoring the reflective paint in them. The end result was
unbelievable with minimal wallet bleeding.
Here it is. https://classicoldsmobile.com/forums...rally-pac.html
I still want to do this myself to get EVEN MORE improvement.
Her end result is just amazing.
cleaning them, and restoring the reflective paint in them. The end result was
unbelievable with minimal wallet bleeding.
Here it is. https://classicoldsmobile.com/forums...rally-pac.html
I still want to do this myself to get EVEN MORE improvement.
Her end result is just amazing.
If the disassembly and repainting is too much work, then the higher brightness LED lights may be just the trick.
Typically i like the brighter 168 bulbs in locations that need to be seen during the day, like the idiot lights and turn signal arrows. If you restore the reflective paint, 194's will usually be sufficient. However, consult the owner's or service manual for the right bulb.
Clocks use the 1445 during that year I think...

Thread
Thread Starter
Forum
Replies
Last Post


