When you click on links to various merchants on this site and make a purchase, this can result in this site earning a commission. Affiliate programs and affiliations include, but are not limited to, the eBay Partner Network.
All,
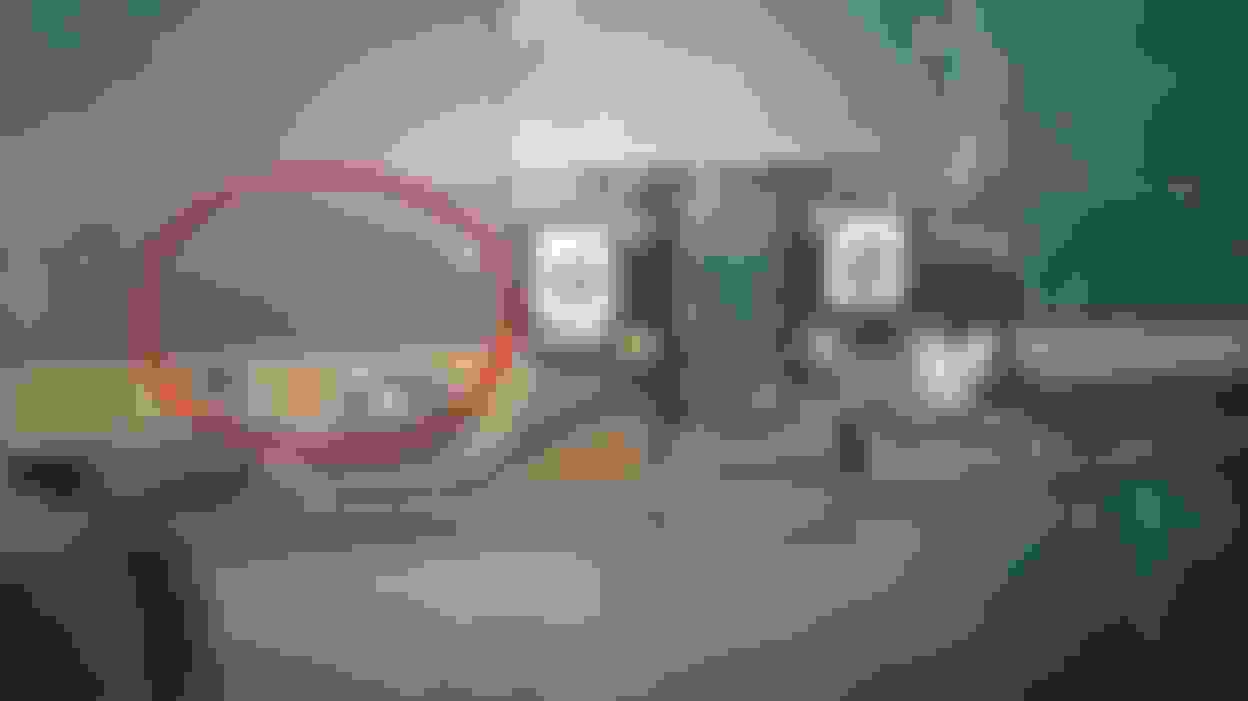
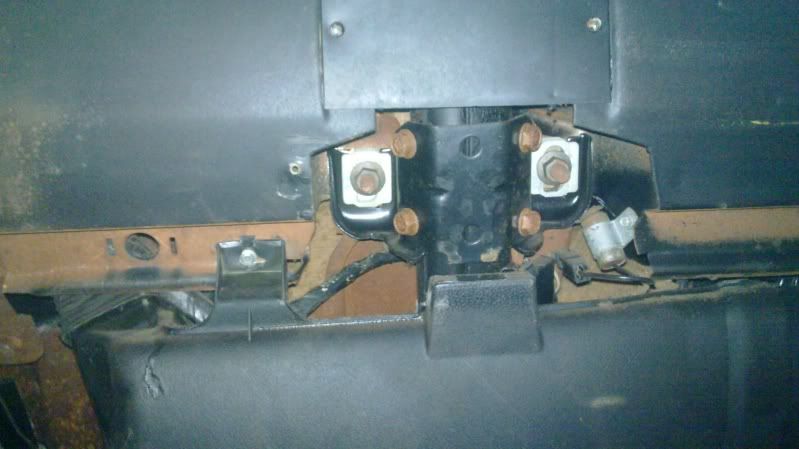
Above is a picture of the underside of my dash. Do I have to take off that ductwork to get my arm up behind the dash and locate that flasher? Or do I just reach my arm up next to the left hand side of the steering column and try to feel around for it?
I have no idea where that damn flasher and that is the last thing I need to fix to get my Cutlass back on the road. Arrrrggggghhh it's always the seemingly 'easy' stuff that gets you
It should be right above the left side by the hole with 2 slots next to it in the pics , look all around that area . There is enough slack in my harness to get the flasher just below the dash , you may be missing the flasher so just look for a plug to. also you will have a flasher in your fuse box , One is for hazards and one is for signals. I would just take out the couple of screws in the duct to make it alot easier to find
It should be right above the left side by the hole with 2 slots next to it in the pics , look all around that area . There is enough slack in my harness to get the flasher just below the dash , you may be missing the flasher so just look for a plug to. also you will have a flasher in your fuse box , One is for hazards and one is for signals. I would just take out the couple of screws in the duct to make it alot easier to find
X2 - It should be up in there.
Not sure why they made it so hard to find and get to.
It should be right above the left side by the hole with 2 slots next to it in the pics , look all around that area . There is enough slack in my harness to get the flasher just below the dash , you may be missing the flasher so just look for a plug to. also you will have a flasher in your fuse box , One is for hazards and one is for signals. I would just take out the couple of screws in the duct to make it alot easier to find
Thank you Sirrrr! That is exactly the type of help I need lol. Sounds like you have done this before :-) I had to hold my arm almost up under the front seat to get this pic. I was outside in my driveway after dark with a flashlight trying to find that darned flasher. Hopefully Ill have better luck today. Least now I have a better idea of where to look at. Thanks again,
paul
P.S. If anyone else has any helpful hints feel free to share.
All,
Above is a picture of the underside of my dash. Do I have to take off that ductwork to get my arm up behind the dash and locate that flasher? Or do I just reach my arm up next to the left hand side of the steering column and try to feel around for it?
I have no idea where that damn flasher and that is the last thing I need to fix to get my Cutlass back on the road. Arrrrggggghhh it's always the seemingly 'easy' stuff that gets you
paul
*frustrated in Falls Church*
All, I found this picture in another thread on this forum. I see there appears to be a bulb in that hole that has the 2 slots next to it. Is my car supposed to have a bulb in there as well? Just wondering... paul
All, I found this picture in another thread on this forum. I see there appears to be a bulb in that hole that has the 2 slots next to it. Is my car supposed to have a bulb in there as well? Just wondering... paul
The flasher is further up under the dash in that location, closer to the steery column. You will need to crawl up in there to look. They tried to hide it...
You got those courtesy lights only if your car came with the "lamps and mirrors" package.
The flasher is further up under the dash in that location, closer to the steery column. You will need to crawl up in there to look. They tried to hide it...
You got those courtesy lights only if your car came with the "lamps and mirrors" package.
Dangit. It would be cool if I had more lights on the floor. I already got my sport mirrors, just tackling other things first
All,
Thanks. I found it. Right in the area where that hole with the 2 slots are. Nice diagram BlueVista, luckily I didn't have to go that route :-)
And once I replaced the flasher the turn signals were working fine. Now I just gotta put the headlight assemblies back together. At least I can drive her to work now though
Dangit. It would be cool if I had more lights on the floor. I already got my sport mirrors, just tackling other things first
While you are twisted up under the dash replacing the flasher, look for some empty connectors with orange and white wires. If you see any nearby, you could add your own light sockets fairly easily.
Often the wire harness includes those if you have lights or not. I do not remember how those are wired, but my 86 actually had the sockets there, just no bulbs!
I have a1970 W31 and cannot find my flasher! I have removed the gauges and steering clamp. There is no flasher in sight! Took the seat out and got way up under the dash and STILL cannot find a flasher!
I have a1970 W31 and cannot find my flasher! I have removed the gauges and steering clamp. There is no flasher in sight! Took the seat out and got way up under the dash and STILL cannot find a flasher!
It's outboard of the steering column, above the parking brake.
The flasher clip/bracket is secured to the metal dash outboard (towards the LH side) of the steering column as Joe described. The flasher simply inserts (is secured) into the top of the clip/bracket. Often times folks will not insert a replacement flasher into the clip/bracket because they find it frustrating to get the flasher into the clip/bracket & instead just leave the flasher dangling.
NOTE: It is FAR, FAR much easier to visualize the flasher location using a flashlight and a mirror. Once you locate the flasher (with a mirror & flashlight) you simply need to reach up with you hand and remove the flasher. Again, mirror & flashlight in hand makes this FAR much easier to visualize.
Last edited by Vintage Chief; Oct 1, 2023 at 03:18 PM.
Sorry guys. I really appreciate the help but it's simply not there! I have the gauges out of the dash as well as duct work. I've used mirrors and lights but have found nothing. I've went up both sides of the steering column to the bottom side of the metal dash. I have traced wires all the way to the light switch ands above. I have worked my way back from the door light switch to the steering column. I have found only a broken blue wire (which should have something to do with the heater?) and a red wire which should plug into the cig lighter. If I ever find it, I will let you know. The car was restored by Thortons. Thanx again!
Well, if the flasher is missing, that's why the turn signals don't work. Look for a two wire connector with one purple and one green with white stripe. That's where the flasher plugs in. The pigtail should be above the lower metal dash panel in this general area.
I FOUND IT! The 2 wire connector had been removed and a pair of black wires connected to them. The flasher was underneath the insulation on the firewall. Now I get to replace the insulation. Thanx for all the help!
I have found only a broken blue wire (which should have something to do with the heater?) and a red wire which should plug into the cig lighter. If I ever find it, I will let you know. The car was restored by Thortons. Thanx again!
Rather than guess what color wire connects to a device or has something to do with anything, you should own a original 1971 OEM GM Oldsmobile Chassis Service Manual (CSM) which contains all of the wiring diagrams and includes a full color version for you car. Owning the CSM is an absolute must. Purchase a used paperback edition as many paperback copies lack detail and do not contain a "color" wiring diagram. CD/DVD editions aren't any better - purchase a used original paperback edition - many on eBay.
Until the time you purchase a CSM here is the 1971 A-Body color wiring diagram. NOTE: As Joe illustrated earlier there are two wires for the FLASHER - one solid purple wire and one green double white stripe wire. Additionally, an orange wire feeds the lighter - there are many orange wires and best to consider orange as "always hot". You can either d/l this image of the 1971 A-Body color wiring diagram or find the 1971 A-Body color wiring diagram in the Electrical forum.
I'll mention you noted a "blue" wire in a previous post. There are basically three blue wires in the dash area: Dk Blue, Lt Blue and I guess I'd call it Deep Blue (since it isn't identified on the color wiring diagram). This Deep Blue wire connects the original radio to its speaker(s). You might encounter this wire clipped off, or laying about unused - especially if someone replaced the radio &/or the speaker(s) - in particular the rear speaker if it was equipped w/ a rear speaker.
Go here & d/l this diagram - which is a diagram I uploaded moons ago and has far better detail than the one I posted above. I obviously posted a poor quality diagram above - I have several. Fine tuning images to get good detail is nearly an art.
Got my new wiring diagram but it does not show the connection for the tach. I'd like to know what size fuse in the tach line. I believe there is an AGA 4 amp currently. Is this correct? Thanx
Got my new wiring diagram but it does not show the connection for the tach. I'd like to know what size fuse in the tach line. I believe there is an AGA 4 amp currently. Is this correct? Thanx
And this is why you should have purchased a real Chassis Service Manual and not some third party wiring diagram. The tach and rally pac wiring is covered in Chapter 15, Accessories.
What tach are you referring to? Stock assembly didn't have a tach. You referring to the optional Tic Toc Tak? Wiring for that tach is located in the back section of the CSM as an Accessory. The wiring diagram is located in that section.
You might get lucky (operative term = might) if you perform a search for "tic toc tac" (quote marks included); or "tic-toc-tak" (quotes always included); or anything resembling tic-toc-tac (depending on how someone may have typed it). During performance of such a search, again - you might get lucky and find someone posted the tic toc tack wiring diagram from the CSM. Buy the CSM. Good Luck.



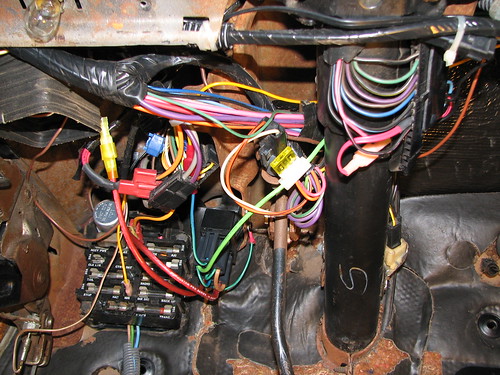 Is my car supposed to have a bulb in there as well? Just wondering... paul

 I go through cases of rattle can black.