
Are these worn out ? UCA bushings

Thread Starter
72 Olds CS
Joined: Jun 2011
Posts: 6,657
Are these worn out ? UCA bushings
Ever since I bought my 72 2 months ago saturdays have been work on the cutlass day. Ive made a list of stuff to do to the car and usually my buddy comes over and we knock a couple items off the list and typically add a couple more on too.
well saturday was more HEI distributor advance day (link) ...until my bud came over and said lets do the UCA bushings (groan) Ok so onto the bushings,the drivers side front one looked bad before we started and made a goaning noise too.
So we removed the whole arm for better access to the bushings, put the arm in my vise held by the shaft and started trying to knock the bushings out. We also noted that someone had tried this previously and gave up (maybes thats why I got new in box bushings as a present from the PO when I bought the car LOL)
Anyway they wern't budging. My bud came up w the idea to grab the lip on each bushing w a pipe wrench and twist. Sure enough one started to loosen then the other loosened up too. we got them right out and were able to get the new ones in and seated w no additional issues.
I did read on another thread someone rented apress for these anyone have a link to what that might look like ?
next week we may do the passenger side ball joints and UCA bushings.
heres a couple pics, in the car and the worst one removed next to a new one
Last edited by RetroRanger; Sep 12, 2011 at 09:57 AM.
NOVICE car nut
Joined: Nov 2010
Posts: 3,140
From: Milwaukee Wisconsin
Ever since I bought my 72 2 months ago saturdays have been work on the cutlass day. Ive made a list of stuff to do to the car and usually my buddy comes over and we knock a couple items off the list and typically add a couple more on too.
well saturday was more HEI distributor advance day (link) ...until my bud came over and said lets do the UCA bushings (groan) Ok so onto the bushings,the drivers side front one looked bad before we started and made a goaning noise too.
So we removed the whole arm for better access to the bushings, put the arm in my vise held by the shaft and started trying to knock the bushings out. We also noted that someone had tried this previously and gave up (maybes thats why I got new in box bushings as a present from the PO when I bought the car LOL)
Anyway they wern't budging. My bud came up w the idea to grab the lip on each bushing w a pipe wrench and twist. Sure enough one started to loosen then the other loosened up too. we got them right out and were able to get the new ones in and seated w no additional issues.
I did read on another thread someone rented apress for these anyone have a link to what that might look like ?
next week we may do the passenger side ball joints and UCA bushings.
heres a couple pics, in the car and the worst one removed next to a new one
well saturday was more HEI distributor advance day (link) ...until my bud came over and said lets do the UCA bushings (groan) Ok so onto the bushings,the drivers side front one looked bad before we started and made a goaning noise too.
So we removed the whole arm for better access to the bushings, put the arm in my vise held by the shaft and started trying to knock the bushings out. We also noted that someone had tried this previously and gave up (maybes thats why I got new in box bushings as a present from the PO when I bought the car LOL)
Anyway they wern't budging. My bud came up w the idea to grab the lip on each bushing w a pipe wrench and twist. Sure enough one started to loosen then the other loosened up too. we got them right out and were able to get the new ones in and seated w no additional issues.
I did read on another thread someone rented apress for these anyone have a link to what that might look like ?
next week we may do the passenger side ball joints and UCA bushings.
heres a couple pics, in the car and the worst one removed next to a new one

Connoisseur d'Junque
Joined: Sep 2010
Posts: 21,183
From: The Hudson Valley


Registered User
Joined: Feb 2008
Posts: 11,798
From: Plano, TX
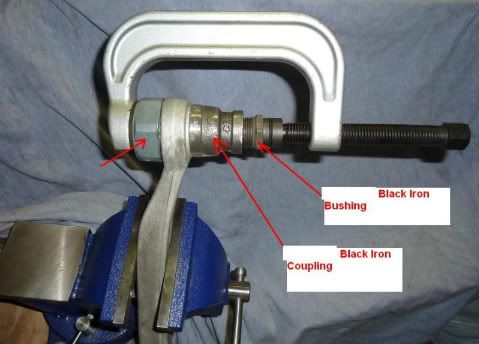
With a little engineering, these are pretty easy to change!
Here is how to remove without that special hard to find tool:
https://classicoldsmobile.com/forums...tml#post291066
Only special item you need is a big regular flat washer.
Here is how to install:
https://classicoldsmobile.com/forums...tml#post295618
Use a loaner ball joint press and some pipe fittings.
Thread Starter
72 Olds CS
Joined: Jun 2011
Posts: 6,657
thanks for the tips, replys and encouragement.
I only did the drivers side, I may do the passenger side (which look better but are still beat ) this weekend, but I needed BJs before I did that (ball joints cmon get your minds outta the gutter)
I was on rockauto and saw they offered two brands of control arm shaft and they both offered additional positive camber. (raybestos and moog) (Moog #k5250)
Is it a good idea to replace the shaft ?
how can I tell if my shaft already has the additional positive camber ?
wait why do i want additional positive camber ?
Registered User
Joined: Feb 2008
Posts: 11,798
From: Plano, TX
Look at the end of the shaft to see of the threaded studs are offset fromt he center of the shaft itself. Apparently, the frames of these cars sag over many miles and these offset shafts help reduce the amount of shims needed to align it right.
Change out the upper contol arm shaft bolts, too (the ones withthe splines that press into the frame. They are high stress points and they can break without warning, dropping your front wheel. Been there done that.
Change out the upper contol arm shaft bolts, too (the ones withthe splines that press into the frame. They are high stress points and they can break without warning, dropping your front wheel. Been there done that.
Just an Olds Guy
Joined: Jul 2008
Posts: 24,528
From: Edmonton, AB. And "I am Can 'eh' jun - eh"
Rob talked me into doing mine (work in progress right now) but I'm glad he did. the CA bushings were not in good shape for uppers or lowers. You just can't see some of the damage from the surface. When you go to do the left side, here's a link that will give you a good idea how to get it done with least amount of effort and protect the steering shaft: https://classicoldsmobile.com/forums...g-plate-3.html .
I'm also doing pretty much what Rob did with the exception that I took off the UCA's before removing the steering shaft. Since you have no reason to remove the steering shaft, permalink 93 of the thread I posted will help you a lot. BTW, I used a piece of 2X4 between the wedge and pry.
Last edited by Allan R; Sep 15, 2011 at 02:21 PM.
Ben
Joined: Mar 2009
Posts: 1,851
From: Snohomish, WA
I went ahead and bought the "special" UCA tool before i started the front end build for my friend here recently.
It was $65 w/ free shipping from amazon.
I like having tools.
If you have a factory chassis manual, at the end of the suspension section, and throughout- they have a list of all the specialized tools they used. You can use your imagination and some trips to the HW store to create most of those specialized tools w/o too much effort.
I also recently bought one of the balljoint popper tools. Works like magjic without having to use the pickle fork.
Just an Olds Guy
Joined: Jul 2008
Posts: 24,528
From: Edmonton, AB. And "I am Can 'eh' jun - eh"
. Seriously I'll just use the pickle fork because I don't care if the ball joint attaching the center link to the pitman is damaged. I'm replacing the entire steering linkages.
Registered User
Joined: Feb 2008
Posts: 11,798
From: Plano, TX
Thread Starter
72 Olds CS
Joined: Jun 2011
Posts: 6,657
Look at the end of the shaft to see of the threaded studs are offset fromt he center of the shaft itself. Apparently, the frames of these cars sag over many miles and these offset shafts help reduce the amount of shims needed to align it right.
Change out the upper contol arm shaft bolts, too (the ones withthe splines that press into the frame. They are high stress points and they can break without warning, dropping your front wheel. Been there done that.
Change out the upper contol arm shaft bolts, too (the ones withthe splines that press into the frame. They are high stress points and they can break without warning, dropping your front wheel. Been there done that.
You should find that the DS is going to be the one with the most offset. The CSM states the DS should have 1/2� more positive than the right side. Ref: pg3-6.
Listen to what master Kenobi is saying here. While the bolts I took out 'look' ok they are 39 years old and have 120000 miles on them. That's a lot of action on the suspension. Doing these bushings is sooo much fun. I just got back from the hardware store with the washers, so I'm off to cut them in a few minutes. Saw your thread and thought I'd add to the list of supporters as you do this. The bolts Rob mentioned are shown in permalink 83. I ended up buying from In Line Tube. They cost 6.00 each. AMK won't process an order below 30.00.
Rob talked me into doing mine (work in progress right now) but I'm glad he did. the CA bushings were not in good shape for uppers or lowers. You just can't see some of the damage from the surface. When you go to do the left side, here's a link that will give you a good idea how to get it done with least amount of effort and protect the steering shaft: https://classicoldsmobile.com/forums...g-plate-3.html .
I'm also doing pretty much what Rob did with the exception that I took off the UCA's before removing the steering shaft. Since you have no reason to remove the steering shaft, permalink 93 of the thread I posted will help you a lot. BTW, I used a piece of 2X4 between the wedge and pry.
yeah I saw Robs thread where he broke the UCA shaft bolt while on a date (Ill go ahead and assume your dates weight had nothing to do with the failure
") )....I was concerned about that too because my bolts dont appear to be the original type. I googled the GM # from the thread in your link and found corvette central (thru amazon) sells the 4 bolts w nuts for ~$18 shipped. then I went to ILT and saw the upper and lower bumpers and a few other parts too.
)....I was concerned about that too because my bolts dont appear to be the original type. I googled the GM # from the thread in your link and found corvette central (thru amazon) sells the 4 bolts w nuts for ~$18 shipped. then I went to ILT and saw the upper and lower bumpers and a few other parts too.So I have ball joints and shaft bolts on the way Im gonna get the bumpers and LCA bushings and Ill do those too likely over the winter. My UCA bushings were really beat so I gotta get thsoe done now
I gotta admit between Allan and Rob its hard to stop fixing stuff its always on more thing LOL you guys should get commisions for all the parts replacements you promote

On the offset UCA good info I dont think I need that (yet). I saw in allans referenced thread he had about 2x as many shims as I have in mine. My passenger side UCA only has 1 thick 1 thin in the rear and 1 thin in the front... the drvrs side is 3 thick 1 thin in the rear and 2 thick 1 thin in the front.
any idea how much in degrees a thick or thin shim is equivelant to ???
Last edited by RetroRanger; Sep 16, 2011 at 04:41 AM.
Just an Olds Guy
Joined: Jul 2008
Posts: 24,528
From: Edmonton, AB. And "I am Can 'eh' jun - eh"
I googled the GM # from the thread in your link and found corvette central (thru amazon) sells the 4 bolts w nuts for ~$18 shipped. then I went to ILT and saw the upper and lower bumpers and a few other parts too.
Good deal. I got my brake booster from them. Great price, even on shipping to Canada
So I have ball joints and shaft bolts on the way Im gonna get the bumpers and LCA bushings and Ill do those too likely over the winter. My UCA bushings were really beat so I gotta get thsoe done now
Get on it, they are so much fun....welcome to the dark side.....While you're at it, you might as well pull the inner liners, clean them and install new rubber flaps, replace your stab links and front bushings, clean the frame, pull the whole brake package and clean it, redo your cooling system, upgrade your steering..... see how easy this is?
On the offset UCA good info I dont think I need that (yet). I saw in allans referenced thread he had about 2x as many shims as I have in mine. My passenger side UCA only has 1 thick 1 thin in the rear and 1 thin in the front... the drvrs side is 3 thick 1 thin in the rear and 2 thick 1 thin in the front.
Each car will have it's own shim pack based on the type of suspension and age (wear/tear). It is rare to have a consitent shim pack in these old cars. When my rebuild goes in, the shims will only be temporary to get to an alignment shop. The castor and camber will have changed and requires new shimming.
any idea how much in degrees a thick or thin shim is equivelant to ???
When you add or take away shims from both the UCA bolts it affects CAMBER. The shim thickness affects this by the following degrees
.030" thick - 3/16�
.060" thick - 3/8�
.120" thick - 3/4�
When you add or take away shims from the FRONT bolt only, it will affect CASTER similarly by the following:
.030" thick - 1/4�
.060" thick - 1/2�
.120" thick - 1.0�
Good deal. I got my brake booster from them. Great price, even on shipping to Canada
So I have ball joints and shaft bolts on the way Im gonna get the bumpers and LCA bushings and Ill do those too likely over the winter. My UCA bushings were really beat so I gotta get thsoe done now
Get on it, they are so much fun....welcome to the dark side.....While you're at it, you might as well pull the inner liners, clean them and install new rubber flaps, replace your stab links and front bushings, clean the frame, pull the whole brake package and clean it, redo your cooling system, upgrade your steering.....
see how easy this is?On the offset UCA good info I dont think I need that (yet). I saw in allans referenced thread he had about 2x as many shims as I have in mine. My passenger side UCA only has 1 thick 1 thin in the rear and 1 thin in the front... the drvrs side is 3 thick 1 thin in the rear and 2 thick 1 thin in the front.
Each car will have it's own shim pack based on the type of suspension and age (wear/tear). It is rare to have a consitent shim pack in these old cars. When my rebuild goes in, the shims will only be temporary to get to an alignment shop. The castor and camber will have changed and requires new shimming.
any idea how much in degrees a thick or thin shim is equivelant to ???
When you add or take away shims from both the UCA bolts it affects CAMBER. The shim thickness affects this by the following degrees
.030" thick - 3/16�
.060" thick - 3/8�
.120" thick - 3/4�
When you add or take away shims from the FRONT bolt only, it will affect CASTER similarly by the following:
.030" thick - 1/4�
.060" thick - 1/2�
.120" thick - 1.0�
Thread Starter
72 Olds CS
Joined: Jun 2011
Posts: 6,657
"When you add or take away shims from both the UCA bolts it affects CAMBER. The shim thickness affects this by the following degrees
.030" thick - 3/16�
.060" thick - 3/8�
.120" thick - 3/4�
When you add or take away shims from the FRONT bolt only, it will affect CASTER similarly by the following:
.030" thick - 1/4�
.060" thick - 1/2�
.120" thick - 1.0�"
interesting thanks
.030" thick - 3/16�
.060" thick - 3/8�
.120" thick - 3/4�
When you add or take away shims from the FRONT bolt only, it will affect CASTER similarly by the following:
.030" thick - 1/4�
.060" thick - 1/2�
.120" thick - 1.0�"
interesting thanks
Just an Olds Guy
Joined: Jul 2008
Posts: 24,528
From: Edmonton, AB. And "I am Can 'eh' jun - eh"
Yup, Pages 3-6 to 3-9. It's an area I'm working with now on my car. I have the front suspension and steering out and am sort of in the same boat Rob is with his car. Only I'm starting later and am not just painting my engine. I'm pulling it (like everyone told Rob to but he wouldn't) in the spring and both the Trans and engine will be totally overhauled. That's when I might changeout my steering gear and work on the HVAC + some interior details that have been waiting for the last 3 1/2 years

Thread
Thread Starter
Forum
Replies
Last Post
AndyBee
Vintage Oldsmobiles
4
Jul 2, 2011 01:13 AM
ROCKET VAPOR
Chassis/Body/Frame
3
Jun 20, 2011 06:50 PM


