When you click on links to various merchants on this site and make a purchase, this can result in this site earning a commission. Affiliate programs and affiliations include, but are not limited to, the eBay Partner Network.
Been a while, busy couple of weeks. So here we go with the next saga in the disc brake conversion.
Step 1: Install the steering arms, backing plates, and caliper brackets. This was pretty straightforward and everything lined up nicely. I was concerned about the far bolt hitting the sway bar link, but after installing the new inner/outer tie rods with sleeves and testing, it doesn't turn that far.
Step 2: Pack the wheel bearings, and put them in the rotors, install the seal, and put them on the new spindles. Not too bad either, and such a nicer/cleaner look.
Step 3. Put on the calipers. This was a little tricky, as they just went on too tight and didn't want to hammer them on. The issue is the bottom part of the caliper doesn't fit EASILY onto the caliper bracket, there's some finagaling involved. But after carefully assessing the fit, I was able to get them on, and the rotors still spun. Pics are later for this.
Step 4. Start taking off the master cylinder and booster. The master cylinder came off just fine. The booster bolts are just hard enough to get at to make life difficult, and I could only get in there with a wrench. And the bolts/nuts had been painted, which made life even more difficult.
In the bottom of that picture, where the brake lines go down, there's a hollow bar. Nothing runs through it, and I don't see what the purpose of that is. The book doesn't show this either, but it definitely looks stock. Any ideas what that is and
what is there for?
Step 4. Install new booster. Which was easier to install than getting the old one off.
Step 5. Install Master cylinder. I installed the new proportioning valve to the master cylinder before putting it in the car, as it was easier than trying to assemble it in the car. But this thing is HUGE compared to the other one.
Step 6. Install brake lines. I didn't feel comfortable reusing the old brake lines, and new front lines came with the kit. So the first step was to take out the old line splitter at the frame, and I cut the two front brake lines and the rear
line and removed the unit. There were a ton of compression fittings on those anyways.
The drivers side brake line installs really nice, and clears everything. There's a rear brake line which only goes down to the old line splitter, which also fit really nice.
The passenger side line was not so nice. This really isn't a fault of the kit though. In removing the old line, there's brackets that hold the brake line to the crossmember. Those lines are 3/16, and the brackets are made for 3/16 line. The new
line is 1/4, and the brackets don't work. I had some line brackets from a blazer that did work though, but take note that the original brackets won't work with the new line. Also, I have headers on this car. (it came with them, and I've never
been a huge fan of headers on something that doesn't have that much horsepower. It doesn't help anything, and they get in the way.) Routing the line, starting at the passenger side involved reconfiguring the line with a line bender to clear the
headers, and reconfiguring the line on the other side as well to clear the header. Like I mentioned, it's not a fault of the kit, but something else to be aware of.
Step 7. Make a rear brake line. I made the rear brake line from the union of the rear coming down to the master cylinder to the rear axle. I know you can buy pre bent lines, but it's so hard to get those in. I started at the rear axle, and worked my way forward. The rear line was 1/4 already, and I used 1/4 replacement line so the original brackets worked. But that one above the axle is a bear to get to.
Step 8. Bleed everything and check for leaks. First, I just opened everything up, put some brake fluid in and let it gravity bleed til fluid started coming out of the rears and fronts. Then with the help of my trusty female sidekick, who was absolutely thrilled to help ( sarcasm, much sarcasm ), I worked my way around, found leaks, tightened those up and bled everything.
I had a couple other things to do, like grease everything, install the sway bar bushing, sway bar links, and I also had to finish putting in the radiator fan shroud. When I did take it for a spin, the brakes were super mushy, then really hard and didn't really grab until the end of the brake pedal travel. I went through and bled everything again, including the bleeders on the master cylinder and noticed I wasn't getting a lot of fluid out the rear wheel cylinders. I checked the union, and had a big leak there. After tightening that up, and re-bleeding the rears, It was getting a lot more fluid. Took it for another spin, and it stops really well. The pedal is a little soft in the beginning, but then feels more solid. I'm going to go through and check everything for leaks, and bleed one more time, but it stops now, which is better than what it did before.
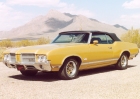
There's a lot more to do to this thing. The alternator isn't alting, (or the gauge isn't working), the exhaust needs to be addressed, there's a leak somewhere in the transmission, the turn signals don't work, the wiring in the engine bay looks like spaghetti, and a lot of interior work to do, but I have a running, driving, stopping car now. I'm pretty happy. The stance is better now too. I just need to get some stock olds rims. Not a big fan of the 18's on there.
Thanks for reading this, and if anyone has any suggestions, or comments, let me know!
In the bottom of that picture, where the brake lines go down, there's a hollow bar. Nothing runs through it, and I don't see what the purpose of that is. The book doesn't show this either, but it definitely looks stock. Any ideas what that is and
what is there for?
My guess is it's the tube for routing the positive battery cable to the starter.