455 engine swap
 June 24th, 2008, 05:47 PM
#41
Junior Member
Join Date: Oct 2004
Location: Southern CA
Posts: 2,212
Thanks. It's the combination, not the engine, as I've gone slower with more power.
Previous owner gets the credit. Except for the wheels/tires/roll bar, it looks like it did when I bought it.

Single pattern (another rookie mistake) cam.

Dynomax bullets. Tested under 95db, at Pomona.
Thanks.
Norm
Previous owner gets the credit. Except for the wheels/tires/roll bar, it looks like it did when I bought it.
Single pattern (another rookie mistake) cam.
Dynomax bullets. Tested under 95db, at Pomona.
Thanks.
Norm
 June 25th, 2008, 05:34 AM
#42
Past Administrator
Join Date: May 2004
Location: Rural Waxahachie Texas
Posts: 10,068
Thanks, going to check into those bullets, and that 108 degree lobe center is interesting. I know it is usually an error to make generalizations but I heard a generalization that 455's liked a wider center, around 110 degrees. But that probably really depends upon the rest of the build too I imagine.
June 25th, 2008, 02:59 PM
#43
Registered User
Thread Starter
Join Date: Nov 2007
Location: Rathdrum, Idano
Posts: 9,127
I would have used the short shaft T-400. That way you have less clearence problems with the U-joint and the X-frame.
I used an Uni-versal engine mount from JC Whitney and used the stock motor mounts for and 64 to 67 Cutlass. V8
I also used the water pump from a 64 Cutlass V8. It is 64 only and the outlet is on the other side compared to the pump you have now. That way I used the stock radiator.
You need to take some measurements and make sure the big block will clear your power sterring with those exhaust manifolds.
I also used the alternator brackets from a non air car. Which put the alternator on the other side and gives more clearence and sits lower and looks better.
All this is on my '50 coupe. The set up is most identical to your '57.
Thanks for the info. The engine exhaust manifold clears the power steering, it's tight but i don't see where there will be a problem. I did have to modify the passanger side air box to get clearence in that area. the X frame will work out ok. I agree it would have been easier with a short shaft but the price was right on the tranny. I had to do a modification on the front generic motor mount kit because of the way the frame rails narrow in at the front of the engine but got that worked out on Saturday. I will have the engine set in place when I finish up the rear trans mount on Saturday and start on the exhaust which will be a challange. I will post pictures this weekend
Gene....
June 25th, 2008, 06:25 PM
#44
Junior Member
Join Date: Oct 2004
Location: Southern CA
Posts: 2,212
It's the number that's left over after the intake/exhaust events have been calculated for a specific use. Thanks to the internet, its importance has been greatly exaggerated.
Only if they are not accurate.
Problem is: To identify the few that are factual vs the many that range from slight exaggeration, to pure BS.
More than, a slight exaggeration.
LCA in my third 455 (468, semi radical, street engine) was 106� and it did just fine.
Norm
Problem is: To identify the few that are factual vs the many that range from slight exaggeration, to pure BS.
LCA in my third 455 (468, semi radical, street engine) was 106� and it did just fine.
Norm
June 27th, 2008, 02:12 PM
#45
Registered User
Thread Starter
Join Date: Nov 2007
Location: Rathdrum, Idano
Posts: 9,127
455 engine swap
Ok guys, a new question has come up. I received an e-mail from an interested party who was concerned about my motor mount locations. Because of the steering box location in my 57 I had to use the front side motor mount locations and the tailshaft mounting location on the transmission for the rear mount. His comment was using the front side motor mount location would put to much stress on the transmission bell housing and because of the distance between the two mounting points would cause it to break. He commented that I should be using the center side or rear side mounts on the engine to elminate this problem which I cannot do unless I make major modifications to the steering and power brakes. Any thought oh this would be appreciated
Thanks
Thanks
June 27th, 2008, 03:35 PM
#47
Old(s) Fart
Join Date: Mar 2007
Location: Northern VA
Posts: 47,693
The concern is that these older cars used front mounts on the engine and rear mounts on the bellhousing, not all the way at the tailhousing of the trans.
June 27th, 2008, 04:48 PM
#48
Registered User
Thread Starter
Join Date: Nov 2007
Location: Rathdrum, Idano
Posts: 9,127
Clarification: I am using the side mounts. In looking at the side of the engine there apears to be 3 alternate mounting locations. location #1 is below the front cylinder, #2 is center to the enginem and number 3 is towards the back of the engine. I am using location #1 because of the steering box
June 28th, 2008, 12:37 AM
#49
Junior Member
Join Date: Oct 2004
Location: Southern CA
Posts: 2,212
Defeats the whole purpose of this forum.
OK, we can see why he chose to contact you privately.
According to his calculations, what is the weight difference, at that point?
The mounts use two bolts, and there are three holes, leaving only two positions, front and rear.
Which positions were used in the donor car? Which positions were used in the A, B, and C bodies? Any of them use the front?
You have one person (who does not have the stones to post it in public) sending you a "private" message, telling you about a "problem" that no one else is aware of.
Two reasons to believe you heard it from a BS artist.
Norm
According to his calculations, what is the weight difference, at that point?
Which positions were used in the donor car? Which positions were used in the A, B, and C bodies? Any of them use the front?
You have one person (who does not have the stones to post it in public) sending you a "private" message, telling you about a "problem" that no one else is aware of.
Two reasons to believe you heard it from a BS artist.
Norm
June 28th, 2008, 12:49 AM
#50
Junior Member
Join Date: Oct 2004
Location: Southern CA
Posts: 2,212
June 28th, 2008, 06:33 AM
#51
Registered User
Thread Starter
Join Date: Nov 2007
Location: Rathdrum, Idano
Posts: 9,127
I am going to continue on with my build using the front mount. I see now other choice other then modifying the whole front clip whic I am not inclinded to do at this point.
 June 30th, 2008, 12:03 PM
#52
Registered User
Thread Starter
Join Date: Nov 2007
Location: Rathdrum, Idano
Posts: 9,127
Update on the engine swap. I have all of the motor mounts built and the modifications to the right side heater air box is complete. I need to pick up some 1" alimimum stock to raise the rear transmission mount so every thing is square to the rear end, notch the x member by and inch on either side then the engine and tranny will be set in place. I should have my radiator back from the shop with the inlets and outlets installed this week. Then i will measure the driveline and have it built, after that its the little things hoses, vacuum lines, tranny lines, wiring. Been 20 years since I built my last rod, Guess I forgot how much work was involved. This 62 year old body doesn't work as well as my 30 year old mind, everthing is heaver then it used to be and crawing around on a creeper takes longer then it used to. I will post more pictures later this week.
July 4th, 2008, 03:37 PM
#53
Registered User
Thread Starter
Join Date: Nov 2007
Location: Rathdrum, Idano
Posts: 9,127
455 engine swap
New question,
I need to gather up the parts for my exhaust. I have installed the W & Z manifolds on my 455 engine as they best clear the steering box on my 57. They require 2-bolt flanges on the exhaust pipe and it look like they might require flanges and donuts on the exhaust pipe. Am I correct on this? I would like to run 2.5" exhaust as this is the largest that will fit through my frame rails. will I have to adapt to a smaller size at the flange or do the make a pipe flange that accepts the 2.5" pipe.
Thanks
Pat
July 5th, 2008, 05:51 PM
#55
Registered User

Join Date: May 2008
Location: vermont
Posts: 43
exhaust
speaking of the 55 gallon drum exhaust. up here exhaust rots very fast, on my 70, i ran 2.5" sprinkler pipes from the tranny back.......it sucked bending and setting it up, but its over seven yrs old and the only abuse is on the tips where i keep grinding the bottoms of goin to fast over speed bumps
July 9th, 2008, 02:37 PM
#56
Registered User
Thread Starter
Join Date: Nov 2007
Location: Rathdrum, Idano
Posts: 9,127
Update,
The engine and transmission are installed, motor mounts are complete, I am just about done with the shift linkage to the existing column shifter. I will have to figure out how to re-arange the symbols on the clear plastic because of the change sequence. I pick up my drive shaft and radiator tomorrow and will install them this weekend. Next is the throttle issue, having the heater airbox in the way is a pain, haven't figured this one out yet, any suggestions. Still have to make the transmission cooling lines, all of the electrical, and the exhaust. Getting closer to turning the key. Can't wait I hear it. I have included a couple of pictures. I know you see the rust on the door panel and fender panel, That it the next project after the engine swap.
The engine and transmission are installed, motor mounts are complete, I am just about done with the shift linkage to the existing column shifter. I will have to figure out how to re-arange the symbols on the clear plastic because of the change sequence. I pick up my drive shaft and radiator tomorrow and will install them this weekend. Next is the throttle issue, having the heater airbox in the way is a pain, haven't figured this one out yet, any suggestions. Still have to make the transmission cooling lines, all of the electrical, and the exhaust. Getting closer to turning the key. Can't wait I hear it. I have included a couple of pictures. I know you see the rust on the door panel and fender panel, That it the next project after the engine swap.
July 9th, 2008, 04:45 PM
#57
Moderator
Join Date: Jul 2007
Location: Edmond, OK
Posts: 16,167
AWSOME! I believe you can get clear plastic indicators for the shift pattern from suppliers like B&M, TransGo, or Speedway. I might be wrong, but I swear I have seen them before.
Also, for the throttle you might consider a cable throttle from Speedway that mounts under the accelerator pedal. Oldsguy bought one for his 46. It is a cable that moves inside of a metal sheath. You can run the cable through the fire wall and mount it next to the carburetor. I believe he got it from Speedway.
I believe you can get clear plastic indicators for the shift pattern from suppliers like B&M, TransGo, or Speedway. I might be wrong, but I swear I have seen them before.Also, for the throttle you might consider a cable throttle from Speedway that mounts under the accelerator pedal. Oldsguy bought one for his 46. It is a cable that moves inside of a metal sheath. You can run the cable through the fire wall and mount it next to the carburetor. I believe he got it from Speedway.
July 9th, 2008, 05:12 PM
#58
Registered User

Join Date: Jan 2007
Location: Gladstone, OR
Posts: 490
I'll second that "Awesome!" I recall a fellow on a forum, maybe here, stating that he used 'self-adhesive' clear printer stock and an inkjet printer to create his new shift pattern indicator. He said he had to play with the fonts and spacing til he got the pattern he wanted. He cut a new Plexiglas insert & laid it over the trial printouts, on white paper, til he got it right. Then printed it on SA clear, stuck it on the plexiglas and trimmed the edges. Just a suggestion. The fellow posted a picture and it looked pretty good.
Don
Don
July 9th, 2008, 06:13 PM
#59
Registered User
Thread Starter
Join Date: Nov 2007
Location: Rathdrum, Idano
Posts: 9,127
AWSOME! I believe you can get clear plastic indicators for the shift pattern from suppliers like B&M, TransGo, or Speedway. I might be wrong, but I swear I have seen them before.
I believe you can get clear plastic indicators for the shift pattern from suppliers like B&M, TransGo, or Speedway. I might be wrong, but I swear I have seen them before.
Also, for the throttle you might consider a cable throttle from Speedway that mounts under the accelerator pedal. Oldsguy bought one for his 46. It is a cable that moves inside of a metal sheath. You can run the cable through the fire wall and mount it next to the carburetor. I believe he got it from Speedway.
July 9th, 2008, 06:14 PM
#60
Registered User
Thread Starter
Join Date: Nov 2007
Location: Rathdrum, Idano
Posts: 9,127
I'll second that "Awesome!" I recall a fellow on a forum, maybe here, stating that he used 'self-adhesive' clear printer stock and an inkjet printer to create his new shift pattern indicator. He said he had to play with the fonts and spacing til he got the pattern he wanted. He cut a new Plexiglas insert & laid it over the trial printouts, on white paper, til he got it right.
Don
Then printed it on SA clear, stuck it on the plexiglas and trimmed the edges. Just a suggestion. The fellow posted a picture and it looked pretty good.
Thanks
July 9th, 2008, 09:13 PM
#61
Registered User

Join Date: Sep 2006
Posts: 1,142
 July 10th, 2008, 07:22 AM
#62
Registered User
Thread Starter
Join Date: Nov 2007
Location: Rathdrum, Idano
Posts: 9,127
59-59-59,
I'll try your idea on the throttle issue My intent was to move up to a more modern cable and gas pedal assembly so I could use a stock electric kickdown switch for the turbo 400. I had to notch and patch the air box on the passenger side to clear the Aluminum head. Clearence is now about one inch. I had to file a 1/4" notch in the aluminum head in order to use a mech water pump. Not enough to cut into the water jacket. Unlike the problem that occured with the Aluminum heads on a 350 in another posted thread")
Pat
I'll try your idea on the throttle issue My intent was to move up to a more modern cable and gas pedal assembly so I could use a stock electric kickdown switch for the turbo 400. I had to notch and patch the air box on the passenger side to clear the Aluminum head. Clearence is now about one inch. I had to file a 1/4" notch in the aluminum head in order to use a mech water pump. Not enough to cut into the water jacket. Unlike the problem that occured with the Aluminum heads on a 350 in another posted thread
Pat
 July 31st, 2008, 11:24 AM
#64
Registered User
Thread Starter
Join Date: Nov 2007
Location: Rathdrum, Idano
Posts: 9,127
455 engine swap
I am working on the small stuff now. Things left to do:
Carb install
throttle linkage
heater hoses
Distributor
sparkplugs and wires
reconnect existing wiring
add new wiring as needed
exhaust system
start car
Drive car
Install grill, front bumper, hood.
Enjoy until I start the body work this winter
Carb install
throttle linkage
heater hoses
Distributor
sparkplugs and wires
reconnect existing wiring
add new wiring as needed
exhaust system
start car
Drive car
Install grill, front bumper, hood.
Enjoy until I start the body work this winter
August 2nd, 2008, 02:41 PM
#65
Registered User
Thread Starter
Join Date: Nov 2007
Location: Rathdrum, Idano
Posts: 9,127
455 engine swap
anybody have a vacuum diagram for my 455 I am installing in my 57 Olds. I have a performer manifold and a 670 CFM double pumper. I understand the vaccum for the power brakes its clearly marked. I have an outlet that is marked full manifold vacuum on the carb. I believe this is where I connect the distributor and also provide a "T" connection for the heater control vacuum. Since I have no requirements for any smog stuff I think my above assumptions are correct. Comment anyone
As always thanks for the help. Almost ready to run
As always thanks for the help. Almost ready to run
August 2nd, 2008, 03:38 PM
#66
Junior Member
Join Date: Oct 2004
Location: Southern CA
Posts: 2,212
 August 10th, 2008, 04:37 PM
#69
Registered User
Thread Starter
Join Date: Nov 2007
Location: Rathdrum, Idano
Posts: 9,127
455 engine swap
I have not been able to put the time in to complete my engine swap due to Illness then laid me up for a while. I started in on it again this last week. All I have left is the coil, spark plug wires, coil, exhaust, and some basic wiring then it will be done. Hope to complete this next week end. Here are a few pictures. I will take some under car shots and post them soon as well. Been 20 years since the last time I did this, had to re-learn a few skills. I will be looking for a 57 wagon as my next projece.
September 7th, 2008, 08:53 AM
#71
Registered User
Thread Starter
Join Date: Nov 2007
Location: Rathdrum, Idano
Posts: 9,127
Will be test running the 455 this week, about time, have some health issues that have slowed me down. Since its been a while since I built a new engine (20 plus years) just wanted to go over some proceedure.
Oil in the oil filter, use a drill and adapter to activate the oil pump and get the oil where is is needed. Hand crank over engine a few times Recheck all oil, water tranny connections and fill levels make usre distributor is set as close as possible. Roller cam, roller, rockers, so I don't think cam break in is an issue. Any other advice?.
Other issue, Whats the best air cleaner to use. I want to duct cool air to the engine. Any ideas.
Thanks for all of the input that has gotten me this far
September 15th, 2008, 07:22 AM
#73
Registered User
Thread Starter
Join Date: Nov 2007
Location: Rathdrum, Idano
Posts: 9,127
Update 455 engine swap.
Yesterday I had all on the mechanical items finished and started on all of the electrical, my son showed up and with his help we finished everything up by noon, put in the fluids and coolent leaked out of the waterpump gasket. The engine builder did missed some silcone at two locations. Had to fixed (pissed me off he'll hear about it today). Had everything ready by 2:30 spun the oil puml (50 lbs pressure) spun the engine. Rehecked everything. Started on the third crank, what a thrill. Will test drive this week and post pictures of the swap along with full engine specs. Thanks for all of the help I have received on this forum. Everyone has been great.
Body, paint carpet, etc next.
Pat
Body, paint carpet, etc next.
Pat
September 21st, 2008, 06:33 AM
#76
Registered User
Thread Starter
Join Date: Nov 2007
Location: Rathdrum, Idano
Posts: 9,127
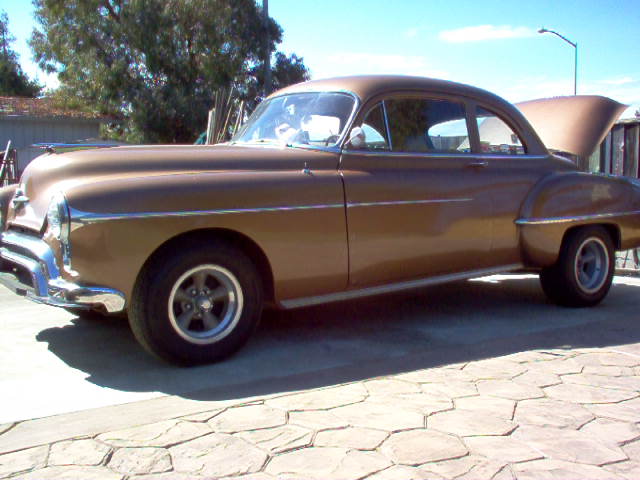
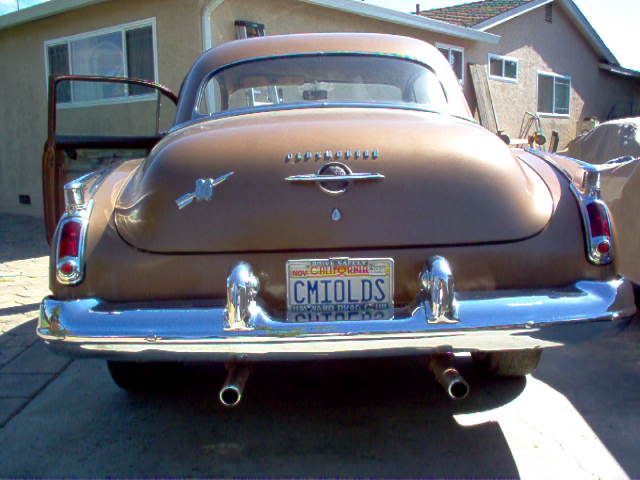
Start Date November 2007 1957 Olds Super 88 2 Door Hardtop with connie kit.
Hi Guys,
THe engine is in and running. All small leaks fixed. Took a long time, I had to revisit and learn some new skills. Learned to Mig-Tig weld along the way (bought a new toy). Jamesbo, I am now going to try to get to a least 1/3 of your skill level. Well enough chatter, Here's how it went. After I got the new engine and tranny together (forgot to put a quart of fluid in the torque convertor). I mocked up the pair in the engine bay (next time I will remove the fenders) to determine the motor mount locations ( I had already purchased a universal cross member) and found what I had purchased would not work because of the steering box location. After some thought and making a cardbord template. I cut the ends off of the universal mount and welded them to a 1/4" steel "L" bracket at an angle with a gusset to brace the "L" after that things started to smooth out. Next came the rear motor mount. I used two 1/4 X 2-1/2" wide flat stock welded. them together and set them ahead of the X-Member. I installed a piece of 1-1/4"H x 2"Wx 1/4" C channel on top of that to get the carb level with car level on jack stands. I then measured the drive line angle and found it to be within tolerence. Measured the drive line and took every thing to NW Drivelines along with my estimated torque numbers and had the driveline built. I then enlarged the cutout at the "X" member to clear the Yoke and the extra width of the driveline. In the meantime I had sent the stock radiator to the shop to have it modified. Moved the upper filler to the center and moved the lower outlet to the passenger side the
of the car, center the tranny cooler outlets, and changed to 3" core. Next were the trans lines. This is were I could take some lessons from Jamesbor, major frustration, Eyeball upside down, come out from underneath bend, damn bent backwards and upside down. I have lots of pre-bent pipe if anyone has a upsidedown and backwards Olds. Finally got the hint. and pre bent soft steel coat hangers for templets. This worked out pretty good. The next challange was the Alternator. After searching the internet for a Non-AC right side alternator mount and not finding one I had resigned myself to deleting the window washer bottle and installing the battery on the right side. I had to make a trip to the You-pull it wrecking yard to get exhaust flanges for the W/Z manifolds, they had just brought in a new load of cars and guess what, a 1965 F-85 with the right side alternator bracket and few other parts I needed, their is a god. Next step Ignition. I then installed at mech oil guage in the engine bay on a "T" so I could monitor the engine pressure while I spun the oil pump, got a solid 50 lbs oil pressure (I had already filled the oil filter) I installed a MSD Ready to run Distributor which I had curved by the engine builder along with Street Blaster Coil and box, and MSD wires. Man what a spark. Set the Street Advenger ready to run 770 CFM carb on top. I had taggged all of wiring harness wiring when I pulled the 371 out so this was my next chore. Most of the wiring was re-usable and long enough, although time consuming it was a fairly simple job and everything worked the first time. I then fabricated the temporary exhaust system (You'll see that in the attached pictures, don't laugh to much). My son stopped by to see how I was doing the next day and stayed the rest of the day to help me finish up. I built the linkage for the carb and installed and wired the kickdown switch, Water temp, Volt meter and tach, while he added all of the fluids and I actually remembered to put the battery on the charger to let it charge to full strength. The engine builder had already set the engine to top dead center and marked it on the flywheel and marker. I adjusted the timing to approx 12 degrees. I the spun the engine by hand with a breaker bare. Installed the sparkplugs, connected the wires. Installed the battery, got behind the wheel had my son prime the Carb. First try, sputter, second try sputter again, third try fired right up. My grin is still on my face, what a thrill, Roller cam, roller rockers, full roller lifters, Still old habits never die let it run at rpm for 20 min. Full synthic oil and tranny fluid. Watched for leaks. Damn the engine builder missed two areas at the water pump with gasket sealer material. Kept pouring water and coolent in the engine (garage a mess) shut down, cuss, remove water pump go to NAPA get new gasket install water pump, no leaks, Still have grin on my face. Here are the pictures of the project. In another installment I will list the things I will be changing and modifying over the winter to (example now that it is in place I can see how to make center motor mounts to better center the weight. I will share the design when I am done). Thats all for now see photo bucket. Next time I will post pictures of the car.
Pat Ellwood,
http://s372.photobucket.com/albums/oo169/citcapp/
September 22nd, 2008, 04:35 AM
#78
Moderator
Join Date: Jun 2008
Location: Atlanta, Georgia
Posts: 17,652
 Me thinks ya gots the wrong fella, I still try'in to figger out how to change an air filter Is it righty tighty, lefty loosey? or the other way round?
But I am flattered to be mentioned in the circle of members with vast Olds mechanical/technical accumen.
September 22nd, 2008, 07:06 AM
#79
Moderator
Join Date: Jul 2007
Location: Edmond, OK
Posts: 16,167
determine the motor mount locations ( I had already purchased a universal cross member) and found what I had purchased would not work because of the steering box location


