1955 Super 88 Build Thread
 September 26th, 2013, 06:44 AM
#1
Registered User
Thread Starter
Join Date: May 2013
Location: Charlotte, NC
Posts: 71
1955 Super 88 Build Thread
Hi everyone. I will try to keep my build contained in this one thread.
A few weeks ago i bought a 55 olds super 88 with a 324. The last few weeks i have cleaned up the outside and started cleaning the inside. Old cars tell a story, and this one is no different.
The previous owner bought it in 2011. When he drove it off the trailer, he parked it in his yard. The next morning, he couldn't get the car into gear. He said he "tried everything" but he had to pull the driveshaft to move the car. More on the transmission later.
Before this owner, the previous owner had it in a barn for an unknown amount of time. The barn smell in this thing knocks you down! I have pulled the back seat, what was left of the carpet, and vacuumed everything out.
I found a few vintage sticks of "Beemans" gum and a Pepsi bottle cap with a cork backing, indicating that it has not been vacuumed since those days. I'm guessing the 70's, as i am 37 and never remember having seen a cork bottle cap on pepsi in the 80's.
I was looking at napa.com for tune up items and a carb kit. Others have noted that my super 88 should have had a 4v carb but i have a 2v. I pulled the carb tag and found it is 7009300--the 2v carb from 1956. This spurred my interest, so i did some more digging and found the intake starts with 56####, the distributor has a points window, the heads are stamped "10" and the block serial number all point to it having had a motor swap to a '56!
From what i read, it seems that the '56 rocket 324 was the sweet spot...higher compression, higher horsepower, and bigger exhaust valves. nice little bonus for me!
When i fired the car, it sounded like open headers. When i looked, sure enough, the crossover pipe and the down pipe are not just rusted...they are rotted away! I'm going to need to fab something up after i do a tune up to get it to an exhaust shop.
Interior wise, i plan to do a complete makeover. The seats, carpet, package tray, and trunk linings are completely gone due to the barnyard animals that called this car home. Additionally, i bought this car to make it a daily driver/family cruiser with an emphasis on safety and luxury. I bought a roll of beige modern car carpet as well as a set of silverado/cadillac/gmc seats that are power, heated leather with integrated seat belts. I plan to dye them and go for a light beige lexus-inspired interior.
I will post up here as i find new and interesting things.
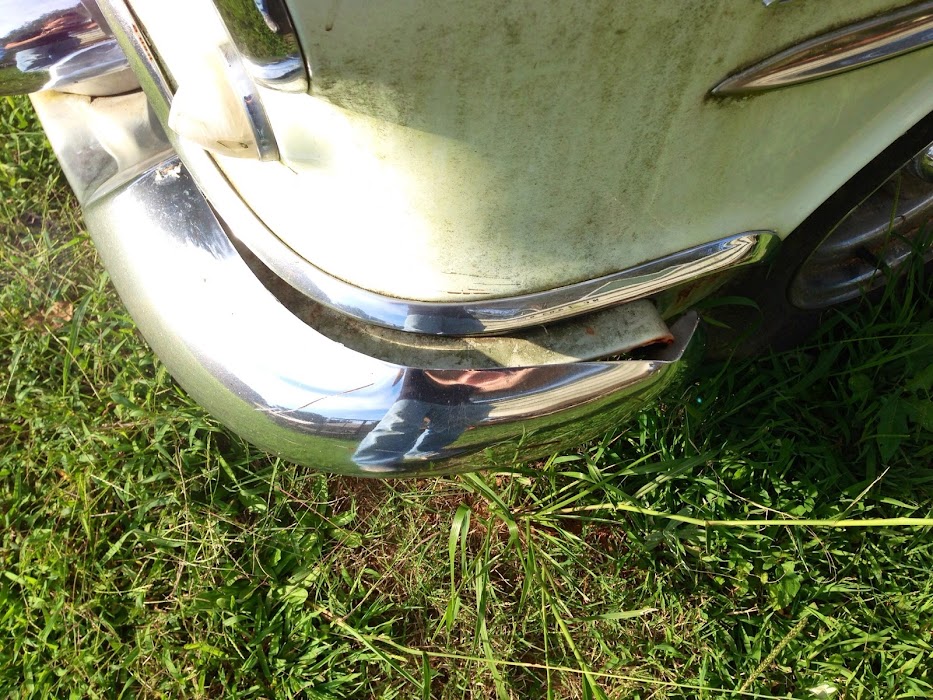
As i bought the car in a field:


After dragging it home and cleaning it up a bit:


A few weeks ago i bought a 55 olds super 88 with a 324. The last few weeks i have cleaned up the outside and started cleaning the inside. Old cars tell a story, and this one is no different.
The previous owner bought it in 2011. When he drove it off the trailer, he parked it in his yard. The next morning, he couldn't get the car into gear. He said he "tried everything" but he had to pull the driveshaft to move the car. More on the transmission later.
Before this owner, the previous owner had it in a barn for an unknown amount of time. The barn smell in this thing knocks you down! I have pulled the back seat, what was left of the carpet, and vacuumed everything out.
I found a few vintage sticks of "Beemans" gum and a Pepsi bottle cap with a cork backing, indicating that it has not been vacuumed since those days. I'm guessing the 70's, as i am 37 and never remember having seen a cork bottle cap on pepsi in the 80's.
I was looking at napa.com for tune up items and a carb kit. Others have noted that my super 88 should have had a 4v carb but i have a 2v. I pulled the carb tag and found it is 7009300--the 2v carb from 1956. This spurred my interest, so i did some more digging and found the intake starts with 56####, the distributor has a points window, the heads are stamped "10" and the block serial number all point to it having had a motor swap to a '56!
From what i read, it seems that the '56 rocket 324 was the sweet spot...higher compression, higher horsepower, and bigger exhaust valves. nice little bonus for me!
When i fired the car, it sounded like open headers. When i looked, sure enough, the crossover pipe and the down pipe are not just rusted...they are rotted away! I'm going to need to fab something up after i do a tune up to get it to an exhaust shop.
Interior wise, i plan to do a complete makeover. The seats, carpet, package tray, and trunk linings are completely gone due to the barnyard animals that called this car home. Additionally, i bought this car to make it a daily driver/family cruiser with an emphasis on safety and luxury. I bought a roll of beige modern car carpet as well as a set of silverado/cadillac/gmc seats that are power, heated leather with integrated seat belts. I plan to dye them and go for a light beige lexus-inspired interior.
I will post up here as i find new and interesting things.
As i bought the car in a field:
After dragging it home and cleaning it up a bit:
 September 26th, 2013, 06:52 AM
#2
Registered User
Thread Starter
Join Date: May 2013
Location: Charlotte, NC
Posts: 71
So when i offered to buy the car from the previous owner, i asked him all about the transmission. He said it was bad, wouldn't get out of park, and that he checked the fluids and tried everything.
When i got to his house, i found that the car was pretty far away from any shelter. When i asked him in person more about the transmission, he said he still had not had a chance to take it to his buddy's house to jack it up and look. Turns out, the guy had a bunch of cars but no garage or even any concrete to jack the car up!
So when i got the car home, i sat in the driveway in the car. I found that it was REALLY difficult to move the shifter up and down and that it didn't go into any indents. it just slid up and down. I figured the linkages were screwed up. I worked the shifter up and down about 10 times gently and finally it gave and effortlessly moved through all of the indents from N - Dr - S - L - R ! it was smooth and positive. I'm HOPING that a stuck shifter linkage was all that was wrong with it. Yeah, that would be some amazing luck!
Here is my plan:
--Tuneup with a carb rebuild, plugs, wires, cap, rotor, points, condenser
--change antifreeze, oil, power steering fluid reservoir
--Fab up a temporary exhaust
--New U Joint (driveshaft is out anyway)
--drain the trans and the torus
--fill the trans and torus with temporary fluid, start the car, let it run in N for a few minutes, then check the fluid level and make sure it is up to the correct level
--put it in DR and let it run a few minutes, then a few minutes in each range.
It will take me a few weeks to get this done. We shall see if that does the trick!
September 26th, 2013, 07:05 AM
#3
Registered User
Thread Starter
Join Date: May 2013
Location: Charlotte, NC
Posts: 71
Interior wise, my inspiration will be to build something like this:


I'm not delusional enough to think that i will EVER get to this level of fit and finish (the owner of this car spent $16,000 on the interior) but the overall color and feel is the direction i want to go.
Here are the seats and carpet i picked up. I plan to use that rear seat as it dimensionally seems to fit PERFECTLY in the back of that car...as if it were made to go in there! A neat feature is that the rear seat folds up flat. That will be handy when i need to haul a lot of stuff in the back!
The seats cost me $250 and the entire roll of carpet was $20! I love the charlotte autofair!
 October 5th, 2013, 05:13 PM
#5
Registered User
Thread Starter
Join Date: May 2013
Location: Charlotte, NC
Posts: 71
Hey thanks! I was going to swap them out, but the more i see it in person, the better i like those old wheels! the challenge now is finding tires to fit. I found a whopping 4 choices out there
October 5th, 2013, 09:00 PM
#8
Registered User
Thread Starter
Join Date: May 2013
Location: Charlotte, NC
Posts: 71
I looked at the trans dipstick...it is bone dry. I bet it will be good to go after a little tranny juice....
October 5th, 2013, 09:02 PM
#9
Registered User
Thread Starter
Join Date: May 2013
Location: Charlotte, NC
Posts: 71
 October 10th, 2013, 06:55 PM
#12
Registered User
Join Date: Feb 2013
Location: Tennessee
Posts: 1,393
If You're Looking For The Original Replacement Material ,I Think SMS Auto Upholstery Has The Material and They Will Send You Samples. Don't Know How Expensive It Will Be,Thank Goodness, My Original Is Still Plenty Good To Keep Me From Finding Out. I Think My Upholstery Is The Same Pattern As Yours,But Green. Larry
October 10th, 2013, 10:52 PM
#13
74 2.8L Capri
Join Date: Aug 2013
Location: Napa, CA
Posts: 358
Ben,
Here is some of the info. I have an Olds Maintenance manual, and took some pictures of the first couple of pages. It will help decode your data plate.
However, it does not address the interior trim code. Sorry, I thought I had that. It does however give paint codes. That may help a bit.


Here is some of the info. I have an Olds Maintenance manual, and took some pictures of the first couple of pages. It will help decode your data plate.
However, it does not address the interior trim code. Sorry, I thought I had that. It does however give paint codes. That may help a bit.
October 11th, 2013, 06:21 AM
#14
Registered User
Thread Starter
Join Date: May 2013
Location: Charlotte, NC
Posts: 71
That is perfect! I JUST got my own Shop Manual on CD and found that! You are right, the paint codes are helpful.
I am going to look at your pictures and try to find something that is close.
As a side note, can you please look at page 13-46 (the wiring diagram)? Please tell me if it is in color or in black and white? Mine is in black and white and it does not have wire colors listed
I am going to look at your pictures and try to find something that is close.
As a side note, can you please look at page 13-46 (the wiring diagram)? Please tell me if it is in color or in black and white? Mine is in black and white and it does not have wire colors listed
October 11th, 2013, 08:05 AM
#15
Collector of Stray 55's
Join Date: Aug 2010
Location: RI
Posts: 1,015
Ben,
Here is some of the info. I have an Olds Maintenance manual, and took some pictures of the first couple of pages. It will help decode your data plate.
However, it does not address the interior trim code. Sorry, I thought I had that. It does however give paint codes. That may help a bit.
Here is some of the info. I have an Olds Maintenance manual, and took some pictures of the first couple of pages. It will help decode your data plate.
However, it does not address the interior trim code. Sorry, I thought I had that. It does however give paint codes. That may help a bit.
According to the shop manual info, there are 10 prefixes for body numbers for manufacture locations, but only 8 for VIN number assembly plant codes.
Could a Kansas City Bodied car (i.e. "BK") be assembled in Lansing?
 October 11th, 2013, 09:59 AM
#17
74 2.8L Capri
Join Date: Aug 2013
Location: Napa, CA
Posts: 358
October 11th, 2013, 10:04 AM
#18
74 2.8L Capri
Join Date: Aug 2013
Location: Napa, CA
Posts: 358
Does anyone know how that "BODY NUMBER" on the cowl tag ties to the VIN on the door jamb?
According to the shop manual info, there are 10 prefixes for body numbers for manufacture locations, but only 8 for VIN number assembly plant codes.
Could a Kansas City Bodied car (i.e. "BK") be assembled in Lansing?
According to the shop manual info, there are 10 prefixes for body numbers for manufacture locations, but only 8 for VIN number assembly plant codes.
Could a Kansas City Bodied car (i.e. "BK") be assembled in Lansing?
 October 11th, 2013, 12:18 PM
#20
Collector of Stray 55's
Join Date: Aug 2010
Location: RI
Posts: 1,015
I don't think so. My body number corresponds with the VIN number and location, in my case Kansas City. If yours were different locations, I'd be surprised. But I've been wrong before. Unless bodies were made somewhere else, and shipped to assembly plants? Maybe transplanted VIN or cowl tag?
October 11th, 2013, 01:54 PM
#23
Registered User
Thread Starter
Join Date: May 2013
Location: Charlotte, NC
Posts: 71
The seats are out of a fullsize chevy/gmc/cadillac truck with extended cab. Somewhere around 2006
October 12th, 2013, 08:56 AM
#24
Registered User
Join Date: Oct 2004
Location: Forest Ranch Ca.
Posts: 7,721
That is perfect! I JUST got my own Shop Manual on CD and found that! You are right, the paint codes are helpful.
I am going to look at your pictures and try to find something that is close.
As a side note, can you please look at page 13-46 (the wiring diagram)? Please tell me if it is in color or in black and white? Mine is in black and white and it does not have wire colors listed
I am going to look at your pictures and try to find something that is close.
As a side note, can you please look at page 13-46 (the wiring diagram)? Please tell me if it is in color or in black and white? Mine is in black and white and it does not have wire colors listed

Thread
Thread Starter
Forum
Replies
Last Post
The Stickman
Vista Cruiser & Wagons
104
July 24th, 2013 05:44 PM
The Stickman
Vista Cruiser & Wagons
17
March 26th, 2010 06:49 AM


