Log In
Register
Forums
New User Forums
The Newbie Forum
Site Related
General
General Discussion
The Clubhouse
Repair & Restoration
Technical & Reference
Major Builds & Projects
Racing and High Performance
Engine
Transmission and Driveline
Chassis, Tires/Wheels, Brakes, & Related
Body & Paint
Electrical
Interior and Trim
Other
Vehicle Lineup
Cutlass, 442, and Hurst/Olds
Large Oldsmobiles
Final Years Oldsmobiles
Vintage Oldsmobiles
Toronado
Other Oldsmobiles
Classifieds
Buyer & Seller Feedback
Oldsmobile Cars
Oldsmobile Parts
Non-Oldsmobile Classified
Miscellaneous Classifieds
Gallery
Tools
Car Payment Calculator
Tire Rim Calculator
Vin Decoder
Recalls
Technical Service Bulletins (TSBs)
Members List
Live Feed
Marketplace
Vendor Directory
Become a Vendor
New Posts
View Dark Mode
Please register or login to enable Dark Mode.
Log In
Register
Threads
Google
Threads
Posts
Advanced
Dark Mode
Please register or login to enable Dark Mode.
Log In
Forgot your Password?
By logging into your account, you agree to our
Terms of Use
and
Privacy Policy
, and to the use of cookies as described therein.
or
Login with Facebook
Recent
Commented
Albums
My Pictures
Ap6954's Photos
View Profile
Sort:
Commented
Most Recent
Most Comments
Albums
Photos
0
2021/07/21 16:54:46
62395
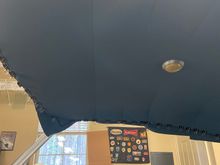
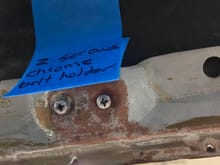
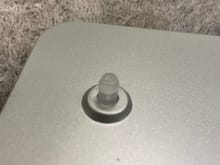
Sample screws and marking with blue tape. The blue tape was moved to the outside roof before headliner installation.
0
2021/07/21 16:54:32
62395
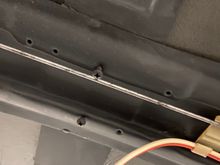
Screws and dome light wire
0
2021/07/21 16:54:08
62395
0
2021/07/21 16:43:58
62395
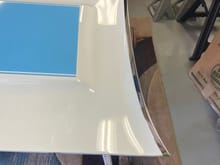
Rear after gluing and trimming before windlace installation
0
2021/07/21 16:43:33
62395
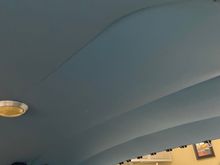
Front of headliner after gluing and some of the jewelry installed but before windlace installation.
0
2021/07/21 16:43:13
62395
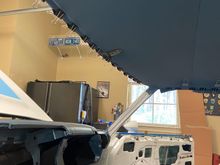
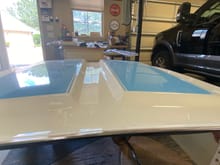
Front of headliner after first stretching and steaming before flying and trimming. The headliner will be trimmed and glued to the a pillar. This will be covered with the metal painted a pillar cover later.
0
2021/07/21 16:42:39
62395
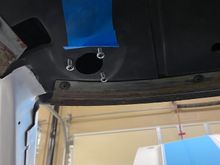
Dome light screws and wire in place
0
2021/07/21 16:42:01
62395
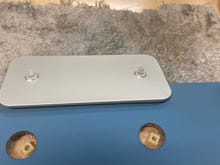
Example of preinstalled screws. I moved the blue tape from the inside to the top of the roof before installing the headliner
0
2021/07/21 16:40:02
62395
0
2021/07/01 11:23:26
62395
0
2021/07/01 11:16:21
62395
The pens come in different tip sizes I used a 2mm and 4mm pen. The capillary action of the pens makes it easy to keep fresh paint at the tip to make your Line fairly consistent in color.
0
2021/06/24 15:37:08
62395
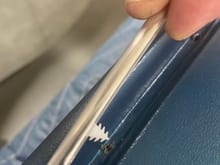
Tiny push pins for the chrome bead around the dash pad
0
2021/06/24 15:37:01
62395
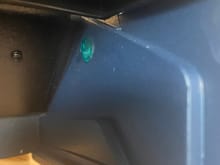
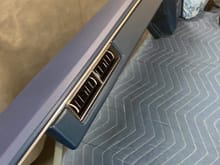
After all these years I did not realize that the Y60 convenience option also included a little light in the ashtray. Tiny blue light lens that the light shines through inside the ashtray area. Build is behind the glovebox liner.
0
2021/06/24 15:36:35
62395
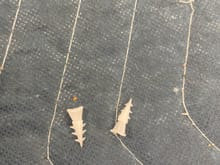
Pins. Original bead had about 15 pins. I used a few more in new holes to hold the bead tighter.
0
2021/06/24 15:34:33
62395
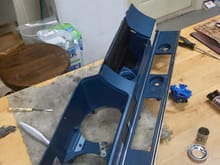
Ready for wood trim and mating with the pad.
0
2021/06/24 15:34:15
62395
0
2021/06/24 15:34:11
62395
0
2021/06/24 15:34:08
62395
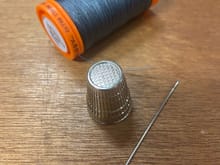
The tools.
0
2021/06/16 14:00:06
62395
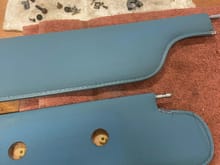
Reassembled passer visor
0
2021/06/16 13:59:58
62395
Push pins on the back of the mirror
0
2021/06/16 13:59:48
62395
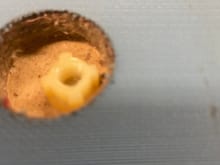
Receptacles for the pushpins on the mirror. I could not find a lot about the method of mirror attachment. It’s just these receptacles that are attached to the visor structure. The mirror pins push in. Pretty tough to push them on. I was afraid to break the mirror pushing it on so I LIGHTLY sanded the pins on the mirro down to make them push in a bit easier. Still had to push pretty hard but they snapped in easier
0
2021/06/16 13:59:40
62395
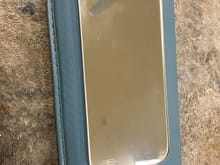
Mirror holes and mirror
0
2021/06/16 13:59:32
62395
A section before sewing
0
2021/06/16 13:59:23
62395
A section sewed back together
0
2021/06/16 13:59:12
62395
Cleaned and in process of sewing
0
2021/06/16 13:58:44
62395
0
2021/06/07 08:16:53
62395
Original
0
2021/05/29 19:02:46
62395
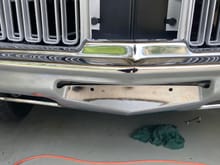
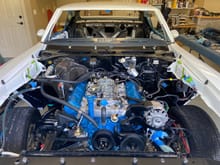
Front end coming together. Yes I know. The headlights are not T3’s. I have a set of those in boxes to put on if I show the car at a show where originality counts. I plan to drive the car, so I like the brightness of the Sylvania xtravisions.
0
2021/05/29 19:01:59
62395
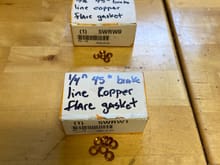
Grainger part numbers for the 5/16” and 1/4” seal.
0
2021/05/22 07:41:01
62395
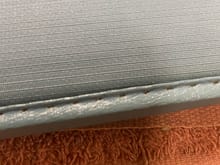
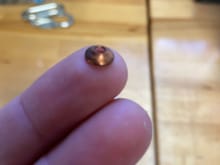
Tiny seal. $10/box of ten is not cheap but worth it to get a good leak free seal.
0
2021/05/22 07:40:39
62395
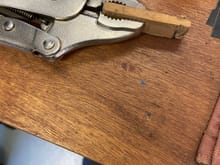
Home made wood wedge tool
0
2021/05/16 12:56:45
62395
Excited to one day have that view behind the wheel.
0
2021/05/16 12:55:35
62395
0
2021/05/16 12:55:24
62395
0
2021/05/16 10:17:16
62395
0
2021/05/16 10:15:20
62395
0
2021/05/16 10:15:06
62395
0
2021/04/30 06:00:53
62395
0
2021/04/30 05:58:09
62395
0
2021/04/30 05:57:55
62395
First
Page
6 of 11
Last
Go To
Page
1
...
4
5
6
7
8
...
11
6 of 11
Go To
GO
Go to page
of 11
pages
1
...
4
5
6
7
8
...
11