LOG IN
REGISTER
Forums
New User Forums
The Newbie Forum
Site Related
General
General Discussion
The Clubhouse
Repair & Restoration
Technical & Reference
Major Builds & Projects
Racing and High Performance
Engine
Transmission and Driveline
Chassis, Tires/Wheels, Brakes, & Related
Body & Paint
Electrical
Interior and Trim
Other
Vehicle Lineup
Cutlass, 442, and Hurst/Olds
Large Oldsmobiles
Final Years Oldsmobiles
Vintage Oldsmobiles
Toronado
Other Oldsmobiles
Classifieds
Buyer & Seller Feedback
Oldsmobile Cars
Oldsmobile Parts
Non-Oldsmobile Classified
Miscellaneous Classifieds
Marketplace
Vendor Directory
Become a Vendor
New Posts
Tools
Car Payment Calculator
Tire Rim Calculator
Recalls
Technical Service Bulletins (TSBs)
Members List
Live Feed
Gallery
View Dark Mode
Please register or login to enable Dark Mode.
Log In
Register
Threads
Google
Threads
Posts
Advanced
Dark Mode
Please register or login to enable Dark Mode.
Log In
Forgot your Password?
By logging into your account, you agree to our
Terms of Use
and
Privacy Policy
, and to the use of cookies as described therein.
Recent
Commented
Albums
My Pictures
My Post Pictures
cdrod
October 15, 2015
2072
0
Sort:
Default
Default
Most Recent
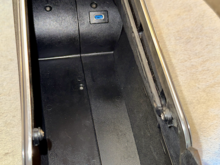
This reinforced seat mounting point 2 additional layers of 16 gauge steel one of which overlaps the cross brace at the RH side of this pic. There is a 2x2 thick washer welded to the 16 gauge steel with a 7/16" nut welded to the washer.
0
2025/06/12 13:24:51
cdrod
0
2025/06/13 07:29:12
cdrod
0
2025/06/13 07:29:13
cdrod
2001 BMW M3 convertible seats wrapped in pearl white, madrid grain vinyl.
0
2025/06/13 07:31:48
cdrod
The upholstery guy suggested the 442 logos on the headrests.
0
2025/06/13 07:31:49
cdrod
0
2025/06/13 07:39:39
cdrod
SEM paints and prep products. The adhesion promoter is only used on plastic parts and needed when repainting the metal headers.
0
2025/06/19 19:04:37
cdrod
This is an after shot of my dash after repainting.
0
2025/06/19 19:04:58
cdrod
0
2025/06/19 19:05:09
cdrod
This is what I started with for header pieces. I stripped them of rust using Evaporust then lightly blasted them in my clasting cabinet being careful not to "blast" away the grein pattern.
0
2025/06/19 19:05:21
cdrod
0
2025/07/04 02:11:15
cdrod
Most guys just coil the extra capillary tubing - see green arrow.
0
2025/07/09 11:59:22
cdrod
0
2025/07/09 11:59:23
cdrod
I wrapped the extra tubing around the bulb at the end of the TXV tubing in a serpentine fashion.
0
2025/07/09 11:59:19
cdrod
0
2025/07/15 03:38:45
cdrod
0
2025/07/21 10:41:45
cdrod
0
2025/07/21 10:41:47
cdrod
0
2025/07/21 10:41:49
cdrod
0
2025/07/21 10:41:50
cdrod
0
2025/07/21 10:41:52
cdrod
0
2025/07/21 10:41:54
cdrod
0
2025/07/21 10:41:55
cdrod
0
2025/07/21 10:41:57
cdrod
0
2025/07/21 10:41:58
cdrod
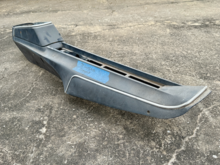
This was the starting point - pretty rough.
0
2025/07/21 10:44:28
cdrod
Using 3M 90 vinyl adhesive, I glued the foam to the console lid and carefully trimmed the edges to follow the curves. I didn't wrap the foam complete around the edges as I don't want the lid to look too wide.
0
2025/07/21 10:44:24
cdrod
I had this vinyl piece laying around but it wasn't wide enough to fully cover the lid, but you get the idea of the end result.
0
2025/07/21 10:44:26
cdrod
The stock console connector is a 3-way packard 56; I used a 4-way to allow for the dedicated power to the USB.
0
2025/07/21 10:44:33
cdrod
0
2025/07/21 10:44:37
cdrod
A shot of the USB jack inside the console compartment.
0
2025/07/21 10:44:38
cdrod
Pic of the foam.
0
2025/07/21 10:44:40
cdrod
I added a USB jack inside the console for charging needs.
0
2025/07/21 10:44:42
cdrod
I used this closed-cell foam as padding for the console lid.
0
2025/07/21 10:44:29
cdrod
I have a 200-4r OD transmission which modifies the shift detent plate to allow for the extra gear. I purchased this "slap shifter" detent plate from CO member Dane Jones.
0
2025/07/21 10:44:31
cdrod
I cut a piece of stiff felt for the bottom to cover the screw heads.
0
2025/07/21 10:44:35
cdrod
0
2025/07/22 04:35:09
cdrod
Close-up shot of the padded lid. Overall, I 'm happy with it, but I would prefer a few less wrinkles.
0
2025/07/22 04:35:11
cdrod
Top shot.
0
2025/07/22 04:35:14
cdrod
The finished product.
0
2025/07/22 04:35:07
cdrod
The vinyl was pretty stretchy, but still had a few wrinkles following the compound curves of the lid.
0
2025/07/22 04:35:13
cdrod
First
Page
51 of 52
Last
Go To
Page
1
...
46
47
48
49
50
51
52
51 of 52
Go To
GO
Go to page
of 52
pages
1
...
46
47
48
49
50
51
52