
455 in a 1956 olds anyone

Thread Starter
1956 oldsmobile
Joined: Dec 2011
Posts: 241
From: st. george, utah
455 in a 1956 olds anyone
Im looking for anyone out there that has put a 455 old engine in a 1956 olds if they would share in picture as well as words how the did the electric wiring and what stuff i need to buy and do to make it work...and if you used the original wiring harness? Thanks shane
Thread Starter
1956 oldsmobile
Joined: Dec 2011
Posts: 241
From: st. george, utah
here are some pics of my wires the first set 3 with the prongs go to the regulator the one with the circle goes on the post on the inside fender which the postive battery cable hooks into.. people have told me that i can get a altinator so i wont need that regulator on the inside fender...do i use all three of the wires that went to the regultor and route them to the altinator now that has a built in regulator in it?? are the main one the next three go to the horn relay... i still need to buy that post that the battery hooks onto being it was gone on my car...is there any other wires or things i will need to hook it all up? and whats a HEI? thanks

Registered User
Joined: Jan 2008
Posts: 209
From: Melbourne Australia
I'll try and dig up what I did with my wiring, but I think I spoke to you via the HAMB , so heres some photos of my install. might help. feel free to ask questions.
IMGP2060_zps0538f481.jpg
IMAG0997_zps749a6128.jpg
IMAG1006_zps5054e8c1.jpg
IMAG1020_zps5bac8b60.jpg
IMAG1025_zps974e1a6e.jpg
IMAG1022_zps6fd24301.jpg
IMAG1048_zps2cd55bb6.jpg
IMAG1051_zps388e6555.jpg
IMAG1030_zpsa82e82d5.jpg
IMAG1032_zps45eb2c87.jpg
IMAG1107_zpsfc77c9f0.jpg
IMAG1111_zps4358af1b.jpg
IMAG1119_zpsbb932bf5.jpg
IMAG1087_zpsc495eb0e.jpg
IMAG1078_zpsb0cf8e84.jpg
Registered User
Joined: Jan 2008
Posts: 209
From: Melbourne Australia
Registered User
Joined: Jan 2008
Posts: 209
From: Melbourne Australia
Thread Starter
1956 oldsmobile
Joined: Dec 2011
Posts: 241
From: st. george, utah
Yep you were the one that i copyed this from.... if you can tell me and have pictures of the electrical hook up areas and even how you did the linkages and gas pedal it would be great ...did you hook it all up to the original wire harness?
if you can tell me and have pictures of the electrical hook up areas and even how you did the linkages and gas pedal it would be great ...did you hook it all up to the original wire harness?
Registered User
Joined: Jan 2008
Posts: 209
From: Melbourne Australia
Thanks Oldscutlsss.
The swap took me longer than I thought I think it took 10 days to do the majority of the work. I did the swap at my parents farm , and as they are out of town 20mi we probably lost 2-3 days in back and forth to get stuff done ( radiator) and find parts.
The two things I ran out of time to do to a level I was happy with was the alternator bracket and the exhaust. Both are still as finished but I plan on fixing both - problem being its my everyday car so doing such things needs time. Plus there is a hoist or lift at the farm now, so much nicer for exhaust stuff.
couple of other photos.
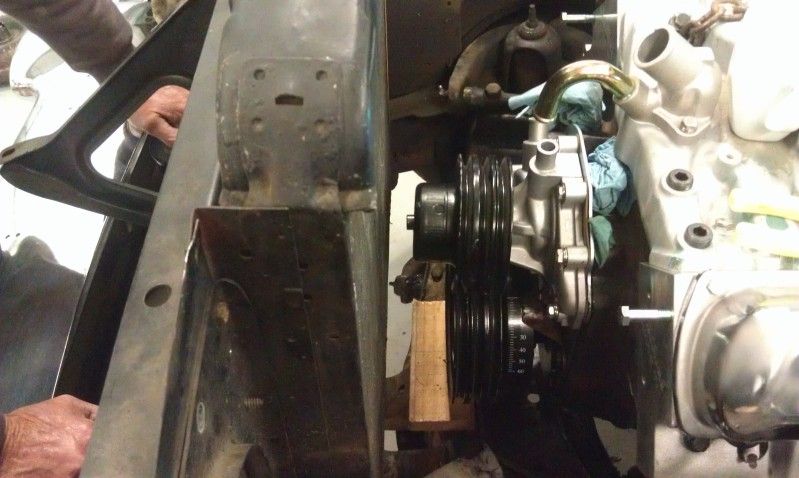
checking the original radiator fits. I did have to have the bottom and top outlets altered I also had the side brackets moved so the radiator sat as far forward as possible
Brake pedal. it's out of a (cough) camry. about a 92-6 variant. after scouring the bone yard this was the only thing that came close to fitting. I know people use G body stuff , but I didn't have access to that here. I used a 8" double diaphragm booster and 1 1/8" master cylinder from speedway motors for the brake conversion. I'm still running the stock drums. I did have to drill a hole lower on the pedal to attach the push rod to , to get enough swing. I also had to bend the pedal somewhat to make the pedal pad level ( see photos above) but this brake pedal *** bolted right up to the booster.
IMAG1076_zpsa21edb4d.jpg
car height pre 455

car post. it settle 1/2" more over the next year or so.
IMAG1120_zps65b42634.jpg
U.S drivers side exhaust was the big time waster. these are a pair of Sanderson headers I bought. I wasted a day making the headers so they fit, missed everything and I could take them off the motor while it was in the car. They are not pretty I know, but they work! was surprised and Sandersons sealing flange looking so weld splattered.
IMAG1031_zps87459577.jpg
IMAG1113_zps40c3d773.jpg
I'll try and go back and edit the above photos with some info to help you with what your doing.
The swap took me longer than I thought I think it took 10 days to do the majority of the work. I did the swap at my parents farm , and as they are out of town 20mi we probably lost 2-3 days in back and forth to get stuff done ( radiator) and find parts.
The two things I ran out of time to do to a level I was happy with was the alternator bracket and the exhaust. Both are still as finished but I plan on fixing both - problem being its my everyday car so doing such things needs time. Plus there is a hoist or lift at the farm now, so much nicer for exhaust stuff.
couple of other photos.
checking the original radiator fits. I did have to have the bottom and top outlets altered I also had the side brackets moved so the radiator sat as far forward as possible
Brake pedal. it's out of a (cough) camry. about a 92-6 variant. after scouring the bone yard this was the only thing that came close to fitting. I know people use G body stuff , but I didn't have access to that here. I used a 8" double diaphragm booster and 1 1/8" master cylinder from speedway motors for the brake conversion. I'm still running the stock drums. I did have to drill a hole lower on the pedal to attach the push rod to , to get enough swing. I also had to bend the pedal somewhat to make the pedal pad level ( see photos above) but this brake pedal *** bolted right up to the booster.
IMAG1076_zpsa21edb4d.jpg
car height pre 455
car post. it settle 1/2" more over the next year or so.
IMAG1120_zps65b42634.jpg
U.S drivers side exhaust was the big time waster. these are a pair of Sanderson headers I bought. I wasted a day making the headers so they fit, missed everything and I could take them off the motor while it was in the car. They are not pretty I know, but they work! was surprised and Sandersons sealing flange looking so weld splattered.
IMAG1031_zps87459577.jpg
IMAG1113_zps40c3d773.jpg
I'll try and go back and edit the above photos with some info to help you with what your doing.
Registered User
Joined: Jan 2008
Posts: 209
From: Melbourne Australia
I used mostly the original linkages. I remember the TH400 arm had to be cut and welded at 90 degree's basically and 'L' shape to be made to work.
The accelerator linkage I made this bracket out of angle iron. I had this on the old 324 and just moved it over. I just had to adjust the length of the linkage which was easy. I had this gas setup on the old 324 so it just all went over to the 455.

the tab as the bottom of the bracket is important to stop the bracket from moving around and screwing up your adjustment

I also remember having to move one of the pins in the neutral safety switch so I had reverse lights and lock out except for neutral. Unfortunately the gear indicator in the dash doesn't line up , but the neutral safety does work which to me is far more important.
I remember also that there was something to do with the wiring from the starter to the dizzy, it was a purple wire. I used a hi torque started and HEI will see if I can find my drawings I did.
I had , had the car converted to an alternator years before , and I just reused the alternator so that wiring was just a hook up deal for me. Sorry can't help on that side of it. I did use the original wiring harness though.
The accelerator linkage I made this bracket out of angle iron. I had this on the old 324 and just moved it over. I just had to adjust the length of the linkage which was easy. I had this gas setup on the old 324 so it just all went over to the 455.
the tab as the bottom of the bracket is important to stop the bracket from moving around and screwing up your adjustment
I also remember having to move one of the pins in the neutral safety switch so I had reverse lights and lock out except for neutral. Unfortunately the gear indicator in the dash doesn't line up , but the neutral safety does work which to me is far more important.
I remember also that there was something to do with the wiring from the starter to the dizzy, it was a purple wire. I used a hi torque started and HEI will see if I can find my drawings I did.
I had , had the car converted to an alternator years before , and I just reused the alternator so that wiring was just a hook up deal for me. Sorry can't help on that side of it. I did use the original wiring harness though.

Registered User
Joined: Oct 2014
Posts: 115
From: Essex, United Kingdom
Hi Shane, assume your the same Shane from the Facebook group since you have the same car in your avatar pic lol. As said on Facebook, get a 10is alternator, you can use your exciting wiring harness, it's pretty much the same, I would upgrade to a HEI distributor unit, over a normal ignition set up, it's worth the money plus actually easier to wire in. If using a 10is alternator and HEI distributor then the alternator is hooked up using the fat live post straight to the positive battery terminal, then the 2 small wires, the red goes onto the battery (can go straight onto the alternator live post) then the white wire goes of to the gen light for the dash. Use the original 324 coolant temp sensor on place of the original 455 one in any of the inlet coolant ports and wire in as stock 324. Use the 455 idiot light oil pressure sender unit (don't use the rally pac one as it's calibrated different) and wire in as stock 324. The starter motor hook up is the same, permanant live onto the main starter wire and then switched live onto the one small terminal (same as stock 324) and the ignition if your using the stock 455 points and condenser set up found on the early 455s then wire it in as the stock 324 set up, if using the later 455 HEI set up you just need your ignition live feed onto the distributor, lastly a good ground wire onto the battery earth terminal. Very easy to wire it up and pretty much same as the original 324, you may need to lengthen or shorten wires but appart from that, it's that simple

Thread
Thread Starter
Forum
Replies
Last Post


