


71 cutlass 2004r


Thread Starter
Registered User
Joined: Dec 2011
Posts: 204
From: Omaha, NE
71 cutlass 2004r
Hey everyone. I will try to post as much as I have the time for on the install of my new transmission from Extreme Automatics. I'm awaiting delivery now of a stage 1 2004r and an 1800 stall converter from them, hopefully only another week away. I have my old th350 pulled out of the car now, and have already wired up my torque converter lockup circuit using tips and advice from previous posts here.
I'm using a bowler transmission lockup delay kit, getting 12v from a switched source, through a brake switch, then to a vaccum switch that uses ported vaccum, and finally to the bowler "box". From what I can figure this should put me right where I want to be functionally, and keep the lockup from hunting and driving me nuts.
I bought the BTO TV Made EZ kit for my edelbrock carb to control the TV, and it's a quality piece. Lastly, I did purchase the shiftworks kit for column shifters, but don't know for sure if it will work for this application. If not, I'll just shelve it and not worry about being able to manually select first gear.
The fun so far has been scraping off 40+ years of grease and road grime from the parts that I've taken off. The crossmember itself had to have had 5 pounds of the stuff stuck to it. Didn't help that after driving the car home from purchasing it I noticed a significant oil leak and found that most of the oil pan bolts were only finger tight. Snugged them up and not a drop since!
I'm using a bowler transmission lockup delay kit, getting 12v from a switched source, through a brake switch, then to a vaccum switch that uses ported vaccum, and finally to the bowler "box". From what I can figure this should put me right where I want to be functionally, and keep the lockup from hunting and driving me nuts.
I bought the BTO TV Made EZ kit for my edelbrock carb to control the TV, and it's a quality piece. Lastly, I did purchase the shiftworks kit for column shifters, but don't know for sure if it will work for this application. If not, I'll just shelve it and not worry about being able to manually select first gear.
The fun so far has been scraping off 40+ years of grease and road grime from the parts that I've taken off. The crossmember itself had to have had 5 pounds of the stuff stuck to it. Didn't help that after driving the car home from purchasing it I noticed a significant oil leak and found that most of the oil pan bolts were only finger tight. Snugged them up and not a drop since!

Thread Starter
Registered User
Joined: Dec 2011
Posts: 204
From: Omaha, NE
I'm well aware of the importance of the TV setup. Along with my TV kit from Bowtie, I also picked up their installation kit. Using their pressure guage, I will be going through a thorough internal pressure check in each gear to be certain that it is operating correctly prior to the wheels hitting the ground. I have far to much time and $ invested in this installation to botch the job.

Registered User
Joined: Oct 2007
Posts: 634
I put a 2004R into my 68 cutlass convertible. I got it from CK performance. I used a Lokar flexible dip stick tube, installed a temp gage in the return line to the trans, installed a small trans pressure gage to verify the TV cable is set correctly. I used a holley carb corrector kit from ebay and used a standard TV cable from a Buick GN.
I shift it through a B&M ratchet type floor shifter. Since my steering column still had the original 2 speed auto shift on it, I wired the 12V source through the reverse light switch. I pop it in and out of lock-up by shifting the obsolete lever into R. A little hokey but it works and is convenient.
The trans cross member was moved to the rear most holes on the frame and used as is. Everything else fit like it was made for it.
I shift it through a B&M ratchet type floor shifter. Since my steering column still had the original 2 speed auto shift on it, I wired the 12V source through the reverse light switch. I pop it in and out of lock-up by shifting the obsolete lever into R. A little hokey but it works and is convenient.
The trans cross member was moved to the rear most holes on the frame and used as is. Everything else fit like it was made for it.
Thread Starter
Registered User
Joined: Dec 2011
Posts: 204
From: Omaha, NE
I was on the fence between CK and Extreme. I swapped emails with Chris and Lonnie both, and ended up picking Extreme. I don't think I could have complained either way. The setup that I have now will unlock the converter through brake or ported vacuum. If I let off the throttle, no vaccum, converter unlocks. If I tip a toe into the gas, once vaccum drops below 10in, converter unlocks. I'm starting with 10in as my starting point but can adjust up or down from there. The pressure guage I have is not meant for in car use, just for setup but I also have a temp gauge to install (needs replaced as it was damaged in shipping). I don't really feel that the temp gauge is necessary beyond initial setup, so I'll probably take it out after everything is settled in and has proven itself (don't like the clutter).

Registered User
Joined: May 2009
Posts: 2,212
From: USA
Good choice.
Extreme Automatics is raved about on Turbo-Buicks, and Jakeshoe who runs Jakes Performance transmissions also recommends them over Performabuilt.
He's a VERY knowledgable Army Ranger / Contractor who runs his own specialty shop out of Texas. I have the brother of his shop Mascot....Odin.
Extreme Automatics is raved about on Turbo-Buicks, and Jakeshoe who runs Jakes Performance transmissions also recommends them over Performabuilt.
He's a VERY knowledgable Army Ranger / Contractor who runs his own specialty shop out of Texas. I have the brother of his shop Mascot....Odin.
Thread Starter
Registered User
Joined: Dec 2011
Posts: 204
From: Omaha, NE
Funny you should mention that. Jakes comments about ea on turbobuick and other forums were one of the swaying points for me. Such high regards from another industry pro shouldnt be taken lightly. I'd like to post pics but all i would have to show is a dirty 350 trans and a dirty shop floor along with a gaping hole where a trans goes and a shiny newly cleaned black xmember.
Old School Olds
Joined: Nov 2008
Posts: 9,271
From: Marble Falls TX
I am curious about the 1800 stall, I was thinking 2800.
I have been holding onto a 87 GNX
2004R for the final on my 69 442.
I am going with a 30 over 69 F block
455 with G heads, 398662 D-2 intake with divorced choke
with factory A/C and a 750 Rodney carb that looks stock.
Just a steet cruiser, please post your results...
I have been holding onto a 87 GNX
2004R for the final on my 69 442.
I am going with a 30 over 69 F block
455 with G heads, 398662 D-2 intake with divorced choke
with factory A/C and a 750 Rodney carb that looks stock.
Just a steet cruiser, please post your results...
Last edited by tru-blue 442; Mar 7, 2013 at 06:12 PM.
Thread Starter
Registered User
Joined: Dec 2011
Posts: 204
From: Omaha, NE
Figured this was worth an update. I have my rear torn apart, cleaned and ready to go back together. Almost forgot how much I missed the smell of cracking open a diff. I'm waiting on my buddy with a press to come back to town so we can get the bearings pressed and go through the process of setting my pinion depth and finalize setting the pattern. That should happen by next weekend. I also talked to Lonnie today and my transmission ships out tomorrow, a little delayed but I feel like a kid waiting for christmas. I still have to figure the tranny lines out so my flow is correct with the 2004R (reverse flow from TH350) and install the temporary filter that came with my Bowtie Overdrives install kit. That will give me enough to stay busy until the delivery shows up. I'll try to take pictures when I get it back together and of the process.
Thread Starter
Registered User
Joined: Dec 2011
Posts: 204
From: Omaha, NE
Thought it was about time for an update. Got the transmission in from EA finally after a little longer wait than expected. My first advice would be to use their website to place an order if you are going to go through them. I phoned in the order and used paypal to pay, which is apparently out of the norm for Lonnie, causing my order to be lost a few different times. The transmission is in, lines switched for proper flow, TV cable installed and adjustments made. I'm going to be filling it and going through pressure tests this weekend, then on the road for the first time this year. My one concern is that the torque converter sat back further than the stock converter by approximately 3/8 of an inch, and I used washers to space and longer grade 8 bolts with red lock-tite to bolt it in. Does anyone think this is going to cause any sort of issues for me? I've got a lot of time and $ invested in this project and want to make sure there are no suprises. Thanks for any info and I'll try to post some pics as soon as I can.

Registered User
Joined: Jan 2010
Posts: 6,104
From: central Indiana
Don't shim the converter bottomed out in the pump. The converter need room to "grow", if there isn't you can damage the pump or wipe out the engine thrust bearing. Your clearance is just a little excessive, I wouldn't worry about it. Did Lonnie include any instructions?
Registered User
Joined: Sep 2012
Posts: 484
From: Gilbert, Arizona
My 2004R conversion also had to much torque converter gap, 3/8" +. I used precision shims from Bowtie that still left the proper amount of expansion room for the converter. Proper gap should be 3/16 with 1/4 max.
I also notched the crossmember to make it easier to get to the very farthest back tranny pan bolt. Make sure your grade8 bolts do NOT contact the converter housing, when housing balloons even the slightest amount you do not want it to contact the bolts. Also the top fitting on the 2004r case is pressure out.
I also notched the crossmember to make it easier to get to the very farthest back tranny pan bolt. Make sure your grade8 bolts do NOT contact the converter housing, when housing balloons even the slightest amount you do not want it to contact the bolts. Also the top fitting on the 2004r case is pressure out.
Thread Starter
Registered User
Joined: Dec 2011
Posts: 204
From: Omaha, NE
Thanks for the replies. I've taken the torque converter bolts out, removed some of the shims to make sure I have proper room for expansion, and reinstalled. I bought 3 different lengths of bolts for the torque converter to make sure that I had proper thread engagement without going through and contacting the torque converter on the back side. My gap was actually over 3/8 of an inch, so I didn't want to pull the converter all the way up to the flexplate without shims to make sure i don't pull it away from the pump too much. Fill and test procedures should begin this weekend.
Registered User
Joined: Sep 2012
Posts: 484
From: Gilbert, Arizona
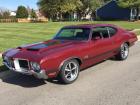
TH 350 swapped out with a 200-4R, my experiences.....70 Cutlass with a 403.....
Starting off with a universal dipstick, its tube will probably have to be modified by cutting back the tube height to get it properly calibrated (full mark on stick equal to bottom edge of case).
The new torque converter might need to be shimmed, as was in my case, to get the proper distance in relation to the flex plate (1/4” away maximum). Put a qt of ATF in the converter and take you time indexing it into the trans. It has to engage the front pump properly.
The cross member will be moved back, no big deal, the holes are already there, but I also had to notch it in a couple of places. The very farthest back pan bolt of the 200-4R tranny is very difficult to get a socket on to r&r the pan because the bolt is right under the cross member lip, making a u-shaped notch in the cross member gives easy access. Also, if your exhaust pipes tip in toward the middle to soon, they can hit the crossmember, requiring more notch work for clearance or a new exhaust pipe. A muffler shop had made my drivers side pipe, it was to close, so a bit of clearance was needed in the crossmember to prevent possible interference.
A bit of parking brake cable work is also needed to make up for the extra slack that comes with moving the crossmember back. I drilled a new hole in the cross member so I could move the hook (that holds one side of the intermediate cable) farther to the outside to take up most of the slack.
The cooling lines seem to line up fairly well, the top outlet is the pressure fitting. No driveshaft work was needed. There is also a floor shifter kit available that allows the manual use of all four gears, it requires the removal of the console assembly to replace the index plate, cable and shift indicator plate. The new plate is marked; P R N (D) D 2 1. The new index plate is needed to properly hold the shifter in the new added positions of the overdrive gear. The kit also comes with a new needed transmission end cable bracket. Don’t forget to re-adjust the backup light/neutral switch while the console is out. Not a huge job, the console work, but time consuming. It all seemed to fit nicely, though the cable seems like it should have been a few inches shorter, but then again the stock cable seemed that way also. It’s important that the click stops in the tranny match the stops of the console shifter index plate, it required a bit of fiddling and adjusting to get the trans click stops, indicator shifter lever positions and lever index plate stops to all match up.
Biggest pain in the neck was the very critical TV (throttle valve ) cable setup, If you use the stock Olds Qjet, here’s the problem, the stock intake has the Qjet carb sitting rather low, thus the bottom part of the throttle arm does not extend down far enough for a proper TV cable hook up with an Olds carb. I tinkered with it the better part of a day before I realized the stock Olds carb linkage wasn’t going to work with the TV cable adapter and universal cable that was supplied by Bowtie. But because I’m using an Edelbrock Performer RPM manifold , there is lots of room below the carb, so I used a junk Chebby Qjet from the mid 80’s (Ebay) and used its throttle arm by grinding off the swedged on arm, off both the stock carb and Chebby carb and swapping them. Then by using one of the two available custom adapters from Bowtie Overdrives for the Qjet which includes a carb spacer plate that has the proper cable bracket built into it, and a matching TV cable, I was able to be set up the TV system without any problem. There are 2 styles used, of course they sent the wrong one (cable and plate) the first time. The TV cable has to be setup so there never is any slack in the cable at slow idle and there should be an instant pressure rise with any movement of the cable, also the spool valve the cable controls has to be buried all the way in the valve body at the full throttle position.
The last hurdle was hooking up the torque converter lock up dis-connect switch. A keyed hot terminal wired thru a relay controlled by the brake switch and then run to the transmission. It was not too difficult. I don’t know yet if I’m going to need lockup delay kit or not.
With this tranny, and running 3.42 gears, at 80 mph cruising speed in fourth gear, I will see a big difference from the 3100 rpm previously down to about 2100 rpm with the engine just loafing along in overdrive. The fourth gear in a 200-4R is a .67 ratio, so RPMs drop by a third, plus first gear is also a bit lower, 2.74 compared to the 350 turbo 2.52 low gear.
Is this a job for a do-it-your-selfer? That depends, If you can’t get your Olds up off the floor about two feet or more, and do not have a tranny jack, then it’s a bear of a job, I could only get my car lifted high enough on car stands, to slide the tranny on the floor to under the car, then I had to get creative to the get tranny up and balanced on a modified car jack, using two other jacks and wood blocks, then install the dipstick tube and bolt it up. It wasn’t the safest or quickest way to go, but doable. I did save about $1500 doing this job my self and only ended up with a few skinned knuckles.
The only thing left now is to get the stock cruise control linkage set up to work with the new Chebby throttle arm, but that project will be for another day…….
Starting off with a universal dipstick, its tube will probably have to be modified by cutting back the tube height to get it properly calibrated (full mark on stick equal to bottom edge of case).
The new torque converter might need to be shimmed, as was in my case, to get the proper distance in relation to the flex plate (1/4” away maximum). Put a qt of ATF in the converter and take you time indexing it into the trans. It has to engage the front pump properly.
The cross member will be moved back, no big deal, the holes are already there, but I also had to notch it in a couple of places. The very farthest back pan bolt of the 200-4R tranny is very difficult to get a socket on to r&r the pan because the bolt is right under the cross member lip, making a u-shaped notch in the cross member gives easy access. Also, if your exhaust pipes tip in toward the middle to soon, they can hit the crossmember, requiring more notch work for clearance or a new exhaust pipe. A muffler shop had made my drivers side pipe, it was to close, so a bit of clearance was needed in the crossmember to prevent possible interference.
A bit of parking brake cable work is also needed to make up for the extra slack that comes with moving the crossmember back. I drilled a new hole in the cross member so I could move the hook (that holds one side of the intermediate cable) farther to the outside to take up most of the slack.
The cooling lines seem to line up fairly well, the top outlet is the pressure fitting. No driveshaft work was needed. There is also a floor shifter kit available that allows the manual use of all four gears, it requires the removal of the console assembly to replace the index plate, cable and shift indicator plate. The new plate is marked; P R N (D) D 2 1. The new index plate is needed to properly hold the shifter in the new added positions of the overdrive gear. The kit also comes with a new needed transmission end cable bracket. Don’t forget to re-adjust the backup light/neutral switch while the console is out. Not a huge job, the console work, but time consuming. It all seemed to fit nicely, though the cable seems like it should have been a few inches shorter, but then again the stock cable seemed that way also. It’s important that the click stops in the tranny match the stops of the console shifter index plate, it required a bit of fiddling and adjusting to get the trans click stops, indicator shifter lever positions and lever index plate stops to all match up.
Biggest pain in the neck was the very critical TV (throttle valve ) cable setup, If you use the stock Olds Qjet, here’s the problem, the stock intake has the Qjet carb sitting rather low, thus the bottom part of the throttle arm does not extend down far enough for a proper TV cable hook up with an Olds carb. I tinkered with it the better part of a day before I realized the stock Olds carb linkage wasn’t going to work with the TV cable adapter and universal cable that was supplied by Bowtie. But because I’m using an Edelbrock Performer RPM manifold , there is lots of room below the carb, so I used a junk Chebby Qjet from the mid 80’s (Ebay) and used its throttle arm by grinding off the swedged on arm, off both the stock carb and Chebby carb and swapping them. Then by using one of the two available custom adapters from Bowtie Overdrives for the Qjet which includes a carb spacer plate that has the proper cable bracket built into it, and a matching TV cable, I was able to be set up the TV system without any problem. There are 2 styles used, of course they sent the wrong one (cable and plate) the first time. The TV cable has to be setup so there never is any slack in the cable at slow idle and there should be an instant pressure rise with any movement of the cable, also the spool valve the cable controls has to be buried all the way in the valve body at the full throttle position.
The last hurdle was hooking up the torque converter lock up dis-connect switch. A keyed hot terminal wired thru a relay controlled by the brake switch and then run to the transmission. It was not too difficult. I don’t know yet if I’m going to need lockup delay kit or not.
With this tranny, and running 3.42 gears, at 80 mph cruising speed in fourth gear, I will see a big difference from the 3100 rpm previously down to about 2100 rpm with the engine just loafing along in overdrive. The fourth gear in a 200-4R is a .67 ratio, so RPMs drop by a third, plus first gear is also a bit lower, 2.74 compared to the 350 turbo 2.52 low gear.
Is this a job for a do-it-your-selfer? That depends, If you can’t get your Olds up off the floor about two feet or more, and do not have a tranny jack, then it’s a bear of a job, I could only get my car lifted high enough on car stands, to slide the tranny on the floor to under the car, then I had to get creative to the get tranny up and balanced on a modified car jack, using two other jacks and wood blocks, then install the dipstick tube and bolt it up. It wasn’t the safest or quickest way to go, but doable. I did save about $1500 doing this job my self and only ended up with a few skinned knuckles.
The only thing left now is to get the stock cruise control linkage set up to work with the new Chebby throttle arm, but that project will be for another day…….

Registered User
Joined: May 2013
Posts: 58
From: Grand Forks, ND
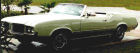
I have a 1970 Cutlass W-31. It does'nt have the original motor or tranny. It currently has a regular cutlass 350 under the hood, and a 74 olds delta 88 transmission.. The shift cable for factory 3 speed hurst shifter is bad. What would be a could place to find a cable? I found a B&m 3ft cable with the eyelet on one end and threaded on the other. Is this going to work? I also need a new transmission bracket for the cable.. Any suggestions would be very helpful.. Thanks.

Thread
Thread Starter
Forum
Replies
Last Post


