When you click on links to various merchants on this site and make a purchase, this can result in this site earning a commission. Affiliate programs and affiliations include, but are not limited to, the eBay Partner Network.
I'm out of ideas for the moment - it simply won't stay running - I reinstalled the prior carb, reset timing back to what it had been before the coil swap and retuned the idle screws to approximately 3 turns out a piece for a base line. It took a while to get the timing set, it was a pretty erratic affair but when finally set it was 15 degrees initial and about 35 all in.
Park idle varies from marginally stable to immediate stall, it won't stay running in gear at all if the idle drops below 900 rpm or so, just coughs and dies out . It does fire right back up so I don't know if I can fault the distributor or not - prevailing thought is when a Pertronix unit is bad it simply stops firing entirely.
At full operating temp (approx. 180 or so) the (new) coil began to intermittently pop as well, wasn't doing that before. I'm fairly certain motor hasn't jumped a gear tooth, the chain is a new Cloyes double roller set with only about 5k mi on the whole motor. Tried spraying around the carb base and vacuum ports, no leaks detected. Only good news is still isn't running rich like before... Any other ideas or premonitions are much appreciated...
STILL nowhere closer to solving this issue. Have not yet swapped out the distributor (or any parts thereof) pending any Pertronix guidance that might follow - they had me run some checks on the Ignitor and here is an outline of my findings/response - all pending their further reply:
Voltage test with coil jumped from (-) to ground - 5.5 v with ign switch on, engine off - this occurred no matter where I tried to ground it, even to (-) battery terminal.I'm running an Optima red, which is about 1yo.
Engine cranking - 8 v
Engine running in park idle - 13 v
I also measured the coil (+) only with a digital meter without jumping the (-) terminal:
Ign switch on, engine off - 11.2 v (which is what the battery measured cold this a.m.)
Engine cranking - 8 v
Engine on - 13 v at idle (with negligible fluctuation just above/below)
Coil is a new replacement Accel yellow canister (p/n 8140 I believe), which I just installed a week ago in place of the MSD blaster 2 that had been on the car for past 1+yr after motor installed.
I presumed it might be best to start with the coil, thinking my sudden onset poor running conditions / carbon fouling was resulting from an MSD coil failure.
Motor was running stock wire harness and setup (newer M&H Wiring repro harness) and I found at that time that the coil volts when engine running were only 1.5 v - I honestly don't know how long that had been the case because until 2 weeks or so ago, car ran beautifully . To refresh your memory, I have the Flamethrower III - p/n D7110700.
I've since re-routed the run wire from starter directly onto the IGN terminal within my fuse box,which restored 12v to the coil. I don't know what the potential issue is there, as the starter was also installed new (brand new Powermaster stock-type replacement).
Distributor is about 1.5 years old, bought it mid-2016 but it didn't actually get fired up for first time until early 2017 when motor had been finally completed and installed.
So after significantly carbon-fouling the replacement plugs (though they were dry) I installed to reset the carb and timing with (R46SZ gapped .045), the next set were dark and fuel soaked.
No difference in overall issues even with swapping in another known good Qjet carb. I've also been all over the car looking for vacuum leaks,can't seem to find any, but the car still idles erratically at best in park,and immediately dies out in gear.
I looked under the distributor cap, nothing appearing cracked, loose or burnt - only have about 5k miles on the car since motor went back in.
Last edited by 70sgeek; June 15th, 2018 at 12:15 PM.
I've since re-routed the run wire from starter directly onto the IGN terminal within my fuse box,which restored 12v to the coil.
This doesn't make sense to me. The wire from the starter to the coil provides 12 Volts when the ignition switch is in the start position. What you have done is connected a key-on 12 volt source (IGN terminal) to key-start 12 Volt source (starter solenoid).
It makes more sense to connect the IGN terminal on the fuse block to the coil positive.
Last edited by Fun71; June 15th, 2018 at 12:57 PM.
You were supposed to run the wire from the IGN terminal to the coil+ terminal and remove the black wire that ran there from the M&H harness and stow it. Running it to the starter basically accomplishes the same thing in a round about way.
I was going to run the yellow from coil (+) to IGN as suggested, clipping the black but couldn't quite make sense of whether that would have been a correct alternate route - In looking at the factory engine harness, the yellow and black wires are interconnected terminating in an open connector that attaches to the coil (+). The harness is taped up going down towards the wiring junctions, so I can't see what else if anything they connect to.
The bottom of the harness running to the starter though, has the yellow and a purple wire coming out for connection to the starter (purple to start, yellow to run). So I didn't know if the black and purple are interconnected (presume they are) and if that would create a no-start condition if clipped.
So the way I tried it was to run the yellow to IGN and leave the black interconnect on the coil (+). Coil currently has 8v cranking, 13v or so with engine running, but still nothing different in the engine running conditions themselves.
You may absolutely be right, I'm probably nuts at this point and should be following your advice - I can easily make the swap you originally suggested, since I doubt I've made any more of a problem than still exists.
I don't understand why the coil originally only measured 1.5v when engine on at such time that all the problems surfaced - I had never thought to check it before when car was running perfectly, so no idea how long that issue existed. But that is why I re-routed the wire to IGN, to restore the volts - maybe a long-standing low volt condition fried the Pertronix and now restoring the volts isn't the whole answer...
I'm just stumped... at least until I can rule out the distributor itself.. I did remove the capacitor and have tried running the car with and without the tach, no change either way. The tach is a Parts Place repro (clock/tach combo) and it works perfectly.
Last edited by 70sgeek; June 15th, 2018 at 02:36 PM.
Like I said electrically your the same in a round about way. I would still snip the black wire that's attached to the yellow at the coil+ terminal just to eliminate everything.
Ok I disconnected the remaining coil (+) black wire which had been interconnected to the (re-routed) yellow run wire and as expected, the coil registered no power in key-on position. The yellow is not currently connected to coil, it currently runs directly from starter lug to IGN.
Make sense, at that point removing that (+) black eliminated any power going to the coil, since the run wire is now running straight to the IGN lug on fuse box.
When back in place, coil shows 5.5v power with key-on, engine off (as before), which is what I'd expect to see at best even if I put the yellow back in place. I know the key-on power reading should be higher but I don't know if that's the whole, if any real part of the problem.
Wondering if a prior low voltage condition fried the Ignitor enough to develop an output condition (waiting on Pertronix for that potential answer)
still waiting on Pertronix for any further thoughts as to whether distributor-related issues may exist.
Last edited by 70sgeek; June 16th, 2018 at 04:38 PM.
The yellow wire needs to run from the starter R terminal to the coil+. You also need to run the wire from the IGN terminal in the fuse box to the coil+ terminal.
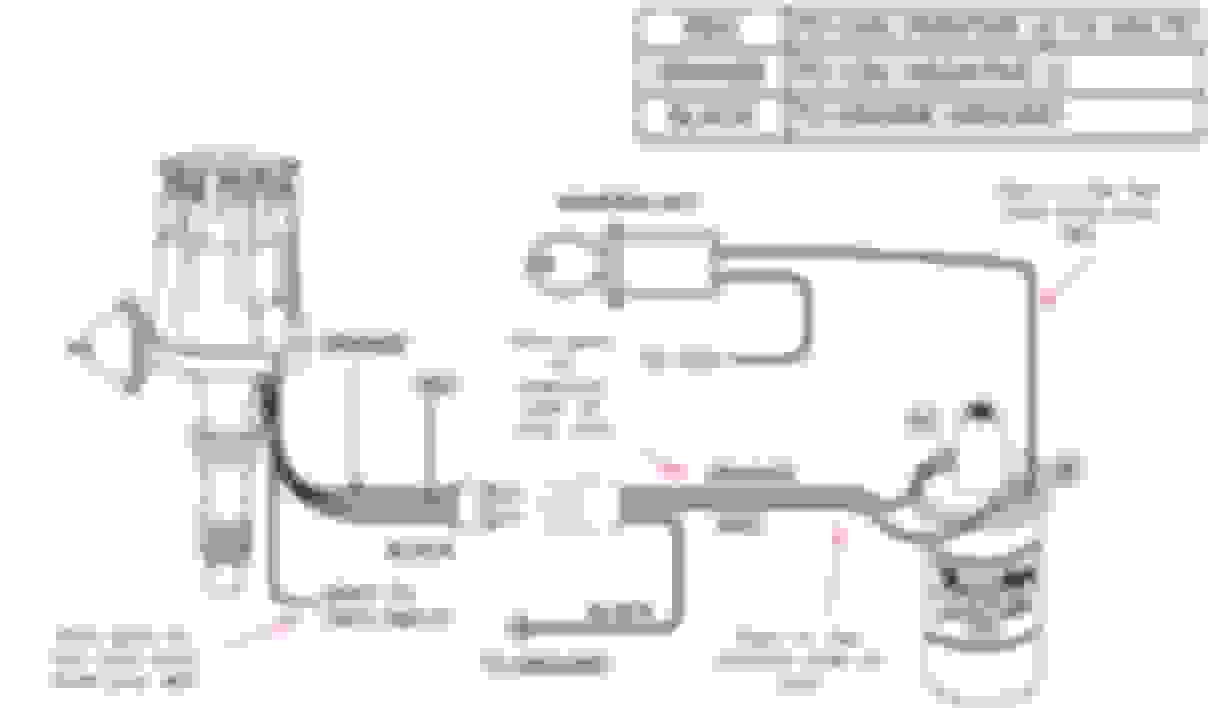
The only wires that should be on the coil+ are... the yellow one from the starter, the one from the IGN terminal, and the red Pertronix wire. The coil- should only have the black wire from the Pertronix. Temporarily mark all the wires and tape them up.
Update - restored ignition harness yellow (coil +) back to original configuration (interconnected with black) and ran the additional IGN wire to coil + as well.
with coil ( - ) jumped to a frame ground, the key-on volts measured roughly 10.2v, well up from the 5.5v previously measured by same means.
I changed out the plugs again to start fresh, as the last set were fuel fouled (the set before that carbon-fouled but were otherwise dry).
So now I'll follow up with Pertronix to see if they can add any further thoughts as to whether the Ignitor III module may be at issue from a prior low voltage condition (or any other reason). I don't want to fuel-foul another plug set and potentially damage my cylinder walls with continued compromised running conditions.
the Pertronix rep wanted me to measure the key-on/engine off volts with coil (-) jumped to a frame ground, that was one of their tests.
connect coil (-) to engine/frame ground, meter (+) to coil (+), meter (-) to ground. He indicated the volts measured that way should have been at least 8v or greater (my reading was 5.5v).
Measuring just across the coil produced full voltage the way I had it previously wired, but now it measure full voltage both ways.
the way it's wired currently is the harness yellow/black (starter wires), yellow from IGN and red distributor to coil (+), distributor black to coil (-).
so in update to my Pertronix chat, the following was their further evaluation:
Yoursecond test indicates you have either a bad positive or ground connect or both.The Ignitor would not be the cause of the low voltage. If the Ignitor were tofail the car would not run. It appears you need to locate the bad connections.As a secondary note if we hadn’t discussed it prior you also want to make sureyou are not running solid core wires.
----------------
The 2nd test he refers to was the subsequent coil voltage ground test I ran after adding a wire from IGN to coil (+) in supplement to the original harness wires - the grounded key-on/engine off volts increased from 5.5 to approx. 10.2. - but I still don't know why - would that indicate something was wrong in the power path between coil (+) and starter, or possibly the factory battery cables themselves? I did get new ones from M&H a few months back anyway, so they will get installed as well before I fire the car up again.
I'm running typical spiral core wires (MSD 8.5mm) so no issue there. I have a new cap/rotor I'll swap in and I'm assuming my 2 week-old Accel 8140 yellow coil is good so I guess I'll try firing the motor up and tuning it again to see if will stay running in its current configuration. I also put a new set of plugs in already, gapped at .040 to start fresh.
if it truly isn't a distributor issue and nothing changes from this last round of adjustments, I'll be back to where I started...
Last edited by 70sgeek; June 19th, 2018 at 02:39 PM.
so in continuing to beat the wheezing horse, a well seasoned gearhead friend and I spent several hours retracing all the steps I've taken to date in effort to return my poor ragtop to the land of the running...
Reaffirmed the absence of carb issues, we have good fuel flow, battery and coil voltage, etc. Can't find any vacuum leak issues. Tested both coils again (my old MSD and newer Accel, both appearing in similarly good working order.
Car continues to start easily but will not stay running below 1100 rpm - immediately dies when foot comes off the gas, even after completely warmed up. Also immediately gas-fouled the new plugs (again).
So now we both give up - I know Pertronix said 'can't be our distributor' but my friend and I are completely baffled and though neither of us are fans of needless parts replacements, he's convinced me to ditch the Pertronix dizzy.
So in an act of total frustration, I am purchasing a new MSD ready-to-run distributor (p/n 8529) along with new wires, plugs and probably another new coil just to eliminate any more variables. Scored a nice discount on the MSD, which will mostly cover the other parts.
My question as to the orientation of the distributor is - the typical install position of the distributor has the vacuum canister pointed towards the engine right rear - it seems limited for rotation space/access back there and I wondered if in theory, with the wires otherwise installed appropriately for the correct firing order, the distributor could be installed with the vacuum unit pointed more forward for easier rotation access.
I would just remove the pertronix and install a uniset points set for a test.
Do you have a set of spark plug wires to fit your new distributor? If you want to move the position of the distributor when you install the new one, just get the body positioned where you want it, then rotate the rotor to which spark plug you want to be #1 when the engine is at #1 tdc, and stab it in.
I'll be getting new wires, the MSD is a male lead cap, Pertronix female.
I don't know if a points set would retrofit in the Pertonix - my friend suggested I get a reman points distributor to swap in for a test, but there are none available locally and cheapest I could order one in was about $100 and minimum 3-5 days to get it - guess I'm just too tired to do any more experimenting...
If its like their replacement setup, you just remove the rotor, pull the black ring off the center shaft, and unscrew the sensor. Then install the uniset, set point gap, and its ready to run.
I know this is a little late - but I wanted to add I had an issue with an engine upgraded to HEI that ran like crap. There was an inline resistor (not a resistor wire) for the distributor + lead. I had people telling me the engine needed a valve job, etc.. Got 12+ to the distributor and it ran like a top. I'm just mentioning this so you make sure you are 1000% positive you have 12+ volts going to the distributor with the key on - and while running.
Otherwise with as much as you've tried - at this point I would just start buying/swapping all ignition parts out.
I do have full 12v hitting the coil at this time and still no change in the running issues. I've resigned myself to changing out the entire distributor, not knowing what else externally could be at issue, despite what Pertronix has told me to date.
new MSD ready-to-run is on order, as are the new wires. Still undecided on a coil, though I'll likely be limited in options due to needing one which is ohm-matched, with an hei-male topped connector. Will probably have to go with the MSD 8223 coil, though I've heard less than stellar comments about its overall construction (apparently the tower attachment has a tendency to come loose from vibration...?).
So in update - I swapped in the new MSD distributor and coil, along with new plugs and wires.
Car immediately ran like new again and I was able to set initial timing solidly at 15 degrees BTDC.
I'm convinced now the Pertronix distributor was faulty, but there is still a collateral issue that I need to diagnose.
The new coil initially showed about 6.5v across the connections with key on/engine off, full 12v with engine on.
After setting the initial timing I shut the engine off. When I went to restart it, cranking power was little to none, followed by no volts showing across the coil either in key on/engine off or cranking modes. BUT when I grounded the coil (-) post to the frame, the meter read 12v to the coil in key on/engine off and approximately 5v cranking (still with no start).
Coil (+) has the engine harness yellow/black from starter contacts, plus the yellow jump wire I ran from the fuse box IGN terminal (which is supplying 12v power supply in key-on position).
Wondering if I might need to try removing the yellow/black harness wires from coil and starter, instead running 2 new independent wires (i.e maybe the harness wires are at issue?).
Not sure why no voltage reading across the connections but volts read with coil grounded to frame.
So now the car cranks but won't start. Wondering if I have a starter solenoid issue now, possibly something that resulted from my prior failure issues if not purely coincidental.
But I know the car runs like it did before all of this occurred so the distributor was in fact at issue at least in some major part.
Last edited by 70sgeek; June 30th, 2018 at 10:24 AM.
Glad its running better. You can separate the yellow and the black wire and tape or heat shrink individually. Then tuck them back into the harness. All you need is the wire from the IGN terminal at the fuse block to the coil +. Make sure the connection is good on both ends.
So disconnecting the yellow/black harness wires would eliminate a direct starter connection to the coil - is that what you're suggesting?
The starter is fed power directly from the (+) battery cable, with the harness yellow/black also feeding the starter run and start terminals up to the coil.
Wouldn't the start terminal still require a direct connection to the coil to be maintained?
For a points distributor, when the solenoid actuates it feeds a full 12v to the coil+ terminal through the yellow wire so as to bypass (over ride) the reduced voltage of the resistance wire, which should be the black one. The resistance wire is there so as not to overheat the coil or burnup the points. Since your running an HEI off of the IGN terminal at the fuse block, you should have voltage in both the start and the on positions of the ignition switch. Having the black wire also connected is a redundant unnecessary circuit connection. Note, if you don't have 12v to the coil + terminal during start then reconnect the yellow wire only to the coil + terminal.
This is the way you should have your new distributor and coil wired with the gray wire connected to your tach. Assume in this drawing that the power feed wire from the key is instead the wire from the IGN terminal in the fuse box.
Yes this essentially is how the distributor is wired. Distributor red to coil (+), orange to coil (-). the harness yellow/black are inter-connected and attached to coil (+) with yellow running down to starter Run terminal and black connecting to starter Start terminal.
the thing I can't quite get is the coil shows no volts when measure strictly across its terminals, but when grounding the coil (-) to frame, the (+) side reads 12v at key on/engine off position, then approx. 6.6v cranking.
shouldn't it read volts measured strictly across the terminals?
Car still won't start, cranks freely - like coil not getting cranking spark (which in theory seems like it isn't by my meter readings).
Which is weird because it did have power right after the new installs and fired up this morning.
Do not short the negative side of the coil to ground. When connecting the volt meter you have to connect the negative lead to ground (engine block) and the positive lead to the coil+ terminal. The negative side of the coil is a pulsed ground signal to fire the coil when the engine is turning.
Again remove the yellow and black wires. Leave the wire from the IGN terminal connected to the coil+. You should have full battery voltage in both the start and run ignition key positions. If you only have 12v at the coil+ in the run position and not the start, then reconnect only the yellow wire to the coil+ terminal. Leave the black stowed away.
Ok, pulling only the black wire off the (+) coil (leaving the yellow harness wire in place) resulted in a complete loss of cranking volts from it - The black I believe is interconnected inside the body of the harness, to the purple wire which connects to the Start terminal on the starter.
Removing both the interconnected yellow/black harness wires entirely from the coil resulted in increased cranking volts (up to 7-8 volts), but motor still would not start no matter where I positioned the distributor.
No matter how much I move the distributor in advance or retard directions, the motor only cranks but won't fire. Plugs are still reasonably clean (some carbon) from the earlier startup right after the new distributor install.
For the most part, motor is struggling even to crank (5-8 cranking volts) and I can't tell if that's a distributor position issue or possibly the starter itself at this point (though it's only a year old Powermaster).
The more clockwise I spin the distributor, the easier the cranking becomes, but the motor won't start. At this point, the distributor vacuum can is aiming at the very back of the right valve cover and the motor barely turns..
this is a crazy chain of events - I know the new distributor coil and wires are good, I'm getting fuel and run volts are good. 6-8 cranking volts were enough to start and time the car this morning and now all it does is crank.
Last edited by 70sgeek; June 30th, 2018 at 01:38 PM.
Ok, pulling only the black wire off the (+) coil (leaving the yellow harness wire in place) resulted in a complete loss of cranking volts from it - The black I believe is interconnected inside the body of the harness, to the purple wire which connects to the Start terminal on the starter.
First thing before you do anything else, make sure your battery is fully charged, 12.7v
The black wire is not connected to the purple wire at all, just leave it aside for now it has nothing to do with your issue.
Removing both the interconnected yellow/black harness wires entirely from the coil resulted in increased cranking volts (up to 7-8 volts), but motor still would not start no matter where I positioned the distributor.
[B[B[/B]]I explained what the yellow wire did above.[/B]
Remove the wire from the IGN terminal and measure the voltage with the key on. It should be pretty close to what the battery voltage is. If your getting low voltage clean the contacts on the Turn Signal Fuse.
No matter how much I move the distributor in advance or retard directions, the motor only cranks but won't fire. Plugs are still reasonably clean (some carbon) from the earlier startup right after the new distributor install.
We need to find your voltage issue first.
For the most part, motor is struggling even to crank (5-8 cranking volts) and I can't tell if that's a distributor position issue or possibly the starter itself at this point (though it's only a year old Powermaster).
What part number is your Powermaster starter?
The more clockwise I spin the distributor, the easier the cranking becomes, but the motor won't start. At this point, the distributor vacuum can is aiming at the very back of the right valve cover and the motor barely turns..
Again, we need to solve the voltage issue.
this is a crazy chain of events - I know the new distributor coil and wires are good, I'm getting fuel and run volts are good. 6-8 cranking volts were enough to start and time the car this morning and now all it does is crank.
Everything you said points to your run and cranking voltage at the coil being too low.
Battery is fully charged, I've been keeping it topped off as needed on a charger - alternator is properly charging as well.
I will remove the black wire again
I did check key-on voltage at the IGN terminal earlier and it matched the battery - with the motor cold it was approx. 11.5v - I had not thought to check the t/s fuse contacts so will clean them up if needed and recheck voltage.
starter is a Powermaster 3655 (the OEM style high torque replacement) - installed it new a little over a year ago when the motor went back in the car.
possibly the column-tube mounted ignition switch is bad?
If your battery is 11.5 with the key off it is not fully charged, it needs to be 12.7v. Leave the IGN wire disconnected. Once the battery is fully charged, disconnect the yellow wire from the coil+ terminal. We need to measure the voltage on the yellow wire from the starter in both the ignition switch on and crank positions. You should only have 12v (very close to what your battery reads) in the crank position only. If you have all the above then reconnect the wire from the IGN terminal and the yellow wire to the coil+ terminal, You will have 12v in both crank and run key positions at coil+. You should be able to start and time the engine. If you don't have these voltages then we need to find out why.
There are no issues with the starter part number it should work fine.
I checked the battery voltage this a.m. before firing the car up for the first time after finishing the distributor install - at that time the car had been sitting about a week or so - it read approx. 11.4v at that time just in the key-on position (which just about matched the reading at the battery terminals.
many thanks for the continuing assist - I know the distributor was bad at this point, now I just need to figure out if something else caused to go bad so I don't damage the new one.
checked IGN terminal voltage with full charge - read approx. 12v in key-on/engine off position, battery terminals are directly measuring about 12.4v after full charge (key off position).
I've now separated the interconnected yellow/black harness wires and crimped each with their own ring terminal.
checked turn signal fuse contacts - fuse looked good and contacts on both sides clean - changed the fuse anyway for good measure
removed only the black harness wire from coil (+) and tried cranking - cranking volts measured 8v+ at the IGN terminal and car briefly sputtered on in the key-on position but wasn't responsive to throttle and died within moments.
then removed yellow harness wire (the one which was originally interconnected with the black) and metered it - no key-on/engine off voltage reading (reading was in the 700-800mv range), approx. 8.5 cranking volts though.
so at this point both the yellow and the black are disconnected from the coil (+), leaving only the yellow I ran from the IGN terminal and the distributor red.
Battery cables are brand new as well, new M&H wiring replacements
Last edited by 70sgeek; June 30th, 2018 at 04:05 PM.
What size wire is the yellow wire you ran from the fuse box? It needs to be at least a 14ga. Ok, temporarily remove the wire from the starter and the wire from the IGN terminal (make sure they can't short to ground) from the coil+ terminal. Run a 14ga jumper wire directly from the positive battery terminal to the coil+ terminal and try and start it with the key. It should start right up, set your timing and tighten the distributor. In order to turn the engine off, you need to remove the jumper wire from the battery. Shut the engine off and reconnect both the wire from the starter and the wire from the IGN terminal to the coil and try to start the car.
Running the wire directly from the battery to the coil eliminates all the cars wiring from the ignition system.
so I'm going to leave the yellow and black harness wires off, also removing the IGN lead - effectively only leaving the distributor red in place on the coil (+).
I have plenty of 14g wire so running a jumper is no problem. I am running 14g yellow from IGN to coil (+) at this time.
Since the car did fire up and run this a.m. I'm not sure what happened to change its condition - I had it running and timed like new until I shut it off and went to restart a few minutes later. So something's still wrong in the system that now appears not to involve the coil or distributor.
so I'm going to leave the yellow and black harness wires off, also removing the IGN lead - effectively only leaving the distributor red in place on the coil (+).
Yes.Tape up the black wire and tie wrap it to the harness, you will not be using it.
I have plenty of 14g wire so running a jumper is no problem. I am running 14g yellow from IGN to coil (+) at this time.
No, your running a jumper from the battery to the coil+, it needs to be made to be easily disconnected to turn off the engine once running.
Since the car did fire up and run this a.m. I'm not sure what happened to change its condition - I had it running and timed like new until I shut it off and went to restart a few minutes later. So something's still wrong in the system that now appears not to involve the coil or distributor.
In a cautiously optimistic twist of events, the car is now running like new under its own power. I've not yet test driven it but it starts and solidly idles in park and gear as before and timing is back on the mark at 15 degrees at 4 degrees BTDC.
It wouldn't start or run first thing this a.m., as it was when I left it last night. After indexing the #1 plug to TDC again I noted the rotor was parked at the #2 plug socket. I don't know how it repositioned itself from the #1 position that I had originally set it for but I ultimately pulled it out and reset it back to where it had been. That hadn't been an issue before when I had checked the TDC position, so I have to presume it was something that changed today.
Currently the coil is wired only with the 2 distributor wires and the yellow I ran from my fuse box IGN terminal to coil (+). Both engine harness wires (the interconnected yellow/black) are off. Distributor ground is bolted to the intake and its gray lead to the tach. Per the tach, park idle is about 900 rpm, gear idle about 700. Gear idle is currently solid even with the a/c on.
Still at issue - car is still struggling to crank - as if it were trying to turn a high compression motor over. There's still something else needing attention but I'm not sure if possibly a starter or under-dash ignition switch issue. Both are essentially only a bit over 1 year old.
Since I'm not experiencing any other issues which might indicate a switch problem (all dash lights and accessories work as they should), starter has me concerned.
battery cables are new M&H - Alternator is a new Powermaster 100 amp with internal VR and charges properly. My engine harness is a newer M&H as well, properly adapted for the alternator (firewall VR is eliminated).
Plan is to let car sit for a few hours to cool off, then try firing it up again - if it runs ok, I'll take it out for a test drive.
Last edited by 70sgeek; July 1st, 2018 at 11:09 AM.
After indexing the #1 plug to TDC again I noted the rotor was parked at the #2 plug socket. I don't know how it repositioned itself from the #1 position that I had originally set it for
Well, I noticed you posted this earlier, which would explain why the rotor's relative position was changed.
Originally Posted by 70sgeek
No matter how much I move the distributor in advance or retard directions, the motor only cranks but won't fire.
It's just been a bizarre (for me at least) event sequence - I marked the positioning of the old distributor (body and rotor) so I could hopefully duplicate and maintain the indexing position of the new distributor after install. I didn't want to lose my orientation and risk mis-timing the engine any further than it may have been as a result of the old distributor's issues (whatever they are/were).
So it did puzzle me further when after rotating the motor back to #1 TDC this a.m. the rotor parked 1 full plug over from where it had been originally set.
Once I reinstalled the distributor back into its prior position though the motor finally started firing and running - I still don't get where the low voltage issues arose from and still not sure I don't have something still going on in that respect - but hopefully at least narrowing those down as may be needed.
took the car out for run and gas fill-up - all running beautifully even with the a/c cranked!
 June 12th, 2018, 04:46 PM