
What would you do if...


Thread Starter
Registered User
Joined: Oct 2009
Posts: 271
From: Lansing, MI
What would you do if...
Here's the deal. I am going to be pulling the 330 out of my 1965 Cutlass this fall when cruising season is done here in Michigan. It runs flawlessly, no ticks or rattles, no leaks, good oil pressure, I just want to clean all the funk off of it and make it look sweet. This is a 52000 original mile unit that has one modification to it. A previous owner installed an Edelbrock 1406 Carb on the Olds 4 barrel intake. While it is on the engine stand it will be cleaned/painted and all new gaskets installed. What else would you replace or upgrade at this time? How about a new oil pump? High volume or standard? I am going to replace the intake with an Edelbrock Performer RPM, so would a new set of lifters be OK to drop in on the original cam while its opened up? How about a timing chain set? I have a set of Kooks SBO Headers with a shiny thermal coating that will really set this 330 off in the engine compartment. I want to do this "clean and detail" without messing up how well everything works. What else would or wouldn't you do to a motor that runs great but looks like crap!
Connoisseur d'Junque
Joined: Sep 2010
Posts: 21,183
From: The Hudson Valley
It runs flawlessly, no ticks or rattles, no leaks, good oil pressure... This is a 52000 original mile unit that has one modification to it. A previous owner installed an Edelbrock 1406 Carb on the Olds 4 barrel intake...
How about a new oil pump? High volume or standard?
I am going to replace the intake with an Edelbrock Performer RPM, so would a new set of lifters be OK to drop in on the original cam while its opened up? How about a timing chain set? I have a set of Kooks SBO Headers with a shiny thermal coating that will really set this 330 off in the engine compartment. I want to do this "clean and detail" without messing up how well everything works.
What else would or wouldn't you do to a motor that runs great but looks like crap!
If I couldn't help myself, I'd stay away from the head gaskets, unless I wanted less compression.
Since you have no plans to change the cam, why would you install an intake that's going to kill your low-RPM torque?
I wouldn't mess with a perfectly good, low-mile oil pump either - you will obtain exactly zero benefit from a HV oil pump in a low-mile engine, but may lose a tiny bit of power and fuel mileage.
As for headers, I wouldn't install them, as you would be trading a slight performance increase for a large increase in engine compartment noise and recurring sealing nightmares.
You've got a great-running engine - why mess it up?
- Eric
Proud Viet Nam Veteran
Joined: Dec 2006
Posts: 10,817
From: Rowlett, TX
I would do the timing chain for sure. Eric is right about the RPM manifold. If you really want to change the manifold, just use the Edelbrock Performer. No way I would do the headers.
Last edited by redoldsman; Aug 26, 2013 at 10:40 AM.
Connoisseur d'Junque
Joined: Sep 2010
Posts: 21,183
From: The Hudson Valley
Yeah. I was going to mention the timing set, but I forgot. ")
The original cam sprocket will lose its nylon teeth - change to a good-quality set and you won't have to worry about it again for a couple of hundred thousand miles.
- Eric
The original cam sprocket will lose its nylon teeth - change to a good-quality set and you won't have to worry about it again for a couple of hundred thousand miles.
- Eric

Registered User
Joined: Aug 2008
Posts: 1,130
From: Iowa
Are you guys trying to be funny? A Performer will work on this motor......the RPM not so much. As far as headers......if a quality header (like Kooks) is installed right, they are not high maintenance and will improve power and mpg with a good exhaust. I would not run without them either at the track or on the street.

Registered User
Joined: Nov 2008
Posts: 8,487
From: Central Fl
Are you guys trying to be funny? A Performer will work on this motor......the RPM not so much. As far as headers......if a quality header (like Kooks) is installed right, they are not high maintenance and will improve power and mpg with a good exhaust. I would not run without them either at the track or on the street.
And make sure you get the right cam. Check out a couple guys on here that got the wrong cams for their 330's.
I do those for the same price as the 39* stuff.
Thanks!!

morgan
Joined: Mar 2011
Posts: 1,925
From: CT
i dont know anything about upgrading a 330 for performance but your saying the engine runs flawlessly and I would leave it alone and clean it and paint it. especially if you dont drive it much and just rebuild it when the time comes (there is the possibility it wont run as well when you rebuild it). i know it would be tough watching it sit there on the engine stand and you would want to start turning a bunch of wrenches, if your bored and want to upgrade the manifold and stuff then sure a cam lifters gaskets chain...and a few more things i'm sure. i do like headers though
Oldsmobile enthusiast
Joined: May 2013
Posts: 689
Changing the lifters is not a good idea.
Just me but if I pulled the engine it would get all new Felpro gaskets including head gaskets to lower compression, new regular Melling oil pump, timing chain and cam and lifters. Freeze plugs are a must.
Redo the heads with hard valve seats and new seals, springs.
Then while the engines out the trans would get a new front seal.
Registered User
Joined: Jan 2010
Posts: 1,548
From: duncan bc
how bad is your 65 now? heres my before and after, your going inside the motor, i didnt. shoulda changed the water pump though because it leaked as soon as i started it up. good luck, i look forward to your progress. i just did a quickee because it was embarrassing to open the hood
IMG_2340.jpg
IMG_3581.jpg
IMG_2340.jpg
IMG_3581.jpg
Connoisseur d'Junque
Joined: Sep 2010
Posts: 21,183
From: The Hudson Valley
Changing the lifters is not a good idea.
Just me but if I pulled the engine it would get all new Felpro gaskets including head gaskets to lower compression, new regular Melling oil pump, timing chain and cam and lifters. Freeze plugs are a must.
Redo the heads with hard valve seats and new seals, springs.
Then while the engines out the trans would get a new front seal.
Just me but if I pulled the engine it would get all new Felpro gaskets including head gaskets to lower compression, new regular Melling oil pump, timing chain and cam and lifters. Freeze plugs are a must.
Redo the heads with hard valve seats and new seals, springs.
Then while the engines out the trans would get a new front seal.
- Eric
Proud Viet Nam Veteran
Joined: Dec 2006
Posts: 10,817
From: Rowlett, TX
Freeze plugs are probably a good idea. They would be a lot easier now than when the engine is back in the car. After all, they may be 48 years old. If that is the case, they are on borrowed time.

Registered User
Joined: Dec 2012
Posts: 1,589
From: Texas
I say while the motor is out, at least change the timing chain and gears. There almost 50 years old, even if its running good I guarantee the chain is stretched some. If it has a nylon cam gear then its on borrowed time. My 67 E block 400 also low mileage ran perfect but the nylon cam gear although intact had a multitude of cracks and the crank gear had significant wear. Oil pump, I don't know they can wear out, never had it happen to me. But again the motor will be out of the car, it would be too easy to replace it. Rear main seal? your call, front will be done if you replace the timing chain or it should be done at that time. If the water pump is old, replace it as it to is prone to failure sooner or later. I think new motor mounts too if there the originals. New freeze plugs perfect time when the motors out. If its running good as you say I wouldn't bother the head gaskets, cam and lifters unless your wanting more power, and if you do want more power rebuild the whole motor.
Registered User
Joined: Sep 2009
Posts: 2,444
From: mn
If you want more power what about a 403 with a rpm intake and cam cleaned up painted stock with headers and some port work . You could change out to a Th350 at the same time keep the 330 on the shelf and get the mod bug out of you. Depends on the funds .
Thread Starter
Registered User
Joined: Oct 2009
Posts: 271
From: Lansing, MI
Thanks for so many reply's! I'll try to comment on your input and advice.
MDchanic - Head gaskets were not going to be part of the deal, basically just all the OTHER bolt on stuff. I will stay away from the Performer RPM and stick with the Performer. The stock cast iron intakes never keep paint on them and always look like crap around the heat crossover, so its got to go. I have been using the Remflex graphite exhaust gaskets for several years now on many different headers, and have NEVER had a header flange leak since. These Kooks are an extremely well built header and they have to go on there in place of the cast iron manifolds. Sounds like a timing chain is on everyone's list.
redoldsman - Freeze plugs, good idea, I hadn't thought of those. Timing chain and a Performer rather than an RPM. I already had to do a water pump.
380 Racer - I think I watched your car at Norwalk a couple of years ago. I LOVE IT! When you talk about a small block Olds, I listen. If you (and cutlassefi) say stick with the Performer, then that's what I will do. I'm with you on the headers, these Kooks are top notch and i can't imagine not using them.
s i 442 - I don't want to get into doing head gaskets, or any machine work. Seems like once I pull the heads I start thinking total rebuild. I had kind of let the trans slip my mind. A new front seal is a great idea.
stan 65 cutlass - I would say mine looks a little more grungy than yours. I can see some gold in your before photo...Do you have power steering? Is it from a later model year? The PS on my Cutlass sticks up higher than the valve cover. I am with you all the way on cleaning it, a couple on new parts and drive it!
steverw - Another vote for timing chain set, and freeze plugs. You're right, new motor mounts are probably inexpensive and its a perfect time. I don't want to get into head gaskets, or a complete camshaft/lifter/spring change. I thought maybe lifters, and an oil pump just because they are a wear items, and they are right there when the intake and oil pan are off for a fresh gaskets.
Once again thanks for the input, I picked up some good advise and some things I missed altogether. Just to be clear, I'm definitely a "Show Car" type of guy. This motor will be so clean you could eat off of it when I'm done. No leaks of any kind will be allowed. I don't go for much chrome, just detail, detail, detail until it looks AND runs perfect.
'87 Delta 88 Royale
Joined: Dec 2010
Posts: 2,514
From: Margate, England
Once again thanks for the input, I picked up some good advise and some things I missed altogether. Just to be clear, I'm definitely a "Show Car" type of guy. This motor will be so clean you could eat off of it when I'm done. No leaks of any kind will be allowed. I don't go for much chrome, just detail, detail, detail until it looks AND runs perfect.
But I'm nitpicking here, sounds like you will take care to do everything as well as it can be done.
I think you are a credit to your car, to Oldsmobile enthusiasts, and to the old car hobby in general.

Roger.
Thread Starter
Registered User
Joined: Oct 2009
Posts: 271
From: Lansing, MI
Pulled the motor today, found some stuff
The weather turned crappy around here and I decided I was done driving my Cutlass for this season. I removed the hood and everything else necessary to get the radiator support out of the way. I took the engine and trans out as a unit, so much easier than leaving the trans in place. I got the engine on the stand and began the process of removing stuff and looking things over. This motor ran nice, no smoke or noises, and yet some of the things I found have me worried.
In the back lower corner of each cylinder head (near the drain back hole) there is/was a collection of crud that appears to have small pieces of nylon mixed in with it. The pieces have a slight "curved" shape. Is that part of something that goes inside the valve springs and has cracked and broken? Even though this thing ran great, I can see a lot of crud on the intake valves when I look down through the intake ports. I know I said I didn't want to get into head gaskets, but there is no way I want to leave the heads on there now that I can see what the valves look like.
I pulled the heads and was pleasantly surprised to find that the tops of the pistons are clean, and the cylinder bores are smooth. After seeing the gunk on the valves I had visions of the pistons being covered in black carbon and crud as well. I am hopeful that the bottom end is still good to go. I am going to drop the heads off tomorrow for what I hope will be a basic rebuild. I would like to think that the heads just need a "valve job" and that most of the parts like the valves, springs, retainers, etc. can be reused.
I have a question concerning the block surface prep for installing the cleaned up heads. How can I clean that head mating surface and not get any loose crud down in the cylinder bores and on top of the pistons? I was planning of using a scuffy pad to clean that area but I'm afraid that some stuff will drop down in the hole and get lodged down beside the piston right above the top ring. How do you get that area ready for a head gasket without causing more problems?
This has already turned into MAW once I saw the heads, now I'm worried that I might get something down in the cylinder that doesn't belong there. I don't want that fear to turn into another "might as well". Then I would have to buy pistons and rebuild the whole motor. YIKES!
Registered User
Joined: Oct 2011
Posts: 390
From: Munich, Germany
The small curved pieces of nylon are, what's left of your valve seals! They get old and brittle and finally end in your oil return holes...I'm sure, when your heads get rebuilt, the machine shop will take care of that! You could easily replace the valve seals yourself, though.
For preparing the block, from what I've read it is recommended to just use a razor blade and lacquer thinner, until you have a smooth surface.
My surface was not smooth enough after that, so I put a rag into each cylinder and used I think 220-grit sandpaper and then a finer one, stretched over a straight block of wood to smoothen the block surface. After that I vacuumed the cylinders with a strong vacuum carefully, to make sure there is nothing left in the cylinders...So far it has worked for me, but I'm sure others don't think this was a good idea ;-)
Good luck! here a picture of mine when it was done, as a little motivation
IMAG0401_zps0f9e5032.jpg
Last edited by dancutlass; Oct 18, 2013 at 12:25 AM.
Connoisseur d'Junque
Joined: Sep 2010
Posts: 21,183
From: The Hudson Valley
Told you not to pull the heads. Intake valves always look like that.
Now that you've pulled the heads, there is no effective barrier to complete disassembly, and once you have the engine disassembled, you WILL find things that will require further work and machining.
You're worried about getting stuff in the cylinders.
I wouldn't be.
All you have to do, is to crank each piston to TDC, brush off the top, then crank it down to BDC and wipe anything that was against the rings out of the bore.
But you won't be happy with that, so that means that the pistons will have to come out.
The only sane way to do that is to take the crank out.
That means the timing chain, so you Might As Well take the cam out.
Of course, the oil pump will come out.
The crank journals will have to be miced, and they'll all be just a little bit out of spec.
The shells will all look just a bit wiped, with tiny bits of embedded debris in them.
So the crank will have to be ground.
The oil galleries will be full of sludge, and you won't feel really confident that you've got it all, so the block will have to go out to be hot tanked, which since it's out anyway, and all the cylinders had ridges bigger than your fingernail, you Might As Well get it bored, which will entail new pistons and rings.
I told you not to pull the heads.
You'll have spent $4,000 now, before you can turn around, on a good-running engine, with nothing wrong with it.
Good luck, and keep us posted!
- Eric
Thread Starter
Registered User
Joined: Oct 2009
Posts: 271
From: Lansing, MI
Dancutlass = Same as what the machine shop said
Nice Picture Dan! Now that's what I'm talking about. I dropped off the heads this afternoon and asked what he would do to prep a block at home for when its time to re-install them. A Razor Blade and mineral spirits were his advice, although he said carb cleaner would work also. So I spun the block around on the stand in order to get gravity on my side. I scraped the block head mating surface smooth as can be with a razor blade. Then wiped it down with carb cleaner sprayed on shop cloths. Since the head gaskets were the original thin metal type, there really wasn't much residue of any kind. Then as MDchanic suggested, I rolled each cylinder around to wipe off the pistons at TDC and the wipe out the cylinders at BDC. There are no ridges or irregular wear in any of the holes, pistons are surprisingly clean on top. Once everything was all cleaned out, I sealed that bank up with duct tape for now and flipped the motor around to do the other side. Wrapped that all up before going to work this evening. I truly believe the bottom end is still good to go mechanically. Just some more gasket scraping and scrubbing and that will be done.
I won't know what the heads will need till they do a tear down. However, I indicated I wasn't looking for any special work (this time around...). Back to stock specs with new seals will work fine for me. I can't imagine a huge price for a set of small block Olds heads.
Since this was advertised as a 10.25:1 motor, I suppose it would be wise to drop that a little with a thicker head gasket. Any suggestions as to what would be a good choice or a preferred brand?
Thread Starter
Registered User
Joined: Oct 2009
Posts: 271
From: Lansing, MI
Trying to load pictures...
I'm attempting to post some pics of my project so far. I'm not real sure of the process, but here goes. First the motor/trans on the hoist, and the crud to be removed.
IMG_0399.jpg
IMG_0400.jpg
IMG_0406.jpg
I spent a few hours in the garage today spiffing stuff up. The oil pan had rustproofing or road tar, and just plain road grime on it. I put some mineral oil soaked rags on there and let it sit while I used a mix of gas, mineral oil and carb cleaner to clean the block surfaces. Sat there most of the afternoon with toothbrushes, rags and scuffy pads. I just keep on wiping stuff off until the rags no longer have any dirt on them.
The oil pan really cleaned up nice. When I pulled the rags off, almost everything that was stuck on there came right off with the rag.
Here's some after photos, the paint is Dupli Color Hi Heat Engine Enamel, "Cast Iron Coat" I like the way it looks as a contrast with cast aluminum parts
IMG_0407.jpg
IMG_0408.jpg
IMG_0413.jpg
IMG_0411.jpg
The motor is out of this 65 Cutlass. Its an Almond Beige/Mohave Mist Two Tone Hardtop.
IMG_0258.jpg
IMG_0251.jpg
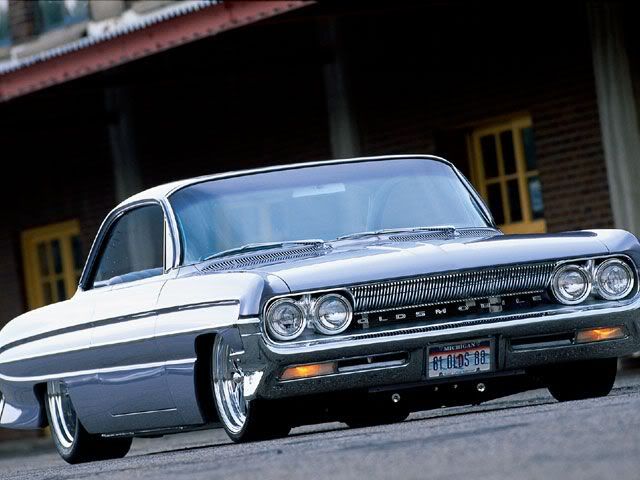
This 61 Dynamic 88 Bubbletop is why my user name is rcdynamic88, oh man I wish I had never sold it!
0301_CCRP_01_z_OLDS-1.jpg
IMG_0399.jpg
IMG_0400.jpg
IMG_0406.jpg
I spent a few hours in the garage today spiffing stuff up. The oil pan had rustproofing or road tar, and just plain road grime on it. I put some mineral oil soaked rags on there and let it sit while I used a mix of gas, mineral oil and carb cleaner to clean the block surfaces. Sat there most of the afternoon with toothbrushes, rags and scuffy pads. I just keep on wiping stuff off until the rags no longer have any dirt on them.
The oil pan really cleaned up nice. When I pulled the rags off, almost everything that was stuck on there came right off with the rag.
Here's some after photos, the paint is Dupli Color Hi Heat Engine Enamel, "Cast Iron Coat" I like the way it looks as a contrast with cast aluminum parts
IMG_0407.jpg
IMG_0408.jpg
IMG_0413.jpg
IMG_0411.jpg
The motor is out of this 65 Cutlass. Its an Almond Beige/Mohave Mist Two Tone Hardtop.
IMG_0258.jpg
IMG_0251.jpg
This 61 Dynamic 88 Bubbletop is why my user name is rcdynamic88, oh man I wish I had never sold it!

0301_CCRP_01_z_OLDS-1.jpg
Registered User
Joined: Jan 2009
Posts: 1,565
From: Dallas Texas
the '65 is very nice looking!!! The '61 Bubble Top is flat G-O-R-G-E-O-U-S!!!! I understand why that would be on your "wish I had never sold it" list. By the way, we all have those...................multiples! You are doing a great job, keep us posted on your progress.
Old School Olds
Joined: Nov 2008
Posts: 9,272
From: Marble Falls TX
the '65 is very nice looking!!! The '61 Bubble Top is flat G-O-R-G-E-O-U-S!!!! I understand why that would be on your "wish I had never sold it" list. By the way, we all have those...................multiples! You are doing a great job, keep us posted on your progress.

Thread Starter
Registered User
Joined: Oct 2009
Posts: 271
From: Lansing, MI
Camshaft Sprocket/Gear Won't Come Off..Tips?
As part of this engine removal project I wanted to install a new timing chain and gears to replace the original nylon unit in there now. I tried to remove the old cam sprocket from the camshaft today and it doesn't want to come off of the cam. I removed the single camshaft bolt and pulled outward while wiggling it a little and the cam comes forward with it. I only pulled out a small amount, I didn't want the cam to come out of its bearings. I tried pulling it out approx. 1/2" and wedging something behind the sprocket so that I could tap through the center bolt hole and make the cam slide back away from the gear. It just doesn't want to break free. I also tried tapping on the cam dowel pin that aligns it to the gear, that didn't help either. What am I missing here? I don't want to pull the cam out because I just know I will nick or scrape a cam bearing surface. How hard can I "Tap" the cam to get it to pop loose from the sprocket" Its just the single bolt and the dowel pin that fasten/align that gear to the cam, right? Any tips would be appreciated!!
I suppose I could leave the original stuff in there, there's no obvious signs of damage to the nylon teeth. Its just seems like a shame not to change it out for a better quality piece while its on the stand.
I suppose I could leave the original stuff in there, there's no obvious signs of damage to the nylon teeth. Its just seems like a shame not to change it out for a better quality piece while its on the stand.
Connoisseur d'Junque
Joined: Sep 2010
Posts: 21,183
From: The Hudson Valley
Personally, I've never had one not just come off when I got the bolt out.
If you can get the cam �" out, I would get it to that point, jam something behind the sprocket to hold it out from the block, screw the bolt in almost all the way, leaving it about ⅛" away from the sprocket, and give the bolt head a good whack with your favorite "persuader."
Should come right off.
- Eric
Thread Starter
Registered User
Joined: Oct 2009
Posts: 271
From: Lansing, MI
Thanks Eric
I hadn't thought of putting the bolt back into the cam like that. See, that's just the reason I come on here! I will give that a try tomorrow. I had been trying to wedge a screwdriver behind the sprocket, but I will put a couple of 1/2" spacers behind it this time. I should be able to get a better whack at it with the bolt in there, and having it screwed in as far as you say should spread the load over more of the threads.
Administrator
Joined: Oct 2009
Posts: 42,497
From: Poteau, Ok
A steering wheel or small gear puller will work also, theres just varnish holding it on. Did you pull your lifters one by one to check the condition? This would also be a good time to drop the trans pan, drain the torque convertor, and replace the transmission filter. MAW do Ujoints and trans mount as they are inexpensive.
Your cars are beautiful!!
Your cars are beautiful!!


