When you click on links to various merchants on this site and make a purchase, this can result in this site earning a commission. Affiliate programs and affiliations include, but are not limited to, the eBay Partner Network.
Hey everyone. I am pretty pumped about what the UPS guy dropped off today. I am getting the Cutlass ready for cruising season. I have been debating installing headers for quite a while. I had to take a lot off of the engine to repair a leak at the front crankshaft seal. With all of that stuff out of the way I said "might as well". Did some research here and elsewhere and decided to go with Hooker Competition 3901-1HKR. I also bought the 2.5" header back exhaust from Summitt. If any one has any suggestions ....I am all ears. I will post some pics along the way on what it takes to get these installed on the car.
Keep them IN the bags while installing to prevent scratching.
Great idea! I put the right one on today and used an old blanket to slide it around under the car. The blanket is big and in the way. Tomorrow I will be smarter with the left one on and put the bag back on it. Thanks
One hint: your life will be much easier if you remove the steering shaft while installing the headers.
Also, I highly recommend Remflex gaskets.
Thanks Joe, I had planned to try to install the left side with the shaft in place. But it sounds like you have "been there & done that". I will probably go ahead and pull the shaft first to save myself some hassle. Thanks
I got the right side on today. Thought I would go with the easiest first. Removed the Oil Filter and Housing and it just about jumped in place. EXCEPT the #3 bolt by cyl 6 exhaust. Holy crap! Gave up and grabbed a beer after dropping the bolt for the hundredth time without getting it started. I tried every tool in the box.
That header bolt on the rear of head is a bitch so put the bolt on first leave it loose and install header and slid it on the bolt then cut the gasket so it slides on then install rest of bolts loose then tighten up. After hot re-tighten bolts.
You could also cut a small length of vacuum line,, push it over the head of the bolt so you have a little more to hang onto when trying to get the bolt started.
Nice headers !! I like the bag or bubble wrap idea as well.
You could also cut a small length of vacuum line,, push it over the head of the bolt so you have a little more to hang onto when trying to get the bolt started.
Nice headers !! I like the bag or bubble wrap idea as well.
Yep! Tried that too. It may have worked if I had stayed at it a while. Good Idea. Works great for starting hard to reach spark plugs too.
That header bolt on the rear of head is a bitch so put the bolt on first leave it loose and install header and slid it on the bolt then cut the gasket so it slides on then install rest of bolts loose then tighten up. After hot re-tighten bolts.
Thanks Gerald! This is the answer. The gasket that came with the header had the keyhole slot too so no need to cut the gasket either. The whole time I was fighting that bolt I kept thinking I should just take the header back off and try it that way. It only took about 30 minutes to remove the header and reinstall the correct way. I bet I spent an hour the night before just trying to get 1 bolt started.
These headers have a pretty neat feature built in to prevent the frustration associated with starting the number 3 bolt. There is a keyhole slot so you can slide the header on the bolt as Gerald pointed out above. It works great if you put that bolt in the head and then slide the header over the bolt and into place.
The problem is the directions that came with the header says:
"#3 Position the header flange gasket and start the front and rear bolts.
#5 Start the remainder of the bolts (most restrictive first). NOTE. The #3 header bolts on the right side will cause the most difficulty.
Crazy that Hooker would spend the engineering time and resources to make a great product easier to use and then give you the wrong instruction.
Well got the left side on today. Maybe I can start asking for redemption now. These headers seem to fit great. I did not have to bend or tweek them in any way. The brake proportioning valve is in the origional location. I had to tweek the bottom brake line that comes from the right side but it was not a big deal. I used the origional starter and there is plenty room. I had to remove the starter to get the header in and then there is plenty clearance to reinstall the starter. I bought a heat blanket to wrap the starter in, as one of the header tubes comes pretty close to the solenoid. One other bit of advise. Connecting the wires to the solenoid is almost impossible with the starter in place. If you unbolt the horn relay from the firewall you get enough slack in the wiring harness to install the wires below the header and then use a floor jack to get the starter up and in position. The biggest obstacle was the motor mount heat shield. I started to just remove it but the header pipe comes pretty close to the Motor mount. 1/4" or less. I spent quite a bit of time modifying it to clear the header and still provide some heat protection. I still have to snug the left side up and will post the final clearances when all is in place.
I seriously considered those headers but don't they hang fairly low? I love my Sanderson's for exhaust pipes even with the oil pan. I had dragging exhaust on my 88 Cutlass, it sucked and got annoying in a hurry. Post some pics when your done, maybe they are OK in ground clearance.
I seriously considered those headers but don't they hang fairly low? I love my Sanderson's for exhaust pipes even with the oil pan. I had dragging exhaust on my 88 Cutlass, it sucked and got annoying in a hurry. Post some pics when your done, maybe they are OK in ground clearance.
I kinda got sidetracked to some other overdue projects this weekend. The headers are bolted up and the engine is sitting back down in the mounts. The collectors sit higher than the Transmission pan. I will get some pics next weekend. These fit good with plenty ground clearance. I think I read somewhere the Super Competitions with 3/4" tubes hang a lot lower.
I kinda got sidetracked to some other overdue projects this weekend. The headers are bolted up and the engine is sitting back down in the mounts. The collectors sit higher than the Transmission pan. I will get some pics next weekend. These fit good with plenty ground clearance. I think I read somewhere the Super Competitions with 3/4" tubes hang a lot lower.
Post some pics when it's done, should look really good when finished.
Last edited by olds 307 and 403; Mar 19, 2018 at 08:11 PM.
Sorry for the slow update. I was away all last week. I thought I would get it finished up this weekend but Summit sent the wrong header flanges with the exhaust st kit. The flanges were 3" and the pipes and header collectors are 2.5"
Here is a pic of the mods to the drivers side Motor Mount heat shield.
I also just installed the Big Hooker Tubes on the restoration of my 66 Cutlass w/ a BB in it. I was very impressed w/ the quality and construction of the header units. Everything fit pretty good, I only had to massage 2 small spots on separate sides. The collector hookups were also of very quality. Sealed up nice and tight.
Nice looking headers, do you have any pictures of them installed? I curious about the ground clearance. Thanks
Stay Tuned Townie. I am waiting on a few parts to finish up and will post some pics when done. Hopefully Friday. Clearance on Jack stands looks good, with the collector flange above the deep sump pan on my 200r4.
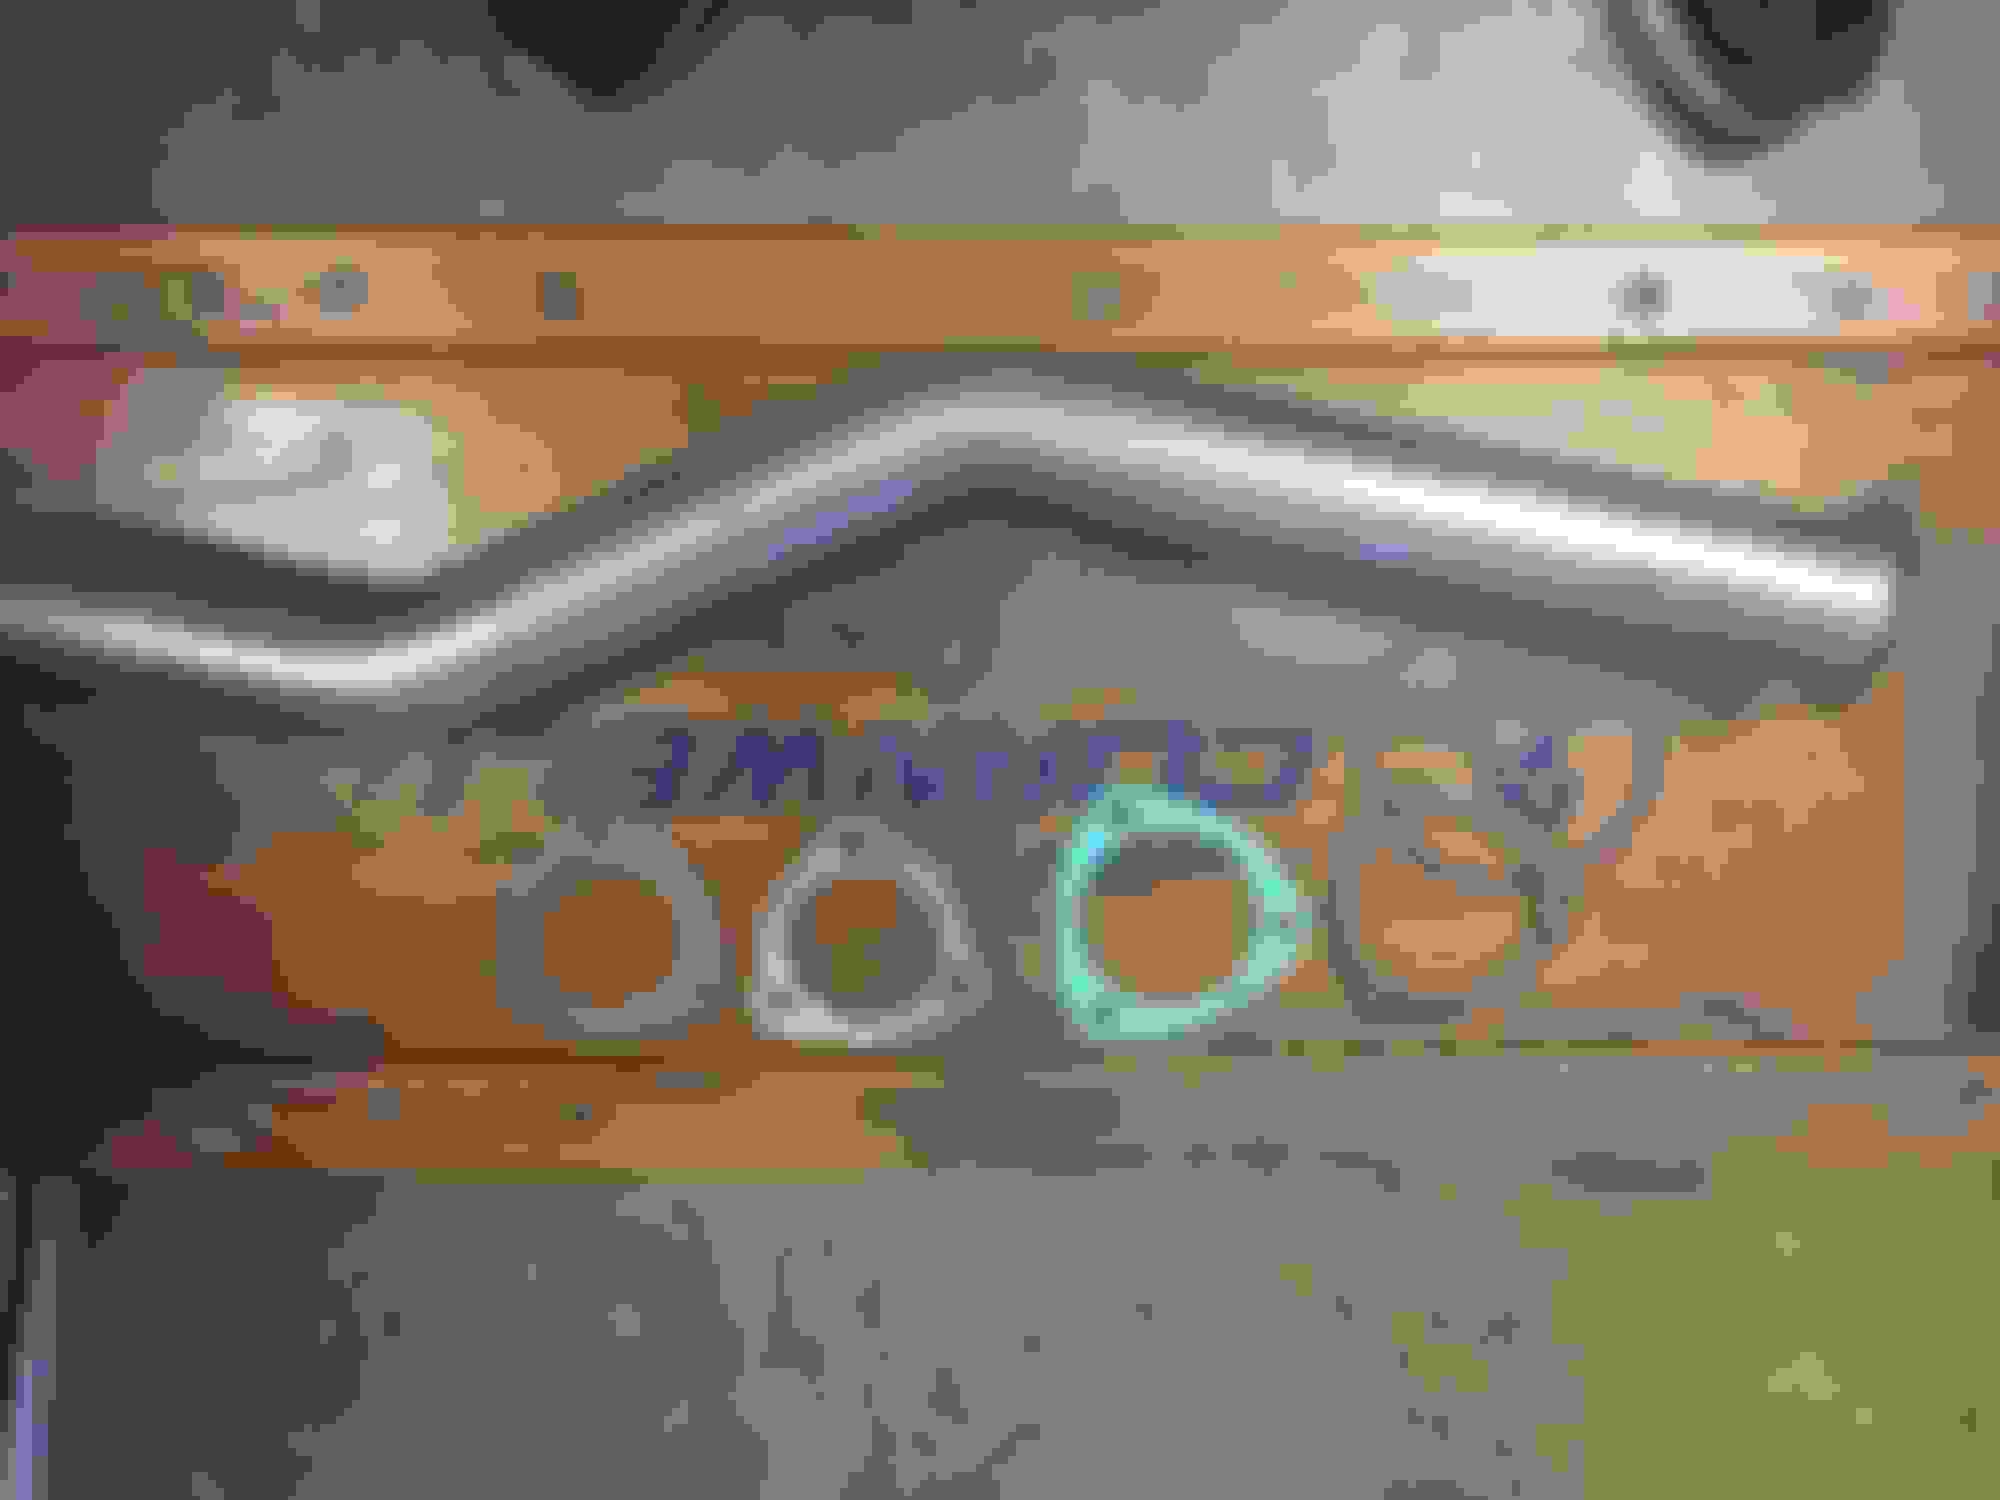
Maybe this belongs in the parts that don't work thread. I bought the 2.5" header back exhaust kit from Summitt for this project. Obviously they are meant for 2.5" exhaust to 3" header collector flange. This is not stated in the description or specs for the item. So I order the 2.5" pipe flanges. Guess what. They will not go over the expanded end of the header pipe
Back to the drawing board today.
The 3" flange and gasket on the right came with the exhaust kit.. the 2.5" gasket came with the header and I ordered the 2.5" flange separate.
The pipe is expanded at one end and flanged at the other. No way ro put a 2.5" flange on this thing.
Every Olds header I've ever bought has 3" collector flanges. These pipes work fine with those. If you have 2.5" collector flanges, cut off the flared part, drop the flange over the pipe, and weld on the 2.5" collectors. Done.
Take it to an exhaust shop and have them expand it?
Expand what? He's trying to fit a 2.5" collector flange over a 2.5" pipe that has a flare at one end and an expanded section at the other end to slip over the 2.5" exhaust pipe.
Every Olds header I've ever bought has 3" collector flanges. These pipes work fine with those. If you have 2.5" collector flanges, cut off the flared part, drop the flange over the pipe, and weld on the 2.5" collectors. Done.
Unfortunately, I think besides your Hooker headers and the new Thornton headers, all the rest, even the shorty headers have 3" collector's. They still should state that in the description.
If you have 2.5" collector flanges, cut off the flared part, drop the flange over the pipe, and weld on the 2.5" collectors. Done.
Yep!^^^^ EXCEPT.......the Murphy's law keeps on rolling. I bought Stainless Flanges so they wouldn't rust. Also my welding experience with thin wall pipe has been awful. It Would be a good chance to try my new mig rig out though. Off to the store for some argon and steel flanges.
THanks Joe
Yep!^^^^ EXCEPT.......the Murphy's law keeps on rolling. I bought Stainless Flanges so they wouldn't rust. Also my welding experience with thin wall pipe has been awful. It Would be a good chance to try my new mig rig out though. Off to the store for some argon and steel flanges.
THanks Joe
The flanges don't get welded. The collector adapters get welded. You cut off the flared section with the solid flange, slip the stainless flanges over the pipe, and weld on the 2.5" collector adapters. Didn't the headers come with these?
Thanks again Joe for helping me understand what is going on.
1). No my headers did not come with collector adapters. ( I just went to The Hooker Header website and it clearly states these do not come with the headers. The flanges and gaskets DO come with the headers, so go figure)
2). It appears most header flanges are 3". The Hooker 3901's are 2.5"
3). The Summit 2.5 Exhaust Kit is designed to connect to 3" Flanges.
I searched Summit and EBay for 2.5" header connectors and could not find a match. Finally hit Jegs and, low and behold, the same pic from Joe P
Thanks Joe! They are on order and hopefully the exhaust and header will connect next week.
























 . I am waiting on a few parts to finish up and will post some pics when done. Hopefully Friday. Clearance on Jack stands looks good, with the collector flange above the deep sump pan on my 200r4.