


Wanting to post build as I go

Thread Starter
Registered User
Joined: Mar 2014
Posts: 177
From: Jackson, TN
Will do
Soon as get home braces will be put in doors. Since gonna come right back off. Was my dads due to cancer it's mine now gonna rebuild in his honor. He taught me everything I know, which is real blessing
Thread Starter
Registered User
Joined: Mar 2014
Posts: 177
From: Jackson, TN
At stand still
At standstill on build with work and budget. Y'all can see few other pics if interested in my album. Will post more when get back to work on fixing rusted trunk edge. And get car moved from moms to my house. This build will be dedicated to my dad. This was his baby.
Thread Starter
Registered User
Joined: Mar 2014
Posts: 177
From: Jackson, TN
Trunk
Fabricating one since don't like thin metal reproductions are made of. Will see how it turns out at worst still in no worse shape than when started so nothing to loose but some time and everything to gain if can save it. As you can see will be bottom edge under trunk. Rest of trunk is SOLID. Will post Pics in process and when done.
Thread Starter
Registered User
Joined: Mar 2014
Posts: 177
From: Jackson, TN
Finally got little time to work again
Pictures coming this weekend finally had little free time at work to be able to bend mold and shape new patch panels for rusted section of trunk. Will be welding in place tomorrow I hope. Praying it works well really don't wanna have to purchase aftermarket truck lid like the thick metal on original. Wish me luck
Thread Starter
Registered User
Joined: Mar 2014
Posts: 177
From: Jackson, TN
Original trunk lost cause
We'll after making patch panel and attempting to weld in
Place rusted trunk just kept showing too much weak metal so not gonna work will be looking for good original or have to settle for aftermarket when the time comes to need trunk
Place rusted trunk just kept showing too much weak metal so not gonna work will be looking for good original or have to settle for aftermarket when the time comes to need trunk
Thread Starter
Registered User
Joined: Mar 2014
Posts: 177
From: Jackson, TN
All pieces finally home
Ok finally have frame and body moved to my house. Building braces for body to get ready to pull off frame again. Will try and post more pics soon. Not much progress yet but only one day a week and limited budget will take time but will get done.

Registered User
Joined: Jun 2014
Posts: 171
From: Battle Ground, WA.
Scott
Thread Starter
Registered User
Joined: Mar 2014
Posts: 177
From: Jackson, TN
Old School Olds
Joined: Nov 2008
Posts: 9,271
From: Marble Falls TX
My build?
Mine was put on the stalled shelf
from a restorer who went out of buisness
to the tune of $6500.

It will have to wait until I either retire, or someone
wants it more than I do.

No hurry on it, I don't need to sell it.

I have more in parts and now labor involved then
it is probably worth. I could have restarted on it,
but chose to buy the 66 instead.

Thread Starter
Registered User
Joined: Mar 2014
Posts: 177
From: Jackson, TN
Sorry to hear
That's why I am glad can do it all myself. Cost way to much for someone else to do it. I work on cars for a living anyway. And thanks to dad know how to do pretty much everything except interior work. Hope U able to get going in yours again soon
Old School Olds
Joined: Nov 2008
Posts: 9,271
From: Marble Falls TX
I don't have a problem with the
mechanics or assembly of the thing.
It was a running and driving car when
I myself pulled it apart years ago.
I never had any training or wanted any
for body work. Maybe one day...Who knows.
mechanics or assembly of the thing.
It was a running and driving car when
I myself pulled it apart years ago.
I never had any training or wanted any
for body work. Maybe one day...Who knows.
Old School Olds
Joined: Nov 2008
Posts: 9,271
From: Marble Falls TX
Take good care of that dash
if it isn't cracked up.
One of the best Olds designed
as far as I care. I used Eagle one
nanocleaner, then their nanowax
carnauba spray on a dash in similar
shape to that one. Soaks up nice but didn't
really soften up as much as I hoped.
I will have to go out and unlock it from
it's plastic bag prison and post a few pics of it.
Good luck and looking forward to
more pics and progress on yours.
if it isn't cracked up.
One of the best Olds designed
as far as I care. I used Eagle one
nanocleaner, then their nanowax
carnauba spray on a dash in similar
shape to that one. Soaks up nice but didn't
really soften up as much as I hoped.
I will have to go out and unlock it from
it's plastic bag prison and post a few pics of it.
Good luck and looking forward to
more pics and progress on yours.
Thread Starter
Registered User
Joined: Mar 2014
Posts: 177
From: Jackson, TN
prior life and now
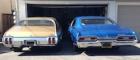
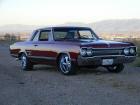
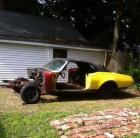
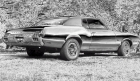
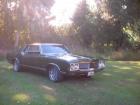
here are some glory day photos, and now, will be back to glory days was a promise to dad before he passed away. last pic major cause of rust problem which began the frame off rebuild before dad diagnoised with cancer and was unable to do anything else. been apart for 12 yrs now
Thread Starter
Registered User
Joined: Mar 2014
Posts: 177
From: Jackson, TN
saved these
at least he did store the hood, doors/ fenders, they are solid, trunk not so much shed had leak where it was it is toast. second and third pic are floor and trunk pans I have located. just have to go cut them out of complete car. gonna try cut out in one total piece and still leave top and rear quarters in saleable condition for owner. anyone needing 71 cutlass hard top body parts?
Thread Starter
Registered User
Joined: Mar 2014
Posts: 177
From: Jackson, TN
profile pic
whats the trick to getting pic to post as profile under my user name. cant seem to figure that one out. can upload new profile pic but cant figure out how to get it where screen name is on left. always pops up upload failed? but can pull it up on user cp under profile and pic is there?
Thread Starter
Registered User
Joined: Mar 2014
Posts: 177
From: Jackson, TN
Floor pan
Ok made drive Sunday to cut good floor pan out of cutlass one major step accomplished now have good true metal oldsmobile floor pan to replace mine have it all in one piece from fire wall to tail lights what a blessing will post picks of it soon still have to do a lot of spot weld cutting to get it ready
Thread Starter
Registered User
Joined: Mar 2014
Posts: 177
From: Jackson, TN
Supplier?
Thinking of getting several from harbor freight they have them for like 6 buck. Prob won't have time to do anything else till next week no day off this week one mechanic off on vacation.
Registered User
Joined: Aug 2014
Posts: 27
From: Port Ludlow
whats the trick to getting pic to post as profile under my user name. cant seem to figure that one out. can upload new profile pic but cant figure out how to get it where screen name is on left. always pops up upload failed? but can pull it up on user cp under profile and pic is there?

Looks like you can use the attachment link that you get here and use the BBcode to make the picture appear here .......in case you don't know BBcode here it is [img][/img] (you put that link in between them)
The one I just used is https://classicoldsmobile.com/forums...1&d=1408437444

Thread Starter
Registered User
Joined: Mar 2014
Posts: 177
From: Jackson, TN
Get floor pan ready
We'll depending on heat index plans for tomorrow are to start drilling spot welds out on floor pan that will be replacing my rusted out one will see heat index today was over 100 so will see will post more pics as I go.
Thread Starter
Registered User
Joined: Mar 2014
Posts: 177
From: Jackson, TN
Well with schedule lately sorry to report no progress on build lately too cold outside so focus right now is getting engine parts together. Y'all all have a Merry Christmas be here before we know it enjoy the time with the kids and family. As learned with Dad they may not be here next year. God Bless all. Back to work soon on Dads car I pray.

Registered User
Joined: Jan 2008
Posts: 3,515
From: South River, New Jersey
will be folowing along,
My condolences on your dads passing, it is great to think your restoring his pride anf joy, I know hes smiling downon you.
Did you put the door braces in? I would do that before cutting any floor or leave it on the frame until the floors are done.
A few words of encouragement when looking at a big project to eat an elephant its one bite at a time,
Looking forward to your progress and we are here to help if we can
Did you put the door braces in? I would do that before cutting any floor or leave it on the frame until the floors are done.
A few words of encouragement when looking at a big project to eat an elephant its one bite at a time,
Looking forward to your progress and we are here to help if we can
Registered User
Joined: Jan 2008
Posts: 3,515
From: South River, New Jersey
Eddie


