Tear Down
#281
I am totally impressed with he work you are doing. Its truly a labor of love!

#283
Blasted the inner fender area and coated upper lip with weldable primer and the inner part with Eastwood epoxy in a can. The paint goes on smooth but the blasting is a mess. I removed the coarse media from the blaster and put in a much finer grit. I wasn't happy with how aggressive the initial media was. Might have to rethink the rest of the car in regards to paint removal. It's a learning experience I guess.
Last edited by TripDeuces; November 21st, 2017 at 02:34 PM.
#284
Did more work in the garage today. Cut out part of a floor brace to make more room for my over drive unit. The metal underneath was still rust free in some spots after over 50 years, amazing. I'll weld it closed another day after I fab some pieces. I was surprised that there was only one spot weld here. Must have been a Friday. 

#285
Cut back the piece I took out and welded it back in today. I know the pics are bad but you hopefully get the idea. Also by chance and a lot of luck I ran into a man who just bought a sand blasting company in town. I'm going to have him glass bead the car to bare metal. Will have him over soon for an estimate.
#287
Welded in the end plates to add strength and cover the gaping holes in the floor brace. It looks so much better in person, ha. I think next I'll prep the body for blasting, remove the windshield, etc., etc.
#288
I had some free time the last few days so I started the tear down of the 66. As I was going through it I have a few questions.
What looks like undercoating on the rear panel, is that factory? Also the window mechanism bolts are covered in a very hard putty (?) that is hard as stone. I'm assuming that's factory but thought I'd ask. Anyone know why it's there to begin with?
There are many things that I know are not factory on this so there will be many questions for those in the know.
I also took off all the molding, windshield trim, etc. I have a question on the corner piece at the top of the windshield. Should it be full of what looks like plumbers putty? It's still soft is why I ask.
Questions, comments and help are greatly appreciated on this thread. It will be a long and slow process I'm sure. On a good note my former boss and body man who now owns a local speed shop has offered to help with the body and paint. Can't beat that deal.
Thanks
Wayne
#289
I do remember plastic water shields but have no proof my car had them. I had a problem with the window track felts. They were bunching up in the lower part of the track and stopped the window from going all the way down. My buddy and I fixed it one day and knowing me I threw them out knowing the resto was happening soon. They were translucent plastic but I have no idea if they were stock although I tend to believe they were. I have one pic maybe two that show a line of dum dum type material around the doors.
There was also this hardened material (clay?) around the rear nuts and bolts. I assumed they were meant to stop wear on the inside of the panel.
There was also this hardened material (clay?) around the rear nuts and bolts. I assumed they were meant to stop wear on the inside of the panel.
Last edited by TripDeuces; May 4th, 2018 at 06:49 PM.
#290
Removed the windshield and found a bunch of rot in the usual places. I have a patch panel coming hopefully next week. Also patched up the drain plug hole on the passenger side behind the front seat. I though it was just pin holes but further examination showed more extensive rot so I just cut it out and eliminated the drain plug all together.
Yes that is a left over piece from my lower rear fender fix.
The beat goes on.
Yes that is a left over piece from my lower rear fender fix.

The beat goes on.
#291
Btw for those interested, removing the windshield changed the center of gravity a lot. The body no longer will stay in any position so I'll have to retune that soon, fun , fun.
#294
It's coming, I love the summer. Paint products are on their way and I ordered a MC, some stainless exhaust hangers and other miscellaneous parts. I've decided to only blast the bottom, floor, trunk, cowl, wheel wells and other small stuff. I'm going to strip the body panels by hand.
Also got a new sway bar. My high dollar DSE front sway bar will be for sale if any are interested.
Also got a new sway bar. My high dollar DSE front sway bar will be for sale if any are interested.
#295
The metal work your doing looks great, yes indeed-takes time and a lot of patience. BTW-that's seam sealer not hardened clay. I used seam sealer on my welds etc. Do you have any undercoat to remove underside of the car and fender wells?
#296
I scraped the wheel wells clean with a putty knife and a propane torch, was quick and painless. I'm glad you mentioned about that because I have more on the bottom to do. Not a lot just some spaces on the trunk floor pan behind the wheel wells
Last edited by TripDeuces; May 31st, 2018 at 11:59 AM.
#297
Ever hear of a needle scalier? Great inexpensive tool, extra needle are cheap too. What a job this does getting rid of the tar like undercoating on these old cars-just make sure its cool where you working and it will chip away. Once the sun hits an area it gets to soft. works on rust too. Check it out:
https://www.eastwood.com/rockwood-pi...yABEgIi_fD_BwE
https://www.eastwood.com/rockwood-pi...yABEgIi_fD_BwE
#300
Cut out the rot at the base of the window. Many spot welds there so I had to grind them away afterward, weld up some holes and straighten out what was left. Not going to weld this in until the body is blasted. I'll have to reinforce the upper dash because all the rigidity came out of it once a removed the lower channel. That's not going to be blasted so I need to protect it.
Also removed the rear windows and it's apparatus along with the left and right convertible top brackets. Amazing how much weight the glass adds to a car. Car spins so easy now.
Also removed the rear windows and it's apparatus along with the left and right convertible top brackets. Amazing how much weight the glass adds to a car. Car spins so easy now.
#301
Big day! Had the body sandblasted today. He mostly does dustless blasting but said he could do just as good or better dry so we did it dry. I think it came out awesome. I'll epoxy prime it soon and then start the real body work. Found filler only on the right rear quarter. Very minor dents there. Found two more rust areas with holes but nothing major. The wire channel in front of the drivers seat and a little spot on the left wheel arch in the rear, simple stuff. Will do the rest of the car, hood, trunks, front fenders and doors later. So excited today!
#303
DP50LF epoxy primer. So glad that is done. Last pic you can see the rough body work the previous owner left me. Not a big deal as long as I get it smoother than that which I know I can do.
#306
Found many holes where the trunk weatherstrip sat. Decided to tackle one side today. Not going too bad once you get the copper backing in place so you're not blowing holes trough the thin sheet metal. I'll fill the pock marks in with Bondo or Lab Metal. Just didn't want any holes where water could get in.
Last edited by TripDeuces; October 12th, 2018 at 09:57 AM.
#310
Something I have never tried to learn and tackle myself but seeing yours makes me want too!
#311
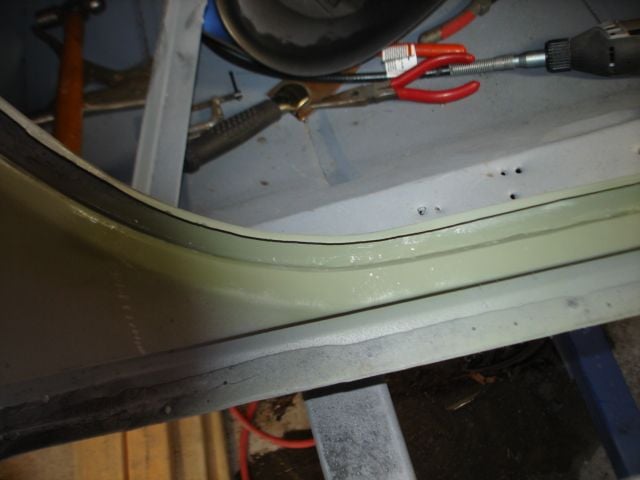
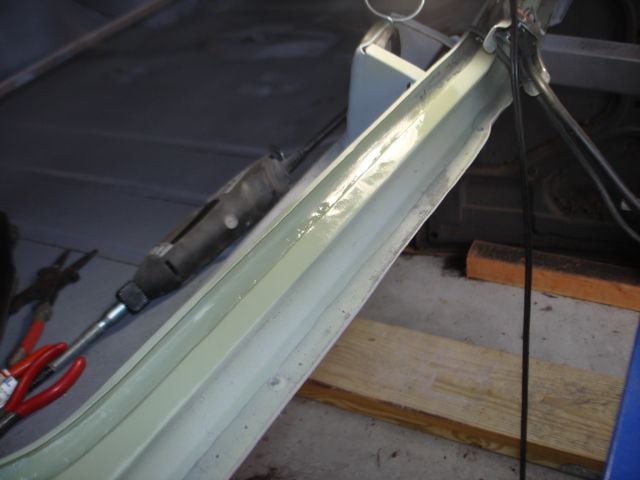
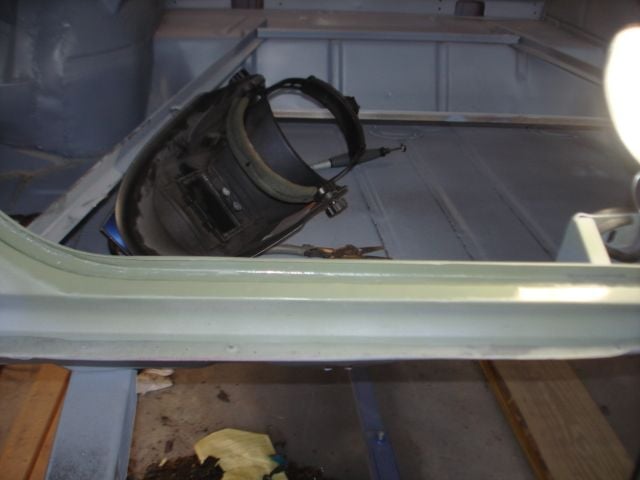
Finished the drivers side weather strip channel on the trunk today. This is the aftermath of the holes and horror above. Came out well I think. At least there are no holes anymore. I'll hit it with a light skim coat of Lab Metal once I get the whole car hole free. Slow but steady
#312

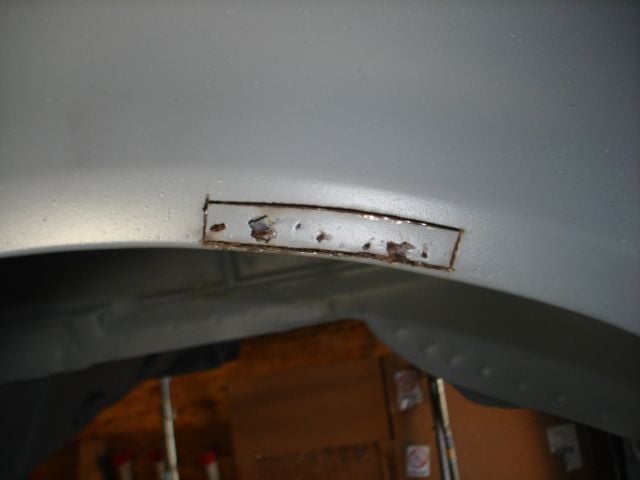
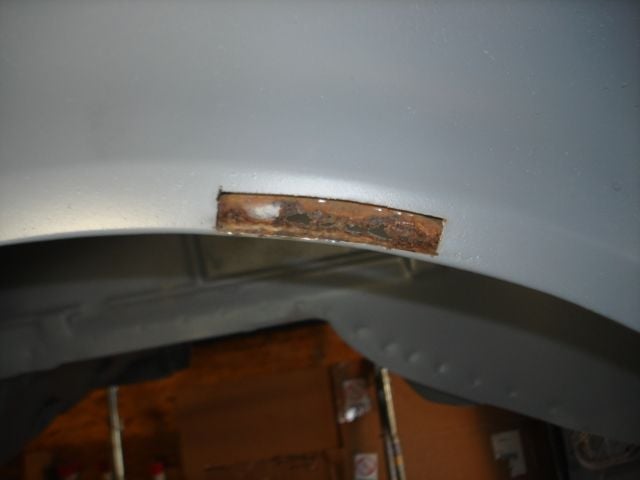
After the blasting a rot spot showed on the wheel well arch. It came from behind and worked it's way out. I'll cut out the inside and replace that piece before I start out front.
#314
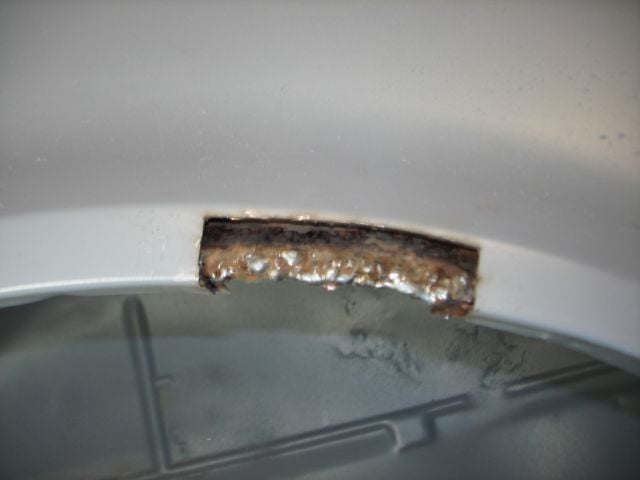
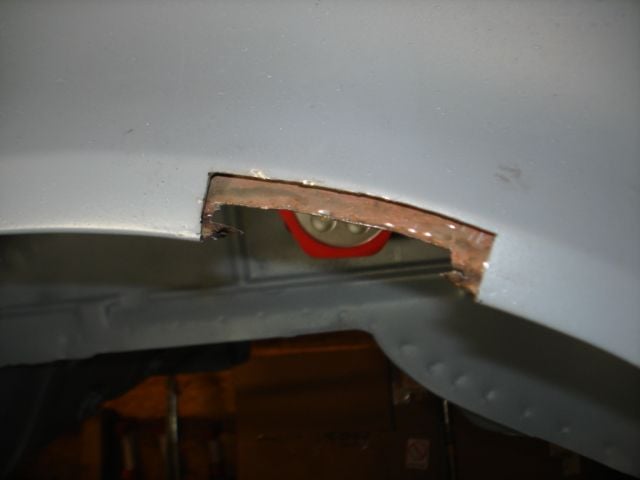
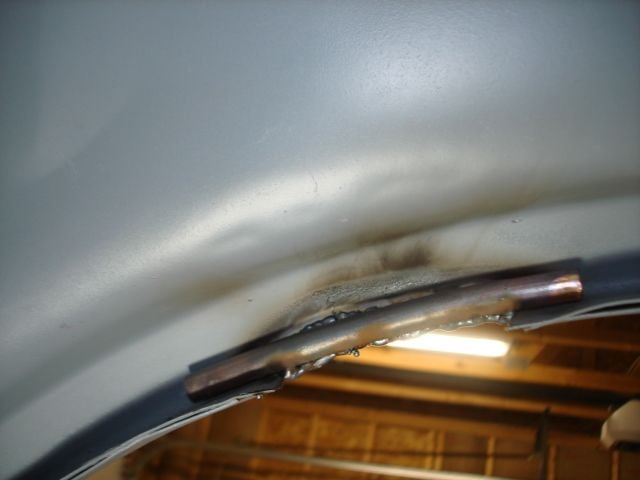
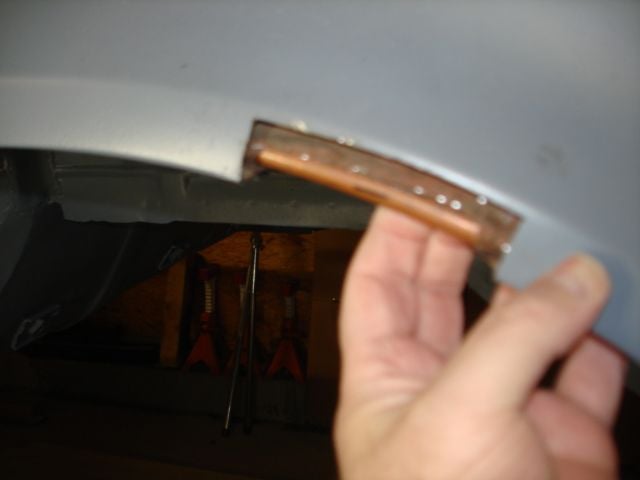
Took me awhile to figure out how I would tackle this problem. I was trying to make it somewhat nice but doing it from inside the wheel well was not going to happen with a welding hood on so I cut out a little more and decided to get it from the front. The inner wheel well panel had a nice 3/8inch half round to it so I took a length of 3/8 copper tubing and bent it to to the wheel arch curve and clamped it in to use as a backing so I could build up weld on the front side. After about a hundred tacks we have a panel, woot. Just need to fabricate some flat pieces, tack them in and call it good. Little by little.
Last edited by TripDeuces; April 10th, 2019 at 10:18 PM.
#316
Thx Gear Head. I need to get more pics up. I finished the wheel well arch except for a skim coat and I've started on the front floor pans that have several (many) holes. Bought a little tool that has a magnet and copper plate in one. Also adjusts to put the copper plate tight to resist the MIG wire. Otw
#317
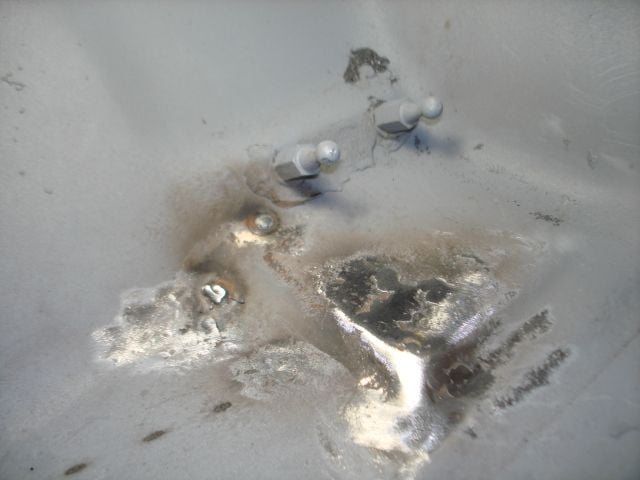
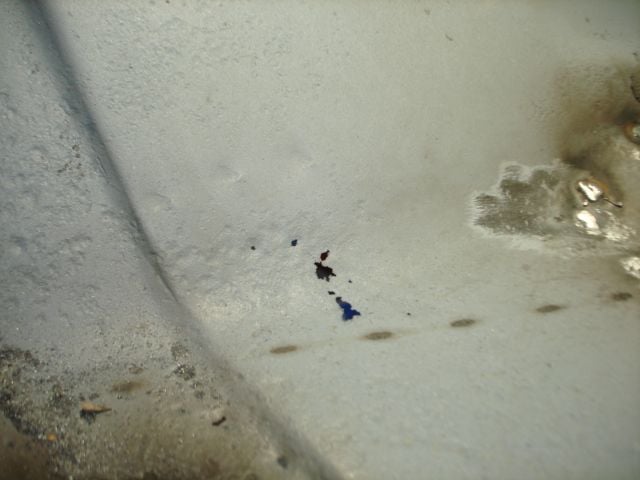
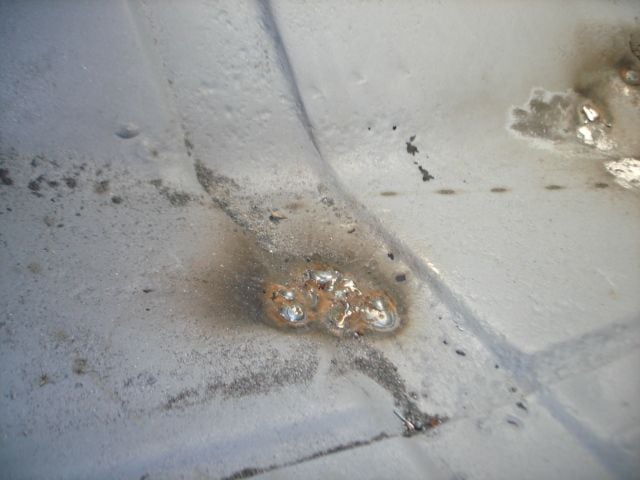
Started on the drivers floor foot well. As you can see many pin holes. Basically everything turns into a multitude of tacks joined together. You can't put a lot of heat into the metal or it blows through badly. If anything it will be thicker than before. I had .025 wire but went down more to .023. Maybe not much but it does seem to work better. Skim coat of Lab Metal later on and good to go. As long as I don't see daylight coming through any of the welds I'll be happy.
#318
I like using .023 on sheet metal up to about 1/16", especially if it's 50 yrs old. If you can access a good TIG machine that will lite off at a very low amperage {5-10 Amp) that will work well also. Did you back it with a copper strip for a heat sink?
Looking good.
Looking good.
#319
I did back some of it with my copper tool but even with it you have to finesse it. I also have access to my buddies TIG but I'd need practice and the learning curve might be long, who knows. This will work well enough for now but I do like the thought of using the TIG. I think it's more versatile in many ways.
#320
Yeah, TIG is a bit of a learning curve for sure. It's kind of like tapping your head, rubbing your belly and doing a Chuck Norris roundhouse all at the same time. Like you say though, much more versatile and very rewarding once you get the hang of it.


