My 1969 Cutlass Supreme Holiday Coupe

Thread Tools
 
Search this Thread
 
Old November 15th, 2014, 12:45 PM
  #1  
Registered User
Thread Starter
 
Christophe2m6's Avatar
 
Join Date: Sep 2014
Location: France
Posts: 207
My 1969 Cutlass Supreme Holiday Coupe

Hi guys!

Wanted to begin this thread to share with you the project of one of my dream car!!

Hope you'll enjoy!

I'm 33 years old, and live in France!

I purchased my first US car in 2001, when I was 20.
A 1986 Fiero V6 2.8, that I've been restoring during 6 years! (will post mics later!)

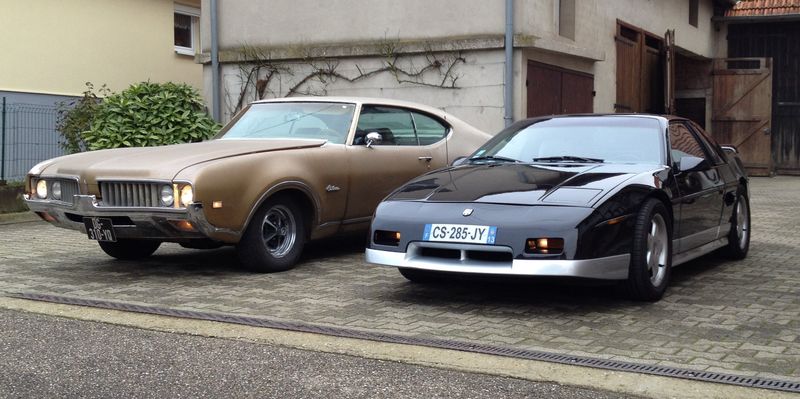
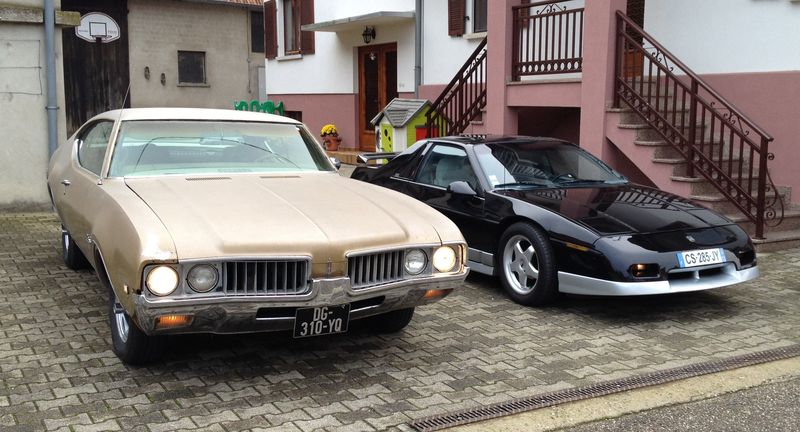
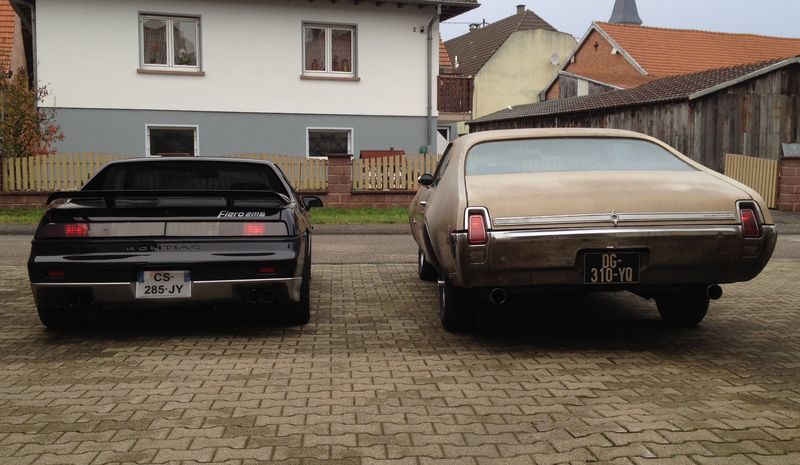
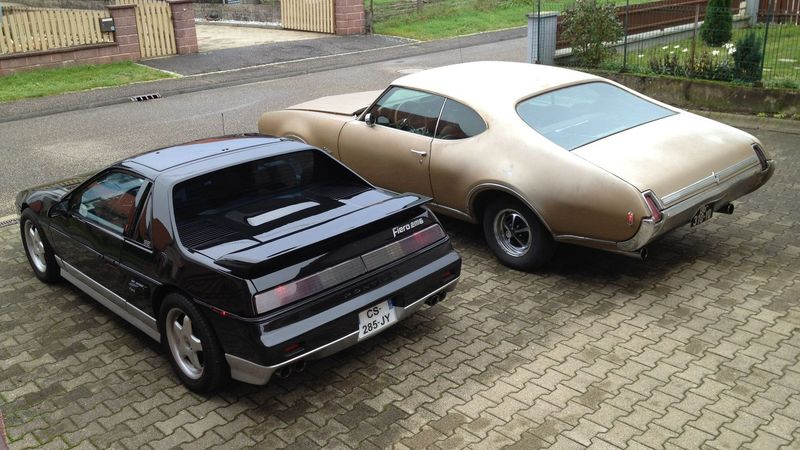
And here's my new car!!!
I've got this car now since end of september, and already drove about 1000miles with it!!

I will restore the car slowly and want to restore it the closer to the original!

VIN# 342879Z111655
3 Oldsmobile
4287 Cutlass Supreme 2 dr. Holiday Coupe (now I know! lol )
9 1969
Z Fremont, CA
111655 #11655 in production

Engine casting number: 395558


Here are the pics from the car when i got it!!


Last edited by Christophe2m6; November 15th, 2014 at 12:59 PM.
Christophe2m6 is offline  
Old November 15th, 2014, 12:50 PM
  #2  
Registered User
Thread Starter
 
Christophe2m6's Avatar
 
Join Date: Sep 2014
Location: France
Posts: 207
First thing:
-cleaned everything
-fixed all bulbs
-changed the steering wheel because it was totally broken
-added gauges to check engine!


Attached Images
File Type: jpg
IMG_7355.jpg (66.1 KB, 225 views)
File Type: jpg
IMG_7309.jpg (73.4 KB, 218 views)
File Type: jpg
IMG_7356.jpg (70.9 KB, 214 views)

Last edited by Christophe2m6; September 19th, 2015 at 08:40 AM.
Christophe2m6 is offline  
Old November 15th, 2014, 12:51 PM
  #3  
Registered User
Thread Starter
 
Christophe2m6's Avatar
 
Join Date: Sep 2014
Location: France
Posts: 207
Cleaned chromes to have it more "shiny"!

before/after pics!


Attached Images
File Type: jpg
IMG_7228.jpg (81.6 KB, 218 views)
File Type: jpg
IMG_7229.jpg (87.6 KB, 218 views)
File Type: jpg
IMG_7323.jpg (56.9 KB, 213 views)
File Type: jpg
IMG_7324.jpg (58.2 KB, 213 views)
File Type: jpg
IMG_7366.jpg (82.0 KB, 211 views)

Last edited by Christophe2m6; September 19th, 2015 at 08:42 AM.
Christophe2m6 is offline  
Old November 15th, 2014, 12:57 PM
  #4  
Registered User
Thread Starter
 
Christophe2m6's Avatar
 
Join Date: Sep 2014
Location: France
Posts: 207
Chrome restoration of originals interior *****!


Attached Images
File Type: jpg
IMG_7332.jpg (67.6 KB, 200 views)
File Type: jpg
IMG_7336.jpg (57.7 KB, 200 views)

Last edited by Christophe2m6; September 19th, 2015 at 08:42 AM.
Christophe2m6 is offline  
Old November 15th, 2014, 01:05 PM
  #5  
Registered User
Thread Starter
 
Christophe2m6's Avatar
 
Join Date: Sep 2014
Location: France
Posts: 207
With my 1986 FIERO V6 2.8!


Last edited by Christophe2m6; November 16th, 2014 at 12:28 AM.
Christophe2m6 is offline  
Old November 15th, 2014, 01:09 PM
  #6  
Registered User
Thread Starter
 
Christophe2m6's Avatar
 
Join Date: Sep 2014
Location: France
Posts: 207
Next steps:
Waiting for:
-new front and rear seats covers, seat backs, gold floor carpet.
-new front headlights housings and bezels, inner headlights.
-some gaskets, stickers...

already made a complete engine tune-up:
-replaced spark plugs, distributor cap and rotor, coil, wire set, air/fuel/oil filter, changed every fluids/liquids (oil, trans...)

Will post new pics when new parts or modifications will be done!

Thanks
Christophe2m6 is offline  
Old November 15th, 2014, 03:14 PM
  #7  
72 Olds CS
 
RetroRanger's Avatar
 
Join Date: Jun 2011
Posts: 6,657
Looks like the cutlass is in decent shape and mostly complete that should make it a ton easier on you especially where the parts may be harder to come by in France.

The fiero and olds have a nice contrast next to each
RetroRanger is offline  
Old November 16th, 2014, 11:37 AM
  #8  
Registered User
 
Eddie Hansen's Avatar
 
Join Date: Jan 2008
Location: South River, New Jersey
Posts: 3,515
sweet...

Very nice looking project... I have a sweet spot for the 69 models looking forward to following along, glad your changing the seat covers I think the69 interior with the tuck and roll look is one of the nicest.
Eddie Hansen is offline  
Old November 16th, 2014, 04:52 PM
  #9  
Old School Olds
 
tru-blue 442's Avatar
 
Join Date: Nov 2008
Location: Marble Falls TX
Posts: 8,941
Welcome Chris. Looks good. Does it have disc brakes? If so those would be the highly
sought after LY code SS-1 wheels.
tru-blue 442 is offline  
Old November 16th, 2014, 09:22 PM
  #10  
Registered User
 
68_convert's Avatar
 
Join Date: Sep 2014
Location: Tulsa
Posts: 106
Welcome!!. Looks like a great project.
68_convert is offline  
Old November 17th, 2014, 11:22 AM
  #11  
Registered User
Thread Starter
 
Christophe2m6's Avatar
 
Join Date: Sep 2014
Location: France
Posts: 207
Thanks a lot guys for your replies!!!

To tru-blue 442: it has drum brake!
Christophe2m6 is offline  
Old January 5th, 2015, 12:06 PM
  #12  
Registered User
Thread Starter
 
Christophe2m6's Avatar
 
Join Date: Sep 2014
Location: France
Posts: 207
Continued some paint job with several parts!!
All parts have been cleaned to bare metal then protected with 2 layers of anti-rust primer then anti-rust color.

Before/After pics!

GRILLS DIVIDER


Attached Images
File Type: jpg
IMG_7500.jpg (79.0 KB, 181 views)
File Type: jpg
IMG_7499.jpg (85.6 KB, 180 views)
File Type: jpg
IMG_7677.jpg (32.2 KB, 184 views)
File Type: jpg
IMG_7678.jpg (55.8 KB, 179 views)

Last edited by Christophe2m6; September 19th, 2015 at 08:43 AM.
Christophe2m6 is offline  
Old January 5th, 2015, 12:09 PM
  #13  
Registered User
Thread Starter
 
Christophe2m6's Avatar
 
Join Date: Sep 2014
Location: France
Posts: 207
radiator plate


Attached Images
File Type: jpg
IMG_7497.jpg (56.9 KB, 185 views)
File Type: jpg
IMG_7498.jpg (43.7 KB, 184 views)
File Type: jpg
IMG_7523.jpg (59.3 KB, 185 views)
File Type: jpg
IMG_7675.jpg (46.5 KB, 187 views)
File Type: jpg
IMG_7676.jpg (50.3 KB, 180 views)

Last edited by Christophe2m6; September 19th, 2015 at 08:44 AM.
Christophe2m6 is offline  
Old January 5th, 2015, 12:13 PM
  #14  
Registered User
Thread Starter
 
Christophe2m6's Avatar
 
Join Date: Sep 2014
Location: France
Posts: 207
grills


Attached Images
File Type: jpg
IMG_7579.jpg (74.3 KB, 197 views)
File Type: jpg
IMG_7620.jpg (59.8 KB, 192 views)
File Type: jpg
IMG_7642.jpg (49.6 KB, 194 views)
File Type: jpg
IMG_7679.jpg (56.5 KB, 191 views)

Last edited by Christophe2m6; September 19th, 2015 at 08:45 AM.
Christophe2m6 is offline  
Old January 5th, 2015, 12:19 PM
  #15  
Registered User
Thread Starter
 
Christophe2m6's Avatar
 
Join Date: Sep 2014
Location: France
Posts: 207
Also rebuilded headlights!!

HEADLIGHTS


Attached Images
File Type: jpg
IMG_7496.jpg (81.3 KB, 177 views)
File Type: jpg
IMG_7531.jpg (74.1 KB, 174 views)
File Type: jpg
IMG_7532.jpg (69.7 KB, 175 views)
File Type: jpg
IMG_7636.jpg (54.7 KB, 177 views)
File Type: jpg
IMG_7638.jpg (56.6 KB, 175 views)

Last edited by Christophe2m6; September 19th, 2015 at 08:46 AM.
Christophe2m6 is offline  
Old January 5th, 2015, 12:21 PM
  #16  
Registered User
Thread Starter
 
Christophe2m6's Avatar
 
Join Date: Sep 2014
Location: France
Posts: 207
headlights


Attached Images
File Type: jpg
IMG_7656.jpg (54.1 KB, 173 views)
File Type: jpg
IMG_7658.jpg (52.0 KB, 172 views)
File Type: jpg
IMG_7659.jpg (46.5 KB, 174 views)
File Type: jpg
IMG_7660.jpg (45.4 KB, 169 views)

Last edited by Christophe2m6; September 19th, 2015 at 08:47 AM.
Christophe2m6 is offline  
Old January 5th, 2015, 12:28 PM
  #17  
Registered User
Thread Starter
 
Christophe2m6's Avatar
 
Join Date: Sep 2014
Location: France
Posts: 207
complete headlights


Attached Images
File Type: jpg
IMG_7662.jpg (42.0 KB, 171 views)
File Type: jpg
IMG_7664.jpg (80.6 KB, 171 views)
File Type: jpg
IMG_7666.jpg (64.0 KB, 172 views)
File Type: jpg
IMG_7685.jpg (59.7 KB, 174 views)

Last edited by Christophe2m6; September 19th, 2015 at 08:48 AM.
Christophe2m6 is offline  
Old January 5th, 2015, 02:53 PM
  #18  
Administrator
 
oldcutlass's Avatar
 
Join Date: Oct 2009
Location: Poteau, Ok
Posts: 40,559
Very nice find of a car that's in great condition.
oldcutlass is online now  
Old January 5th, 2015, 03:31 PM
  #19  
Registered User
 
Eddie Hansen's Avatar
 
Join Date: Jan 2008
Location: South River, New Jersey
Posts: 3,515
Nice work christophe very nice
Eddie Hansen is offline  
Old January 5th, 2015, 04:17 PM
  #20  
Registered User
 
vette442's Avatar
 
Join Date: Nov 2006
Location: McMurray, PA
Posts: 1,781
Great looking car!
vette442 is offline  
Old February 2nd, 2015, 11:31 AM
  #21  
Registered User
Thread Starter
 
Christophe2m6's Avatar
 
Join Date: Sep 2014
Location: France
Posts: 207
Thanks for your words!

Had some time this week end so bring the bucket seats and back seats for reupholstery!!!

Pull everything out of the car for new anti rust and new interior paint!
(Will be done this month)

Interior looks pretty nice for a 45 years old car, no??


Attached Images
File Type: jpg
IMG_7816.jpg (72.8 KB, 225 views)
File Type: jpg
IMG_7818.jpg (76.2 KB, 221 views)
File Type: jpg
IMG_7819.jpg (68.4 KB, 223 views)
File Type: jpg
IMG_7792.jpg (70.0 KB, 218 views)

Last edited by Christophe2m6; September 19th, 2015 at 08:48 AM.
Christophe2m6 is offline  
Old February 3rd, 2015, 05:26 PM
  #22  
Registered User
 
Sherwood442's Avatar
 
Join Date: Oct 2014
Location: Morgantown WV
Posts: 2
What a clean looking Olds. You have it looking good! I'm jealous since I live in the rust belt. Although mine was only driven 8 years, it wasn't too bad. Best of luck to you!
Sherwood442 is offline  
Old February 3rd, 2015, 05:48 PM
  #23  
Registered User
 
pacekar's Avatar
 
Join Date: May 2013
Posts: 215
nice floor boards and I like the power windows
pacekar is offline  
Old February 3rd, 2015, 06:33 PM
  #24  
Registered User
 
steverw's Avatar
 
Join Date: Dec 2012
Location: Texas
Posts: 1,584
Nice car, I love the 69's. California car, should have minimal rust issues. Theres lots of good information on this site, you can learn anything you dont already know from alot of Olds gurus here. And theres lots of repro parts available if you cant find originals.
Good luck with the build

Steve
steverw is offline  
Old February 7th, 2015, 09:53 AM
  #25  
Registered User
Thread Starter
 
Christophe2m6's Avatar
 
Join Date: Sep 2014
Location: France
Posts: 207
Thanks a lot for your compliments guys!!!

Today, I cleand my power seat motor/track!!

Before/after pics!

1st pic: as it came out of the car
2nd pic: after cleaning an assembled
3rd pic: all parts cleaned
4th pic: dirty track
5th pic: cleaned track


Attached Images
File Type: jpg
IMG_7872.jpg (39.6 KB, 191 views)
File Type: jpg
IMG_7920.jpg (65.3 KB, 187 views)
File Type: jpg
IMG_7911.jpg (65.0 KB, 192 views)
File Type: jpg
IMG_7882.jpg (48.9 KB, 192 views)
File Type: jpg
IMG_7888.jpg (58.2 KB, 190 views)

Last edited by Christophe2m6; September 19th, 2015 at 08:49 AM.
Christophe2m6 is offline  
Old February 16th, 2015, 01:54 AM
  #26  
Registered User
Thread Starter
 
Christophe2m6's Avatar
 
Join Date: Sep 2014
Location: France
Posts: 207
Beginning of the floor cleaning!!!


Attached Images
File Type: jpg
IMG_7934.jpg (42.8 KB, 186 views)
File Type: jpg
IMG_7935.jpg (68.9 KB, 186 views)

Last edited by Christophe2m6; September 19th, 2015 at 08:50 AM.
Christophe2m6 is offline  
Old February 23rd, 2015, 11:32 AM
  #27  
Registered User
Thread Starter
 
Christophe2m6's Avatar
 
Join Date: Sep 2014
Location: France
Posts: 207
Work in progress!!
Everything has been cleaned and first coat of antirust paint applied!!


Attached Images
File Type: jpg
IMG_7960.jpg (67.3 KB, 193 views)
File Type: jpg
IMG_7963.jpg (68.0 KB, 183 views)
File Type: jpg
IMG_7971.jpg (71.1 KB, 189 views)
File Type: jpg
IMG_7977.jpg (59.2 KB, 185 views)
File Type: jpg
IMG_7973.jpg (85.1 KB, 187 views)

Last edited by Christophe2m6; September 19th, 2015 at 02:10 PM.
Christophe2m6 is offline  
Old February 23rd, 2015, 12:16 PM
  #28  
Registered User
 
wr1970's Avatar
 
Join Date: Sep 2013
Posts: 3,574
Great project how about motor are you going to paint it also? Oven cleaner works good to remover grease and oil. Thanks for pictures.
wr1970 is offline  
Old March 2nd, 2015, 01:10 PM
  #29  
Registered User
Thread Starter
 
Christophe2m6's Avatar
 
Join Date: Sep 2014
Location: France
Posts: 207
Originally Posted by wr1970
Great project how about motor are you going to paint it also? Oven cleaner works good to remover grease and oil. Thanks for pictures.
Thanks!!
Yes! I used oven cleaner in my bathtub for cleaning all parts!
Had first to explain to my wife what I was going to do!!

Will paint the tracks!
Christophe2m6 is offline  
Old March 2nd, 2015, 01:15 PM
  #30  
Registered User
Thread Starter
 
Christophe2m6's Avatar
 
Join Date: Sep 2014
Location: France
Posts: 207
Sanded the front of the car this saturday!
Antirust layer applied!
Next step is primer coat then black paint, then polish!

BEFORE / AFTER PICS!


Attached Images
File Type: jpg
IMG_7481.jpg (97.6 KB, 194 views)
File Type: jpg
IMG_8025.jpg (78.3 KB, 194 views)
File Type: jpg
IMG_7484.jpg (87.9 KB, 195 views)
File Type: jpg
IMG_8026.jpg (71.5 KB, 196 views)

Last edited by Christophe2m6; September 19th, 2015 at 08:53 AM.
Christophe2m6 is offline  
Old March 2nd, 2015, 01:23 PM
  #31  
Registered User
Thread Starter
 
Christophe2m6's Avatar
 
Join Date: Sep 2014
Location: France
Posts: 207
Also got my seat back from reupholstery on friday!!

LOVE THEM!!
(Before/After pics)


Attached Images
File Type: jpg
IMG_7779.jpg (53.4 KB, 188 views)
File Type: jpg
IMG_8017.jpg (69.8 KB, 195 views)

Last edited by Christophe2m6; September 19th, 2015 at 08:53 AM.
Christophe2m6 is offline  
Old March 2nd, 2015, 02:14 PM
  #32  
Registered User
 
Boilerz25's Avatar
 
Join Date: Jan 2014
Location: Houston, TX
Posts: 453
Looking good. I would love to see the car on the streets of France someday.

Sean
Boilerz25 is offline  
Old March 17th, 2015, 11:41 AM
  #33  
Registered User
Thread Starter
 
Christophe2m6's Avatar
 
Join Date: Sep 2014
Location: France
Posts: 207
Work continued this weekend!!!

After a first layer of antirust that dried 3 weeks, a good layer of antirust primer!!!


Attached Images
File Type: jpg
IMG_8117.jpg (69.2 KB, 186 views)
File Type: jpg
IMG_8118.jpg (60.0 KB, 175 views)
File Type: jpg
IMG_8121.jpg (63.4 KB, 180 views)
File Type: jpg
IMG_8087.jpg (53.0 KB, 181 views)

Last edited by Christophe2m6; September 19th, 2015 at 08:54 AM.
Christophe2m6 is offline  
Old March 17th, 2015, 11:49 AM
  #34  
Registered User
Thread Starter
 
Christophe2m6's Avatar
 
Join Date: Sep 2014
Location: France
Posts: 207
Front end that been sanded to bare metal had also a layer of antirust, then 2 layers of antirust primer, 2 layers of black paint, and 2 layers of clearcoat!!


Attached Images
File Type: jpg
IMG_8113.jpg (69.0 KB, 186 views)
File Type: jpg
IMG_8114.jpg (63.0 KB, 183 views)
File Type: jpg
IMG_8115.jpg (67.8 KB, 182 views)
File Type: jpg
IMG_8116.jpg (65.6 KB, 187 views)

Last edited by Christophe2m6; September 19th, 2015 at 08:56 AM.
Christophe2m6 is offline  
Old March 17th, 2015, 11:51 AM
  #35  
Registered User
Thread Starter
 
Christophe2m6's Avatar
 
Join Date: Sep 2014
Location: France
Posts: 207
All seat rails and power seats parts have been polished and "antirusted"!!

Attached Images
File Type: jpg
IMG_8106.jpg (56.8 KB, 173 views)

Last edited by Christophe2m6; September 19th, 2015 at 08:57 AM.
Christophe2m6 is offline  
Old March 17th, 2015, 12:14 PM
  #36  
Registered User
 
Rusted72's Avatar
 
Join Date: May 2013
Location: Bartlesville OK
Posts: 9
what type of chemicals are you using.

you mention anti rust paint. What do you use ? i rather like the way he anti rust paint turned out.


-Nice rust busting.
Rusted72 is offline  
Old April 7th, 2015, 01:59 PM
  #37  
Registered User
Thread Starter
 
Christophe2m6's Avatar
 
Join Date: Sep 2014
Location: France
Posts: 207
Originally Posted by Rusted72
you mention anti rust paint. What do you use ? i rather like the way he anti rust paint turned out.


-Nice rust busting.
It's a colorless antirust!
After one layer, you need to apply a layer of antirust primer, then finish with antirust paint!
Christophe2m6 is offline  
Old April 7th, 2015, 02:21 PM
  #38  
Registered User
Thread Starter
 
Christophe2m6's Avatar
 
Join Date: Sep 2014
Location: France
Posts: 207
Finished my the front fascia of the car!
All parts have been sanded to bare metal, then antirust layer, primer, paint and clear coated!
Please see previous posts for all details grills, headlights, radiator plate...)

Last pic is how it looked like before!!


Attached Images
File Type: jpg
IMG_8198.jpg (72.6 KB, 180 views)
File Type: jpg
IMG_8199.jpg (69.6 KB, 182 views)
File Type: jpg
IMG_8200.jpg (83.4 KB, 193 views)
File Type: jpg
IMG_7481.jpg (97.6 KB, 183 views)

Last edited by Christophe2m6; September 19th, 2015 at 08:57 AM.
Christophe2m6 is offline  
Old April 7th, 2015, 02:28 PM
  #39  
Registered User
Thread Starter
 
Christophe2m6's Avatar
 
Join Date: Sep 2014
Location: France
Posts: 207
And also finished the interior paint with 2 layers of black antirust paint!!

Next steps: dampening kit, new carpet!


Attached Images
File Type: jpg
IMG_8204.jpg (81.2 KB, 180 views)
File Type: jpg
IMG_8205.jpg (79.9 KB, 183 views)
File Type: jpg
IMG_8207.jpg (77.1 KB, 183 views)

Last edited by Christophe2m6; September 19th, 2015 at 08:58 AM.
Christophe2m6 is offline  
Old April 7th, 2015, 02:31 PM
  #40  
Registered User
Thread Starter
 
Christophe2m6's Avatar
 
Join Date: Sep 2014
Location: France
Posts: 207
Last post for tonight with 2 examples of before/after!!


Attached Images
File Type: jpg
IMG_7934.jpg (42.8 KB, 181 views)
File Type: jpg
IMG_8208.jpg (68.4 KB, 178 views)
File Type: jpg
IMG_7969.jpg (58.4 KB, 175 views)
File Type: jpg
IMG_8203.jpg (52.9 KB, 179 views)

Last edited by Christophe2m6; September 19th, 2015 at 08:59 AM.
Christophe2m6 is offline  


Quick Reply: My 1969 Cutlass Supreme Holiday Coupe


All times are GMT -7. The time now is 11:11 AM.