When you click on links to various merchants on this site and make a purchase, this can result in this site earning a commission. Affiliate programs and affiliations include, but are not limited to, the eBay Partner Network.
Went and visited the shop today that is doing the body repairs and paint. The car is now out of the paint booth and undergoing polishing prior to having the bumpers and trim reinstalled. The gaps on the hood and doors are very even. The hood now opens and closes nicely without any binding at the release mechanism. The hood also now follows the top fender line very well. Very happy with the quality of the paint and body fitment. The lines on the curves in the wheel wells look great as they should given that this is all new metal. Still have some under coating to do to prevent future issues. Have been looking at the shows coming up in August in anticipation of actually being able to show the car and spend some quality time with fellow motorheads! For some reason I enjoy car shows much more as a participant than as an observer!
The car is out of the paint booth and getting polished and put back together. It will get its first oil change and have a mechanical oil gauge installed. The oil filter that we pulled ( used during breakin) looked normal ( no excess metal) when we cut it open so we will watch the oil pressure gauge closely over the next little bit to see that everything looks fine with the 10W30 Amsoil Synthetic. Been looking at the car show schedule closely and really looking forward to get back to enjoying the car and meeting fellow motorheads at the shows. Once I feel good about the miles on the motor it will be time to go to the strip and see how all the things that were done perform in anger!
Last weekend I took the car to the first show in over three years. Still have some significant issue to work. For some reason the trim catches on the driver side rear ( does not on the passenger side ) as well as the engine is not running as well as I think it should with an EFI system. Ordered a system today that will allow full tuning access to all parameters on a laptop. The system I have is likely good for most cars but does not have enough ECU to deal with all of the necessary tuning parameters when an engine has been well modified. As well I am looking at bringing the car back to its original ride height. The Hotchkis stage 2 dropped the car about 1.5 inches. This should take care of the issues in the rear wheel wells as well as give me more clearance for the headers. Was originally planning on custom headers but the body work and upgrading the EFI is just too much coin at this time. It just never ends!
Installed some spacers both front and back to give me some room in the rear wheel wells as well as keep the headers from touching down. It now looks like I should have ample room for the rear tires without the car looking like it is jacked up in the rear.The Hotchkis gear dropped the car so the stance is now close to stock. I went with spacers vs different springs as I really like the ride that the springs provide.
The engine was running poorly so we looked into what was going on. Found that the drive gear on the distributor was wearing very quickly. The thrust washer above the gear showed signs on being compressed more than it should. After measuring things up it was found that the distributor ( Fast product) overall length was slightly too long. The wear on the gear allowed close to 30 degrees of play while engaged. Have a new gear and thrust washer on the way. Will likely machine the gear slightly to get the overall length right and keep the gears engaged without being misaligned. Have replaced the ECU for the fuel system with the Fast XFI Sportsman unit. This unit will allow us to do a full on tune through a laptop vs the basic tune provided through the Fast EZ 2.0 .
While waiting for the distributor gear we are going to modify the exhaust to pull the pipe closer to the frame. Some slight changes to the X-pipe location will let me run the exhaust closer to the original path. Once we get the distributor back on it will be time to go on the dyno to set up the EFI.
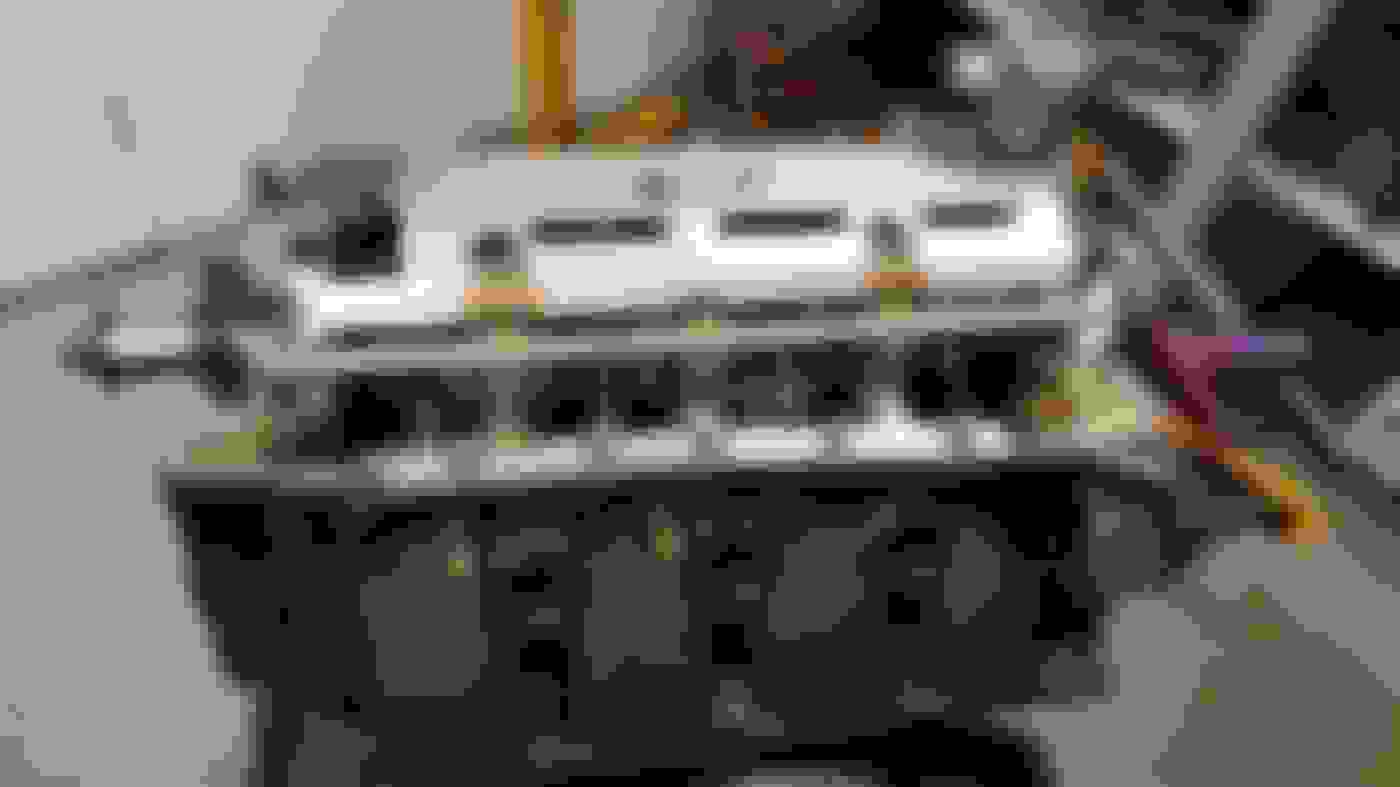
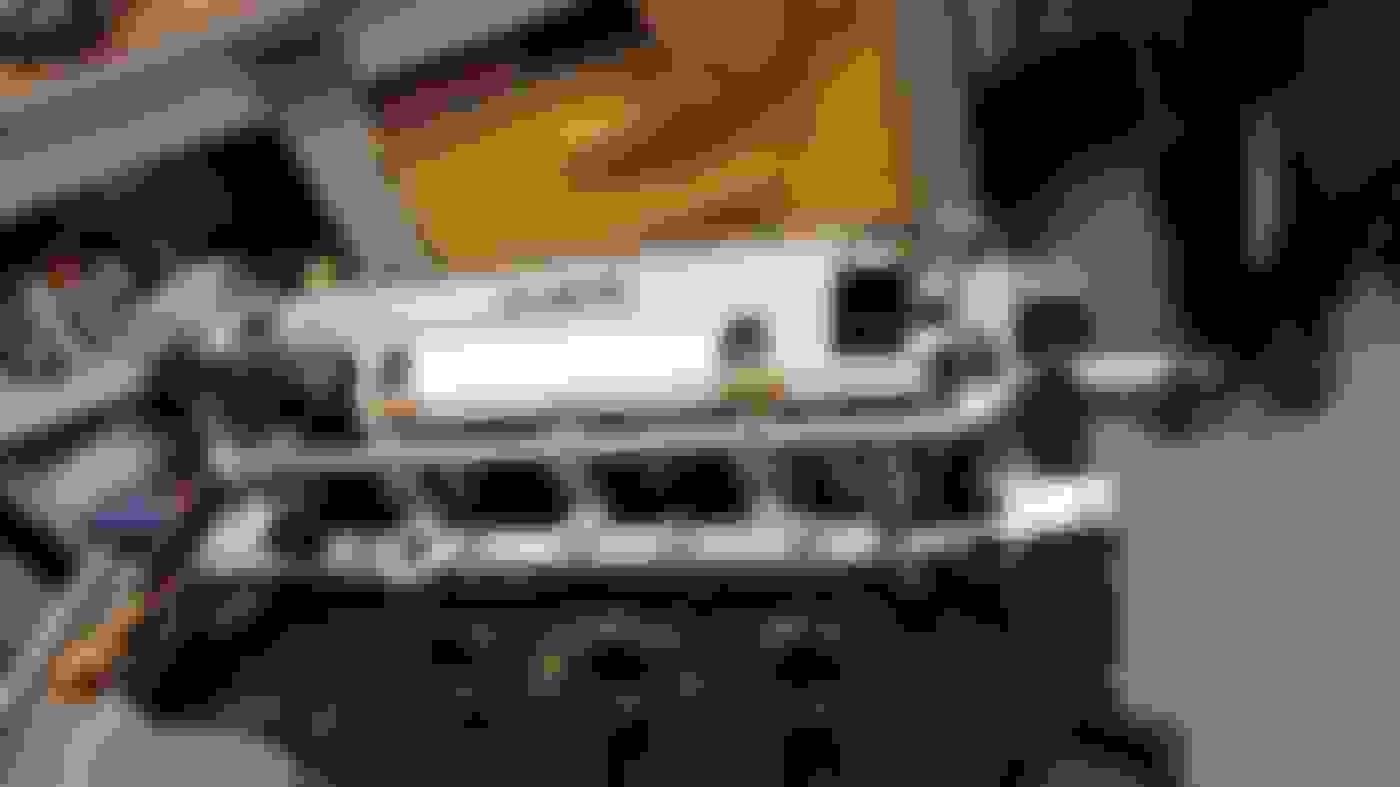
Had to get a new Fast Distributor for my engine as the initial Fast distributor was having issues that was throwing the timing out. The bottom of the cam gear was rubbing hard against the block. This caused the cam gear to wear very quickly and resulted in retarded ignition timing. While we were replacing the distributor we also upgraded the ECU for the fuel injection. It is the Fast Sportsman which gives me alot more tuning capability. The exhaust pipes also got a tweek that pulled them up about 2 inches closer to the car. The pipes now nearly follow the stock path. Once we got everything running right the car was tuned on the dyno. We hit our targets of 600 ft/lbs TQ as well as 500 HP. The nice air intake got removed as we found that it just did not allow the air flow that the engine required. The manufacturer swore that it would support our horsepower. Removing the air system and going to a conventional filter gave us and extra 70 ft/lbs of torque and HP. At full throttle I am getting some blowby. As the engine is now as 495 stroker I am thinking that this is most likely related to windage. The leak down test confirmed that the rings and valves are in good shape. The last issue that I need to resolve is getting the power steering pump swapped out and getting a power steering reservoir that is better suited for the requirements of a hydro boost system.
nice numbers and good catch on the aircleaner 70 hp and trq is a lot to lose., i was gonna suggest checking to see if the body is centered on the frame re wheel rub on one side.
Since getting the car running (late July) the Hydroboost / Power steering combo has always been noisy. It got worse and I contacted March as I run a March serpentine system with their pump and remote reservoir. They immediately let me know that their system will not match up with the hydroboost. I have since located a reservoir made specifically for a hydroboost system that will keep air out of the system. The reservoir is slightly bigger so I am going to try to turn the battery to make room . If this does not make sufficient space the battery will be relocated to the trunk. Once I get it all installed I will update with pictures.
Got the replacement PS pump installed as well as the PSC PS reservoir. There are no longer horrible sounds of a PS pumping in distress every time I use the brakes or steer. I checked the PS reservoir after driving to the gas station and the fluid is 100% free of bubbles. As well I added 8 ounces of fuel stabilizer to the fuel. Last but not least the battery tender is hooked up. In looking through my odds and ends I found the 455 Oldsmobile Rocket disc for on top of the air cleaner. Will see if I can fine a place that can make me a new disc with "495 Oldsmobile Rocket " on it. It is frustrating to not have really driven the car this year and now finally have most of the bugs worked out only after the snow flys! Winter will be painful but next summer holds alot of promise.
Last edited by rummer; Nov 26, 2017 at 03:03 PM.
Reason: Added text
After the dyno tuning we went with a more conventional setup. Attached are a couple of pics of the engine compartment. I also got a decal made for the to plate of the air cleaner. Have a spare top coming that I will put the decal on and use for when we show the car.
Well here we go again. I never felt good about what the oil pressure was doing so last fall the decision was made to pull the motor and have a look to see what was going on. As it turns out it was the right decision as things were not going to last long the way things were going.Without going into detail on what all of the issues were ( a good number) it can be said that the motor is being totally rebuilt. The rotating assembly is getting new pistons as well as some machining to the crank. The heads have been completely rebuilt with additional porting , new heavier springs and new roller rockers. All of the valve seats were redone as well as the valve guide seals. The before and after flow bench results are very telling ( gained just over 80 CFM ). Alot of attention has been made to oiling with alot of grinding taking place to improve oil return. The cam we are using is a little more aggressive with slightly more lift , longer duration and slightly different lobe separation. New Hydraulic roller lifters are also going in along with restricted push rods. The oil pan will now feature a baffle to keep the oil at the oil pickup on acceleration. A DMR girdle and Windage tray combo is also being bolted in place. A valley pan will also be used to keep the oil from spraying the underside of the intake Manifold. The Mondello Single plane intake will also get some die grinding as there are sharp turns that need to be converted to nice smooth curves for better air flow ( less turbulence ). I am also going to a slightly higher stall converter just to help with bottom end get up and go! I really hope that this time we finally get it right. The short block is done so things should move pretty quick from here. The DMR Girdle setup looks to be very stout and should keep things in the bottom end from moving around. They also have a modified 7 quart pan that is notched in order to work with the section of the girdle mount on the pan rails.
Short Block w/ girdle - windage tray Modified high volume oil pump Block and main caps get alot of support from this assembly JE Custom size Forged piston Slight pockets on the edges for the exhaust valves. Should end up at roughly 10.5 to 1
Not to throw cold water on your project, but with the money you have spent on block/girdle/oilpan etc to rework this, why didn't you just go with a new Rocket Racing block with ALL the improvements it has to offer?? Stronger(no need for a girdle), dedicated oiling to mains(oil pressure issues gone), dual bolt pattern(BOP AND CHEBBY). Seems like a no brainer to me....
Not to throw cold water on your project, but with the money you have spent on block/girdle/oilpan etc to rework this, why didn't you just go with a new Rocket Racing block with ALL the improvements it has to offer?? Stronger(no need for a girdle), dedicated oiling to mains(oil pressure issues gone), dual bolt pattern(BOP AND CHEBBY). Seems like a no brainer to me....
What caused the issue in the first place??
.02
Greg
Greg:
I am sure that often better solutions exist but you go with what you know. During a build you always learn things. Slowly I am getting to know of more vendors but usually due to running into so sort of issue. The FI system , air intake , suspension , body all presented issues that were not fore seen and that had to be resolved. I think that what makes it a challenge and why we build these things.
As for issues there were alot that were the result of a lack of attention to detail as well as products that did not make the grade. The end result was that when I accelerated from speed the oil pressure would drop. I also ate up a distributor gear very quickly and had issues with over heating. The dip stick calibration was not measured up properly resulting in the oil being foamed up. I am also pretty confident that too much oil made its way to the heads and was slow to return. We should have also put a baffle in the pan as well as utilize a windage tray ( 20 - 20 hind sight). Poor work at the machine shop resulted in a big variation in clearances at the crank journals. The rings never totally seated properly resulting blow by ( discovered on the dyno). You also see this in the hatch marks in the bores as they were worn unevenly. Some of the uneven wear may also be tied to the oiling issues. The Porting and valve job was not as good as it could have been, With redoing the valve seats and some attention to detail on the ports ( mostly around the valve stem throats) with a die grinder gave us some 80 more cfm air flow on the test bench. The cam was not buttoned down which chewed up the distributor gear and also messed with the ignition timing ( probably the cause of the over heat ). The Fast EFI computer was upgraded as the base model just did not have the parameters available to tune the motor right. Fast was very good as they switched both the the Distributor and computer out. virtually free of charge. The piston skirts were collapsing. I thought that this should not be an issue as even with a stroker the skirts stay pretty well in the bore but when we were measuring things as we took the engine apart the piston skirts as short as they are were moving in towards the center. The folks that did the work had done great work on two previous cars but for some reason the attention to details just was not there. I know that they can execute the level of detail needed but for some reason it was up to their normal standard in this case. This car is not going to be a race car. My goal was to have an over built motor that would run reliably for a long time and move a heavy car smartly when asked to do so. It may go to the strip just to see what it will do but it is more likely to be seen at a car show or a ice cream shop on a Sunday night! If all I wanted was a really fast Cutlass I could have installed a turbo ed LS motor but I wanted to stay true to the brand!
Have had a good news bad news week. The good news was that my engine did 625 TQ and 525 HP on the engine dyno on the first run. Then the computer tied to the dyno pooped the bed. It was going to take a while to repair the dyno so it was decided to have a look at the bottom end to see how things were going. What we found was not good. Once the oil pan was removed we found metal in the oil. The main bearings on cylinder #2 was chewed up pretty good. The other journals and bearings looked good. On closer inspection of the crank journal we found what looked like a small circle with a lip on one end that was digging into the bearing. It was very fortunate that we decided to check out the bottom end. Since then the engine has been stripped down , thoroughly flushed , bores fine honed , and metal cleaned from the piston skirts. I had a call with the crankshaft supplier and they do not seem to want to back their product . My thought is that since it is a stroker crank it is a performance crankshaft and you should be able to machine the journals at least once without running into flaws in the metal. A new crank is on the way but after this experience I am skeptical as per the quality. Does anyone know of an effective process to see if the metal in a crank shaft has defects below the surface? My concern is that many of these manufacturers get their products made out of Chinese steel and some have the machining done there as well. Scat uses Chinese steel but they seem to have a good handle on the QA / QC and as such can build high horsepower Crankshafts without issues. My crankshaft is an Eagle Specialties unit and I am really hoping that the next unit I get is better as this is getting very costly. It is pretty easy to speculate what caused the flaw but at the end of the day the metal in a crank shaft should be of the same quality and properties throughout.
#2 Main #2 Main other half Circular flaw close up Circular flaw
That looks like something was dropped on the journal. Something round. The rods use bolts or nuts to secure?
As I was typing this I noticed the amoeba looking spot/outline on the journal under the nick. Was that welded?
That looks like something was dropped on the journal. Something round. The rods use bolts or nuts to secure?
As I was typing this I noticed the amoeba looking spot/outline on the journal under the nick. Was that welded?
I have two trains of thought on what took place with my crank shaft.
1st These are made in China with Chinese steel. I am wondering if in the initial machining something went south and some welding took place to cover the issue.
2nd There was a flaw in the steel itself. The steel could have a small flaw that had some porosity.
In both cases the issue did not surface until the crank was turned down due to some scuff marks found on the original tear down. The bearings on #2 looked nothing like this on the first tear down.
The vendor ( Eagle) claims that we must have had some debris in the motor to cause this. Knowing the engine builder quite well I really doubt that. He is as meticulous as I have seen. Eagle suggested that the debris caused the bearing to heat up and and thus the crank got hot at this point. I am not sold on their explanation. If I could afford a Scat stroker it would be how I would go but they are steep.
Did you check the run-out on the crankshaft? Those bearings look like they're being hit by the crank. I mention this because my last Eagle crank had a Total Indicated Run-out, TIR, of .004. That was a long time ago and they supposedly had fixed that issue but it's worth a check.
Did you check the run-out on the crankshaft? Those bearings look like they're being hit by the crank. I mention this because my last Eagle crank had a Total Indicated Run-out, TIR, of .004. That was a long time ago and they supposedly had fixed that issue but it's worth a check.
TripDeuces
When I first used this crankshaft nothing like this took place. The crank journals were turned as we were rebuilding the engine and wanted to go with new bearings. It is a good point and I will get the new crankshaft checked for Total Indicated Run -out prior to installation. This should be easy to do as we have to send the rotating assembly out for rebalance once it is in our hands.
You should be able to check TIR on the old crank also. What are all those marks on the journal ? Did someone have a die grinder get away from them ?
You should be able to check TIR on the old crank also. What are all those marks on the journal ? Did someone have a die grinder get away from them ?
We were trying to see if in fact we had some sort of flaw in the metal. You can see just how deep the pits were. If you follow the line around you can see very small pits in the line which are likely just the top of a deeper pit.
Finally got the engine back together after having a major issue due to the Eagle crankshaft on the previous dyno run. Had to go with a new Stroker crankshaft as the previous one had already been machined and was beyond repair. The engine fired up very quickly on the dyno. The scatter data that the dyno collects had the engine running at about .5% throughout the RPM range. I am told that this means that the engine is basically a "happy motor" and is pretty close to making as much power as it will with the present configuration. They use the inertia of the dyno to start them and often new engines will pull the dyno down as they work to get going. My 495 Rocket ran nicely right from the start. We had a Holley 750 installed for the dyno run. Once the engine gets installed the EFI will go back on and get tuned on the chassis dyno. After the testing the oil and oil filter looked good with only typical metal content from a new motor. We pulled the valve covers afterward and also found that everything in the valve train looked as it should. The only issues that need to be dealt with are a leaky rear seal and venting the crankcase better ( oil still trying to come out of the filler cap). The torque came in early and hard. The peak was 635 ft/ lbs. The peak HP was 565 at 4800 RPM. The HP actually flat lined unit 5300 RPM when it started to roll over. I am running a Mondello single plane intake which we ported and cleaned up. The heads where CNCed but we also spent some time with the die grinder afterwards and found more airflow on the flow bench. The intake works great as it did not hurt the torque but definitely helped the airflow higher up. Given the torque curve I may go with a higher stall ( 3000 vs 2200 ) converter.
Folks:
Been a long time since I posted. I have had the car out as much as weather has permitted. Over the summer the car has run well. When I have done shows it has been fairly well received. It will go to the dyno to tweek the tune as well as get some minor things wrapped up. The best show I attended was in Radium BC. We had great weather and a good turnout. The drive through the mountains was a ball with the suspension working very well in the corners. The huge tq really makes for fun coming out of corners. Been a long time since I was really able to enjoy the car but we are finally there. Enjoy the pics! The Olds in the fog Amazing restomod Impala Great paint There is a 426 Hemi hiding in this Merc truck Shiny Pontiac Stage 1 GS The clouds went away Roof down in the sun!
It just is never really done! We have installed a Gear Vendor overdrive in my Cutlass. I did alot of procrastinating prior to taking this step. My final thoughts were that I had a TH400 that could take the torque that the motor makes so why not bolt something on that will deal with the torque easily and give me my overdrive. The install went fairly smoothly although we found out that a x member is made for hard tops and the Overdrive unit but not for the convertible frame configuration. Surgery was done on the original X member and it now works fine. It also required some mods in order to make the x pipe now fit slightly farther back in the system. I have not taken the car out for an extended run yet but I did do some playing around. When you put your foot into it the close ratios makes it seem that all that is going on is constantly shifting until you get into the final OD gear. The shifts are solid and fast. I did not have the courage to watch the tach as this was taking place as it does cover some ground in short order. The only thing that is a little weird is that when you come to a stop after running up the gears all the way to OD is that you get a slight clunk! I am told that this will get quieter as the unit gets some wear and tear. It has a manual option but the way it flies through the gears in auto mode I doubt that I will use it.
With these cars it is never over. I got a pretty good paint chip roughly a year and half ago driving on a local highway. I have been trying to get the car into the shop that originally painted the car. They have been so busy that I finally went to another vendor. When I dropped the car off we got talking about some ideas that I had for the car even though it was pretty well done. For the longest time I have been wanting to re-badge the car. It is a Cutlass S but it is much more than a S. With all of the suspension / brake , drive train , motor , cosmetic and electrical upgrades it is well past the capabilities of even the almighty 442's. The one thing that I did not do is build a 442 clone. All that said I like to think of the car as a Cutlass "SS". I do not want to use the Chev symbols but do want to stay somewhat true to the Oldsmobile Badging. The bodyshop fellow came up with an idea for the badges. He also know of a craftsman who will cast the badges once we give him a design. I came home and got busy on the computer. We came up with two variants. After some discussion we are going with the two S's diagonally positioned. This allows the badge to be narrower and longer which will make them easier to fit on the curved surfaces. As well I have reached out to a vendor to make a new decal for the air cleaner. The engine is now 500 cu in due to issues we had during the build. The decal will soon state that. Paint Chip Up close Paint chip from afar Old Decal
Been a long time since I posted. The Oldz has finally become very reliable. Not showing it much anymore. Just enjoying the car. Have redone the interior and had a new top installed since I last posted.
Went with a black lid Have installed a console complete with cup holders and storage after this picture was taken.
[QUOTE=old80cs;1641670]Wow, this thread has been quite a saga getting the car to where it is now! Glad to hear it’s running well and reliable, It looks great![/QUOTEI]
I had many problems with the remote entry / push button start that drove me nuts! "Touch wood" but it has been solid for a couple of years now. At first I felt that it was the product. All it took was getting the product in the hands of a vendor that actually understands how it works. I have had a good number of less than positive experiences with vendors who either don't know the products that they offer or don't stand by the products when issues arise. I have had vendors that also went above and beyond to support their products when issues arose. Anyone who has gone through a major build knows exactly what I am talking about. If you have never had a issue with a vendor or the wares they sell feel very good about your luck! Over time we got 99% of things worked out. When I used to show the car more I would get lots of questions about various aspects of the build. My motto was just be honest! I don't go out of my way to beat up a supplier but if asked by a fellow motorhead about a particular product or process I will be honest about. A good vendor totally understands the impact of word of mouth amongst fellow motorheads! Those that choose to ignore this do so at their own peril! At the end of the day the quality of a built is the sum of good and negative experiences and how you manage them. I am lucky in that over time I got to know folks that I could trust to do it right and would stand by their work and be supportive if there are issues. All said and done I am quite happy with my Oldz and feel that I achieved the vision that I had in my head for the car. Alot of fun to drive with modern technology applied and reliability. We tested the reliability by driving the Oldz to Denver from my home in Alberta and back without a hitch. And yes it is a long and not so cheap road. It has been over ten years since I started this trek. I am lucky in that my spouse has been very forgiving when it came to $$$$ spent. Never keep your receipts organized and all in one place!
Getting the engine right and looking dressed to kill was likely the biggest challenge.
Last edited by rummer; Jul 26, 2025 at 09:29 AM.
Reason: Grammar
I meant to ask, what fender badge did you go with? I liked the narrow design with the two S�s angled.
I went with the two S's offset and narrow as pictured below. The fellow that made the castings was an old retired gentleman who does this kind of stuff to stay busy. He spent quite a bit of time making them as he makes the molds in sand and then pours them. He was actually really reasonable with his price. It was touches like the badges and the functional 67 GTO hood scoop that makes the car a one off custom. I kept the car predominantly an Oldz but at the same time I was not interested in building a 442 clone. {A clone would have been much cheaper to build} Building a clone is really pretty simple as your know exactly what you need and how to do it. In the end what I did is make it a car that had my ideas integrated into it in a manner that suits my tastes. It also pisses off the purists but then I don't mind that and I own the car! Fat fingers!
What specific red did you go with? Mine is a 68 Juneau Gray 442 Convertible, that will end up red with a white top. I may also go with all white interior and black carpet. I�m in Arizona, dark colors just absorb too much heat.
I like the personalized badging. The purists might have a stroke🤣
good work, looks fun! I will start mine in the next year. Just retired, picking up a retirement gig for the next 5-6 years. I want the car done in 4.
I hope it looks a gray as yours!!!!
Matt
The red is a gm color known as fire red. I bought my Cutlass originally in Houston in 2013. It was a number matching original car. The car had a 350 Rocket with a two speed automatic ( boring ). After a year I was tearing it apart. It took me over 10 years to get the car where I wanted it. I had a vision in my head that I wanted to achieve. My goal was a fun reliable car to drive that was still true to the Olds name but that was taking advantage of new technology that just was not available in 1968. It was driven from Calgary to Denver a couple of years back without a hitch. The car has modern suspension , brakes , many modern goodies in the motor and drive train ( th400 and a gearvendor overdrive. I even have USB outlets in the dash so we can power electronics going down the road.The end result is a one of one Cutlass. The hood ( 1967 GTO Scoop) , custom badging , custom rear rims and interior all came from my vision for the car. The hood scoop works great as the inlet air temp stays cooler with all that fresh air coming in. And yes the purists get triggered by the badging but then they do not own the car or pay for it's upkeep! The motor makes a healthy 635 ft/lbs of TQ so I figured that the car earned the SS badging!
If you are keeping your car close to stock than your timeline is possible given that you start with a reasonable car. If you go just a little of off the rails your build time will grow substantially. In some areas I went well off of the rails but I made an effort to keep the mods tasteful and stock looking to the non Olds crowd. The Olds crowd for the most part likes my car but every once and a while I get beat up by a purist.
Awesome! I�ll check out that red color. The Olds Matador Red is a bit too orange based red for me, I prefer more of a blue based red.
I�ve had mine since 2008. Project for me and my boys that turned into a retirement project. Life, career, basketball, lots of basketball, CGSC and Master�s degree with the Army�. I�m officially retired as of 9/29/2025. I�m looking at a 3-4 year timeline to completion while working a retirement gig. My last of 3 boy�s left home for college last night. This pic is him the day we bought it,123,000 miles, virtually rust free number matching Arizona car. My �68 442 Conv and youngest son (20 now)!
Last edited by lfootmatt; Aug 26, 2025 at 09:44 AM.