72 Olds Cutlass Seat Cover Help
 December 12th, 2009, 10:00 AM
#1
Registered User
Thread Starter
Join Date: Oct 2009
Posts: 204
72 Olds Cutlass Seat Cover Help
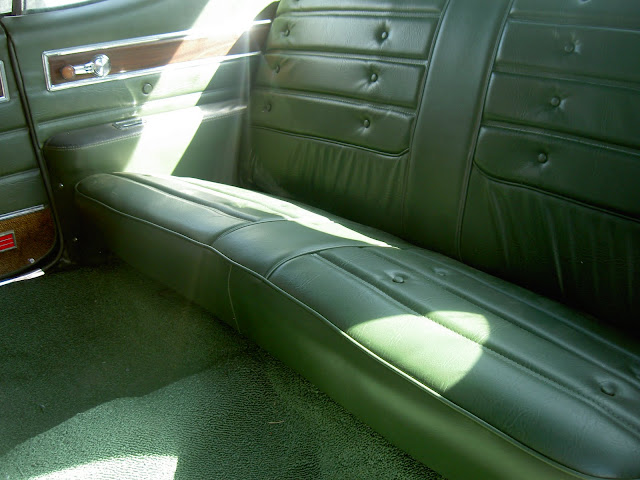
I'm looking into seat covers to help finish out my restoration project. My original seats are bench with front 50/50 folding seats for 2 door, dark green vinyl. I have found some on Parts Place but not much info provided... They talk of PUI -machine sewed and Legendary--hand sewed.and say good quality... Can anyone tell me the quality and closeness to reproducing origianl seats.... ? How about issues with installing seat covers, replacing rubber or other issues that will probably pop up???? Should I go alone or just take it to an upholstery shop and pay? Any tutorial web or youtube sites on seat cover installation? too many questions.Cheers
Richey
Richey
 December 12th, 2009, 10:03 AM
#2
Just an Olds Guy
Join Date: Jul 2008
Location: Edmonton, AB. And "I am Can 'eh' jun - eh"
Posts: 24,525
Go with Legendary. Lady72nRob71 did his car with Legendary and had super results. Not sure if PUI will give you the original look with the deep pleats and proper piping.
December 12th, 2009, 12:34 PM
#3
Registered User
Join Date: Feb 2008
Location: Plano, TX
Posts: 11,798
Do it once, and right the first time.
Here is almost everything you wanted to see about a 72 interior resto (except for headliners...)
https://classicoldsmobile.com/forums...-makeover.html
The back seat should be able to be done yourself easily. The front might be a little challenging. If you have the time and space and patience, then try it! The rest of the stuff is fairly straight forward. Door seals are easy, too. See the website in my sig for more info on the door seals.
Last edited by Lady72nRob71; December 13th, 2009 at 07:33 PM.
December 12th, 2009, 02:18 PM
#4
Registered User
Thread Starter
Join Date: Oct 2009
Posts: 204
Car seat response
Thanks Rob and Alan, I'll contact Legnedary and see what they can do for me.
Haven't taken them appart but I think other than some new rubber the the sprngs, frame, etc are in pretty good shape.
I do have one busted seat belt spring, wont rewind, driver side. All I have found is a generic repalcement, still looking for original...?
Richey
Haven't taken them appart but I think other than some new rubber the the sprngs, frame, etc are in pretty good shape.
I do have one busted seat belt spring, wont rewind, driver side. All I have found is a generic repalcement, still looking for original...?
Richey
December 13th, 2009, 06:24 PM
#5
Registered User
Thread Starter
Join Date: Oct 2009
Posts: 204
Cutlass seat covers
This is right. Their seat covers are all 20% off until 12-31, so please get one from them direct (legendaryautointeriors.com). The 72 supreme bench seat covers are as close to perfect as one could get. Only the armrest center seam is not there (but looks better IMHO). And if perfect, Legendary will make em right at their expense. The PP will insist they are correct and tell you to go away. Had that experience, too.
Do it once, and right the first time.
Here is almost everything you wanted to see about a 72 interior resto (except for headliners...)
https://classicoldsmobile.com/forums...-makeover.html
The back seat should be able to be done yourself easily. The front might be a little challenging. If you have the time and space and patience, then try it! The rest of the stuff is fairly straight forward. Door seals are easy, too. See the website in my sig for more info on the door seals.
Richey
 December 13th, 2009, 07:42 PM
#6
Registered User
Join Date: Feb 2008
Location: Plano, TX
Posts: 11,798
Rob, I looked at the legendary web page but could not find a 72 cutlass bench seat... so I just emailed them looking for covers and the 20% off..... also checked your thread on restoring your interior.... looks great I have put that in my subscription to use as a guide as I start that part... Thanks for all the pics and info...
Richey
Richey
72 CUT S/442 SPLIT BENCH - GREEN
AA72GUS0020465G
$320
I am assuming you have the Supreme...
Their website is a bit cluttered, so you have to filter the search. Download their catalog in pdf format and everything will be there, headrest covers, door panels, and all!
The headrest covers you can do in less than an hour yourself - easy.
Get sheet foam from a fabric store (the medium blue stuff) if you do it yourself. The preformed high $ stuff is not required.
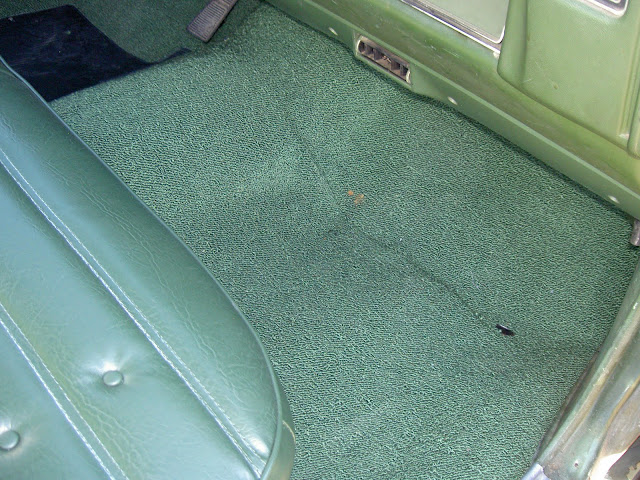
The back seat will be next and I am sure you need new carpet...
")
After all that is done, the door panels will show their fadings......


Last edited by Lady72nRob71; December 13th, 2009 at 07:45 PM.
December 14th, 2009, 07:00 AM
#7
Registered User
Thread Starter
Join Date: Oct 2009
Posts: 204
Cutlass S seat covers
Rob thanks for the help, I'll try downloading the catalog this evening.... Assuming, you had a 50-50 chance but mine is a Cutlass S.. but it is probably same if it is a full bench... and I'm affraid your probably right about the door panels... looked at it again last night and the driver door panel is seperating at the top edge, to many arms resting on it I guess.....
Richey
Richey
December 14th, 2009, 07:19 AM
#8
Registered User
Join Date: Feb 2008
Location: Plano, TX
Posts: 11,798
Richey,
It looks like I got the above part # correct - it is for an S model.
So you do not have an armrest, right? Only the Supreme came with the folding center armrest.
Below is a screenshot from their old catalog (I need to get a new one...)
Yours should be the one on the left. - Compare with the supreme one on the right with the armrest (I have this one).
Do get the headrest covers, too - they are super easy to do and will match with the new seats. Also a rear seat cover so the colors match perfectly. The door panels are next it sounds like!
If you want to see the color before you buy, they will send you a free sample swatch if you ask. If you do not have the armrest, I bet you can do the front seat yourself. If you want seat heaters, this would be the time to add those, too...
Last edited by Lady72nRob71; December 14th, 2009 at 07:25 AM.
December 14th, 2009, 04:41 PM
#9
Registered User
Thread Starter
Join Date: Oct 2009
Posts: 204
Legendary Catalog
Rob, Thanks That is exactly what I'm looking for and I think I will go for the seat heaters. They are great in my Tahoe.. Should not be that hard to add.. And your right no arm rest on the S mod..Calling tomorrow!!
Richey
Richey
December 14th, 2009, 06:37 PM
#10
Registered User
Join Date: Feb 2008
Location: Plano, TX
Posts: 11,798
Below are the seat heaters I used - I go the large carbon fibre ones. I paid the upholstery shop $100 each for them - they were worth it.
See my interior thread on more seat heater installation hints...
December 14th, 2009, 06:58 PM
#11
Just an Olds Guy
Join Date: Jul 2008
Location: Edmonton, AB. And "I am Can 'eh' jun - eh"
Posts: 24,525
It looks like I got the above part # correct - it is for an S model.
So you do not have an armrest, right? Only the Supreme came with the folding center armrest.
Below is a screenshot from their old catalog (I need to get a new one...)
Yours should be the one on the left. - Compare with the supreme one on the right with the armrest (I have this one).
Do get the headrest covers, too - they are super easy to do and will match with the new seats. Also a rear seat cover so the colors match perfectly. The door panels are next it sounds like!
If you want to see the color before you buy, they will send you a free sample swatch if you ask. If you do not have the armrest, I bet you can do the front seat yourself. If you want seat heaters, this would be the time to add those, too...
Must be getting old. I opened the printscreen you posted. Since it has the windows format, I tried closing it using the X at the top right. Then I realized what i was doing. You rascal. Just for that, I'm gonna copy it and post it full size so the rest of us don't get caught doing the same thing.
 September 18th, 2010, 04:04 PM
#12
Registered User
Thread Starter
Join Date: Oct 2009
Posts: 204
Progess in covring seats
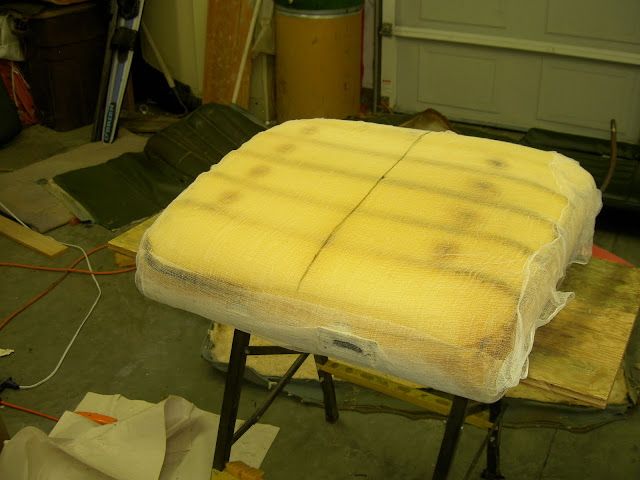
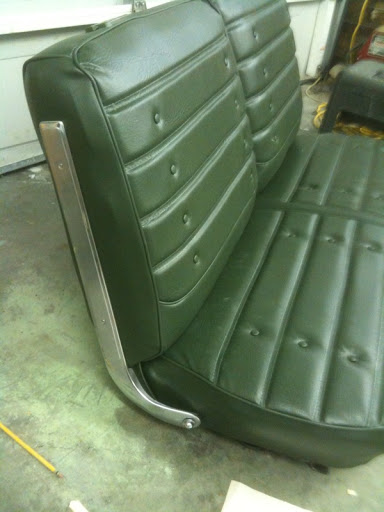
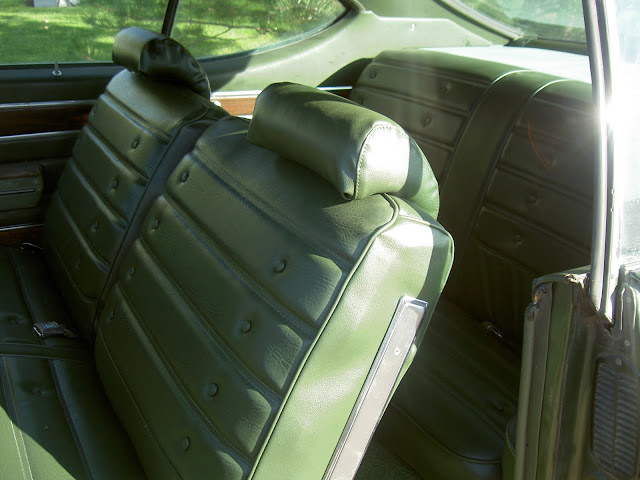
Slow but steady progress. I have finished all the interior: headliner, new package tray, new carpet and now I'm on to adding seats. I ordered my seat covers through Legendary at the end of 2009 and had them stored in my barn since the middle of January. I decided to rebuild the seats using a high density blue foam combined with a pink foam outshell that is coated with a nylon cheese cloth.... You can see pictures on my Picasa web album http://picasaweb.google.com/gunfight...J2r873Tm_aWgwE#
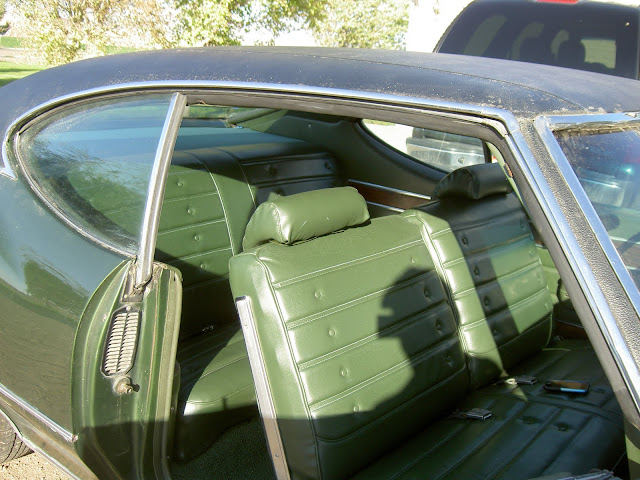
I was going to do the front seat to start but to my shock I discovered that the seat covers I had been storing for almost a year were bucket seats instead of bench... Legendary is working to fix that issue... Meanwhile I have taken everything apart takeing a lots of pictures to make sure I can remember how to put them back together... did the back seat this weekend and it came togehter with a little finger streangth and help form my wife to add one more hand as I strethched the bottom of the rear seat..
Overall it looks great! Can't wait to get the front seat cover and put them on!!
Richey
September 18th, 2010, 08:15 PM
#13
Registered User
Join Date: Feb 2010
Location: Jacksonville,Fl
Posts: 120
nice....... those seats came out GREAT......im working on mine now......but i took mine to the upholstry shop....i wish i'd known about the seat covers from legendary's....i changed the seat pattern up ah lil bit.....buy if i dont like it imma look into the seat covers
September 18th, 2010, 08:32 PM
#14
Registered User
Thread Starter
Join Date: Oct 2009
Posts: 204
nice....... those seats came out GREAT......im working on mine now......but i took mine to the upholstry shop....i wish i'd known about the seat covers from legendary's....i changed the seat pattern up ah lil bit.....buy if i dont like it imma look into the seat covers
September 20th, 2010, 07:37 AM
#16
Registered User
Thread Starter
Join Date: Oct 2009
Posts: 204
Rob Thanks, your interior job has been a great inspiration to me in trying to do it right. The Legnedary seat covers have gone on with some effort but look great. I have been workig with their sales rep Mike and others at Legendary and they have been great, working the swap for the correct front seat covers. Fed Ex was at the door to pick up the buckets the very next day after I finially notice and made my call. While I was disappointed It has been good to let my fingers take a break after building the rear seats.
October 9th, 2010, 05:44 PM
#17
Registered User
Thread Starter
Join Date: Oct 2009
Posts: 204
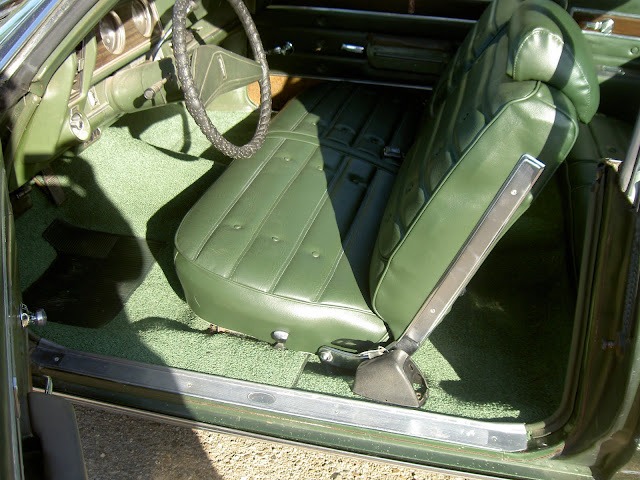
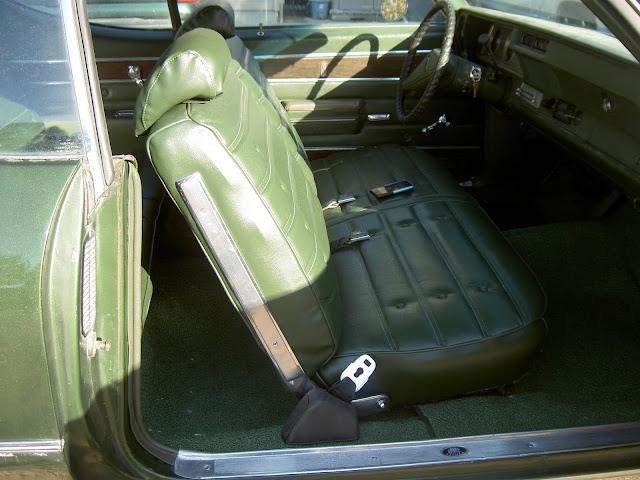
Alan thanks for the reply, I decided to get up out of my chair and just do it!! I did go with the Cheese cloth and no use the silicone as Legendary instructions suggested. I took lots of pictures as I dismantled my seats to hopefully get them back like they can form the factory. I also on took one seat apart so if needed I could look at the other to figure out how it went back together. This was good for figuring out how they stuffed the ends and hook the edge around the big bar/seat hinge and latch. I did invert the seat covers and mark the center strip as instructed( not sure I really used this once I started putting on the seat covers. I then put the seat cover right side out, outside in the sun while I prepped the seats. I added �” foam to the driver seat, but left the passenger as it was, it looked ok to me? I then draped a large piece of cheese cloth over the seat and smoothed it against the seat. I laid the seat on my workbench and then pulled the seat cover on, just like pulling on a pillow case… It actually worked on fairly easily, pushing on the seat frame and pulling on the edges of the cover… Once on I replaced the wires, hog ringed it in placed as close to as it was before as possible and then ended up stitching the bottom cover to help it lay smooth. I used the needle to find the screw holes and replaced all the hardware. What a great feeling to get that done!!!! I have added a couple pictures of my project but you can go to my web page and see a few more.
http://picasaweb.google.com/gunfightersmac/OldsInteriorSeats?authkey=Gv1sRgCJ2r873Tm_aWgwE#
cheese cloth and center line
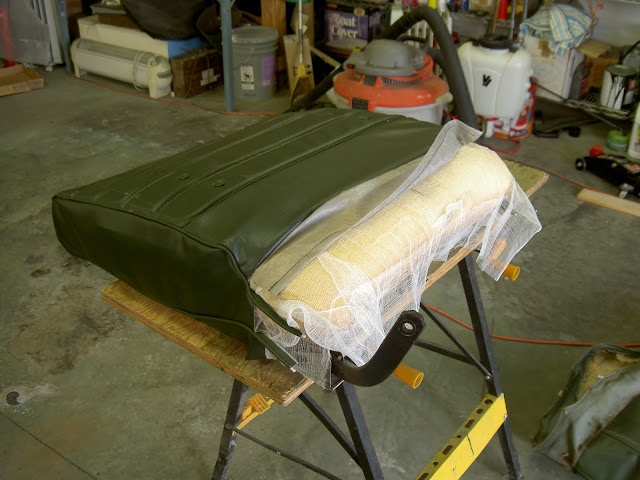
Just pulling it on
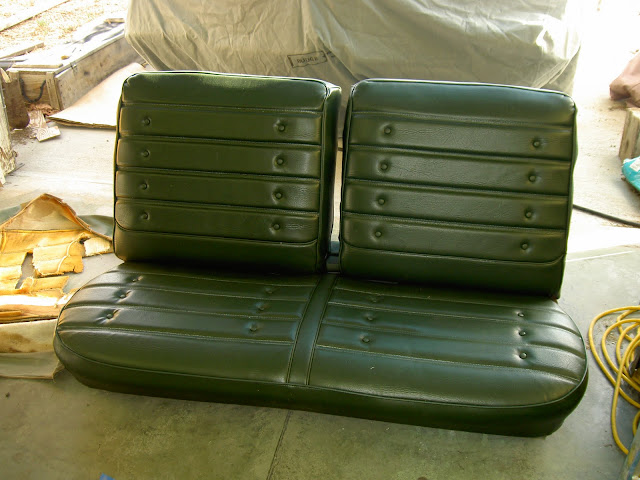
End of an afternoons work!!
It is feeling great to be getting close to hitting the road!
Richey
http://picasaweb.google.com/gunfightersmac/OldsInteriorSeats?authkey=Gv1sRgCJ2r873Tm_aWgwE#
cheese cloth and center line
Just pulling it on
End of an afternoons work!!
It is feeling great to be getting close to hitting the road!
Richey
Last edited by richeyb; October 9th, 2010 at 05:48 PM.
October 9th, 2010, 06:28 PM
#18
Just an Olds Guy
Join Date: Jul 2008
Location: Edmonton, AB. And "I am Can 'eh' jun - eh"
Posts: 24,525
Way to go Richey!
That front seat looks absolutely amazing. I think you did the right thing with adding a little extra padding to the drivers seat. I noticed mine feels a little on the thin side. Not sure if that's because I weigh a lot more than when I was 20 or whether the seat foam just deteriorated a little over the years. By the looks of it, it's not a terribly hard job, and for an afternoons work it shows fantastic results.
I'm going to replace the stock front bench A52 seat in my car with the center armrest one. I know that only came in the CS cars, but I'm going to have a local shop custom make the upright panels so it will look more stock. Don't want to have the CS stitching pattern in the Cutlass S. Over the years of owning other cars with the center armrest, I just can't seem to live without it anymore. When the new seat goes back in, it will be a 4way power bench/armrest. Fun and games....
October 9th, 2010, 07:16 PM
#19
Registered User
Thread Starter
Join Date: Oct 2009
Posts: 204
Allen R, Center console sounds like a good project.... from your other comment, I did order the door panel carpet to match my new floor carpet but not sure how to go about installing?// or if I just want to pay the money and order a whole door panel.. my first goal was to get it drivable. Next will be the engine area, Its been rebuilt and runs great but s missing a few parts that got miss placed in process,radiator shroud, hood insulation, A-frame seals.....
October 10th, 2010, 11:30 AM
#21
Registered User
Thread Starter
Join Date: Oct 2009
Posts: 204
Finished?
Finally got all the locks, srews, chrome edging, etc on and finished my seats. Ready to install and take a ride..
I am putting my head rest together today... not sure if I need to glue or just staple it on. I'll bake'm in the sun a while and the stretch on the cover and try stapling them in place...
I am putting my head rest together today... not sure if I need to glue or just staple it on. I'll bake'm in the sun a while and the stretch on the cover and try stapling them in place...
October 11th, 2010, 05:03 PM
#22
Registered User
Thread Starter
Join Date: Oct 2009
Posts: 204
Finally seat are back in
I finally finished my seat restoroation and got them all back in jsut in time for a Columbus Day ride.!!!! Only problem was trying to get the bolts to take with the addition floor insulation and new carpet... but after pushing and pushing we got them in... and I had my ride...

Thread
Thread Starter
Forum
Replies
Last Post
Pacecar
Parts Wanted
2
August 8th, 2012 04:40 AM
Swede64
Interior/Upholstery
4
December 14th, 2010 05:09 AM


