When you click on links to various merchants on this site and make a purchase, this can result in this site earning a commission. Affiliate programs and affiliations include, but are not limited to, the eBay Partner Network.
I thought I'd share a little about the refurbishment I just did on my '73 Delta 88 steering wheel.
Like most steering wheels from this time, the bakelite plastic does not hold up well to heat and UV from sunlight. Over time they begin to crack, and in some cases, like mine, larger chunks began to come right off. I looked at purchasing the plastic kits to fill the voids and cracks, and then just going with a repaint, but I figured it wasn't worth the effort as the plastic would likely break/crack again. So I decided to try a different route and made a custom steering wheel and hub cover out of leather because I wanted to save the original look.
Total cost ~$55-75. Total time ~8 hours (there was some time spent learning how to use a sewing machine again and practicing).
List of items you'll need:
-JB Weld - Plastic putty or equivalent. You'll use this to fill the gaps, cracks and holes. (~$8 each tube - I needed 2)
-100 grit sandpaper, and a 2x2 block of wood about 4inches long as a sanding block. The block isn't necessary, but it helps.
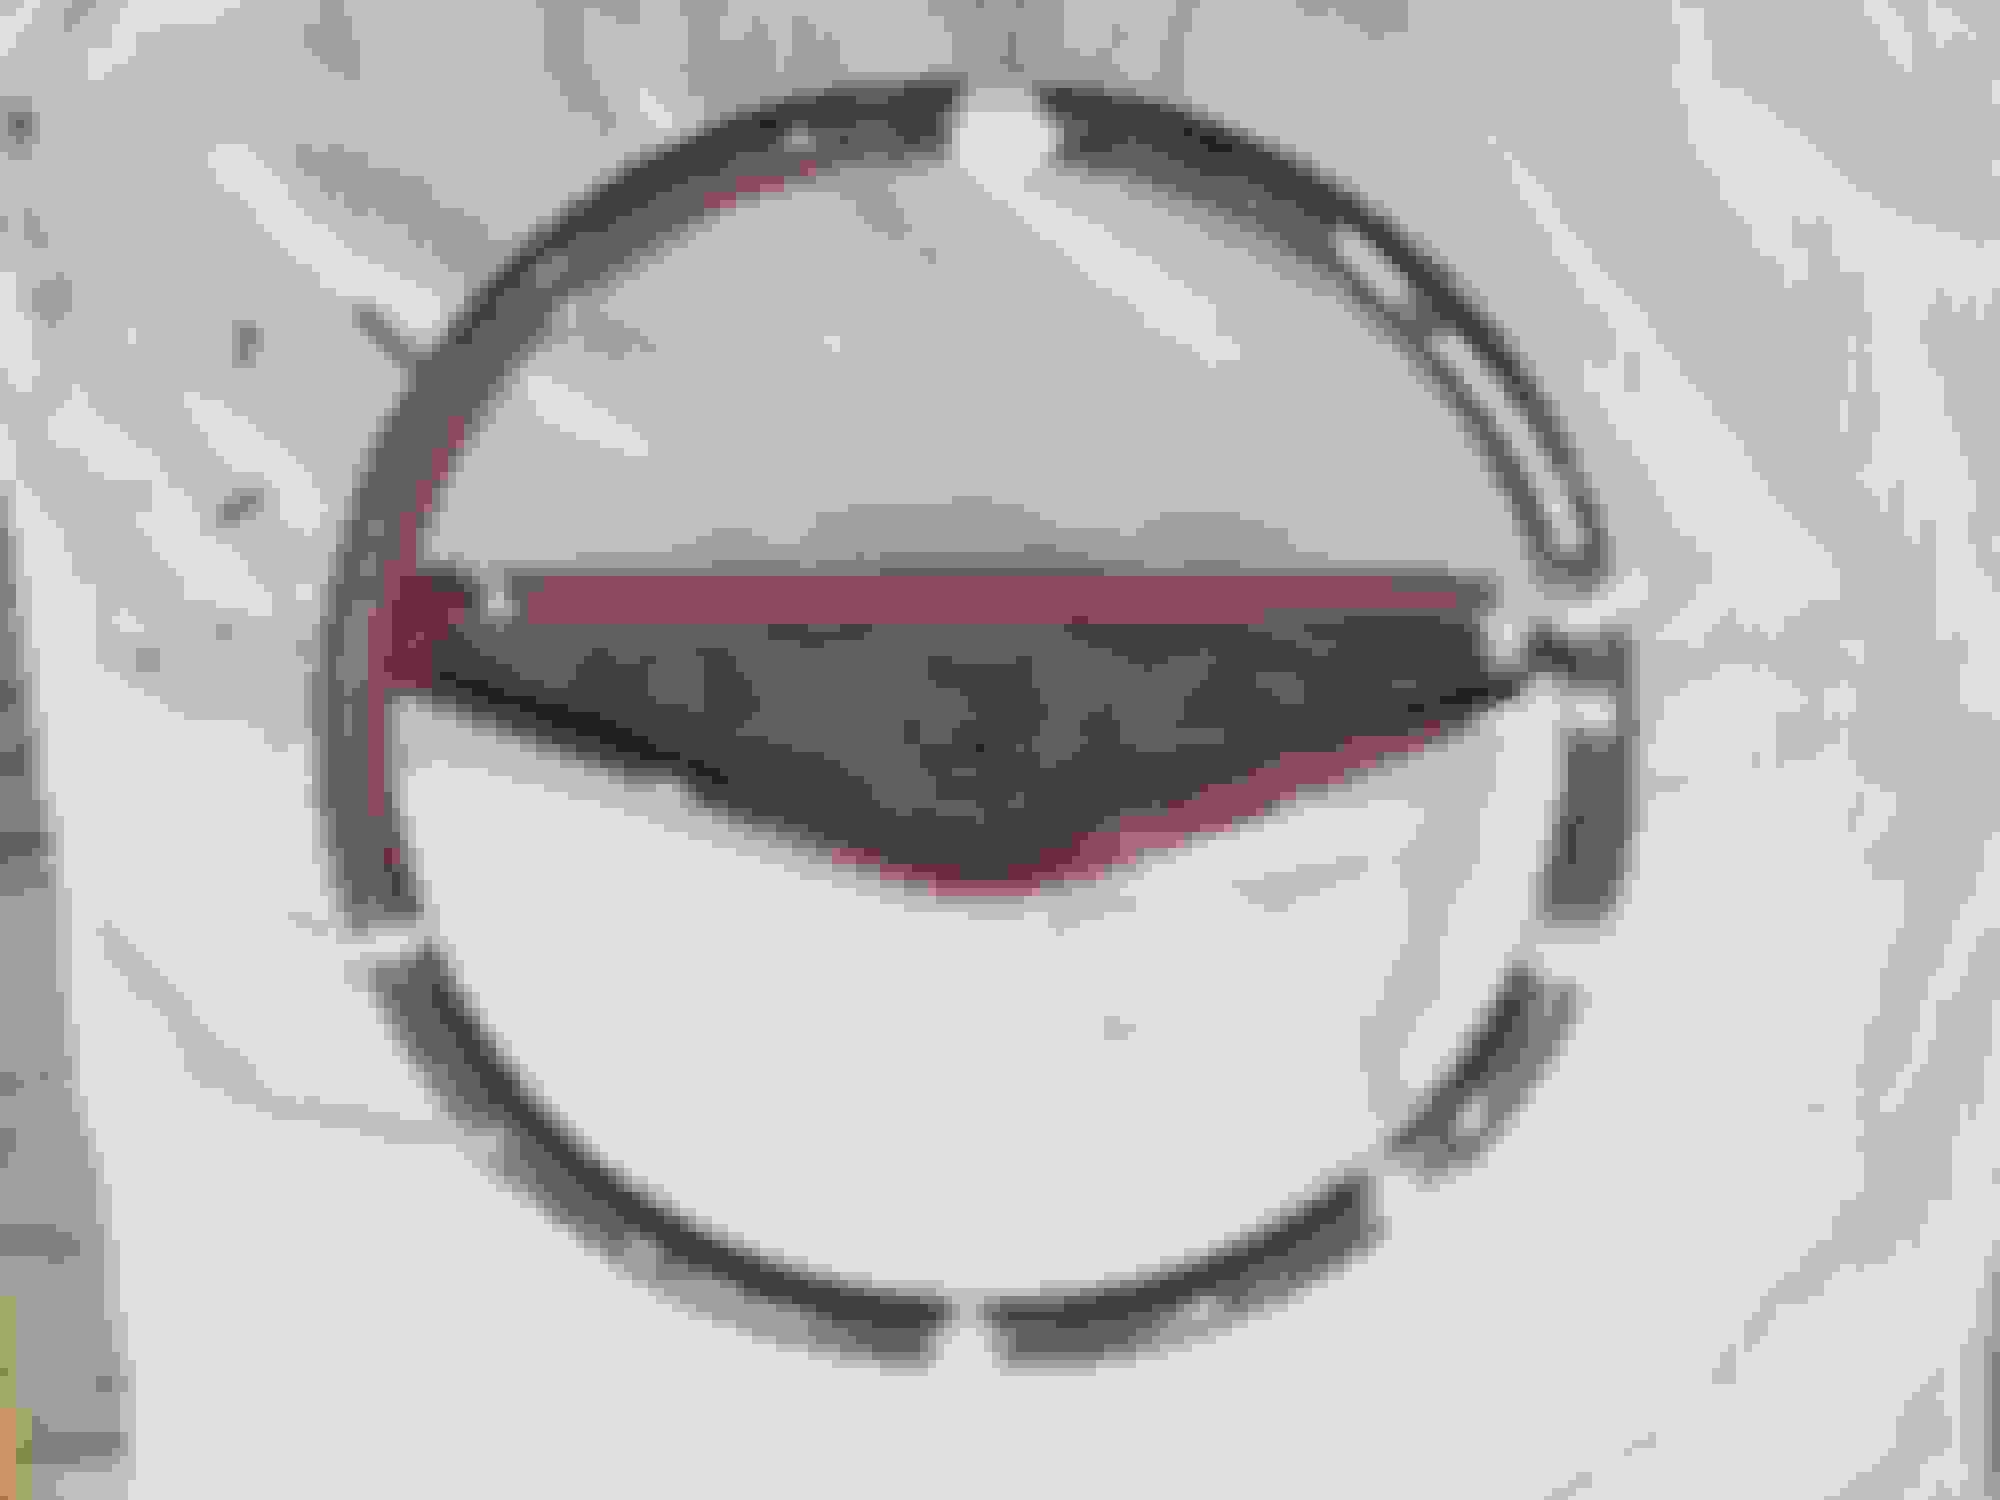
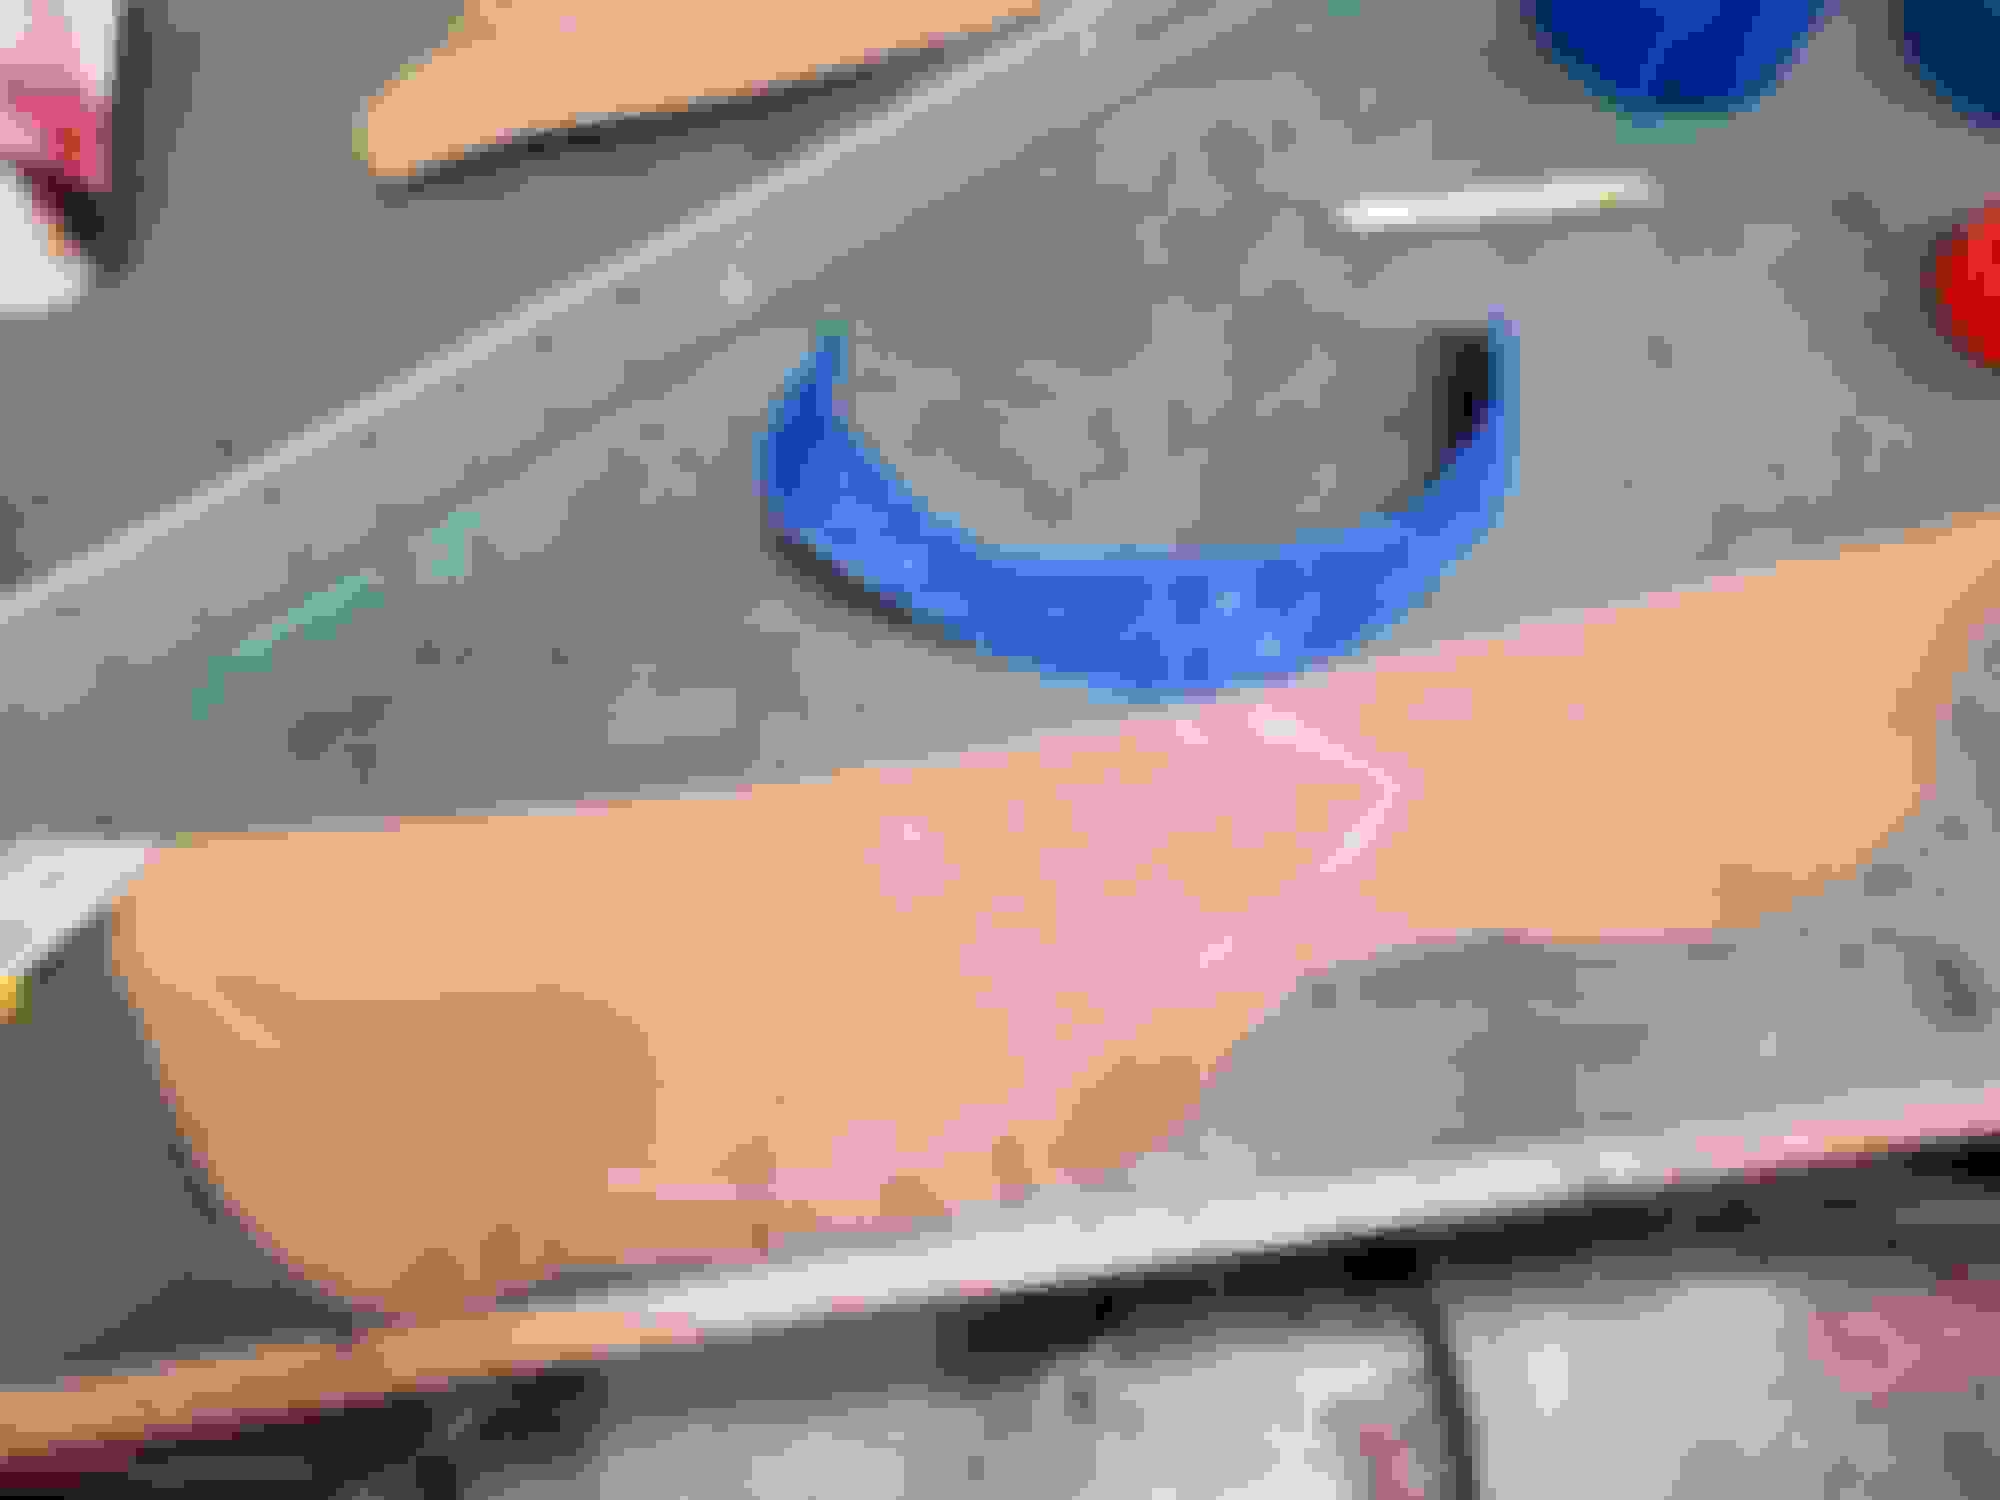
-Piece of leather hide or pelt of your colour choice. 1-1.3mm thick. I opted for goats leather as its soft to the touch, inexpensive, easy to get, and durable. You want the piece to be large enough to make 2 straps 26-30 inches long each - approximately 3 inches wide. The width will depend on the circumference of your wheel grip. Mine was 2.875" around on the grip, therefore my straps were 2.875" wide as well. The wheel is a 15.5" diameter wheel, which works out to approximately 49" circumference. The piece of hide will also need to have enough excess to cover the center hub and bracing (wings from hub to wheel that holds the horn) - see photos to details. Overall, mine was approximately 3ft x 2ft in size, but make sure you do the math on it yourself. Cost ~$25, please keep in mind this can range heavily depending on the leather type.
-Upholstery thread. Make sure it's upholstery, not regular thread. Colour of your choosing. (~$4)
-Sewing Machine and a heavy duty needle (the needles can be purchased nearly anywhere you can buy thread). You do not need a special heavy duty sewing machine either as normal one will suffice. I do recommend the heavy duty needle though ($3). The most difficult part of putting leather through the sewing machine is that it is bulky, and does not slide easily through the runner/needle/foot. Because the leather creates a lot of friction, the mechanism in the machine that pushes the fabric through has a hard time so you have to be mindful of pulling it through yourself and assisting the machine at a STEADY pace to make the stitching relatively even and clean. I highly recommend using excess cutoffs for practice first. You can always aim to do it all by hand, but it will be slow, and difficult as leather (even thin) is pretty tough to push a needle through. If you go the hand sewn route, you'll need to practice your running stitches (see photos).
-A good, sharp exacto knife or blade.
-A meter/yard stick with a good edge.
-3M Scotch-Weld Nitrile High Performance Rubber and Gasket Adhesive 847 ( https://www.3m.com/3M/en_US/p/d/b40069393/ ) or something similar. This bonds well to plastics and leather. I had this already, so I do not recall the cost.
-Hook needle. Just a basic hand needle and it C-shaped. You'll use this when installing the hub collar and wheel cover. ($4 for a kit with 6 sizes)
-Basic sewing skills. For real, I hadn't touched a sewing machine since I was a kid, some 25+ years ago, and it took me 30 minutes to figure it out again.
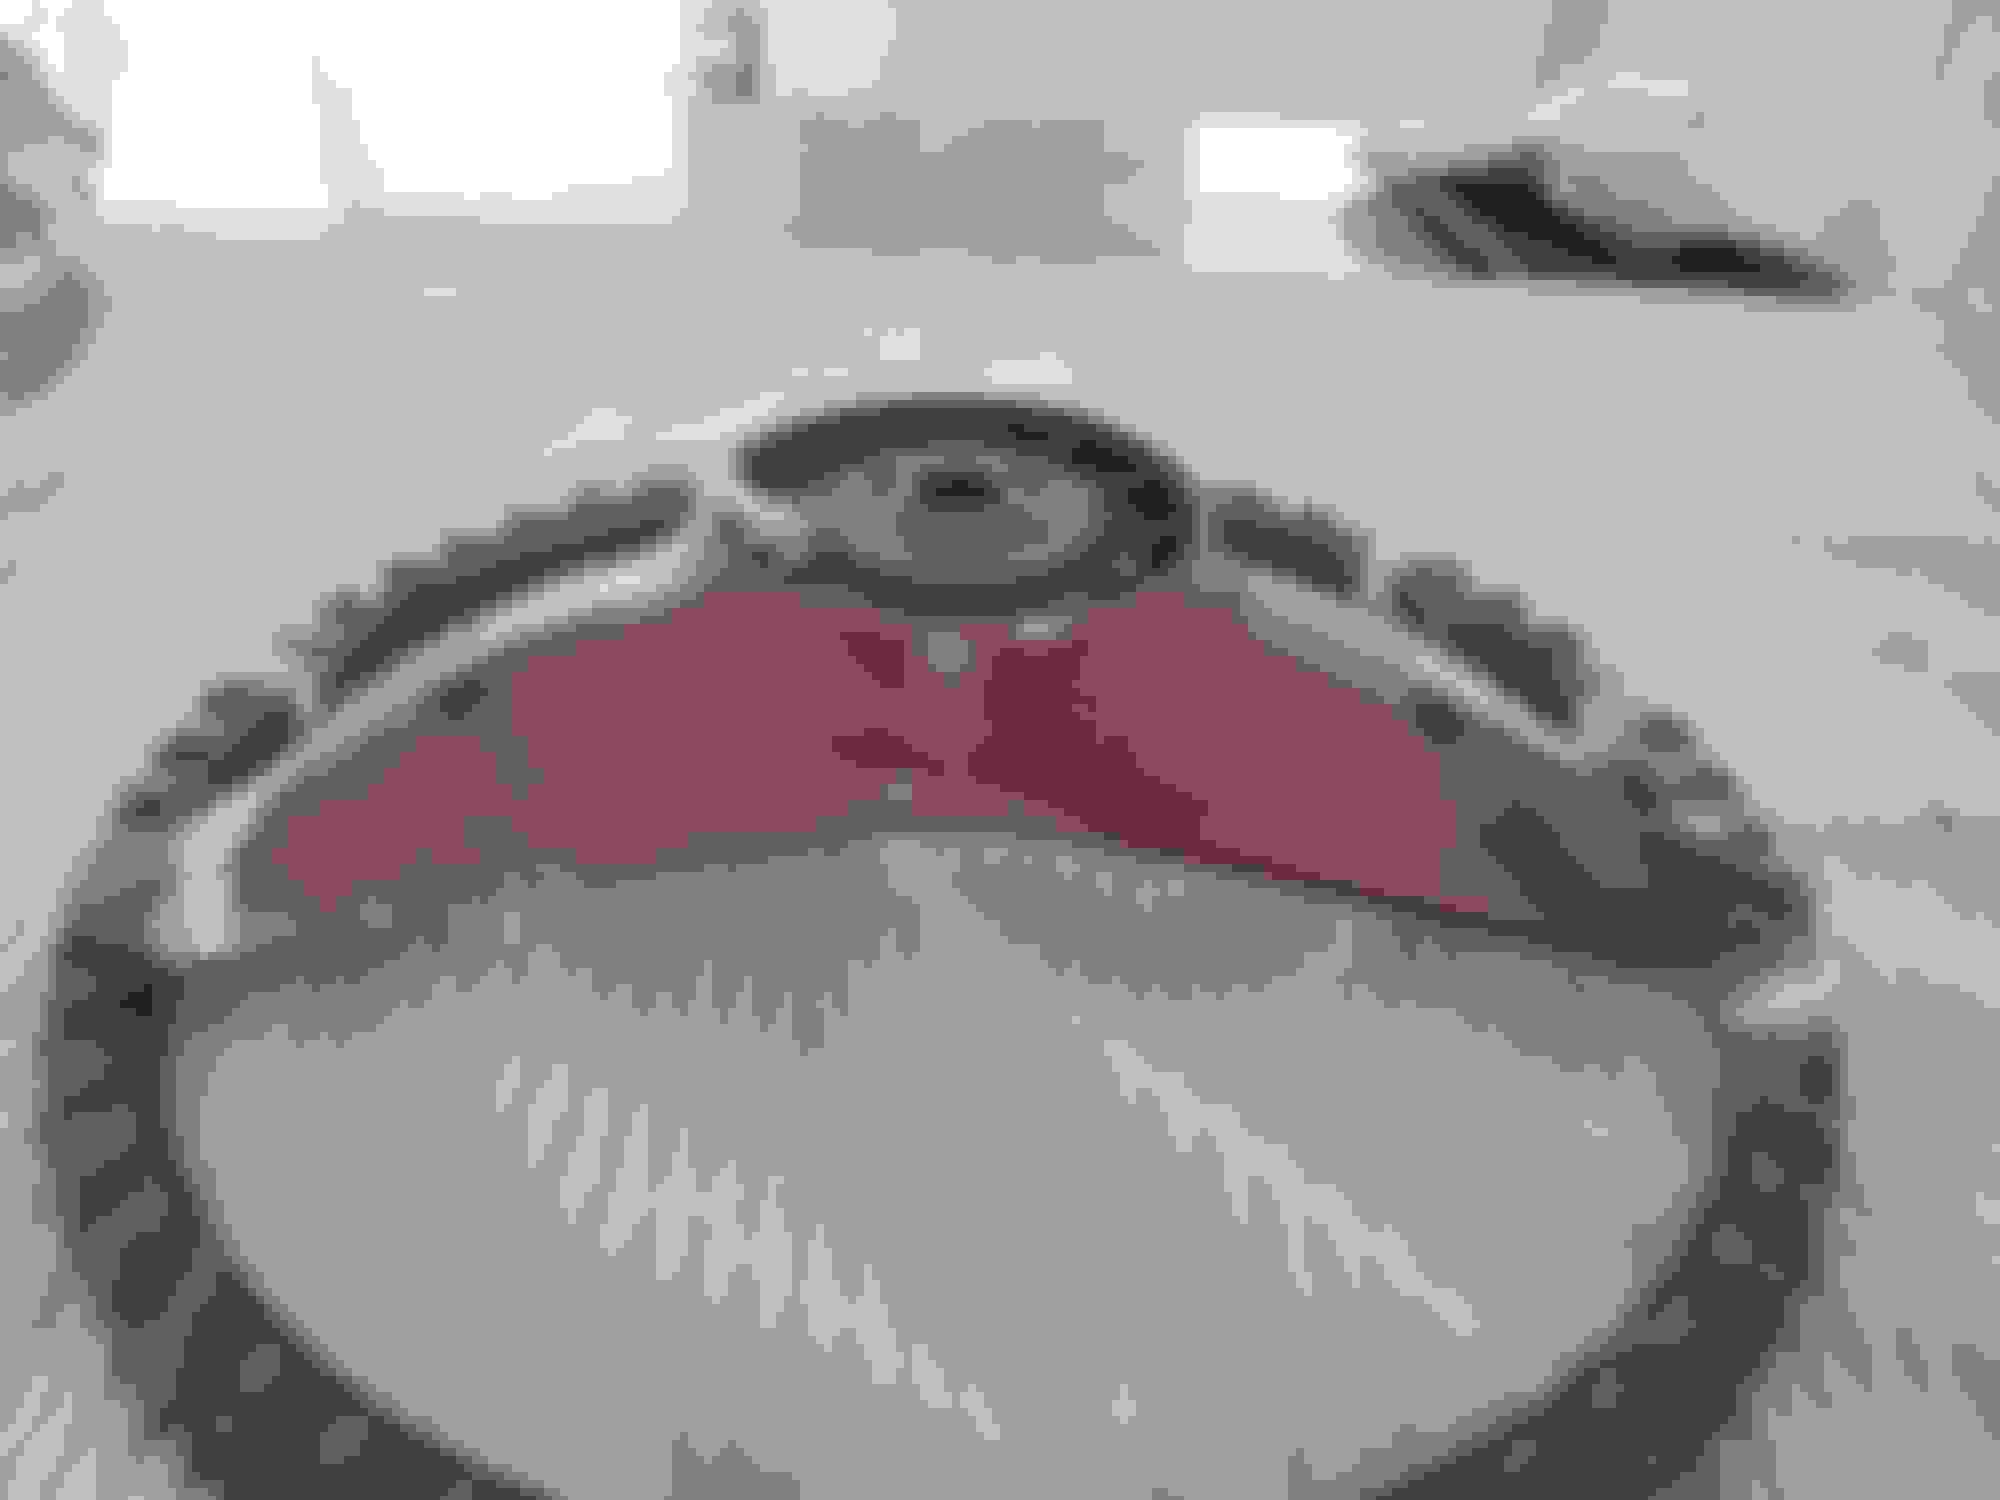
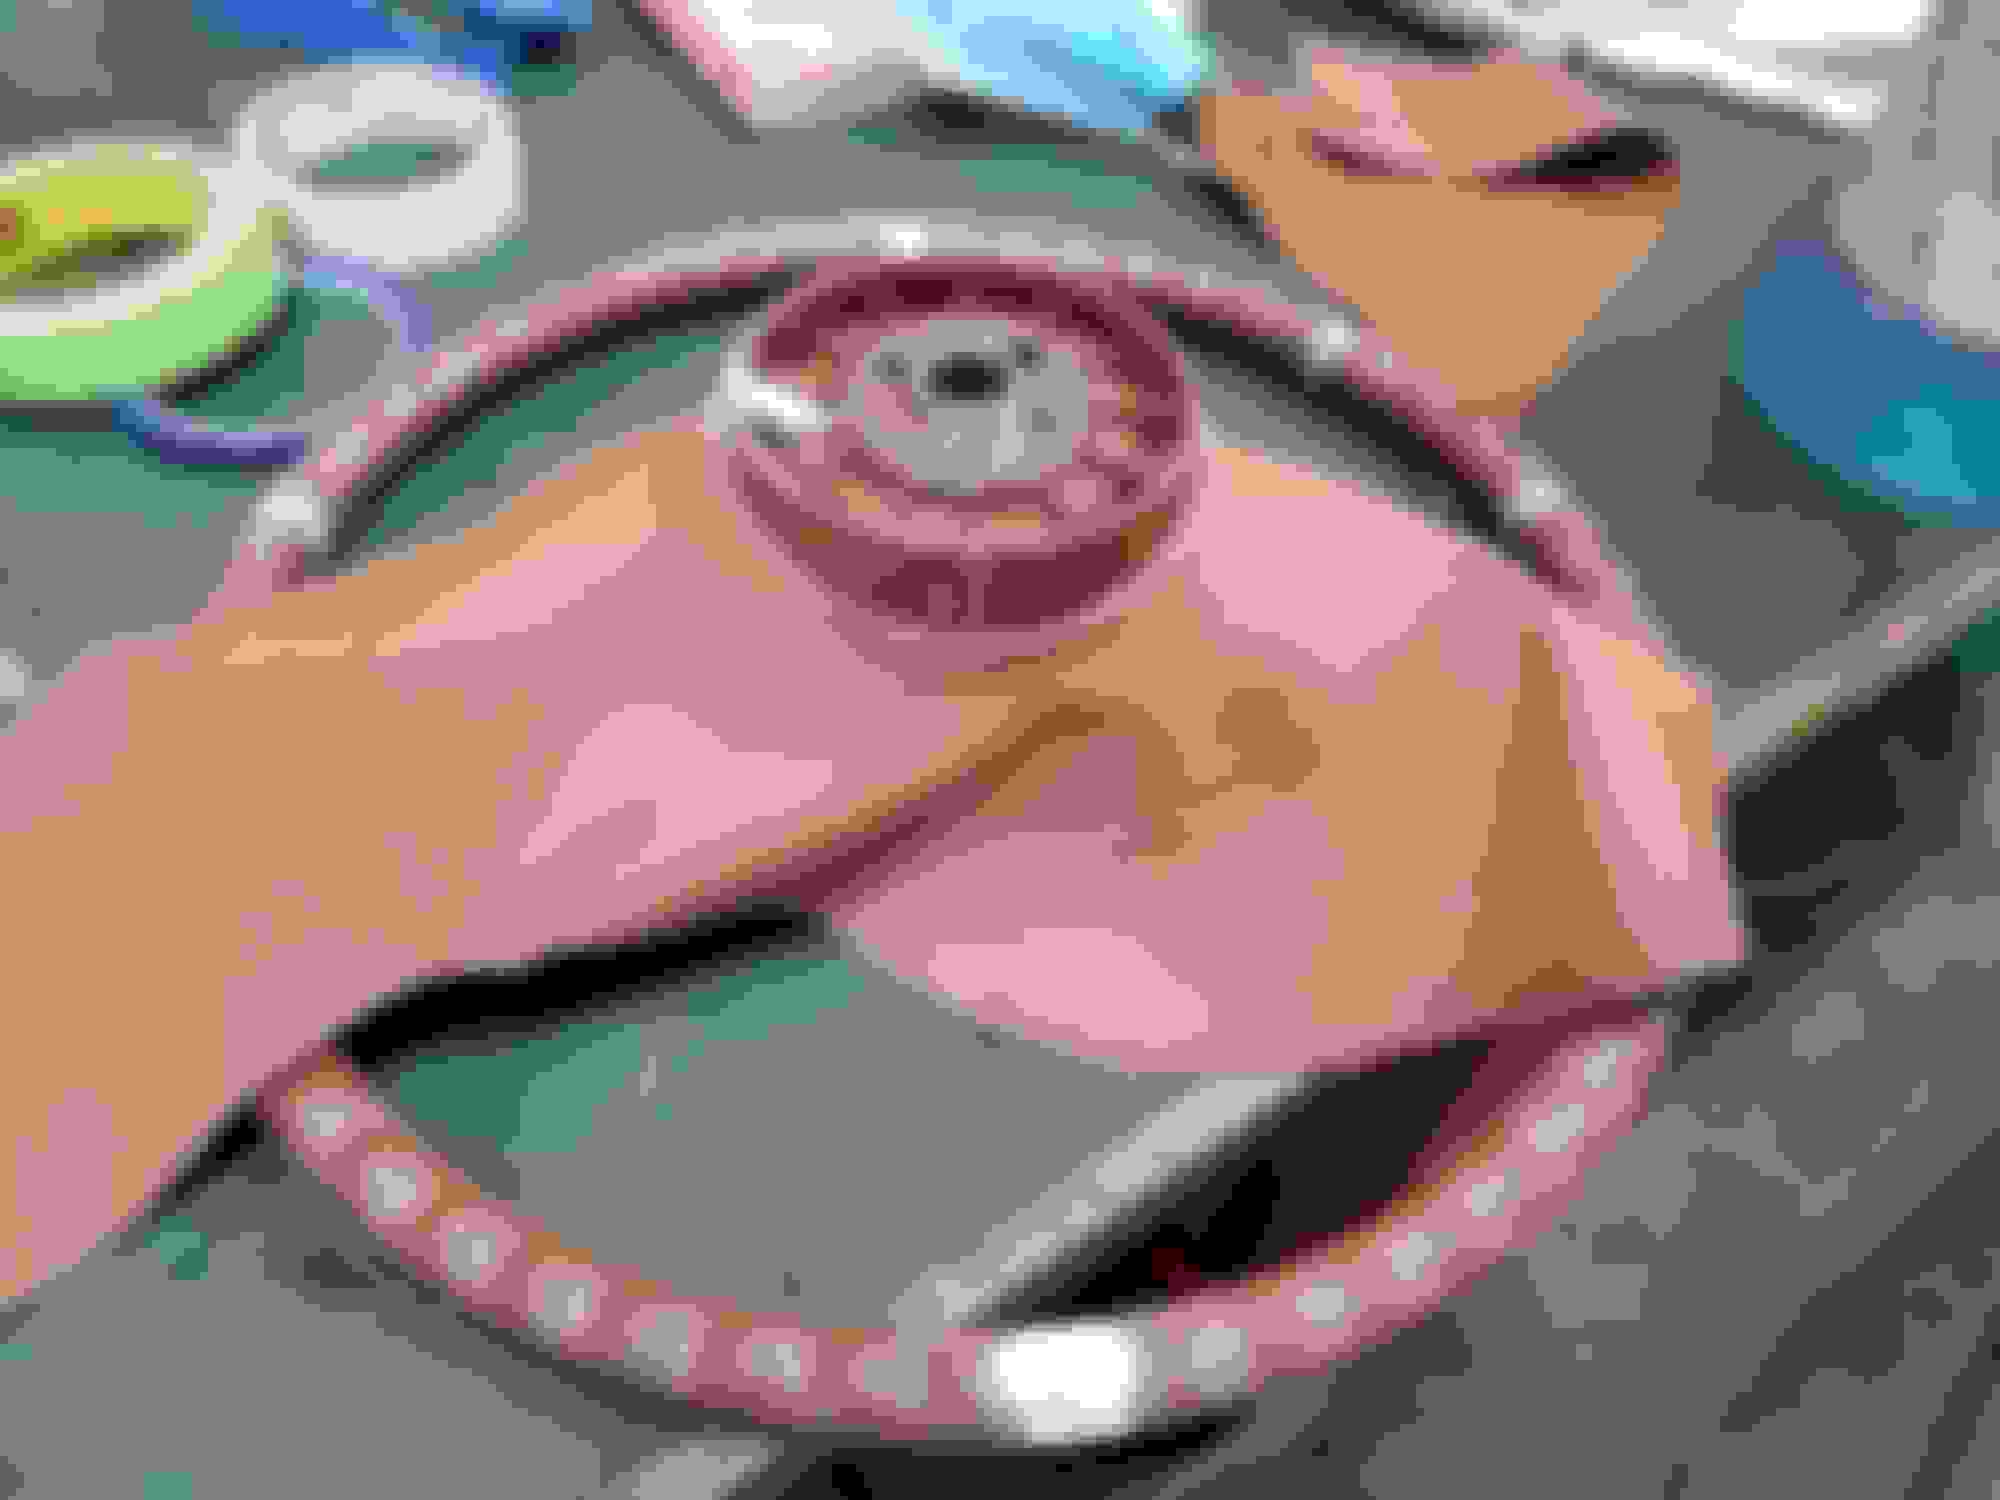
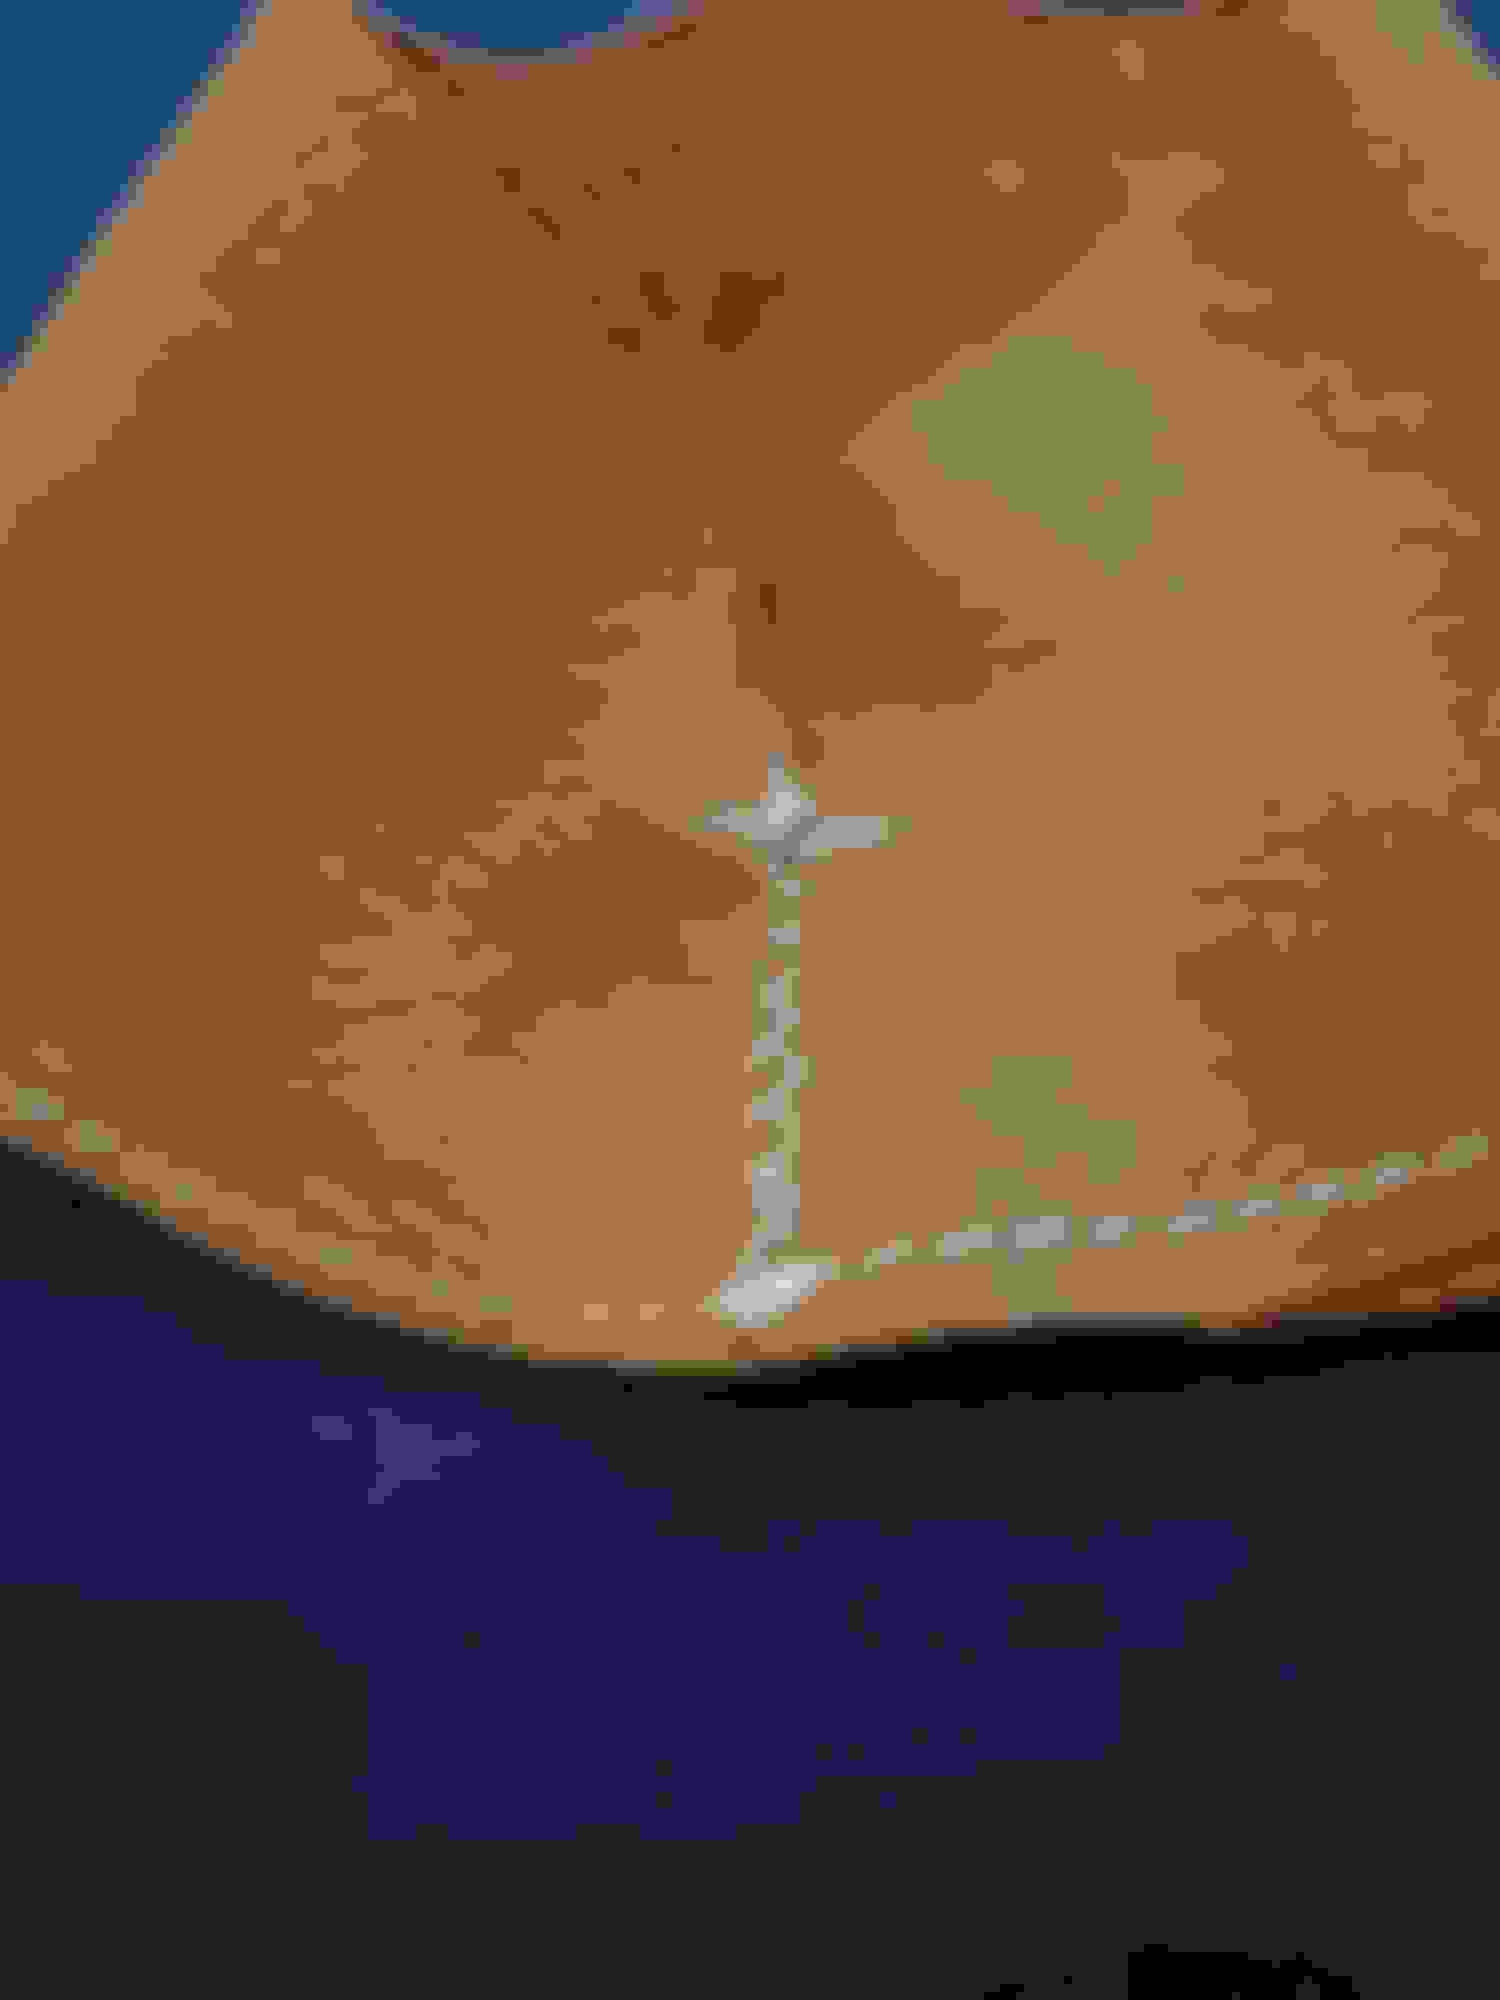
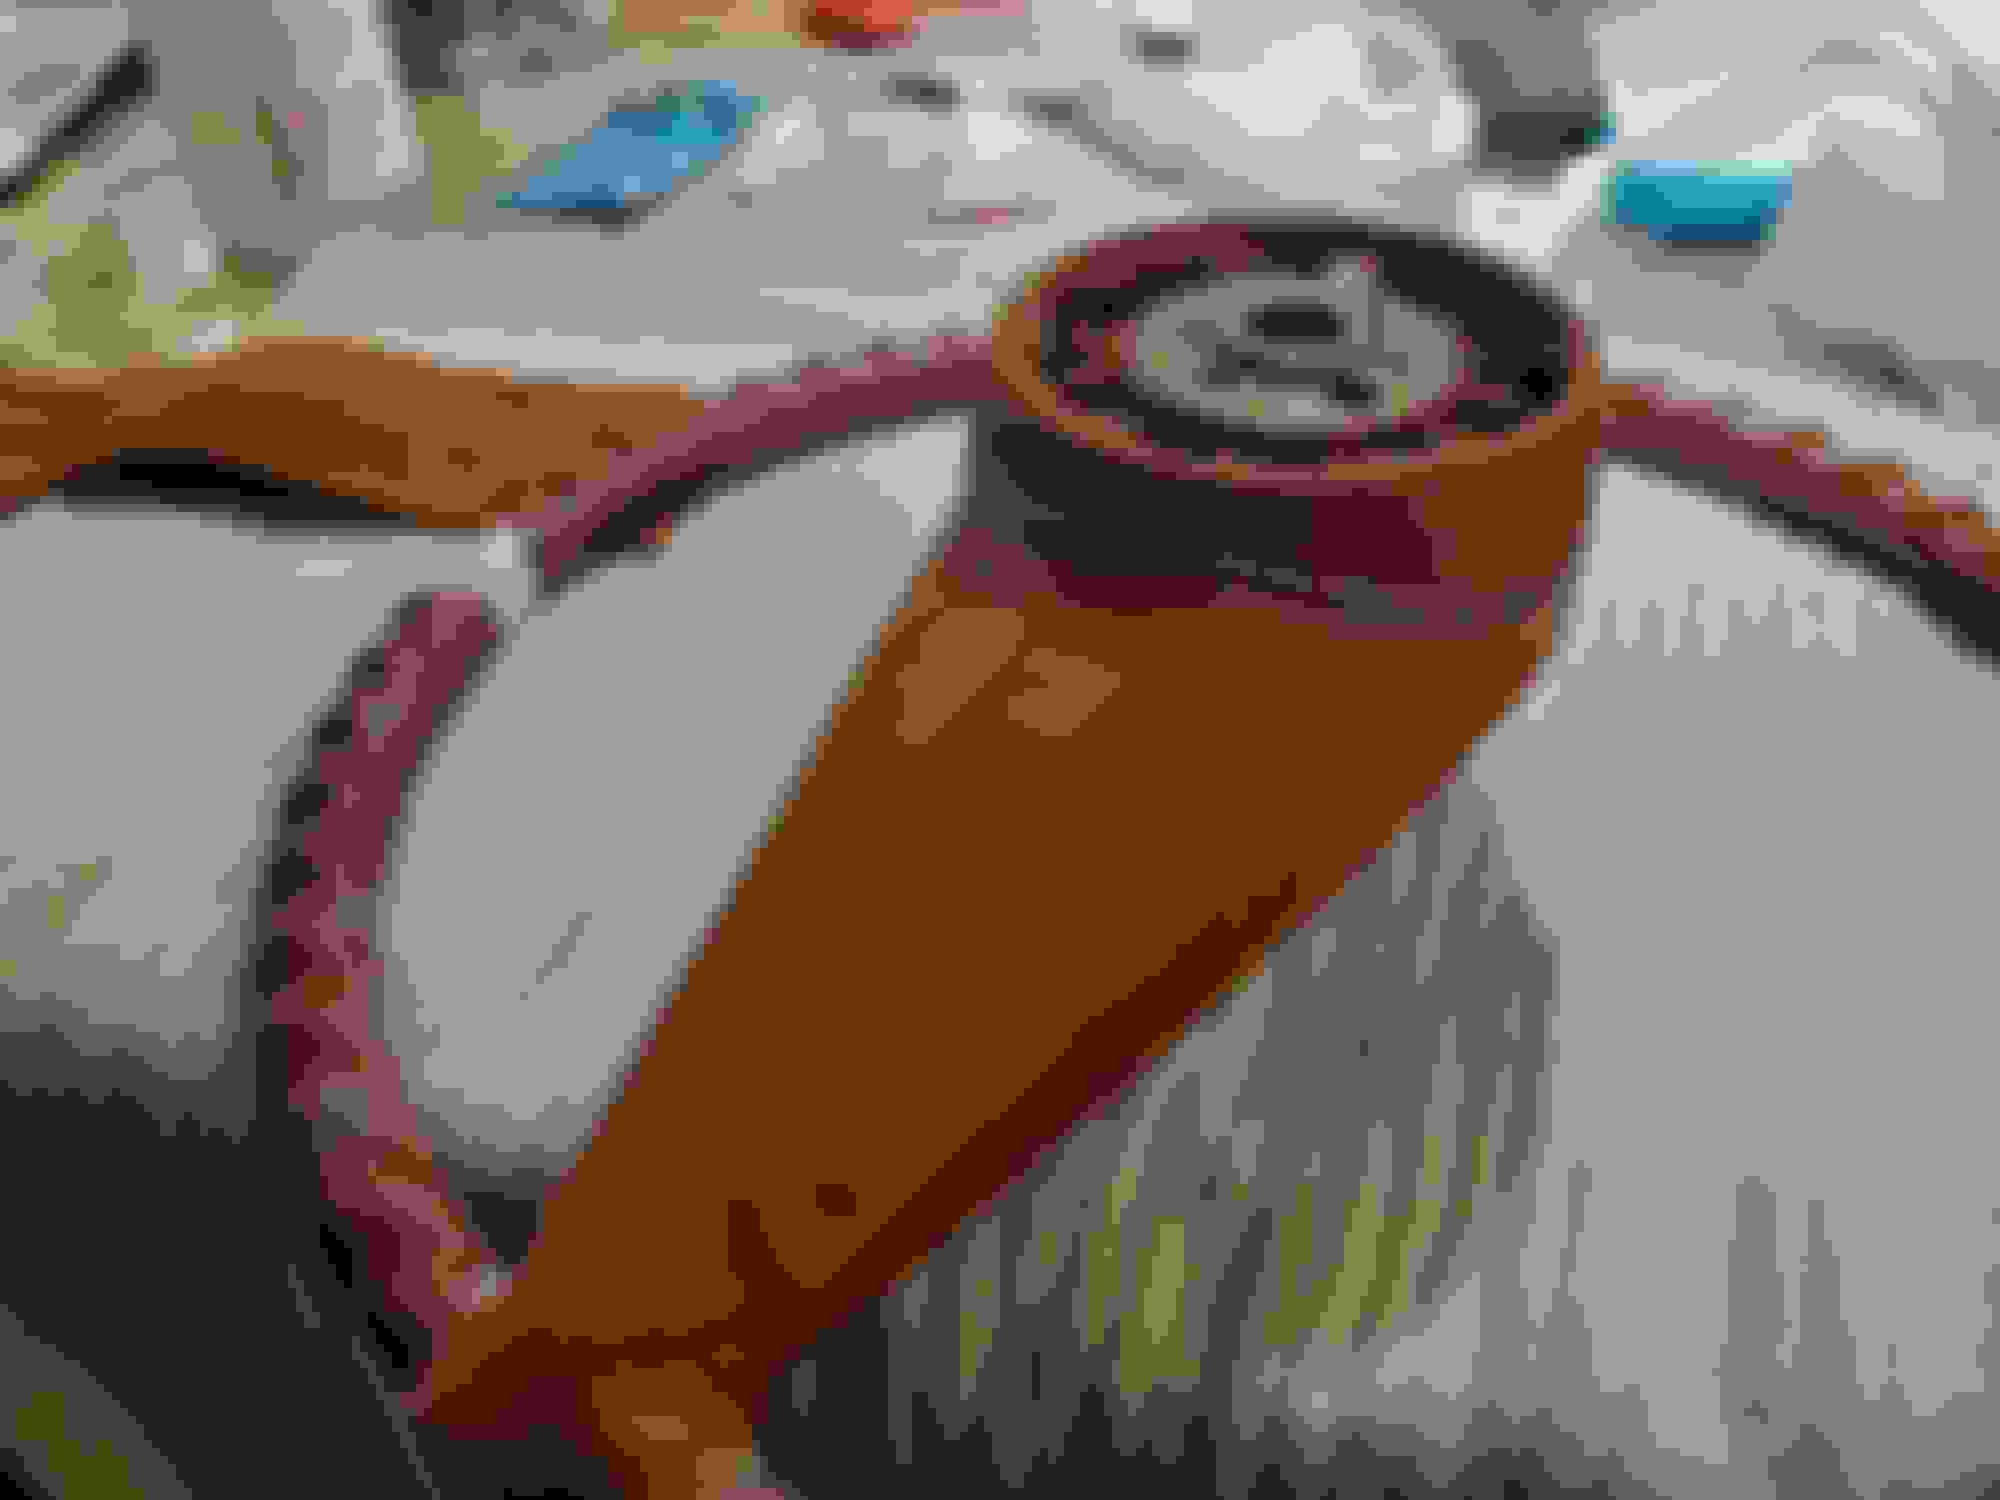
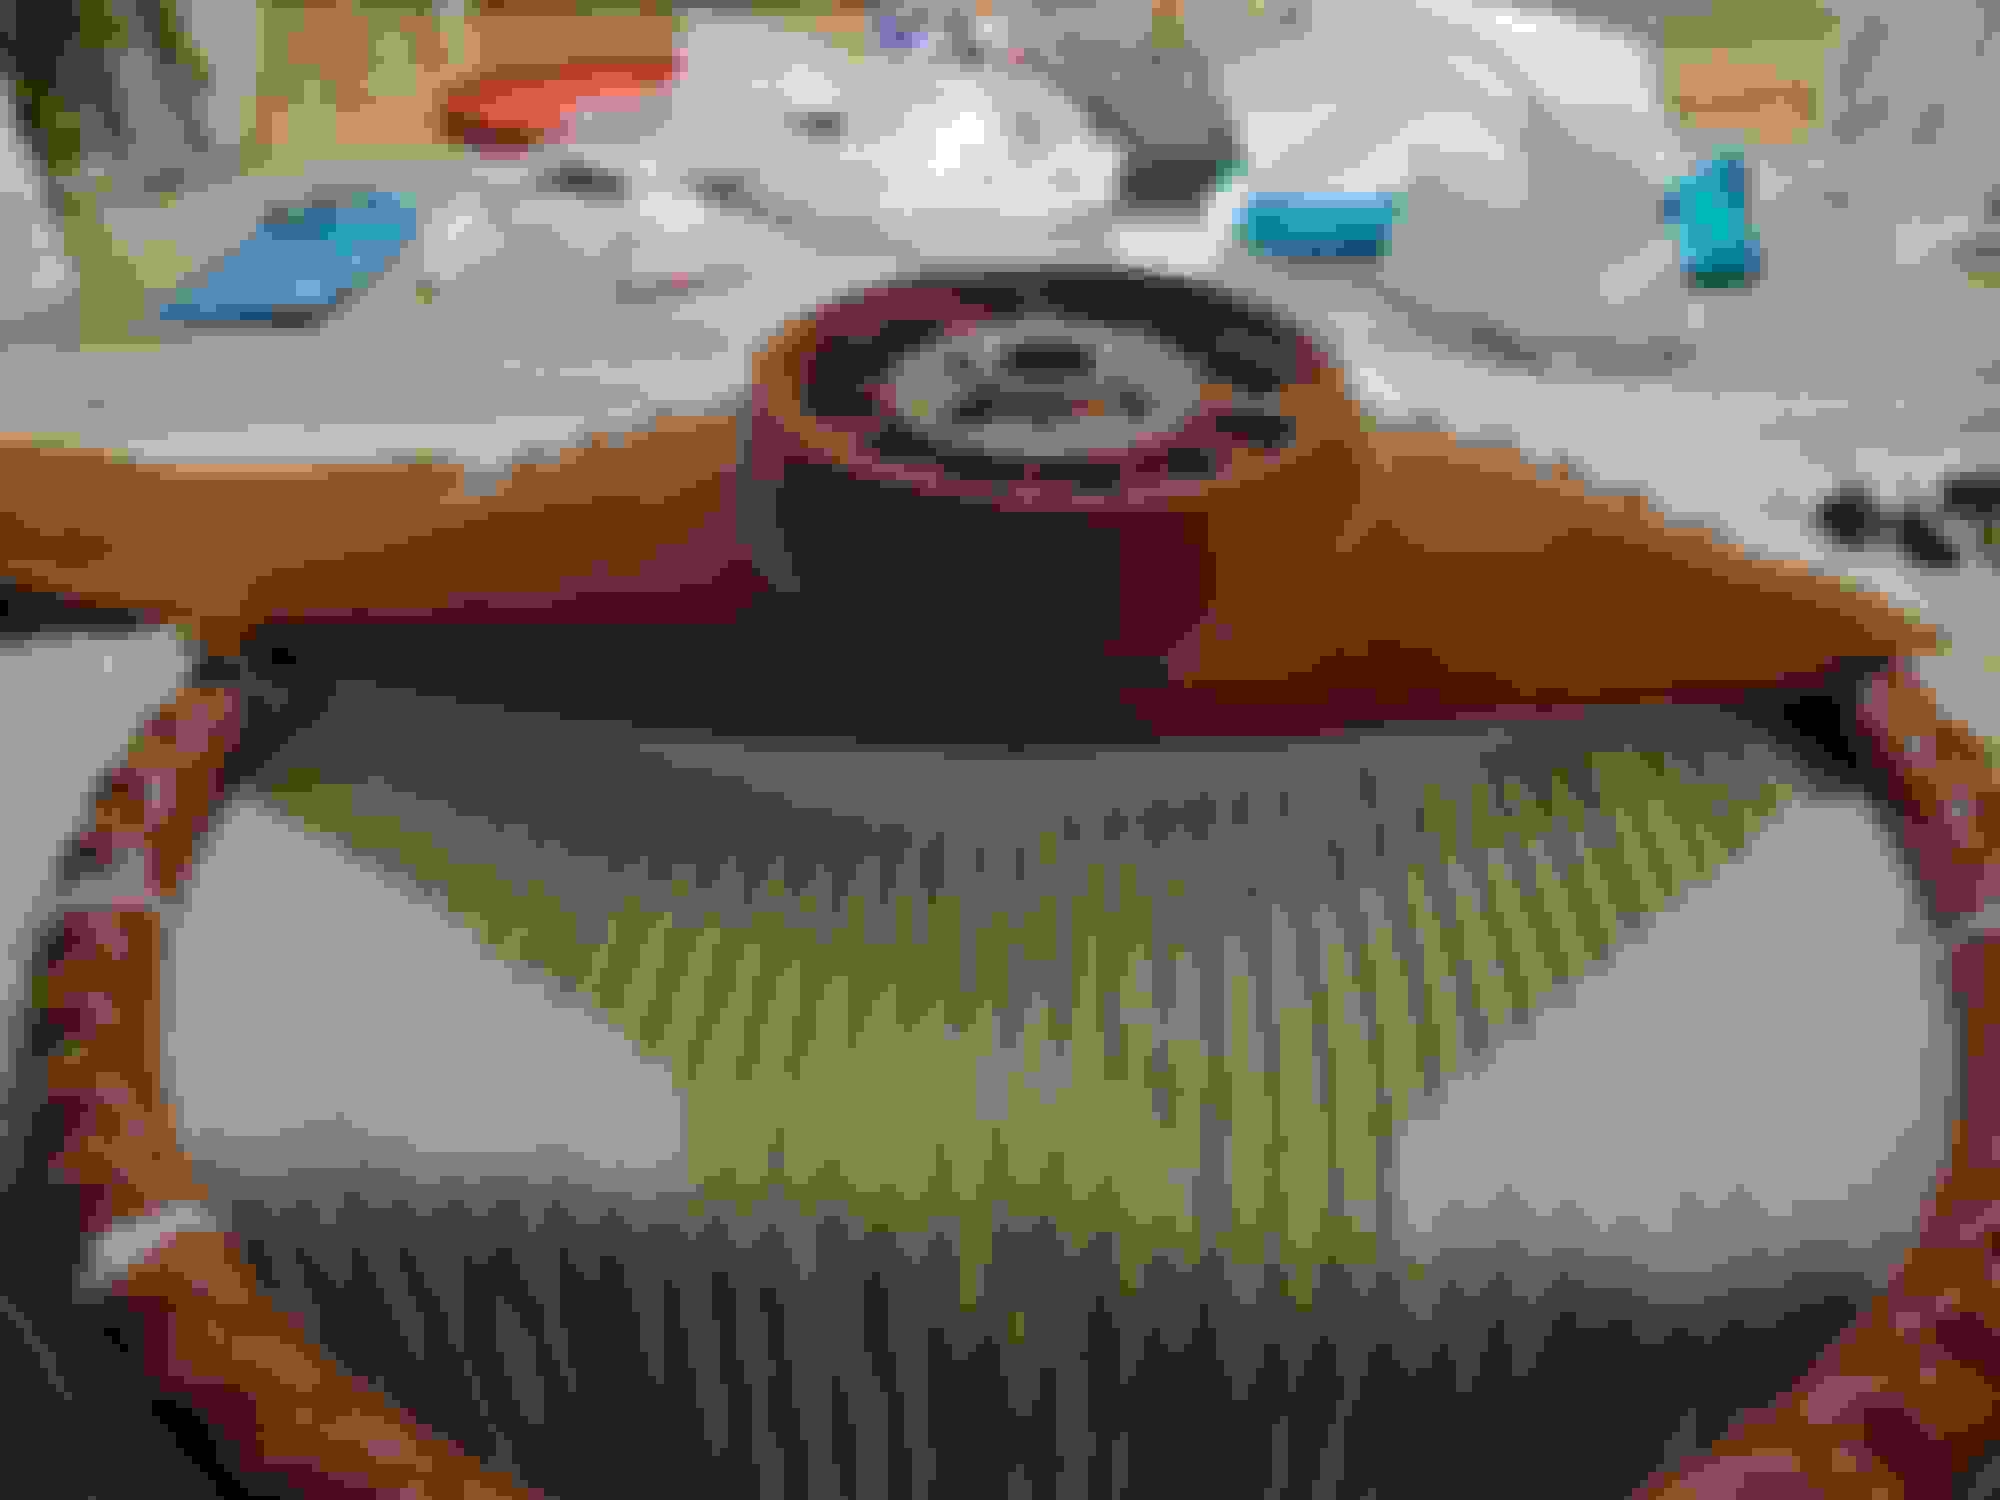
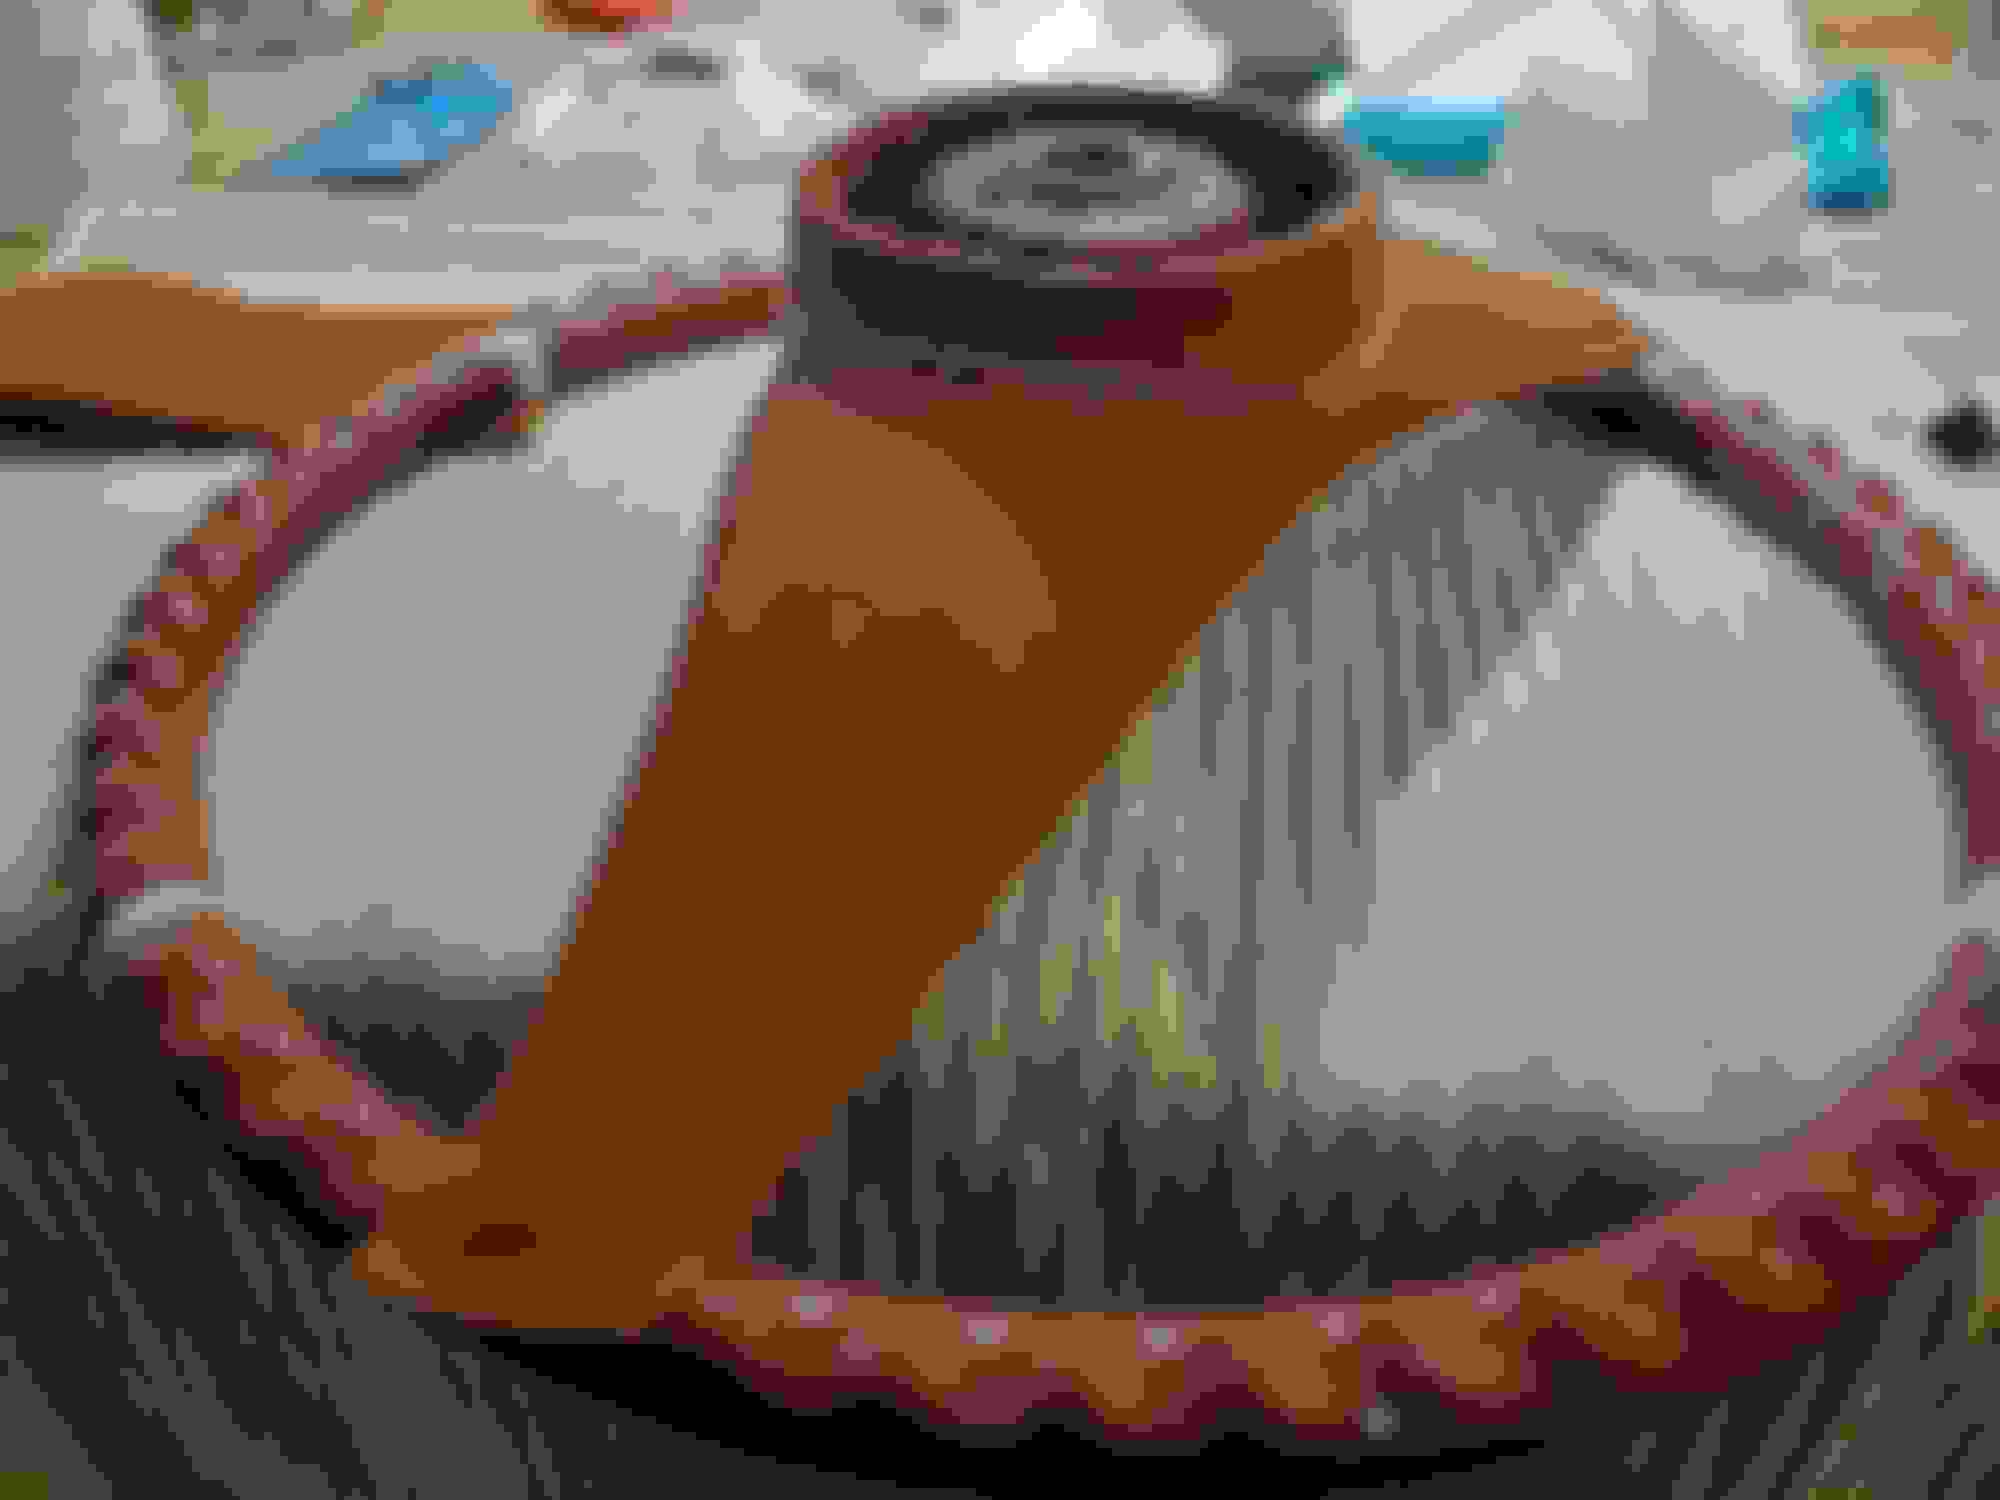
I'll try to be as thorough as I can, but unfortunately, I did not take as many photos of the process as I wish I had. First, remove any plastic that is loose or falling off. Use the putty to fill the voids and cracks. Be sure to put a little more on than is required to you can sand an shape to the surface of the wheel. As you can see, the back of the wheel had a few large gaps. Some as wide as 3 inches. Sand everything smooth. It does not need to be perfect like it is going to be painted, but it should have smooth transitions to the plastic of the wheel. To cover the hub and wings. I cut a hole in the middle of the "boomerang" piece that would cover the rear side of the wheel hub. The hole was approximately 1/4-3/8" smaller that the collar itself so it could stretch over the hub. I then pushed it down low on the hub as you can see in the photo. I did this so I could make the collar that would be sewn to the hub and wings cover. At this point I used painters tape to make a template of the collar. I simply covered the part of the exposed hub not covered in leather. Traced the seam with a marker then removed the tape, flattened it, and trimmed with scissors to shape. I then traced the pattern onto the pelt leaving excess on the top I would trim later. This is the hub collar. Before sewing it together, while still in a flat pattern, I ran a running stitch about 1/8"-3/16" from the pattern edge along the entire edge. I did the same thing on the hole of the "boomerang" piece as well. Then, I stitched by hand the collar ends together. Note how the stitching only goes part of the way up - this is because I left excess on the top of the collar. At this point, trimmed and I glued the "boomerang" to the backside of the wheel wings. The glue only takes a minute or so to set, so you need to be mindful of gluing large areas at once. I slowly worked from the hub towards the outer wheel stretching, gluing, and holding for it until it set then moved outwards. You can see the running stitches on the "boomerang" and collar. Before gluing the leather collar to the wheel collar, you should hand stitch the leather collar to the "boomerang." This looks much more complicated than it is. Use the hook needle and upholstery thread to essentially stitch the stitches together. This means hooking the needle under the exposed thread on the boomerang and collar in a zig-zag pattern. There is no need to pull the thread super tight as you do not want the seam to look too bunched up. Start at the collar joint and work around. Now, push a little glue (you don't need much) down the back of the collar and hub. This will just keep it firmly attached to the wheel. Trim the excess leaving a 1/2" lip at the top, then push the lip over the back side of the hub and glue it in place.
Last edited by Shaman; March 20th, 2022 at 08:23 PM.
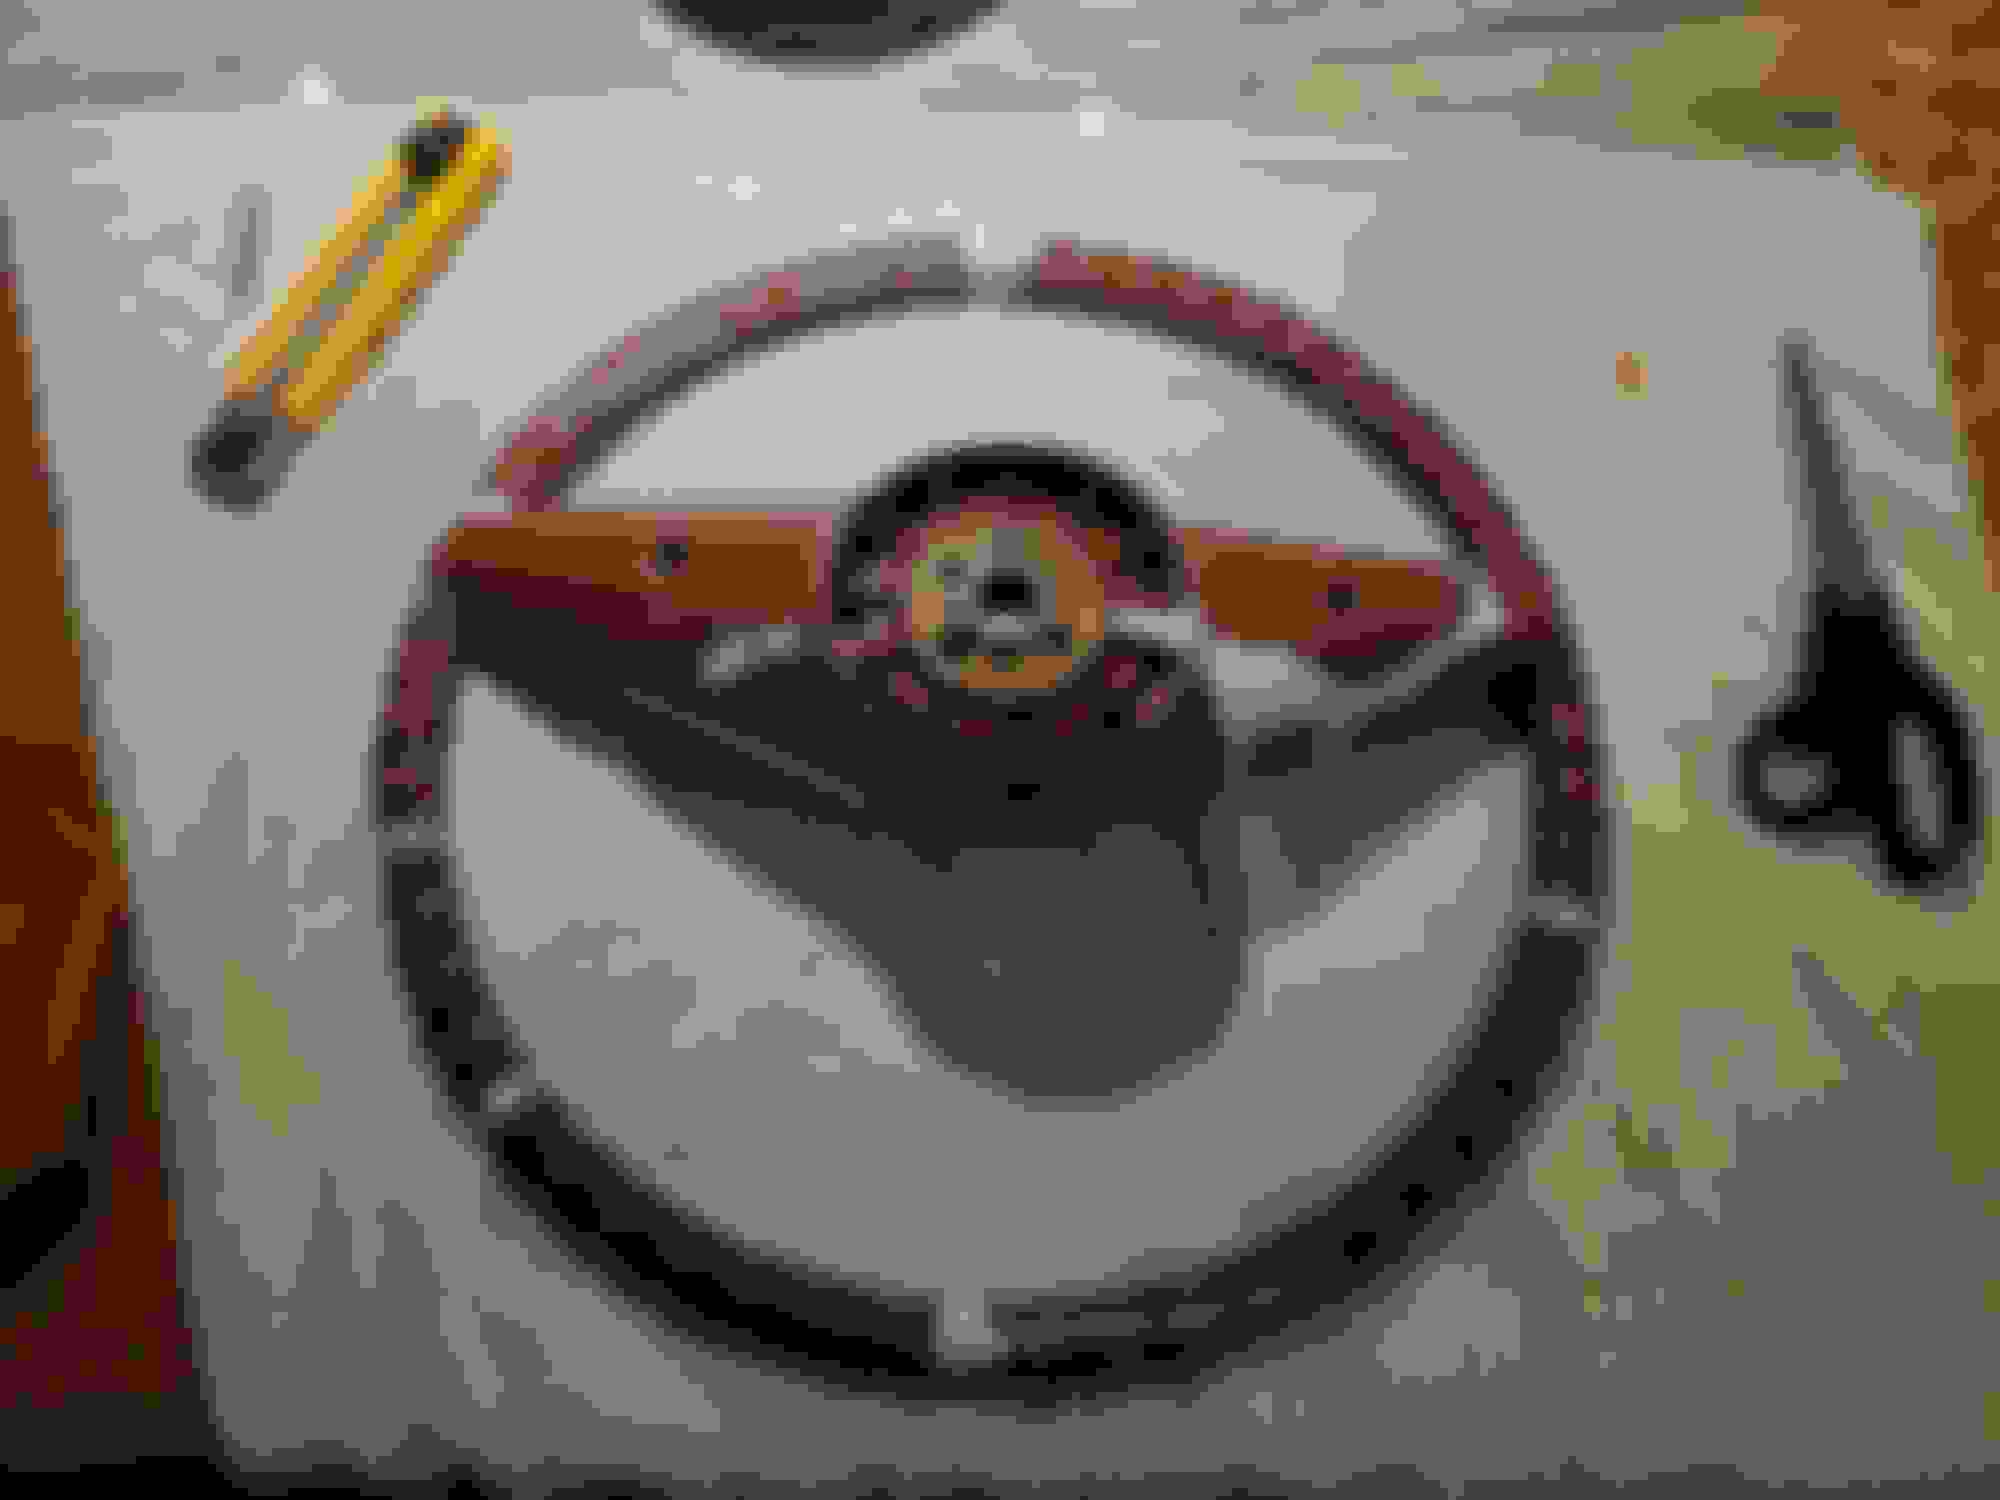
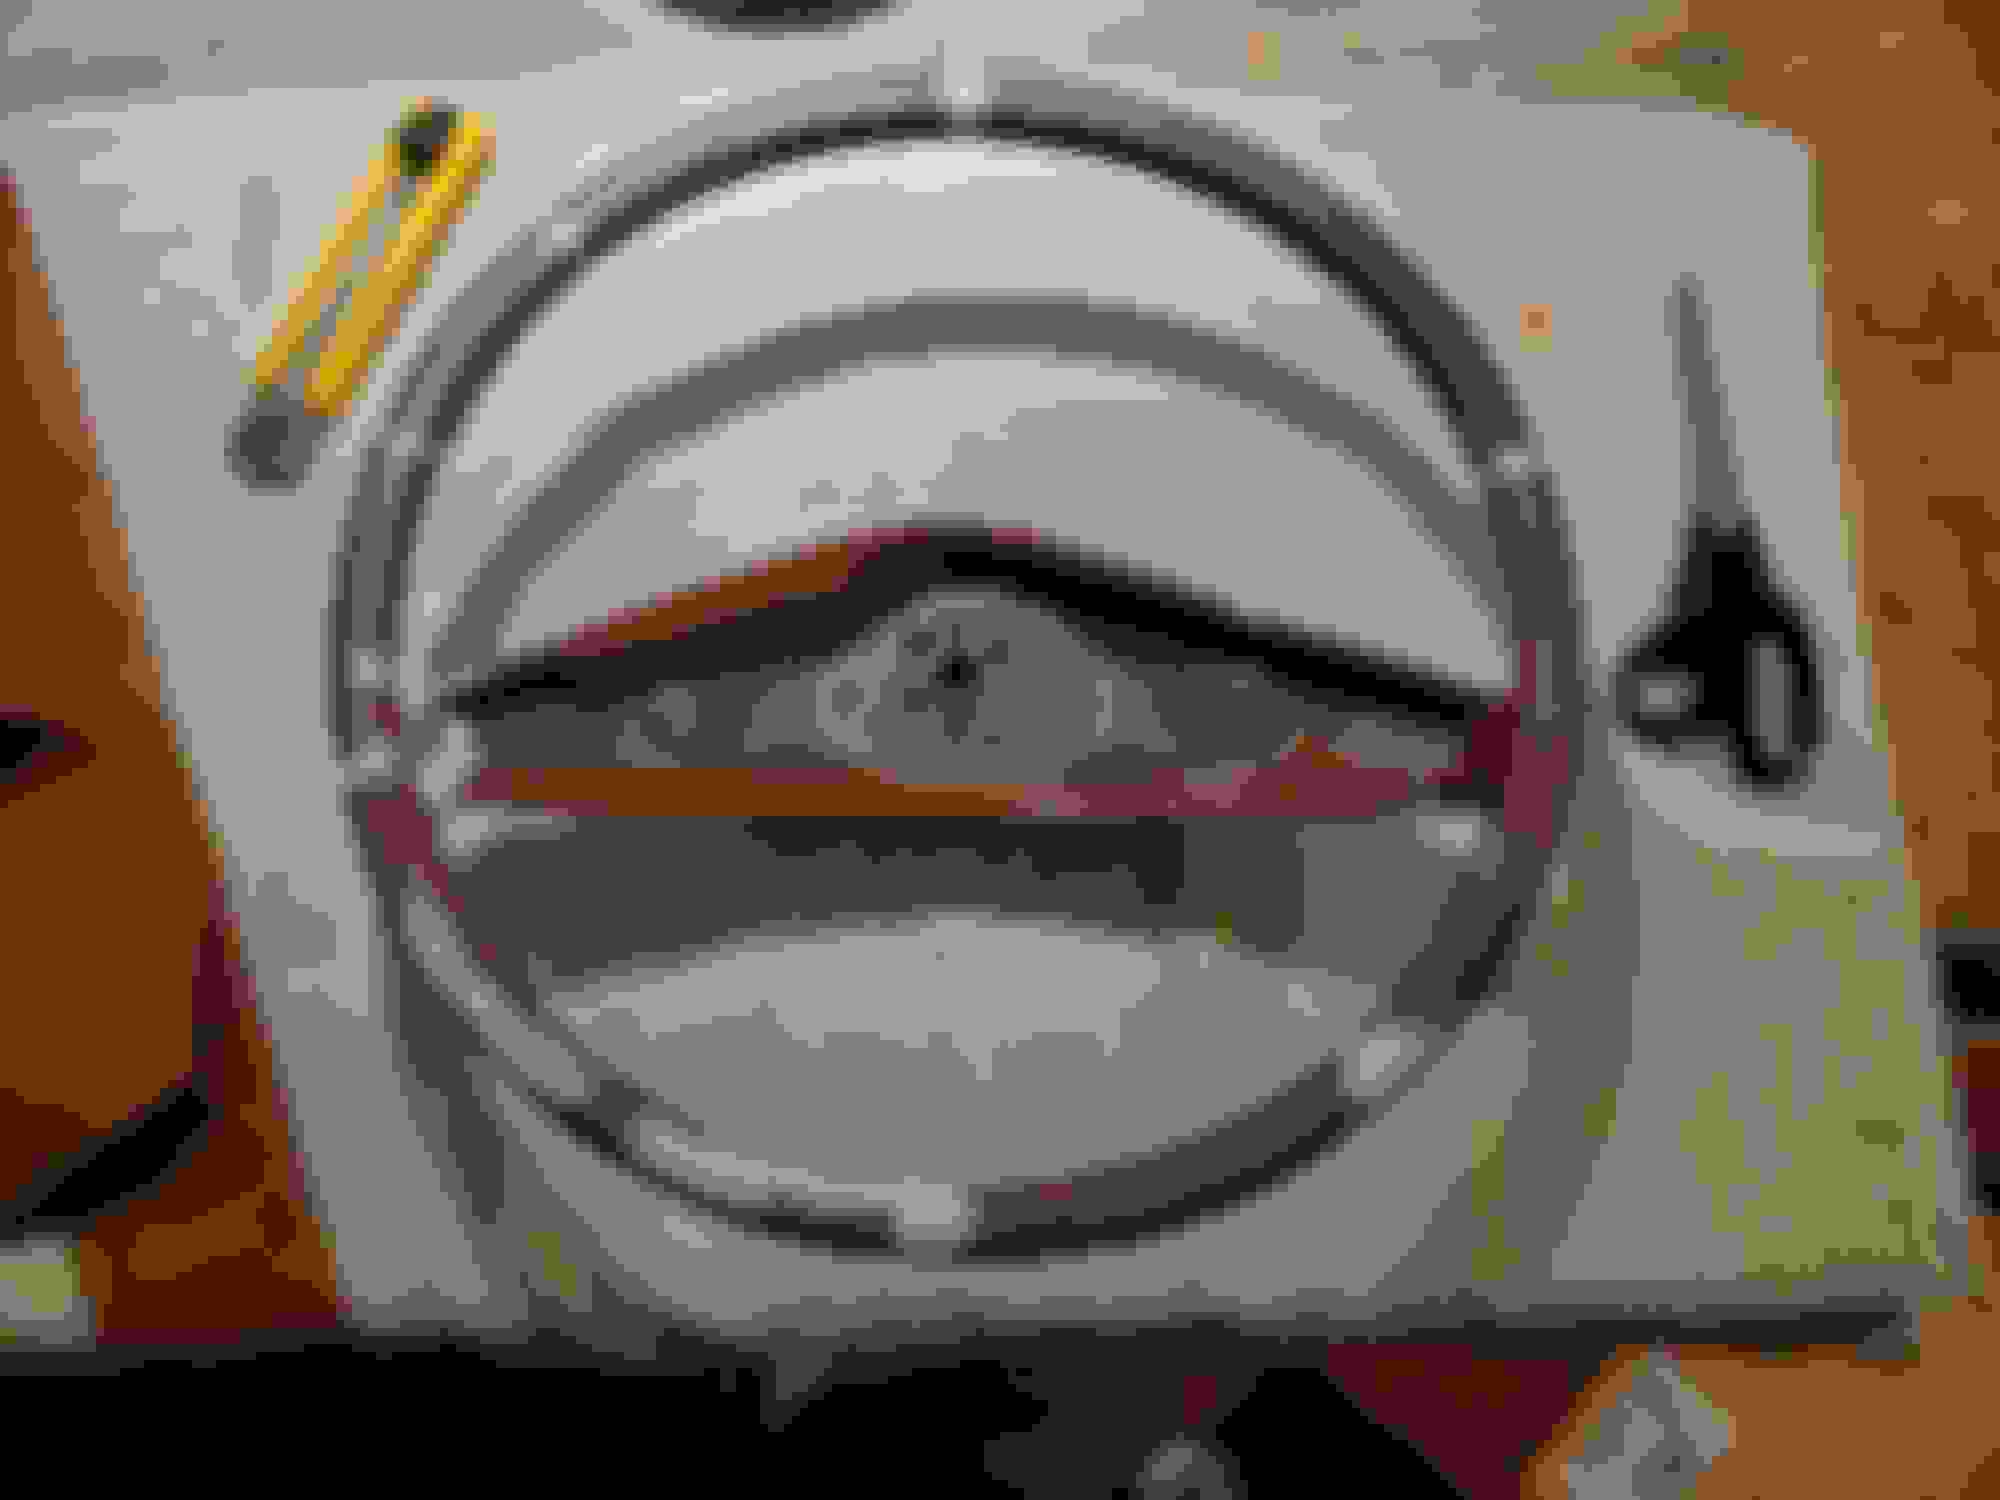
Now you need to make the belt for the wheel. using your two strips, put a running stitch along the edge of each piece. Do as before and make them about 1/8-3/16\" from the edge. Outside/Exposed side of the wheel covering - belt. Belt seam from the exposed side with running stitches. Now sew the two belts together. Turn the belt inside-out for this part to make a nice clean seam. Then trim the excess. See the next photo. Under side of the wheel cover. Seam stitch and running stitch - belt. As I mentioned before, depending on the size of your wheel, you'll want to make the seam about 0.5\" smaller than the total circumference of the wheel. Ideally you'll want the belt to be a snug fit on the wheel. If it is still loose, make a new seam (shortening the belt) and test fit it again. Once you have a snug fit of the belt, you'll want to align the seams to be at the top and bottom of the wheel (north and south or 90 & 270 degrees). Attempt to center the belt to the wheel. You'll now sew the belt the same way as the collar by stitching the stitches. You'll also want to do this in 4 quadrants starting at the seams (north or south) and working towards where the wings meet the wheel. See next photo before sewing. With the belt aligned, glue the upper face and grip side of the wheel to the belt ONLY in the quadrant you are working on. Do not glue the entire belt at once as it might be accidentally misaligned. This is a closeup of the stitching a stitch. Ideally you'll be able to go from one loop to the other without too much misalignment. Don't expect it to be perfect, you might have to double a stitch a loop to keep the spacing. Go through each quadrant one at a time. It took me about 40 minutes for each quadrant between gluing and stitching. When you reach where the hub-wings meet the wheel, you'll end your stitch (do not be afraid to pull this stitch tight). Basically, do a double or triple stitch at the joint and tie it off. Trim and tuck the excess tie-off thread under the leather. Final Installation
Last edited by Shaman; March 19th, 2022 at 08:51 PM.

 March 19th, 2022 | 08:37 PM