
1970 Olds Gauge Restoration


Thread Starter
Registered User
Joined: May 2009
Posts: 2,212
From: USA
Olds Gauge Restoration
So I'm taking cues from Rob's write up about how to restore my gauges......and I'm going a few steps further.  It literally is just a confidence booster because you can tear a gauge down in 5 minutes. Literally......it's that simple.
I wanted to post the internal pics of MY gauges because they were absolutely wretched with illumination even after buying all new 168, 161, and 194 incandescent bulbs. (not cheap either. )
)
So I was unhappy with the pathetic improvements, and bought 5 SMT LED's ($2 each) to put in all the sockets. (FYI , now that I've seen how much room there is INSIDE the gauge, I highly recommend 194 socket 13 SMT LED's instead) This dramatically increased the gauge illumination. However, I still am not satisfied, so I thought of Rob's efforts next.
Here's my speedo dissected. Tools required, just a 1/4" socket, and flat head screwdriver. Top right is the back side of the gauge casing ring. You can see it's sky blue color is still perfect. The light illuminates the inside area of the casing, and reflects off that blue front ring to illuminate the gauge face. That's probably going pure gloss white as well.
2011442GaugeRestoration1.jpg
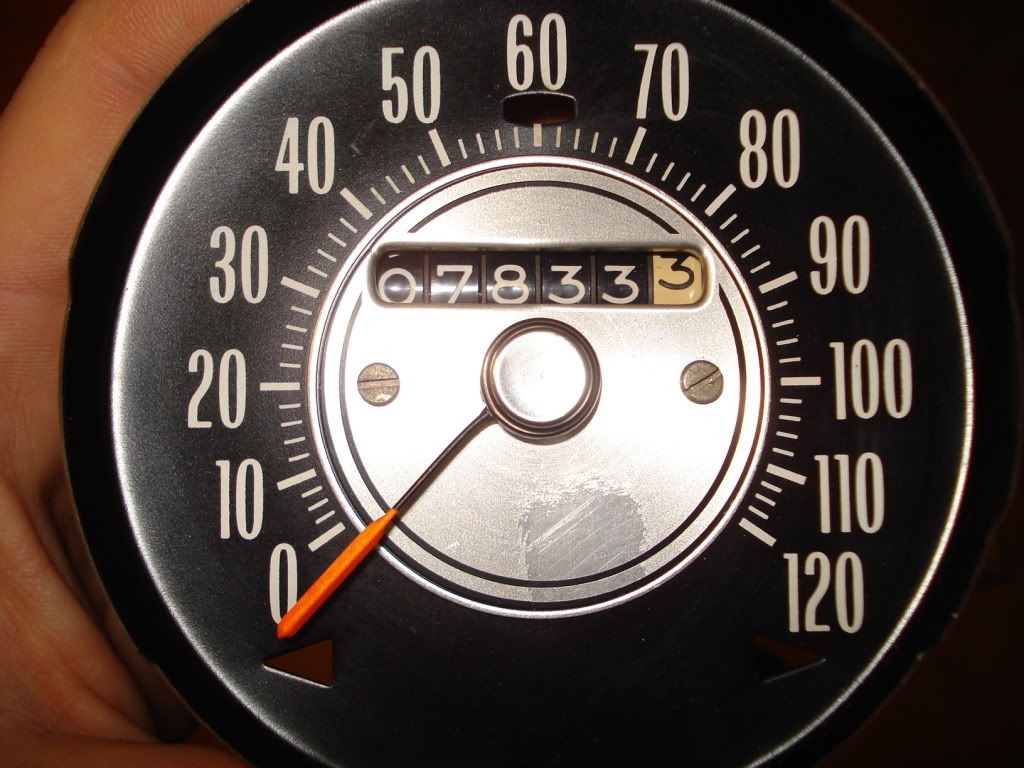
Gauge faces, were immaculate with next to no dust or build up on them.
2011442GaugeRestoration4.jpg
HOWEVER......the gauge casing which reflects the lighting.....absolutely horrible.
This is primarily why I started my own thread, so people can see how bad this is. So check yours.
2011442GaugeRestoration2.jpg
Home Depot carries a professional grade Rustoleum paint.
I got some Gloss white because the blue paint is to soften the yellow of the incandescents. Left gauge case is my quad gauge which is unpainted for a comparison view. It wasn't NEARLY as bad as my speedo was. With pure white LED"s , the blue isn't necessary.
2011442GaugeRestoration7.jpg
This was my BEFORE pics before adding the 194 socket 5 SMT LED's. The pic does it more justice then it deserved.
OldsGaugeLEDChanges3.jpg
Stay tuned.
It literally is just a confidence booster because you can tear a gauge down in 5 minutes. Literally......it's that simple. I wanted to post the internal pics of MY gauges because they were absolutely wretched with illumination even after buying all new 168, 161, and 194 incandescent bulbs. (not cheap either.
) So I was unhappy with the pathetic improvements, and bought 5 SMT LED's ($2 each) to put in all the sockets. (FYI , now that I've seen how much room there is INSIDE the gauge, I highly recommend 194 socket 13 SMT LED's instead) This dramatically increased the gauge illumination. However, I still am not satisfied, so I thought of Rob's efforts next.
Here's my speedo dissected. Tools required, just a 1/4" socket, and flat head screwdriver. Top right is the back side of the gauge casing ring. You can see it's sky blue color is still perfect. The light illuminates the inside area of the casing, and reflects off that blue front ring to illuminate the gauge face. That's probably going pure gloss white as well.
2011442GaugeRestoration1.jpg
Gauge faces, were immaculate with next to no dust or build up on them.
2011442GaugeRestoration4.jpg
HOWEVER......the gauge casing which reflects the lighting.....absolutely horrible.
This is primarily why I started my own thread, so people can see how bad this is. So check yours.
2011442GaugeRestoration2.jpg
Home Depot carries a professional grade Rustoleum paint.
I got some Gloss white because the blue paint is to soften the yellow of the incandescents. Left gauge case is my quad gauge which is unpainted for a comparison view. It wasn't NEARLY as bad as my speedo was. With pure white LED"s , the blue isn't necessary.
2011442GaugeRestoration7.jpg
This was my BEFORE pics before adding the 194 socket 5 SMT LED's. The pic does it more justice then it deserved.
OldsGaugeLEDChanges3.jpg
Stay tuned.
Last edited by Aceshigh; Jan 11, 2011 at 09:51 PM.
Registered User
Joined: Feb 2008
Posts: 11,798
From: Plano, TX
Glad I can give some motivation here and there...
Good pictures. Yours show how the factory gauges can get with age - the paint ages, turns flat, rust comes through, etc....... Many times the inside cases are dirty, from the heat convections from the bulbs, or sometimes the bulbs' heat discolors the paint.
Yes, gloss white is the thing to use in the cases, as it reflects the light. I used model paint, but it took a longer time. On the plus side I was able to paint in the house and get high over the smell on a cold winter day.....
Your front ring looks okay. Looks like there is a little gloss on it. This is the color that will soften the yellow tint.
However, test it out with a battery or power supply in a dark room before crimping it back together. If it is not blue enough, you can repaint the ring with a slightly darker glossy blue model paint.
This is also a good time to lightly clean and lube the speedo and pull the speedo cable out, clean it with wd40 and put it back in.
Thread Starter
Registered User
Joined: May 2009
Posts: 2,212
From: USA
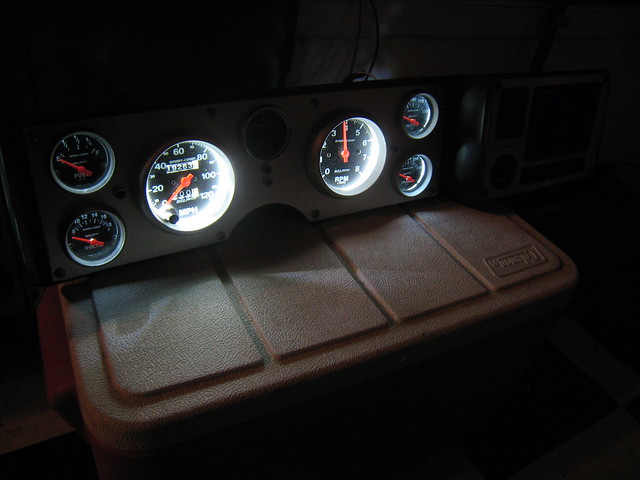
1st End result. I'm open for critique and suggestions if anyone has any.
Might be pulling em apart again to go even whiter.
Sorry, no pics from the drivers seat yet. My battery is in the garage.
2011OldsGaugeRestorationII3.jpg2011OldsGaugeRestorationII4.jpg
That's funny, because that's what I did upon coming home 1st thing this morning after the white paint was cured.
I put them back together, but I'm now thinking I might want to paint the reflector sky blue ring gloss white as well. You can see the "Pure White LED's" are not pure white. They're fairly blue.
2011OldsGaugeRestorationII.jpg2011OldsGaugeRestorationII2.jpg
Might be pulling em apart again to go even whiter.
Sorry, no pics from the drivers seat yet. My battery is in the garage.
2011OldsGaugeRestorationII3.jpg2011OldsGaugeRestorationII4.jpg
I put them back together, but I'm now thinking I might want to paint the reflector sky blue ring gloss white as well. You can see the "Pure White LED's" are not pure white. They're fairly blue.
2011OldsGaugeRestorationII.jpg2011OldsGaugeRestorationII2.jpg
Last edited by Aceshigh; Jan 12, 2011 at 12:26 PM.
Registered User
Joined: Feb 2008
Posts: 11,798
From: Plano, TX
Looks very blue but very bright!!!
How does it look with regular light bulbs?
Those LEDs are far from 'pure white'. There are Ultra Whites now that more resemble incandescent. Osram makes some that I use in designs at work.
White LEDs are just blue ones with a layer of phosphorus over them to filter out much (but not all) of the blue wavelength. The earlier 'white' LEDs are much bluer because the technology has improved over the years.
You can also trace the ring on a piece of thin cardboard and cut it out and paint it white to try it. If you don't like it, your original ring is still light blue.
If you are looking for the stock look, you will need incandescents or maybe new UW LEDs and a lighter blue ring. All experimentation at this point, and half the fun.........
Thread Starter
Registered User
Joined: May 2009
Posts: 2,212
From: USA
Thanks. I'm a picky bastard, so I'm not quite satisfied just yet. LOL
I guess I can try that too. These are the 168's I believe.....IIRC they are the highest wattages
They don't seem as bright as the LED's to me at all. Mind you this is UP CLOSE......not in the drivers seat.
442GaugeRestoredIncandescent.jpg
Yeah the LED's are not pure white at all like advertised.
They look like the 6000 Kelvin color. Incandescents are closer to the 3000K mark.
PURE white is closer to the 5000K mark, but this scale doesn't show it well enough.

Ewww good call.......going to try that instead of painting it first.
They don't seem as bright as the LED's to me at all. Mind you this is UP CLOSE......not in the drivers seat.
442GaugeRestoredIncandescent.jpg
Yeah the LED's are not pure white at all like advertised.
They look like the 6000 Kelvin color. Incandescents are closer to the 3000K mark.
PURE white is closer to the 5000K mark, but this scale doesn't show it well enough.
You can also trace the ring on a piece of thin cardboard and cut it out and paint it white to try it. If you don't like it, your original ring is still light blue.
Last edited by Aceshigh; Jan 12, 2011 at 01:24 PM.
Thread Starter
Registered User
Joined: May 2009
Posts: 2,212
From: USA
Pics help to point problems out. Take a photo and upload it to www.imageshack.us
If you want to go a step further, open it in MS Paint and circle the area you're referring to.
Save it again. Then host it.
I could be wrong on the latter.....but I thought someone said Parts Place sells new lenses.

http://www.youtube.com/wa
Joined: Nov 2010
Posts: 291
ok i will try to get a pic of that and is this the right lenses http://www.opgi.com/product.asp?catm...odCode=C230101
but i also have lenses from my column shift speedo but why did this one fog up
and i am going to paint it gloss white what are the best leds to use thanks
but i also have lenses from my column shift speedo but why did this one fog up
and i am going to paint it gloss white what are the best leds to use thanks
Thread Starter
Registered User
Joined: May 2009
Posts: 2,212
From: USA
You'll have to elaborate on what car you're inquiring about.
Best is a subjective term.
My opinion of what "Best" is , is best buy for the $$$$.
Here's 10x 5 SMT LED 194 socket LED's for $19 shipped. Less then $2 a pop.
You only need 2 for the Speedometer illumination, 3 for the left quad gauge illumination.
The rest in both gauges (idiot lights, turn signals, brights indicator, etc)
you can use the incandescents if you want since they rarely light up.
But the 13 SMT LED's I'm eyeballing now.
Everything I buy is off Ebay for the lights.
Last edited by Aceshigh; Jan 12, 2011 at 05:58 PM.
Thread Starter
Registered User
Joined: May 2009
Posts: 2,212
From: USA
Maybe the cleaner you used ruined the lens somehow??
Clean it again using a different glass cleaner.
If all else fails, have someone buff and polish it out for you.
Things made 40 years ago tend to be better quality materials then the crap Made in China today.
Clean it again using a different glass cleaner.
If all else fails, have someone buff and polish it out for you.
Things made 40 years ago tend to be better quality materials then the crap Made in China today.
http://www.youtube.com/wa
Joined: Nov 2010
Posts: 291
I ran out of mind reading pimp juice this week.
You'll have to elaborate on what car you're inquiring about.
Best is a subjective term.
My opinion of what "Best" is , is best buy for the $$$$.
Here's 10x 5 SMT LED 194 socket LED's for $19 shipped. Less then $2 a pop.
You only need 2 for the Speedometer illumination, 3 for the left quad gauge illumination.
The rest in both gauges (idiot lights, turn signals, brights indicator, etc)
you can use the incandescents if you want since they rarely light up.
But the 13 SMT LED's I'm eyeballing now.
Everything I buy is off Ebay for the lights.
Registered User
Joined: Jul 2008
Posts: 4,533
From: Chi-town
great info, for what it worth I replaced the lenses, lights and painted the insides light blue again and I was as happy as can be - made a hige difference. I may try the LEDs next time. Silver paint may work well also.
Thread Starter
Registered User
Joined: May 2009
Posts: 2,212
From: USA

Registered User
Joined: Feb 2008
Posts: 11,798
From: Plano, TX
Residual moisture in the gauge. Wait a while and see if it goes away - mine did that too. The paint must not have been cured and it was cold outside and the moisture condensed on the inside of the lens. If you put the thing back together in a humid house and put it in a cold car you would see the same problem.
Ace - after you try the white cardboard ring, paint it light gloss blue, then try the 168s again. For some reason, yours is not as bright as mine, and i never painted my speedo - just cleaned it up... See pics at: https://classicoldsmobile.com/forums...tml#post130178
I assume you have 12-13V to the bulbs.
Also, if you installed "long life" 168's, you really installed standard 194's. The long life ones are always dimmer as they are designed for a higher voltage. Make sure they are regular 168's.
Thread Starter
Registered User
Joined: May 2009
Posts: 2,212
From: USA
Finalization.
I painted the reflector rings pure gloss white to reflect the most white I could onto the gauges.
I can totally see the difference myself in person. It's far whiter then the 1st pic in post 4 with the sky blue reflector.
Not sure if pics can capture it well enough.
Rob, I was wrong, the incandescents I put in there were 194's......doh....
I have 168's I'll take a snapshot and compare side by side.
DSC02844.jpg
Last edited by Aceshigh; Jan 24, 2011 at 09:25 PM.
Registered User
Joined: Feb 2008
Posts: 11,798
From: Plano, TX
That white ring looks much better with the LEDs. Bluer than stock, but if you like it, keep it that way.
The 168's should look brighter than those 194's.
Try it and post a picture for inquiring minds.
Then keep the one you like better.
Here is a short version:
https://classicoldsmobile.com/forums...tml#post130178
Longer one starts here:
http://www.flickr.com/photos/robsalb...7602930020786/
Pretty easy...
The 168's should look brighter than those 194's.
Try it and post a picture for inquiring minds.
Then keep the one you like better.
https://classicoldsmobile.com/forums...tml#post130178
Longer one starts here:
http://www.flickr.com/photos/robsalb...7602930020786/
Pretty easy...

Registered User
Joined: May 2009
Posts: 1,452
Finalization.
I painted the reflector rings pure gloss white to reflect the most white I could onto the gauges.
I can totally see the difference myself in person. It's far whiter then the 1st pic in post 4 with the sky blue reflector.
Not sure if pics can capture it well enough.
Rob, I was wrong, the incandescents I put in there were 194's......doh....
I have 168's I'll take a snapshot and compare side by side.

Thread Starter
Registered User
Joined: May 2009
Posts: 2,212
From: USA
After removed from dash:
Speedo =
1. Front metal trim ring is pinched on, just unpinch with a flat head and remove retainer ring, lens, and reflector ring. (See Below)
2. Remove 2 bolts from the rear of printed circuit board. Speedo assembly will come out of housing.
3. Inner brights tube, and turn signal housings are just pushed on.
Left gauge =
1. Same as above step #1.
2. Remove 3 bolts from the rear printed circuit board. Gauge itself will come out of housing.
3. Inner idiot light reflector assembly is just pushed on.
Simplest way to explain step #1 is, they are pinched on just like these dinner takeout pans are pinched together.
It's not very high tech at all.....LOL

Last edited by Aceshigh; Jan 14, 2011 at 10:26 AM.

Registered User
Joined: Jun 2009
Posts: 4,293
From: Palm Bay, FL
Ok cool. I have been a bit nervous to tackle this, but I think it looks like it will be good to go. Keep in mind I have the gauges and tic-toc-tach so it may be a bit more involved, but I am confident it won't be all that bad now.
http://www.youtube.com/wa
Joined: Nov 2010
Posts: 291
Registered User
Joined: Dec 2009
Posts: 66
http://www.youtube.com/wa
Joined: Nov 2010
Posts: 291
Thread Starter
Registered User
Joined: May 2009
Posts: 2,212
From: USA
Those are the cheapest, but I'd even go with the 9 or 13 SMT LED's.
Little more $$$ but you really only need 5 of them between the left gauge,
and speedo for gauge ilumination.


Thread Starter
Registered User
Joined: May 2009
Posts: 2,212
From: USA
I'm going a step further and ordered these LED rings.
Someone I know did this mod to their gauges and it's SUPER bright !!!!
LOL Winter is mod junky time while I sit indoors and shop around.

Someone I know did this mod to their gauges and it's SUPER bright !!!!
LOL Winter is mod junky time while I sit indoors and shop around.
Last edited by Aceshigh; Jan 24, 2011 at 09:29 PM.
Registered User
Joined: Jun 2003
Posts: 1,226
From: Southeast Michigan
Thread Starter
Registered User
Joined: May 2009
Posts: 2,212
From: USA
Nothing is back in my car yet.
Battery is in my garage on a tender for the winter.
If dimming is a necessity where the stock dimmer doesn't do the deed.
You can always do one of these options.
http://www.superbrightleds.com/cgi-b...s%2Fdimmer.htm
Battery is in my garage on a tender for the winter.
If dimming is a necessity where the stock dimmer doesn't do the deed.
You can always do one of these options.
http://www.superbrightleds.com/cgi-b...s%2Fdimmer.htm

Registered User
Joined: Apr 2010
Posts: 99
Hello Awesome Job Ace
Just wondering when it comes to the LED lights will these work
http://www.ebay.com/itm/10x-T10-194-...19077542792478
I am only asking because your link is completely gone.
Just wondering when it comes to the LED lights will these work
http://www.ebay.com/itm/10x-T10-194-...19077542792478
I am only asking because your link is completely gone.
Last edited by Axeni; Feb 17, 2012 at 10:56 AM.


