
Let's talk weatherstripping
 January 13th, 2012, 04:47 PM
#1
Let's talk weatherstripping
My '72 Cutlass S could really use a new set of weatherstripping around both side windows. In fact, the passenger window is really rattling when I drive it and the wind noises are driving me nuts too.
Basically are these kits about $120 to buy and are they difficult to install for a complete newbie? If I wanted a shop to do it, would I be able to get it done at a Safelite type place or my local garage perhaps? It doesn't seem too complicated, but when I look at these kits I can see how I would be easily confused.
Thanks,
Bill
 January 13th, 2012, 05:11 PM
#2
Registered User
Join Date: Feb 2008
Location: Plano, TX
Posts: 11,798
If you are handy with mechanic things, then you should be able to do it in your garage! Since it takes time to do a good job, it could be costly at a shop. If you do not want to install it, at least remove the old and scrape away the old. That is most of the job right there.
Many of us had done this and can guide you through the process.
You will need a razor knife, 3M black weatherstrip cement (5oz does two whole cars), some plastic/wood scraping tools, some goo-gone, a weekend, tape measure, lots of patience, and some beer to celebrate a job well done!
Get a good set, like from Steele or Metro - the cheap ones will be hard to compress.
How does the door w-strip look?
January 13th, 2012, 06:57 PM
#4
Registered User
Join Date: Feb 2010
Location: Windsor, Ontario
Posts: 902
Hey TenMidgets: You can do it man! Did you check out U.S.A. Parts Supply?
Check out pages 81-90.
http://www.usapartssupply.com/upload...75_catalog.pdf
Good luck with your project!
Check out pages 81-90.
http://www.usapartssupply.com/upload...75_catalog.pdf
Good luck with your project!
January 13th, 2012, 07:08 PM
#5
Just an Olds Guy
Join Date: Jul 2008
Location: Edmonton, AB. And "I am Can 'eh' jun - eh"
Posts: 24,525
1/4 glass? Is the rubber on the upright dried out and brittle? It may need changing too.
Although this sounds like a lot of work, you can take your time and be patient as you do and learn.
Jaybird my man. That USA catalogue is great. What a nice resource for B C body cars too. Thanks, I've added it to my list of favorites.
 January 13th, 2012, 08:15 PM
#6
Registered User
Join Date: Feb 2008
Location: Plano, TX
Posts: 11,798
Oh - if the glass moves excessively in the door, pull the door panel and inspect the 4 guides that the glass runs on. I bet they are worn like mine were.
Picture story starts here:
http://www.flickr.com/photos/robsalb...57602930020786
Picture story starts here:
http://www.flickr.com/photos/robsalb...57602930020786
January 13th, 2012, 08:25 PM
#7
1974 DELTA 88
Join Date: Jun 2011
Location: Yavapai County, Arizona
Posts: 569
Hey TenMidgets: You can do it man! Did you check out U.S.A. Parts Supply?
Check out pages 81-90.
http://www.usapartssupply.com/upload...75_catalog.pdf
Good luck with your project!
Check out pages 81-90.
http://www.usapartssupply.com/upload...75_catalog.pdf
Good luck with your project!
 January 13th, 2012, 08:41 PM
#9
Gary
Join Date: Jul 2007
Location: Houston,Tx
Posts: 1,209
If you are handy with mechanic things, then you should be able to do it in your garage! Since it takes time to do a good job, it could be costly at a shop. If you do not want to install it, at least remove the old and scrape away the old. That is most of the job right there.
Get a good set, like from Steele or Metro - the cheap ones will be hard to compress.
How does the door w-strip look?
Get a good set, like from Steele or Metro - the cheap ones will be hard to compress.
How does the door w-strip look?
January 13th, 2012, 08:47 PM
#10
Registered User
Join Date: Feb 2008
Location: Plano, TX
Posts: 11,798
Gary, my doors closed very tightly with the Metro seals, for about a month while the new rubber conformed to the edges. After that, it was fine. Now the crappo trunk seal i got from brothers, still requires a healthy slam. The Metro trunk seal was wider but had a hollow core, for more sealing surface area and less compression effort. I got it locally for my Ford and worked great on its trunk. Made me want to replace Lady's, but I did not.
Metro FTW in my opinion...
Metro FTW in my opinion...
January 13th, 2012, 09:54 PM
#11
1974 DELTA 88
Join Date: Jun 2011
Location: Yavapai County, Arizona
Posts: 569
January 14th, 2012, 04:16 AM
#12
Registered User

Join Date: May 2009
Location: USA
Posts: 2,203
STEER CLEAR OF "OER" BRANDED WEATHERSTRIPPING.
I'm not sure if they make anything for Olds, but I'm sure they do.
It's straight up expensive and a complete waste of money.
Mine dryrotted in less then 3 years. I have worse pictures......
http://www.nastyz28.com/forum/showthread.php?t=179995
I'm not sure if they make anything for Olds, but I'm sure they do.
It's straight up expensive and a complete waste of money.
Mine dryrotted in less then 3 years. I have worse pictures......
http://www.nastyz28.com/forum/showthread.php?t=179995
January 14th, 2012, 09:17 AM
#13
I agree with Rob. There are lots of guys who can help you out with this. One thing I want to ask is about the rattling. Are you saying the door glass is rattling back and forth/maybe forward backward and doesn't form a good seal? That's another project by the way that means the teflon rollers on the regulators may be shot and should be replaced. Rob has an uber thread showing how to rebuild them, but you can also get new teflon rollers ready made for installation. The side glass might also be loose in the channel and need to be reglued.
1/4 glass? Is the rubber on the upright dried out and brittle? It may need changing too.
Although this sounds like a lot of work, you can take your time and be patient as you do and learn.
Jaybird my man. That USA catalog is great. What a nice resource for B C body cars too. Thanks, I've added it to my list of favorites.
That said - do I need to remove the rear seat if I try this myself? Don't know if I want to get that deep into it. Are there weatherstripping installers our there? Or is it more of a niche thing to do at home?
Rob - I'm checking out your thread, thanks.
Bill
January 14th, 2012, 09:47 AM
#14
Registered User
Join Date: Feb 2008
Location: Plano, TX
Posts: 11,798
You do not need to remove any seats to do the door felts. The rear window felts, yes. The outers can be replaced by lowering the window down stops and rollong the windows down more so you can get to the screws. Inners are more involved as they are attached to the door panels. Replacing those are outlined within my "interior makeover' thread.
The felts are usually sold separately from the weatherstrip. Check out those guides in the door first.
The felts are usually sold separately from the weatherstrip. Check out those guides in the door first.
January 14th, 2012, 11:57 AM
#15
You do not need to remove any seats to do the door felts. The rear window felts, yes. The outers can be replaced by lowering the window down stops and rollong the windows down more so you can get to the screws. Inners are more involved as they are attached to the door panels. Replacing those are outlined within my "interior makeover' thread.
The felts are usually sold separately from the weatherstrip. Check out those guides in the door first.
The felts are usually sold separately from the weatherstrip. Check out those guides in the door first.
Would this kit type be what I need? http://www.opgi.com/p/weatherstrippi...02/WK7008.html
Let me know what is involved with installing the harder trim pieces and maybe I can give it a try if its repair 101?
Thanks,
Bill
Last edited by TenMidgets; January 14th, 2012 at 12:09 PM.
January 14th, 2012, 03:16 PM
#16
Registered User
Join Date: Feb 2008
Location: Plano, TX
Posts: 11,798
Looks like that kit is what you need.
Call and find out what brand it is before ordering.
I only replaced the door frame and trunk weatherstrip, but I am sure others can guide you through the other pieces.
After seeing those pics, all of your weatherstrip needs replacing!
Call and find out what brand it is before ordering.
I only replaced the door frame and trunk weatherstrip, but I am sure others can guide you through the other pieces.
After seeing those pics, all of your weatherstrip needs replacing!
January 14th, 2012, 05:00 PM
#18
Just an Olds Guy
Join Date: Jul 2008
Location: Edmonton, AB. And "I am Can 'eh' jun - eh"
Posts: 24,525
Actually that kit from OPGI looks to be fairly decently priced. There are 2 types of repros. Ones called 'reproduction' which may not look right, and "Original' which has the rounded silver bead on the outside fuzzy channel. Ask which one you are buying before you commit to the sale. You can also buy a kit from parts place.
I looked at Parts Place, Fusick and In Line Tube for the parts you are replacing. Bought on an individual basis they are almost exactly the same as the 'kit' you are buying. PP was less expensive by about 20.00 overall. I just mention this because I've found that some folks only know about 1 supplier. It's like having only a hammer in your tool box - everything gets treated like a nail. Just saying that you might want to look around and compare. I understand that OPGI has a 'sale' on. But their 'sale' makes them competitive with the other suppliers regular prices.
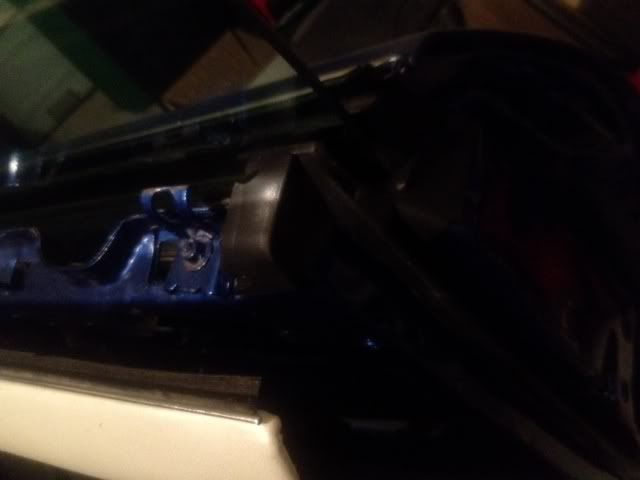
BTW, I noticed that you are missing the lower door bumper on the DS door. See those 2 little holes at the bottom of the inner door skin? They're called 'door bumpers' and are only about 1.50 each. Probably missing on the other side too.
FWIW, if your rubber parts on the car all look like this, I'd also put in a new rubber cowl lacing. It keeps engine off gasses from flowing back into the fresh air intake on the top of the cowl. Those quarter window rubber seals aren't sealing anything. You'd be better off just rolling the window down for all the noise reduction they provide. As you can see the rubber also has a steel inner stiffener. The whole thing is probably glued into the channel so it's not going to come out all that easy. You'll have to take the chrome channels off to do that job.
re: seat removal? To get the inner fuzzies installed on the back, taking out the rear seat is actually easy. You push the seat straight back, and while keeping backward pressure just lift it up. Do this on both sides. After that you can easily take out the upright after removing some screws/tether bolts
For the front inner fuzzies and weatherstrip, you take off the inside door panel. Again - really easy. When you get to that stage let us know. There's a trick to taking the window crank off - plus you have to remove the door armrest before unscrewing or unclipping the door panel. Although it sounds like a lot of work it really isn't that bad.
NOTE: take pictures of everything you do, and also label and put small parts where they're not going to get lost. Seems like when you put something together there's ALWAYS more parts left in the bin than when you started I can safely say this for both Rob and myself.
I looked at Parts Place, Fusick and In Line Tube for the parts you are replacing. Bought on an individual basis they are almost exactly the same as the 'kit' you are buying. PP was less expensive by about 20.00 overall. I just mention this because I've found that some folks only know about 1 supplier. It's like having only a hammer in your tool box - everything gets treated like a nail. Just saying that you might want to look around and compare. I understand that OPGI has a 'sale' on. But their 'sale' makes them competitive with the other suppliers regular prices.
BTW, I noticed that you are missing the lower door bumper on the DS door. See those 2 little holes at the bottom of the inner door skin? They're called 'door bumpers' and are only about 1.50 each. Probably missing on the other side too.
FWIW, if your rubber parts on the car all look like this, I'd also put in a new rubber cowl lacing. It keeps engine off gasses from flowing back into the fresh air intake on the top of the cowl. Those quarter window rubber seals aren't sealing anything. You'd be better off just rolling the window down for all the noise reduction they provide. As you can see the rubber also has a steel inner stiffener. The whole thing is probably glued into the channel so it's not going to come out all that easy. You'll have to take the chrome channels off to do that job.
re: seat removal? To get the inner fuzzies installed on the back, taking out the rear seat is actually easy. You push the seat straight back, and while keeping backward pressure just lift it up. Do this on both sides. After that you can easily take out the upright after removing some screws/tether bolts
For the front inner fuzzies and weatherstrip, you take off the inside door panel. Again - really easy. When you get to that stage let us know. There's a trick to taking the window crank off - plus you have to remove the door armrest before unscrewing or unclipping the door panel. Although it sounds like a lot of work it really isn't that bad.
NOTE: take pictures of everything you do, and also label and put small parts where they're not going to get lost. Seems like when you put something together there's ALWAYS more parts left in the bin than when you started
I can safely say this for both Rob and myself.
January 14th, 2012, 05:48 PM
#19
Registered User
Join Date: Feb 2008
Location: Plano, TX
Posts: 11,798
")
If it won't work, hit it. If it breaks, it needed replacing anyway.
Beat it beyond repair so you would not have to even try to fix it!
January 14th, 2012, 06:44 PM
#20
Just an Olds Guy
Join Date: Jul 2008
Location: Edmonton, AB. And "I am Can 'eh' jun - eh"
Posts: 24,525
 I know ALL ABOUT you and your BFH and I don't mean 'Best Friend Harriet'.
 Good thing you have a computer and a car. ( I don't count the Plinko or Cataract as real cars.....one explodes its gas tank and the other sucks your gas tank dry
) Otherwise we'd be waiting for you to show up riding a mule and yelling "Hear Ye, Hear Ye....."
Come to think of it, you would fit right in at an auction. You and the BFH forever!!! Sold! Bang! You bought it! Bang, bang bang!
January 18th, 2012, 06:33 AM
#21
Actually that kit from OPGI looks to be fairly decently priced. There are 2 types of repros. Ones called 'reproduction' which may not look right, and "Original' which has the rounded silver bead on the outside fuzzy channel. Ask which one you are buying before you commit to the sale. You can also buy a kit from parts place.
I looked at Parts Place, Fusick and In Line Tube for the parts you are replacing. Bought on an individual basis they are almost exactly the same as the 'kit' you are buying. PP was less expensive by about 20.00 overall. I just mention this because I've found that some folks only know about 1 supplier. It's like having only a hammer in your tool box - everything gets treated like a nail. Just saying that you might want to look around and compare. I understand that OPGI has a 'sale' on. But their 'sale' makes them competitive with the other suppliers regular prices.
BTW, I noticed that you are missing the lower door bumper on the DS door. See those 2 little holes at the bottom of the inner door skin? They're called 'door bumpers' and are only about 1.50 each. Probably missing on the other side too.
FWIW, if your rubber parts on the car all look like this, I'd also put in a new rubber cowl lacing. It keeps engine off gasses from flowing back into the fresh air intake on the top of the cowl. Those quarter window rubber seals aren't sealing anything. You'd be better off just rolling the window down for all the noise reduction they provide. As you can see the rubber also has a steel inner stiffener. The whole thing is probably glued into the channel so it's not going to come out all that easy. You'll have to take the chrome channels off to do that job.
re: seat removal? To get the inner fuzzies installed on the back, taking out the rear seat is actually easy. You push the seat straight back, and while keeping backward pressure just lift it up. Do this on both sides. After that you can easily take out the upright after removing some screws/tether bolts
For the front inner fuzzies and weatherstrip, you take off the inside door panel. Again - really easy. When you get to that stage let us know. There's a trick to taking the window crank off - plus you have to remove the door armrest before unscrewing or unclipping the door panel. Although it sounds like a lot of work it really isn't that bad.
NOTE: take pictures of everything you do, and also label and put small parts where they're not going to get lost. Seems like when you put something together there's ALWAYS more parts left in the bin than when you started I can safely say this for both Rob and myself.
I looked at Parts Place, Fusick and In Line Tube for the parts you are replacing. Bought on an individual basis they are almost exactly the same as the 'kit' you are buying. PP was less expensive by about 20.00 overall. I just mention this because I've found that some folks only know about 1 supplier. It's like having only a hammer in your tool box - everything gets treated like a nail. Just saying that you might want to look around and compare. I understand that OPGI has a 'sale' on. But their 'sale' makes them competitive with the other suppliers regular prices.
BTW, I noticed that you are missing the lower door bumper on the DS door. See those 2 little holes at the bottom of the inner door skin? They're called 'door bumpers' and are only about 1.50 each. Probably missing on the other side too.
FWIW, if your rubber parts on the car all look like this, I'd also put in a new rubber cowl lacing. It keeps engine off gasses from flowing back into the fresh air intake on the top of the cowl. Those quarter window rubber seals aren't sealing anything. You'd be better off just rolling the window down for all the noise reduction they provide. As you can see the rubber also has a steel inner stiffener. The whole thing is probably glued into the channel so it's not going to come out all that easy. You'll have to take the chrome channels off to do that job.
re: seat removal? To get the inner fuzzies installed on the back, taking out the rear seat is actually easy. You push the seat straight back, and while keeping backward pressure just lift it up. Do this on both sides. After that you can easily take out the upright after removing some screws/tether bolts
For the front inner fuzzies and weatherstrip, you take off the inside door panel. Again - really easy. When you get to that stage let us know. There's a trick to taking the window crank off - plus you have to remove the door armrest before unscrewing or unclipping the door panel. Although it sounds like a lot of work it really isn't that bad.
NOTE: take pictures of everything you do, and also label and put small parts where they're not going to get lost. Seems like when you put something together there's ALWAYS more parts left in the bin than when you started
I can safely say this for both Rob and myself. January 18th, 2012, 07:13 AM
#22
Registered User
Join Date: Feb 2008
Location: Plano, TX
Posts: 11,798
I would replace the little toyish gavel with a SBF wood mallet.
And beat the guilty ones on the head with it, NOT the desk!
(Picture Mario in "Donkey Kong" when he gets the little hammer.)
 January 18th, 2012, 01:44 PM
#24
Just an Olds Guy
Join Date: Jul 2008
Location: Edmonton, AB. And "I am Can 'eh' jun - eh"
Posts: 24,525
Yikes! Was it cross threaded or something? That's about the only way those studs get broken. No worries though - you can still drive it temporarily with 4 wheel lugs. When you get down to 2, then you're in real trouble Replacement studs are available from your local auto parts store. O'reillys sells Dorman wheel studs for 7/16" for less than 2 bucks each. http://www.oreillyauto.com/site/c/de...on+wheel+studs
February 23rd, 2012, 06:54 PM
#25
Registered User

Join Date: Oct 2008
Location: Austin, TX
Posts: 41
'68 Cutlass Conv Metro Molding install on doors
I am trying to install Metro part LM-12B on my doors. The part number seems right but I do not see how to position the ends. I am sure it is me. Do I need to modify the molded ends?
February 23rd, 2012, 08:20 PM
#26
Registered User

Join Date: Jun 2010
Location: Houston, Tx
Posts: 169
I just recently installed both my doors weatherstripping and roof rails on my Cutlass. The first thing you need to do is take off the door panels to gain access to the three holes on each side which the rubber tabs to go into. This is how I installed mines:
Locate this end of the weatherstripping Start at this, using a liberal amout of 3M weatherstripping glue. Now locate the three holes ontop the door by the door lock **** . You will see rubber tabs that need to be placed into the three holes.
Repeat the process, placing glue on the weatherstrip and placing the rubber tabs all the way around to the other end
1330055363.jpg
 February 24th, 2012, 09:40 PM
#31
Registered User

Join Date: Aug 2011
Posts: 86
I recently did my vert roof rails, header bow and rear window quarters. It was a breeze - almost. I would rate replacing weatherstripping as as about a "2" with "10" being something like rebuilding an automatic tranny. I read the Metro link I posted below for pointers. The kit was from from Steele. Every piece fit perfectly with the correct tabs and screw holes EXCEPT the no screw holes in the curved pieces on either side of the roof rail that sealed the back windows. I suspect it was since the kit was for "66-70 Full Size GM RWD". It is possible Olds and Buick had different screw patterns, so they didn't drill the holes. I had a heck of a time drilling the holes just right and then getting the dang screws in. Not to mention I dropped a screw in the window well and fished with a magnet for 40 minutes until I found it. I would rate replacing the window felts a "3" or "4" on my 98 since chrome trim had to be carefully removed to get at the screws and the felt brackets had to be set just right to get the window to seal with the rail. I would buy from Steele again.
http://metrommp.com/
http://metrommp.com/
February 26th, 2012, 03:13 PM
#32
Registered User
Join Date: Oct 2008
Location: Austin, TX
Posts: 41
Metro Passenger door weathstripping
Removed the door panel and still stuck  The molded end at the back of the door does not fit. Not close on the 4 pin holes matching up. The part number looks correct LM-12B. Any help is greatly appreciated.
The molded end at the back of the door does not fit. Not close on the 4 pin holes matching up. The part number looks correct LM-12B. Any help is greatly appreciated.
April 12th, 2015, 05:03 PM
#37
Registered User

Join Date: Jul 2011
Posts: 288
Oh - if the glass moves excessively in the door, pull the door panel and inspect the 4 guides that the glass runs on. I bet they are worn like mine were.
Picture story starts here:
http://www.flickr.com/photos/robsalb...57602930020786
Picture story starts here:
http://www.flickr.com/photos/robsalb...57602930020786

Thread
Thread Starter
Forum
Replies
Last Post
Lady72nRob71
General Discussion
21
February 17th, 2011 01:17 PM
gearheads78
General Discussion
12
November 21st, 2008 04:59 PM


