1972 Rear Tailight Socket
#1
1972 Rear Tailight Socket
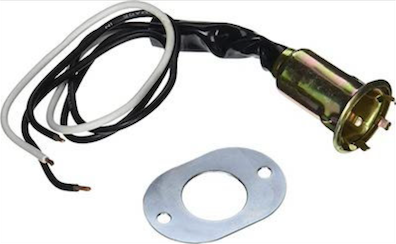
1972 Cutlass rear tailight socket. One of the sockets got rusty and the lightbulb doesn't sit in there properly. Need to replace that one socket but can't find a direct replacement. Only universal ones. The below one MIGHT work but factory is steel with two pins. Replacement is plastic with two metal strips. Anyone have any recommendations?
Universal Light Socket - Summit
Universal Light Socket - Summit
#2
#4
#5
#6
Pettrix:
The third wire is a dedicated ground wire; the factory socket only had 2 wires because it grounded the bulb through the housing. If you think about it, the ground path for the tail light bulbs was very convoluted; it grounded through the socket housing, the tail light housing, the bumper, the bumper bracket and finally the chassis frame rail. There were so many places the continuity of the circuit could be compromised by a painted surface or corrosion. I plan to use this third wire as a dedicated ground to the body tub to simplify the ground path.
Rodney
#7
Pettrix:
The third wire is a dedicated ground wire; the factory socket only had 2 wires because it grounded the bulb through the housing. If you think about it, the ground path for the tail light bulbs was very convoluted; it grounded through the socket housing, the tail light housing, the bumper, the bumper bracket and finally the chassis frame rail. There were so many places the continuity of the circuit could be compromised by a painted surface or corrosion. I plan to use this third wire as a dedicated ground to the body tub to simplify the ground path.
Rodney
The third wire is a dedicated ground wire; the factory socket only had 2 wires because it grounded the bulb through the housing. If you think about it, the ground path for the tail light bulbs was very convoluted; it grounded through the socket housing, the tail light housing, the bumper, the bumper bracket and finally the chassis frame rail. There were so many places the continuity of the circuit could be compromised by a painted surface or corrosion. I plan to use this third wire as a dedicated ground to the body tub to simplify the ground path.
Rodney
Hopefully the old socket will come out of the housing. Might have to be drilled out by the looks of things unless it can be pushed out from the back. Any ideas on how it is removed?
#8
I used a Dremel tool to make a few shallow cuts to the lip on the inside of the the tail light housing, lightly clamped the housing in a vise, the used a small hammer and a 3/8" socket extension to "pop" it out the back. With the relief cuts, it didn't take much to pop out the socket. I will solder and heat shrink the new socket wiring into the original harness. I hope to get back to this project this weekend and will post some pics.
Rodney
Rodney
Thread
Thread Starter
Forum
Replies
Last Post
Waverly1984
Chassis/Body/Frame
17
October 23rd, 2021 02:25 AM
pops1958
Parts Wanted
0
August 13th, 2021 07:05 PM


