When you click on links to various merchants on this site and make a purchase, this can result in this site earning a commission. Affiliate programs and affiliations include, but are not limited to, the eBay Partner Network.
Hey folks,
I'm in the middle of rebuilding the front end on my '71 Supreme (tubular A-arms, moog ball joints, Moog tie rod ends, center link, etc.) but here's the thing; I can't get the spring out. The original plan was to jack the front up enough that the lower control arms would swing all the way down, releasing the springs. I fed a long length of chain through the spring in case of a mis-hap, and went for it. But of course things never go as planned and the control arm (driver's side so far) is hitting the header and won't come all the way down. So I ran out and bought a spring compressor. Brilliant. Not! I've tried two different internal compressors and they're both a major pain. I have to disassemble it, feed the upper and lower arms into the spring, feed the threaded rod through the lower and upper arms, yadda yadda......but the higher I try to get on the spring, the smaller the spaces between the coils, and I can't get the hooks through the small spaces. So I went as high as I could and compressed as much as I could but the spring was still too tight to remove. I thought about loosening the headers but, on the driver's side at least, I risk bending or breaking the dipstick tube.
I get that this is a dangerous job and I'm being as careful as I can (with my fingers threaded through the coils of a loaded spring).
Tomorrow I'm going to try and unload the spring (lower the control arm) as much as possible and see if I can get the compressor higher inside the spring. Other than that, I'm out of ideas.
I tied that compressor thing too and ended up using 1/2" threaded rod (all thread?), maybe two feet long, fed up through the shock top hole, and two suitable cross bars with hole, across the coils to compress the spring.
Go to AutoZone's website and look up this part number: 27035. It may be what you need.
And reading your post, I can tell you I share (as I'm sure do others) in the frustration of having a game plan only to keep running into unforeseen circumstances. But, nothing compares to the satisfaction of conquering that giant and knowing you got it done!
did you loosen the LCA bolts maybe the bushings are casuing it to bind if you did not? When i did mine the old spring was loose and kinda popped out of the pocket, the new spring fit right in no comp needed for either ?
I tied that compressor thing too and ended up using 1/2" threaded rod (all thread?), maybe two feet long, fed up through the shock top hole, and two suitable cross bars with hole, across the coils to compress the spring.
I'm assuming your cross bars were threaded to accept the all thread? Or one of them, anyway.
Originally Posted by 72455
Go to AutoZone's website and look up this part number: 27035. It may be what you need.
And reading your post, I can tell you I share (as I'm sure do others) in the frustration of having a game plan only to keep running into unforeseen circumstances. But, nothing compares to the satisfaction of conquering that giant and knowing you got it done!
Yeah man, I saw that one too. A little easier to use maybe, because of the flat piece on the bottom but my real problem is getting the top hooks high enough in the spring. And thanks for sharing in my pain, lol.
Originally Posted by RetroRanger
did you loosen the LCA bolts maybe the bushings are casuing it to bind if you did not? When i did mine the old spring was loose and kinda popped out of the pocket, the new spring fit right in no comp needed for either ?
Hey Retro, how are ya? No, I didn't actually loosen those bolts but that's not the issue. I can see the control arm pressing against the header. Tomorrow I'm going to try getting higher up in the spring. This job makes me nervous.
I have notched the LCA's to clear header tubes, and keep the springs partially compressed by fitting clamps onto them. They are made from 3/16" thick, 1" wide steel straps with the ends bent over just past 90 degrees to clip over a coil--they are long enough to hold several coils compressed when the weight is taken off.
I have notched the LCA's to clear header tubes, and keep the springs partially compressed by fitting clamps onto them. They are made from 3/16" thick, 1" wide steel straps with the ends bent over just past 90 degrees to clip over a coil--they are long enough to hold several coils compressed when the weight is taken off.
I've thought about modifying the control arm to clear the header, and will definitely have another look at that but I'm worried that I'll have the reverse issue with the install. Maybe compressing the new springs will be easier and more effective with them not in the car.
Thanks Rund
Way back in the 80s or 90s I tried a spring compressor and ran into similar issues. I ended up putting the threaded rod through the top shock absorber hole and used just one set of the spring hooks on the lower part of the spring and �trapped� the spring up in the frame pocket. Note that I was not replacing the spring, just needed to get the lower control arm off to replace the bushings and ball joints.
I have never used a spring compressor on a car that was not taken apart. With the car sitting as high as I can get it on jack stands, I raise and lower the control arm with a floor jack. As far as the header interference, you need to remove them if they are in the way of getting the job done.
I will loan you this one with a $100 deposit .
You pay shipping both ways . PM me .
Thanks man, I may take you up on that. I'm going to look into moving the headers this morning. Or notching the LCA. It looks like the holders on the OTC slide in from the side. If so, I won't be able to get it high enough in the spring to give me the compression I will need. I'll let you know.
Originally Posted by Fun71
Way back in the 80s or 90s I tried a spring compressor and ran into similar issues. I ended up putting the threaded rod through the top shock absorber hole and used just one set of the spring hooks on the lower part of the spring and �trapped� the spring up in the frame pocket. Note that I was not replacing the spring, just needed to get the lower control arm off to replace the bushings and ball joints.
Food for thought. With the control arm off there would be plenty of room to unload and drop the spring. I'll have too go look but I don' think my shock hole is big enough for the threaded rod, though.
I'll report back.
Thanks Kenneth
I have never used a spring compressor on a car that was not taken apart. With the car sitting as high as I can get it on jack stands, I raise and lower the control arm with a floor jack. As far as the header interference, you need to remove them if they are in the way of getting the job done.
Sigh.... I knew someone was going to say that. And at 3:00 this morning while I was trying to sleep, I came to the same conclusion. If memory serves, I spent the better part of a day trying to get that last header bolt in; the one behind the AC box.
Thanks Eric.
IF you have to take the headers out, notch the back hole so you can start the bolt in and then slide the header into place, it is tight by the ac box. Tim
Way back in the 80s or 90s I tried a spring compressor and ran into similar issues. I ended up putting the threaded rod through the top shock absorber hole and used just one set of the spring hooks on the lower part of the spring and �trapped� the spring up in the frame pocket. Note that I was not replacing the spring, just needed to get the lower control arm off to replace the bushings and ball joints.
Alright Kenneth my lad, that just might work. The threaded rod fits through the hole, barely. But you're right, it's not long enough to completely unload the spring. I could leave the old, 48 year old, springs in there and hope for the best. Two years ago when I replaced the shocks, I remember being surprised that they didn't sag at all with the shocks out.
I suppose the compressor's threaded rod is some sort of hardened steel and I can't just go buy a longer rod? And it's probably fine thread to boot.
Originally Posted by green1972
IF you have to take the headers out, notch the back hole so you can start the bolt in and then slide the header into place, it is tight by the ac box. Tim
Oh sure, where were you last summer when I was putting this engine in?
Great idea, thanks dude.
So, one last thought; using Kenneth's idea, pulling the spring up into the pocket, I could pick up a set of exterior compressors and put them on after the spring is loaded, hence allowing me to remove the spring. I'm not a fan of the exterior compressors but it's worth a thought.
When I was in the USAF, we could sign-up to rent the automotive bays on base for one hour blocks of time - my first time changing out front coil springs was in 1976 on my 1972 4-4-2. They had several types available and the gentleman who headed up the automotive bays provided me w/ some advice when reviewing/examining the coil springs on my car. He said to use the exterior compressors so that's what I did. As I recall, I kept the car on the ground w/ the springs compressed as much as possible, put a spring compressor on both sides of each spring (absolutely it was nerve wrenching - no doubt about it), but I had no difficulties removing each spring, raised the vehicle, dropped on stands, continued compressing until there was room to slide them out - each slid right out. It was kind of tedious since you have to take your time to adjust/tighten each compressor independent of the other maintaining a solid amount of equal tension on each side of the spring. I realize there are other types available, but I'm just sharing how I removed and installed mine - x2 two exterior compressors one on each side of each spring. JS
Last edited by Vintage Chief; May 23rd, 2019 at 08:01 AM.
Thanks for the input, Norm. I love it when an experienced old-timer says "What the heck are ya doin'? Just do it this much easier and safer way!" Assuming the auto-bay manager was an old-timer. Smart though. In theory, someone might be able to go up through the shock hole with the car on the ground and the spring compressed. Heck, even have a couple friends sit on the hood. But there wouldn't be much clearance for moving around.
I've been cleaning and painting parts this morning, so far. But I did drop the threaded rod down through the shock hole and it's long enough to capture the spring. I may even just jack up the LCA as far as I can, compressing the spring, to take some of the work off the compressor.
Okay, so here's where I'm at; I've got the compressor threaded through the shock hole on top of the frame, threaded through the jaws at the bottom of the spring, and the spring compressed with my floor jack under the LCA. I was jacking the LCA a little and then tightening the compressor bolt, and repeat. Now I just need to let the jack down. I'm scared as he!! that the shock hole won't hold so I'm building myself a fortress between me and the spring. Wish I had an old mattress laying around.
Wish me luck!
Back in the day (I'm talkin waaaaaay back), whenever I needed to work on the front control arms on my 66, before starting I would secure the springs in the compressed position. To do that, I would take 2 wire coat hangers, cut them open, then run one on each side of the spring, over the top most part and bottom most coil of the springs that I could get to. Twist the ends together, and turn a few times with a pair of pliers to take out the slack. Never had a failure of the coat hangers, and I could then easily remove and reinstall the springs. Be sure you have the control arms reattached to the ball joints before releasing the tension on the coat hangers....... (ask me how I know......LOL)
Back in the day (I'm talkin waaaaaay back), whenever I needed to work on the front control arms on my 66, before starting I would secure the springs in the compressed position. To do that, I would take 2 wire coat hangers, cut them open, then run one on each side of the spring, over the top most part and bottom most coil of the springs that I could get to. Twist the ends together, and turn a few times with a pair of pliers to take out the slack. Never had a failure of the coat hangers, and I could then easily remove and reinstall the springs. Be sure you have the control arms reattached to the ball joints before releasing the tension on the coat hangers....... (ask me how I know......LOL)
Holy tension Batman! You're crazy, dude. Or, at least, you used to be. But weren't we all? At least I feel better about my method now, lol.
So yes, I'm alive. Not injured. The spring is compressed on the frame pocket and the jack has been removed. BUT, BUT, the LCA is stuck to the bottom of the spring. I'm gonna' spray it down with PB Blaster but am I going to have to pry the spring out of the control arm?
And no, the scissor jack isn't really doing anything. The passenger side ball joints have been broken loose but the spindle is still in place. The scissor is just an added measure.
Lol...we must have been posting at the same time��
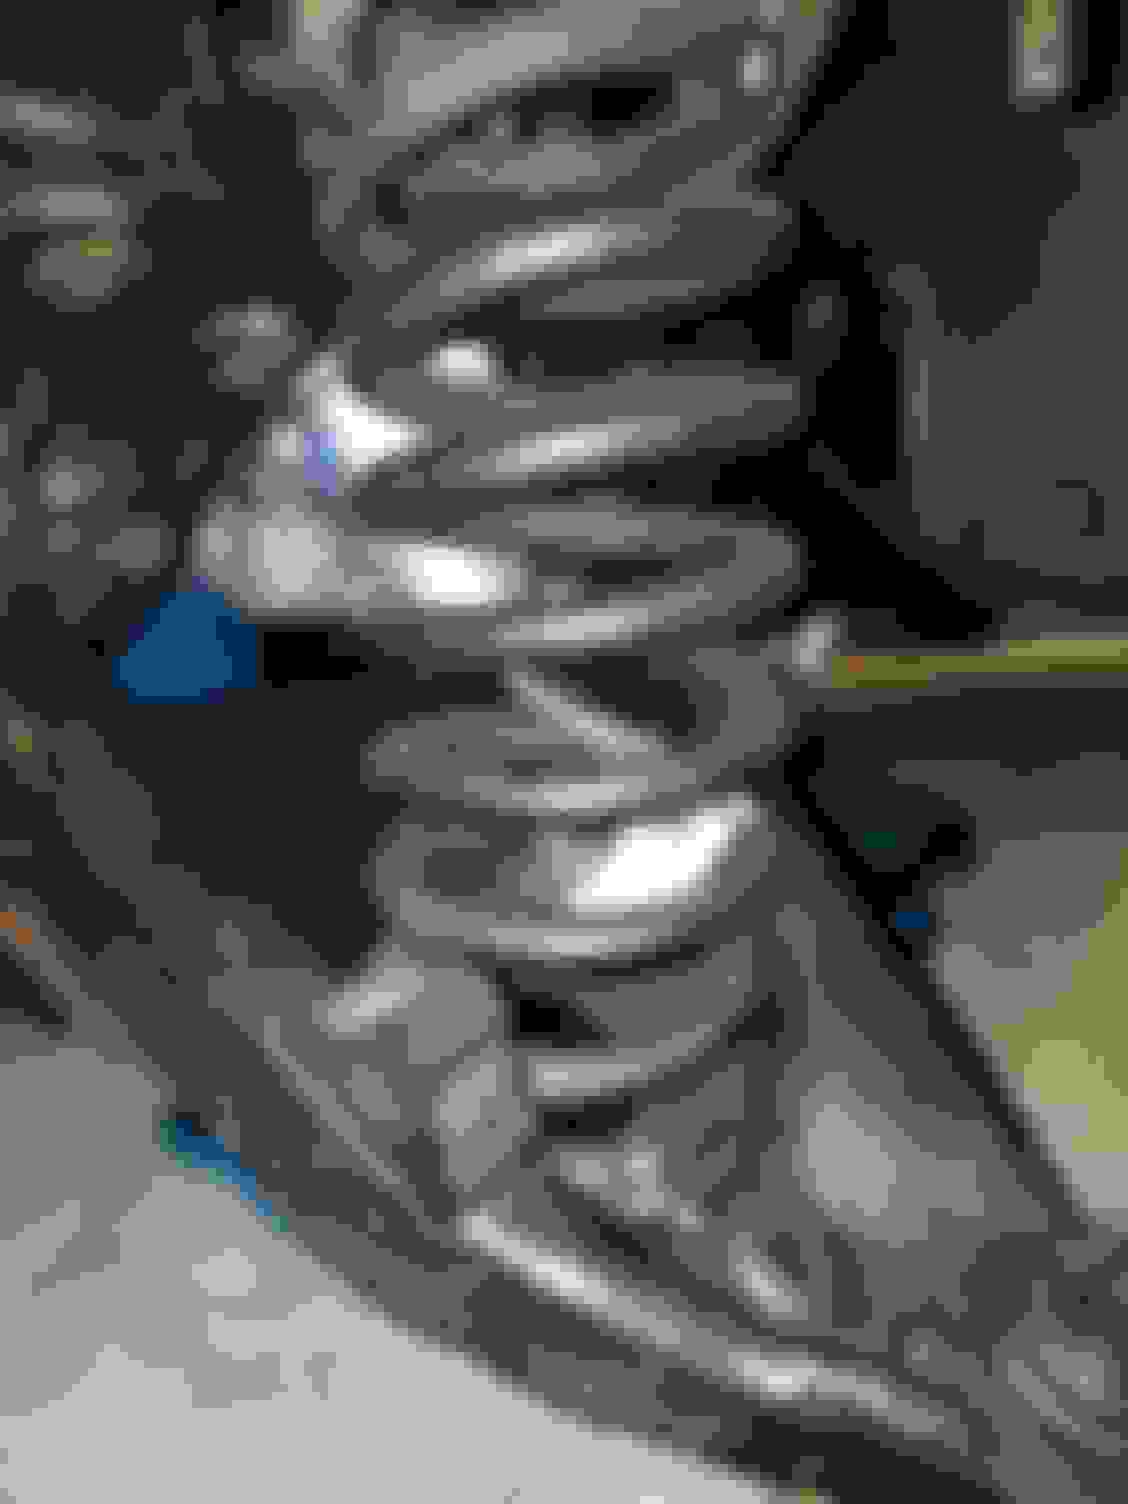
Lol, yeah. I try to be as safe as I can when I work. Mostly because I've learned I probably won't die, just get maimed. Which is why this is so upsetting; I thought the spring was stuck to the control arm but it wasn't. It was stuck IN the control arm. When I tapped the control arm down, this happened...
The compressor jaws must have slipped out of place at some point. Near the end of compressing I wasn't watching placement, just how much they were wrapped around the coil. Am I boned? I feel pretty boned. The compressor is definitely not long enough to unload the spring completely before I run out of room.
The only solution I can think of is to compress the spring even more and try to pry it back into the control arm and then jack the arm up, relieving the compressor so it can be re-positioned. I'm really starting to hate suspension work.
Lol, yeah. I try to be as safe as I can when I work. Mostly because I've learned I probably won't die, just get maimed. Which is why this is so upsetting; I thought the spring was stuck to the control arm but it wasn't. It was stuck IN the control arm. When I tapped the control arm down, this happened...
.... I'm really starting to hate suspension work.
That's why I'm going to pay someone to replace my control arm bushings...I'd be throwing wrenches and hammers and saying some not-so-nice words..
Just let the arm down slowly and take out the spring.
I should have explained the photo; the control arm isn't touching the spring at this point, and the jack isn't touching the control arm.
Originally Posted by 11971four4two
If You are not going to use those springs again cut the coil spring into halves with a torch "fire wrench"
But you see, that's the problem. The spring is compressed into the frame pocket. It doesn't look like it, but it is under A LOT of tension. I can let out maybe 70% of that tension though. For a second I thought I could get the exterior compressors and take off enough tension to re-position the compressor jaws but there's not a lot of access to the coils and something tells me it won't work anyway. At this point, I think I have no choice. I'm going to let out as much compression as I can, making the spring as long as I can, and wrap it in a thick blanket and rope, then wrap the underside of the car in thick blankets and duct tape, and just let it fly. I don't see a safer choice here.
Originally Posted by 72455
That's why I'm going to pay someone to replace my control arm bushings...I'd be throwing wrenches and hammers and saying some not-so-nice words..
As I was saying, when you use a two foot long all thread rod with the two cross bars with hole, a nut and washer on the top of the top- bar does not put any pressure on the shock hole area. The holes in the bar need not be threaded. Because the rod is two feet long, or maybe three, there is enough rod there to compress the spring and then slowly unthread the rod to release tension. I have done several spring changes this way and I also use a stout chain to hold the spring in case something slips. It takes a long time to turn the nuts with a wrench, but it works.
I should have explained the photo; the control arm isn't touching the spring at this point, and the jack isn't touching the control arm.
But you see, that's the problem. The spring is compressed into the frame pocket. It doesn't look like it, but it is under A LOT of tension. I can let out maybe 70% of that tension though. For a second I thought I could get the exterior compressors and take off enough tension to re-position the compressor jaws but there's not a lot of access to the coils and something tells me it won't work anyway. At this point, I think I have no choice. I'm going to let out as much compression as I can, making the spring as long as I can, and wrap it in a thick blanket and rope, then wrap the underside of the car in thick blankets and duct tape, and just let it fly. I don't see a safer choice here.
That's a GOOD day in my shop
IF You heat a coil spring up with oxy acetylene it will lose strength
red hot with the torch
IF you cut the spring with a torch tension will be gone and it basically fall out of the car in 2 pieces
Lol...we endure so much heartache and frustration only to keep asking for more...sheer insanity🤪
They can keep their opioids and alcoholism. I already have my addiction!
Originally Posted by Yellowstatue
As I was saying, when you use a two foot long all thread rod with the two cross bars with hole, a nut and washer on the top of the top- bar does not put any pressure on the shock hole area. The holes in the bar need not be threaded. Because the rod is two feet long, or maybe three, there is enough rod there to compress the spring and then slowly unthread the rod to release tension. I have done several spring changes this way and I also use a stout chain to hold the spring in case something slips. It takes a long time to turn the nuts with a wrench, but it works.
No threaded holes? I'm not following. Do you have any pictures handy?
Originally Posted by 11971four4two
IF You heat a coil spring up with oxy acetylene it will lose strength
red hot with the torch
IF you cut the spring with a torch tension will be gone and it basically fall out of the car in 2 pieces
Easy if you have torch set and know how to use it
BE SAFE
All the best
I getcha' I think. You're hardening the steel, taking the "spring"" out of the spring. Sadly, I have no cutting torch, just an angle grinder, which won't do the same thing.
If the holes are threaded, then you turn the rod, if the holes are not threaded you turn the nut. No pics, just a hole in the bar to fit the rod through with a washer and nut on bottom. On the top, rod through hole in bar, washer, nut, turn nut a couple hundred times until spring is compressed. The bar is just a piece of sturdy metal for strength, the hole in the bar is just for the rod to pass through, with a nut and washer as a stopper on one end or the other. So if the rod is too long at the bottom, then the LCA will not swing out of the way for the spring to drop and you also said that the headers were interfering. Put a chain around the spring and frame or control arm so it won't escape and then pry it up or outwards.
Holy crap, Mac. I feel responsible for getting you into this situation. Sorry. Wish I were close enough to redeem myself by stopping by and lending a hand. Good luck and be safe. Use chains as said above.
If the holes are threaded, then you turn the rod, if the holes are not threaded you turn the nut. No pics, just a hole in the bar to fit the rod through with a washer and nut on bottom. On the top, rod through hole in bar, washer, nut, turn nut a couple hundred times until spring is compressed. The bar is just a piece of sturdy metal for strength, the hole in the bar is just for the rod to pass through, with a nut and washer as a stopper on one end or the other. So if the rod is too long at the bottom, then the LCA will not swing out of the way for the spring to drop and you also said that the headers were interfering. Put a chain around the spring and frame or control arm so it won't escape and then pry it up or outwards.
I gotcha' now. I was missing the nut on the bottom. Are you using hardware store threaded rod?
Originally Posted by Fun71
Holy crap, Mac. I feel responsible for getting you into this situation. Sorry. Wish I were close enough to redeem myself by stopping by and lending a hand. Good luck and be safe. Use chains as said above.
Oh hell, Kenneth, I'm a grown man, lol. Not your fault in the least. It was good idea and still is. My fault for not watching the alignment of the jaws. I have a heavy chain and three huge, quilted bed comforters. And some memory foam to boot. I'll be alright. And this way I get to use the new springs I bought.
Okay fellers, the spring is out and I'm uninjured. Very anticlimactic, thank goodness. I put down a layer of 4" memory foam and covered all sides in heavy blankets. Of course I put my heavy-arss chain through the spring and frame first. kneeling on the engine I went at it with an electric impact wrench. I know, I know, not what you're supposed to use but I didn't want the rod jamming on the last few threads. It took about five seconds. I heard a very quiet thud and the wrench spun freely. I guess by the end of the threaded rod, there just wasn't all that much tension on the spring.
The hardest part of today was unbolting the header. 5 minutes for four bolts, 40 minutes on the last (back) bolt. Had to do it, the header wasn't going to allow the control arm bolt to come out.
Anyway, thanks for all the help and suggestions. I have a long way to go but I'm making progress.
Okay guys, I'm working on getting the upper UCAs off now. I've got the cross shaft nuts at the end of the bolts and have been trying to pry them out but those splined bolts are really in there. How bad would it be to just twist those out, ruining the press fit, and tack welding the heads of the new bolts to the frame? Now that I've written it, it sounds pretty bad. I'll get back to prying.
 May 22nd, 2019, 05:35 PM


")


