When you click on links to various merchants on this site and make a purchase, this can result in this site earning a commission. Affiliate programs and affiliations include, but are not limited to, the eBay Partner Network.
To the last part. At last. My passenger side inner doorfelt was completetely shot, and of course i had to change it.
Changing these inner doorfelts requires patience to open old staples, and assemble new. Took me approx 1,5hr per doorskin to just assemble new staples, since i wanted to do it as good as possible.
About felts. I bought ones made by " Top Catwhisker- Top quality and original fitment". Some might consider that they are good when they see pics, and also consider im a bit nitpicky, but they just dont fit the way i would want. In my books original fit means exact copy, not one which is close enough...
Well, to the work.
First, remove upper doorskin. 2 Philips head screws visible at the corners, and two under door pull-strap coulisse-panels. Also you have to unsrew door lock ****, and at drivers side mirrors remote control. Then just lift it off. Now its also good time to fix visible rust behind the doorskin, when you take old felt off. Theres some rust for sure under doorskin too, but atleast fix the visible. I did that. And painted with zinc.
Disassembling old felts is easy. I used small flathead screwdriver to lift ends of staples a bit off from skin, and then used small quality wire cutters to cut the ends, and from top lifted what was left from staples off with small flathead.
Then mark carefully the position of old felt to doorskin using some kind of marker. I found new ones to be exactly same length than old ones, they just have a little bit different radius at the end where they start to raise towards roofline. This bugs me. Big time.
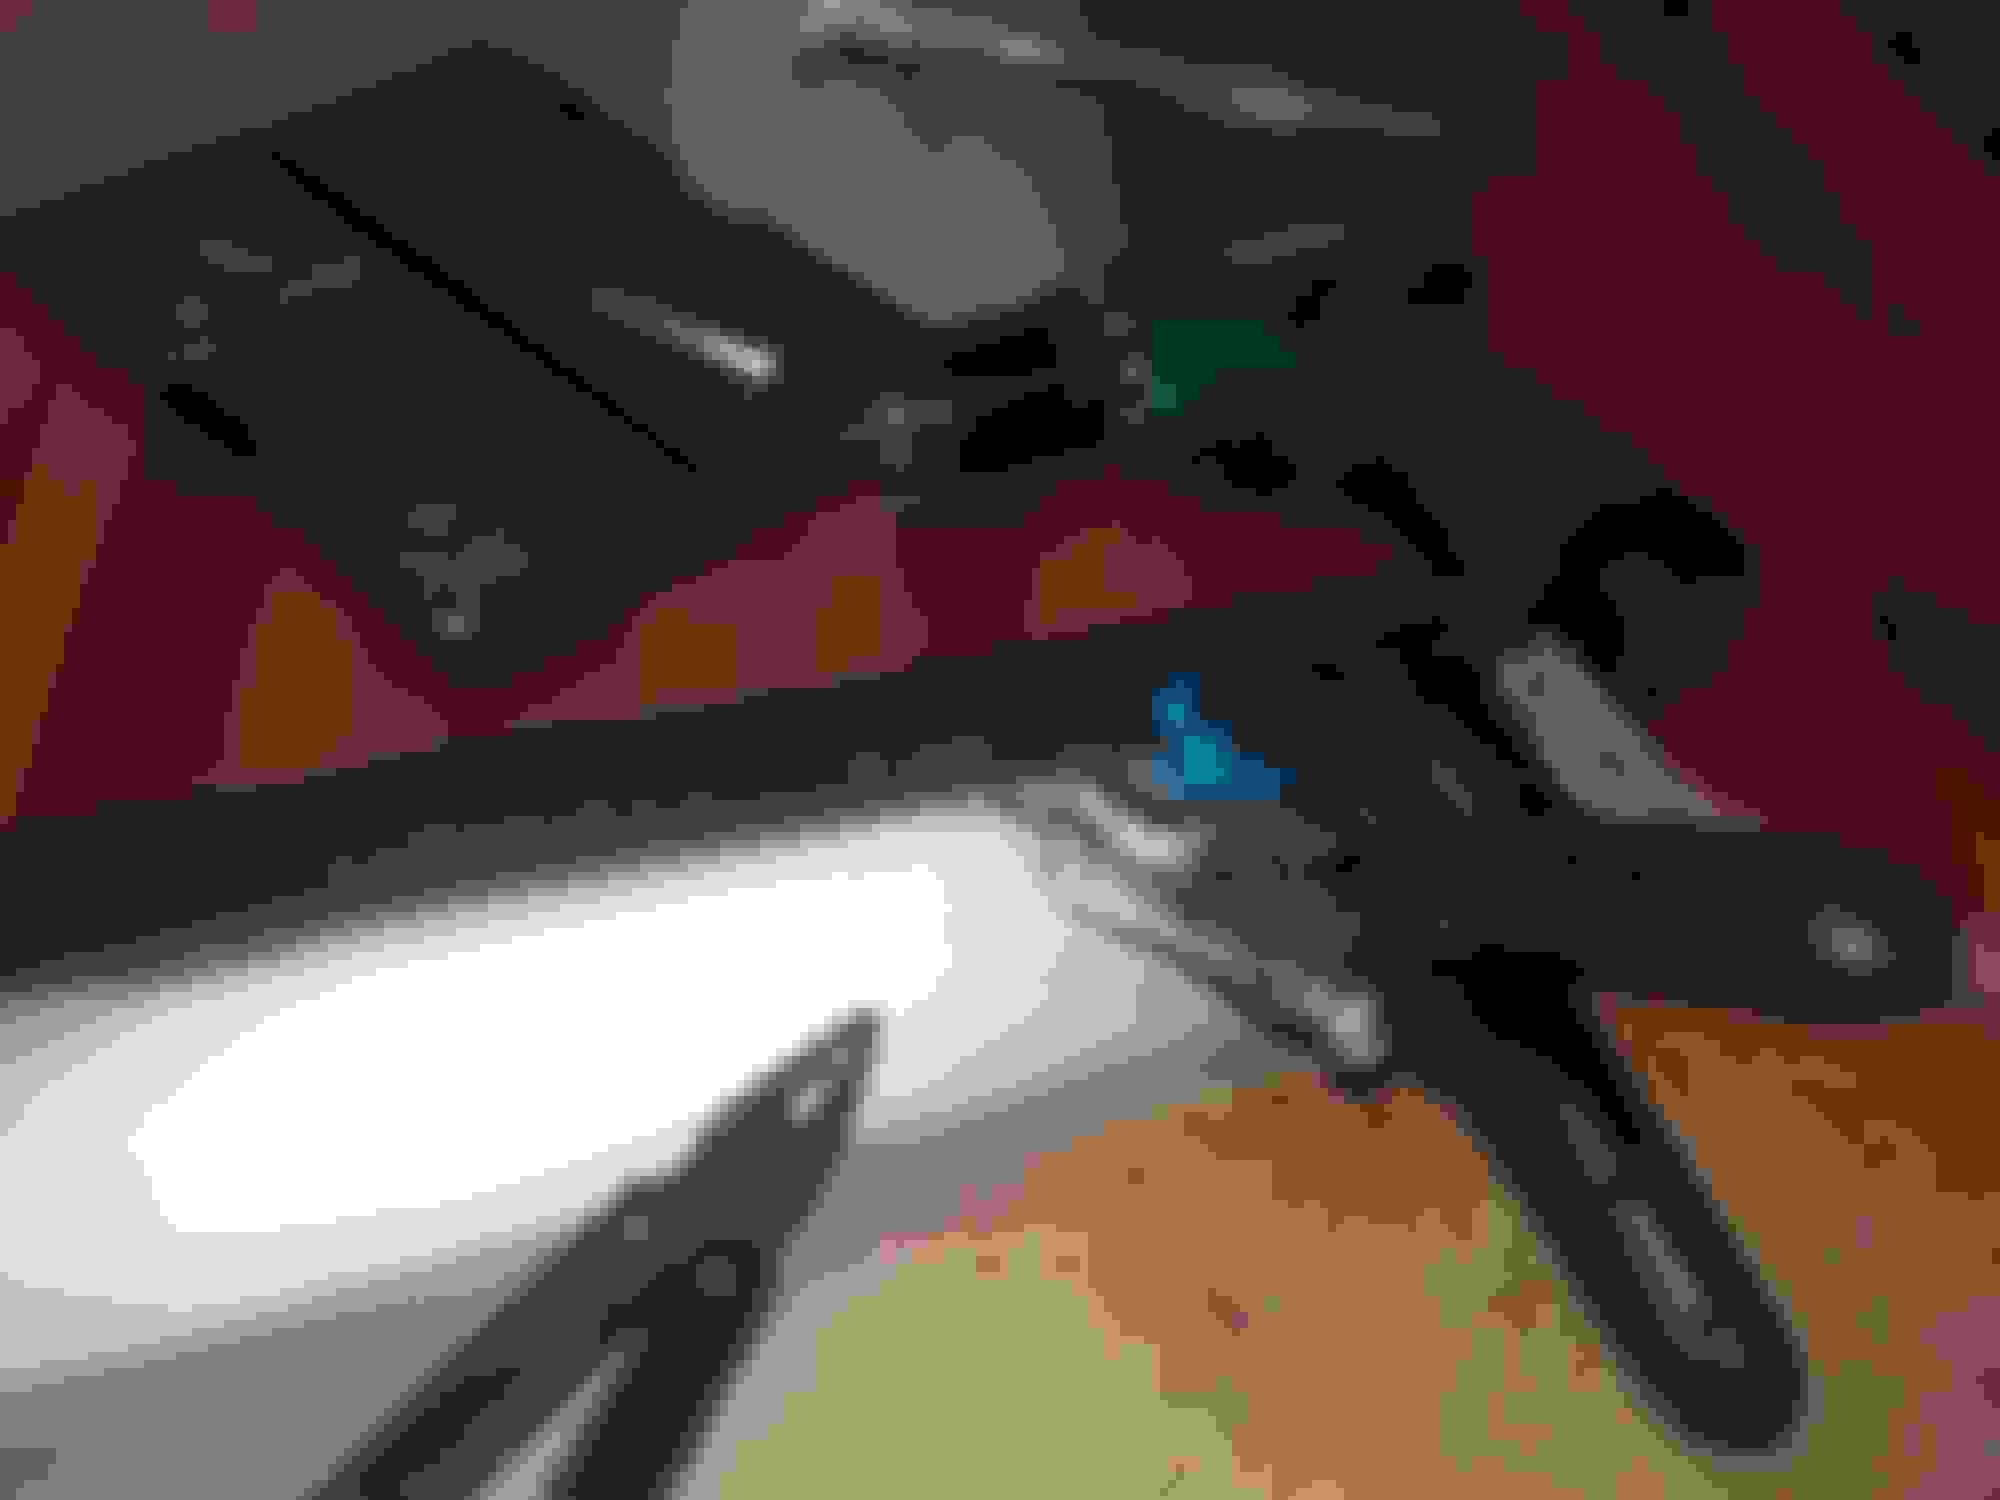
Okay, installing new ones. Carefully assemble new felt at Place using some kind of holders. When your satisfied with fit, its time to start fixing them on. Top Catwhiskers provide original-like staples, and have few more than is needed if you happen to do something wrong. Heres picture how i held new felt at Place when installing new staples. After few staples, remember to loosen and re-attaching holders, to remove any tension which may have formed when attaching felt to doorskin.
For drilling holes to the doorskin through new felts, DO YOURSELF A FAVOR; make an simple jig to get your holes always to correct position. I used a piece of aluminium, drilled two holes ( as you see, second set of holes hit the mark ) at exact width of staple, and drilled all holes through this. That way your staples do fit correctly every time!
Assembling new staples iS pretty easy after you do your jig, and get holes to correct locations. I used small vice-grips to hold staple tight against felt, and then used pliers to turn both ends of staple tight against door skin, and then used bigger pliers to squeese them tight. This way worked right, i got really tight fitment, theyre not loose at all. Factory-like, i would say.
Heres first ready. I practiced to passenger side, of course
I must say, im one part proud and one part unhappy. I did assemble them 100% as good as it is ever possible, but when the profile isnt 100% correct, you cant get them fit like originals..
And heres one pic showing the problem. Same at passenger side. They have tighter radius than original at the end, and it shows up that way:
.... Mixed feelings. I hate, when somebody rides with words like "quality" and "original fit", and the truth is they fit like a crap.
Atleast, they are intact ones, and not shot. My advice would be; dont change them atleast to Top Catwhiskers, if yours are even remotely good. You just get disappointed, or not? Then just assemble everything back, and youre good to go.
Hope this helped somebody.
Last edited by Inline; May 27th, 2016 at 09:25 AM.
Location: Edmonton, AB. And "I am Can 'eh' jun - eh"
Posts: 24,525
I noticed this also with 72 felts for the 3687 models. The curve wasn't exact, but surprisingly with patience you can 'tweak' the radial curve down to meet the OEM design but applying graduated pressure starting at the initial point of curve. I don't know if you have installed these or can adjust them with the felts attached to the upper panel.
I noticed this also with 72 felts for the 3687 models. The curve wasn't exact, but surprisingly with patience you can 'tweak' the radial curve down to meet the OEM design but applying graduated pressure starting at the initial point of curve. I don't know if you have installed these or can adjust them with the felts attached to the upper panel.
Pics taken, and assembly done with max pressure i could get to them to follow the lines of door panel. Without any pressure they would been way worse; at passenger side i re-did last half of the assembly, since without any pressure towards the curve it did look way worse even compared to current situation.
 May 27th, 2016, 09:20 AM
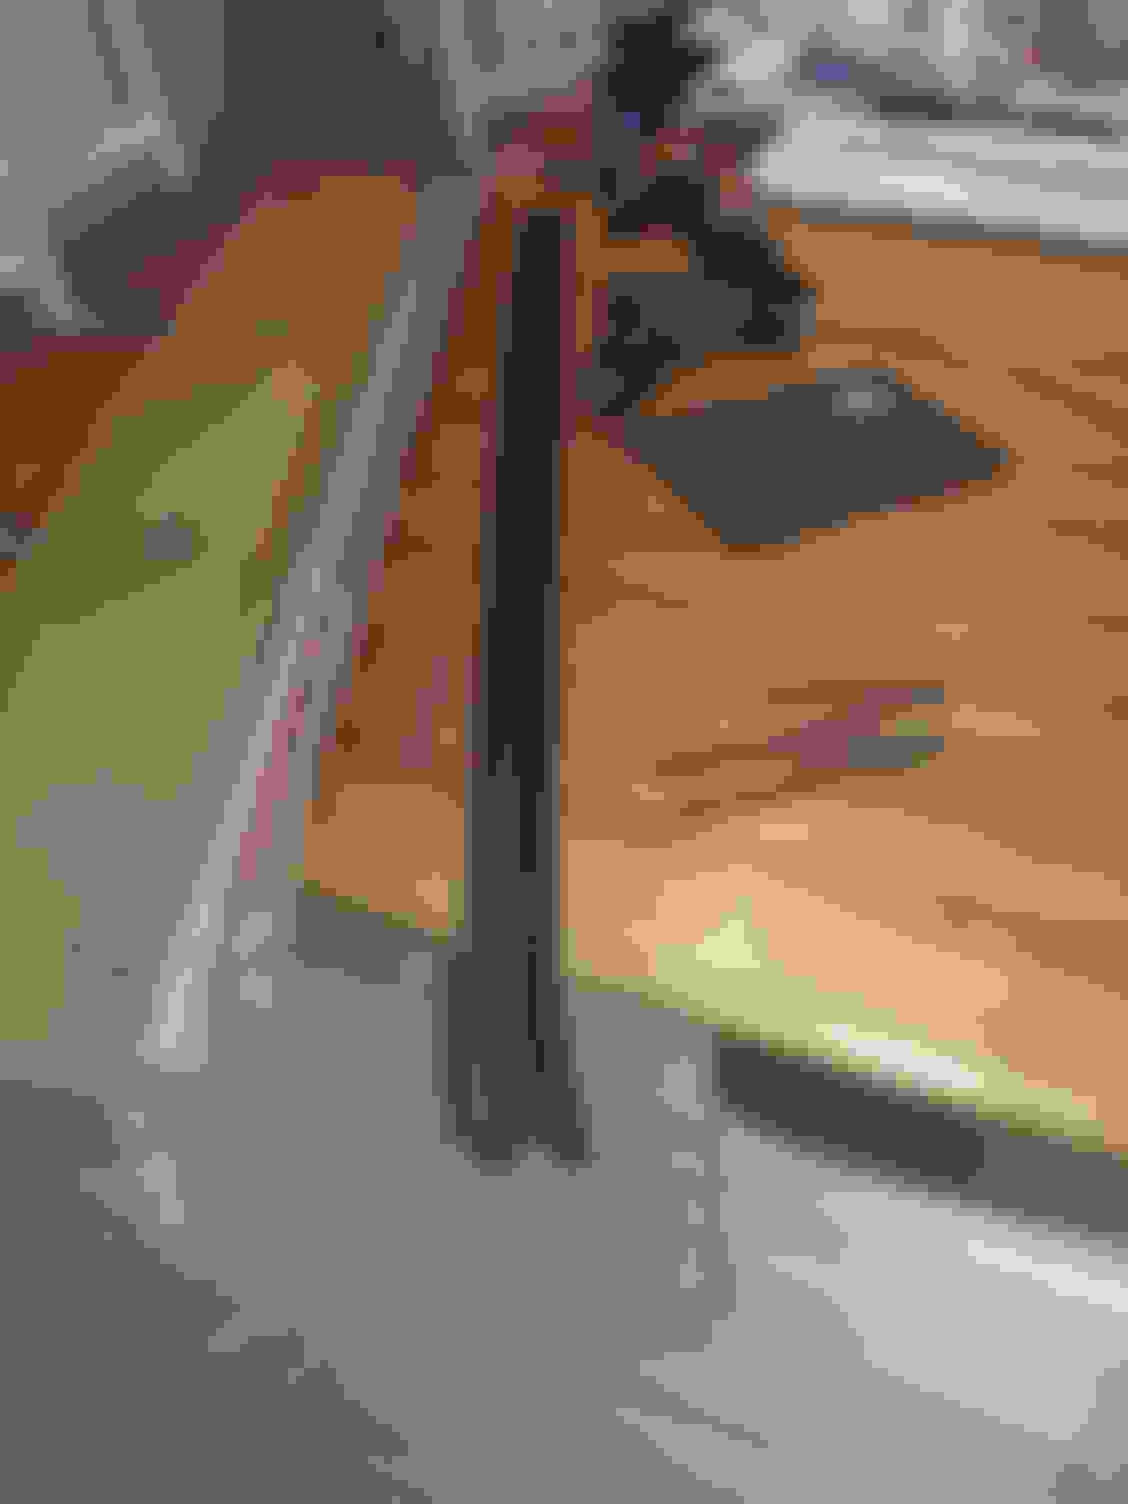

 ) at exact width of staple, and drilled all holes through this. That way your staples do fit correctly every time!