
Replacing intake gasket 455 tipsand tricks?????

Thread Starter
Registered User
Joined: Feb 2012
Posts: 537
From: Alberta
Replacing intake gasket 455 tipsand tricks?????
Anyone have any good tips when installing ne intake gaskets.....Ive watched some videos on youtube and some videos show just using silicone and not using the front and back rubber seals!!!
Some say to use a little silicone on both sides of the rubber and some say dont use any!!!
This is my first time doing this and I want to do it right!!
Thanks!!!
Some say to use a little silicone on both sides of the rubber and some say dont use any!!!
This is my first time doing this and I want to do it right!!
Thanks!!!
Last edited by scooter123; Mar 28, 2012 at 09:07 PM.
Registered User
Joined: Oct 2005
Posts: 7,304
From: NJ
I guess you will get many opinions. The felpro metal gasket usually comes with instructions and High-tac and silicone. I would follow the instructions. As for me I use silicone/RTV on the top of the rubber seals and would not toss them. I do not RTV the underside of the rubber seals but as instructed carry the bead around the manifold water ports.
Registered
Joined: Jul 2006
Posts: 4,430
From: Northeast Ohio
A lot of intake manifold gaskets don't even include ends seals anymore, they give you a tube of RTV.
I'm not saying they won't work in all cases but just about everybody uses silicone instead of the rubber seals no matter what kind of engine it is anymore. I did the silicone with rubber seals on my 350 and they took about a week to start squeezing out.
Otherwise make sure everything is perfectly clean, do a final cleaning with brake cleaner or alcohol before doing the gaskets.
Permatex silicone around the water ports and high tack around the intake ports. I have a couple of bolts with the heads cut off I put in the front and rear bolt holes in the head on one side to guide the manifold in, don't want to be shifting it around once it's set. Set a towel in the valley and push paper towels into the ports to keep crud out when you clean off the old gasket material or sealer and remember to remove them before you install the manifold, not taking them out happens a lot believe it or not.")

I'm not saying they won't work in all cases but just about everybody uses silicone instead of the rubber seals no matter what kind of engine it is anymore. I did the silicone with rubber seals on my 350 and they took about a week to start squeezing out.
Otherwise make sure everything is perfectly clean, do a final cleaning with brake cleaner or alcohol before doing the gaskets.
Permatex silicone around the water ports and high tack around the intake ports. I have a couple of bolts with the heads cut off I put in the front and rear bolt holes in the head on one side to guide the manifold in, don't want to be shifting it around once it's set. Set a towel in the valley and push paper towels into the ports to keep crud out when you clean off the old gasket material or sealer and remember to remove them before you install the manifold, not taking them out happens a lot believe it or not.
Thread Starter
Registered User
Joined: Feb 2012
Posts: 537
From: Alberta
Well I not feeling real smart right now.....I have removed all the coolant and all the bolts on the intake.....so my question is whats the trick to breaking this thing loose.......And It would be much easier to work if I removed the distributor.....right now it is not lined up with #1 ....So can I mark it where it is and remove it????
Like I said this is my first time doing this so dont come down on me too hard....
.....I have removed all the coolant and all the bolts on the intake.....so my question is whats the trick to breaking this thing loose.......And It would be much easier to work if I removed the distributor.....right now it is not lined up with #1 ....So can I mark it where it is and remove it????Like I said this is my first time doing this so dont come down on me too hard....
Thread Starter
Registered User
Joined: Feb 2012
Posts: 537
From: Alberta
Well guys and gals....I got the intake out and all cleaned up!!! From the looks of things all the surfaces were done with rvt both sides!!!
Do you know what size the o-ring is on the distributor???
As for the timing I marked where it was before I removed it...IF I put it back in the same place the timing should be cotrrect right!!!
This job is a bit of a back breaker.....I now have a lot more respect for the mechanics in the world who do this all day long!!!
DSC08069.jpg
DSC08069.jpg
Thread Starter
Registered User
Joined: Feb 2012
Posts: 537
From: Alberta
Registered User
Joined: Apr 2011
Posts: 2,703
Well I not feeling real smart right now.....I have removed all the coolant and all the bolts on the intake.....so my question is whats the trick to breaking this thing loose.......And It would be much easier to work if I removed the distributor.....right now it is not lined up with #1 ....So can I mark it where it is and remove it????
Like I said this is my first time doing this so dont come down on me too hard....
.....I have removed all the coolant and all the bolts on the intake.....so my question is whats the trick to breaking this thing loose.......And It would be much easier to work if I removed the distributor.....right now it is not lined up with #1 ....So can I mark it where it is and remove it????Like I said this is my first time doing this so dont come down on me too hard....

Also, on the end seals...you would be well served to get a center punch and dimple the ends of the block and manifold where the rubber ends would go. Then just use Ultra Copper or Ultra Black without the rubber end gaskets...make sure you get enough in the corner where the head, block, and intake meet.
Steve

Last edited by ah64pilot; Jun 20, 2013 at 04:56 PM.
Just an Olds Guy
Joined: Jul 2008
Posts: 24,528
From: Edmonton, AB. And "I am Can 'eh' jun - eh"
Good job Roger!
Yes, if you marked the distributor (indexed) at the top and the bottom, you'll be ok with reinstall.
You actually have an advantage with that intake! It's waaay lighter than a stock. Yours is aluminum probably weighs in around 20 lbs? Mine is stock OEM Cast iron - wieghs in at around 50 lbs.
You're doing fantastic keeping your work area and block clean.
Registered User
Joined: Apr 2011
Posts: 2,703
And now that I see you are using an aluminum intake, you should be using a composite intake manifold gasket, not a steel turkey tray.
For a great seal, use permatex high tack gasket sealant on both sides of the composite gasket...then use ultra copper around the water jackets on both the head and manifold. Dimple the end seals like I mentioned above and use ultra copper without the rubber end seals. I have anywhere from 50-90 psi oil pressure and I haven't seen a leak from the manifold yet.
For a great seal, use permatex high tack gasket sealant on both sides of the composite gasket...then use ultra copper around the water jackets on both the head and manifold. Dimple the end seals like I mentioned above and use ultra copper without the rubber end seals. I have anywhere from 50-90 psi oil pressure and I haven't seen a leak from the manifold yet.
Thread Starter
Registered User
Joined: Feb 2012
Posts: 537
From: Alberta
Well im not a happy guy right now.... I installed the new intake gasket to spec and fired it up today wit new oil and took it for a drive and when I returned both the front an rear rubber gaskets were getting pushed out...****!!!!
I torqued the bolts to 35ft lbs and let it sit for a bit and retorqued the second time...then let it sit for 24 hrs!!
So I guess I will just use straight rvt the next time....and through those rubber end seals in the trash where they belong!!!
So I guess Im off to buy another $50 gasket....I assume once the intake is torqued down the gasket is no longer re-usable!!!
I installed the new intake gasket to spec and fired it up today wit new oil and took it for a drive and when I returned both the front an rear rubber gaskets were getting pushed out...****!!!!I torqued the bolts to 35ft lbs and let it sit for a bit and retorqued the second time...then let it sit for 24 hrs!!
So I guess I will just use straight rvt the next time....and through those rubber end seals in the trash where they belong!!!
So I guess Im off to buy another $50 gasket....I assume once the intake is torqued down the gasket is no longer re-usable!!!
Registered User
Joined: Oct 2005
Posts: 7,304
From: NJ
For the most part the metal intake gaskets are a 1 time use. The question is why did the seals push out?! Under the intake there should be next to no pressure so it is not like there is a force to push out the gaskets. Do you have a working PCV system and valve cover vent? What gasket did you use and pictures would be helpful. Did you put RTV on top of the rubber seals and did it squish out when you torqued down the manifold?
car guy
Joined: Apr 2008
Posts: 5,675
From: Dallas TX

Registered User
Joined: Oct 2011
Posts: 280
From: bowman, north dakota
what intake are you using? the performer is designed to be used with the turkey tray gasket. reusing the gasket is a crapshoot, i've done it and gotten along fine, just have to be a bit more generous with the rtv...
ive never done more than just a dab of rtv at the corners and never had any trouble. the main thing is to set the manifold down gently and then wiggle it just enough to squish it down into the rtv then start your bolts & snug 'em down.
maybe i've just been lucky but the 460 ford has a reputation for being a pita & i've done then the same way and gotten the same results...
Thread Starter
Registered User
Joined: Feb 2012
Posts: 537
From: Alberta
here are a few pics!!!!! I also used the HIGH TACKSPRAT-A-GASKET....on the heads then the turkey tray also sprayed on the under side of the intake.....and it didnt seem to seal that well...even after letting it sit for 24 hrs!!!
DSC08174.jpg
front seal
DSC08170.jpg
rear seal looks ok
DSC08171.jpg
also have a broken wire to this thing which goes to the coil!!! is it a condensor???
DSC08175.jpg
DSC08174.jpg
front seal
DSC08170.jpg
rear seal looks ok
DSC08171.jpg
also have a broken wire to this thing which goes to the coil!!! is it a condensor???
DSC08175.jpg
Registered User
Joined: Sep 2006
Posts: 2,384
From: Union City Calif.94587
I have never heard of the aluminum intake design for the metal gasket. I've always used the composite gasket. A Mr gasket or Rocket gasket #404. The intake is I would say is thicker at the end rails and that is why they push out. If you put a 1/4 inch bead across each and set the manifold down in one motion, you should be good to go. Torque it down and let it set up before you run it.
Gene
Gene
Registered User
Joined: Sep 2006
Posts: 2,384
From: Union City Calif.94587
I see your pic and the reason the seal is broke is do to the fact that the intake rail is thicker. Use the composite gasket and silicone on the ends.
The wire is for the radio suppression. It is to help keep the spark for coming thru the radio.
Gene
The wire is for the radio suppression. It is to help keep the spark for coming thru the radio.
Gene
Connoisseur d'Junque
Joined: Sep 2010
Posts: 21,183
From: The Hudson Valley
It isn't needed for the car to run, but it is needed of you plan to listen to the radio.
- Eric
Registered User
Joined: Aug 2009
Posts: 409
From: ID
Cut off the ports of the old turkey tray gasket to use as an oil shield. Buy composite gaskets. I used these on mine: Mr G# 4695G
http://www.jegs.com/i/Mr.+Gasket/720/4695G/10002/-1
Forget the rubber seals. Dimple the end rails like ah64pilot showed. Lay a bead of the "right stuff".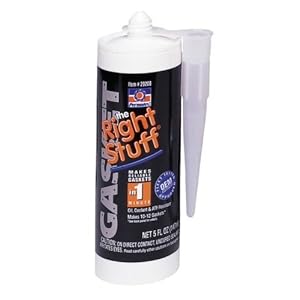
If you mask off the front edge of the block and manifold, you can smooth off the squeeze out and make a nice bead.
http://www.jegs.com/i/Mr.+Gasket/720/4695G/10002/-1
Forget the rubber seals. Dimple the end rails like ah64pilot showed. Lay a bead of the "right stuff".
If you mask off the front edge of the block and manifold, you can smooth off the squeeze out and make a nice bead.
Thread Starter
Registered User
Joined: Feb 2012
Posts: 537
From: Alberta
One other question...on my distributor there is a o-ring....is there also supose to be a paper gasket between the block and the top where the distributor sits???
anyone know the size of the oring and the paper gasket if one is required....the guy at napa did not have the listing for a paper gasket so he sold me another gm one that was too small!!
anyone know the size of the oring and the paper gasket if one is required....the guy at napa did not have the listing for a paper gasket so he sold me another gm one that was too small!!
Registered User
Joined: Mar 2012
Posts: 2,163
From: Sistersville, WV
I never use the frount and rear gasket on an aluminum intake." The right stuff" is the hot lick. Lay it out 1/4 inch thick and sit the intake straight down on it. Never dimpled it either, but that might be a good idea if using the rubber gaskets.
No gasket, just an o-ring, but I don't know size. Match up the old one, or reuse if it is not torn.
No gasket, just an o-ring, but I don't know size. Match up the old one, or reuse if it is not torn.
Registered User
Joined: Oct 2005
Posts: 7,304
From: NJ
The late Joe Mondello always said not to use the stock style valley pan intake gasket with an aluminum intake manifold. The factory did use just that on their W cars. I have found that the paper/composite gaskets require frequent retorqueing as they squish unlike the metal gaskets. I do spray the metal gasket both sides with the high tack spray. It this case you should set the manifold in place without any gaskets to see what kind of gap there is front and back where the rubber seals go. Or just set it on with whatever gasket you will be using to check. If one split there may be too little room for the front and back seals and it compressed so much it squished out and split?
Just an Olds Guy
Joined: Jul 2008
Posts: 24,528
From: Edmonton, AB. And "I am Can 'eh' jun - eh"
Roger, sorry to hear that the gasket didn't work out. Like you said though - you're getting to be an old pro at this. Hopefully Saturday will be the perfect install with nothing going wrong. I'm split on this thing with the turkey tray. I've always used them, and as bigD says, the performer is designed for use with it. If you decide not to risk another expensive gasket set, check out the Edelbrock intake gasket #7284
Here's a reference to Edelbrocks Performer from their product page: http://www.edelbrock.com/automotive_.../2000/2151.pdf
Here's a reference to Edelbrocks Performer from their product page: http://www.edelbrock.com/automotive_.../2000/2151.pdf
NOVICE car nut
Joined: Nov 2010
Posts: 3,140
From: Milwaukee Wisconsin
Oh Boy ! That looks like fun! The 350 on my car needs a gasket also , but it looks like I may not have to worry about it since I'm gonna try and put a 455 in the car .... probably next summer . I was gonna try and repair the engine knock and gaskets , seals when I get the motor out and have my boy help so we can both learn
The 350 on my car needs a gasket also , but it looks like I may not have to worry about it since I'm gonna try and put a 455 in the car .... probably next summer . I was gonna try and repair the engine knock and gaskets , seals when I get the motor out and have my boy help so we can both learn
Thread Starter
Registered User
Joined: Feb 2012
Posts: 537
From: Alberta
Well fellers I got the intake in for the 2nd time and took the advice of center punching the intake front nad back and used copper rvt sealent and tossed to rubber gaskets in the trash!!!
Got all the other odds and ends put back together and will now let it sit for 24 hrs and then we will see how it holds up!!!
Stay tuned
Got all the other odds and ends put back together and will now let it sit for 24 hrs and then we will see how it holds up!!!
Stay tuned
Thread Starter
Registered User
Joined: Feb 2012
Posts: 537
From: Alberta
YYYYYYYYYYYYYYYYYYYYYYEEEEEEEEEEEEEEEEEHHHHHHAAAAA AAAAWWWWW?...........I got it back together and it was a success .....no oil leaks
I did the center punch trick with the copper rvt and let sit for 24 hrs....thank you Jesus...lol
Now the timing on the other hand.....I set the # 1 at TDC but I was setting the distributor in the wrong place and cranked it over and it backfired and almost blew the windows out of the garage.....frightened the s-)t out of me and a few of my neighbors on the block.....lol
One phone call to a good friend who came to help me out with it ..... 5 min later it was good to go!!!!!
Thanks for all your help guys!!!!!!
Registered User
Joined: Jun 2011
Posts: 32
From: Western NY
Does the image with the High Tack and ultra copper suggest that using the High Tack on both sides and ultra copper for the end seals is all that's needed or does it suggest ultra copper around the water ports with the High Tack?
Registered User
Joined: Jun 2011
Posts: 32
From: Western NY
Actually, the reason I'm asking this is because it didn't seem like a good idea to add silicone on top of the High Tack so I only used High Tack on both sides of the turkey tray with the Ultra Coppper on the ends of the block and it seems to be holding so far. I am concerned that without the water ports being circled with silicone that I would have a problem down the road.
There are so many opinions on what the best process is that it turns into a situation of "whatever works".
My heads were slightly worn and I have an older Holley Street dominator intake. Not knowing how well the end seals that came with the gasket would line up and observing the old ones to be split, it made sense to use just the Ultra Copper. The High tack on both sides of the gasket seemed like a reasonable approach. I just didn't want to have to do the job over if I didn't need too.
morgan
Joined: Mar 2011
Posts: 1,925
From: CT
Actually, the reason I'm asking this is because it didn't seem like a good idea to add silicone on top of the High Tack so I only used High Tack on both sides of the turkey tray with the Ultra Coppper on the ends of the block and it seems to be holding so far. I am concerned that without the water ports being circled with silicone that I would have a problem down the road.
There are so many opinions on what the best process is that it turns into a situation of "whatever works".
My heads were slightly worn and I have an older Holley Street dominator intake. Not knowing how well the end seals that came with the gasket would line up and observing the old ones to be split, it made sense to use just the Ultra Copper. The High tack on both sides of the gasket seemed like a reasonable approach. I just didn't want to have to do the job over if I didn't need too.
There are so many opinions on what the best process is that it turns into a situation of "whatever works".
My heads were slightly worn and I have an older Holley Street dominator intake. Not knowing how well the end seals that came with the gasket would line up and observing the old ones to be split, it made sense to use just the Ultra Copper. The High tack on both sides of the gasket seemed like a reasonable approach. I just didn't want to have to do the job over if I didn't need too.


