LOG IN
REGISTER
Forums
New User Forums
The Newbie Forum
Site Related
General
General Discussion
The Clubhouse
Repair & Restoration
Technical & Reference
Major Builds & Projects
Racing and High Performance
Engine
Transmission and Driveline
Chassis, Tires/Wheels, Brakes, & Related
Body & Paint
Electrical
Interior and Trim
Other
Vehicle Lineup
Cutlass, 442, and Hurst/Olds
Large Oldsmobiles
Final Years Oldsmobiles
Vintage Oldsmobiles
Toronado
Other Oldsmobiles
Classifieds
Buyer & Seller Feedback
Oldsmobile Cars
Oldsmobile Parts
Non-Oldsmobile Classified
Miscellaneous Classifieds
Marketplace
Vendor Directory
Become a Vendor
New Posts
Tools
Car Payment Calculator
Tire Rim Calculator
Recalls
Technical Service Bulletins (TSBs)
Members List
Live Feed
Gallery
View Dark Mode
Please register or login to enable Dark Mode.
Log In
Register
Threads
Google
Threads
Posts
Advanced
Dark Mode
Please register or login to enable Dark Mode.
Log In
Forgot your Password?
By logging into your account, you agree to our
Terms of Use
and
Privacy Policy
, and to the use of cookies as described therein.
Recent
Commented
Albums
My Pictures
My Post Pictures
stokerg
December 21, 2016
68
0
Sort:
Default
Default
Most Recent
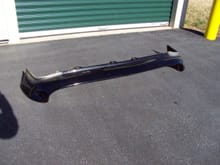
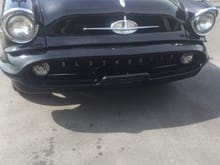
Several parts out being re-chromed and switching bumpers back to chrome
0
2016/12/21 17:21:25
stokerg
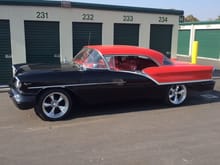
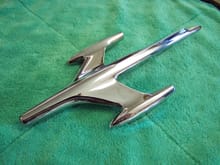
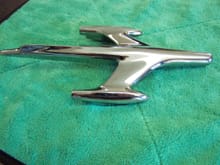
Beautiful original condition!!
0
2017/01/22 11:29:18
stokerg
0
2017/01/22 11:30:32
stokerg
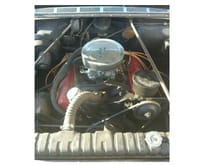
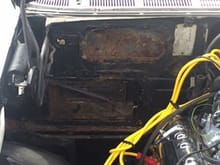
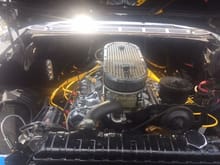
Here's what the engine compartment looked like when I first began. Someone removed the original J2 intake and installed an aftermarket carburetor. The engine compartment, wiring, etc... was a mess. Note the heater blower and the large air duct units on both the left and right behind the engine. These have since been removed and a plate to cover the entire firewall is under fabrication. I'll install a bolt on plate to cover the wiper motor in the center directly behind the air cleaner.
0
2017/03/04 12:23:43
stokerg
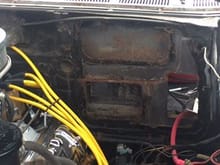
I've removed the ductwork, fan motor, heater core, etc... I made cardboard templates of the firewall area to be covered.
0
2017/03/26 19:19:57
stokerg
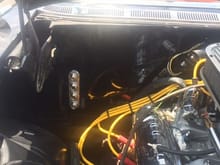
Passenger side engine compartment duct/heater core removed. A new 3/16" plate will be installed with a bulkhead fitting for the AC unit.
0
2017/03/26 19:22:32
stokerg
Drive side duct removed. The red cable was a temporary relocation as the battery was relocated to the trunk. This is where the hydroboost will be mounted.
0
2017/03/26 19:23:37
stokerg
0
2017/03/30 10:03:31
stokerg
Passenger side
0
2017/03/30 10:03:48
stokerg
driver side
0
2017/03/30 10:03:59
stokerg
This isn't the actual unit but looks like it...
0
2017/03/30 10:10:59
stokerg
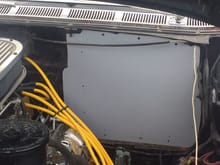
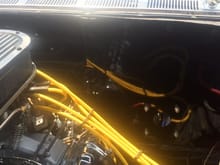
Its hard to see because of the black but the firwall panels have been panted gloss black and re-installed.
0
2017/07/27 13:44:35
stokerg
Passenger side panel with Heater & A/C connection mounting.
0
2017/07/27 13:46:36
stokerg
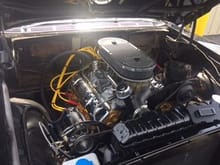
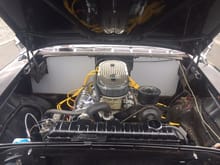
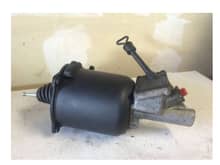
Driver side firewall panel. I used plastic bolt head covers to keep the panel looking neat. It provides a nice reflection of motor. Note mounting bolts for hydro-boost brake booster/master cylinder.
0
2017/07/27 13:48:42
stokerg
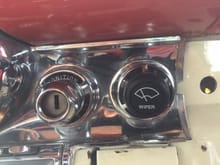
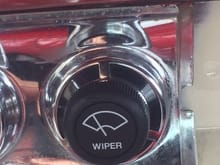
I replaced the vacuum based wiper motor with a new electrical unit from Yogi's. The motor bolted into place perfectly. The original wiper switch is to the left of the steering wheel and the new switch wouldn't fit in that location so I removed the cigarette lighter and mounted the wiper switch there using a spare "light switch bezel".
0
2017/07/27 13:52:56
stokerg
New
0
2017/07/27 13:56:42
stokerg
Installed a new electric wiper motor purchased from Yogi's and installed the switch where the cigarette lighter was using a spare light switch bezel
0
2017/07/27 13:58:49
stokerg
A closer up picture of wiper switch
0
2017/07/27 14:00:32
stokerg
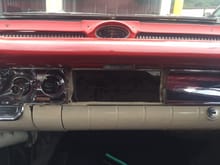
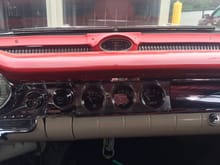
Since the stock radio was inadequate for my future needs (GPS, Backup camera, Stereo), I decided to remove it and install a set of 2-1/16" gauges in it's place... Here I cut the dash to accommodate the gauge set.
0
2017/07/27 14:02:12
stokerg
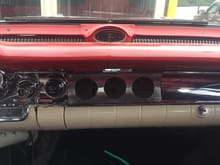
Using the original radio template, I bolted an aluminum panel with gauge cut-outs to the top & bottom chrome rails from the radio bezel.
0
2017/07/27 14:05:06
stokerg
The new template and gauges are set in place to check the fitment. Its not bolted in and will line up much better when tightened down but first, the new template is going to be wrapped with 3M chrome silver vinyl so it blends in with the dash.
0
2017/07/27 14:07:18
stokerg
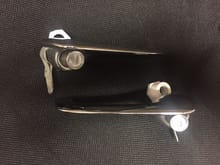
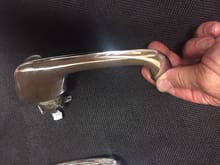
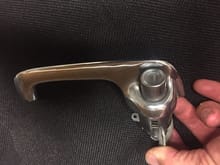
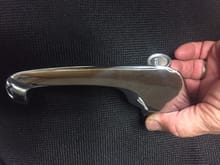
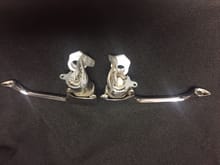
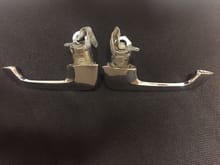
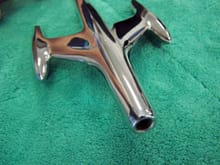
Very nice set of front door exterior handles for a 1957/1958 Oldsmobile Sedan or four door. NOTE: these do not fit a Super 88 hardtop or convertible! No pitting, very, very light scratches. I don't have keys but they can be made at a locksmith.
0
2017/07/30 09:13:30
stokerg
0
2017/07/30 09:13:31
stokerg
0
2017/07/30 09:13:32
stokerg
0
2017/07/30 09:13:33
stokerg
0
2017/07/30 09:13:34
stokerg
0
2017/07/30 09:13:35
stokerg
0
2017/12/13 09:56:28
stokerg
0
2017/12/13 09:56:45
stokerg
0
2017/12/13 09:56:56
stokerg
0
2017/12/13 09:57:07
stokerg
0
2017/12/14 06:39:03
stokerg
0
2017/12/14 06:39:18
stokerg
0
2017/12/14 06:39:36
stokerg
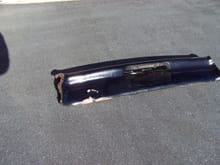
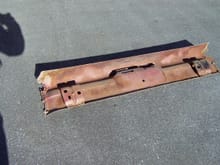
Solid top bumper, Good re-chroming candidate
0
2017/12/15 13:07:41
stokerg
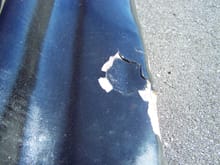
Surface rust but solid and straight
0
2017/12/15 13:07:55
stokerg
Looking to get $150 + shipping or pick it up with no shipping cost. Located in Hickory NC 28602 Gene 315-402-6166
0
2017/12/15 13:08:21
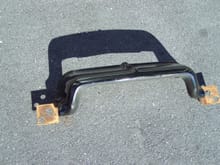
stokerg
Mounting brackets not included
0
2017/12/15 13:11:46
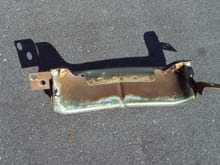
stokerg
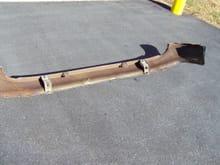
Surface rust but a solid piece
0
2017/12/15 13:11:56
stokerg
Looking to get $75 or best offer + shipping. Gene 315-402-6166 (pick it up without shipping cost Hickory, NC 28602)
0
2017/12/15 13:12:53
stokerg
First
Page
1 of 2
Last
Go To
Page
1
2
1 of 2
Go To
GO
Go to page
of 2
pages
1
2