LOG IN
REGISTER
Forums
New User Forums
The Newbie Forum
Site Related
General
General Discussion
The Clubhouse
Repair & Restoration
Technical & Reference
Major Builds & Projects
Racing and High Performance
Engine
Transmission and Driveline
Chassis, Tires/Wheels, Brakes, & Related
Body & Paint
Electrical
Interior and Trim
Other
Vehicle Lineup
Cutlass, 442, and Hurst/Olds
Large Oldsmobiles
Final Years Oldsmobiles
Vintage Oldsmobiles
Toronado
Other Oldsmobiles
Classifieds
Buyer & Seller Feedback
Oldsmobile Cars
Oldsmobile Parts
Non-Oldsmobile Classified
Miscellaneous Classifieds
Marketplace
Vendor Directory
Become a Vendor
New Posts
Tools
Car Payment Calculator
Tire Rim Calculator
Recalls
Technical Service Bulletins (TSBs)
Members List
Live Feed
Gallery
View Dark Mode
Please register or login to enable Dark Mode.
Log In
Register
Threads
Google
Threads
Posts
Advanced
Dark Mode
Please register or login to enable Dark Mode.
Log In
Forgot your Password?
By logging into your account, you agree to our
Terms of Use
and
Privacy Policy
, and to the use of cookies as described therein.
Recent
Commented
Albums
My Pictures
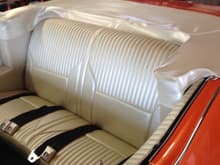
1968 442 convertible rebuild
Tom442
March 28, 2012
30
2
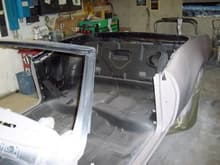
Pics of my car finally coming back together.
Read more »
Sort:
Most Recent
Default
Most Recent
Intrior 014
0
2014/08/20 20:20:15
Tom442
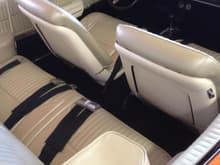
Front Seats 024
0
2014/08/20 20:20:15
Tom442
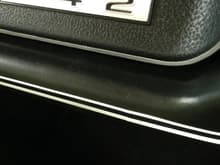
dash stripe 019
0
2014/08/20 20:20:15
Tom442
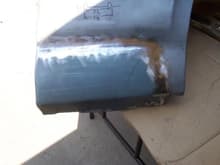
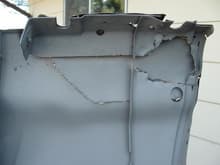
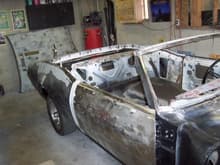
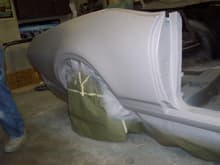
Here is my patch on passenger fender
0
2012/03/28 21:07:52
Tom442
Drivers side wasnt any better, inner brace Swiss Cheesed and a poorly welded in patch by a previous owner.
0
2012/03/28 21:07:52
Tom442
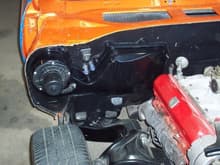
I cut out the inner brace and replaced it from a donor fender.
0
2012/03/28 21:07:52
Tom442
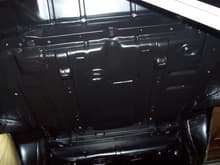
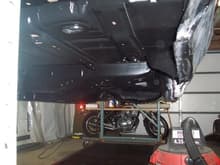
Underside where fuel tank goes all painted up.
0
2012/03/28 20:58:38
Tom442
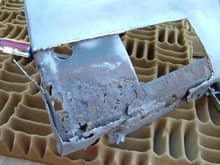
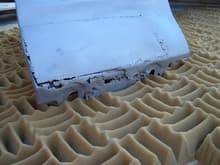
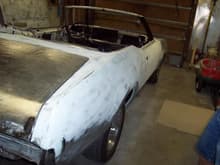
Previous owner patch panel on the dog leg of the fender. Blasting really shows you what you got.
0
2012/03/28 20:58:38
Tom442
After the bottom was completely stripped, patches were welded in drivers floor, left side trunk, right side trunk, both trunk drop offs and front floor pan brace. I painted the bottom with DP90.
0
2012/03/28 20:58:38
Tom442
Dura-glass skim coat on quarter that I welded in...guess it needed a little help.
0
2012/03/28 20:51:15
Tom442
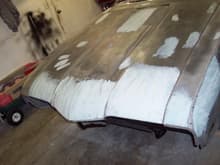
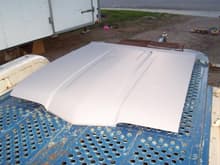
Hood needed a little help to get smooth.
0
2012/03/28 20:51:15
Tom442
Some Dura-glass skim coat.
0
2012/03/28 20:51:15
Tom442
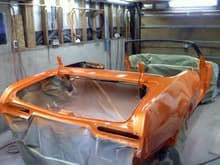
Some base sprayed on.
0
2012/03/28 20:48:13
Tom442
Right quarter was replaced.
0
2012/03/28 20:48:13
Tom442
Hood waiting for the color.
0
2012/03/28 20:48:13
Tom442
Fenders at the painters.
0
2012/03/28 20:42:46
Tom442
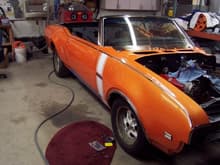
At the painters after getting cleared.
0
2012/03/28 20:42:46
Tom442
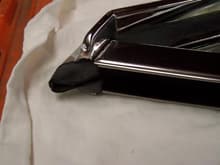
FYI, on the front window channel weatherstrip, they are side specific. Tiny "L" and tiny "R" in the rubber right above the hole where the screw goes in the upper vent window frame.
0
2012/03/28 20:42:46
Tom442
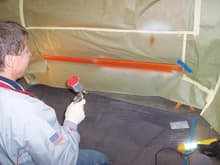
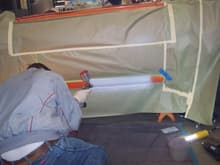
Spray a little color then some clear.
0
2012/03/28 20:37:07
Tom442
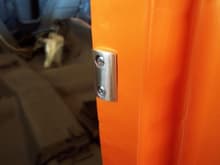
Convertible only brass door wedge cleaned up and shiny.
0
2012/03/28 20:37:07
Tom442
Then finish with a little wet sanding and buff it out and good as new...lessons learned the hard way. Thats how we learn I guess.
0
2012/03/28 20:37:07
Tom442
Some primer and base coat.
0
2012/03/28 20:33:32
Tom442
Stud gun and pulled the rocker dent. A little filler.
0
2012/03/28 20:33:32
Tom442
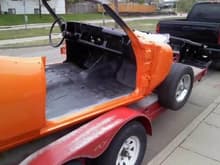
Had a slight problem bringing it home from the painter. My bad. Put your car in park as well as the tie downs.
0
2012/03/28 20:33:32
Tom442
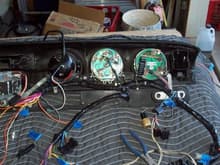
Backside of the instrument cluster. I removed the clock and fit a Sun tach.
0
2012/03/28 20:28:50
Tom442
A/C delete plated installed.
2
2012/03/28 20:28:50
Tom442
I used Ea$twoods trunk spatter paint. You have to spray their diamond clear (already sprayed in picture)on the spatter paint.
0
2012/03/28 20:28:50
Tom442
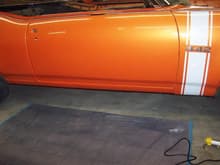
I have some body colored 15's ready. Just need some new T/A's.
0
2012/03/28 20:22:06
Tom442
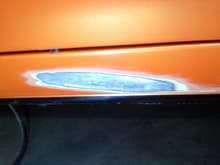
I riveted the stainless trim to the under bumper scoops.
0
2012/03/28 20:22:06
Tom442
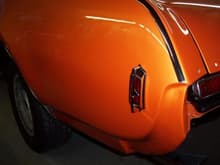
Quarter marker lights.
0
2012/03/28 20:22:06
Tom442