


63 Starfire Progress

Registered User
Joined: Oct 2013
Posts: 63
From: Edmonton, Alberta
No tricks. I just mixed the two parts on a piece of cardboard and I think I spread the glue on the air cleaner lid and put on the pie plate. I'm sure that if you went to a body shop, they would have some left over from a job that they would give you some.
Registered User
Joined: May 2006
Posts: 394
From: Ohio
Hey Don, what paint are you using under the hood? I am about to repaint my engine (got the engine paint from Fusicks while I was at the olds nats in Cincy a few weeks ago). I figured I might as well do some other detailing while I was in there 
Thread Starter
Registered User
Joined: Feb 2011
Posts: 1,192
For the engine I used Duplicolor Engine Enamel with Ceramic. Color DE 1615 Aluminum for the valve covers and misc parts, I cheated and used DE 1605 Ford Red for the block. Pretty close but a bit brighter than original. I used regular Krylon black for the rest. I used to use their semigloss black but they have changed it and it is now too flat so I used gloss black instead. If you want spend more money you can get factory semigloss from places like Eastwood. Post some pics!
Registered User
Joined: May 2006
Posts: 394
From: Ohio
I was going to go with Eastwood, but I figured there would have to be something better (and cheaper) that would look just as good. I am not doing a show car but want to spruce up the stuff while I had the intake off and changing valley pan gaskets anyway.
So the gloss isn't too glossy? I am sure the eastwood stuff works great, but I don't wanna spend that kind of cash for the black parts. Maybe for the cast iron stuff one day hehe but I just want to get the car on the road first. One thing at a time. I will post some picts though thanks!
So the gloss isn't too glossy? I am sure the eastwood stuff works great, but I don't wanna spend that kind of cash for the black parts. Maybe for the cast iron stuff one day hehe but I just want to get the car on the road first. One thing at a time. I will post some picts though
thanks!
Thread Starter
Registered User
Joined: Feb 2011
Posts: 1,192
Thread Starter
Registered User
Joined: Feb 2011
Posts: 1,192
We're having nice fall weather here in the 70s and low 80s so I'm knocking a few more things off my list. First is detailing the doors including removing and cleaning the interior door panels, lubricating the window mechanisms and replacing the door weatherstripping. The driver's door looked good under the upholstery with the original factory red oxide primer like the floors. The door edges and jambs were repainted with the car but appear to be rust free. The new weatherstrip is A &M Soffseal (from Fusick), very good quality and perfect fit. I'll start the passenger side tomorrow.
Thread Starter
Registered User
Joined: Feb 2011
Posts: 1,192
Wow, I can't believe it has been so long since I posted to this thread! I haven't done much except drive this car, I did start cleaning up the trunk and will add some pictures later. I do have one issue that I need help with, the summer heat has hit and I took it out for a long ride with the A/C on and it puked coolant all over the garage floor. I found out the cap was bad, the rubber on the bottom seal is shot. Since I have to replace that I want to finally add a coolant recovery tank along with the right kind of cap to allow the coolant to flow back in when the car cools off. Has anyone done this successfully on a similar car, say 61 to 64 full size? If so can you tell me which tank and cap to buy? Also where did you mount the tank? Any help will be appreciated, thanks.
Thread Starter
Registered User
Joined: Feb 2011
Posts: 1,192
Well, I didn't hear from anyone so I went ahead with the addition of a coolant recovery system. The car was puking coolant without one but that was made worse by the fact my old radiator cap was shot, see the picture. If you haven't checked your cap lately do it now, I should have done mine a long time ago!
I decided to remove the old cracked windshield washer tank on the front of the core support and put the recovery tank there. I found a nicely sized universal tank at NAPA and also bought a new 16 lb. vented cap. I threw away the old flimsy overflow hose and replaced it with 3/8" fuel hose. I used a Greenlee knockout punch to make a hole under the tank inlet and routed the hose to that point. By the way, if you do not have a set of these punches get some, they make perfect holes in sheet metal and can be found cheaply on Ebay.
I connected the hose, added a piece of heater hose at the hole to protect it, and zip-tied everything in place. One of the tank brackets even lined up with the old washer tank mounting hole. I filled the radiator all the way to the top then added about an inch of coolant to the tank. I took it for a ride this morning with the A/C on and the coolant level went up about 1 1/2" so it appears to be working. This will work for me since I don't use my windshield washers but a different tank location would be needed to retain them.
I decided to remove the old cracked windshield washer tank on the front of the core support and put the recovery tank there. I found a nicely sized universal tank at NAPA and also bought a new 16 lb. vented cap. I threw away the old flimsy overflow hose and replaced it with 3/8" fuel hose. I used a Greenlee knockout punch to make a hole under the tank inlet and routed the hose to that point. By the way, if you do not have a set of these punches get some, they make perfect holes in sheet metal and can be found cheaply on Ebay.
I connected the hose, added a piece of heater hose at the hole to protect it, and zip-tied everything in place. One of the tank brackets even lined up with the old washer tank mounting hole. I filled the radiator all the way to the top then added about an inch of coolant to the tank. I took it for a ride this morning with the A/C on and the coolant level went up about 1 1/2" so it appears to be working. This will work for me since I don't use my windshield washers but a different tank location would be needed to retain them.

Registered User
Joined: Apr 2015
Posts: 11
I know this thread is a few years old but hope it will still reach you. I have a 63 Starfire convertible and am researching replacement of the transmission. You installed the TH 400 and I am curious how that worked out. Please respond so I can ask additional questions.

Registered User
Joined: Sep 2009
Posts: 92
Hello Bob, I am not sure if Don has done this, but here the guy to talk to: Tony at Ross Racing. He is the best, and will set you up with anything for the conversion. Not cheap, though....:http://rossracingengines.com/c/5/old...early-catalog/
I don't know if this adapter will work on a 700R4, but it works great on a TH400, as I have one on mine. No issues at all, and I drive my Starfire daily now.
I don't know if this adapter will work on a 700R4, but it works great on a TH400, as I have one on mine. No issues at all, and I drive my Starfire daily now.
Thread Starter
Registered User
Joined: Feb 2011
Posts: 1,192
Bob, I have not done this conversion, I still have the original Slim Jim. You should look at Dutch Injun's thread plus do a search on here for other trans conversion threads, there are quite a few.
Thread Starter
Registered User
Joined: Feb 2011
Posts: 1,192
Not sure but I think the original pipes were 2". I went to 2 1/4". I had a custom system installed to mimic what came on late 60s Mopar musclecars, with an H pipe connecting the head pipes and two large reverse flow "Hemi" mufflers but no resonators. These are stock type reverse flow mufflers, not any brand. It has a nice low rumble at idle and you can hear it inside the car but very mellow, no drone. I think the original exhaust had steelpacks and resonators so mine is probably quieter than stock. Go back to page 1 of this thread for photos.
Thread Starter
Registered User
Joined: Feb 2011
Posts: 1,192
Since I got my 67 GTX and put my 34 Packard up for sale I have had to rent a garage and store the Starfire. (See my other post: https://classicoldsmobile.com/forums...el-1100-a.html ). I am hoping the Packard sells quickly, I don't like to have any cars at remote sites. I went there today and took it for some exercise, I hope to take it out every couple of weeks to keep all the juices flowing...
Thread Starter
Registered User
Joined: Feb 2011
Posts: 1,192
My Packard has not yet sold so I put it in the storage garage and took the Starfire home. I want to take advantage of the fall weather and get a few more things done. Since the brakes have never been quite right on this car I decided to remove the booster and send it out to be rebuilt. While that is being done I'm going to finish the underhood detailing. I removed the hood, cowl panel, wiper motor and got the booster out today. I was going to try leaving the master cylinder attached but when I actually looked at it closely I decided to remove it. With the MC out of the way removing the booster was actually pretty easy. I'm pretty sure I found my problem as the booster was full of old brake fluid! I dumped at least a pint of the disgusting stuff before packing and shipping it to Booster Dewey.
I'm also planning to replace some steering linkage pieces, I'll keep you posted.
I'm also planning to replace some steering linkage pieces, I'll keep you posted.
Registered User
Joined: May 2006
Posts: 394
From: Ohio
How much will it cost to get your booster rebuilt? I am working on my 62 Starfire now and trying to find some info out.. like who does a good booster rebuild. Also, where did you get your motor/transmission mounts from? I found some on rock auto and summit (Made by Anchor for the drivers side.. DEA and Westar for the pass side and front motor mount)...but is there really a difference between those and the very expensive ones from Fusicks/ USA parts supply??? I am starting to gather a lot of parts so I thought I would ask.
Thread Starter
Registered User
Joined: Feb 2011
Posts: 1,192
The booster will cost me around $220 including zinc dichromate replating and shipping. I bought my mounts from Fusick. My experience with the quality of Rock Auto stuff has been poor, not sure about Summit.
Registered User
Joined: Nov 2006
Posts: 1,918
From: SE Wisconsin
I had my booster rebuilt by Brake Mat'ls & Parts out of Ft. Wayne, IN. Cost was $185. I was very satisfied and give them a high recommendation!
http://brakematerialsandparts.webs.c...rebuilding.htm
http://brakematerialsandparts.webs.c...rebuilding.htm
Thread Starter
Registered User
Joined: Feb 2011
Posts: 1,192
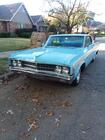
Continuing work on detailing the engine compartment. I took off the hood hinges and all the hardware around the cowl then cleaned it all up for repaint. As usual a ton of masking for a very small area of paint. I also cleaned and painted the wiper motor, it all looks a lot better. I need to move the hood to another location where I can work on it but will need some help for that!
Registered User
Joined: Jul 2009
Posts: 3,191
From: Dallas-Fort Worth
Very nice detail Don. I just discovered on the 62 the wipers do not work, but there's power to the motor. From your pictures looks the same motor-2 speed-but they moved it in 63. Did you sell the other cars yet?
Thread Starter
Registered User
Joined: Feb 2011
Posts: 1,192
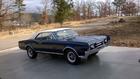
Putting that car up for sale has been an interesting but so far disappointing experience. The market for 30s prewar cars is not what it used to be. It also seems that all the talk about there being high demand for original cars is just talk. I've lowered my price as far as I will and if it doesn't sell I'll keep it.
Thread Starter
Registered User
Joined: Feb 2011
Posts: 1,192
Continuing with my cowl and firewall detailing, I took off the black plastic vacuum storage tank that is used for the HVAC controls. I tested it and it leaks, another reason my system doesn't work well! I need a replacement tank and started a new thread here:
https://classicoldsmobile.com/forums...tml#post867526
https://classicoldsmobile.com/forums...tml#post867526
Thread Starter
Registered User
Joined: Feb 2011
Posts: 1,192
Moving right along, I got my brake booster back from Booster Dewey on Friday. I paid them extra to replate it in factory zinc dichromate, it looks great. Yesterday I reinstalled the booster, master cylinder, vacuum tanks, and wiper motor along with new vacuum lines. Good thing I pulled off all the lines, I found a crack in one that I thought I had replaced before but apparently never did. Now I'll see if the brakes need bleeding and start the engine to check vacuum readings, fingers crossed!
Thread Starter
Registered User
Joined: Feb 2011
Posts: 1,192
Slow progress. I cleaned and painted the hood hinges, cowl trim panel and loose hood parts and got the cowl panel installed. I lost a day because I had to cram our good daily driver in the garage due to a hail prediction, but we dodged the bullet. I also found a fuel leak at the line entry to my carburetor, I had fixed this before but it came back. I took it apart and resealed the fittings, I will start it today so my fingers are crossed.
Thread Starter
Registered User
Joined: Feb 2011
Posts: 1,192
Today is a good day! I started it up and took it for a short ride. I now have fully working power brakes for the first time since I bought this car! I also lucked out, I removed the master cylinder and capped the lines while the booster was rebuilt. I reinstalled it and topped off the fluid, pumped it a few times and had a hard pedal without bleeding. Third and last good thing for today, no more fuel leak, the resealed fittings are dry - thank you.
Registered User
Joined: Jul 2009
Posts: 3,191
From: Dallas-Fort Worth
That's nice Don. I will be out wrenching over the weekend. Will carefully take the wiper motor apart on the 88, and start getting the 67 442 for sale...FYI-I started a post in the "electrical" section titled-62 88 wiper motor issues and will continue to post the progress. Seems this is another area where these early 60"s Big cars need help in alot areas...And thanks again for your contributions....
Registered User
Joined: Dec 2012
Posts: 1,589
From: Texas
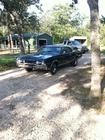
Hey Don, great work and beautiful car. FYI your air cleaner looks a whole lot like the cleaner on my 67 442. I bought a pie pan retainer for mine that may very well work on yours too. Its a chrome cup that fits into the cup of the air cleaner. It has a lip that holds the pie pan on. Your carb stud comes up through it and the wing nut holds it all down. Not sure where i got it but i think it was OPGI. Part number CT20110, $27.99 kind of pricey, but it works. I looked at Fusicks and Inline Tube and didnt see it there. I have 2 air cleaners and 2 pie pans that it works on and only one retainer, SO if you buy one and it dosent work i will buy it from you so your not stuck with something that you dont need because of my recomendation. Ill use it, so thats my deal if you want to give it a try. You can look it up on their site see what you think.
Anyway keep up the great work.
Steve
Anyway keep up the great work.
Steve
Registered User
Joined: Dec 2012
Posts: 1,589
From: Texas
Heres a pic of the retainer although its not bolted down, and its on my open element air cleaner. My original cleaner looks ALOT like yours, maybe the same. Once its bolted down it should hold the pan firmly down and flat on the lid. If not then i will glue it and then the retainer might hold it in place so it dosent release from the glue.
Last edited by steverw; Nov 6, 2015 at 08:18 PM.
Thread Starter
Registered User
Joined: Feb 2011
Posts: 1,192
Hey Don, great work and beautiful car. FYI your air cleaner looks a whole lot like the cleaner on my 67 442. I bought a pie pan retainer for mine that may very well work on yours too. Its a chrome cup that fits into the cup of the air cleaner. It has a lip that holds the pie pan on. Your carb stud comes up through it and the wing nut holds it all down. Not sure where i got it but i think it was OPGI. Part number CT20110, $27.99 kind of pricey, but it works. I looked at Fusicks and .
Steve
Steve
Thanks Steve, I've seen these before, think I had one on my 67 Toronado years ago. I'll look at it but I would still have to glue mine down. After my last fiasco (used the wrong adhesive that couldn't take the heat) I've been working on other things but I do need to get it done.


