And Here we go...
 February 6th, 2013, 07:18 PM
#161
Registered User
Thread Starter

Join Date: Jul 2011
Posts: 288
Here's a thought. Get ahold of John (2blue442) Eric (Jensenracing77) or Scott (oldspackrat) and see if any of them have the rear brace on a junker fender. They may be willing to cut that part of the fender for you and ship it so you'll have the benefit of a proper brace and support on your car. I can appreciate how frustrating it is to go through all this. Didn't realize someone had cut that brace on you. It really should be there for the support it provides. It's also part of the lower rad/fender support bracket attachment and needs to be fairly solid. Thin gauge patch panel won't give you that. Sorry if this sounds like I'm a harbinger of bad news. I'm just suggesting it since it sounds like you really would prefer to do the repair properly.
 February 9th, 2013, 09:55 AM
#162
Registered User
Thread Starter
Join Date: Jul 2011
Posts: 288
Here's a thought. Get ahold of John (2blue442) Eric (Jensenracing77) or Scott (oldspackrat) and see if any of them have the rear brace on a junker fender. They may be willing to cut that part of the fender for you and ship it so you'll have the benefit of a proper brace and support on your car. I can appreciate how frustrating it is to go through all this. Didn't realize someone had cut that brace on you. It really should be there for the support it provides. It's also part of the lower rad/fender support bracket attachment and needs to be fairly solid. Thin gauge patch panel won't give you that. Sorry if this sounds like I'm a harbinger of bad news. I'm just suggesting it since it sounds like you really would prefer to do the repair properly.
Hi Allan,
You are right I should replace these....they are going to check their stock. Any idea if these can be purchased aftermarket in case I have no luck ? I looked at the usual suppliers and dont see this part.
February 9th, 2013, 10:26 AM
#163
Just an Olds Guy
Join Date: Jul 2008
Location: Edmonton, AB. And "I am Can 'eh' jun - eh"
Posts: 24,525
Unfortunately they are part of the fender assembly and are not re-popped by any of the vendors I know of either. Only way I know to get them is from a donor fender.
I suppose you could always call GM Goodmark and ask if they sell just the fender brace. Can't hurt to ask
I suppose you could always call GM Goodmark and ask if they sell just the fender brace. Can't hurt to ask
Questions or need help? Call Toll Free (877) 477-3577
February 9th, 2013, 12:30 PM
#164
Registered User
Thread Starter
Join Date: Jul 2011
Posts: 288
I watched a video on you tube of a guy cutting a piece of an aftermarket one and patching it in so someone sells them.
I'll see if someone has one first.
Thanks
February 9th, 2013, 01:04 PM
#167
Just an Olds Guy
Join Date: Jul 2008
Location: Edmonton, AB. And "I am Can 'eh' jun - eh"
Posts: 24,525
Yes! Very nice work. Only thing is there are waaay more aftermarket sheet metal parts for old fords, trucks and mopar. I don't know if Chevy, Buick or Pontiac fender braces will work?? Olds is still the wallflower at the dance. I've been doing some web browsing looking for that piece and so far - nothing.
February 9th, 2013, 01:11 PM
#168
Registered User
Thread Starter
Join Date: Jul 2011
Posts: 288
Yes! Very nice work. Only thing is there are waaay more aftermarket sheet metal parts for old fords, trucks and mopar. I don't know if Chevy, Buick or Pontiac fender braces will work?? Olds is still the wallflower at the dance. I've been doing some web browsing looking for that piece and so far - nothing.
I had no luck either....I know where a 69 442 is here locally that is in rough shape and I think he may be willing to part with a few pieces. I dont know how close they would be.
Hopefully one of theu guys you recommended will have a set...I also bounced an e-mail to that millionsandtrillions outfit in Tulsa.
February 9th, 2013, 01:57 PM
#169
Just an Olds Guy
Join Date: Jul 2008
Location: Edmonton, AB. And "I am Can 'eh' jun - eh"
Posts: 24,525
Just sent an email to a company called C2C. They make sheetmetal parts for cars. I found them through a link on this site. Hopefully they have a brace - I'll get back to you soon as I hear from them.
69 fender braces? Not sure, but if it's close to you go have a look and see it it looks close. Sure can't hurt...
69 fender braces? Not sure, but if it's close to you go have a look and see it it looks close. Sure can't hurt...
February 9th, 2013, 04:37 PM
#170
Registered User
Thread Starter
Join Date: Jul 2011
Posts: 288
no wonder my fenders were off...I knew they were a bit longer but after fianlly getting at them I realized that whoever did it cut about 4" of the botton and welded a full patch panel over the fender and not a butt weld. I am going to cut them off and see what I can do.
I'll put the skin on and hopefully put the brace in later.
I'll put the skin on and hopefully put the brace in later.
February 9th, 2013, 04:56 PM
#171
Just an Olds Guy
Join Date: Jul 2008
Location: Edmonton, AB. And "I am Can 'eh' jun - eh"
Posts: 24,525
So they were guessing on the finished length? Sorry to hear that. If you run into any snags with the fitment, LMK and I'll take some pics of mine for you. I still have the inner liners out so it might be easier to get the shots you want. My guess is you're going to find a fair bit of filler on the outside of the fender at that weld.
February 9th, 2013, 07:37 PM
#172
Registered User
Thread Starter
Join Date: Jul 2011
Posts: 288
So they were guessing on the finished length? Sorry to hear that. If you run into any snags with the fitment, LMK and I'll take some pics of mine for you. I still have the inner liners out so it might be easier to get the shots you want. My guess is you're going to find a fair bit of filler on the outside of the fender at that weld.
February 10th, 2013, 10:29 AM
#173
Registered User
Thread Starter
Join Date: Jul 2011
Posts: 288
So they were guessing on the finished length? Sorry to hear that. If you run into any snags with the fitment, LMK and I'll take some pics of mine for you. I still have the inner liners out so it might be easier to get the shots you want. My guess is you're going to find a fair bit of filler on the outside of the fender at that weld.
Hi Allan...can you get me one more measurement before I attemp this...just like before but on the black line. I got one shot at this and I dont want to screw it up.
February 11th, 2013, 06:05 PM
#174
Just an Olds Guy
Join Date: Jul 2008
Location: Edmonton, AB. And "I am Can 'eh' jun - eh"
Posts: 24,525
Ok, I did that measurement as best I could and it came to 706 mm or 27.79". I hope that works for you. I know if you use both of those measurements you're going to be awfully close to putting on a perfect fitting fender. LMK how this works out.
Also got an email back from C2C
Also got an email back from C2C
I wish that we could help you however we do not make those nor do we have a source on them.
Michael Laiacono
Classic 2 Current Fabrication
www.c2cFabrication.com
Michael Laiacono
Classic 2 Current Fabrication
www.c2cFabrication.com
February 11th, 2013, 06:12 PM
#175
Registered User
Thread Starter
Join Date: Jul 2011
Posts: 288
Ok, I did that measurement as best I could and it came to 706 mm or 27.79". I hope that works for you. I know if you use both of those measurements you're going to be awfully close to putting on a perfect fitting fender. LMK how this works out.
Also got an email back from C2C
Also got an email back from C2C
I got the same reply from goodwrench. There was a vid on youtube where a patch for a pontiac had a pretty simple brace. If all else fails i'll try to fab one.
Pics to follow.
February 16th, 2013, 11:32 AM
#176
Registered User
Thread Starter
Join Date: Jul 2011
Posts: 288
welding done...almost
Apart from making up some sort of inner brace the fenders are ready for epoxy. All in all I am very please with the way they turned out. I just laid the fender on the car...no bolts and the profile is very nice. Plan is to put the fender on align the doors and do the body work. I plan on dismantling for paint.
February 16th, 2013, 12:56 PM
#178
Registered User
Join Date: Jun 2010
Location: Rogues Island, USA
Posts: 3,613
When I watch guys like in that video do body work I'm so impressed. It's like watching someone play an instrument. I can't do either. I'll be learning to do my own body work though once I start on my Cutlass. It will be fun to learn.
February 21st, 2013, 02:21 PM
#180
Registered User
Thread Starter
Join Date: Jul 2011
Posts: 288
I agree ... it is an awesome job. Other than when I was 18 and used a few cans of bondo this is my first real kick at it. I can't do it like the guy in the video but I can try. I am not building a show car so when I am driving by the guy on the side of the road cant tell the difference.
February 21st, 2013, 02:24 PM
#181
Registered User
Thread Starter
Join Date: Jul 2011
Posts: 288
So they were guessing on the finished length? Sorry to hear that. If you run into any snags with the fitment, LMK and I'll take some pics of mine for you. I still have the inner liners out so it might be easier to get the shots you want. My guess is you're going to find a fair bit of filler on the outside of the fender at that weld.
Hi Allan,
Looks like your car has chrome here but do you know if the fender bottom goes tight to the rocker or is it gapped the same as the door.
February 21st, 2013, 02:48 PM
#182
Just an Olds Guy
Join Date: Jul 2008
Location: Edmonton, AB. And "I am Can 'eh' jun - eh"
Posts: 24,525
I think you forgot to attach the pic. I don't have the inner liners on my car yet so I went and checked. The fender appears to be tight to the rocker panel on the bottom. I noted it has about a 1/8" shim where it attaches to the fender brace though. (passenger side) The DS is buried too close to the wall right now to check for you.
There is a gap between the fender and the cowl, but I don't think that's what you're asking about?
There is a gap between the fender and the cowl, but I don't think that's what you're asking about?
February 21st, 2013, 03:15 PM
#183
Registered User
Thread Starter
Join Date: Jul 2011
Posts: 288
I think you forgot to attach the pic. I don't have the inner liners on my car yet so I went and checked. The fender appears to be tight to the rocker panel on the bottom. I noted it has about a 1/8" shim where it attaches to the fender brace though. (passenger side) The DS is buried too close to the wall right now to check for you.
There is a gap between the fender and the cowl, but I don't think that's what you're asking about?
There is a gap between the fender and the cowl, but I don't think that's what you're asking about?
yeah sorry about that...trigger happy. It looks like it is a tight fit from some for sale ad's I have been browsing.
February 21st, 2013, 03:59 PM
#184
Just an Olds Guy
Join Date: Jul 2008
Location: Edmonton, AB. And "I am Can 'eh' jun - eh"
Posts: 24,525
Ok, now I know what you're talking about. Yes, the fender should be tight to the rocker. I haven't ever seen them with a gap there at all.
If you google 71 442's you will get a better idea of the fitment. None of the 70-72 442's had rocker stainless. The fit between fender/rocker appears so tight as to almost be invisible from a distance.


This one probably shows it the best. I think the trick is to get the door gaps perfect and the fender to rocker gap takes care of itself?

If you google 71 442's you will get a better idea of the fitment. None of the 70-72 442's had rocker stainless. The fit between fender/rocker appears so tight as to almost be invisible from a distance.
This one probably shows it the best. I think the trick is to get the door gaps perfect and the fender to rocker gap takes care of itself?
February 21st, 2013, 05:22 PM
#185
Registered User
Thread Starter
Join Date: Jul 2011
Posts: 288
Ok, now I know what you're talking about. Yes, the fender should be tight to the rocker. I haven't ever seen them with a gap there at all.
If you google 71 442's you will get a better idea of the fitment. None of the 70-72 442's had rocker stainless. The fit between fender/rocker appears so tight as to almost be invisible from a distance.
This one probably shows it the best. I think the trick is to get the door gaps perfect and the fender to rocker gap takes care of itself?
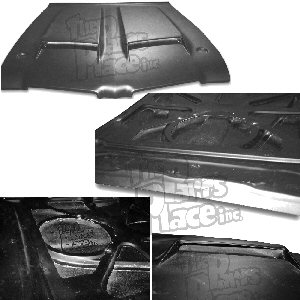
Awesome thanks....would love to get me one of those OAI hoods. Decided to change it up a bit tonight. I am cleaning up the engine wiring harness and rewrapping it. I'll Post some before and after pics when I'm finished.
February 21st, 2013, 06:12 PM
#186
Just an Olds Guy
Join Date: Jul 2008
Location: Edmonton, AB. And "I am Can 'eh' jun - eh"
Posts: 24,525
I went and looked at that fit on my car. You're right that I have stainless over top, but with the door open and looking straight down between the fender and rocker I don't think there's more than 1/16" gap at the outside edges.
Those OAI hoods you can get as straight fibreglass with functional airbox for around 558.00 all the way up to the uber pricey 2500.00 Thornton hood.
From what others have said about fitting the all fibreglass ones, it's a bit of a crapshoot on how the surfaces line up beside the fender. Most of the problems that have been discussed relate to shaving the rear of the hood so the rear hood stainless will fit.
Here's a pic I took showing the fender to rocker gap on my car. Sorry I couldn't hold the measure for you - had a light in one hand and camera in the other. The gap that would show on the outside is very small
February 21st, 2013, 07:29 PM
#187
Registered User
Thread Starter
Join Date: Jul 2011
Posts: 288
I went and looked at that fit on my car. You're right that I have stainless over top, but with the door open and looking straight down between the fender and rocker I don't think there's more than 1/16" gap at the outside edges.
Those OAI hoods you can get as straight fibreglass with functional airbox for around 558.00 all the way up to the uber pricey 2500.00 Thornton hood.
From what others have said about fitting the all fibreglass ones, it's a bit of a crapshoot on how the surfaces line up beside the fender. Most of the problems that have been discussed relate to shaving the rear of the hood so the rear hood stainless will fit.
Here's a pic I took showing the fender to rocker gap on my car. Sorry I couldn't hold the measure for you - had a light in one hand and camera in the other. The gap that would show on the outside is very small
For 558...that must be a pin on ? Is this a Tamraz ?
February 21st, 2013, 10:05 PM
#188
Just an Olds Guy
Join Date: Jul 2008
Location: Edmonton, AB. And "I am Can 'eh' jun - eh"
Posts: 24,525
I think 558 was the 'old' price. Everything seems to be more expensive now. Problem with them is you need weaker hood springs and there's no hood latching system with it.
Only other one I've seen with reinforcement for stock hinges and hood latch is the one from fibreconcepts. It runs 799.00 + pallet & shipping.
Both Tamraz and Parts Place sell the all fibreglass with functional air box.
Tamraz: http://www.ebay.ca/itm/71-72-1971-19...ht_3861wt_1024 - it's gone up to 790.00 + shipping.
Parts Place: BP5094T - 589.00
(1971 - 1972 Cutlass/442) FIBERGLASS W-25 442 RAM AIR HOOD - BOLT ON (CORRECT LOOKING FIBERGLASS UPPER TOP PANEL, AIR BOX WITH FACTORY LOOK FIBERGLASS FRAME)
VFN : 71-72 442 Ram Air Bolt On Hood W/ Airbox. Price=595.00 Weight=38 Ship: Truck Freight. Has screening for air cleaner.
February 26th, 2013, 04:54 PM
#189
Registered User
Thread Starter
Join Date: Jul 2011
Posts: 288
I think 558 was the 'old' price. Everything seems to be more expensive now. Problem with them is you need weaker hood springs and there's no hood latching system with it.
Only other one I've seen with reinforcement for stock hinges and hood latch is the one from fibreconcepts. It runs 799.00 + pallet & shipping.
Both Tamraz and Parts Place sell the all fibreglass with functional air box.
Tamraz: http://www.ebay.ca/itm/71-72-1971-19...ht_3861wt_1024 - it's gone up to 790.00 + shipping.
Parts Place: BP5094T - 589.00
(1971 - 1972 Cutlass/442) FIBERGLASS W-25 442 RAM AIR HOOD - BOLT ON (CORRECT LOOKING FIBERGLASS UPPER TOP PANEL, AIR BOX WITH FACTORY LOOK FIBERGLASS FRAME)
VFN : 71-72 442 Ram Air Bolt On Hood W/ Airbox. Price=595.00 Weight=38 Ship: Truck Freight. Has screening for air cleaner.
I almost had a momement of weakness and ordered one of those. I am going to stick with my good hood for now until I get closer to paint anyway. Thanks for the info
February 26th, 2013, 05:05 PM
#190
Registered User
Thread Starter
Join Date: Jul 2011
Posts: 288
off to the trunk lid...
Well I got my harness re wraped and I am quite pleased with it. I got some pics but they are not that good.
I am off to the trunk lid now...I got a bit carried away cutting out some small blisters and now I find myself having to do a lot of welding to insert a couple of patches. The metal is real thin in those areas so I am probably better off. I know where I can buy a good rust free lid in my area for a real good price but unfortunately it is off a cutlass S.
My pics failed to upload....too large. Will take again later....in for the night now.
I am waiting from some RAD and Heater hoses to finish hooking up the motor. I want to change the pace a bit and try and fire that engine up. Time for a drink !
February 27th, 2013, 04:00 PM
#191
Just an Olds Guy
Join Date: Jul 2008
Location: Edmonton, AB. And "I am Can 'eh' jun - eh"
Posts: 24,525
Unfortunately the Cutlass S deck lid is also a different contour also than the CS. Good thing is you can take a donor deck lid from any 70-72 CS, and IIRC pretty sure the Cutlass sedans also used the same deck lid as the CS
March 24th, 2013, 08:32 AM
#192
Registered User
Thread Starter
Join Date: Jul 2011
Posts: 288
I want to paint the steering column and put it back in before I get to far ahead...any idea what type of paint you put on there. I dont want to get a quart of anything mixed for this...hoping something from a can would be close.
March 24th, 2013, 02:47 PM
#193
Just an Olds Guy
Join Date: Jul 2008
Location: Edmonton, AB. And "I am Can 'eh' jun - eh"
Posts: 24,525
Use a satin finish. I just went back and looked at your Freemont build sheet. Noticed you have a 'special order' car there. Look at the right side of the build sheet and you will see Y68 and in the middle section of the sheet you will see 2X Bypass code 2. To the right it also specifies 'customer order'.
Any chance you can post your cowl tag with the paint codes and such on it? I know we discussed this a long time ago and your car was originally green but now I'm really curious to see if the cowl tag has some other fisher body info on it.
Any chance you can post your cowl tag with the paint codes and such on it? I know we discussed this a long time ago and your car was originally green but now I'm really curious to see if the cowl tag has some other fisher body info on it.
March 27th, 2013, 06:30 PM
#194
Registered User
Thread Starter
Join Date: Jul 2011
Posts: 288
Use a satin finish. I just went back and looked at your Freemont build sheet. Noticed you have a 'special order' car there. Look at the right side of the build sheet and you will see Y68 and in the middle section of the sheet you will see 2X Bypass code 2. To the right it also specifies 'customer order'.
Any chance you can post your cowl tag with the paint codes and such on it? I know we discussed this a long time ago and your car was originally green but now I'm really curious to see if the cowl tag has some other fisher body info on it.
Any chance you can post your cowl tag with the paint codes and such on it? I know we discussed this a long time ago and your car was originally green but now I'm really curious to see if the cowl tag has some other fisher body info on it.
April 2nd, 2013, 06:16 PM
#195
Registered User
Thread Starter
Join Date: Jul 2011
Posts: 288
hi Allan,
here is what I can read...it is hard to see with the primer on there.
St70-342 7 bf 03563 4 ( the 4 is a different stamping) bdy
tr 997 dbu 45 45 pn
018 26176 930089
not sure if everything is correct but in the lighting I had I tried my best.
April 10th, 2013, 12:58 PM
#196
Just an Olds Guy
Join Date: Jul 2008
Location: Edmonton, AB. And "I am Can 'eh' jun - eh"
Posts: 24,525
Sorry to take so long getting back.
From what I can see it should go like this:
ST 70 - 1970 model production
3 - Oldsmobile
42 - (4200 series) = Cutlass Supreme
57 - (there should be a '5' in front of the 7) 2 door HT Holiday Coupe. You'll see 34257 on your build sheet in box 25.
BF - Production Plant = Freemont
03563 - Fisher assigned body number (not related to VIN)
4 - Not really sure. I've seen 1 and 2 here, but not 4
TR997 - Ivory themed interior
dbu - ??? Double check this. It may be just hard to read but it may be A65? Do you have a split bench seat or bucket seats. If buckets it likely is A51
PNT 45 45 - Lower and upper paint color (aspen green)
018 - Odd. Check again. I believe this should read 01B (your build sheet shows sequencing for Jan 9, which would correspond. The build date code on the cowl is always number/letter. Number is the month, letter indicates the calendar week of production.
26176 - this should be 261765. It will match the the job production sequence in box 24 of the build sheet.
930089 - this is another reference to production sequence. Comes from box 1 and box 10 information.
I have only seen the last series of codes on cars that were either special ordered or customer ordered.
If you look at the middle part of your build sheet you will also see V48 which identifies this car as a Canadian Export. Interesting that the car was originally ordered and delivered to Fort McLeod in southern Alberta. Lucky you, they are still in business today! Scougall Motors Fort McLeod
April 10th, 2013, 01:12 PM
#197
"Car"mudgeon
Join Date: Feb 2011
Location: Perry, GA
Posts: 5,191
Allan is quite the wealth of knowledge and I for one am proud to be able to call him a good friend of mine 
Clcutlass your build is coming along quite nicely Keep up the good work and the pics coming
Clcutlass your build is coming along quite nicely
Keep up the good work and the pics coming
July 4th, 2013, 03:06 PM
#198
Registered User
Thread Starter
Join Date: Jul 2011
Posts: 288
Thanks..been a while since I was in the garage...had some back issues that I had to take care off and I was watching a lot of hockey. Back in last night so I will have some pics to follow. In the next few days I am hoping to fire this thing up. I agree on Allan....he has been a huge help.
July 11th, 2013, 05:17 PM
#199
Registered User
Thread Starter
Join Date: Jul 2011
Posts: 288
Oy my nerver...my poor muffler
well...here is how the engine startup went.
day 1.
I had replaced the points with a petronix igniter and a flame thrower coil. I put the #1 at TDC by hand cranking and lined up the cap with #1 moved it slightly until it sparked.
I previously primed the oil pump with a drill for a few minutes and got lot of pressure. I filled to carb bowels and tried her out. After a couple of attemps se fired up...I kept the rpm's at 2000-2500 for about 20 min. It would not idle good but I figured I would look at that on day 2.
engine never got real hot...up to around 200 I am guessing.
day 2.
I turned the idle screw up on my 670 Holly and it idled faster but would stay running.
I wanted to use my timing light....with everything connected even the vacuum line to the dist it apperaed to be 10-12 deg advance. One I unpluged the vacuum from the dist and tried to plug it the engine would stall.
With the car shut off I tried to just move the dist about 1/8 to 1/4 " CCW but the thing would not start. I moved the dist back to orgional and tried the car...it seem to back fire a little and then with one loud bang...my muffler was toast....I may try and hammer it back together.
Now discouraged....I am here and having a drink thinking about what to do next. I should have had someone try to keep the rpm up while I took of the vacuum hose and checked the timing.
I have a HEI distributor here I am considering trying. Any suggestions ?
Last edited by CLcutlass; July 11th, 2013 at 05:58 PM.


