When you click on links to various merchants on this site and make a purchase, this can result in this site earning a commission. Affiliate programs and affiliations include, but are not limited to, the eBay Partner Network.
I was disassembling my carby and my air horn did not have a solenoid adjusting screw plug. It was missing and a tiny cobweb was covering it all the time 😁 226 - solenoid adjusting screw.
when removig the solenoid adjusting screw, it was a total pig and never came out. So i took it to my friendly lathe shop and after trying many times, finally he welded a T bit to its top and wiggled it out. To our horror, it was flat at the bottom. Want to know whether it is the factory installed one.
Next issue is, when removing this 226, its head and a small part of 227 got slightly damaged. Are these available to buy? Or what metal is this made of? So that i can get one made at the lathe shop?
Damaged 226 and 227
Finally, i noted that this plastic cup like thingy had its lip damaged. Not sure where this broken piece was gone. How do i take this cup off? How to fix it? Any problems if I leave it like this?
None of your pictures posted, so it's difficult to know what you're talking about. I've bought a number of CCC Qjet cores for about $10 each at swap meets.
Well, I don't know what's going on, but again the photos didn't post in the thread. Interestingly, I DID get links to them in my notification email, so here they are:
I give up. How in the heck does someone do that? People like that shouldn't be allowed to use tools.
You certainly won't find those parts new. A parts carb is your only option here.
I am totally confused. Could you please elaborate a bit in line with my problems? I live half the world away so fixing bits is the best option i have
i was thinking maybe to tap the solenoid adjusting screw (SAS) mounting hole in the carby housing. Then machine a new SAS...then mount it on a spring to do the job. Its function is only to position the rich limit stop isn't it?
what is the significance of that plastic cup? What can happen with that broken lip?
Really appreciate your insight here
Last edited by kuseetha; May 26th, 2018 at 08:38 AM.
the plastic cup fills a void from previous years when they had a separate ATP metering device that used to mount in that location. LIke Joe said, maybe look into another carb, maybe on ebay motors. Your carb has been in the wrong hands at some point. Is your car subject to emission testing? If not there are other alternatives.
the plastic cup fills a void from previous years when they had a separate ATP metering device that used to mount in that location. LIke Joe said, maybe look into another carb, maybe on ebay motors. Your carb has been in the wrong hands at some point. Is your car subject to emission testing? If not there are other alternatives.
Many thanks for the reply. Yes, it is heartbreaking to see the damage caused by idiots! This isn't subject to emissions testing though. But I like to retain the CCC system as it is intended.
As a last shot, what I am about to do (at a machining shop) is to re-tap the housing and lathe out a new solenoid adjusting screw with with a slotted head so that the stop rich limit stop can be adjusted with a flat head screw driver going through the hole where solenoid adjusting screw plug was supposed to be.
Glad to know that plastic cup hasn't got to do much with the CCC system. Should all fail, I would go for another carby. Will keep updates posted.
Does anyone know the length of this Solenoid Adjusting Screw 226? I managed to get the hole tapped and a long bolt that screws in to it. Would be great to know the length of an unmolested one because I need to cut the excess of the bolt. Only want the total length (thread length + shank) without the head.
Finally managed to get the passage tapped and a suitable threaded bolt. Position max Position min
What is the maximum distance between the above two positions? Would be a big help to know the new bolt allows the full displacement before continuing the rest of the work.
thanks in advance
Revisiting an old thread which I started, with few updates.
Finally, the car is back after a couple of years and I changed the plugs, rotor, cap, oil, fuel pump, set base timing but the car would not idle.
When I pressed the accelerator pump, fuel came out of this hole.
I knew this wasn't right, so I went ahead and took the carby off the car, took off the air horn and watched a few videos on YT.
Few questions. Q1: What is this item? I don't have it on mine. Is it a critical item? What's on YT vs. what's on mine
A preface to the next question. My new style solenoid adjusting screw, after I tapped the base and fitted it with a new screw. A lot of dirt has collected on the black plastic plate. Also a lot of particles collected in the fuel chamber
I have removed all the components of the main body as seen in the photo below. Next two items removed were the 2 springs you see in the photo.
Q2: This is about cleaning the carburetor. I have sprayed carburetor cleaner through all the orifices I could find on this. (the two idle mixture adjusting screws in the throttle plate were also removed so that the carby cleaner came out of those as well)
It took away a lof of gunk and dirt out, I would soon visit a shop and apply high pressure air through all of them. (I don't have an air compressor).
Is this really necessary? Any things I should be careful about?
Q3: The throttle plate, should that be removed when cleaning at this stage? What is the use if so? The primary and secondary throttle plates move so freely without any binding.
Q4: The choke did not close, ever, and it seemed like the chose lever is binding. So, I drilled out the choke cover and there was some soot / dust inside.
Is it necessary to take the whole assembly out to clean? OR is it sufficient to spray some cleaner to the linkages to free them up? Would that clog or bind things in future?
Asking because the torx screw in the middle is so tight.
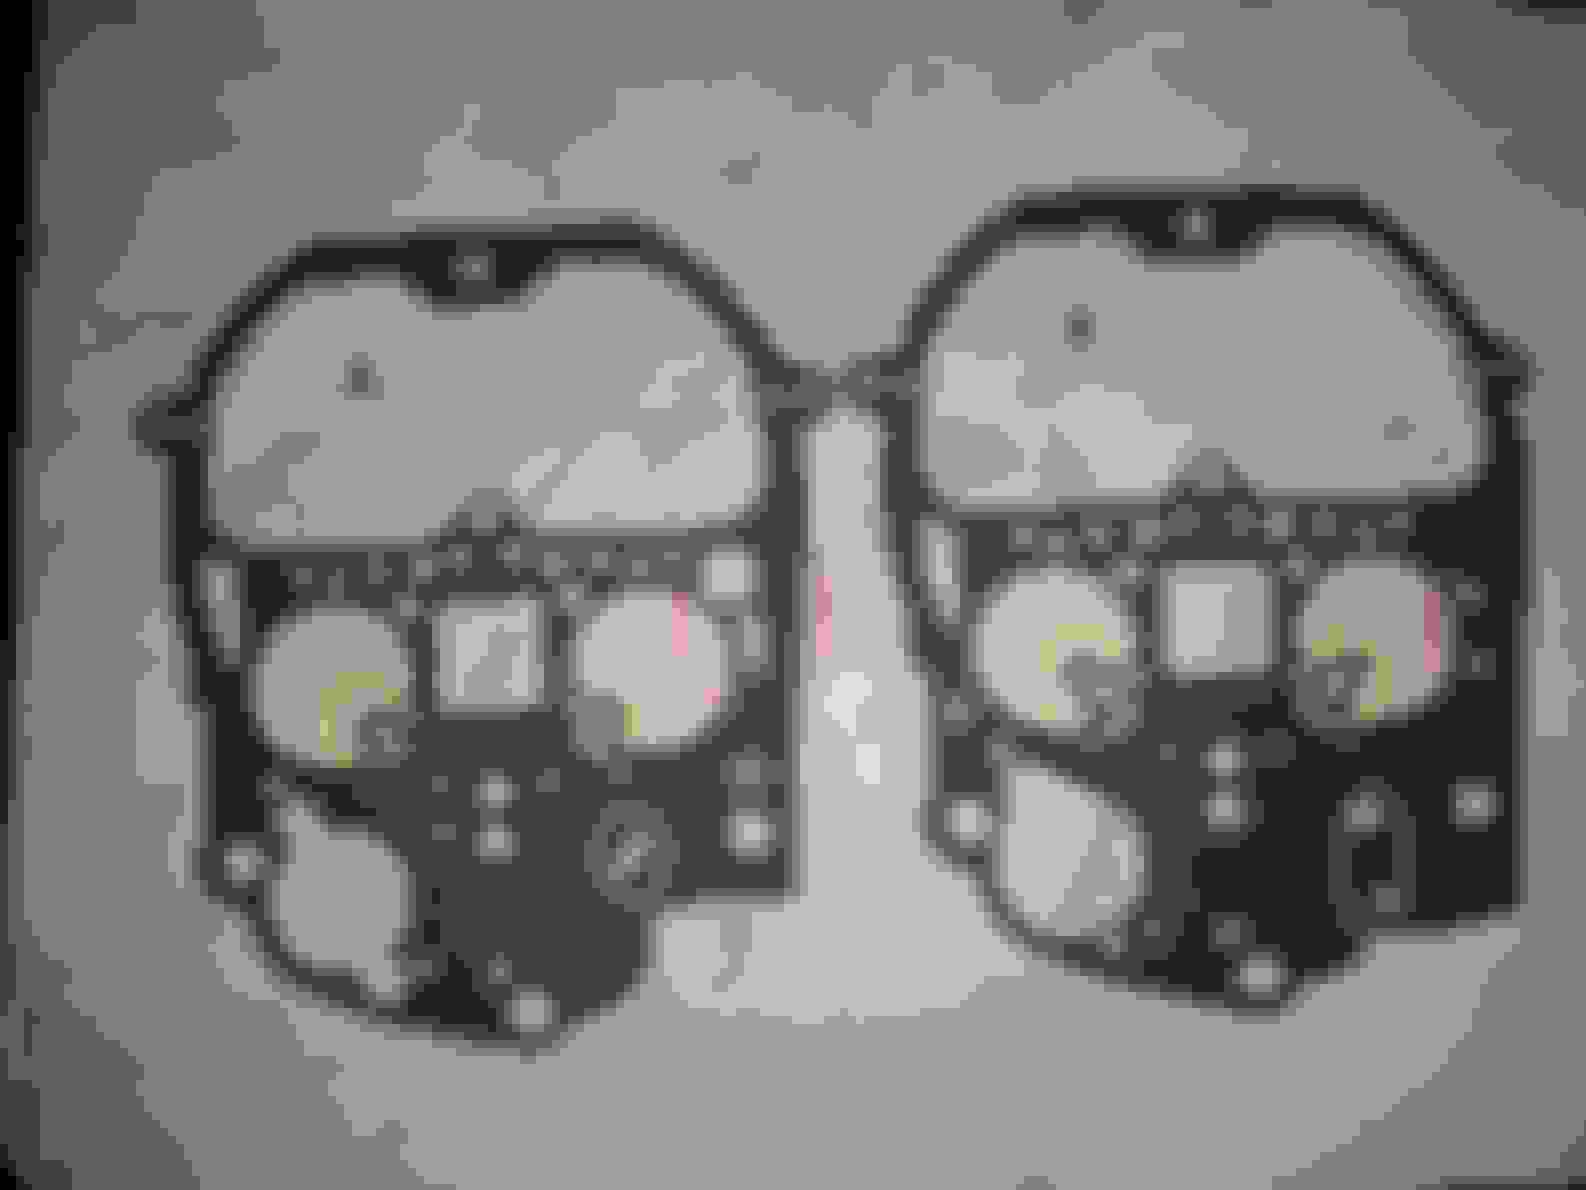
Q5: The gaskets. I have two in the kit but they are slightly different. Marked out the differences. What is about this?
Last edited by kuseetha; July 8th, 2023 at 11:45 AM.
As far as the top cover gaskets, you need gasket "A".
Q1: That little round thing is called a rich stop. It's for 3 and 4 point adjustment carbs. Yours is a 2 point and the little hook on top of your Mixture Control Solenoid screw is what takes its place.
Setting the Mixture Control Solenoid initial depth is done via a specialized tool. You can make one, it's 1.304" long. Check you tube videos and such for this tool. The use of it should be in your service manual as well. Your rich stop is preset with that hook like protrusion sticking out over the paddle. Not sure your rich stop is set right or could ever be with the modifications you used to remount it.
You can make your own, though... OVERHAULING THE LAST OF THE QUADRAJET CARBURETORS PT. 8 - AutoRestorer
A couple of mentions here. When working on a carburetor, clean clean clean! You can't be too clean. Dirt is a carburetor's enemy. Secondly, you really need to review the adjustment and setting procedures for your carb. Some settings have to be exact or your car will never run right. Unfortunately, being miles overseas isn't helping for sure. I wish I had a spare VIN Y carb for you, I'd be able to set it up on the bench and at least get you in the ballpark for fine tuning.
I'm no expert, particularly on CCC qjets, but I can volunteer a couple of points which may help:
1) With carbs, perhaps particularly with qjets, cleanliness is next to godliness. I.e., make absolutely certain fuel & air passages are clean & of exactly the same diameter/size on each side of the carb. Yes blow it out with a compressor & measure holes with a caliper.
2) The plastic bit in the passenger side void is not used by my professional rebuilder so that empty cylinder serves more or less as an extra float bowl. This may be specifically different in the CCC qjet. If you remove it, on startup, look for any fuel leakage. If there is none, no safety risk. If there is a fuel leak onto the intake manifold, put the broken plastic spacer back on.
3) With respect to which gasket to use, simply match it up against the one you removed. If that gasket has been discarded, match it up against the castings you're using and see which seals the metal parts the best.
4) If you're half the world away, get a couple of good quality rebuild kits (which are mainly gaskets...) from a specialist supplier like Cliff Ruggles.
You may not have the option in your country, but if you are not concerned about emissions, you can substitute a 170 series quadrajet. It's a completely mechanical carby & you can achieve your goal with no crude electronic silliness. The CCC qjets for GM were a band-aid between the 170 emissions-sensitive series & fuel injection which arrived in the early 80's. The CCC qjets were not performance carbs and I suspect (though do not know) they can be improved upon by going 1 generation earlier to fully mechanical.
Of course this would mean disconnecting whatever computer module is ordering the CCC to do its bidding, but at least with mechanical you can tune and more or less "see" what's going on.
Hope this helps,
Chris
If the carb is not running right, a very old trick is to spray carb cleaner where you suspect a leak and see if the RPM's rise. If they do, you have a vacuum leak, meaning that part is worn. The most common spot for such leaks are the primary throttle shafts. These can be resealed with a bushing kit, but that's another story.
ku,
What part number carb do you have ? I have a box of spare E4MC parts but you said you were half way around the world so getting them to you might not be easy. Whats chances of you finding a decent used carb in your area to use for parts ?
ku,
What part number carb do you have ? I have a box of spare E4MC parts but you said you were half way around the world so getting them to you might not be easy. Whats chances of you finding a decent used carb in your area to use for parts ?
I'm betting it will be 17086008 if original since they were down to two part numbers by 1987. The other was the 442 carb VIN 9, and it was 17086009, but it was a 3 point adjustment with a separate rich stop.
I'm betting it will be 17086008 if original since they were down to two part numbers by 1987. The other was the 442 carb VIN 9, and it was 17086009, but it was a 3 point adjustment with a separate rich stop.
Correct, it is 17086008.
There's hardly any chances that I could get my hands on one here Bill.
I have to attend to the meter cluster so that I could get the check engine light to work (on a different 1974 dashboard literally).
Tomorrow I would be cleaning all the ports with compressed air and would try to fit it with all the possible measurements, such as the float level, lean stop measurement and the rich stop measurement, plus the idle mixture screws with the dwell meter.
Should look into what's doable and look for other options if all fails.
By the way, does anyone know what these chambers and ports are? And where they lead to?
Throttle linkage side Choke mechanism side
Last edited by kuseetha; July 9th, 2023 at 09:50 PM.
Just make sure those holes you got circled aren't blocked and are clean. Those are fixed idle air bypass ports for each front venturi. Don't resize them or plug them. If you match up your lid and throttle base to where the holes go, you'll see where the ports go. Same with the TPS well drain hole which exits the side of the carb right where the curb idle set screw would sit. If you're not taking off the throttle plate, you won't see where the ports end up, but trust me, it's a controlled vacuum leak around the idle circuit, but it won't hurt anything. It was made to be that way. I think Chevys do it differently, but all the E-Quads operate similarly, just a few different tweaks on how to get there.
If all else fails, this guy currently has 8 of the 008 carbs rebuilt? Maybe. I know nothing about them or the seller, but it's something to consider if something goes south.
Just make sure those holes you got circled aren't blocked and are clean. Those are fixed idle air bypass ports for each front venturi. Don't resize them or plug them. If you match up your lid and throttle base to where the holes go, you'll see where the ports go. Same with the TPS well drain hole which exits the side of the carb right where the curb idle set screw would sit. If you're not taking off the throttle plate, you won't see where the ports end up, but trust me, it's a controlled vacuum leak around the idle circuit, but it won't hurt anything. It was made to be that way. I think Chevys do it differently, but all the E-Quads operate similarly, just a few different tweaks on how to get there.
wow, would've never guessed that, thank you so much, should get those cleared as well then.
If all else fails, this guy currently has 8 of the 008 carbs rebuilt? Maybe. I know nothing about them or the seller, but it's something to consider if something goes south.
I would like to see the rest of the components of the CCC system and if all is well, then something like this could be useful, or else I might as well go old school with the CCC system ditched for good.
No 1
My choke doesn't close fully, even after the primaries are opened.
The reason being the RVB to Choke link hits the secondary rod.
Choke spring is already removed.
Is this normal for 87 Vin Y 307?
If not, how to bend the rod to avoid this?
It fully closes when this rod is removed.
No 2
I have made a tool of length 1.304" to set the rich stop limit (cut from an old syringe)
1.304 x 25.4 = 33.1216mm
Here comes the problem.
Please ignore the screw that holds the rich stop limit in place.
1. It is only the rich stop limit that should push down the plunger.
2. I can push the plunger with finger, so that it touches the top of the tool.
3. But I cannot push the rich stop limit down any further as it makes the MC solenoid hit the spring seat.
How do I adjust the rich stop limit any further down to make sure it touches the fabricated tool? (The tool is seated on the seat that is halfway on the jet/tube, not the bottom of the bowl)
The gap is about 2/32".
What am I missing here?
*Both springs of the MC solenoid (wide one at the bowl, narrow one as seen on the picture) are there.
Last edited by kuseetha; July 12th, 2023 at 02:39 AM.
Ok, about your rich stop. There's not much you can do about that setting as it's fixed. You really can't (and shouldn't) try to change the rich stop.
What you need to do is ensure that the 1.304" tool sits on the last bottom "ledge" on the jets. It shouldn't go all the way down to the bottom of the fuel well, but will sit on top of that last ledge on the primary jet. It appears it does, but just making sure.
You need to MANUALLY and lightly press down on the plunger until the bottom edge of the plunger JUST TOUCHES the top of that tool. Adjust the set screw as needed to achieve this. Once that's set, no need to touch that screw again.
And yeah, you may want to bend that RVB rod back a little to give you room enough to close the choke. The front vacuum break should pull it partly open when the car starts anyway. That RVB is virtually useless. It appears that rod is crunched pretty good there.
Here's a picture of what I was talking about. I have the tool, so I just used the float gage and held down the plunger and used the adjusting tool to set the screw so the plunger was just touching the tool. Hope the picture gives you the right idea. My carb has the separate rich stop in the air horn, so it just has an adjusting screw without the built-in rich stop on it. Otherwise it's the same way to set it up.
Here's a picture showing the general look of the RVB linkage.
Your carb will do method "B" for adjusting. Which means bending the linkage.
Even though I have the bending tool, it's a bit cumbersome when a pair of needlenose can do the trick. See bottom right of picture showing the needlenose pliers on the linkage. I set mine per specs, even though I'll probably not care. You do need some gap in there on the RVB linkage to allow the choke blade to fully close, though.
Ok, about your rich stop. There's not much you can do about that setting as it's fixed. You really can't (and shouldn't) try to change the rich stop.
What you need to do is ensure that the 1.304" tool sits on the last bottom "ledge" on the jets. It shouldn't go all the way down to the bottom of the fuel well, but will sit on top of that last ledge on the primary jet. It appears it does, but just making sure.
You need to MANUALLY and lightly press down on the plunger until the bottom edge of the plunger JUST TOUCHES the top of that tool. Adjust the set screw as needed to achieve this. Once that's set, no need to touch that screw again.
So glad to see this reply.
This is where the problem is.
The tool is seated here, which I think is correct.
.
Rich stop sets the topmost position of the plunger travel, which is the 1.304" isn't it?
In other words, the plunger should not jump up beyond what's set by that tool. Is that correct?
Please correct me if am wrong here.
Then, yes, I can hold the plunger to the tool, but to make sure it doesn't go up, I have to tighten the screw so that the rich stop, stops the plunger at that tool's topmost position, isn't it?
The problem I have is, the bottom part of the rich stop sits on the MC solenoid (Y shaped plate) and that pushes the solenoid Y plate to the top of the "solenoid adjusting screw spring" seat/carb body.
Therefore, the plunger could not be set to that tool's height, a gap is left.
Hope I made this clear.
BTW, I will pull the U shaped portion of the lever away from the carb then. That should do the trick.
EDIT: saw the latter replies after I posted mine. thank you so much.
I think, my rich stop with that postman pat like nose is causing this problem.
Last edited by kuseetha; July 12th, 2023 at 05:23 AM.
Here's a picture showing the general look of the RVB linkage.
Your carb will do method "B" for adjusting. Which means bending the linkage.
Even though I have the bending tool, it's a bit cumbersome when a pair of needlenose can do the trick. See bottom right of picture showing the needlenose pliers on the linkage. I set mine per specs, even though I'll probably not care. You do need some gap in there on the RVB linkage to allow the choke blade to fully close, though.
Hope this helps.
Got this linkage sorted!
Last edited by kuseetha; July 12th, 2023 at 06:32 AM.
Your rich stop will stay right where it is in relation to the M/C solenoid height. You are simply adjusting the solenoid height with the adjusting screw. That's what should be happening. As you adjust the lean stop setpoint, the rich stop if fixed so it automatically follow whatever you do with the adjustment screw.
What you're doing with the 1.304" tool is setting the LEAN stop. The paddle must be free to flip up and down that 1/8" or so between rich and lean stop. But in order to get the metering rod to go to the lean stop setting and actually lift to the rich stop and allow max fuel, it has to start at 1.304" tool setting with the paddle DOWN. What you're doing is simulating how far the paddle will be pulled down by the solenoid when it is energized. When it is deenergized, the paddle springs up and stops on the rich stop. The metering rods follow the paddle. Energized, the paddle pulls down and presses the tops of the metering rods to the leanest position.
I got it finally, you sir, are a legend, thank you so much.
Trick was, initially the plunger only hit the solenoid stop.
When tightening the screw, it came to a position where the plunger hit both the solenoid stop AND the gauge.
If you tighten further, the solenoid goes down further but the plunger spring keeps the plunger up.
My mistakes were following two.
1. Not pushing plunger with finger
2. Not noticing the solenoid stop
Last edited by kuseetha; July 13th, 2023 at 03:44 AM.
Yup. That's why I said you stop adjusting when the paddle just touches the top of the height tool while holding it all the way down against the solenoid. Probably should have dug up these pictures first.
Wait until you get to the idle air bleed valve adjustment. You either have a letter on top of the valve or you don't. Read this carefully. WITHOUT a letter, use procedure A. WITH a letter, use procedure B. -
If your idle air bleed valve (IABV) has a letter on it, it should look something like this. Mine was lettered.
Setting with the hook tool. You can thread the IABV to the bottom of it's seat LIGHTLY. Don't torque it with a screwdriver as you're going to be adjusting it back up anyway.
Got to remember to lightly press down on the hook to press the paddle down to the lean stop and adjust the IABV to barely touch the end of the hook.
You can make a shepard's hook out of some stiff wire with the ends exactly 1.756" apart if you need to. The guide just keeps everything straight and even. It's listed as Kent Moore tools J-33815 if you can find a little kit somewhere. Invaluable tool kit for E-jet carbs.
Not sure if that would work. Essentially, the hook puts the top of the IABV 1.756" higher in relation to the LEAN STOP measurement from the top of the plunger paddle on the bench. In other words, it ensures that the IABV is closed when the metering rods are in the lean stop position (lowest point of travel). So when dialing in the carb on the car, it may change a little after any adjustments. If you have an IABV without a letter stamped on top, then you may need to tweak the IABV a little to get the dwell reading from procedure A, step 5 above, which is 25-30 degrees dwell.
Not only does the mixture control solenoid plunger paddle operate the primary metering rods, at the same time it's opening and closing the IABV. Plunger goes down, it closes down on the primary rods and closes the IABV. When the plunger goes up, it allows the primary rods to rise and opens the IABV.
Oh, I didn't know about the plunger operating the IABV. Btw, mine does have an X marked on it.
Started the engine today, doesn't idle (dies) unless I press the pedal ever so slightly. Have to look in to the workshop manual before touching the fast idle screw or anything.
I will attend to the IABV when I connect the dwell meter.
Cannot get it to warm as there's no cooling system connected.
 May 26th, 2018, 12:12 AM