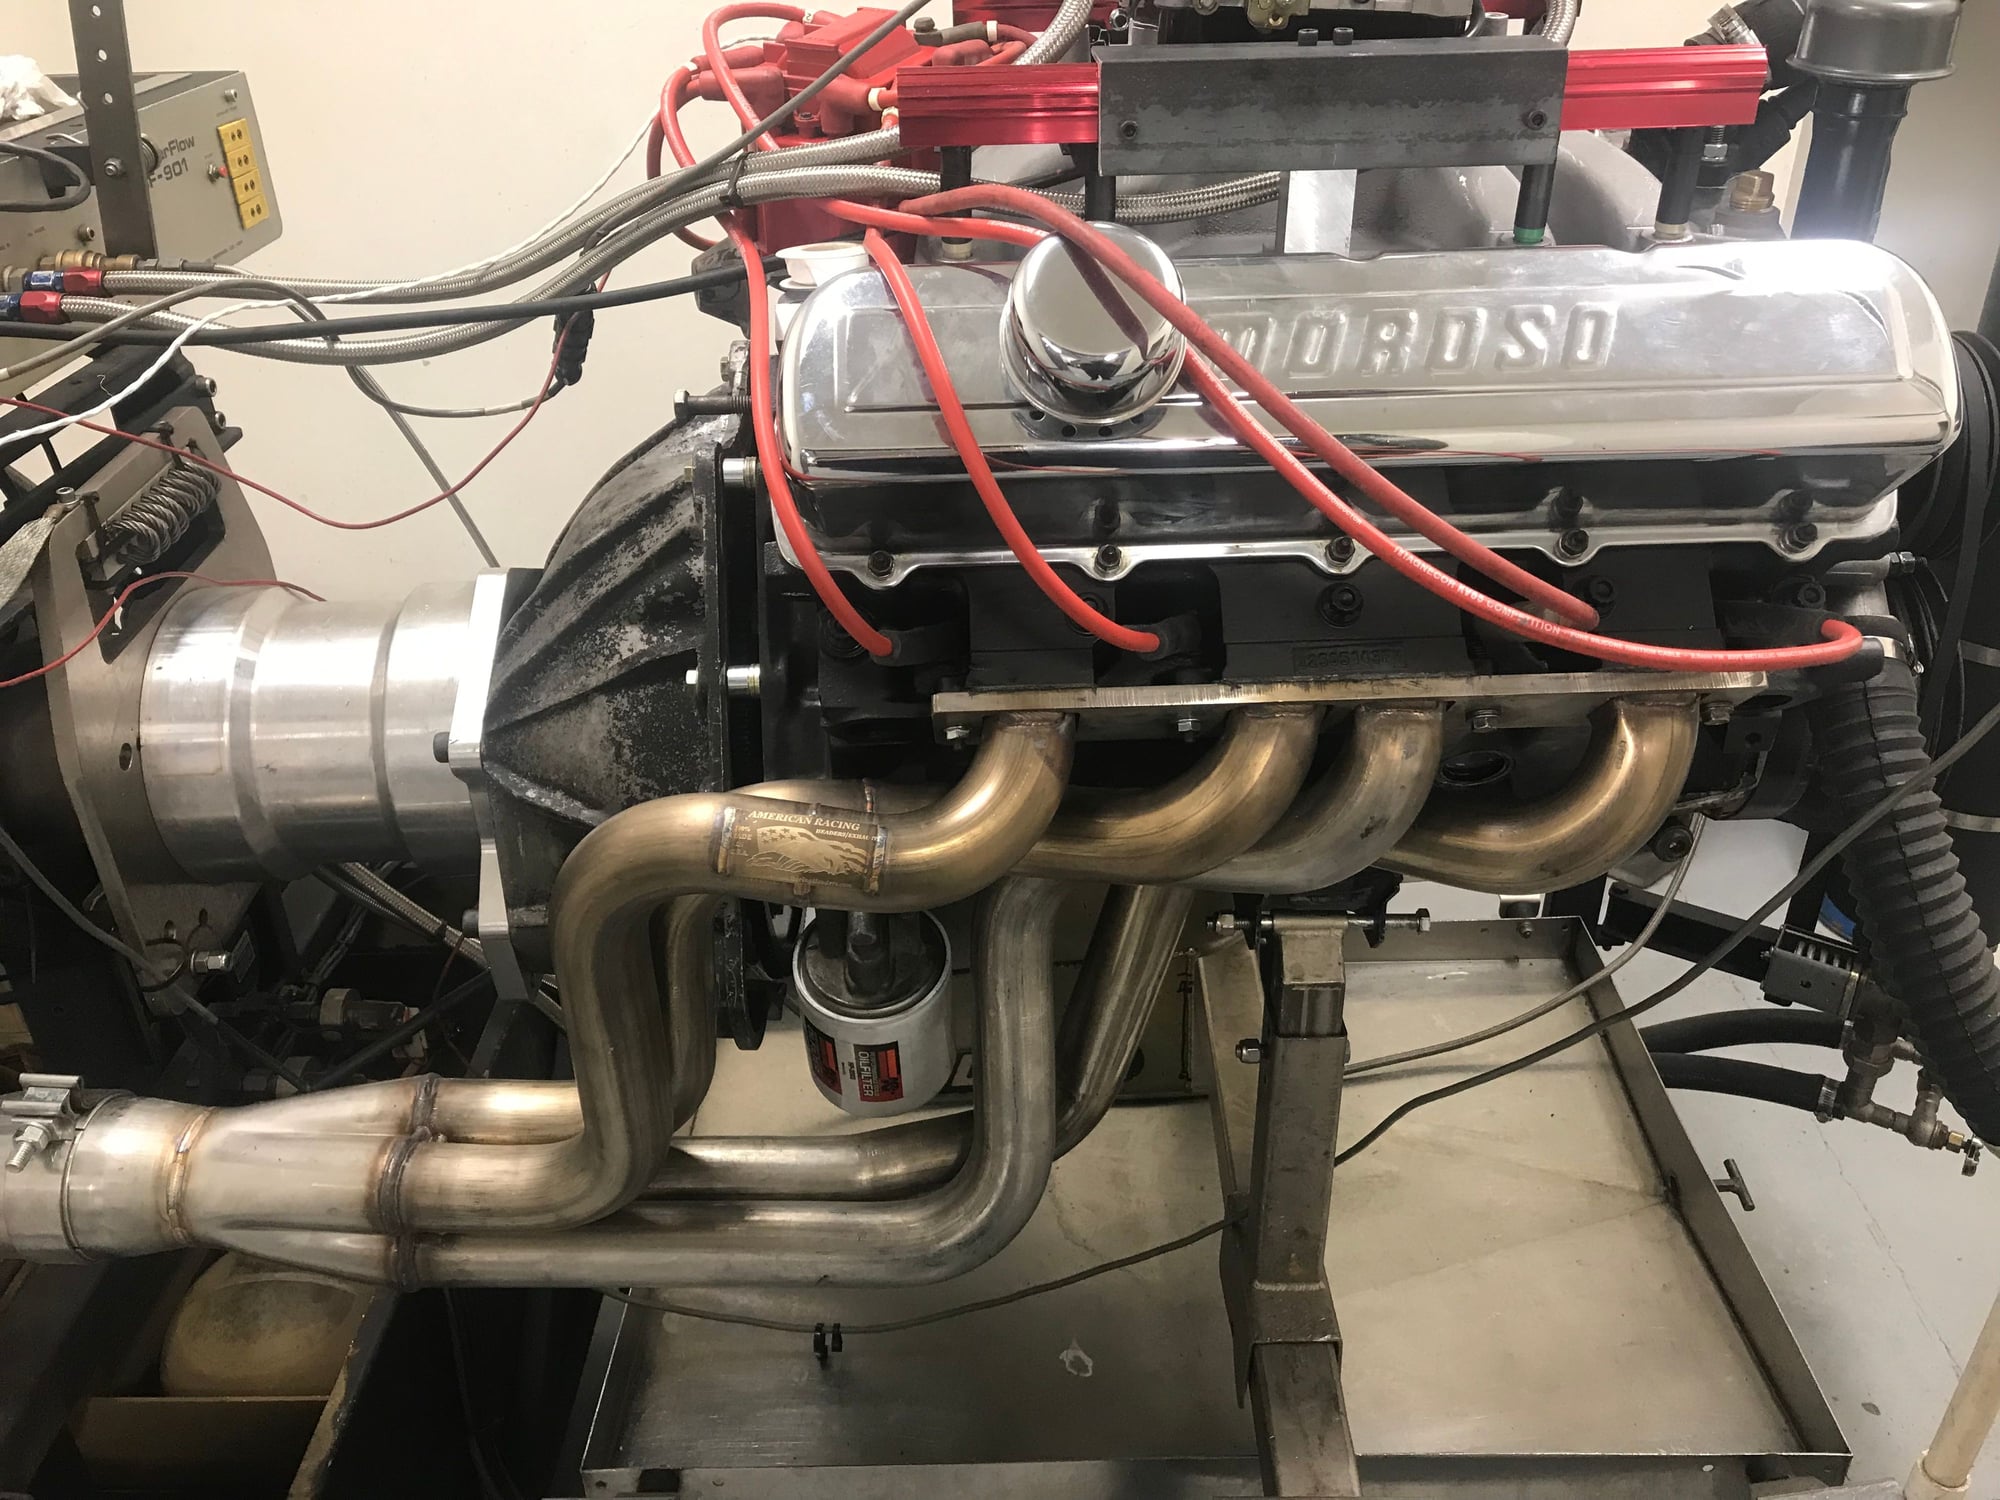
Upgrading a Batten Headed 455 originally built by Joe Mondello 20+ years ago
#123
Yes Sir, coming together well now.
The freeze plugs and galley/oiling plugs with oiling holes have been installed, the oil pump has been blueprinted and loctited and getting ready for the cam degreeing and button-up of the shortblock soon, depending on what we can get done over the holiday.
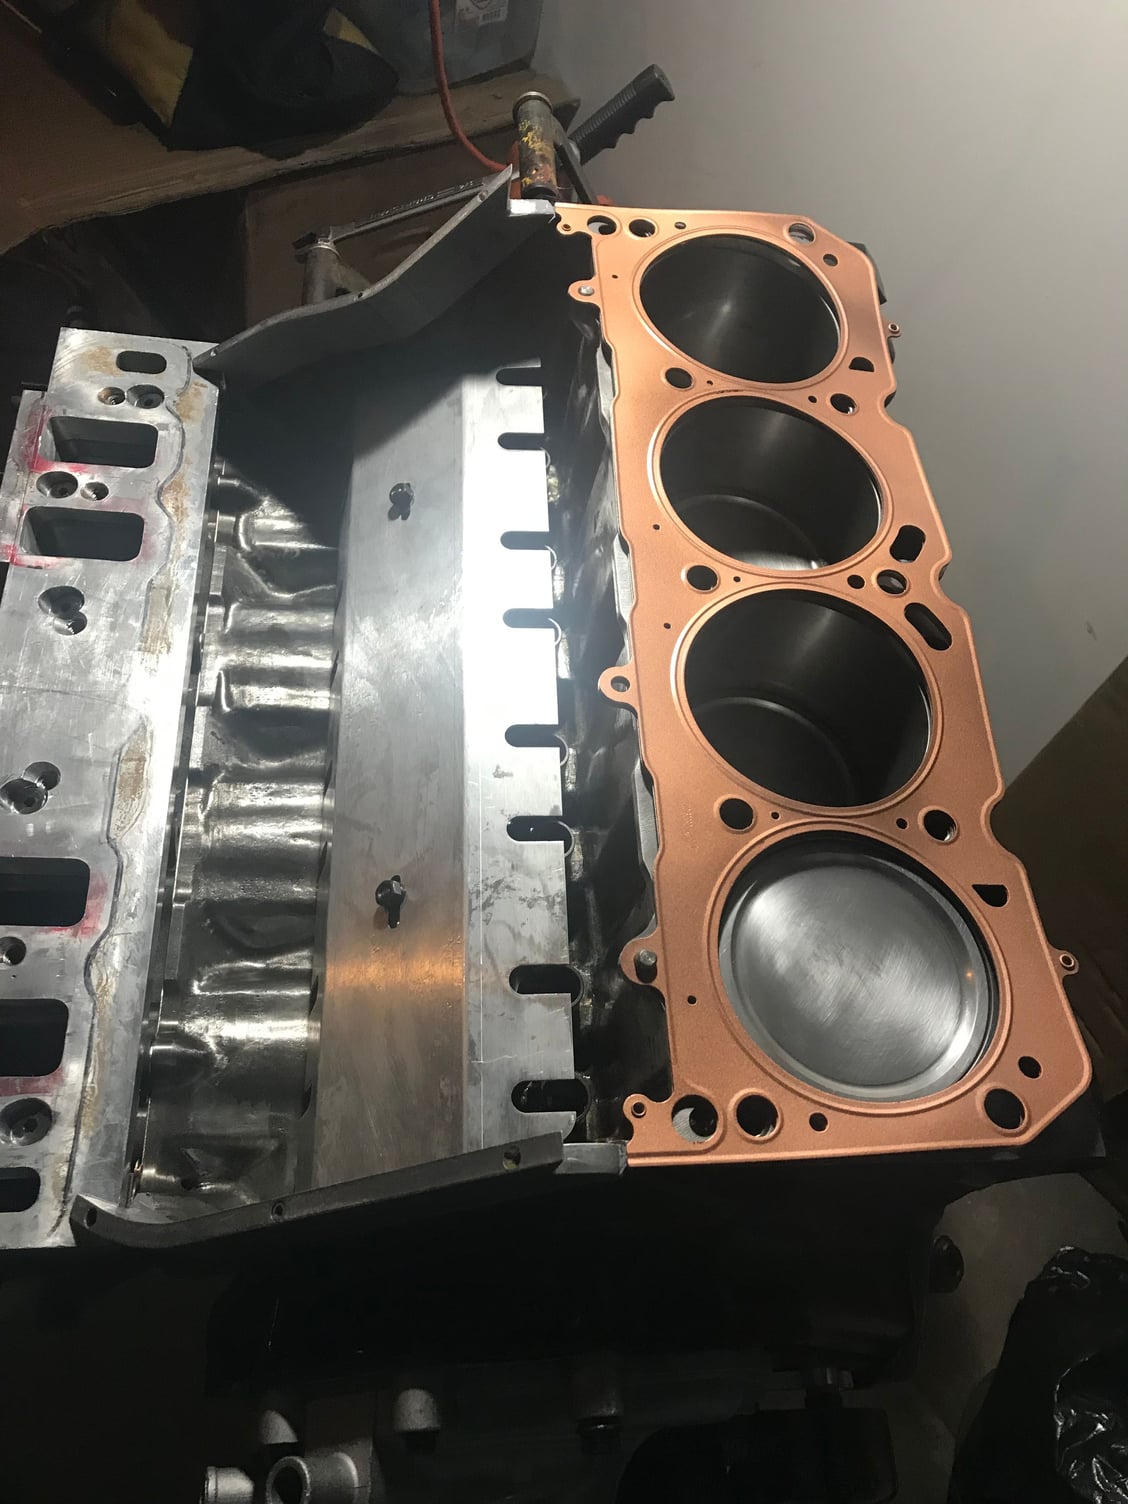
I did check for the deck clearance to see how far the piston crowns reside below deck. I was crossing my fingers that the block was squared and true from before......
I only saw .0025 difference from end to end on both sides, measuring #1and #7 and between #2 and #8 averaging at .0155 crown below deck.
This will work perfect with my .027 thick cometic head gaskets, with a quench of about .042.
Last edited by Battenrunner; November 22nd, 2018 at 08:45 AM.
#124
Moving forward more today.... We were able to degree the cam. Luckily, we had purchased a Trovato Cloyes Timing set earlier in the build that allowed quite a bit more degrees of adjustment.
As it ended up, with the timing set installed at 2degrees advanced on the cam, the numbers were showing to be 8 degrees retarded on the opening and closing events vs. the cam card @ .050 lift.
We pulled the crank gear off, and moved it to the advanced position, and then pulled the cam gear off and moved it to the 6A (6 degrees adanced position, and we got everything to line up on the cam card.
We then went back and double-checked the intake centerline, and we got 107 degrees on our calculations, so it exactly matched the cam card, which was the best we could do with our cam and crank gear limitations.
We are now setting the end-thrust for the bronze thrust bushing on the cam nose, and we did use the bronze thrust washer behind the cam thrust face on the first journal (after Mark - Vortecpro- machined the face of the block for the .040 washer).
Our goal is .004 end thrust clearance with the gasket installed, checking it with feeler gauges and a straightedge on top of the gasket, and assuming .002-.003 gasket crush.
Juggling washers looks to have gotten us close to our goal, and we will double check it tomorrow as well as installing the front cover, oil pump assembly, and oil pan........ Crossing my fingers it goes smoothly.
Last edited by Battenrunner; November 23rd, 2018 at 09:11 PM.
#126
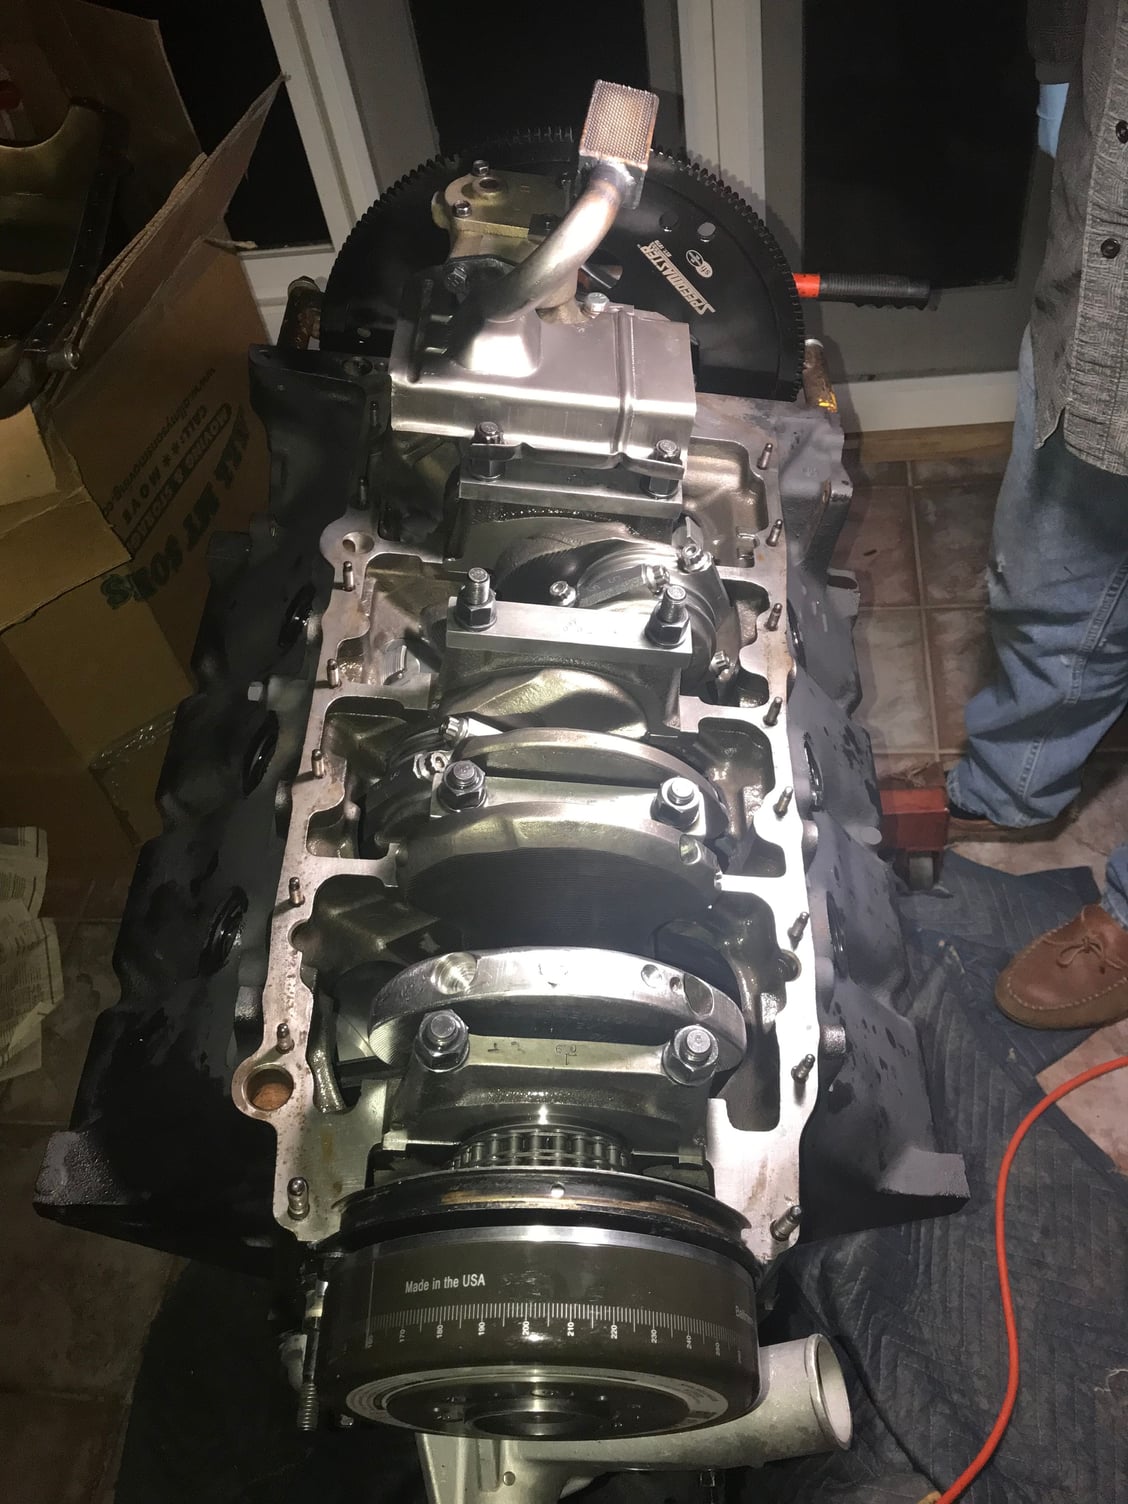
At a snails pace lately, as my Dad has been sick, after they had guests staying at their house for a loooong time...
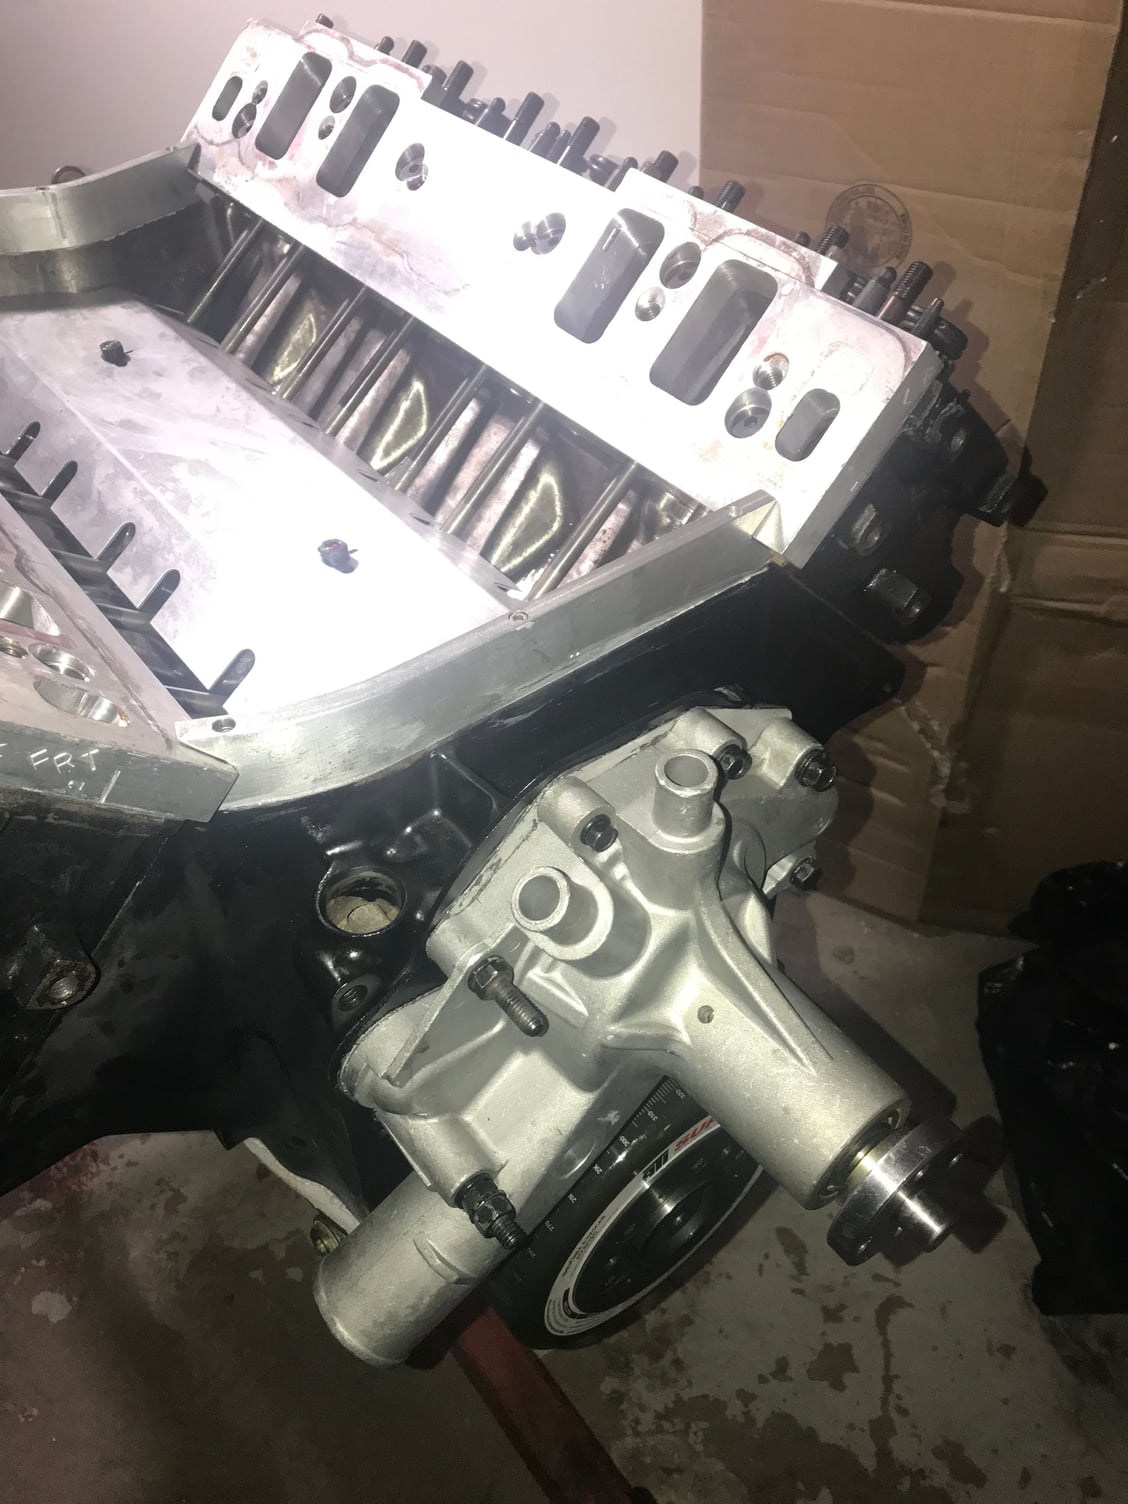
Installed ATI damper and BTR timing pointer, aluminum water pump, 2 piece thick timing cover, billet flexplate, oil pump and pickup, and oil pan studs into the block. The Moroso pan was given a few tweaks for frame clearance and a tweak for oil pump pickup clearance as well.
Hoping to install oil pan tomorrow after checking for pickup clearance and torque-cycle ARP flexplate bolts.
Hoping we can Dyno this at Vortecproís shop By Christmas
Last edited by Battenrunner; December 5th, 2018 at 10:58 PM.
#127
Much more progress today, as we checked pump to pan clearance, and it is .325 on all sides, good to go!
We prepped all the surfaces and using yamabond 4, installed the steel cored, cork-covered oil pan gaskets and the Moroso oil pan, using yamabond 4 at all points, neatly applied.
We then torque-cycled the bolts for the billet steel SFI flex plate and checked the starter clearance, all good.
Next, I inspected and final cleaned and lubed the hydraulic roller lifters and installed them down their bores.
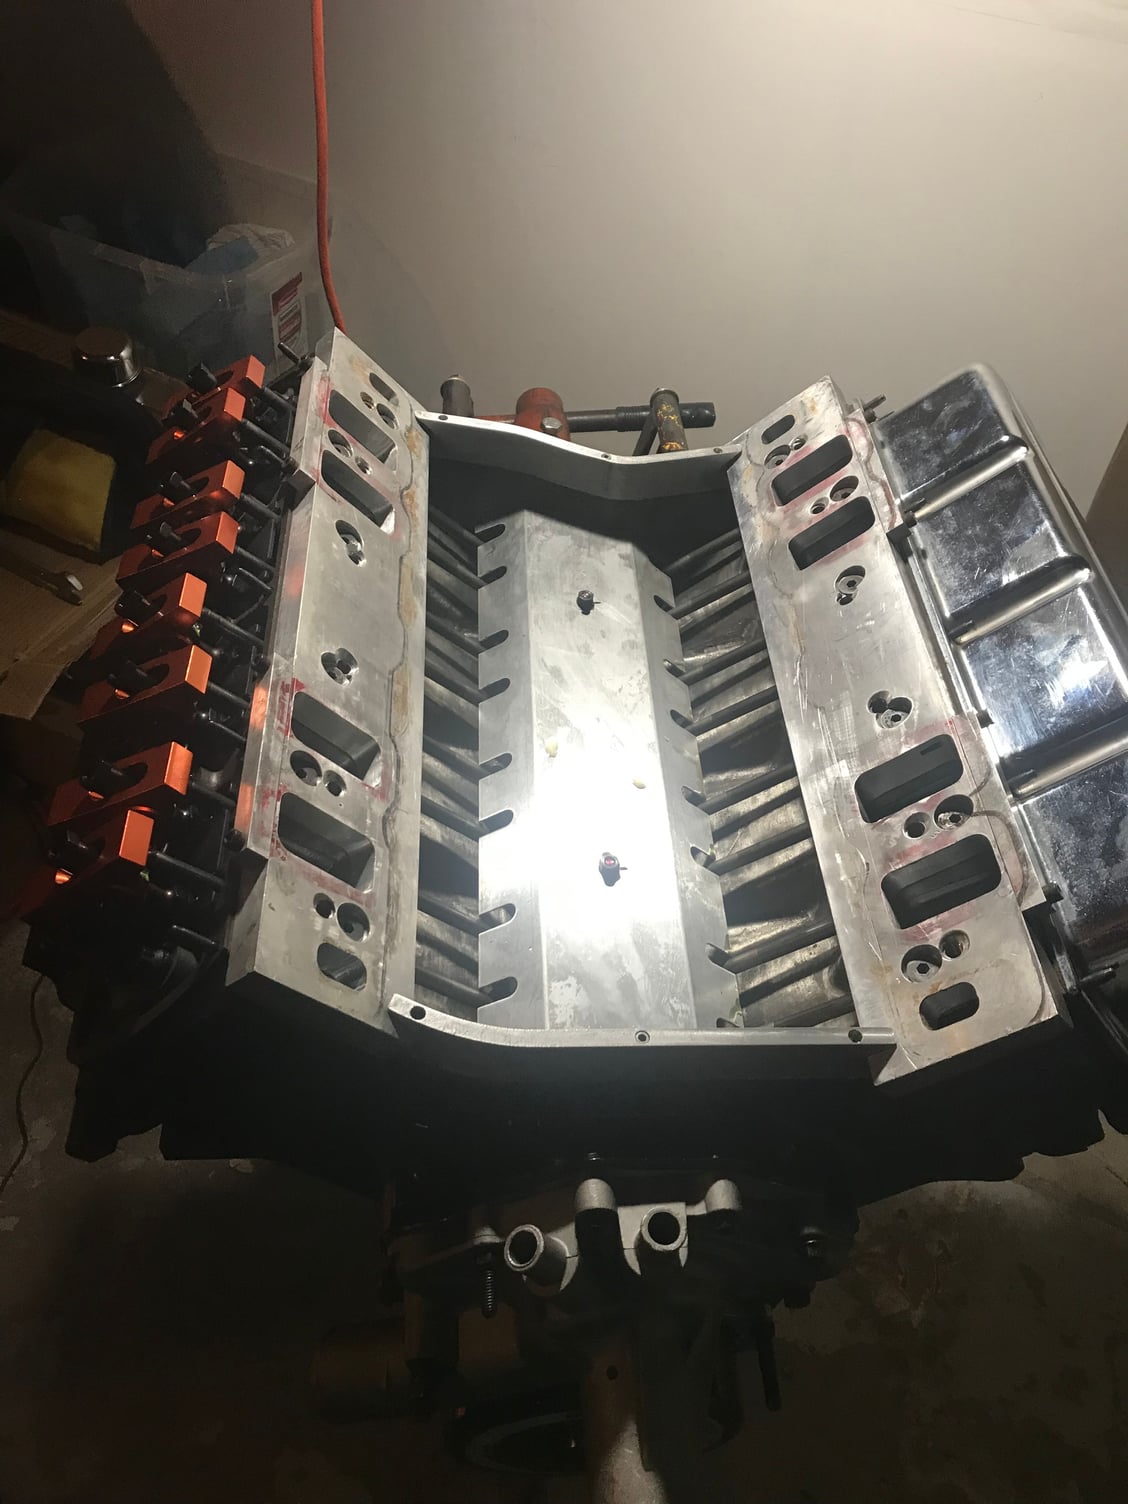
We then installed the lifter galley baffle tray and aluminum intake heat shield, as well as the Batten-head-block-end-rail spacers.
We moved the engine from the ďclean roomĒ to the garage, keeping it covered with the handy Moroso engine bag.
I sprayed the .027 thick Cometic head gaskets tonight with copper gasket spray, and left them to dry until hopefully tomorrow, when we can install and torque the heads and lash the valvetrain.
Next comes a choice, to use the extra tall Chrome Moroso valve covers, or use the extra tall GM Olds script cast aluminum valve covers....
Hopefully we will have a 500hp+ engine for Christmas!
Last edited by Battenrunner; December 6th, 2018 at 06:28 PM.
#130
Thanks!
The valley tray is retained by two Arp straight threaded rods with Arp nuts, double-nutted on the bottom with red loctite to go into the block, and double-nutted and red loctite under the valley tray, then a lock washer and red loctite with a last nut on top.
The valley tray is retained by two Arp straight threaded rods with Arp nuts, double-nutted on the bottom with red loctite to go into the block, and double-nutted and red loctite under the valley tray, then a lock washer and red loctite with a last nut on top.
Last edited by Battenrunner; December 11th, 2018 at 04:09 AM.
#131
So, we had time to finish up a few more small things, and we lashed the valves tonight with about 5/8 of a turn while locking the allen screw to jam against it.
We ran into a SNAFU tonight with testing the distributors for clearance. The factory HEI dropped in, with only about 1/4 inch of clearance to the Batten intake adapter rail at the back, but it had a cast boss that could be removed without hurting anything and give another .200 of clearance to the top of the intake manifold. The bottom of the gear doesn't touch the block thrust either, so it is ok for our dyno testing purposes.
The problem came when we tried the Holley dual-sync distributor, which was shorter than an HEI factory distributor, and it was touching the edge of the Batten adapter piece about 3/8 of an inch before the Holley distributor would even sit all the way down in the block. This distributor really is the easiest and most affordable way for us to get cam and crank signals to the Motec ECU, so I am looking at finding out from Holley if they can tell me if they have another distributor shaft from another dual-sync model that might be about 1-1.5 inches taller than the stock Oldsmobile unit ideally, and still .500 diameter. If not, I know a stock Chevrolet shaft is way longer and .500 diameter, so I could possibly use one of them and just cut it down to proper length. I have a small lathe and a little mill, so I can do several of these little projects like this.
I will cut the Holley distributor body where it is the smallest part of the housing, and I will make a nice, tight-fitting sleeve that I can extend the length of the distributor body with, and we can redrill the shaft for the gear at the proper position, if all goes as planned.
Last edited by Battenrunner; December 12th, 2018 at 04:35 PM.
#133
Mark, To clarify my statement above, I was trying to say that I am going to have to customize the regular production Holley Dual Sync distributor for the Olds engine and make it a longer shaft version to fit the weird Batten head-intake adapter height.
I will snap pictures as things progress with the distributor and dyno Testing of the engine (planned for Dec. 21st tentatively). For now, it looks like we can modify an HEI distributor to barely make it work for the dyno testing. The intake looks great after Vortecproís guy, Eric, did some work to allow the injectors to fit and drilled and tapped a water port hole in the rear Driverís side, and it didnít require milling at this time, so we were lucky.
I will snap pictures as things progress with the distributor and dyno Testing of the engine (planned for Dec. 21st tentatively). For now, it looks like we can modify an HEI distributor to barely make it work for the dyno testing. The intake looks great after Vortecproís guy, Eric, did some work to allow the injectors to fit and drilled and tapped a water port hole in the rear Driverís side, and it didnít require milling at this time, so we were lucky.
Last edited by Battenrunner; December 12th, 2018 at 04:34 PM.
#134
Gotcha, but you also inferred if there was another one of a different design. I was merely stating there wasn't to my knowledge.
Once you get the Motec up and running let me know how good the timing control is(steady timing mark). Iíll be interested to see how well the dist interfaces with the Motec ECU.
Once you get the Motec up and running let me know how good the timing control is(steady timing mark). Iíll be interested to see how well the dist interfaces with the Motec ECU.
#135
Registered User
Join Date: Aug 2012
Location: Colorado Springs Colorado/Thousand Oaks Ca
Posts: 1,719
Mark, To clarify my statement above, I was trying to say that I am going to have to customize the regular production Holley Dual Sync distributor for the Olds engine and make it a longer shaft version to fit the weird Batten head-intake adapter height.
I will snap pictures as things progress with the distributor and dyno Testing of the engine (planned for Dec. 21st tentatively). For now, it looks like we can modify an HEI distributor to barely make it work for the dyno testing. The intake looks great after Vortecproís guy, Eric, did some work to allow the injectors to fit and drilled and tapped a water port hole in the rear Driverís side, and it didnít require milling at this time, so we were lucky.
I will snap pictures as things progress with the distributor and dyno Testing of the engine (planned for Dec. 21st tentatively). For now, it looks like we can modify an HEI distributor to barely make it work for the dyno testing. The intake looks great after Vortecproís guy, Eric, did some work to allow the injectors to fit and drilled and tapped a water port hole in the rear Driverís side, and it didnít require milling at this time, so we were lucky.
Remember..........Carburetors Gasoline N.A.
#137
You might want to contact ICE IGNITION and see if one of their distributors works with the Batten intake.
They are not cheap but they produce a quality product https://www.iceignition.com/product/8200-series/
They are not cheap but they produce a quality product https://www.iceignition.com/product/8200-series/
#138
Thanks for the recommendation Bernhard, but I bet there is likely only one standard housing length that they have like all others, especially for an Olds engine.
I will inquire to them, just in case; thanks!
I will inquire to them, just in case; thanks!
#139
Is the length issue caused by the body of the distributor hitting part of the intake, not allowing the distributor to seat on the block?
If this is the case then a small body distributor would also solve your problem correct?
If this is the case then a small body distributor would also solve your problem correct?
#141
The distance from the block to cam gear is the same on all Olds engines correct + or - a few .001.
So you need a distributor that is taller from the block to the bottom of the distributor housing to allow for clearance correct?
If you increase the shaft length you will have to make a spacer for between the block and distributor hold down base correct?
So you need a distributor that is taller from the block to the bottom of the distributor housing to allow for clearance correct?
If you increase the shaft length you will have to make a spacer for between the block and distributor hold down base correct?
#143
What about an old nos Oldsmobile billet Accell, MSD, Mallory with a new style trigger?
Sorry for the spam just trying to help find a easy fix for your clearance issues.
Sorry for the spam just trying to help find a easy fix for your clearance issues.
Last edited by Bernhard; December 13th, 2018 at 06:17 AM.
#144
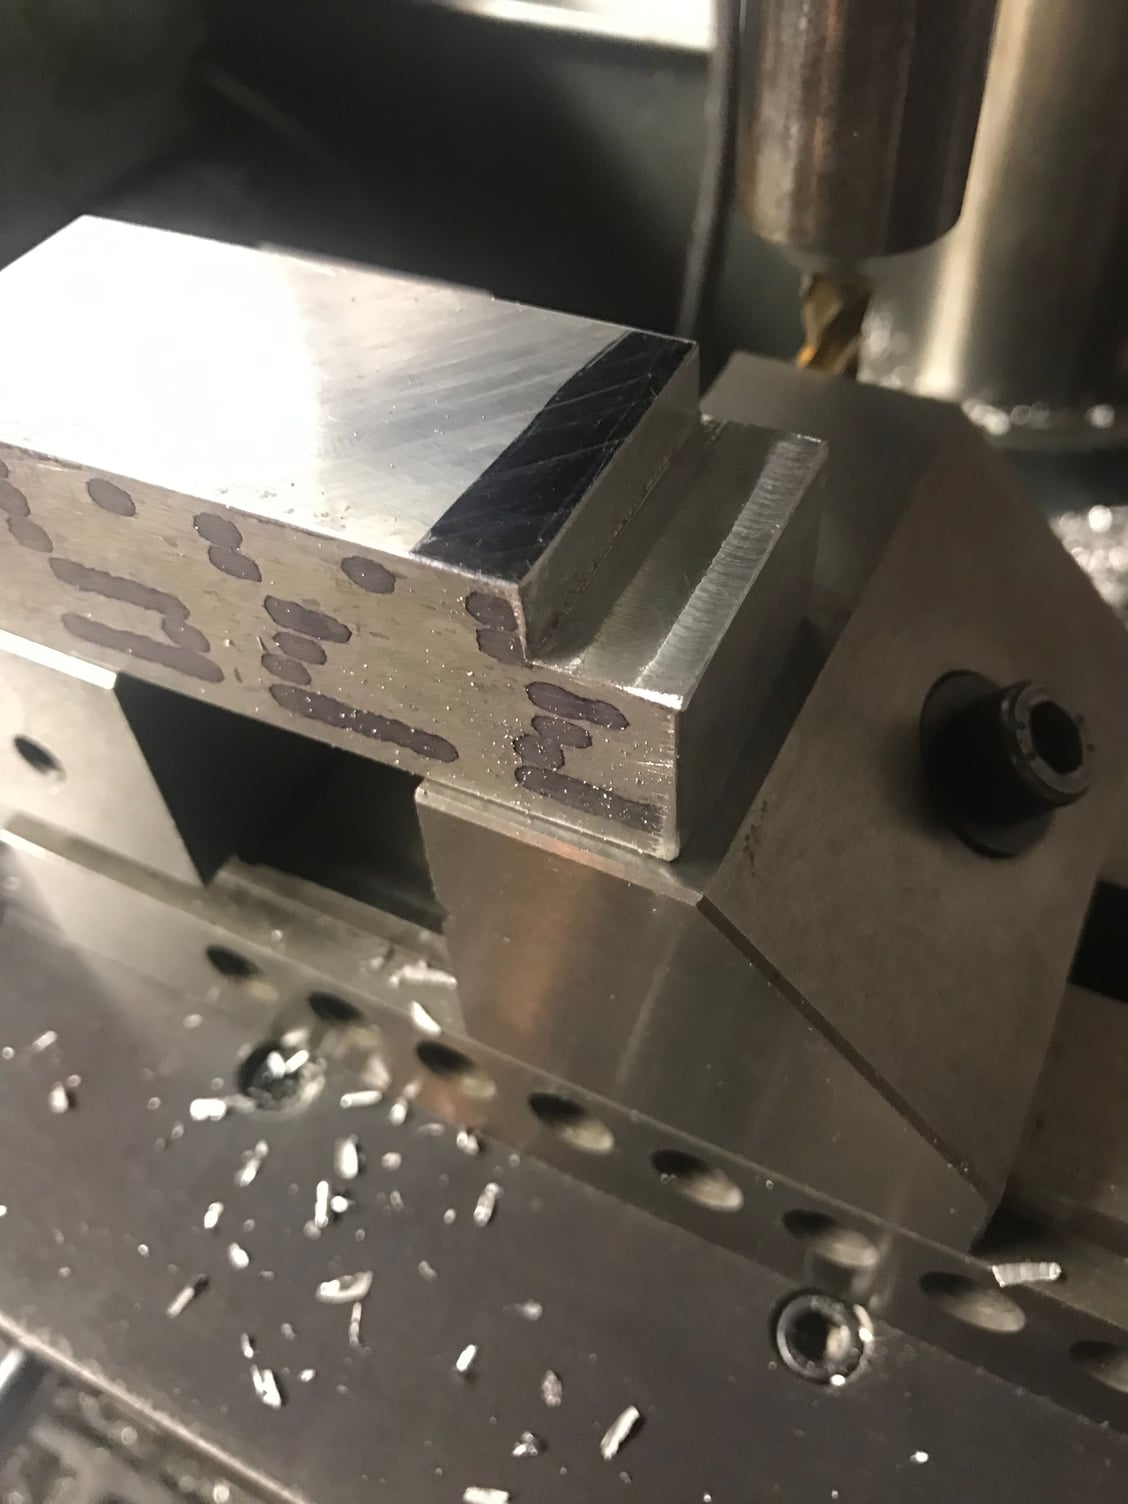
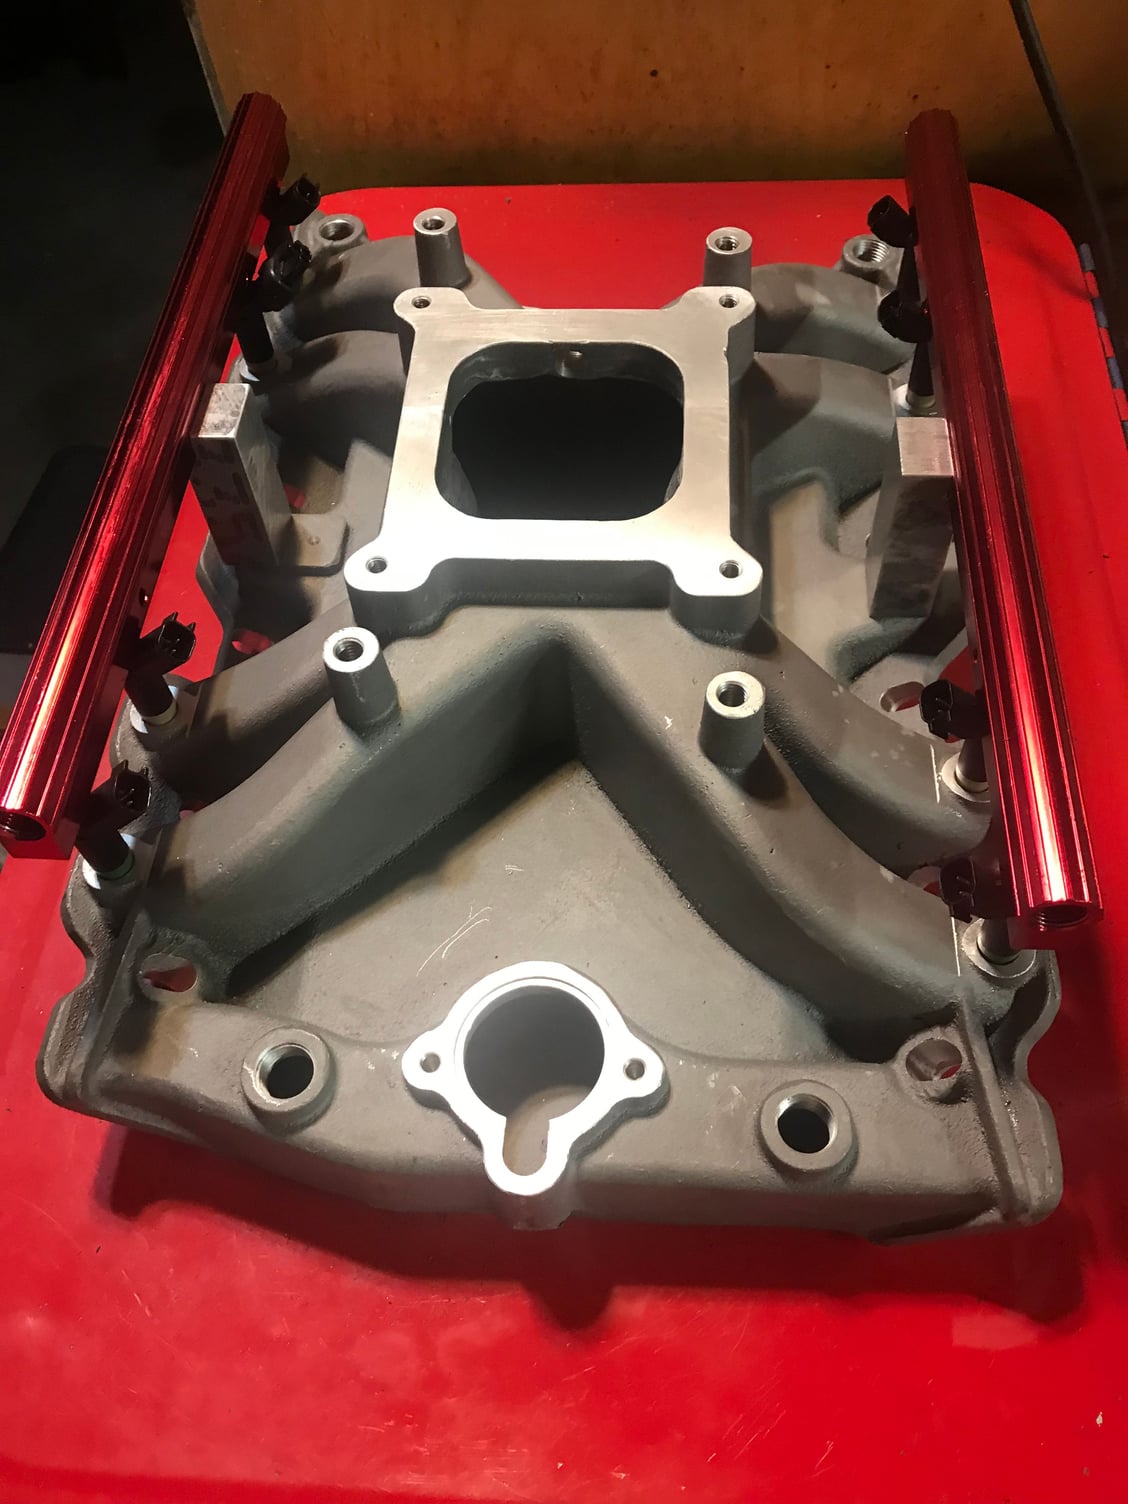
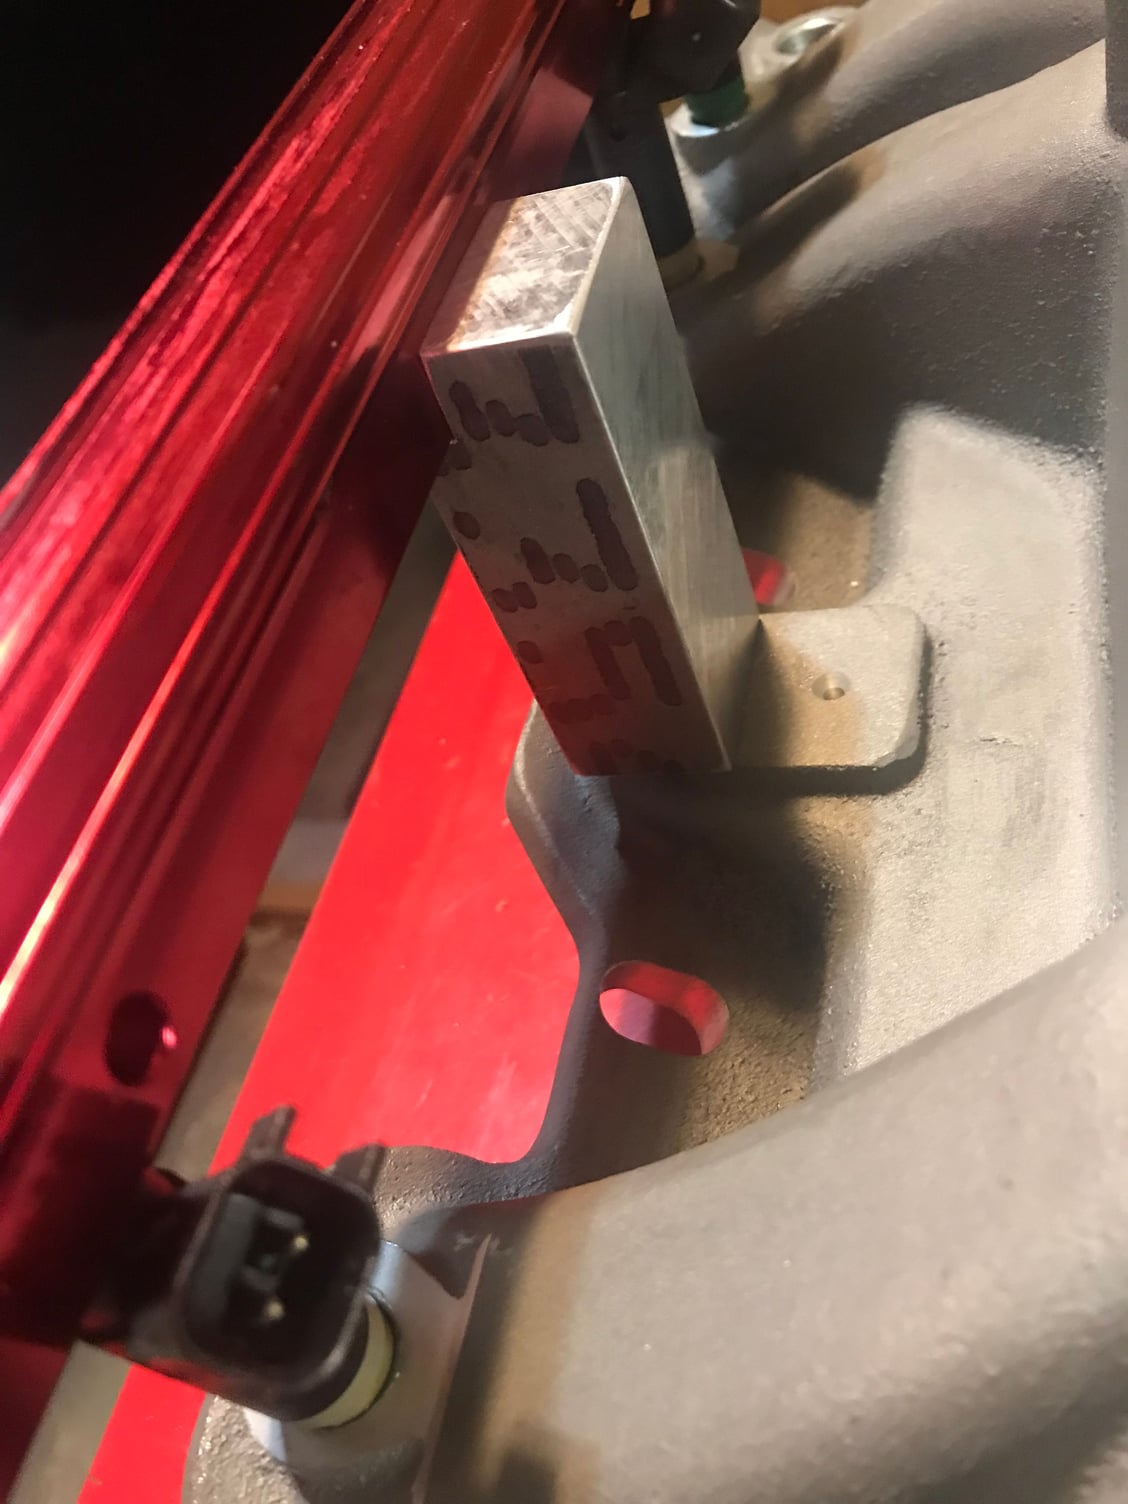

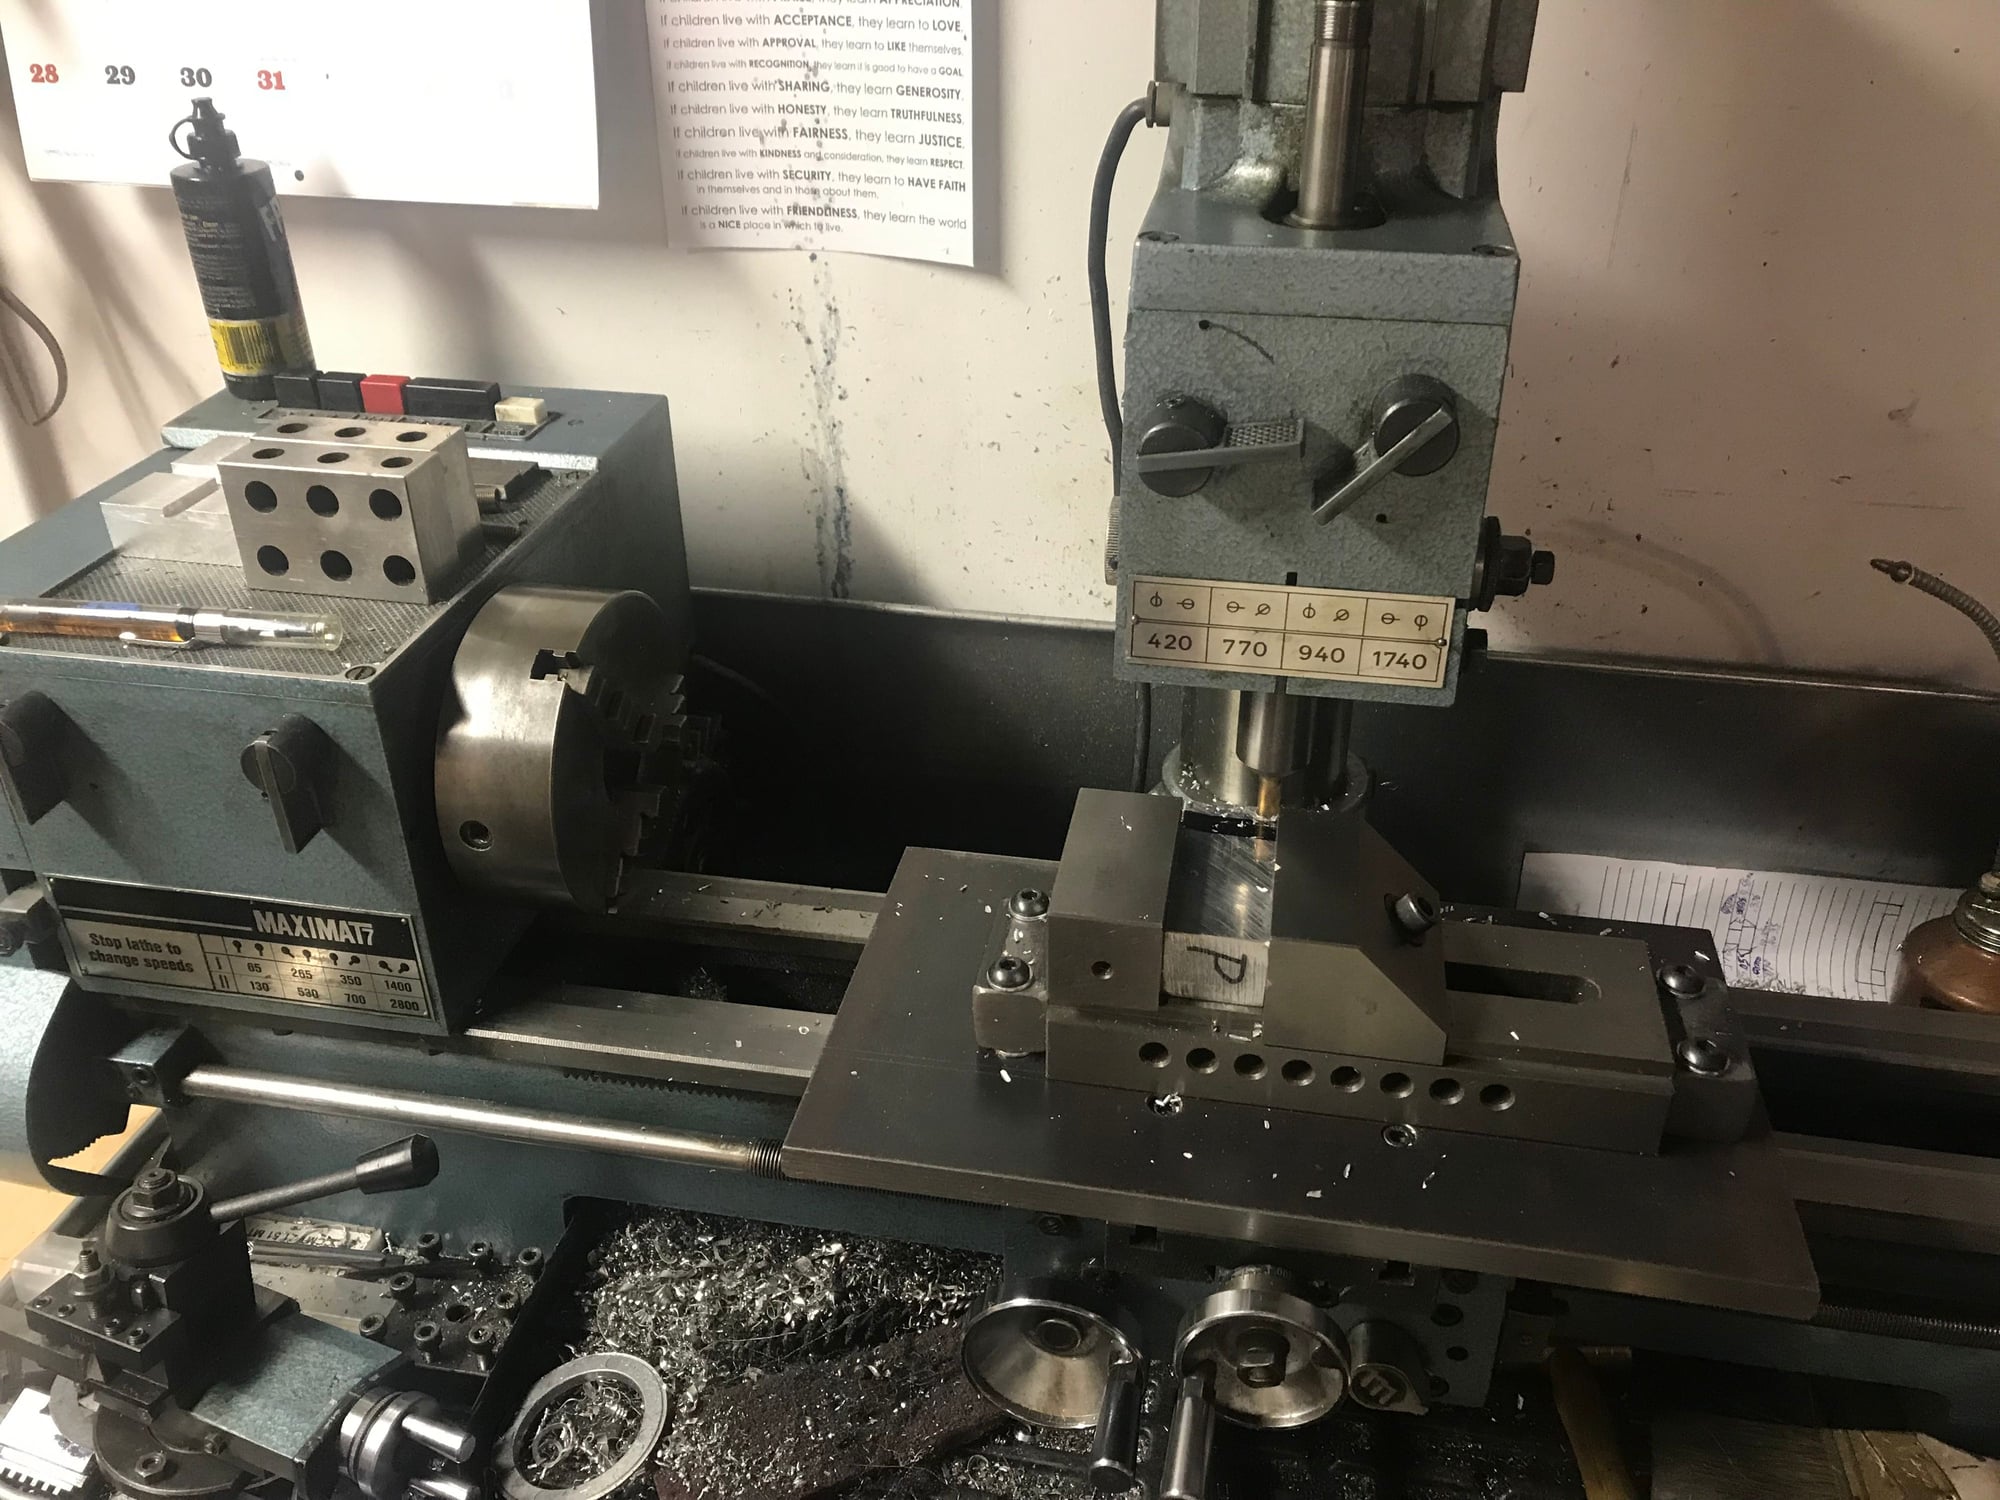
Working on the intake manifold to get the fuel rail mounts/hold-downs made to fit..... these intakes are a nice design, but the fuel rails donít come with adapters/hold-downs that fit.....
Last edited by Battenrunner; December 15th, 2018 at 07:45 PM.
#145
Lots of little things going on, getting ready to go Dyno on Friday, fingers crossed that all goes ok.
Still need to finish the fuel rail hold-downs and install the intake so it can cure before Friday morning......
Still need to finish the fuel rail hold-downs and install the intake so it can cure before Friday morning......
#146
To start on this long diatribe, I should definitely start by thanking Mark of Vortecpro, his son,and Mark's assitant, Eric, as we couldn't have come this far down the right path without them.
Yesterday was a day of lots of work by all of them, as well as of course my Dad and myself, but more on that after the rest of the story......
Before that, had a SNAFU on Thursday at my folks' house when my Dad accidentally left a piece of paper with the part number on it for the intake and the tape holding it onto the bottom of the intake manifold. Of course, by the time I got there after work and asked if he had removed the tape and the paper, there was a short pause, which was followed by some understandable frustration and disappointment, as the heavy silicone had already set up for about 5 hours at that time. I told him that we better get it off and see what happens to the intake gaskets. Of course the intake gaskets tore, and being in the hurry that we have been in constantly, we hadn't ordered a spare set to have in the case of such an occurrence, even though I had wanted to do so.
So, we decided to fix the gaskets with silicone after we removed the paper and tape. the silicone we had was very high build Threebond, so we thought it would surely be strong enough to work.
We cleaned and re-sealed the end rails and installed the intake for it to cure before Friday. We were on to the next task of mounting the fuel rails with the unfinished brackets for now, which was accomplished, mostly, at about 10:00 Thursday night, with a little bit more to do to finish up early Friday morning.
As Friday morning rolled around, we got to it early, and finished up the passenger's side Intake rail temporary bracket for now, so it would hold the injectors without a vacuum leak as we ran it with a carb on the Dyno for now.
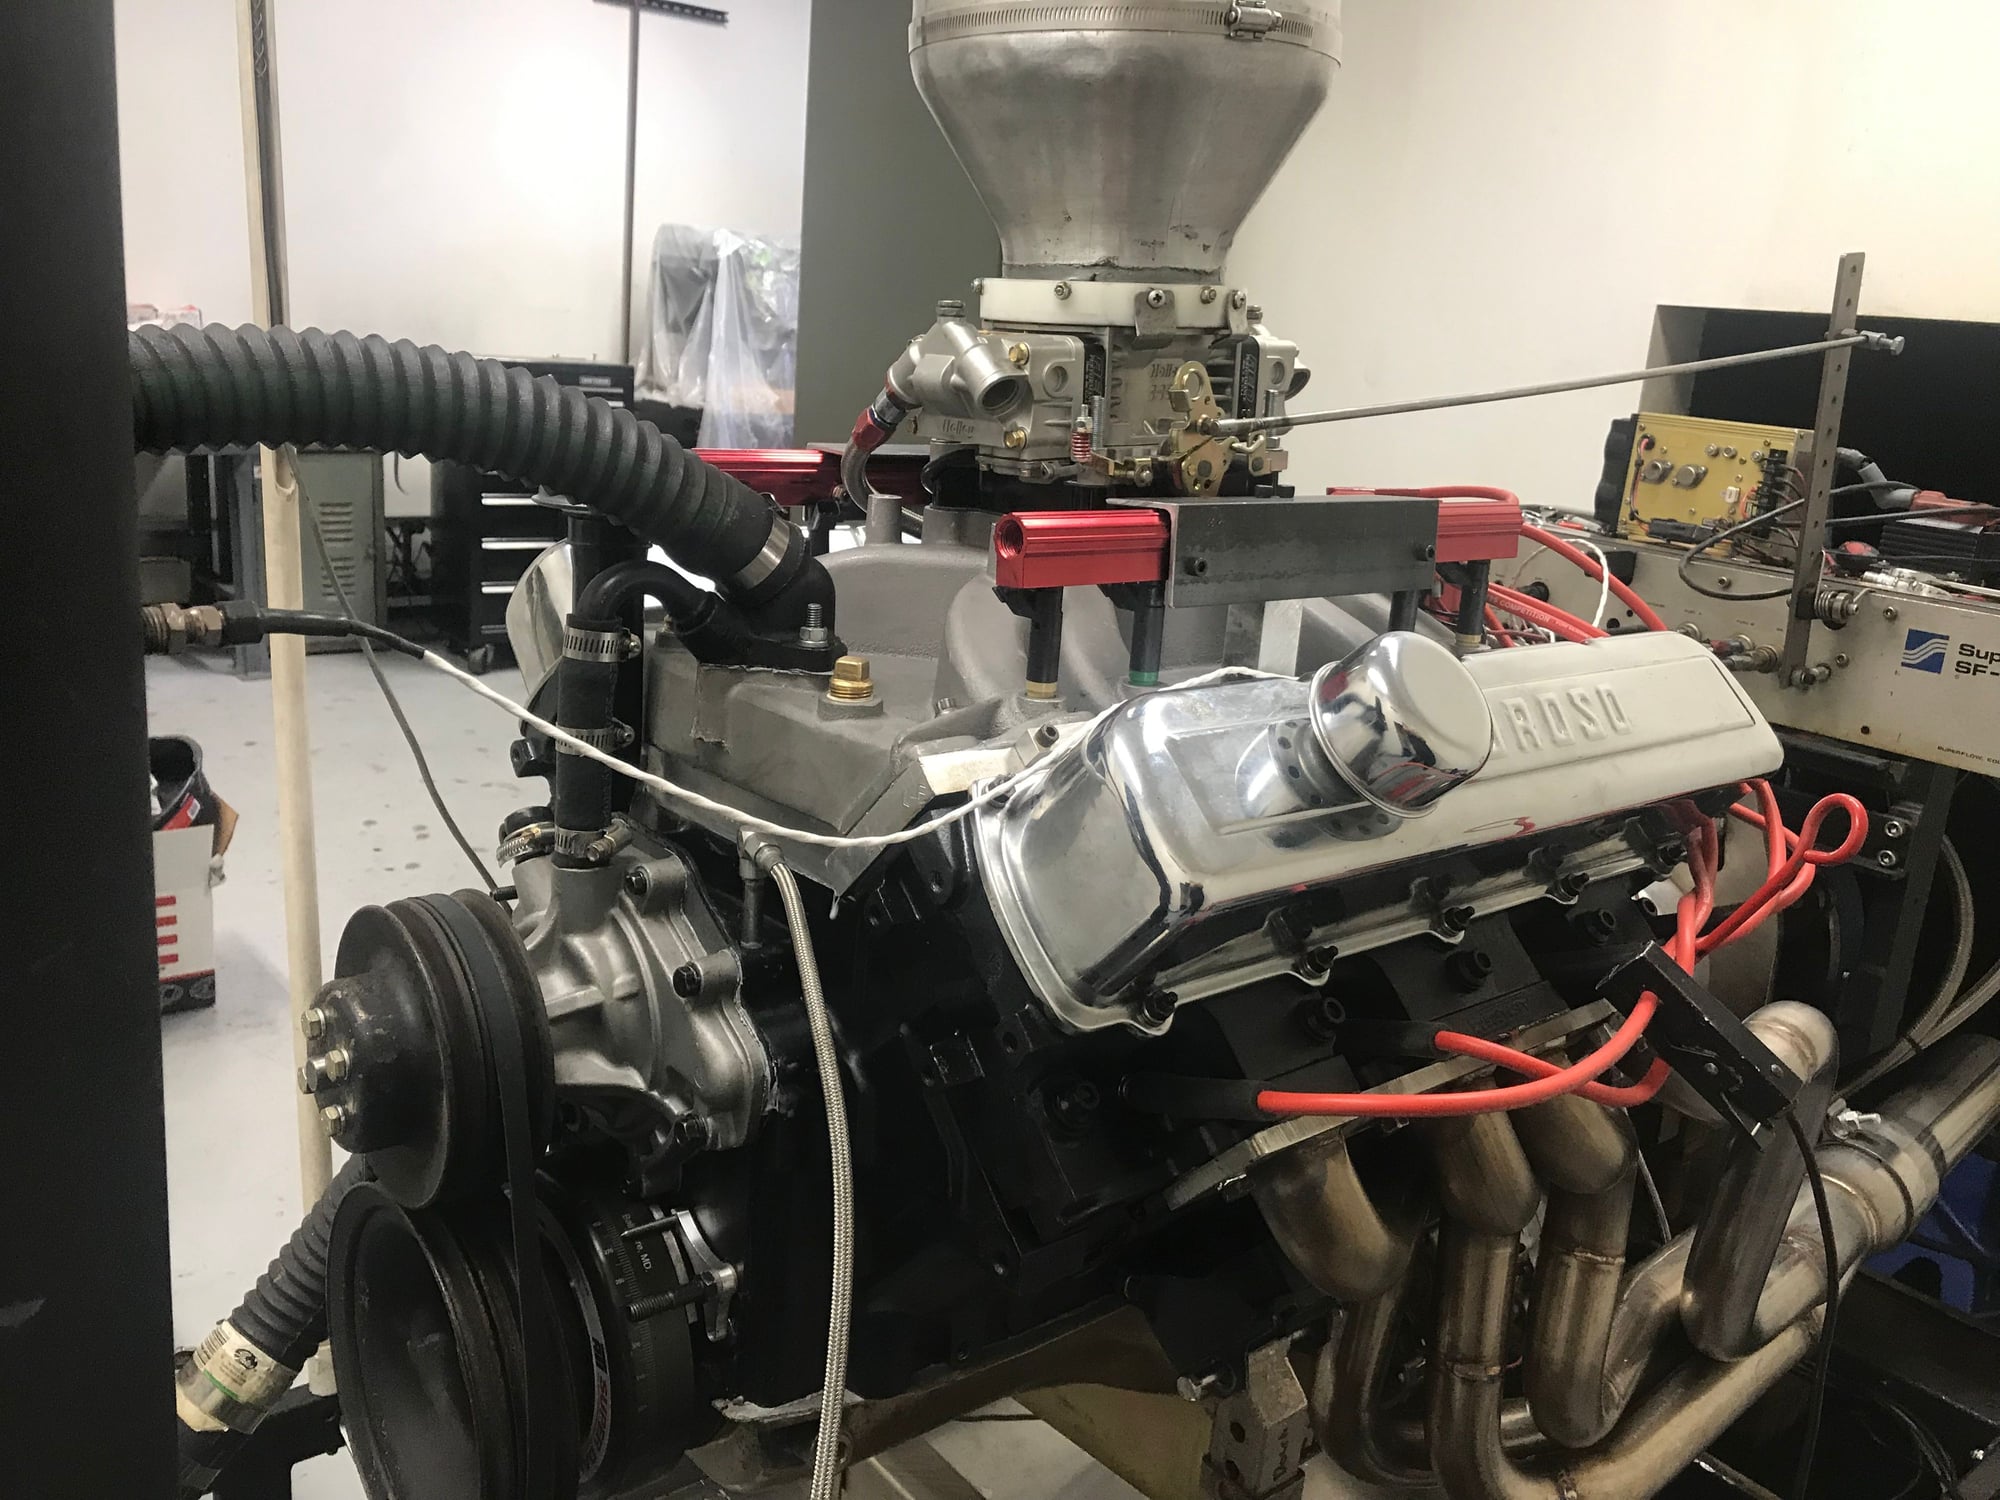
We were able to load the engine onto a uhaul trailer we rented to transport it, and secure it for a 1 hour and 30 minute drive from Lakewood to Colorado Springs to VortecPro's shop. We arrived at approximately 10:45, and got the engine unloaded.
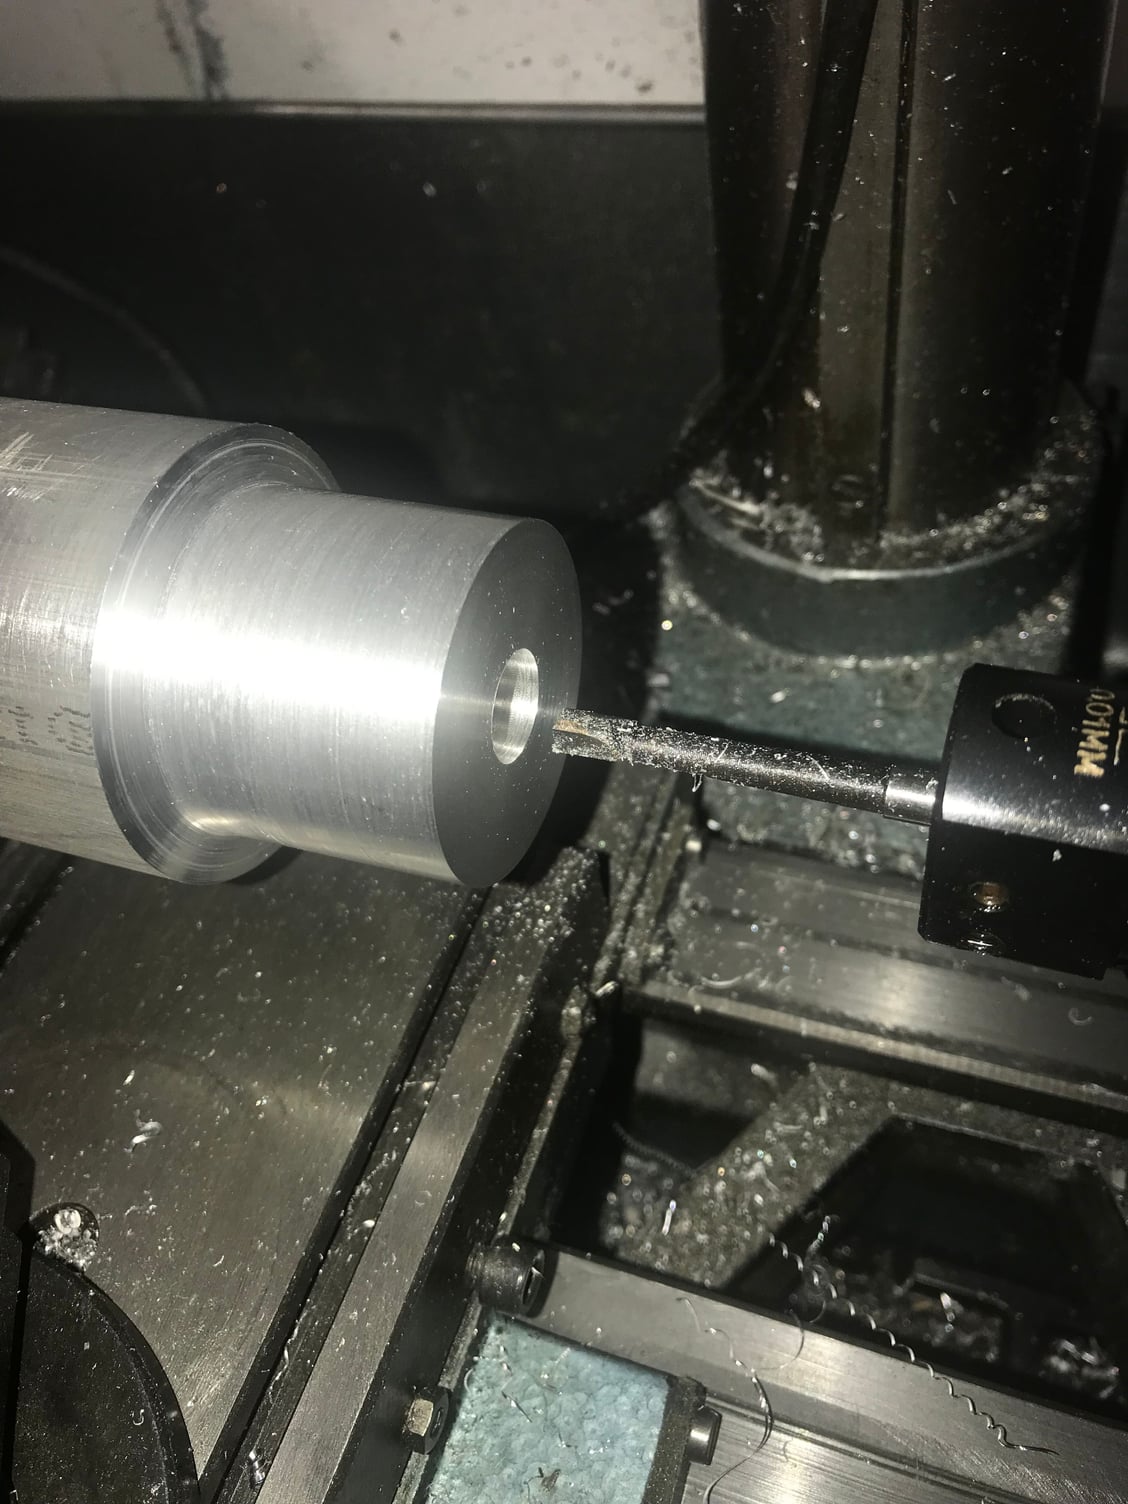
In the meantime, earlier in the week, Mark (Vortecpro) has spoken about what was needed to run the engine on the dyno, and because our Olds engine hadn't been drilled for a Pilot bearing, I had to make a custom Pilot adapter/spacer for the rear face of the crank hub on my little lathe, as well as buy and lathe some TCI Extra long dowel pins so that they would fit into the block and be long enough to space the dyno bellhousing out far enough to mate the drive plate for the dyno to the automatic-only crankshaft without cutting the end of the pilot shaft system down. We installed the correct spacers so that the crankshaft could move without being pushed into the pilot shaft system and removing all of the crank-thrust-end-play.
Next, we got it all readied and full of water, and started it. It ran bad at first, really shaking and messing up. Mark and I had to double check that Dad had set up the plug wires for the 4-7 firing order swap cam. Dad had two wires crossed, so that definitely made it better, but it was still shaking like a dog with some peach pits being disposed of out the back-side, so something was missing, or a few somethings.
But wait, there is more excitement. The water pump was leaking water out of the bottom flange, from close to where the smallest bolt almost touches the ATI balancer, and water was leaking out of two temp sending units that Dad had chosen to use as pipe plugs for the rear of the intake manifold, as well as the rear flange of the intake manifold was leaking, likely where we had attempted our repair of the torn gasket area the previous day. We had used liquid Teflon paste on both of these sending unit/impromptu water plugs, but neither were tight enough to seal. We tightened both, and stopped the driver's side plug from leaking, then, as we tightened the Passenger's side plug, the plug stopped leaking, but the intake leak wasn't stopping, even with tightening the intake down more.
At 2:30pm, we decided to stop as we weren't making progress, Mark was having the patience of Job with us, and he sent us to a parts hub in Denver to buy intake gaskets that they hopefully had. We were calling the parts place before we left and leaving messages, and about halfway back on the hour and a half drive, I received a return call that they did have both the Edelbrock 7284's, and the Holley/MRGasket 404's , both fine, but the E-Brocks were nicer. We finally arrived to the parts place at 4:25, with Denver Friday Holiday traffic setting in fast. The gaskets were secured, but this meant another trip back to Mark's shop down in Colorado Springs early on Saturday morning, and a hope that we could fix it all early enough to get some Dyno time in by Noon.
Last edited by Battenrunner; December 22nd, 2018 at 10:10 PM.
#147
This morning, we were in the car and on the road back to Vortecpro's shop by 7:15am. We had a new tube of Ultra Grey silicone (we were almost out of Threebond), several tools (of course not enough and not all the right ones), and lots of rags and hope that today would be the day of a successful dyno pull.
We arrived at the shop by 8:45am and set to work right away. Mark had already drained the block for us on the Dyno, so we set to work removing and prepping, and re-sealing the water pump with a new gasket and fresh silicone. All was well.
The intake was next, and we were able to slice the silicone on the end rails to help it release. We did so and after examining things looking for the leak on the rear passenger's side water port where the plug was, I quickly discovered the culprit of our Olds Faithful (Olds version that looks more like someone peeing hot water....). On these special Batten Heads, there are aluminum intake spacers to allow the use of the Batten heads with factory or aftermarket Intake manifolds, as the special Edelbrock Victor intake for a Batten-Headed Olds Big Block is very rare. On these spacers, the water port is only about half the length of the stock head water port hole. Remember those temp sending units that Dad used to plug the holes at the back of the intake that were leaking on Friday? The one on the passenger' side was extra long and was gouging into the Batten intake spacer plate as it was tightened to keep it from leaking on the threads. This long sending unit was mechanically flexing and forcing the intake to have a leak at that rear corner the tighter it got. The silicone gasket fix would have likely worked that was performed earlier. Murphy Strikes, again. These were both fixed with proper pipe plugs and Teflon tape.
We got the intake sealed back up with those super nice Edelbrock 7284 gaskets, and we reassembled all of the parts back onto the intake and re-installed the distributor. I am keeping the Mr Gasket 404's for spare parts "just in case..".
Mark Fired the engine up and it still had the weird missing sound that wasn't right. A quick spritz of the headers with some water confirmed that number 4 and number 7 weren't hot.
After several checks and ideas, Vortecpro smartly suggested we swap the wires back to the standard GM firing order. IT WORKED! Which was great, but not so great, as I was planning on the 4-7 swap for some extra power and improvements along with a different lobe that worked better for our combination, which this really didn't seem to do.....
Now we were firing on all 8, though, but something still wasn't quite right as some lower RPM running confirmed.
Remember 4 and 7 being in the right order now (previously thought to be in the swapped/corrected order)? I had attempted to lash the valves in the firing order to minimize turning it over with a long breaker so much, which I thought I had done if the correct 4-7 swap order. WRONG! I had screwed up the lash and missed it on these two cylinders by a bunch, and Mark found another that was a little too loose as well, and corrected it to the same as all the others I had set at 5/8 of a turn.
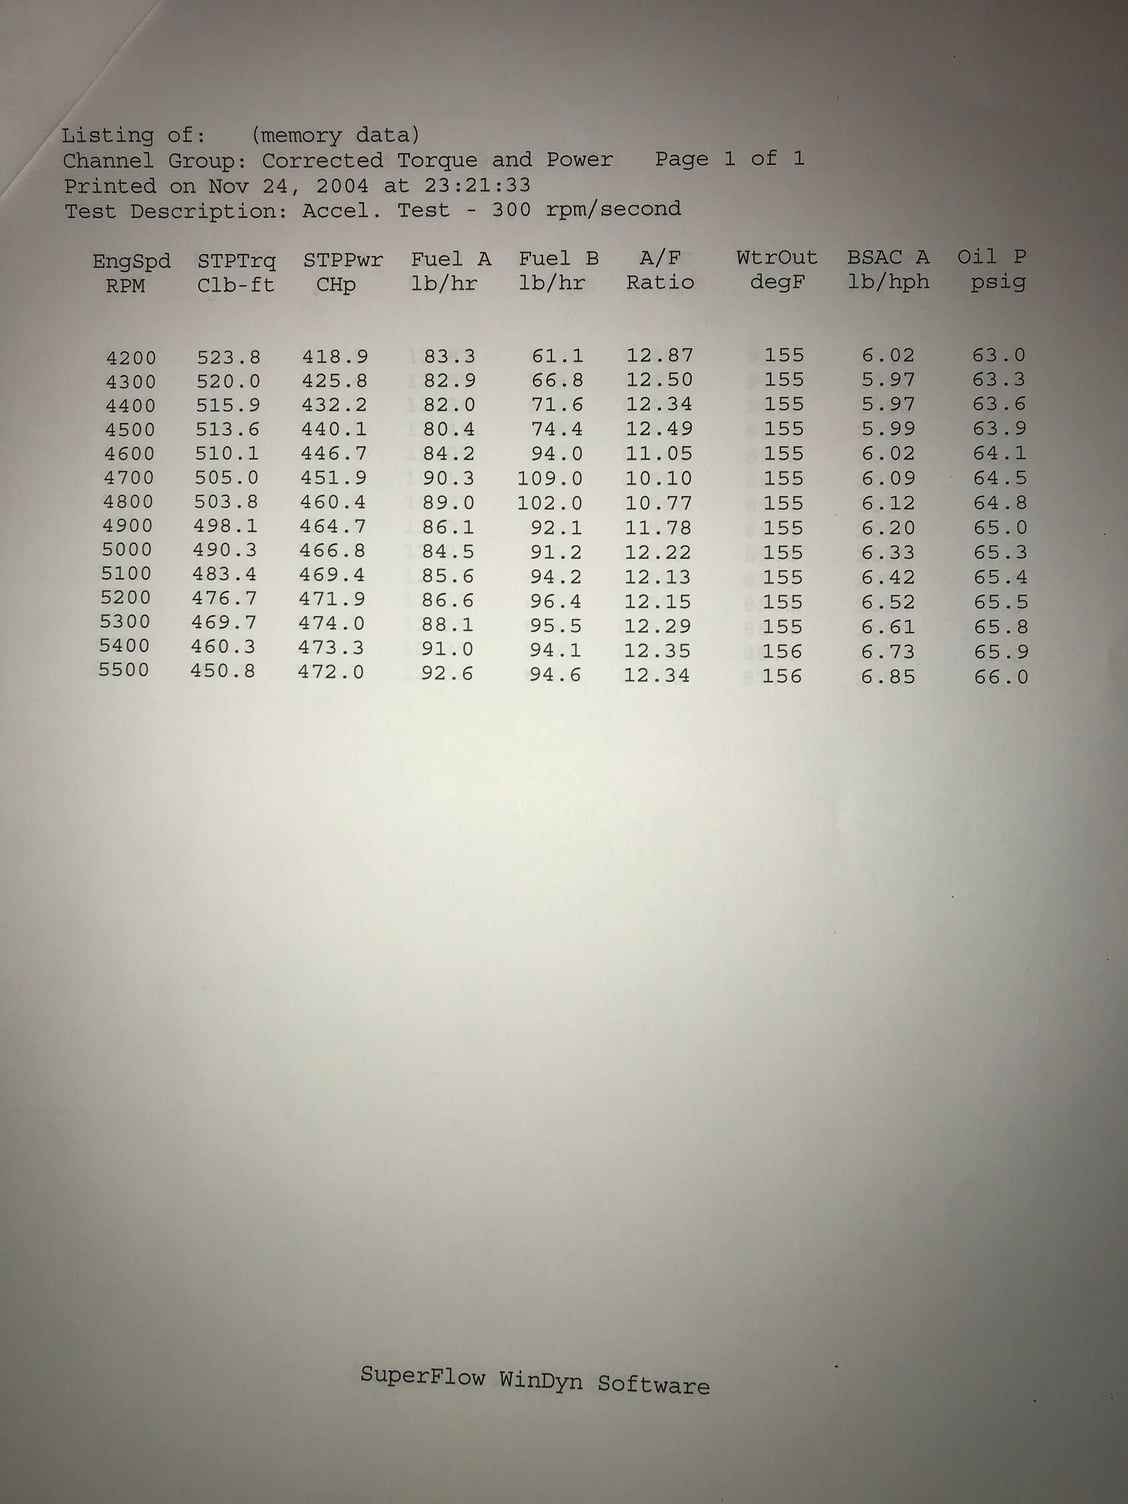
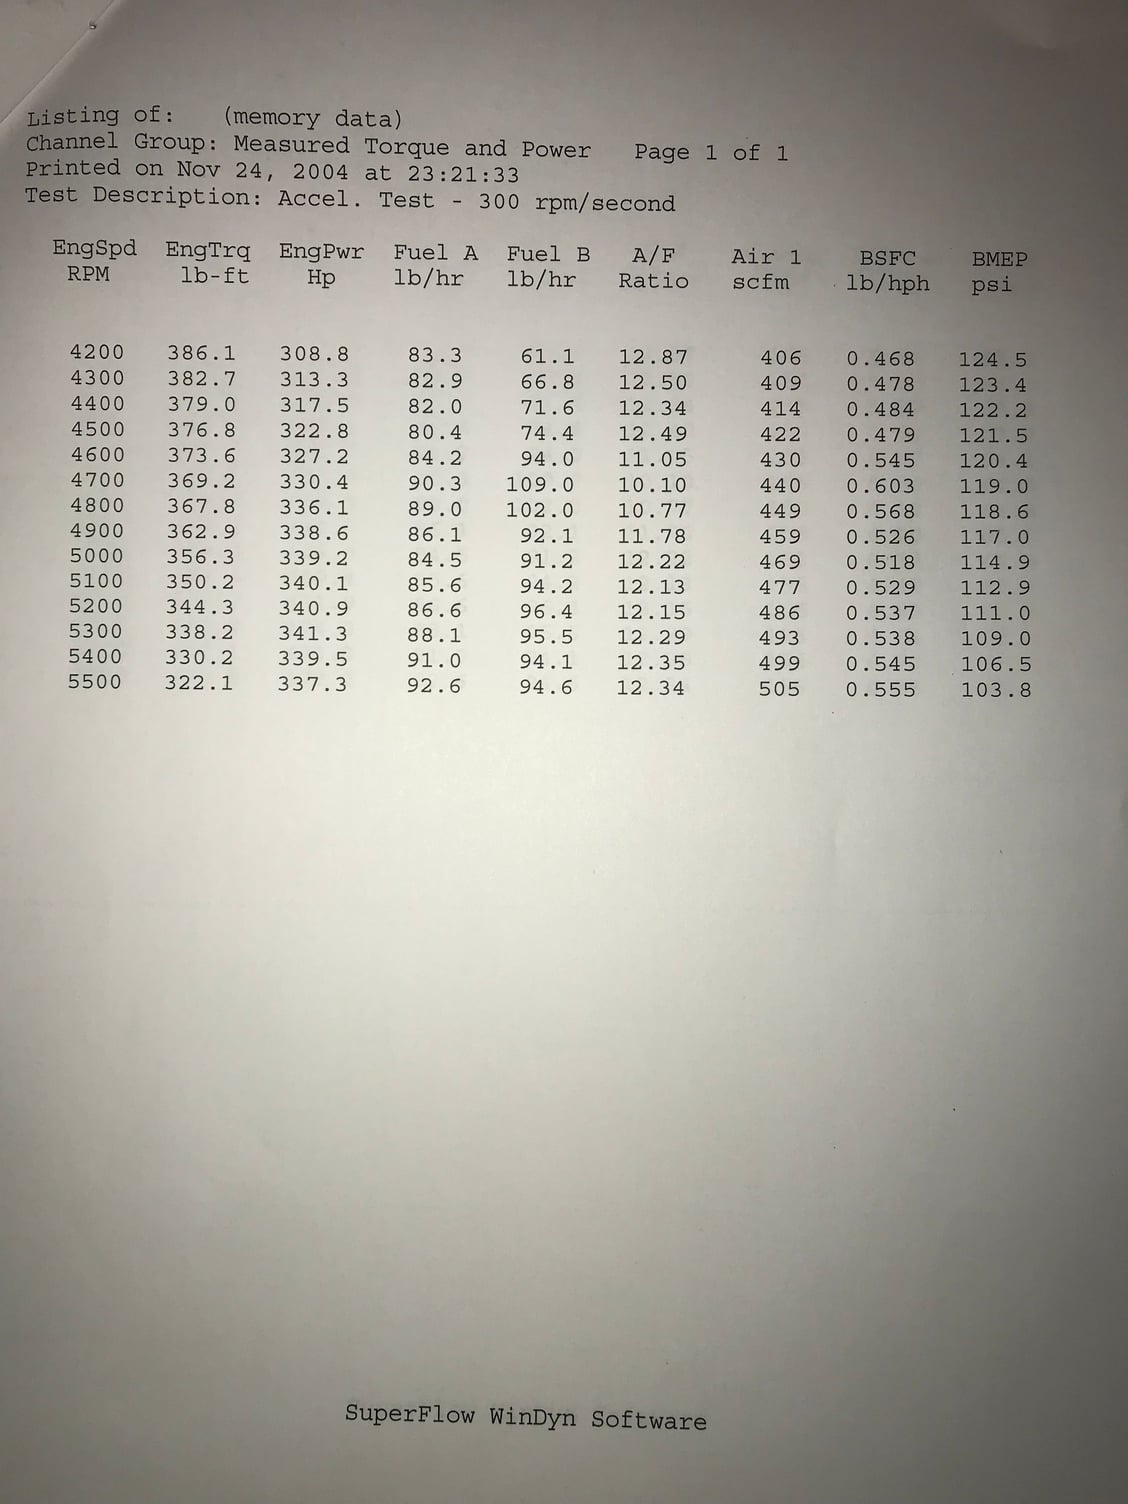
Now we were sounding much better again! With some Dyno runs to 5,000, it confirmed things were looking up, but the power was still not impressive; milquetoast to say the least. The BSFC was climbing out of the mid-high .450->.480 range very quickly after 4200rpm, and Mark started trying ideas; he told me this usually indicates valve bounce or "mild Float", with the timing verified and adjusted correctly, but we were finally above 400hp now. Knowing the Holley HP 1000cfm was a known solid-performer helped as well. Mark went back and relashed the valves to a very narrow 1/8 turn, and it picked up quite a bit of power, putting us into the 450hp range. Running the Dyno up to 5500 rpm just produced more frustration, as the numbers were not only done climbing, it had started to fall down with an erratic power curve above 4800rpm. We did see the power get to 455hp corrected one time.
The fuel curve was erratic and it was showing even worse on this pull, timing didn't seem to matter more than 3 or 4 HP either way, it seems to like 35 degrees of timing the best.
It definitely seemed like a mechanical power limiter was happening, but, also running on an 38-year old HEI AC-Delco used module and stock coil, I thought it might be a good "Hail-Mary" to try out a performance module. There was an Oreilly's right down the street, so we ran to grab an Accel module they had in stock for $50 to try it.
With the Accel module in, it picked up a noticeable amount of horsepower and torque, registering the highest output of all the dyno runs, and it was consistent; we messed with the timing again, but it didn't seem to make a change. We tried out another HEI coil, and it didn't change anything either.
At the end of the day...... we were looking at 523lb-ft of torque at 4200rpm, and a Horsepower peak of 474 at 5200rpm.
Mark had made over 20 dyno pulls on the engine, oil pressure showing 66psi solid and idling hot at 30psi at 850rpm, and pulling 12.5 inches of vacuum with very low timing advance (no vacuum advance). The 6 qts of Maxxima 20w-50 conventional oil mixed with the one of the Joe Gibbs BR oil produced extremely clean looking oil under the valve covers and on the dipstick. Vortecpro’s meticulous machine work had paid off, and we still have a happy, well-built engine without any noise or worries and proven it can take a beating!
Mark (Vortecpro) is quite sure that the .640 lift cam lobe is way too aggressive for our valve spring rate, and may not be controllable.
I am going to be calling Howard's Cams to see what valvespring rate they recommend, as the 160 # @seat/360 # @open doesn't seem to be good enough.
There might be another 25hp hiding in the valve-bounce situation above 4900 rpm, so some different springs and maybe some titanium retainers might help, but that is speculative and hopeful on my part.
We also feel there is more power in a different cam grind, and what I had paid and hoped to have with the 4-7 swap, so that is a disappointment. At the end of the day today, combined with yesterday, Mark (Vortecpro) had put in more than 10 hours of time with us on the Dyno, helped troubleshoot some major issues that would have had us chasing our tails, and tuned it with his expertise on lash and assessing/minimizing the effects of a valve-bounce and watching the BSFC where it was showing the problems.
We don't really have the money to get another cam that might be better for this combo, so we are going to do what we can with this one. Otherwise, I am doing some scrounging to get some money up so we can change the cam to one that will work to make some better power and be controllable.
Also, note the true observed horsepower that is what was read at 6400ft. elevation, even less exciting, but it is what it is.
We can’t thank Vortecpro enough for his kindness, tuning expertise, and execution of excellent machine work.
Last edited by Battenrunner; December 25th, 2018 at 08:27 PM.
#149
Good info thanks. But a few things.
The 4-7 swap wonít do squat for your combo. Been there done that. Don't lose any sleep over that, really.
And that grind was making good torque down low, despite being on a 114lsa. That shouldíve made a less peaky, flatter torque curve. At what icl did you install it? Note, your bsfc went south in the middle too, basically because of an extra fat air/fuel at that point. Thatís a strange problem with a carb like that.
What lifter is in it? When doing a hyd roller especially, itís extra important to match the springs to the lifter. Not sure what your current valve spring pressures are, but Iíve done dozens of hyd roller Olds builds that pull to 6000 with no problems, using a similar cam to yours.
The best combo Iíve found is 150-160 on the seat with about 380 or so open. That, coupled with the new Topline-Hylift lifter will get you to 6000 no problem, if everything else is right of course. I donít think your issue is the cam necessarily.
And you didnít have time to do it with EFI? Too bad, that would've been great to see the difference.
Hope this helps. Thanks.
Last edited by cutlassefi; December 23rd, 2018 at 06:22 AM.
#150
Registered User
Join Date: Aug 2012
Location: Colorado Springs Colorado/Thousand Oaks Ca
Posts: 1,719
Ryan
Great job on your build! The engine ran solid just a few details on the combination need to be addressed and I'am sure you will. Any one needing to dyno a Olds with out a drlled crank should look you up, as your kit you made for adapting your Olds to my dyno was excellent! Nice work!
Great job on your build! The engine ran solid just a few details on the combination need to be addressed and I'am sure you will. Any one needing to dyno a Olds with out a drlled crank should look you up, as your kit you made for adapting your Olds to my dyno was excellent! Nice work!
#151
Registered User
Join Date: Aug 2012
Location: Colorado Springs Colorado/Thousand Oaks Ca
Posts: 1,719
Good info thanks.
What lifter is in it? When doing a hyd roller especially, it’s extra important to match the springs to the lifter. Not sure what your current valve spring pressures are, but I’ve done dozens of roller Olds builds that pull to 6000 with no problems, using a similar cam to yours.
The best combo I’ve found is 140-150 on the seat with about 380 or so open. That, coupled with the Topline-Hylift lifter will get you to 6000 no problem, if everything else is right of course.
And did you not have time to do it with EFI? That would've been great to see the difference.
Thanks.
I have to ask.....when I go to your statistics, and look at your BBO engine build threads, how come at least the first several builds all peak around 5100 RPM to 5300 RPM, and in some cases the BSFC takes off after 5000 RPM?
1. 463 EFI Build
2 469 Carb/EFI build
3. 463 build
4. 455 build
5. 468 EFI build
https://www.tapatalk.com/groups/real...fi-t13676.html
Last edited by VORTECPRO; February 4th, 2019 at 04:37 PM.
#153
Most were out of the box carbs. And they will be less efficient when run out of range of the combo.
Rockers are typically 1.6.
And look at the 480 I did. Made power into the 6000ís with the same Topline lifter and springs as the rest. Oh and that had 1.7 rockers and a bigger cam than the others, almost identical to the one in this build. So why did it make power into the 6000ís?
Rockers are typically 1.6.
And look at the 480 I did. Made power into the 6000ís with the same Topline lifter and springs as the rest. Oh and that had 1.7 rockers and a bigger cam than the others, almost identical to the one in this build. So why did it make power into the 6000ís?
Last edited by cutlassefi; December 23rd, 2018 at 07:51 AM.
#154
Good info thanks. But a few things.
The 4-7 swap wonít do squat for your combo. Been there done that. Don't lose any sleep over that, really.
And that grind was making good torque down low, despite being on a 114lsa. That shouldíve made a less peaky, flatter torque curve. At what icl did you install it? Note, your bsfc went south in the middle too, basically because of an extra fat air/fuel at that point. Thatís a strange problem with a carb like that.
What lifter is in it? When doing a hyd roller especially, itís extra important to match the springs to the lifter. Not sure what your current valve spring pressures are, but Iíve done dozens of hyd roller Olds builds that pull to 6000 with no problems, using a similar cam to yours.
The best combo Iíve found is 150-160 on the seat with about 380 or so open. That, coupled with the new Topline-Hylift lifter will get you to 6000 no problem, if everything else is right of course. I donít think your issue is the cam necessarily.
And you didnít have time to do it with EFI? Too bad, that would've been great to see the difference.
Hope this helps. Thanks.
The 4-7 swap wonít do squat for your combo. Been there done that. Don't lose any sleep over that, really.
And that grind was making good torque down low, despite being on a 114lsa. That shouldíve made a less peaky, flatter torque curve. At what icl did you install it? Note, your bsfc went south in the middle too, basically because of an extra fat air/fuel at that point. Thatís a strange problem with a carb like that.
What lifter is in it? When doing a hyd roller especially, itís extra important to match the springs to the lifter. Not sure what your current valve spring pressures are, but Iíve done dozens of hyd roller Olds builds that pull to 6000 with no problems, using a similar cam to yours.
The best combo Iíve found is 150-160 on the seat with about 380 or so open. That, coupled with the new Topline-Hylift lifter will get you to 6000 no problem, if everything else is right of course. I donít think your issue is the cam necessarily.
And you didnít have time to do it with EFI? Too bad, that would've been great to see the difference.
Hope this helps. Thanks.
It is ground on a 112LSA, and we installed it at a 107 intake centerline.
The lifters were identified to be an early Morel lifter, 25 years old but never ran, as the engine was delivered by Mondello. These were the same valvesprings that came on the engine originally as well, and they tested good.
With my work schedule being so crazy, I couldnít do nearly as much as I had hoped by this time, we were lucky to get it to the Dyno at all the way things went. EFI will happen after we get all the mechanical gremlins corrected.
Last edited by Battenrunner; December 23rd, 2018 at 08:07 AM.
#155
Ryan
Great job on your build! The engine ran solid just a few details on the combination need to be addressed and I'am sure you will. Any one needing to dyno a Olds with out a drlled crank should look you up, as your kit you made for adapting your Olds to my dyno was excellent! Nice work!
Great job on your build! The engine ran solid just a few details on the combination need to be addressed and I'am sure you will. Any one needing to dyno a Olds with out a drlled crank should look you up, as your kit you made for adapting your Olds to my dyno was excellent! Nice work!
We couldnít have asked for anyone better than you and your team At Vortecpro to have given us so much help, above and beyond what should have been.
At least we got the adapter setup done right, and it worked well, thankfully!
#156
It is ground on a 112LSA, and we installed it at a 107 intake centerline.
The lifters were identified to be an early Morel lifter, 25 years old but never ran, as the engine was delivered by Mondello. These were the same valvesprings that came on the engine originally as well, and they tested good.
With my work schedule being so crazy, I couldnít do nearly as much as I had hoped by this time, we were lucky to get it to the Dyno at all the way things went.
Just an FYI, i quit using the Morels about 2 years ago for most of my builds because of problems like this. Iíve been using the Topline Hylifts exclusively since then.
Again hope this helps.
Last edited by cutlassefi; December 23rd, 2018 at 08:22 AM.
#157
Gotcha. Did you pull some rockers and look at the top of the valve stems? Normally that will tell you if youíve got a valve float problem. Iíll bet the lifters are the culprit. Iíve done too many with these same styles of cams for it be that.
Just an FYI, i quit using the Morels about 2 years ago for most of my builds because of problems like this. Iíve been using the Topline Hylifts exclusively since then.
Again hope this helps.
Also, how much would a set of those hylift lifters run?
We obviously want to fix the issues, I just donít want to dump another $1000 into it with the same results at the outcome.
#158
Registered User
Join Date: Aug 2012
Location: Colorado Springs Colorado/Thousand Oaks Ca
Posts: 1,719
Thank you for the input Mark, have you used these lobes in anything yet besides our engine? Do you have some dyno graphs of those runs with the morel lifters that you could share so we can compare? Were they doing the same thing to your BSFC numbers because of bounce?
Also, how much would a set of those hylift lifters run?
We obviously want to fix the issues, I just don’t want to dump another $1000 into it with the same results at the outcome.
Its not the lifters................235@.050......640 lift I believe thats the problem, and then theres the 115 cranking compression. As far as Morel lifters go I've never seen a Morel lifter down on power to another lifter brand, (and I've done a lot of testing) I've heard noise in some cases, but not in Ryans case.
Last edited by VORTECPRO; December 23rd, 2018 at 08:56 AM.
#159
Congrats on getting it back together and on the dyno. Its nice to see Classic Oldsmobile members working together and helping out its what I always liked about car building.
You can now work through any issues that still remain knowing you have a solid base to work from.
Thanks for sharing and being so honest with the trials of your build.
You can now work through any issues that still remain knowing you have a solid base to work from.
Thanks for sharing and being so honest with the trials of your build.
#160
Mark / Vortecpro wrote:
Its not the lifters................235@.050......640 lift I believe thats the problem, and then theres the 115 cranking compression. As far as Morel lifters go I've never seen a Morel lifter down on power to another lifter brand, (and I've done a lot of testing) I've heard noise in some cases, but not in Ryans case.
Bernhard wrote:
Do you think the cam is bleeding off to much cylinder pressure or is it a sealing issue?
Did you have a chance to do a leak down test?


