Rocket Vapor

Thread Tools
 
Search this Thread
 
Old January 21st, 2017, 03:30 AM
  #1  
Registered User
Thread Starter
 
wr1970's Avatar
 
Join Date: Sep 2013
Posts: 3,574
Rocket Vapor

I am going to try and post pictures of my tube chassis car as my album was deleted somehow. Est date to Track 2018 or as cash allows. I will get a picture of all tin work that is done.
wr1970 is offline  
Old January 21st, 2017, 03:55 AM
  #2  
Registered User
Thread Starter
 
wr1970's Avatar
 
Join Date: Sep 2013
Posts: 3,574


wr1970 is offline  
Old January 21st, 2017, 03:58 AM
  #3  
Registered User
Thread Starter
 
wr1970's Avatar
 
Join Date: Sep 2013
Posts: 3,574
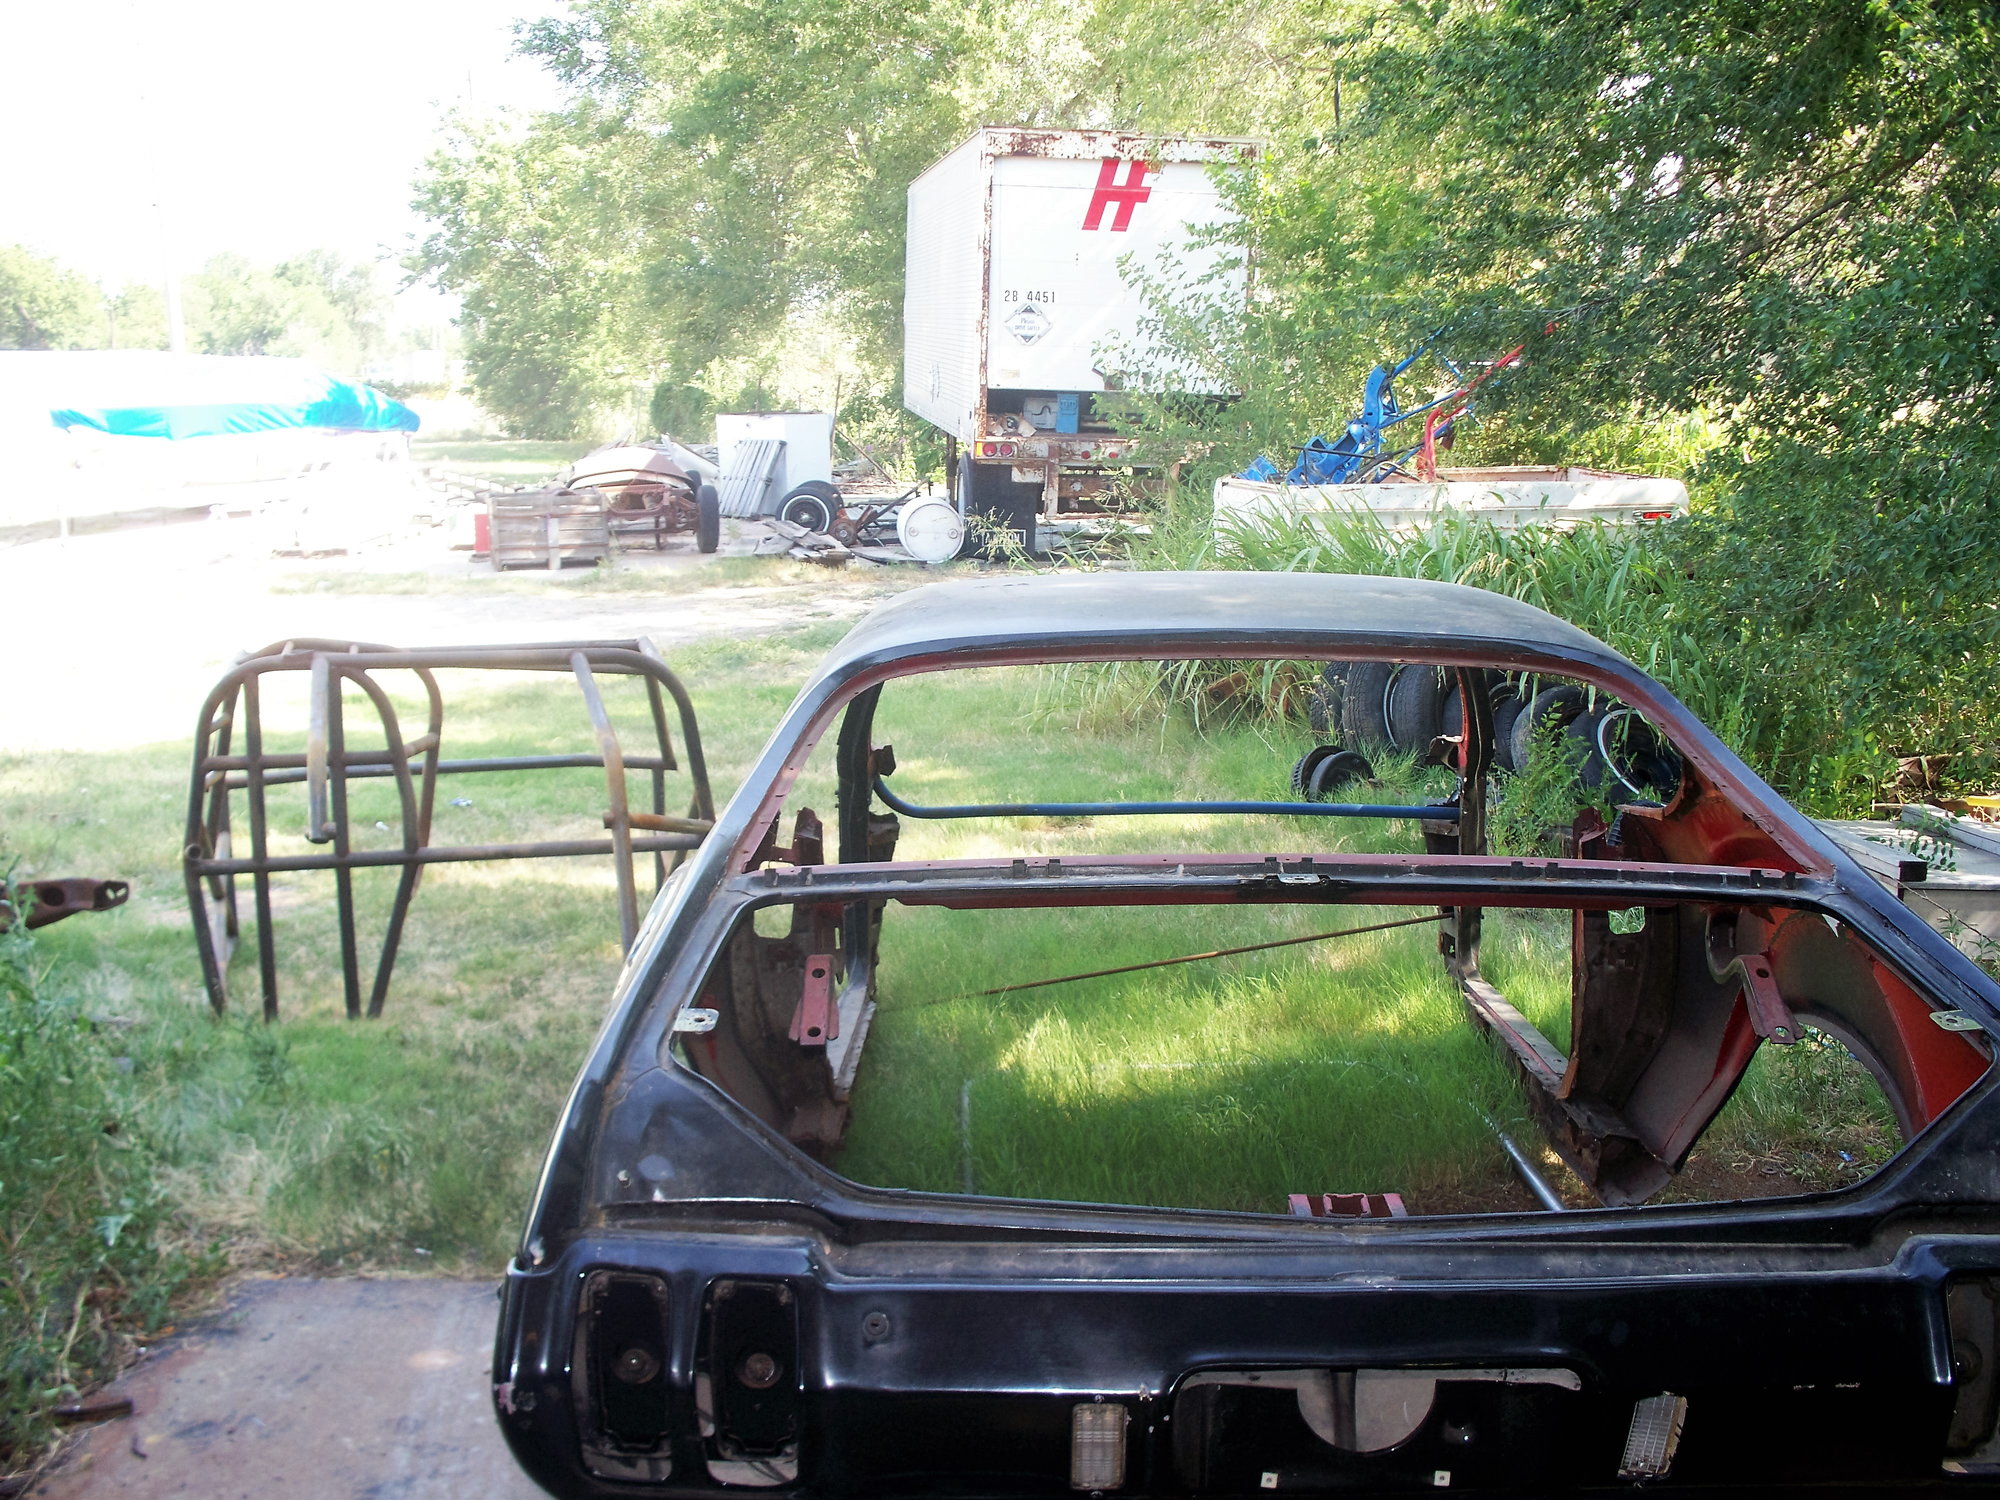
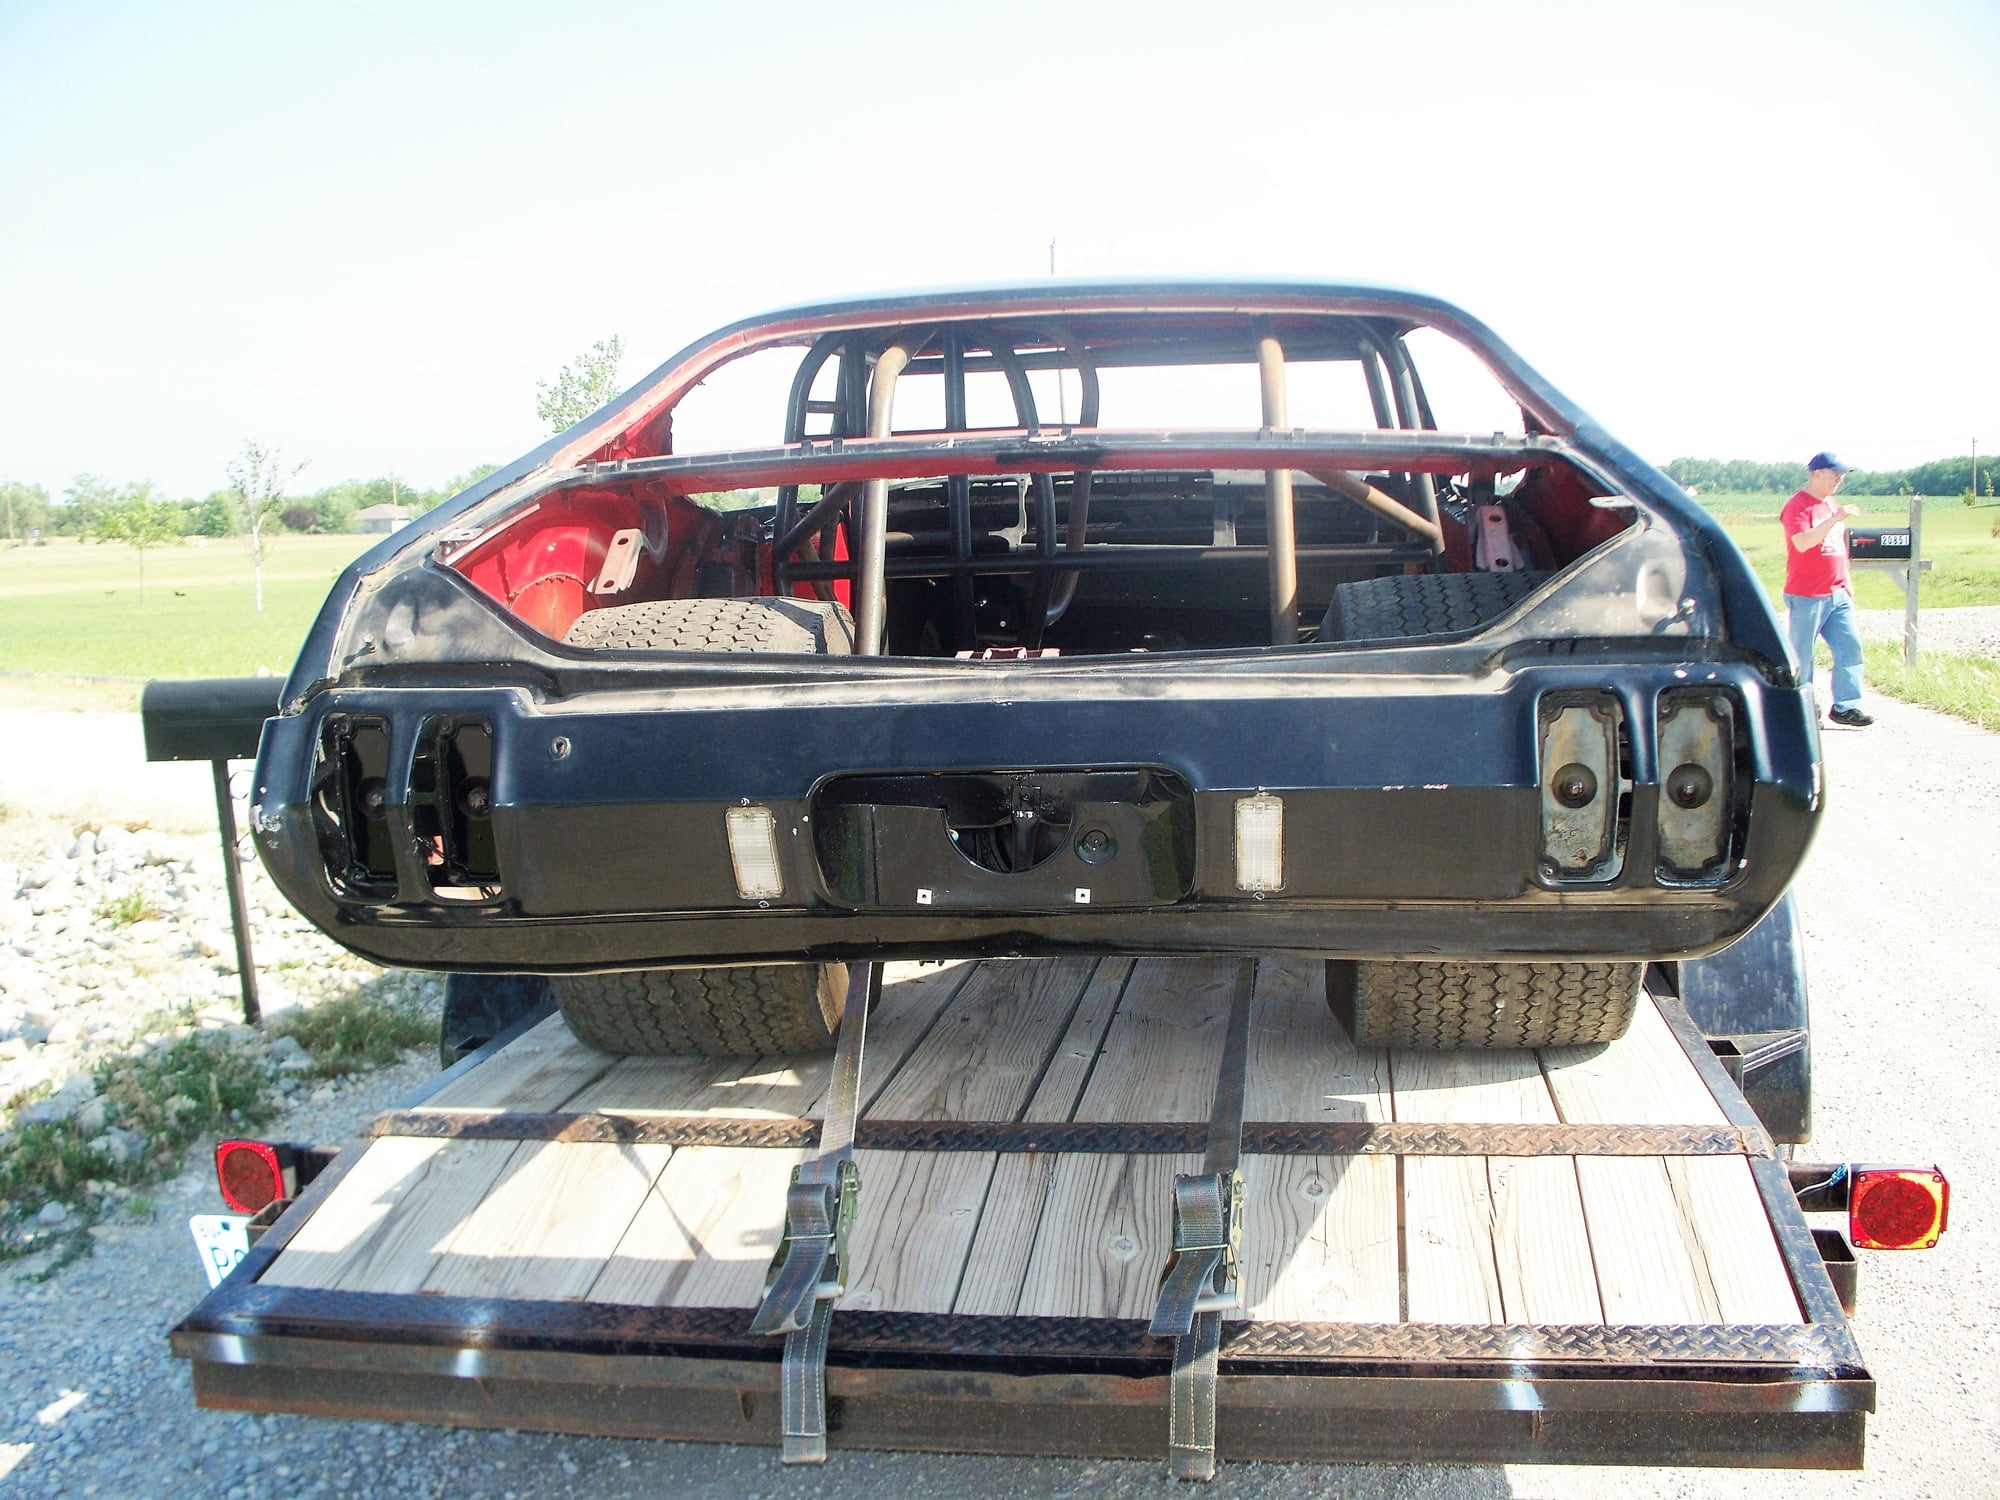
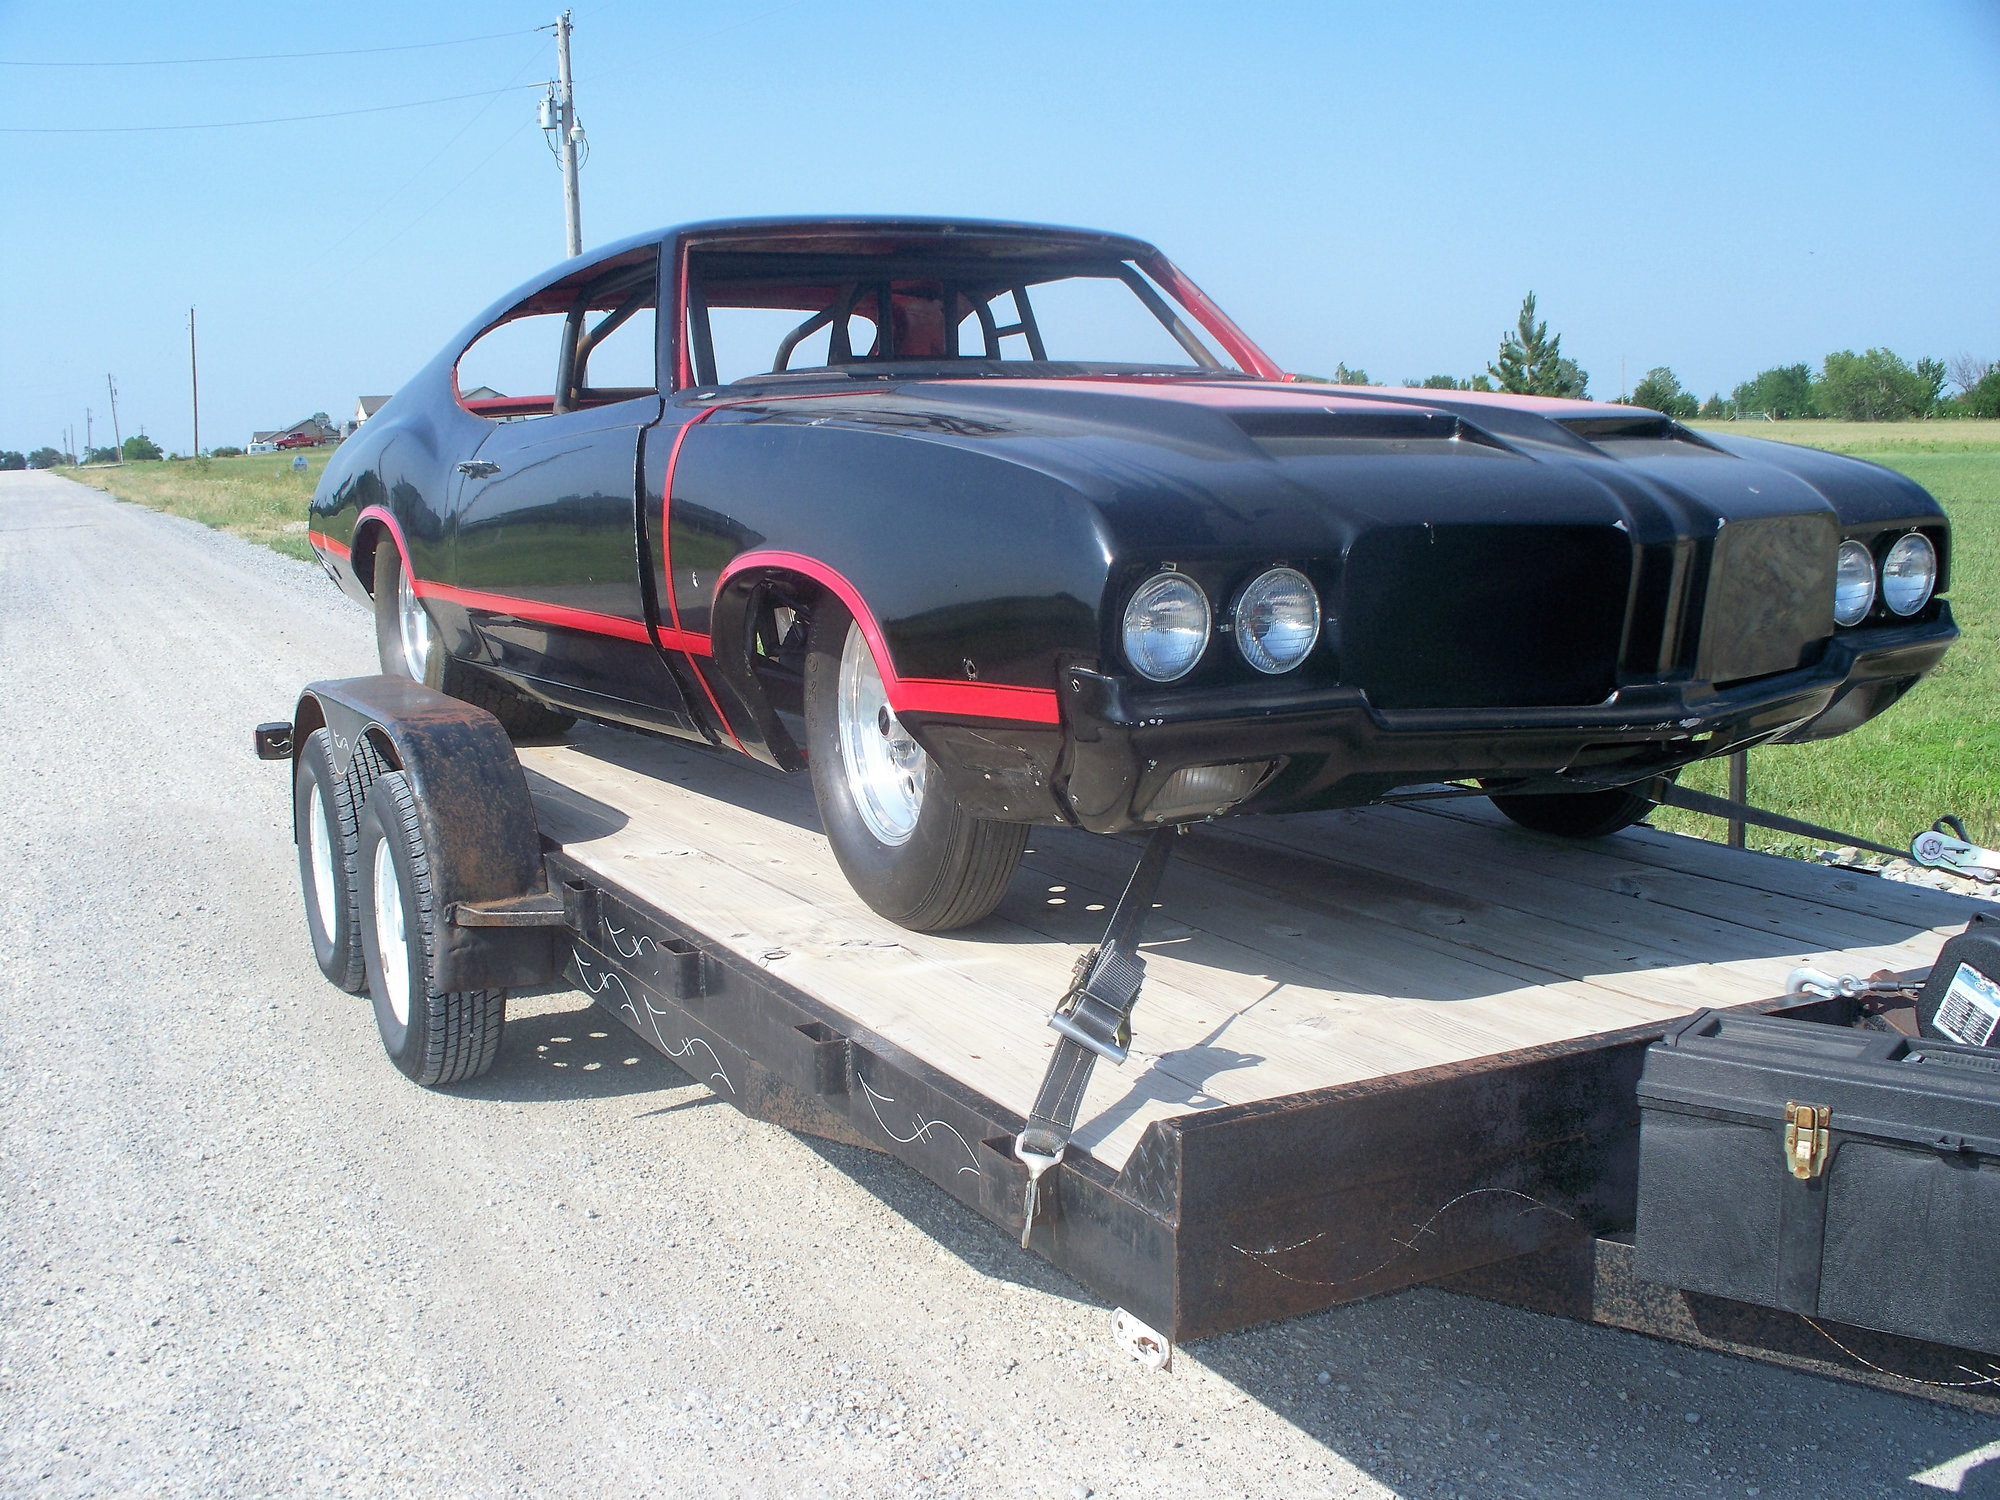
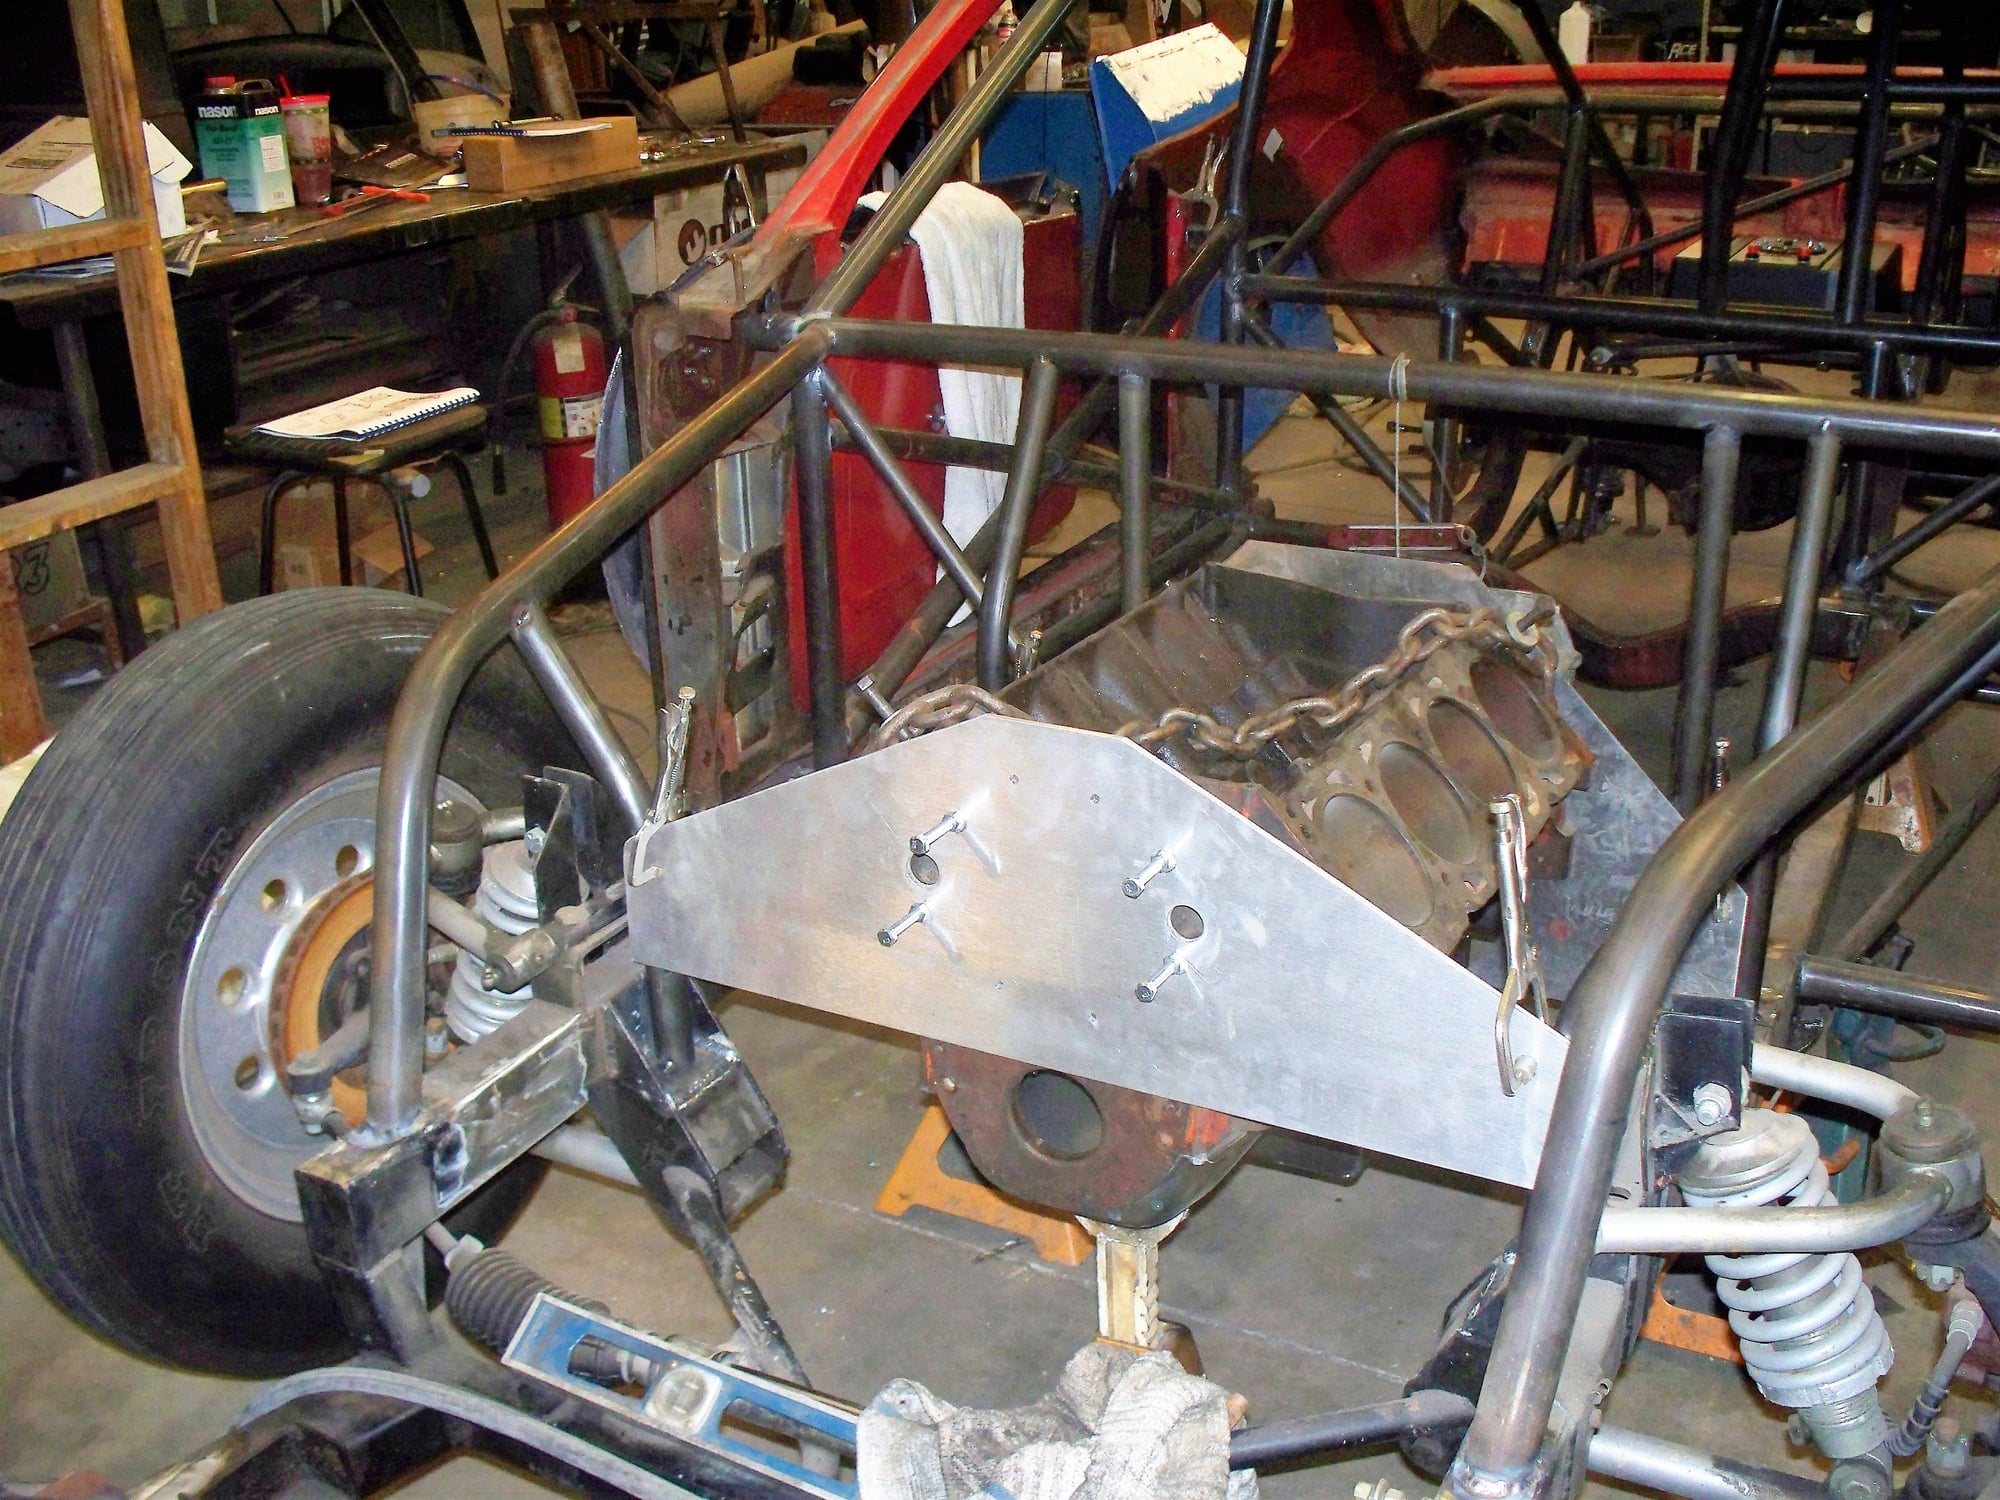
The first two pictures are before the chassis was reworked and is loaded to go to the shop for work to be done. Reason was someone cut door bar connect to chassis off to short and cut a piece out of the frame on drivers side forward of fire wall.
wr1970 is offline  
Old January 21st, 2017, 04:02 AM
  #4  
Hookers under Hood
 
76olds's Avatar
 
Join Date: Nov 2013
Location: Ontario, Canada
Posts: 3,543
Thanks for posting, pics look awesome!! I'm sure this will help someone looking to get into racing and anyone having questions with your process in building the perfect chassis.
I hope guys with questions will ask away in this thread.
I'm following along,
Cheers
Eric

Last edited by 76olds; January 21st, 2017 at 04:11 AM.
76olds is offline  
Old January 21st, 2017, 04:04 AM
  #5  
Registered User
Thread Starter
 
wr1970's Avatar
 
Join Date: Sep 2013
Posts: 3,574


wr1970 is offline  
Old January 21st, 2017, 04:06 AM
  #6  
Registered User
Thread Starter
 
wr1970's Avatar
 
Join Date: Sep 2013
Posts: 3,574
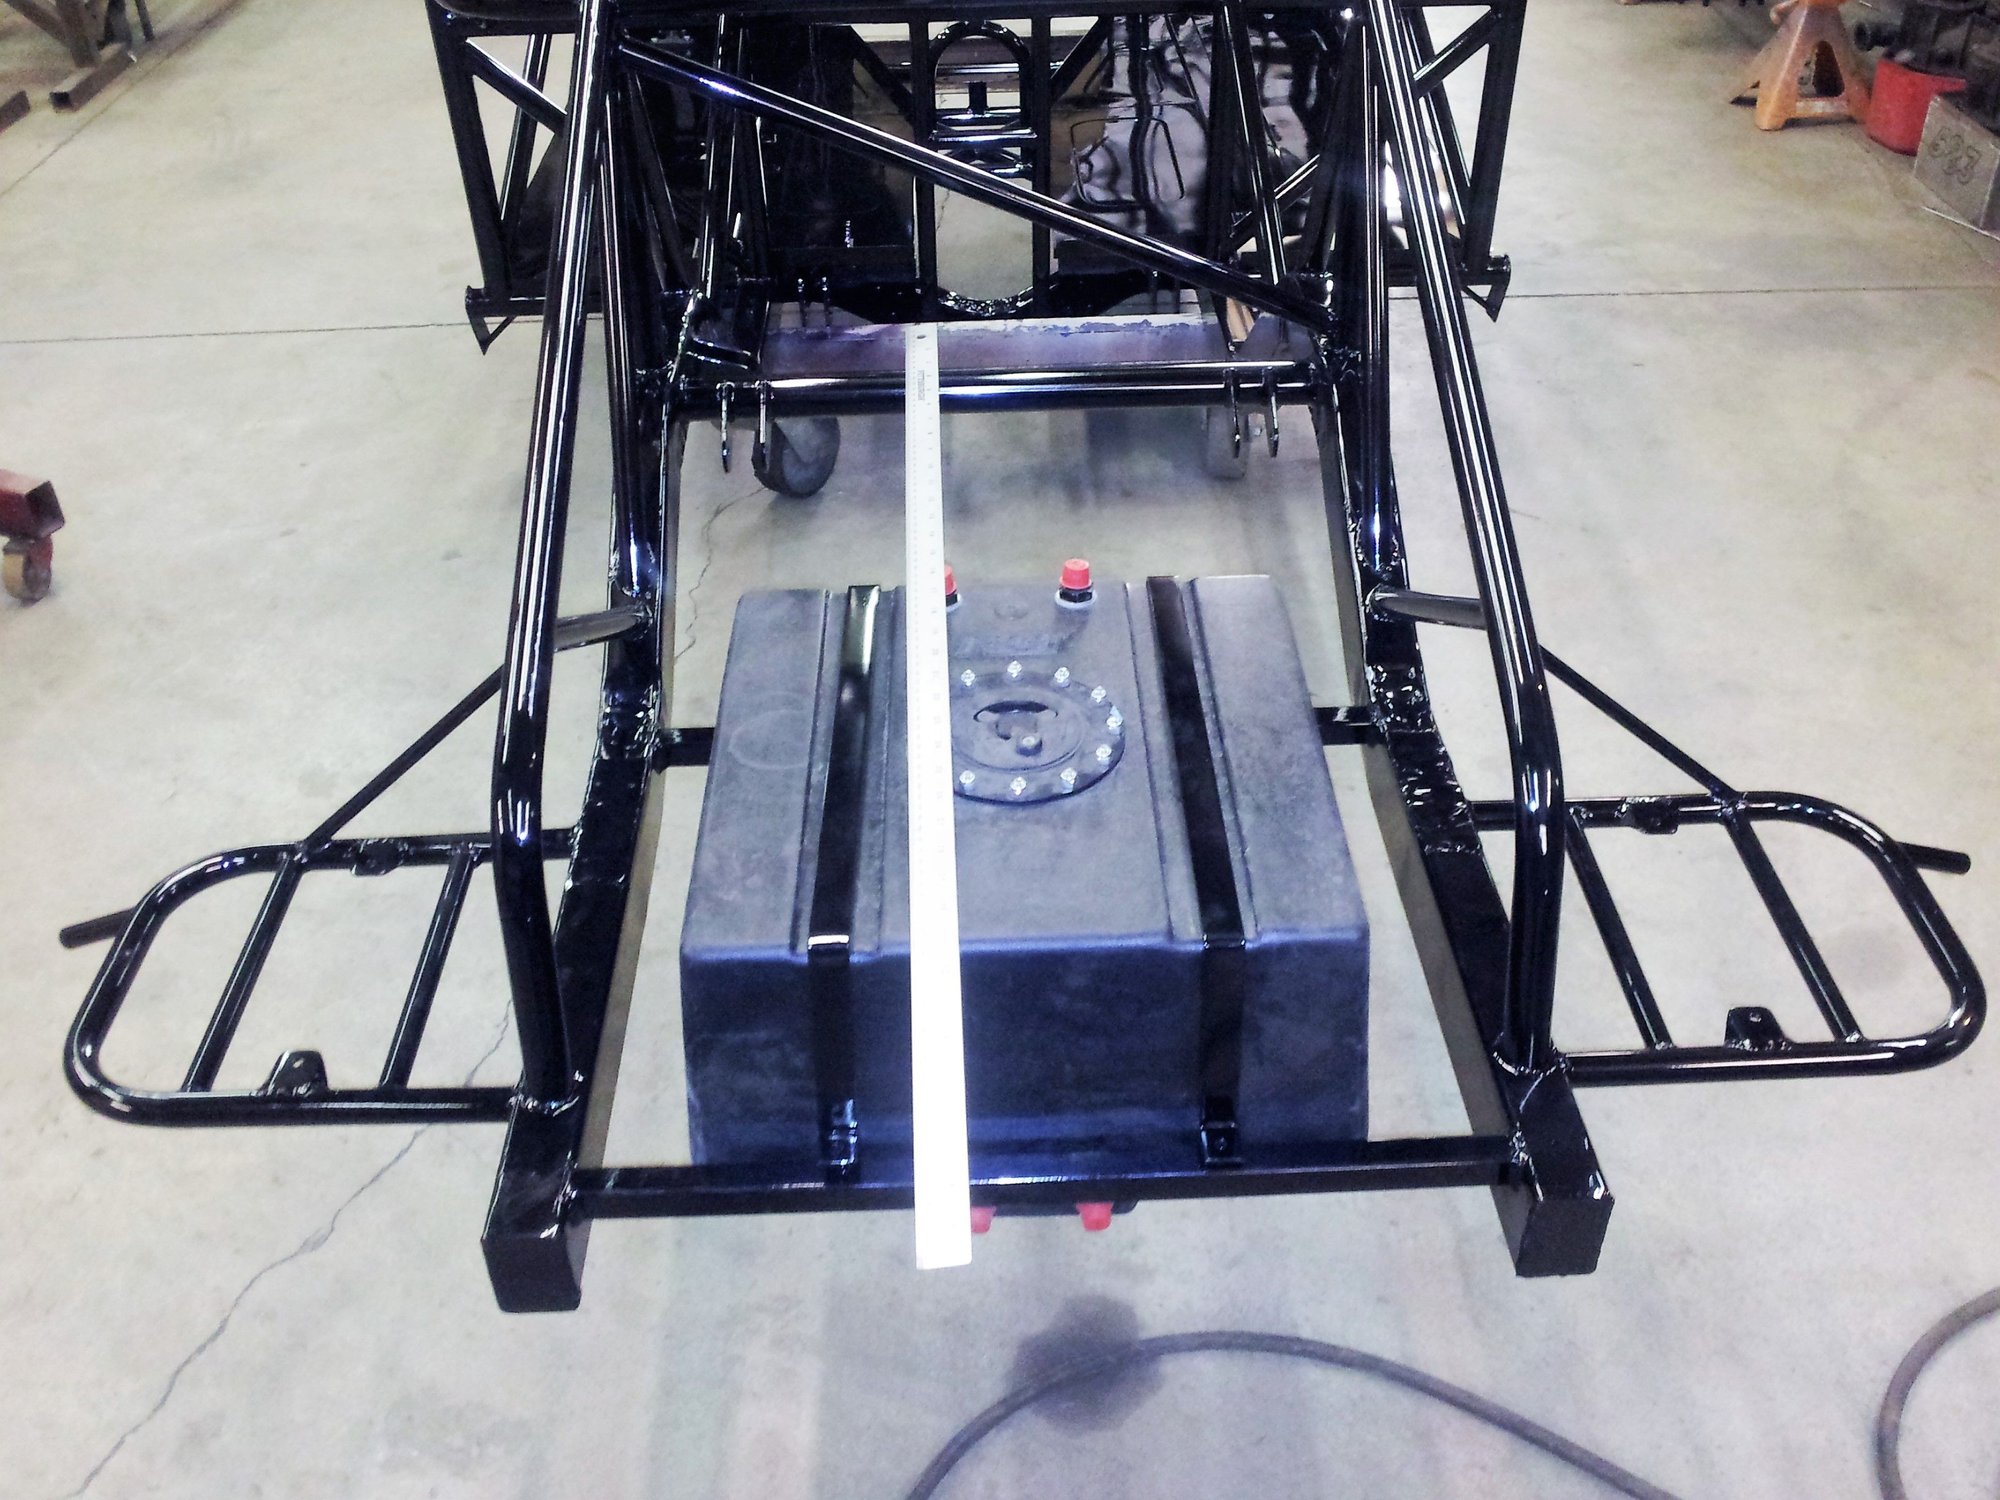
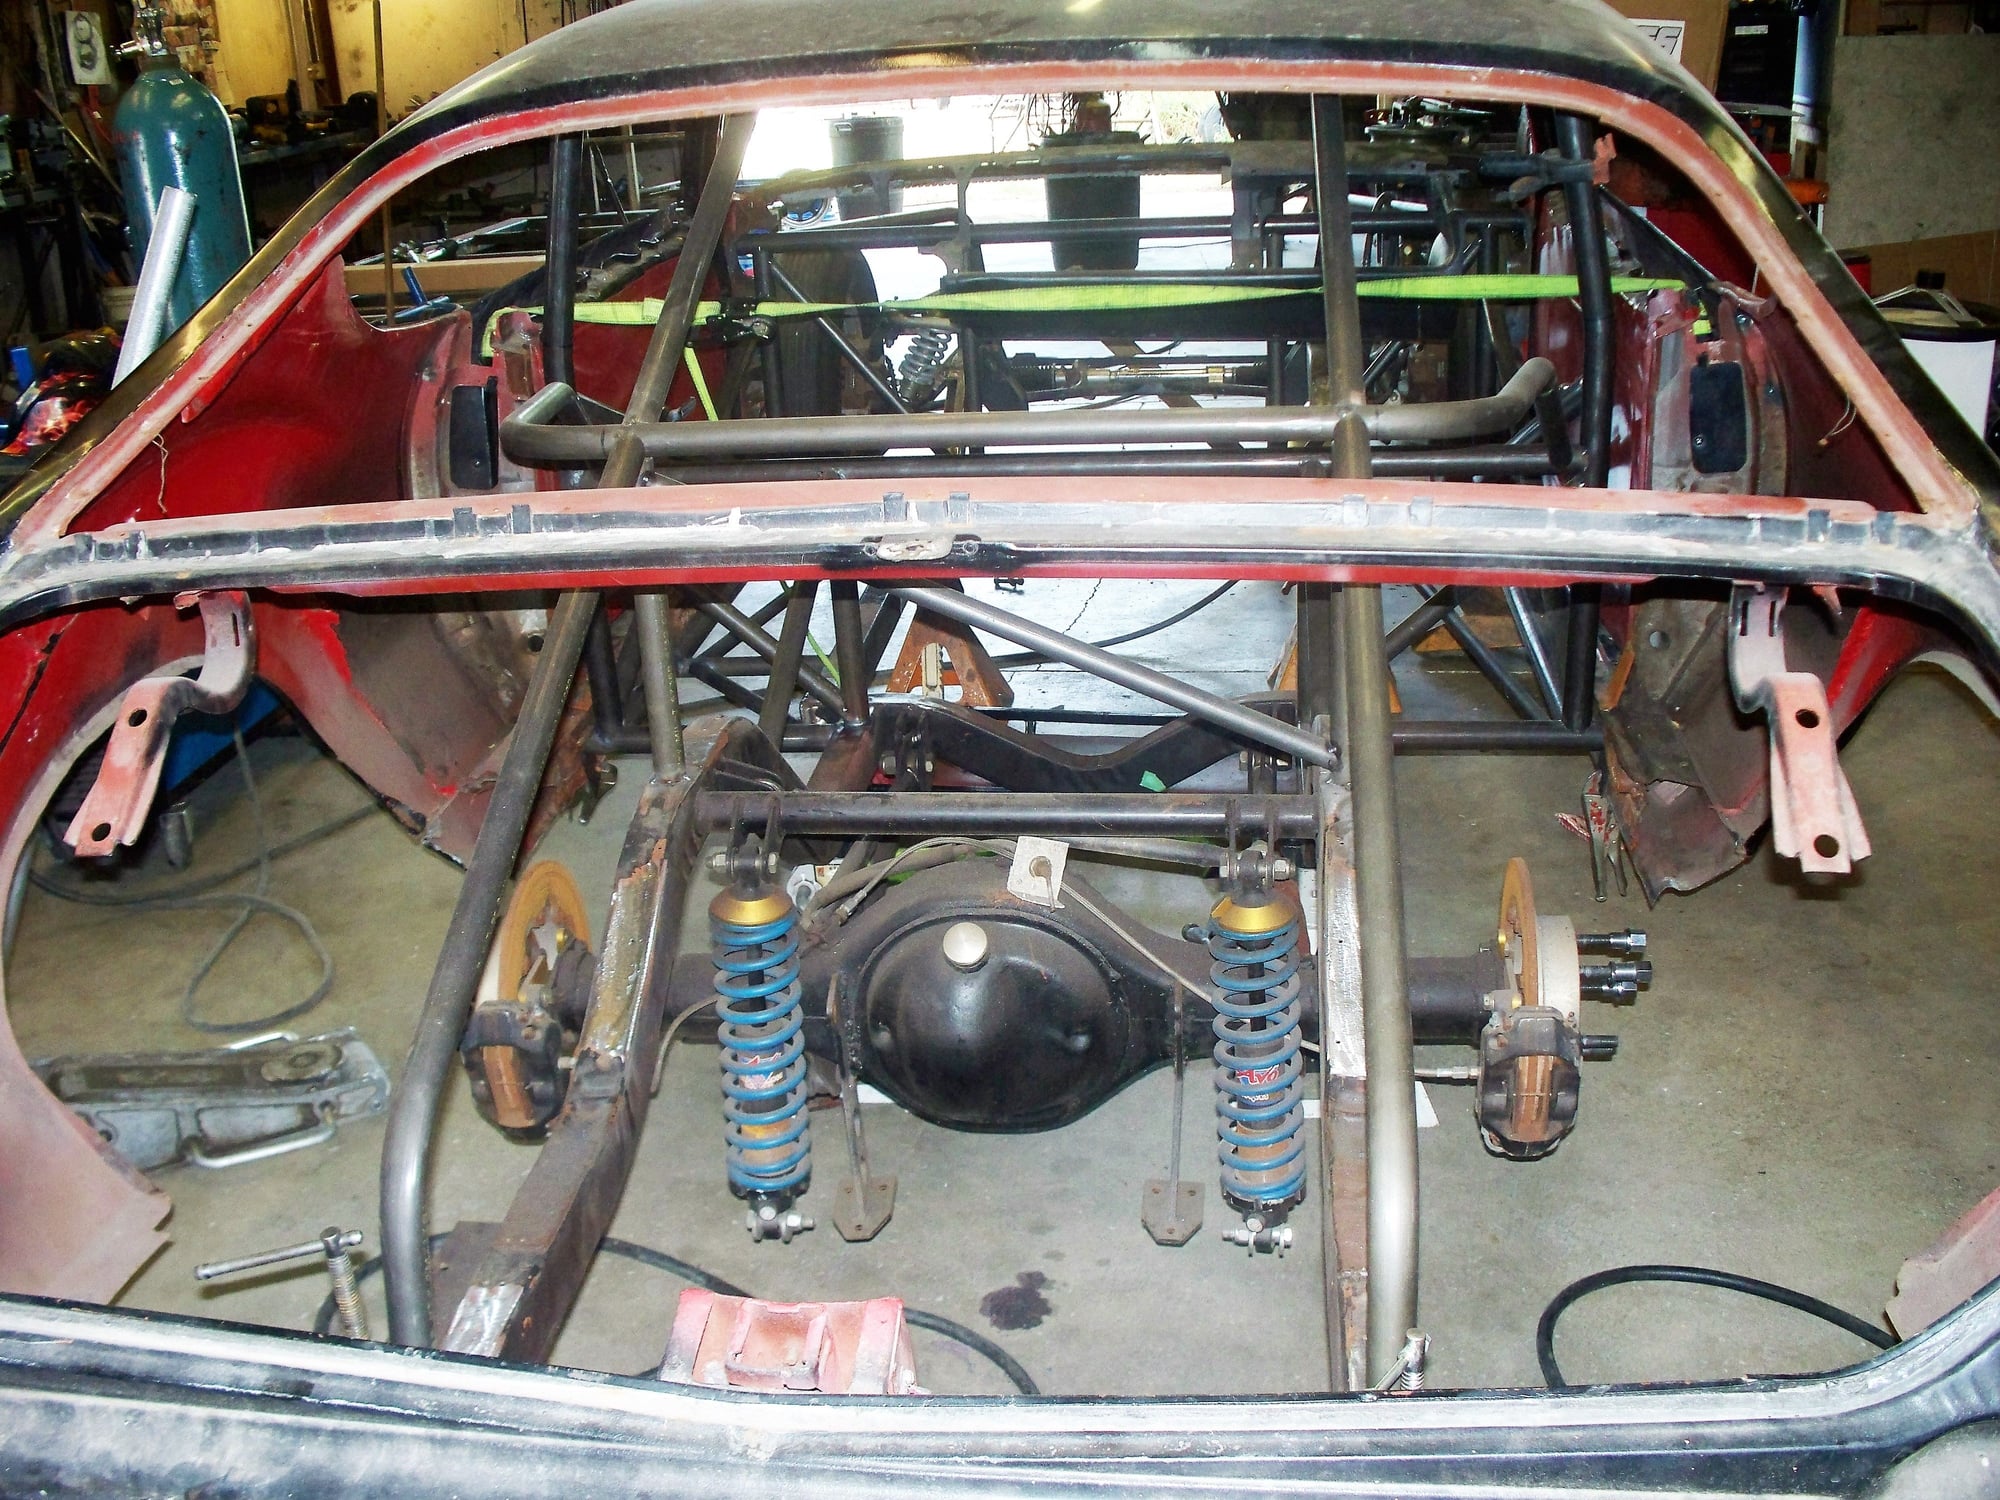
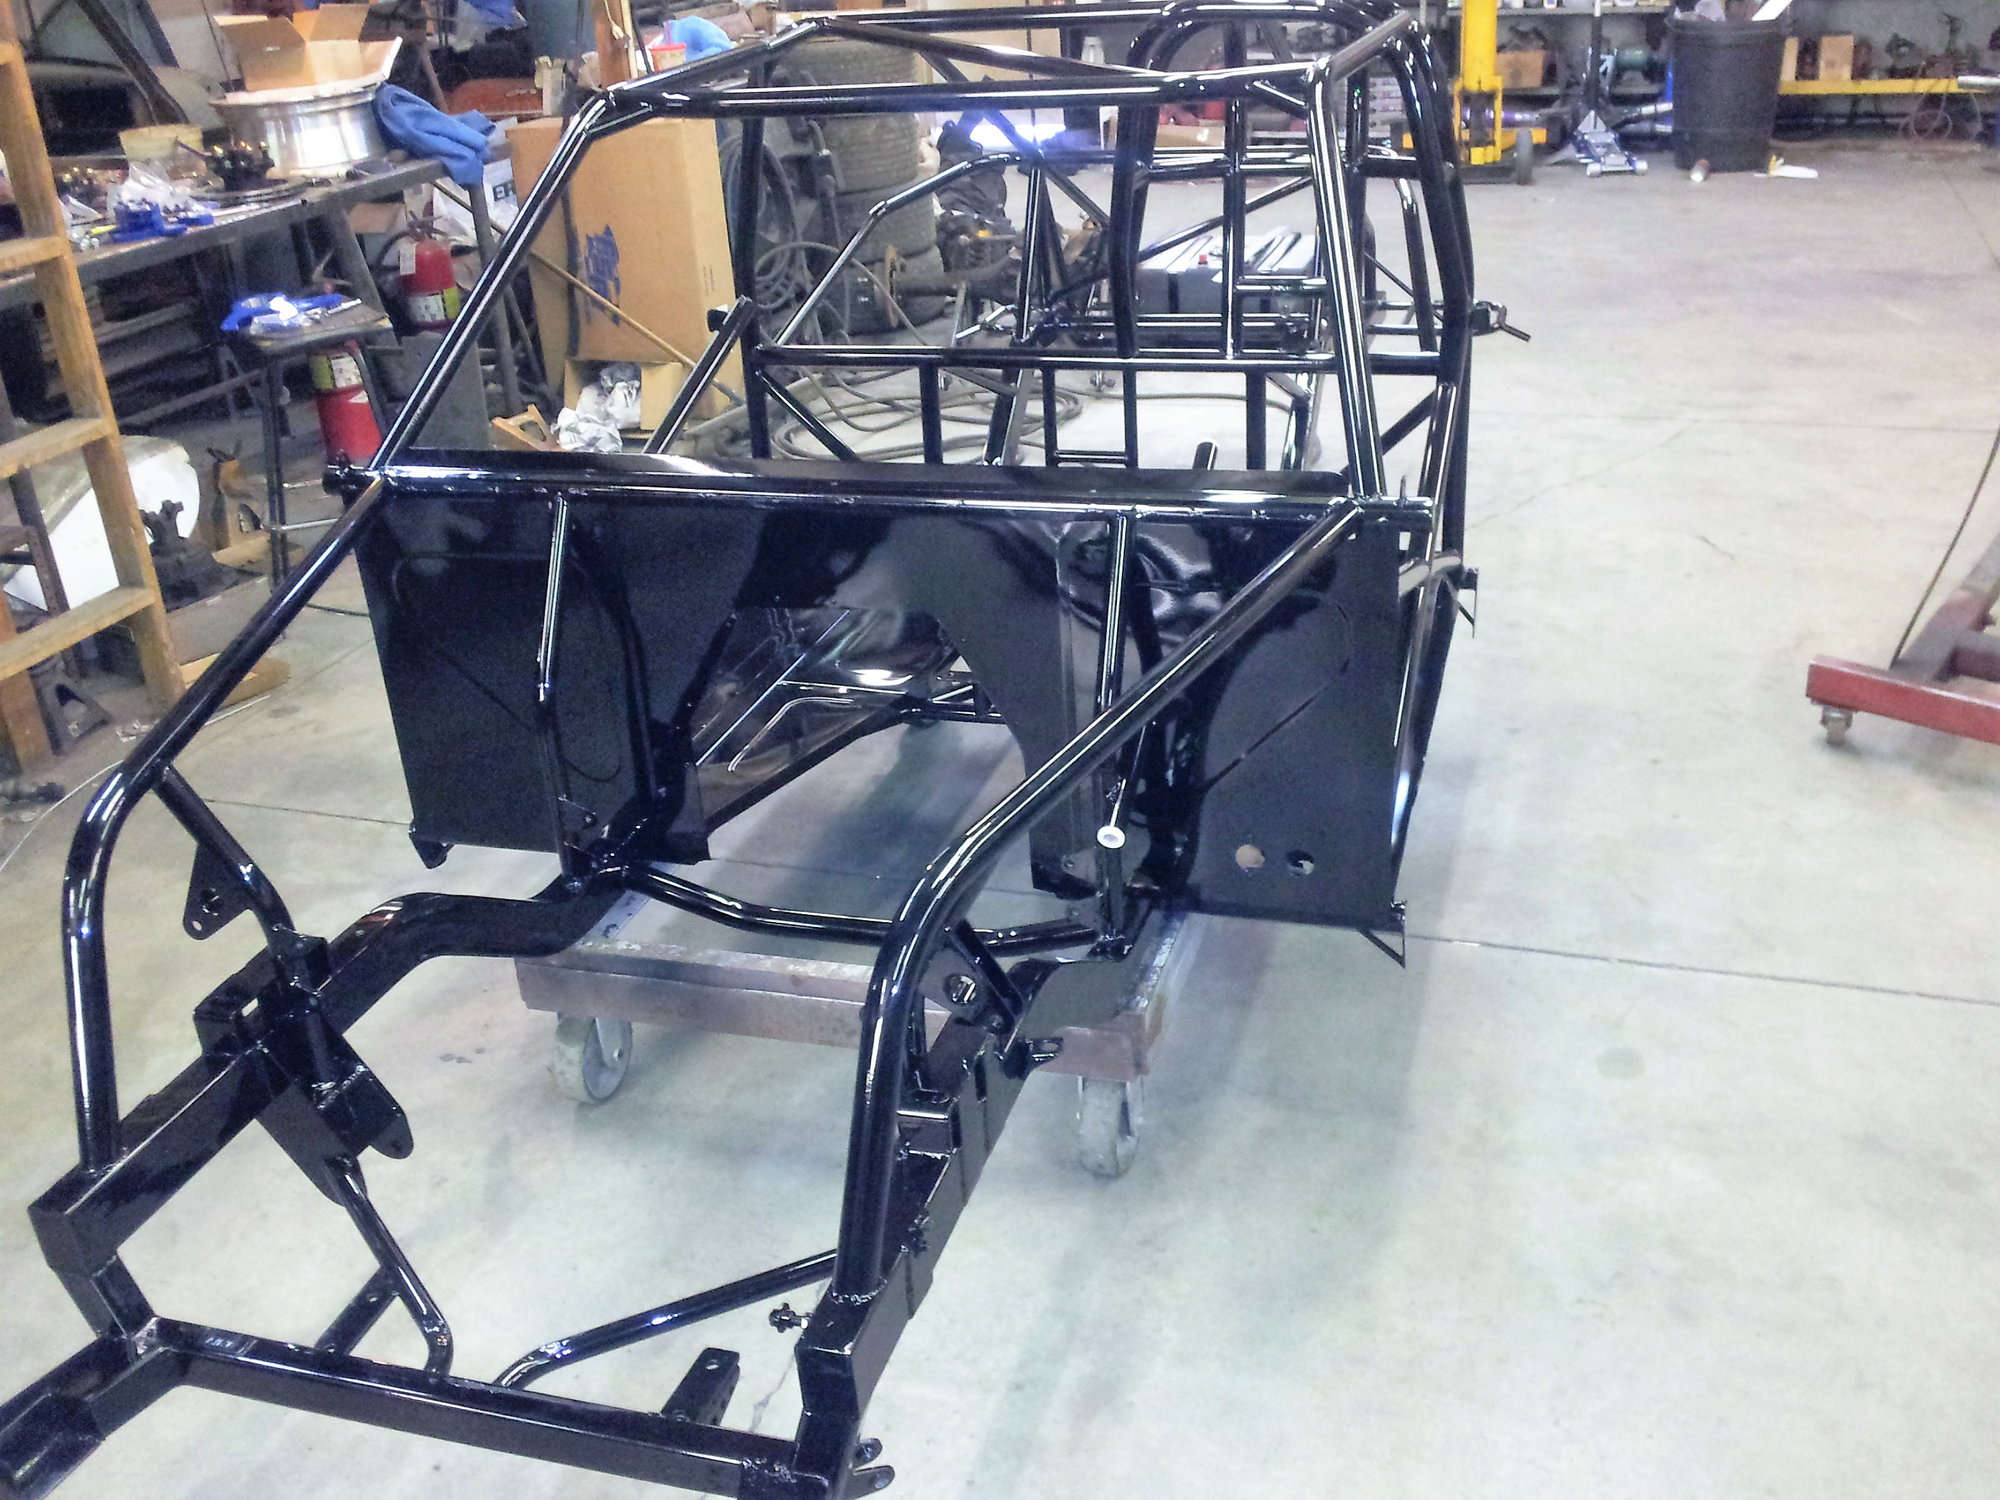
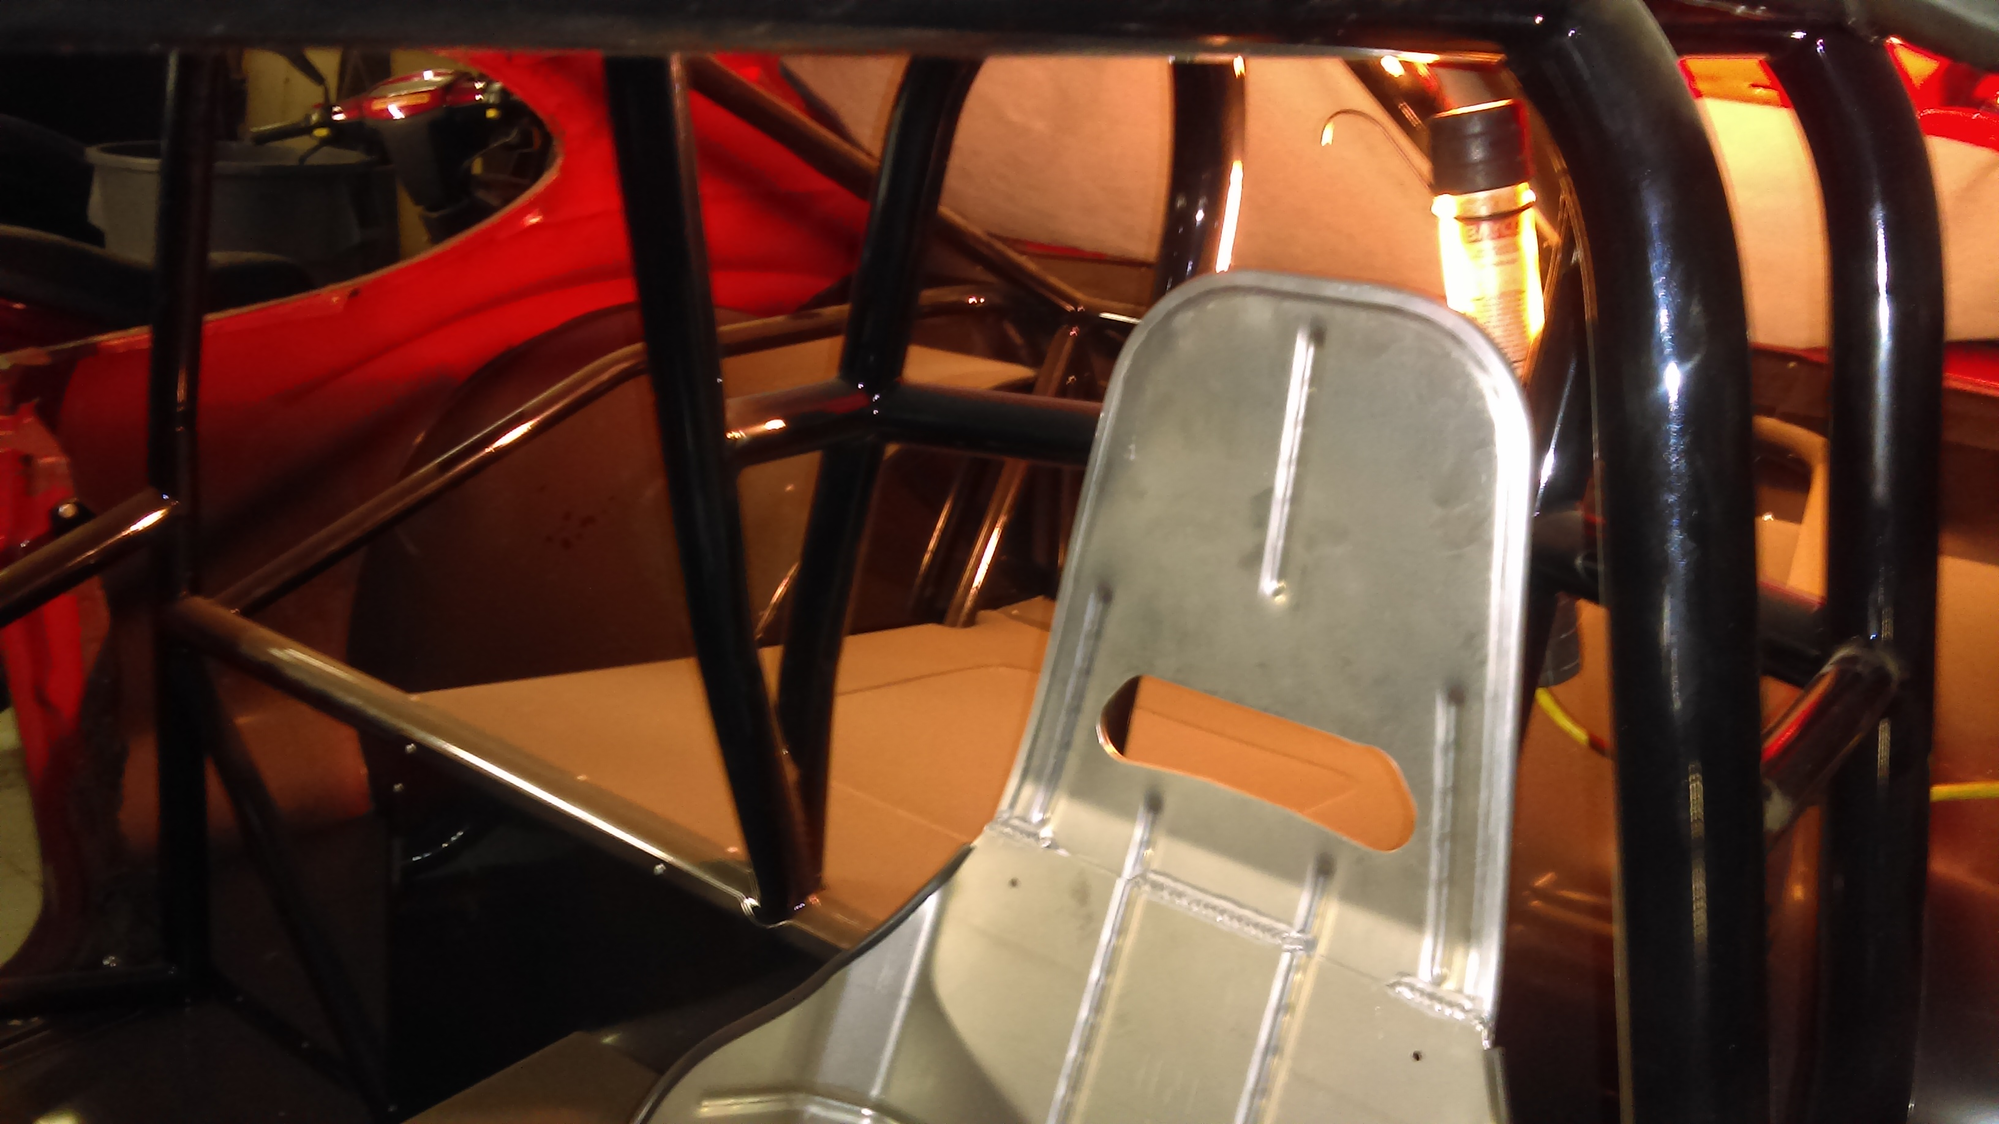
These are as work in progress. All tig welded with chrome moly funny car cage.
wr1970 is offline  
Old January 21st, 2017, 04:08 AM
  #7  
Registered User
Thread Starter
 
wr1970's Avatar
 
Join Date: Sep 2013
Posts: 3,574
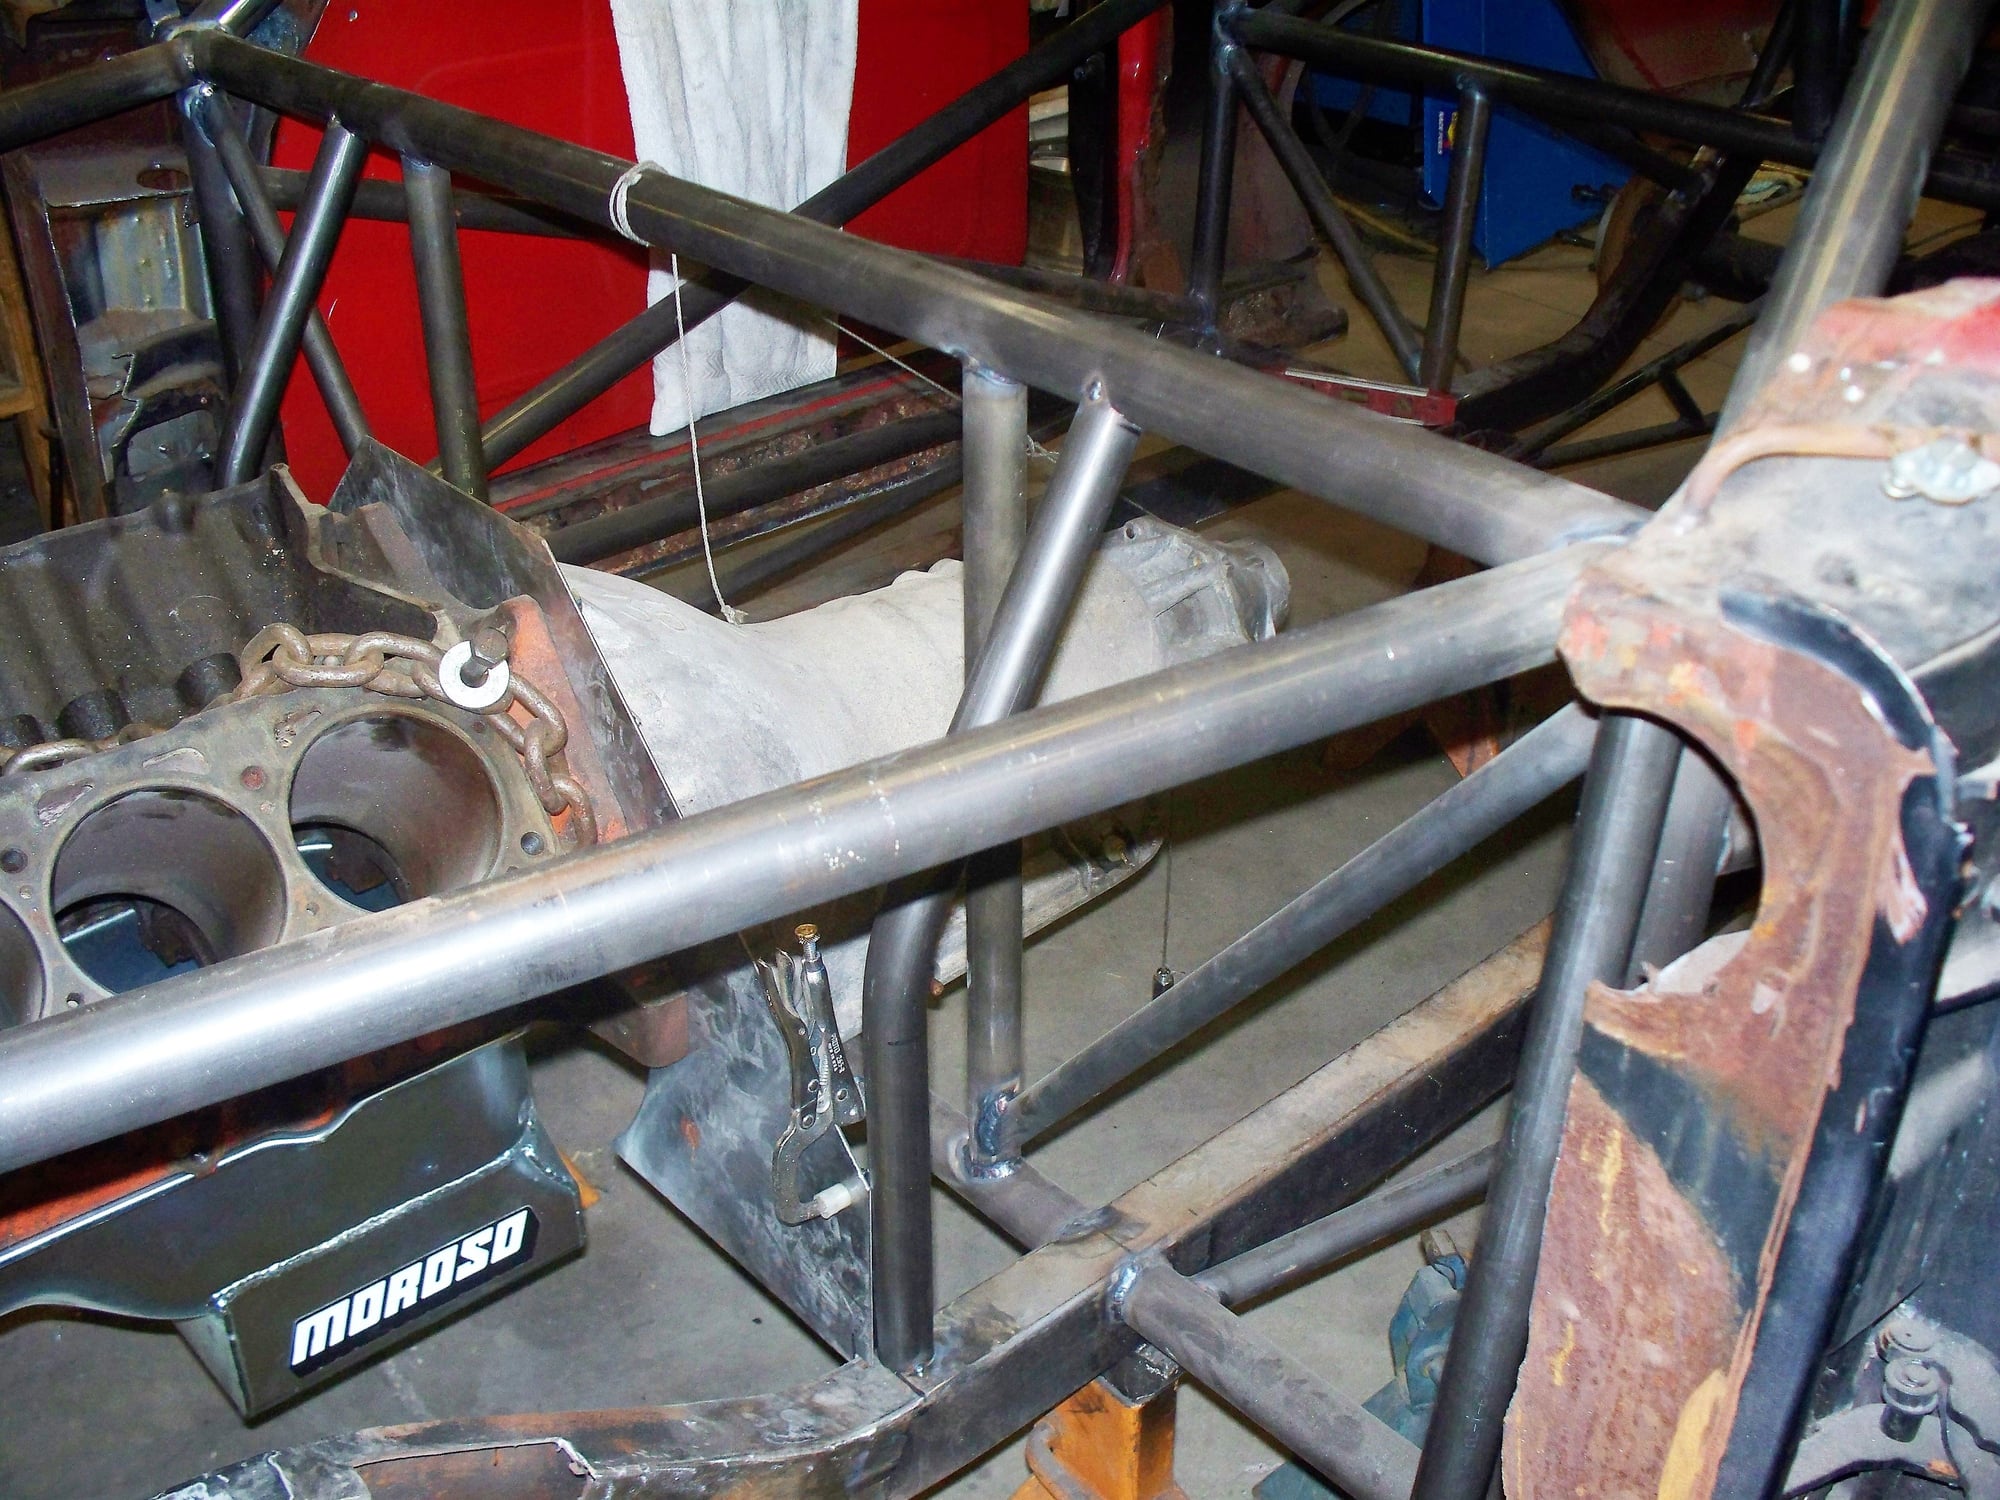
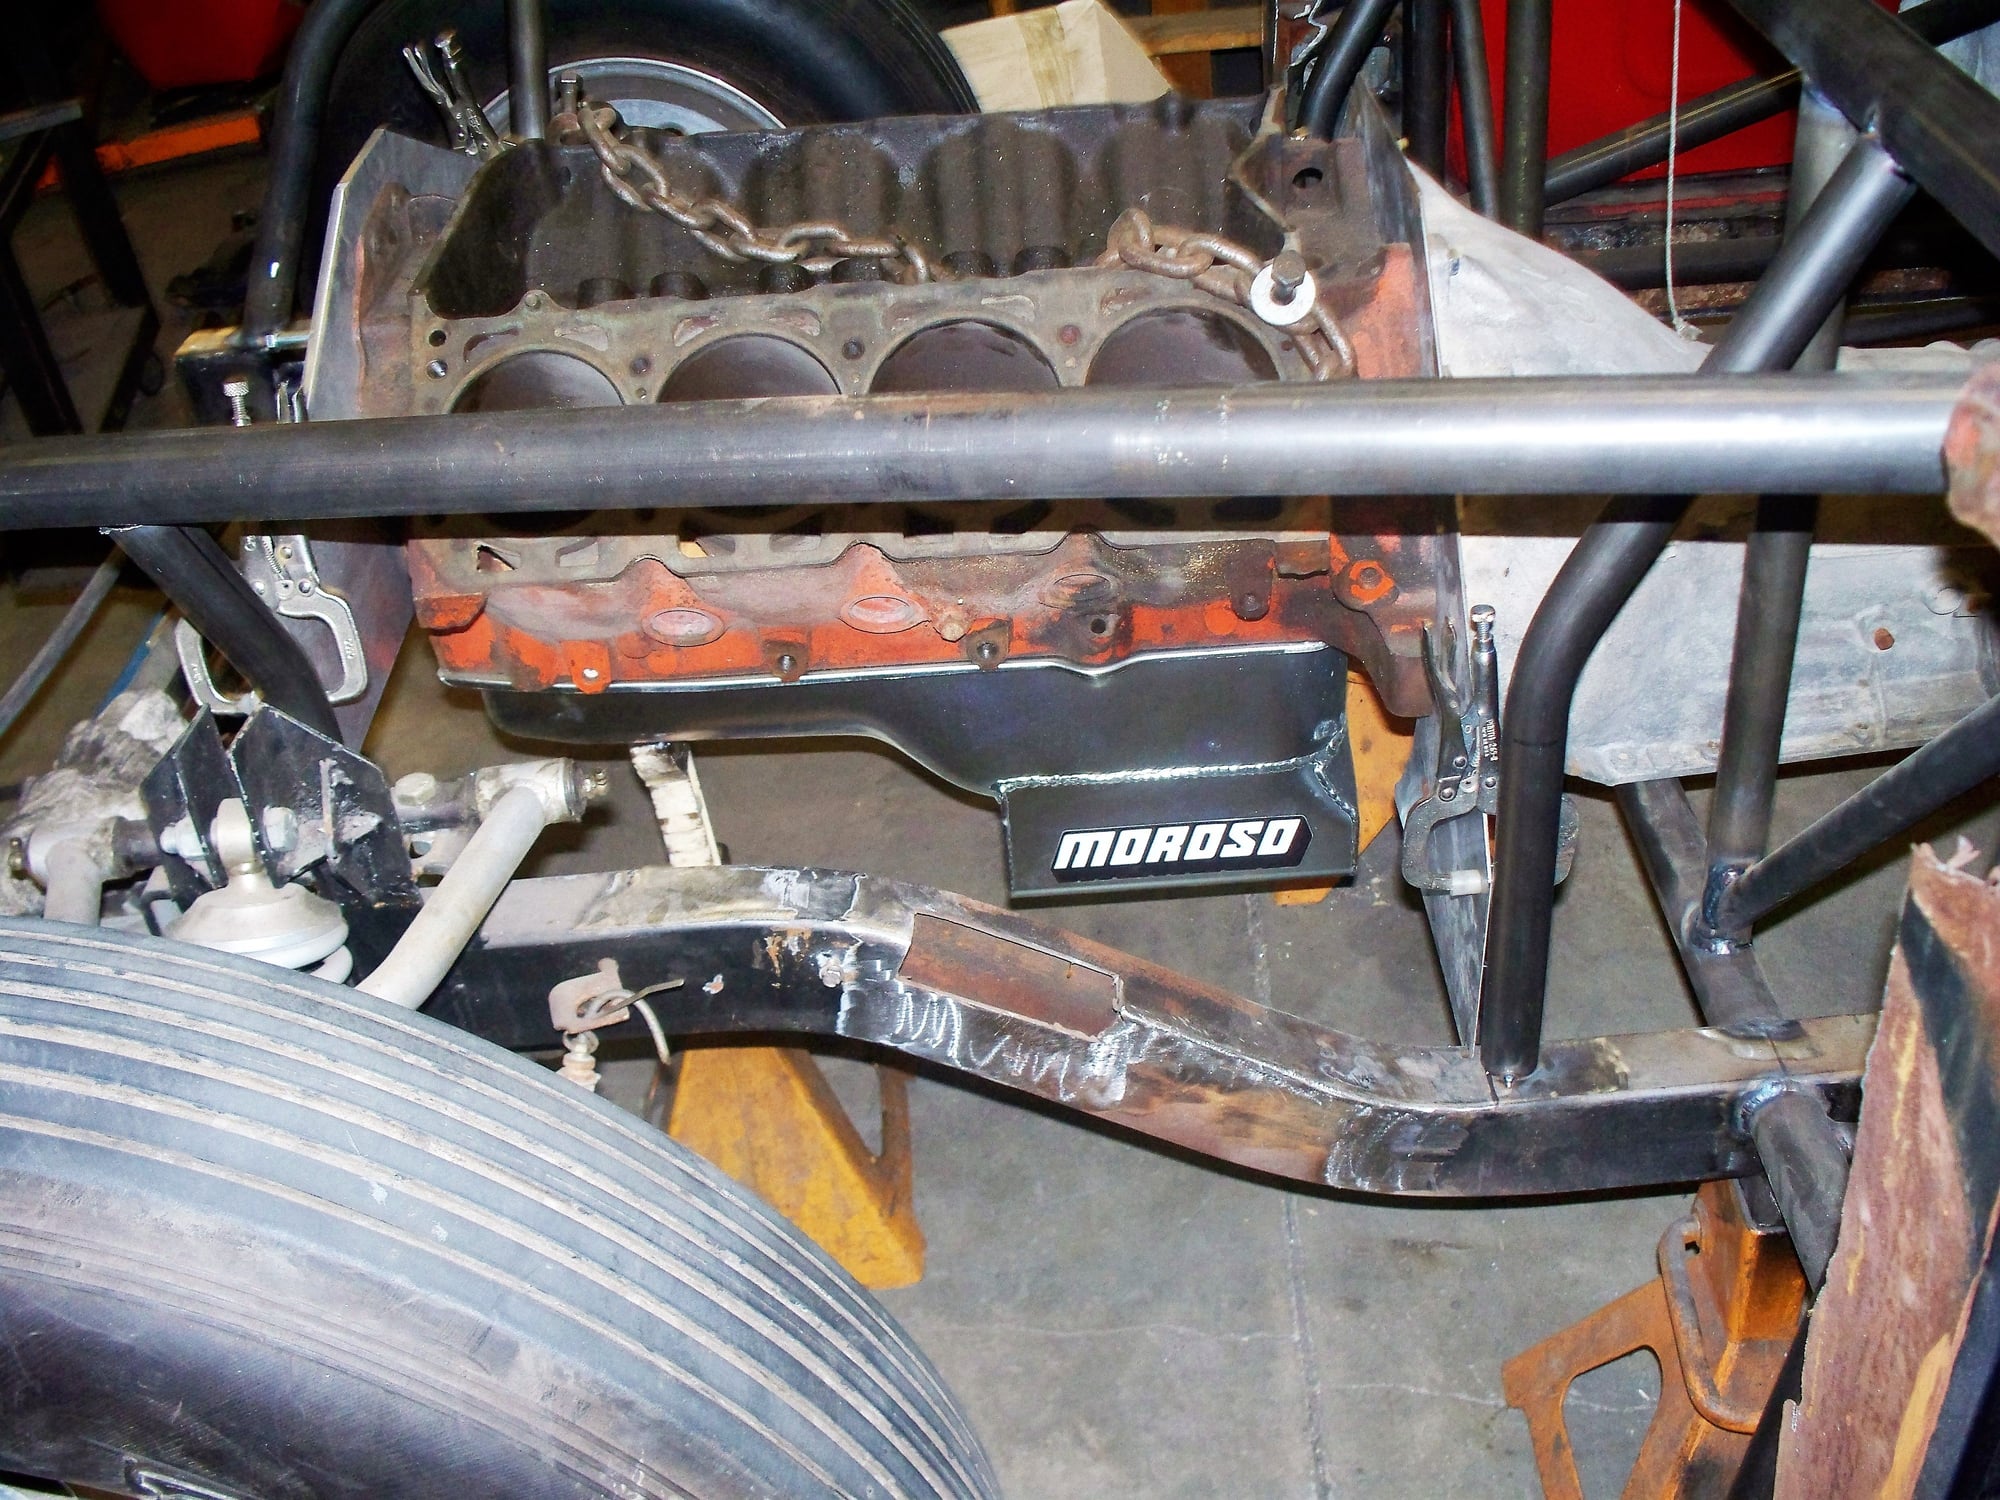
The above picture in the middle shows at the bottom where frame has a cutout in the frame not sure why this was done and left open. It since has been repaired.
wr1970 is offline  
Old January 21st, 2017, 04:11 AM
  #8  
Registered User
Thread Starter
 
wr1970's Avatar
 
Join Date: Sep 2013
Posts: 3,574


This is what the chassis looked like before body was added to finish tin work. It is totally powder coated.
wr1970 is offline  
Old January 21st, 2017, 04:24 AM
  #9  
Registered User
Thread Starter
 
wr1970's Avatar
 
Join Date: Sep 2013
Posts: 3,574


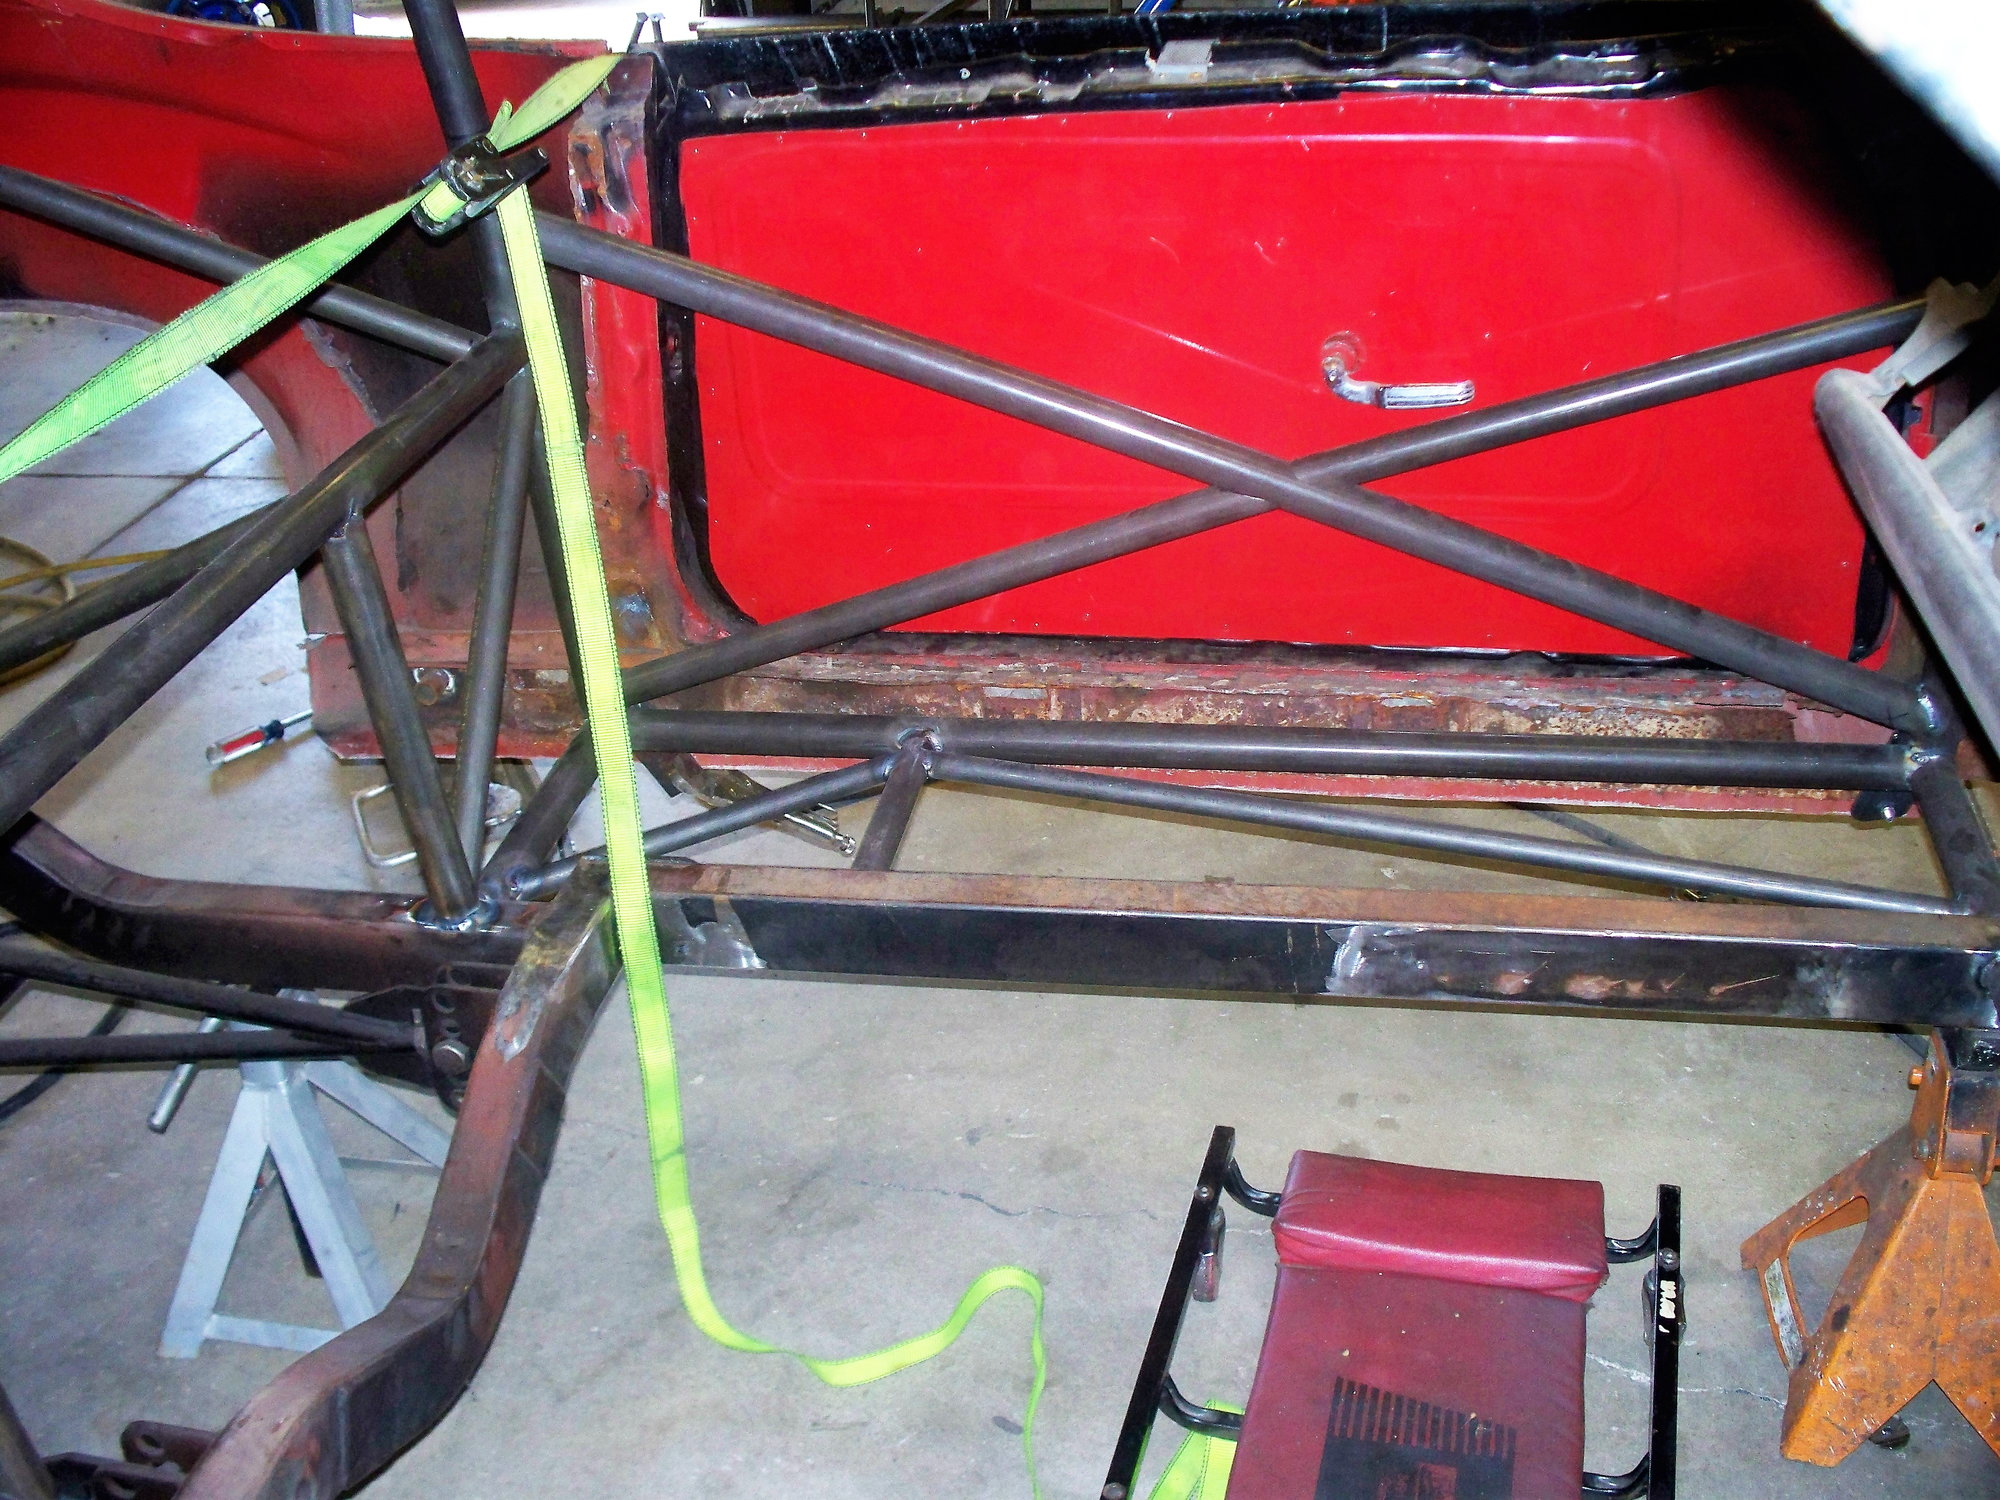
This is the old cage that was thrown away because door bars to short. NHRA will not allow slug welded ends to be added so they can be attached to chassis. If you do this and get caught you will be bared for life at NHRA tracks.
wr1970 is offline  
Old January 21st, 2017, 04:27 AM
  #10  
Registered User
Thread Starter
 
wr1970's Avatar
 
Join Date: Sep 2013
Posts: 3,574


This is where the new cage door bars are connected to chassis.
wr1970 is offline  
Old January 21st, 2017, 04:32 AM
  #11  
Registered User
Thread Starter
 
wr1970's Avatar
 
Join Date: Sep 2013
Posts: 3,574


Here is a better picture of the missing metal where someone cut out the chassis. It has been repaired.
wr1970 is offline  
Old January 21st, 2017, 04:40 AM
  #12  
Registered User
Thread Starter
 
wr1970's Avatar
 
Join Date: Sep 2013
Posts: 3,574
These are just high light pictures. I have many more. What i haven't taken is the tin work completed on interior. I will post them soon. This car is set up prior to me owning it as a tilt front end. Front end is all fiberglass one piece. rear bumper is fiberglass and doors are fiberglass.
wr1970 is offline  
Old January 21st, 2017, 04:42 AM
  #13  
Hookers under Hood
 
76olds's Avatar
 
Join Date: Nov 2013
Location: Ontario, Canada
Posts: 3,543
Does the NHRA have a minimum for tubing size and wall thickness ? What size tubing and wall thickness did you use?
76olds is offline  
Old January 21st, 2017, 05:13 AM
  #14  
Registered User
Thread Starter
 
wr1970's Avatar
 
Join Date: Sep 2013
Posts: 3,574
Yes NHRA does but it depends on cert. When this chassis was put together on the rebuild a book was ordered by the shop who did the work for a 7.50 cert. I can't remember wall thickness or tubing now it maybe on the paper work. They will perform a test on the chrome moly to verify it is chrome moly. The guy doing the cert seen this car chassis when the shop was building it. He said bring it by when you are ready to race it and i will take care of it.He knows the chassis is correct because the shop called him to come look at it. The shop said there was a lot of traffic on the car because no Oldsmobile tube chassis this year which is a 1970 being raced. The front fiberglass isn't a 70. I think it is a 72 supreme.Us body works.I have been sitting on this project since 2011 for lack of cash. My job was going away in 2013 so no more work to finish has been done.

Last edited by wr1970; January 21st, 2017 at 05:18 AM.
wr1970 is offline  
Old January 21st, 2017, 05:28 AM
  #15  
Registered User
Thread Starter
 
wr1970's Avatar
 
Join Date: Sep 2013
Posts: 3,574
In 2018 i will be 62 i will draw my social security and will have to make a loan to finish this car. This is a bucket list car when done and drove for awhile as fast as cash allows i am going to sell it. This year my plan is to put in a temp drive train that runs to wire the car and if cash allows all the lexan and i will have to do the paint. No cash for a pro job. The motor and trans is my big cost will have to wait till 2018. Common warm weather.
wr1970 is offline  
Old January 21st, 2017, 10:03 AM
  #16  
Once Olds Always Olds
 
Troys Toy 70's Avatar
 
Join Date: Nov 2011
Location: New Matamoras, Ohio
Posts: 1,202
Interesting project I am in.
Troys Toy 70 is offline  
Old January 21st, 2017, 10:51 AM
  #17  
Registered User
 
young olds's Avatar
 
Join Date: Mar 2010
Location: Mt Vernon,WA
Posts: 1,946
That thing looks good, is like to start working on mine again but it's in storage till I get a better garage to work on it in. I've always wanted to paint an olds like that, reminds me of an sr-71
young olds is offline  
Old January 21st, 2017, 11:27 AM
  #18  
Hookers under Hood
 
76olds's Avatar
 
Join Date: Nov 2013
Location: Ontario, Canada
Posts: 3,543
Originally Posted by wr1970
I have been sitting on this project since 2011 for lack of cash. My job was going away in 2013 so no more work to finish has been done.
I wish you all the best in 2017 for work. Hopefully Trump will be the guy that can get everyone back to work. Not just back to work, need decent paying jobs .
I know Tool & Die has ramped up over here in Canada along with custom CNC machining in aerospace, mining, and robotic components.
It would be nice to see everyone working and enjoying the hobby again rather than being strapped to a tight budget.

Eric
76olds is offline  
Old January 21st, 2017, 12:02 PM
  #19  
Registered User
Thread Starter
 
wr1970's Avatar
 
Join Date: Sep 2013
Posts: 3,574

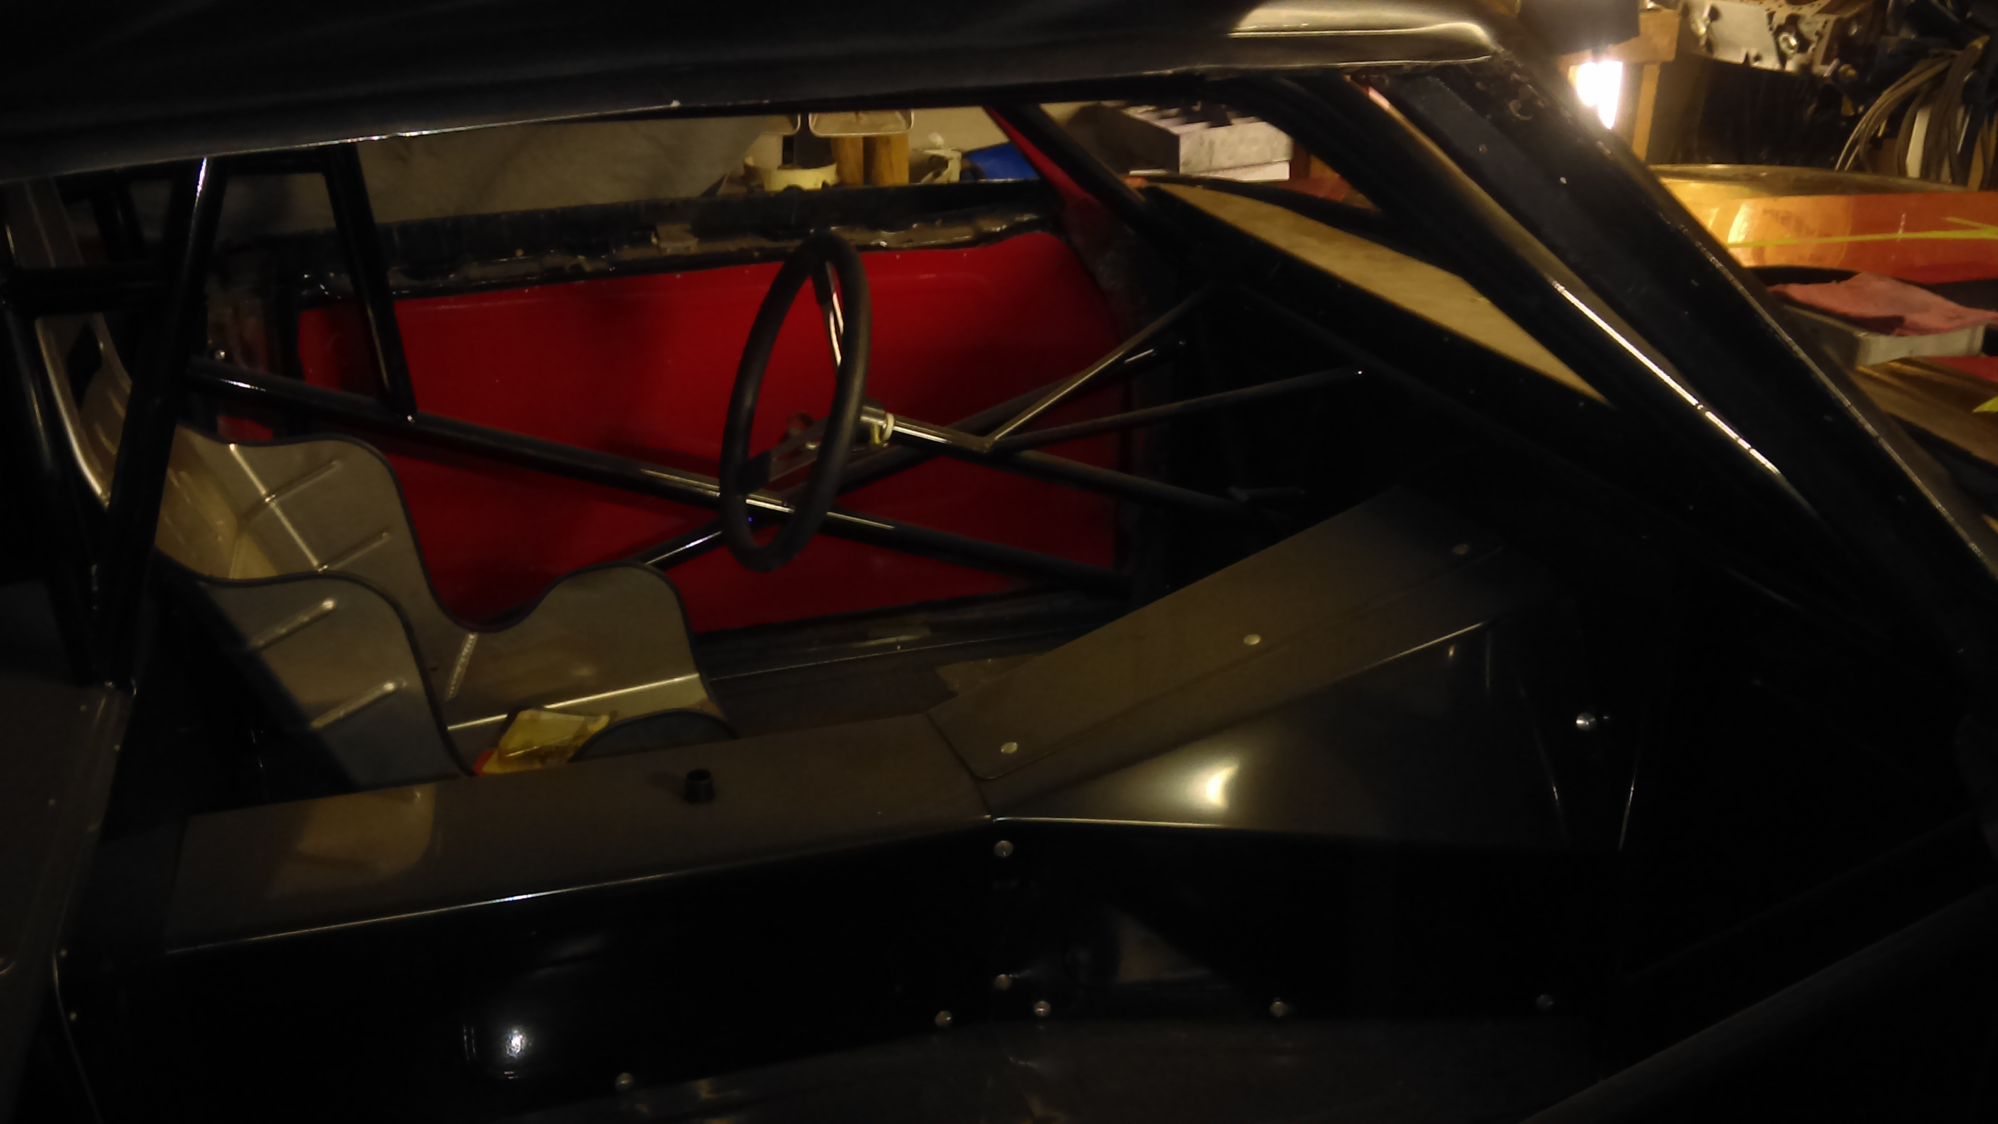
Sorry for the bad lighting.
wr1970 is offline  
Old January 21st, 2017, 12:07 PM
  #20  
Registered User
Thread Starter
 
wr1970's Avatar
 
Join Date: Sep 2013
Posts: 3,574
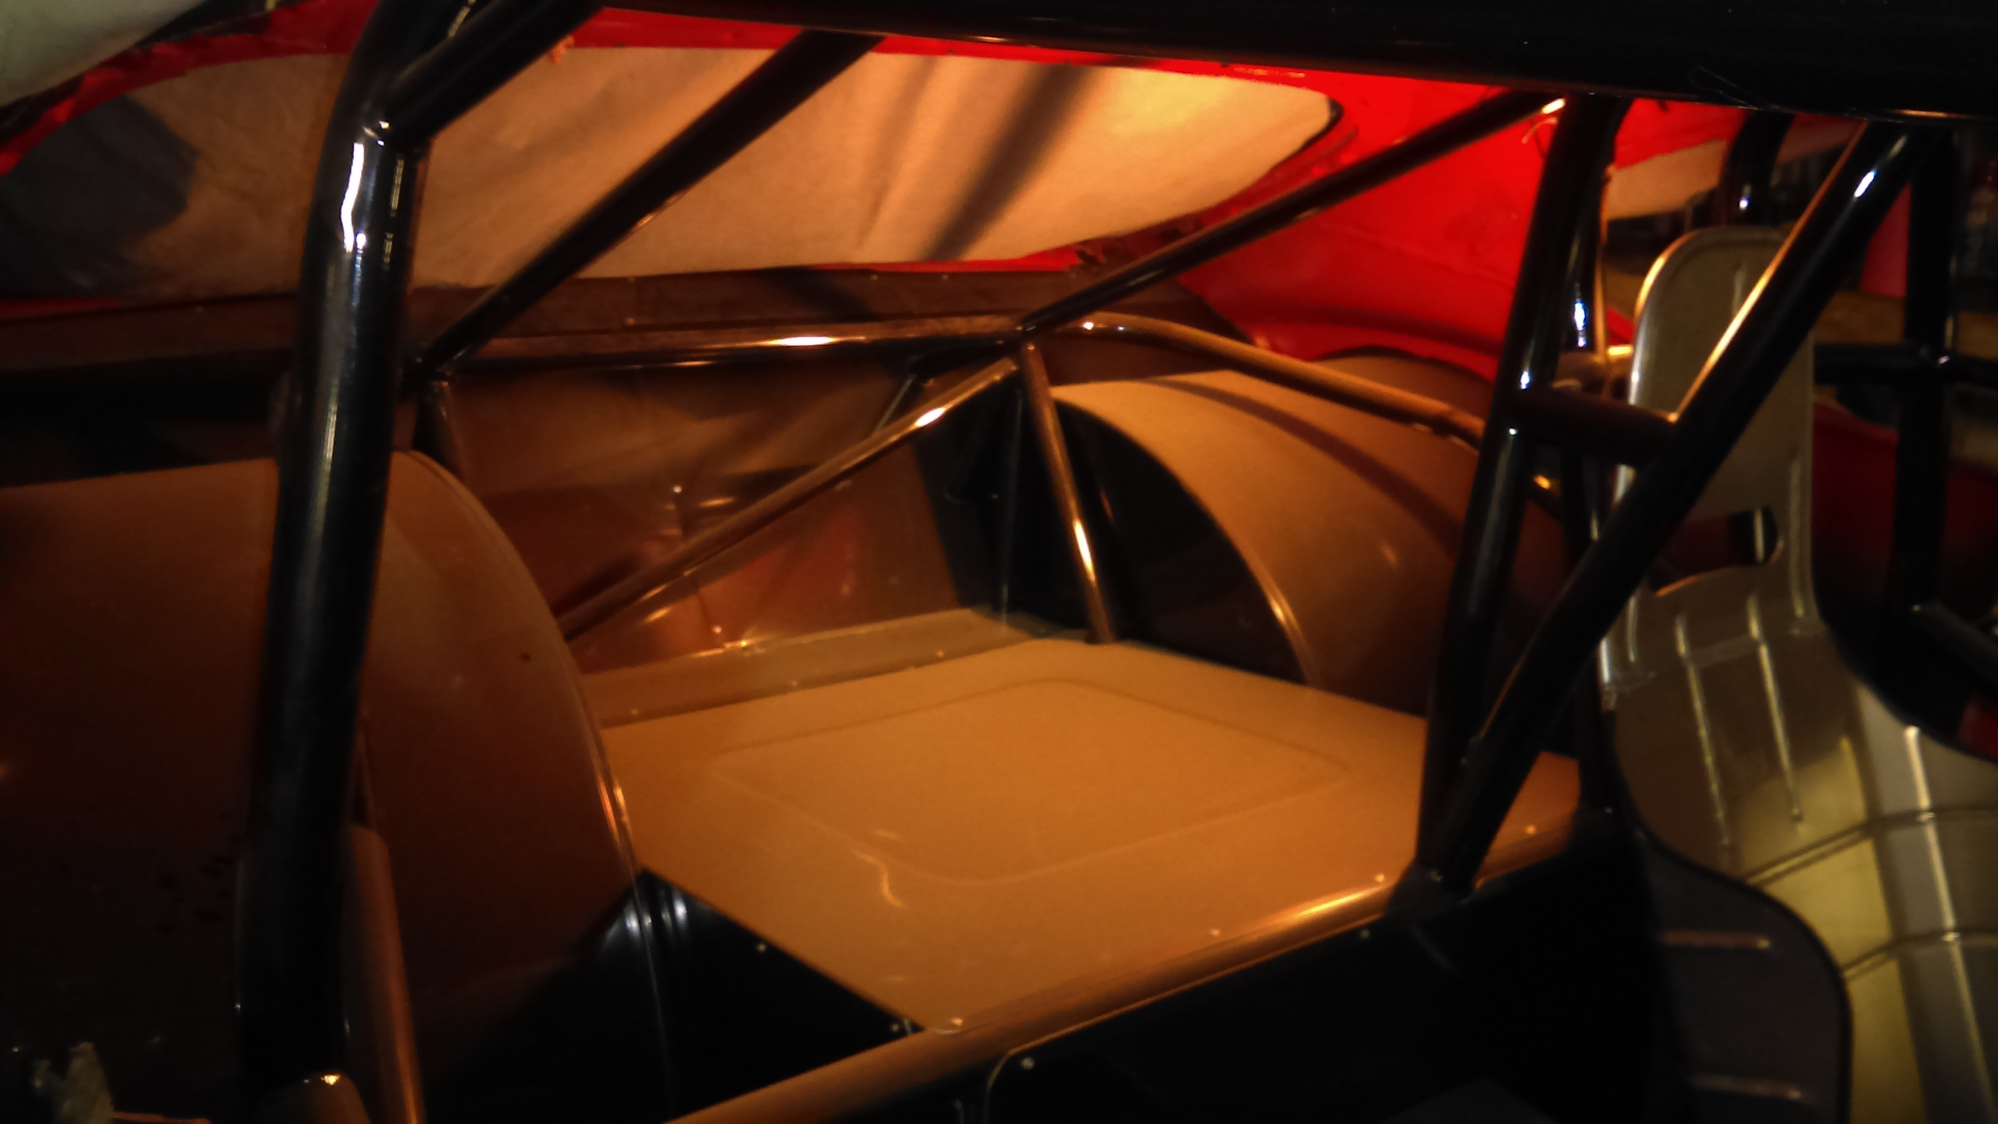
Sorry a little dusty.
wr1970 is offline  
Old January 21st, 2017, 12:07 PM
  #21  
Registered User
 
Inline's Avatar
 
Join Date: Sep 2015
Location: Chicago suburbs, Finland
Posts: 1,882
Just signing in to show some kind of support, following out of curiosity. Please keep it coming.
All the best for your dream.
Inline is offline  
Old January 21st, 2017, 12:16 PM
  #22  
Registered User
Thread Starter
 
wr1970's Avatar
 
Join Date: Sep 2013
Posts: 3,574
wr1970 is offline  
Old January 21st, 2017, 12:18 PM
  #23  
Hookers under Hood
 
76olds's Avatar
 
Join Date: Nov 2013
Location: Ontario, Canada
Posts: 3,543
Dam, that's some nice custom fabrication work. Custom console is cool nice neat job!! That's attention to detail, shear and brake work, not just hammered up and thrown together.
Awesome pictures!!

Eric
76olds is offline  
Old January 21st, 2017, 12:18 PM
  #24  
Registered User
Thread Starter
 
wr1970's Avatar
 
Join Date: Sep 2013
Posts: 3,574
Still have a trunk picture to post. May have to wait till tomorrow to go and take it as i have none of it right now.
wr1970 is offline  
Old January 21st, 2017, 12:24 PM
  #25  
Registered User
Thread Starter
 
wr1970's Avatar
 
Join Date: Sep 2013
Posts: 3,574
Originally Posted by 76olds
Dam, that's some nice custom fabrication work. Custom console is cool nice neat job!! That's attention to detail, shear and brake work, not just hammered up and thrown together.
Awesome pictures!!

Eric
Thanks for the kind words.It is removeable. This was all done by Bills built in Wichita. They really like working on this car and i was down the 3/4 times a week to verify progress and answer questions. I get guys coming up to me in stores asking when will it go to the track.
wr1970 is offline  
Old January 21st, 2017, 01:48 PM
  #26  
Administrator
 
oldcutlass's Avatar
 
Join Date: Oct 2009
Location: Poteau, Ok
Posts: 40,551
Nice car, hopefully you can get down the track ahead of schedule.
oldcutlass is online now  
Old January 21st, 2017, 05:32 PM
  #27  
Chevy budget Olds powered
 
coppercutlass's Avatar
 
Join Date: Jul 2011
Location: Elgin, Illinois
Posts: 8,630
If i can ask why did you guys choose square tubing for the main rails vs. tubes. Seems like that would be a bit bulky in weight.
coppercutlass is offline  
Old January 21st, 2017, 06:29 PM
  #28  
Registered User
 
74sprint's Avatar
 
Join Date: Apr 2014
Location: Winnipeg
Posts: 122
Bucket-list build

Nice to see someone else finally getting their car built, to bad it has to be a bucket-list build. I am also doing my bucket-list build which I should start a thread for it, still have lots of parts to get. Your build to me, is off to a good start, very nice work. My car will be a back-half prostreet/strip car. I'm using my royalities that I get quarterly so I'm tied to sales. That and life will dictate how fast things get done. I also wish you the best of luck on your build.


Ray
74sprint is offline  
Old January 21st, 2017, 07:11 PM
  #29  
Registered User
 
steverw's Avatar
 
Join Date: Dec 2012
Location: Texas
Posts: 1,584
Looks very impressive to me, something i know nothing about.
Good luck with your build.
steverw is offline  
Old January 21st, 2017, 07:53 PM
  #30  
Registered User
Thread Starter
 
wr1970's Avatar
 
Join Date: Sep 2013
Posts: 3,574
Originally Posted by coppercutlass
If i can ask why did you guys choose square tubing for the main rails vs. tubes. Seems like that would be a bit bulky in weight.
Not really square it is rectangle on mine. Mine is that way because this car was raced by a different guy and it was torn apart. Then i bought the shell and screwed up chassis. Front end was bent where the upper control arms are mounted. So that was cut off and new mounts installed. Frame was 1/2 inch off level. Looked like this car popped a wheelie and came down hard at some time. The rear end is set up for wheelie bar mounts if you look at the picture i posted showing rear area. The chassis also had a bow in it but it was pulled back in place as it was just the drivers side rail. No clue why it was that way.
wr1970 is offline  
Old January 22nd, 2017, 02:14 PM
  #31  
Chevy budget Olds powered
 
coppercutlass's Avatar
 
Join Date: Jul 2011
Location: Elgin, Illinois
Posts: 8,630
Did you guys just replace bent stuff or did you set it up on a frame bench and straighten it out then replace. . I good friend of mine had a big wheelie situation came down hard and bent the front half. Took it to a frame shop and straightened it out.
coppercutlass is offline  
Old January 22nd, 2017, 02:55 PM
  #32  
Registered User
Thread Starter
 
wr1970's Avatar
 
Join Date: Sep 2013
Posts: 3,574
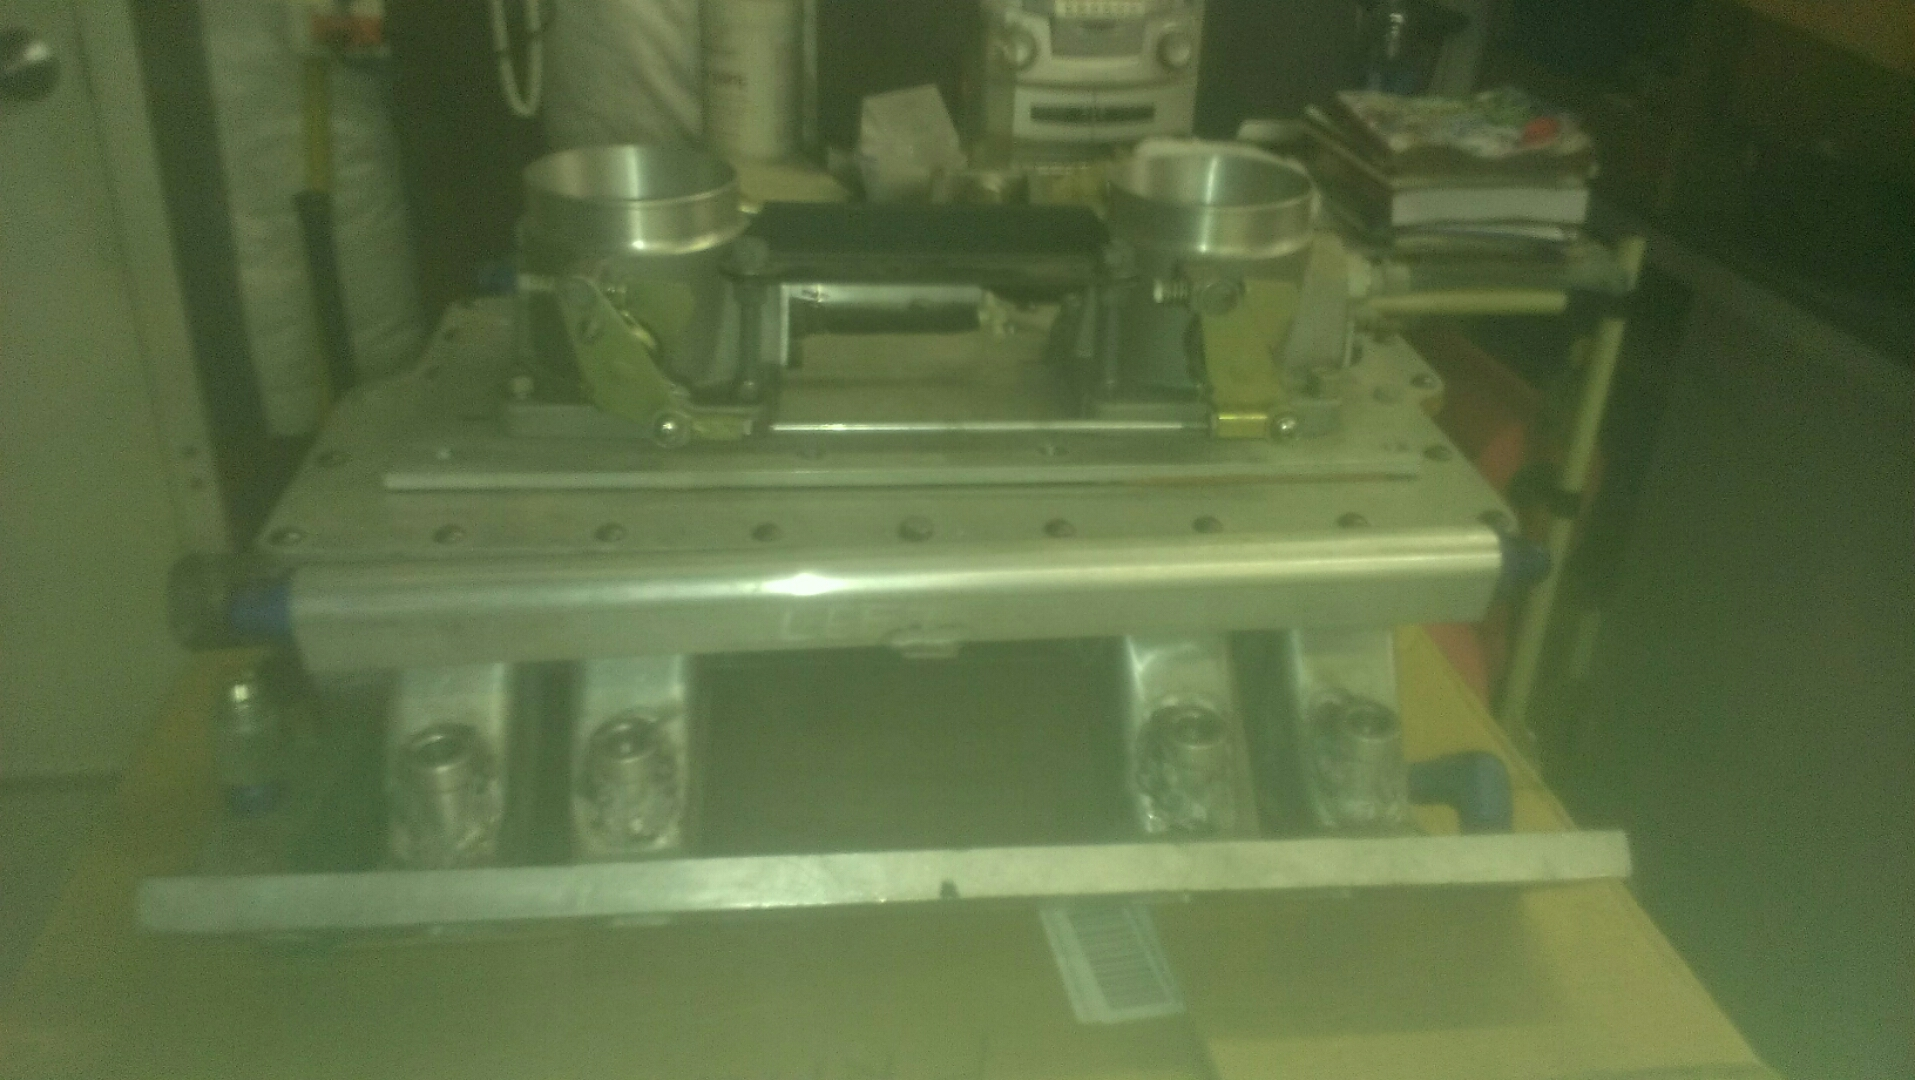
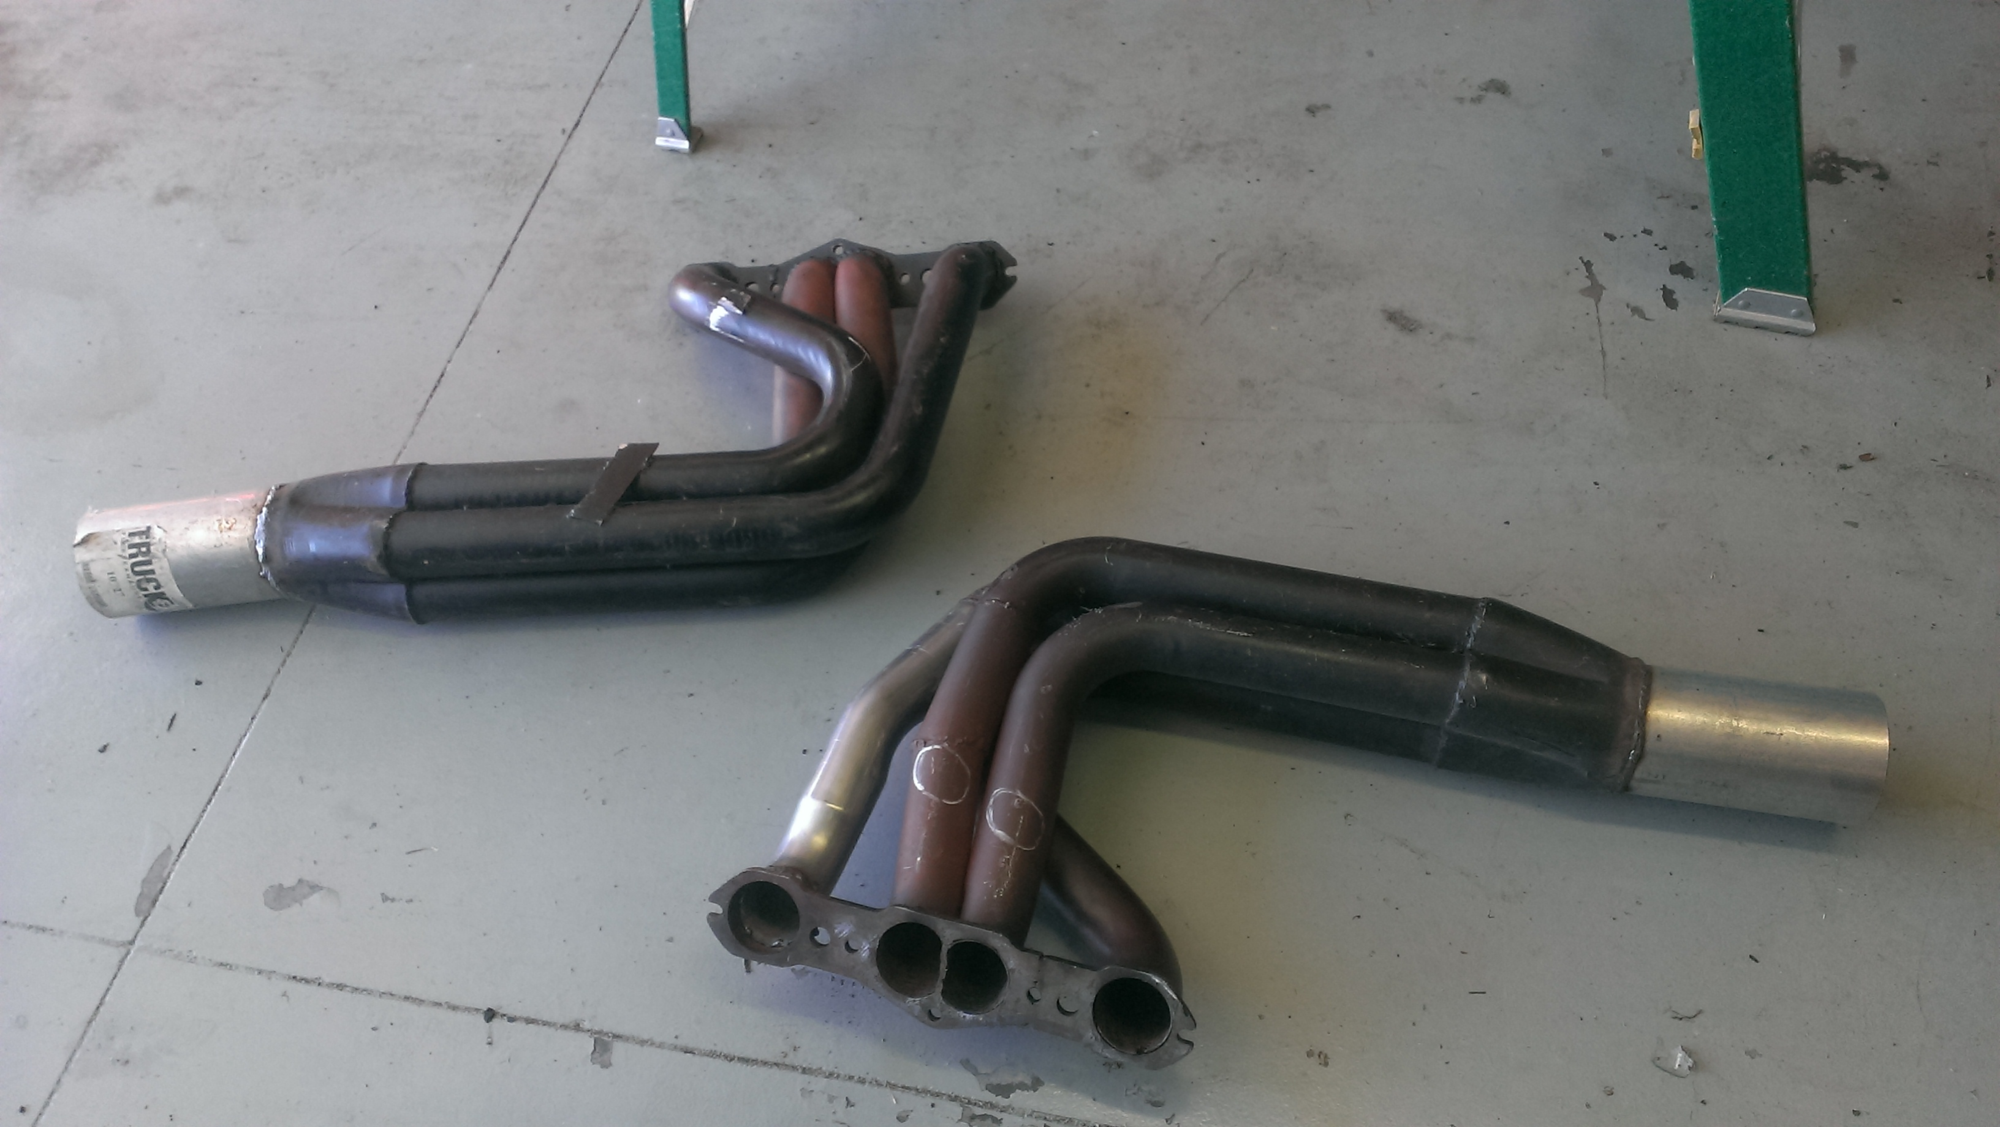
All the bracing was cut loose then strapped to a leveling jig. Then they just rachet strap pulled it in and Checked square and level replace the welds on driver side and that was the one bowed.The story is this car went in the sevens and there is no proof other than past owner .No time slip. This car has a home made intake and huge headers that will not fit after chassis was repaired car sets to low. I should have insisted they make the chassis work to the headers. Now it will require custom built headers. I was told the cost for those will be $1400. Thinking about trying to make my own to cut cost.
wr1970 is offline  
Old January 22nd, 2017, 03:13 PM
  #33  
Registered User
Thread Starter
 
wr1970's Avatar
 
Join Date: Sep 2013
Posts: 3,574


Sorry bad lighting.
wr1970 is offline  
Old January 22nd, 2017, 03:17 PM
  #34  
Registered User
Thread Starter
 
wr1970's Avatar
 
Join Date: Sep 2013
Posts: 3,574
More bad lighting.This intake was used on this car when previous owner claimed it ran in the sevens. This car was using a 455 engine fuel injected was told NOS was also used.The heads were ebrock heads modified by dart. The headers tubes were round at the attach point flange 2 1/4 x4 inch collectors.This engine had a custom crank not sure but was told callies unknown stroke. I can not back any facts up on et/mph.

Last edited by wr1970; February 23rd, 2017 at 04:09 AM. Reason: more info added
wr1970 is offline  
Old February 23rd, 2017, 04:25 AM
  #35  
Registered User
Thread Starter
 
wr1970's Avatar
 
Join Date: Sep 2013
Posts: 3,574


I wonder if the heads that these headers attached to also had round-ish exhaust ports.for this 455 engine. The heads were modified by dart.I modified the collector by adding a longer length and turned them at a angle to try and clear chassis. Didn't work. These headers were built by previous owner.

Last edited by wr1970; February 23rd, 2017 at 04:29 AM.
wr1970 is offline  
Old February 25th, 2017, 08:27 AM
  #36  
Registered User
 
CDNW30's Avatar
 
Join Date: Jan 2008
Location: Regina Sask Canada
Posts: 25
Very nice looking project. It will be nice to see it going down track.

What are you planning for the engine build when the time comes ?
CDNW30 is offline  
Old February 25th, 2017, 09:06 AM
  #37  
Registered User
Thread Starter
 
wr1970's Avatar
 
Join Date: Sep 2013
Posts: 3,574
Looking at a 480ci. but i have more parts for a diesel d block build 442ci. I think with my 4.19 stroke crank it could be possible to build a 453 ci also. I think the 480ci will cost less to make.

Last edited by wr1970; February 25th, 2017 at 09:23 AM. Reason: add more info
wr1970 is offline  
Old June 17th, 2018, 12:36 PM
  #38  
Registered User
Thread Starter
 
wr1970's Avatar
 
Join Date: Sep 2013
Posts: 3,574
Well I am reviving this thread! Things i am doing for project is. I bought new power master 9510 mini starter,Jegs electric 130 gpm fuel pump, fuel line,and new brake lines. I also bought a turbo 400 transmission that i will get re-freshed.I also bought new gauges . My social security checks will be coming in soon and will allow me to do more work!
wr1970 is offline  
Old June 17th, 2018, 01:20 PM
  #39  
Registered User
 
Gascoop's Avatar
 
Join Date: Apr 2018
Location: So. Utah
Posts: 130
Well happy birthday or so and happy retirement. I retired at 56 and started my SS payments at 62 also, never regetted it. They will try and convince you to wait till you're 72 or so ........ not me, too much chit can happen in those 10 yrs. My money, give it to me! Good luck with your build.
Gascoop is offline  
Old June 17th, 2018, 03:02 PM
  #40  
Registered User
 
young olds's Avatar
 
Join Date: Mar 2010
Location: Mt Vernon,WA
Posts: 1,946
Nice, glad to see your back around. You planning on running that intake?
young olds is offline  


Quick Reply: Rocket Vapor


All times are GMT -7. The time now is 04:32 PM.