When you click on links to various merchants on this site and make a purchase, this can result in this site earning a commission. Affiliate programs and affiliations include, but are not limited to, the eBay Partner Network.
Sept 2015 start date...
Nice work so far, your skillset more than can handle this.
Dust off the "oh so much to do" overwhelming feeling and let's go!
Been there , done that. The sprint turns into a crawl...just keep crawling!
Sept 2015 start date...
Nice work so far, your skillset more than can handle this.
Dust off the "oh so much to do" overwhelming feeling and let's go!
Been there , done that. The sprint turns into a crawl...just keep crawling!
Will be watching.
Yeah, it's pretty sad I haven't gotten more done. We've been going some motor work and I've been getting some more stuff together. Hope to get back to it when it's a little warmer.
Bro, this is just normal. I sustained my pace for couple years really well, then just got completely burned out. Life throws curve ***** too and combination of it all can just wear you out. I'm just going to crawl slowly , consistently these days, one major project a week, or work on one small one a day. Just keep crawling!!😉
(But I live in warmer climate, So. Fla...so different scenario. But you got better sources up there car work wise. Many are thieves or just plain dishonest down here.)
I have a guy up here that does restorations and has done a lot of show winning pint jobs and cars in low rider mag, etc. that I'm leaning towards doing the paint on mine. I'm hoping to at least get it driveable this year, but that was the plan last year so we will see. Ran into some motor issues this past weekend so now I have to figure out my next step there.
It's been a dreadful period of time of getting very little done. The motor I was going to use needed to be rebuilt so rather than spending money on that I've picked up another one that should work.
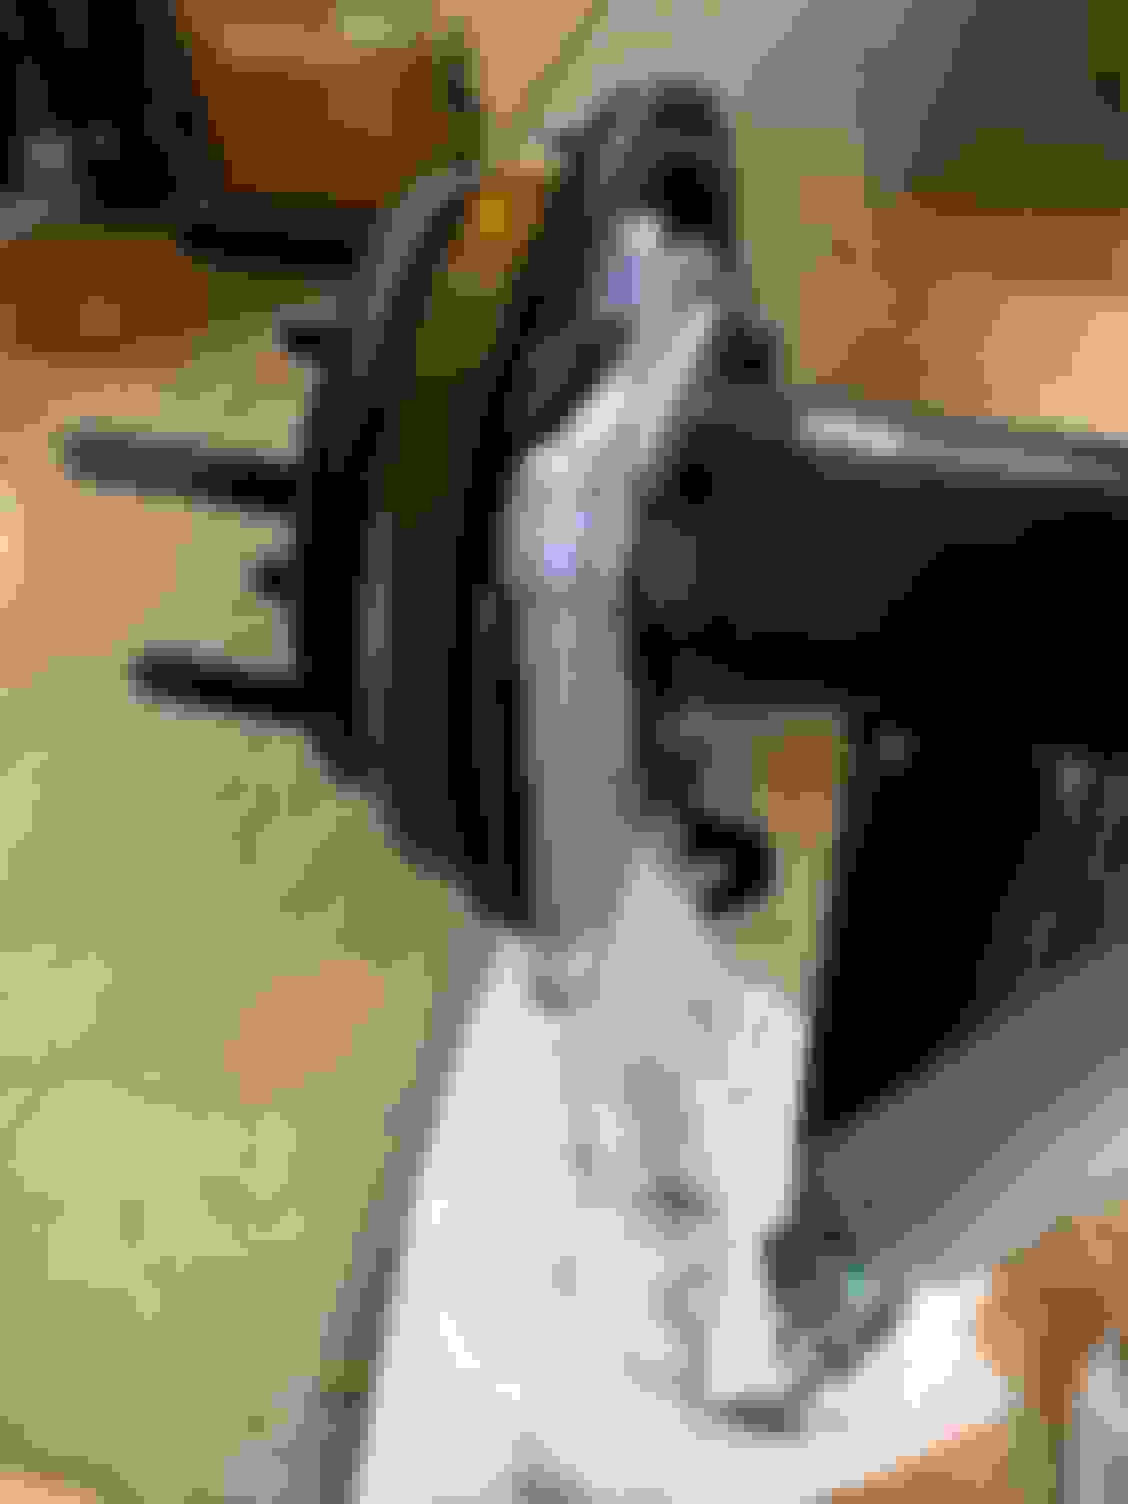
Continuing the budget aspect of the build I picked up a posi unit with an extra set of clutches for $75 and last week I got a set of brand new 3.73 gears for $70 bucks. Scored a free parking brake cable for my f-body/C6 brake setup from junkyard. Also picked up a few more parts, new AC condensor, gaskets, seals, etc that I'm going to need. A buddy of mine cut me some aluminum bearing retainers and spacers with parking brake cable bracket out of aluminum for the ls1 backing plates for me.
My son has been helping me with a lot of this and he shouldn't have to do much to his race car this spring so he's going to be helping out a lot and progress will pick up soon. First will be getting the motor and trans painted and finished and ready to go. Then probably put the front hubs on and make sure the brackets for the calipers work as expected and put the ls1 backing plates and calipers on. I haven't found a local guy/shop to do the gear/posi install yet, but that may wait until closer to the car being done to push back spending money on that for a while. Also, he is going to build rear control arm braces and rear shock brace for me.
I've been toying with the paint color. I've been going back and forth between the viking blue with maybe a little more metallic and the 2016 Corvete Laguna blue, it's amazing. Kind of leaning to keeping it more the original color, but not for sure yet.
Hopefully much more progress very soon.
Last edited by DewChugr; March 18th, 2019 at 08:15 AM.
Here are some photos. I'm uploading them from my phone so I hope they aren't megasized.
Not bad for $75 and an extra set of clutches.
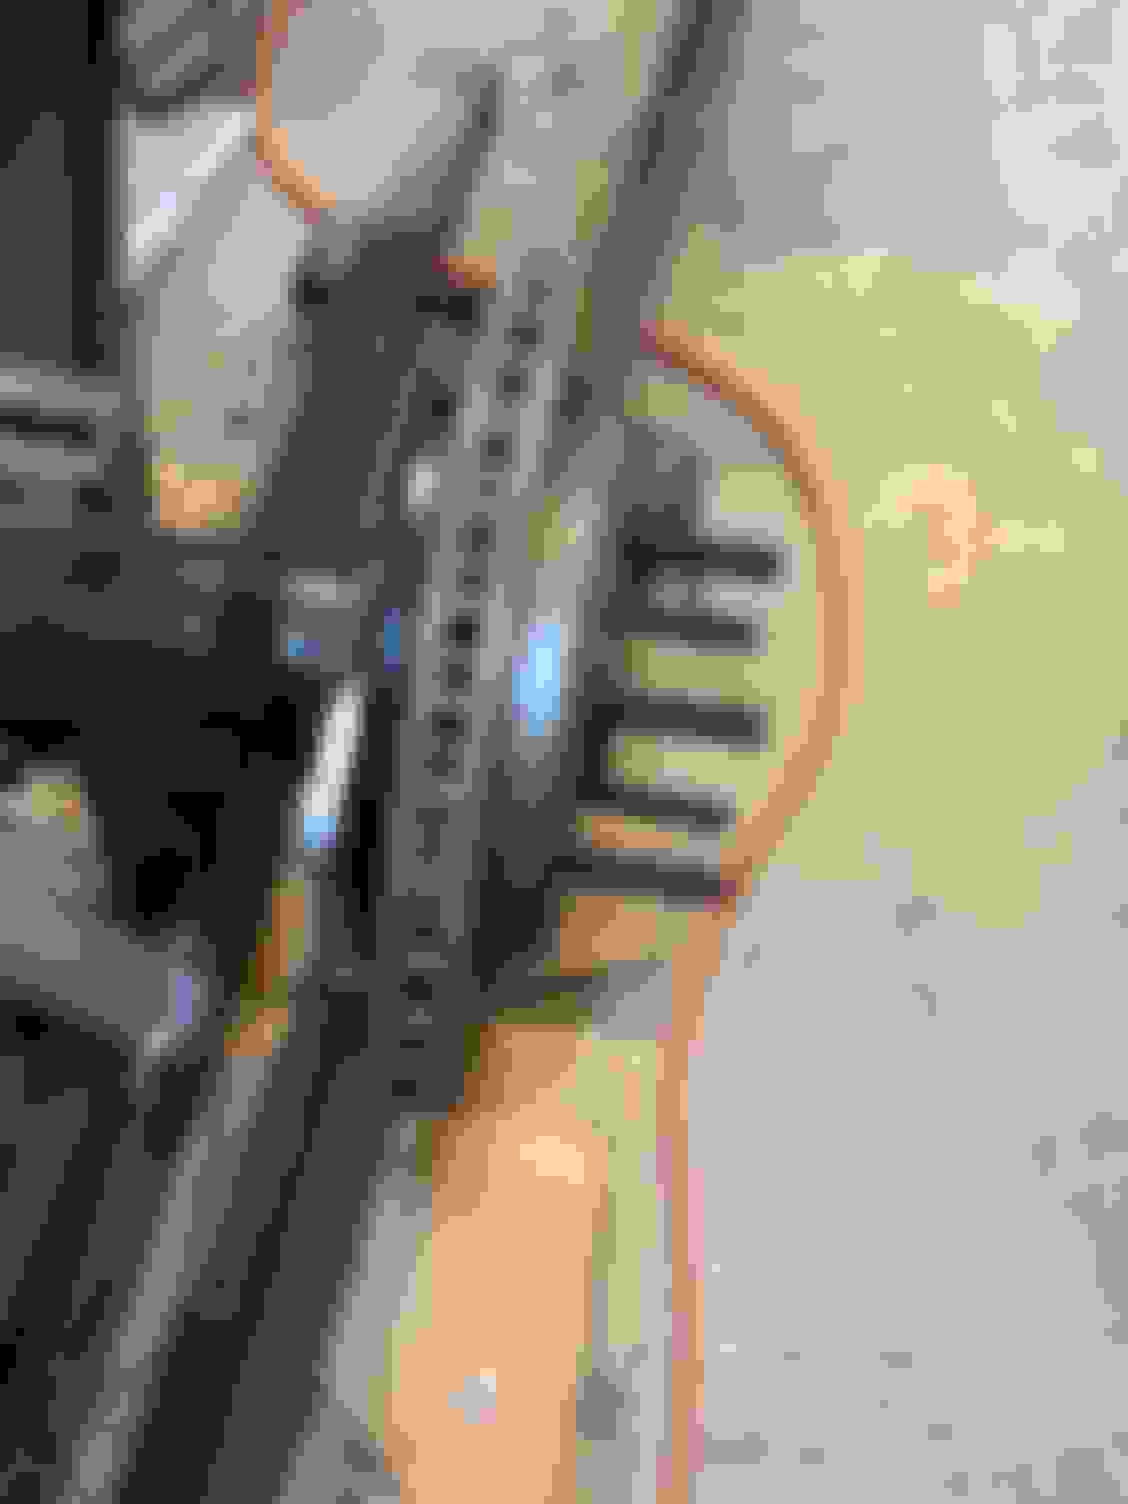
These are the gears I got, and they are brand new.
Parking brake cable before cleaning and painting.
Rear spacer and bearing retainer for use with the f-body backing plates/C6 brakes. I got cad files from the guy at this site. He was super helpful and willing to answer my questions. http://1967firebird.atwebpages.com/chassis2.php
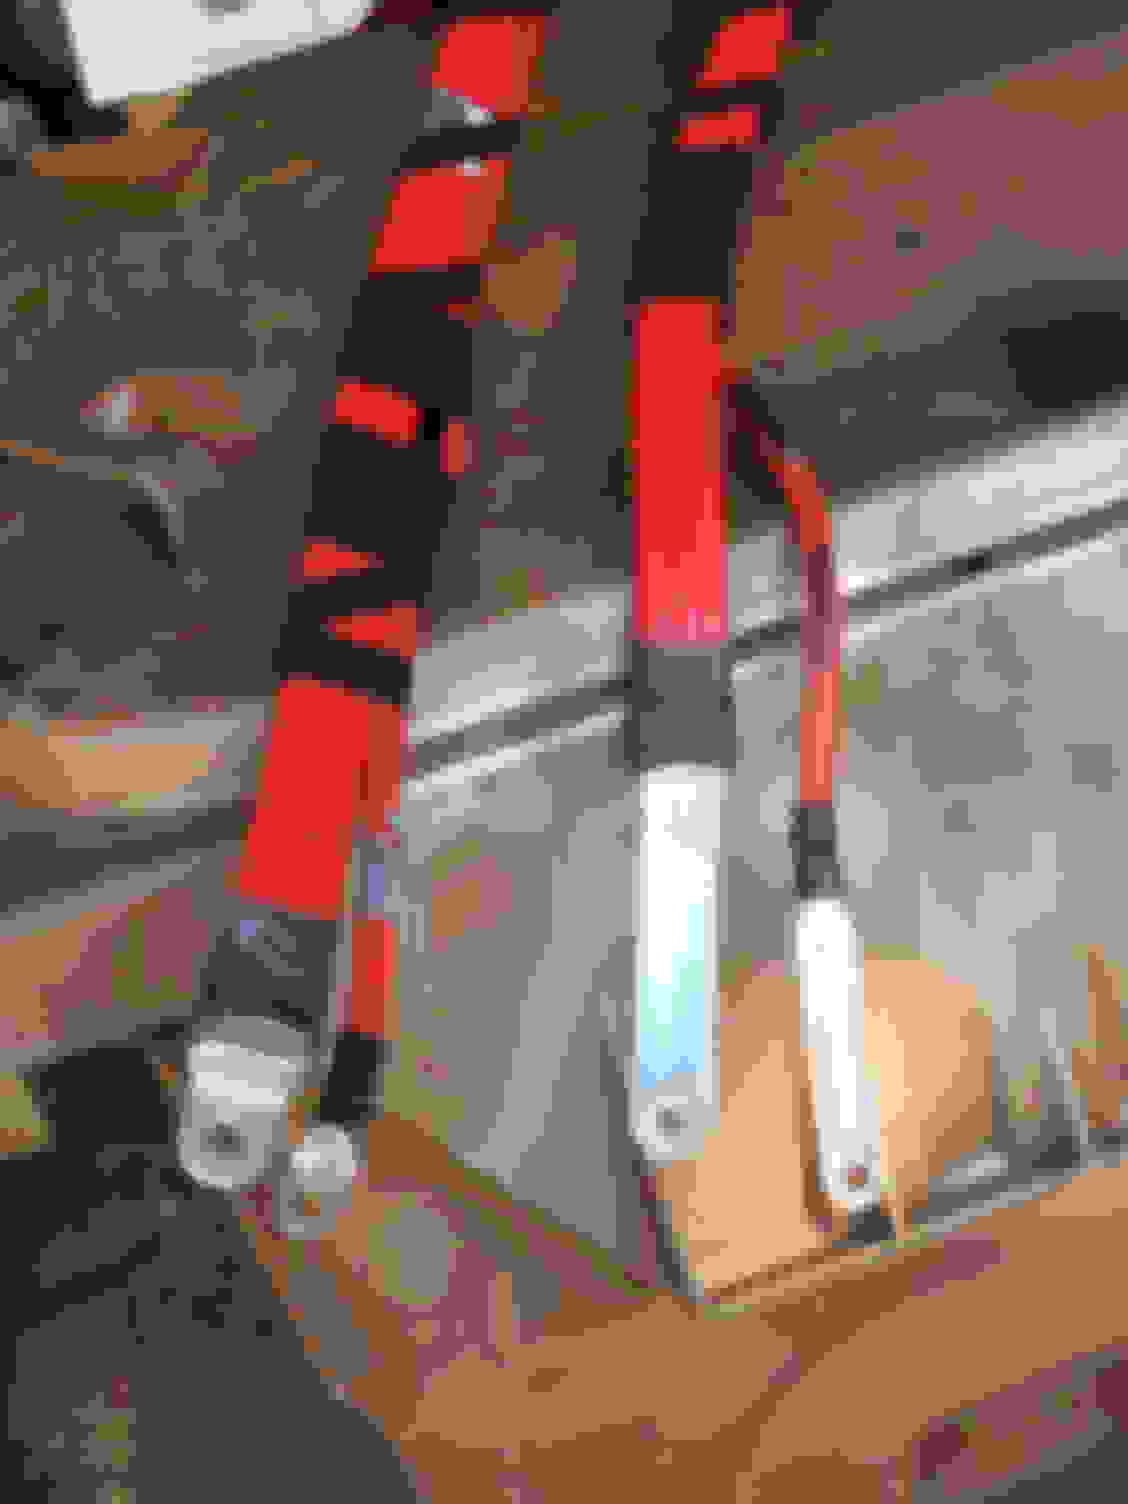
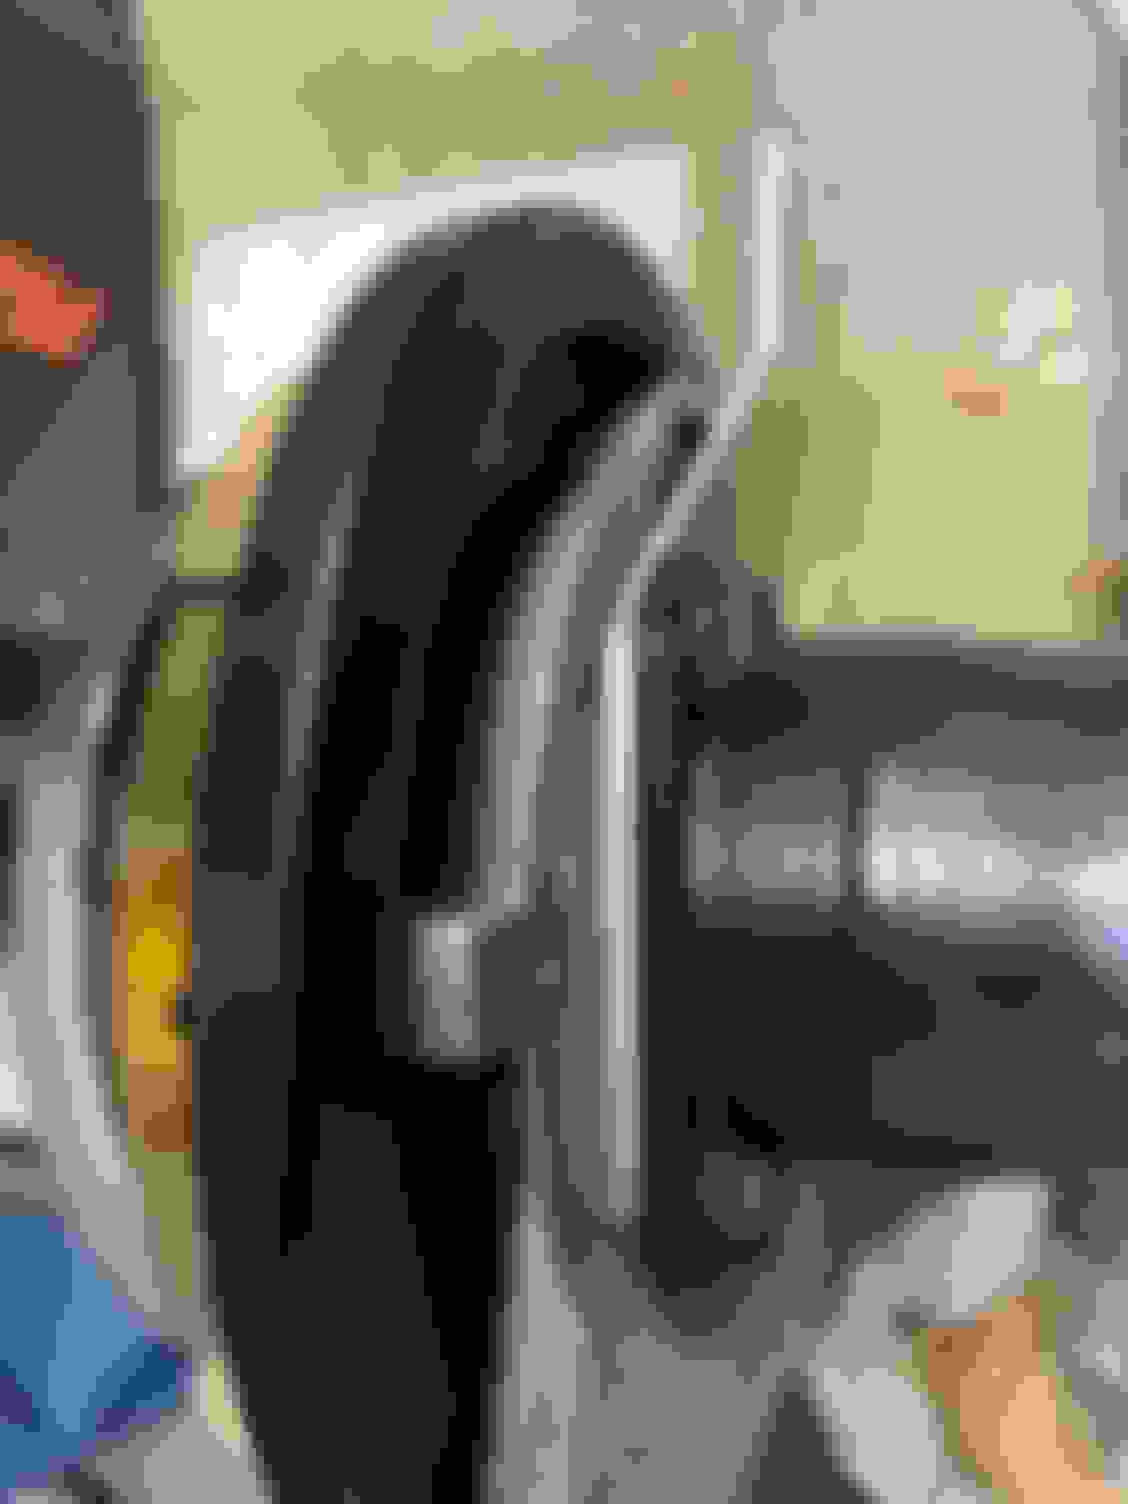
BMW 745i battery cable, in case you know, you want the battery in the trunk. Five dollar and quite substantial.
Last edited by DewChugr; March 18th, 2019 at 08:21 AM.
Hey, can you post more pics of BMW battery cables and junction box etc? I'm moving my battery to the trunk and very interested in good ideas to do this. I've looked into many ideas out there and love to see your ideas on this. 👍👍
So temp motor while you redo yours. Looking forward to engine build.
Hey, can you post more pics of BMW battery cables and junction box etc? I'm moving my battery to the trunk and very interested in good ideas to do this. I've looked into many ideas out there and love to see your ideas on this. 👍👍
So temp motor while you redo yours. Looking forward to engine build.
This cable is about 12 or so feet long, there are 2 separate wires as you can see. There is a junction that snaps into the firewall, but I could not get it out because there was zero access to that area at the junkyard. I have seen various methods used on BMWs, this one they bolt to both sides of the piece in the firewall, one car that was similar but one wire and cars where the cable passed through a grommet. I'm not sure if I have the terminal in the trunk either. there is usually a short positive and negative cable in the trunk as the long cable does not attach directly to the battery.
The new motor is THE motor, the old one is not going to be used due to the cost of needing a rebuild. You may not want to see the engine build.
Gotcha, Junctions instead of solid one piece cable. I'm going to google it see how they do it.
If you want info on the motor PM me, I am not ready to pay info on it here yet.
I will tell you, these battery cables are a pain in the *** to take out. The ONLY reason I got the one out of the 745 is because it's the longest I have seen and the front seats were out. There is about two inches of insulation under the carpet nad the cable goes under the driver and rear seats. Sometimes it's under plastic ducts, usually the carpet is soaked and sometimes you can't get into the trunk. That being said my yard charges $6 for a battery cable whether its a foot or 12 foot long.
This first one I know was from the 745i. It was in the engine compartment and has a bar on it (right side of photo, top of device) you can use as a jump spot. Not sure I'll use this. Different cars have different options.
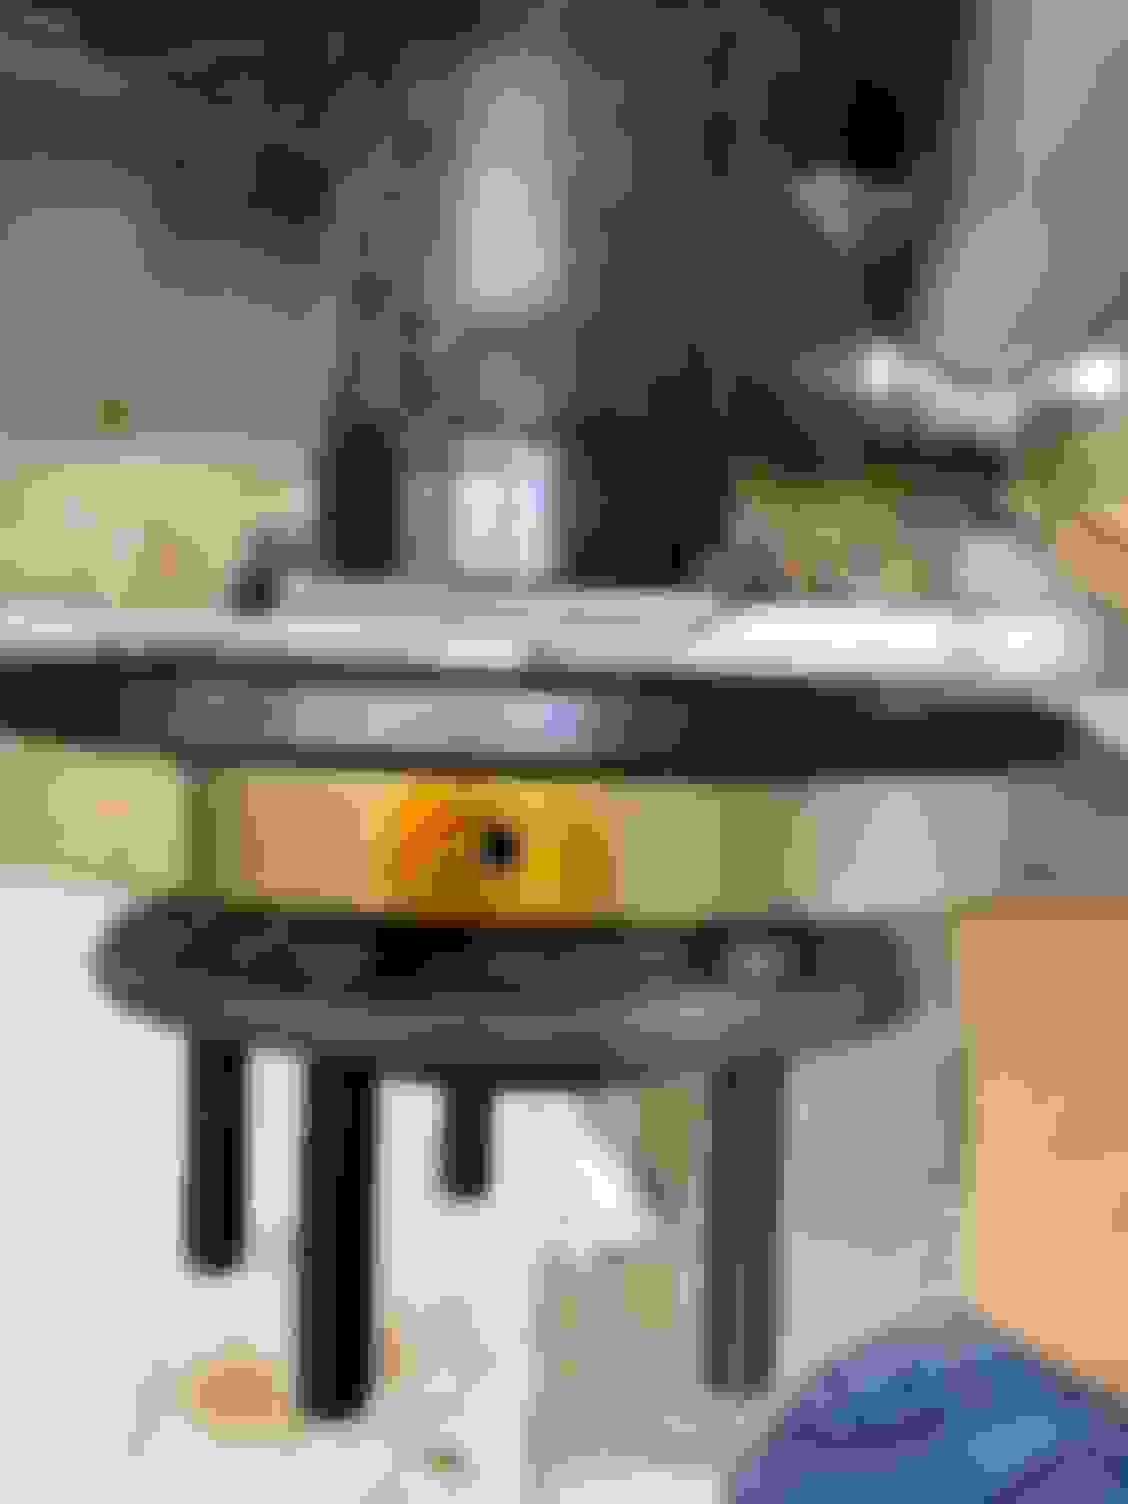
I think this was also in the 745, but not 100% sure.
Last edited by DewChugr; March 18th, 2019 at 01:51 PM.
Got the motor painted. Next I'll be painting some of the brackets, etc.
We are considering doing the trunk and quarters ourselves. Not decided yet, but my son can do pretty much anything so we might go for it. Planning on buying sheet meta from the parts place and won't have to pay shipping.
So, long time since the last update. Haven�t gotten nearly as much done as I would like. Having never done this and not being a mechanic takes its toll on my motivation.
we will probably replace the trunk ourselves, but I think I have decided to let the body guy do the quarters. I had him stop by last month to look it over and give me a guesstimate and I was pleasantly surprised that it won�t cost as much as I was expecting to get painted, which is a relief.
anyway, the engine and trans are done and ready to go. I�ve gathered some more parts, junkyard and online. I do t know what all since last time, but I grabbed an AC condenser, a battery cable from a 745i, this thing is bad ***. I bought some threaded 1/2� studs from Strange.
I had a shop tap all the holes for the studs and put new axle bearings and seals on. It was a bit more than I expected at $145, but the shop is good and saved me a lot pressing new hubs on my 4Runner las year. I had thought about just buying better axles, but I found the posi and brand new 3.73 gears for $75 each so stuck with my stock axles.
I�ve got a take-off tank I got from a well known guy in trade for some work a few years ago, so no cost replacing the rusted out one that was on the car and had holes in it.
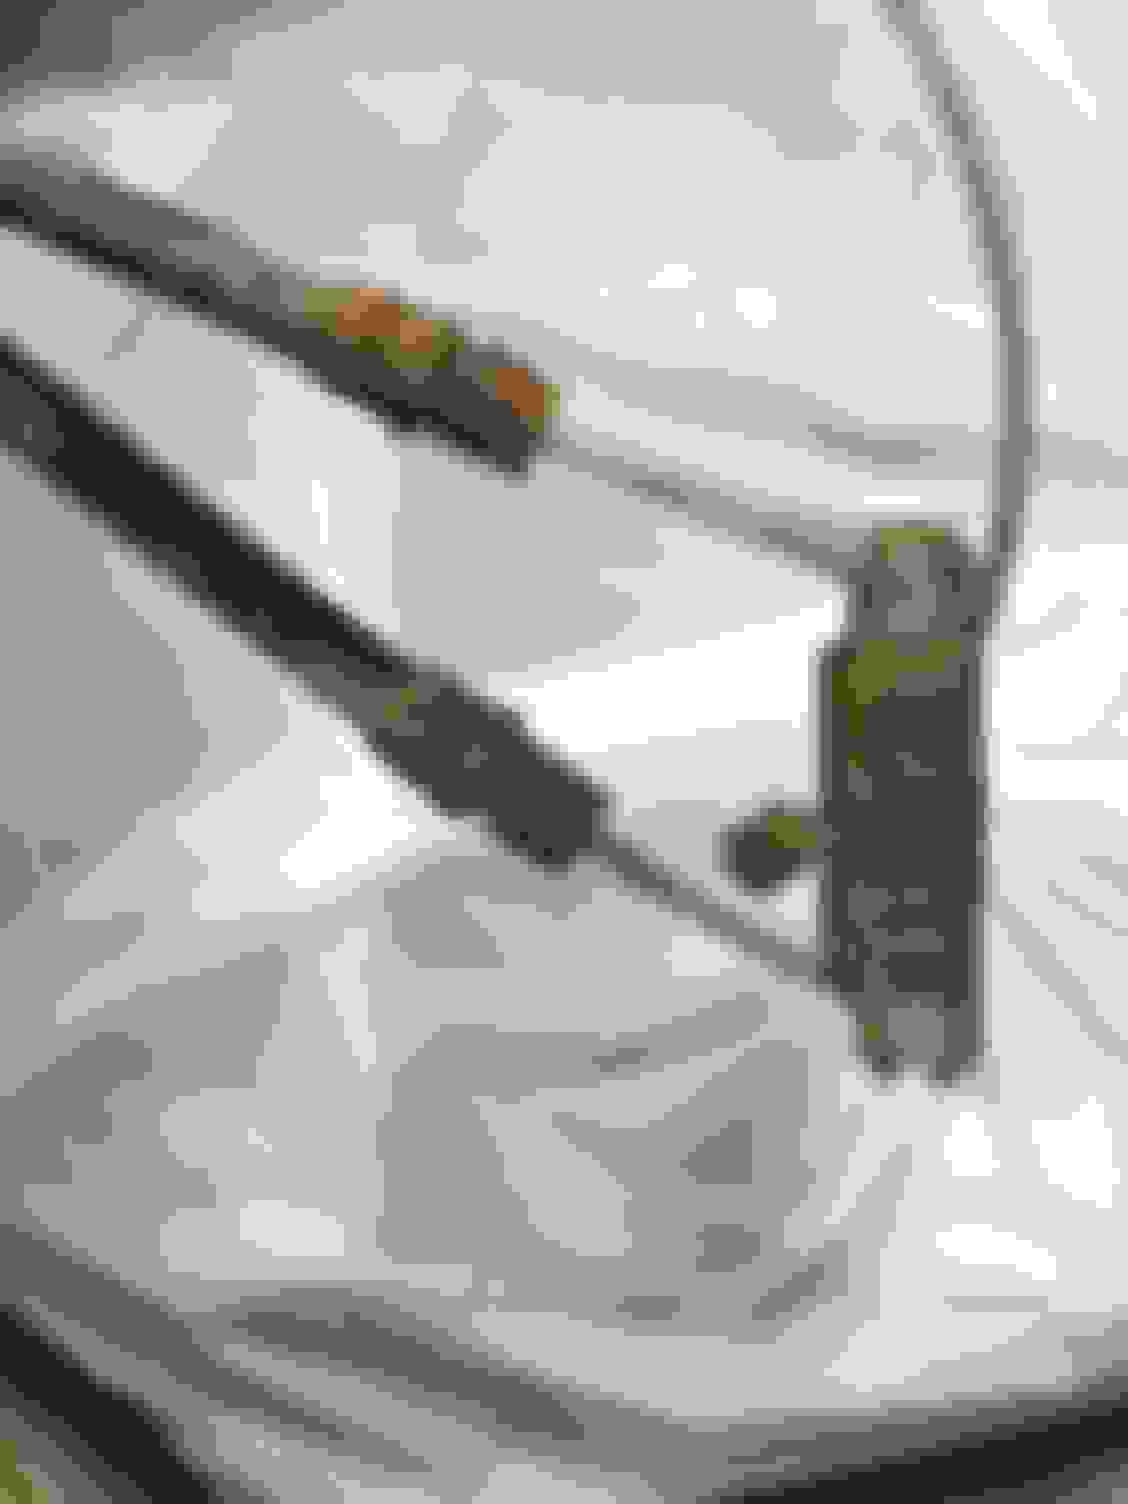
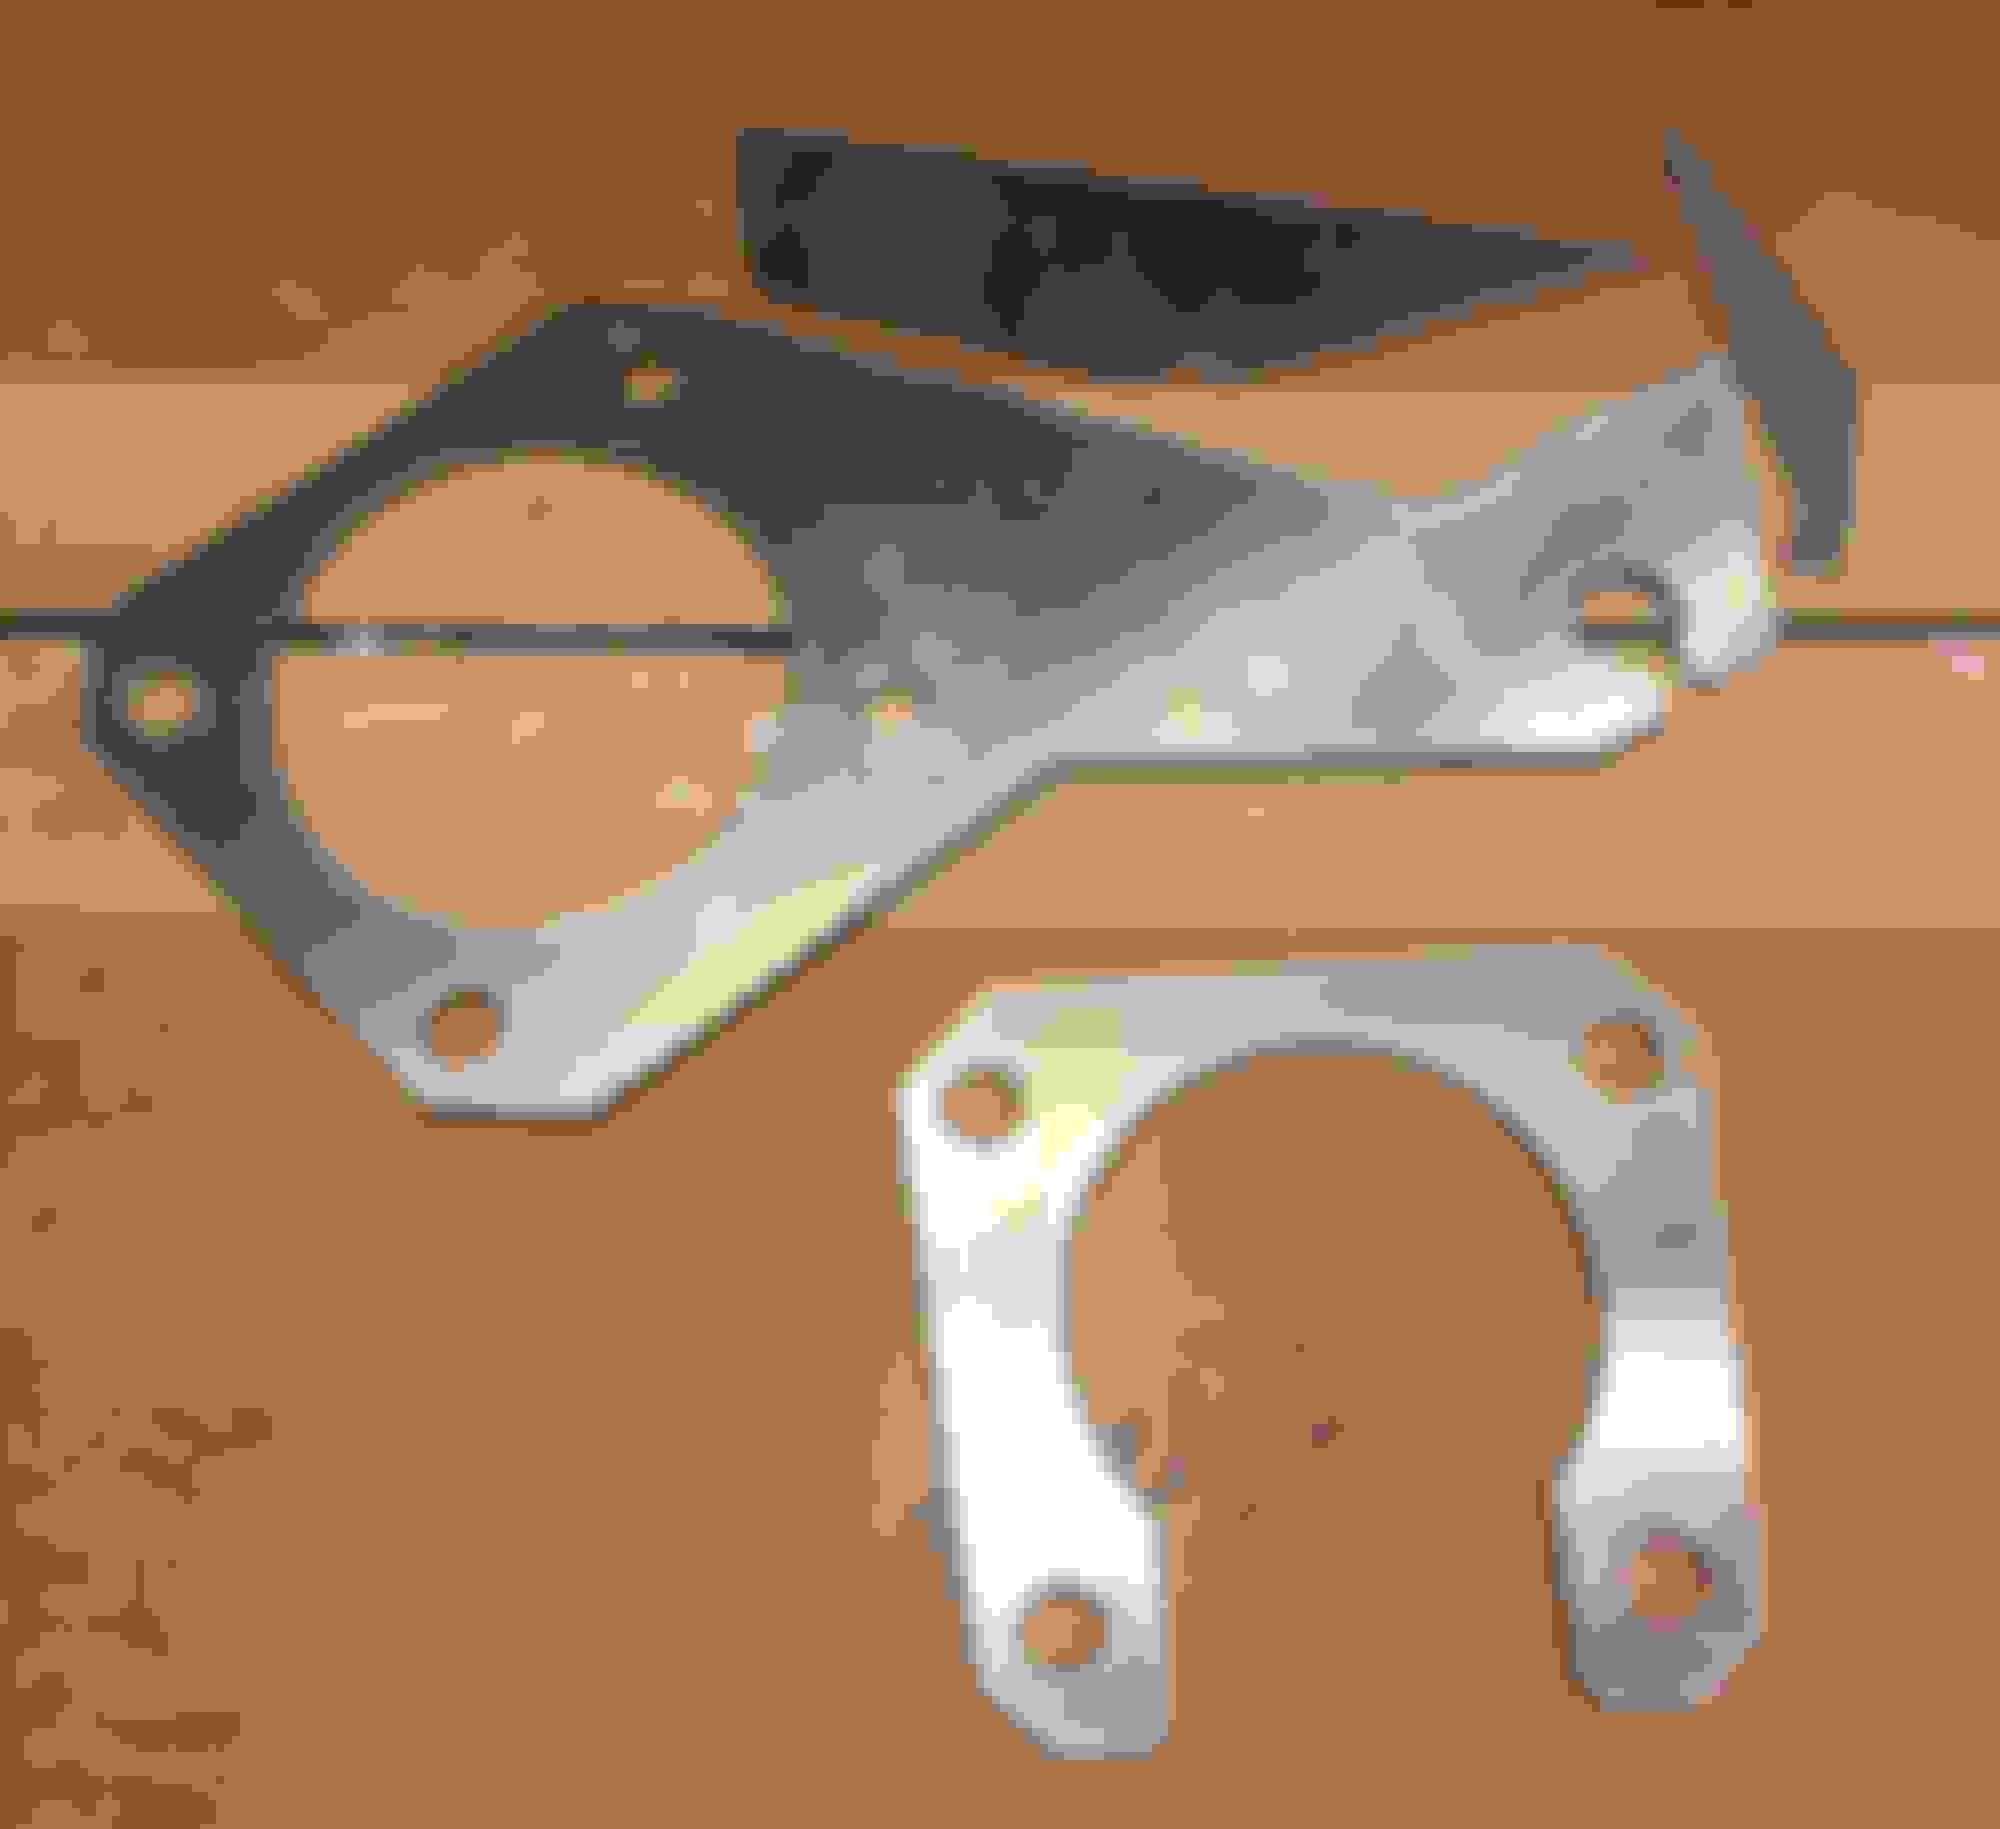
Yesterday we spent some time putting the axles and brakes on. I�m switching to C6 brakes with the fbody backing plates. If you aren�t familiar the opening in the backing plates is rather large so no way to hold the axles in. In addition they need to be spaced out from the axle tubes 1/4� for the rotors to line up. I found a guy who used these on his first gen Firebird and he was nice enough to share cad files on his site of an 1/8� spacer and 1/8� bearing retainer he designed to fix these issues. The cool thing about the spacer is that he designed it with a notch to hold the fbody parking brake cable. I�ll post a link to his site from my desktop later. I have a friend that has access to laser and mechanical cutters and he was nice enough to cut these out of aluminum for me. They were cut from one 12� x 12� sheet of 1/8� aluminum I bought on amazon for around $15.
In the photo the smaller of the two is the bearing retainer. Assemble is spacer, retainer, backing plate, then axle. We measured things up and went to Rural King and bought some hardware for the back and the front. The guy I got the templates from used Ford t-bolts. I bought some metric bolts which were slightly bigger than the old ones. We had to drill the axle ends and the spacers and retainers very slightly. Because the holes are so close to the axle tubes we had to cut one edge of the bolts off. In addition, because of the length we were not able to get the bolt by the shock mount in. We ground it at a bit of an angle as seen in photo so it would slip past. Added a lock washer and bolted it all together. It�s a bit of work, but I think it will be well worth it.
Forgot to mention, some red locktite and 90 ft lbs for the wheel studs. I bought 3� studs, yeah I know they are to long. I have no idea what wheels I�m going to use and I was worried about getting them to short. I�ll either use open lug nuts or cut them down later.
The spacer and bearing retainer. The �arm� on the spacer will get bent but I�m not sure how at what angle yet. The piece above it is a brace that will get welded in to stiffen it.
One last thing on the brakes. The Vette calipers work fine on the rear, but ls1 fbody caliper brackets and rotors are required to make this work. Another trip to the junkyard to hopefully find a set of brackets soon.
Next up, install studs in the drum brake hubs in the front, mod the drum spindle a bit and put that together. Then put all the steering stuff on. Then torque all the suspension stuff, minus the two rubber bushings on the rear control arms.
Still need to find a rear sway bar. Found a place that is supposed to have one from a Chevelle for $50, but are email unresponsive. Will need to call.
I think I�ve been putting things off because I don�t want to do the underside of the body. At least I don�t have to clean rust of the underside of the trunk since it is getting replaced. There were two small areas where the seat belt mounted about 4� square we cut out to replace. The rest of the floor is solid, except the convertible trunk floor.
if I didn�t post it earlier I drove to the parts place and bought a trunk floor, drop offs, body and tank braces. Good chance some wheel house work will be needed. At least the firewall, windshield frame and almost all the passenger floor are good to go.
I�ll post some more when we get the front hubs on. I have a feeling the caliper brackets I had made for the front aren�t going to work after seeing some actual drawings another person used, but we will see.
One last thing regarding the rear brakes. I put the left backing plate on the right side and right in left. Did this so the parking brakes would pull from the front. Cable was free from the junkyard, all cleaned up and painted. Can�t find a photo right now.
I was just looking at my spreadsheet. So far I have spent about $3900 plus about $700 worth of things I've gotten as gifts, etc.
I post this to inspire those that think there's no way they can afford to restore or work on their car, to show you that even if money is tight this can be done. There are people that sell way more and make way more than I do, but I have very little time in this. I started with a few hundred bucks and the desire to see if I could do it without using my paycheck. I buy stuff from Walmart and other stores on clearance as well as parts from the junkyard and sell them on Facebook or Craiglsit preferably or ebay as a second choice. Obviously ebay is my last choice because of the fees. I've sold everything from titanium backpacking sporks to TVs to you name it. One day this summer I took the day off and drove from central Illinois down to southern Illinois. I stopped at 7 Walmarts and bought $900 worth of hunting items. I've got three pairs of binoculars and a $400 scope left and I cleared $1700 so far. I should be getting some high profit junkyard BMW parts in the next couple weeks. My biggest problem is wanting to keep stuff that I get cheap instead of selling it. I did let my wife keep one of the vacuums I got for $40 and I kept a Nikon Monarch Scope.
I've sold about $9,000 worth of walmart, etc. clearance deals and junkyards parts and so far. Return on expense for clearance items, 320%. Return on expense for junkyard car parts, 753%.
As far as the car goes, I went to the junkyard last week to get a pair of 98-02 fbody rear caliper brackets (it doesn't need to be a v8 car). The vette calipers will work, but the brackets and rotors need to be from an fbody, I spent $40 and have enough parts to sell for $300. If anyone wants a set of rear fbody calipers I have a set I'll let go. I ordered ACDelco rotors from amazon, then realized they won't be here til Feb 13th. I cancelled those and ordered a set of Bendix rotors that will be here tomorrow. I have a couple of other parts coming in Monday.
Small update, I got the caliper abutments from the Camaro electronically de-rusted when we had a couple warm days. Painted those and the center of the rotors this weekend. Going to make sure they have plenty of time to cure before I put it together.
The spacer and bearing retainer I had cut aren't working as designed. The center opening of the retainer is a bit to big. I ordered a set of axle retainers from Strange Engineering. Great service, I called to ask them the thickness, 3/16" and ordered them and they were here the next day. Also, my spacer is 1/8" where the original backing plate is .1". I don't know if 25 hundredths of an inch is going to leave them to loose, but we'll try them out. If they are to loose will try to sand them slightly at my buddies shop and see if that helps.
The caliper mounted to the Camaro backing plate is to far outboard and the axle Strange retainer will make it slightly worse. We'll have to space them in a bit to center them on the rotor. It's a bit discouraging, but none of these parts are designed to work on this car. That being said, it is amazing how much carries over from these old cars to newer vehicles. Who would have thought you could use modern Corvette breaks on a car from 1971 or that you could find gears in 90s trucks?
it�s been a long time since the last update. Motivation issues and busy with other things as well as not having a heated space in winter.
anyway. I�ve done some small stuff. Picked up a cruise module, painted some parts, got some poly motor mounts, etc. I think I finally have the rear axles/retainers/backing plates/calipers figured out and workable.
I probably mentioned before but the motor and trans are done and ready to go in. Still trying to find some seats for the front that are a little more comfortable and sporty. Part of the problem is the interior is white and there are few two door cars with white seats so I�ll probably have to recover whatever I get. I�d rather have cloth but white cloth would be a disaster and o don�t want to switch to black or gray. Volvo C70 seats look nice.
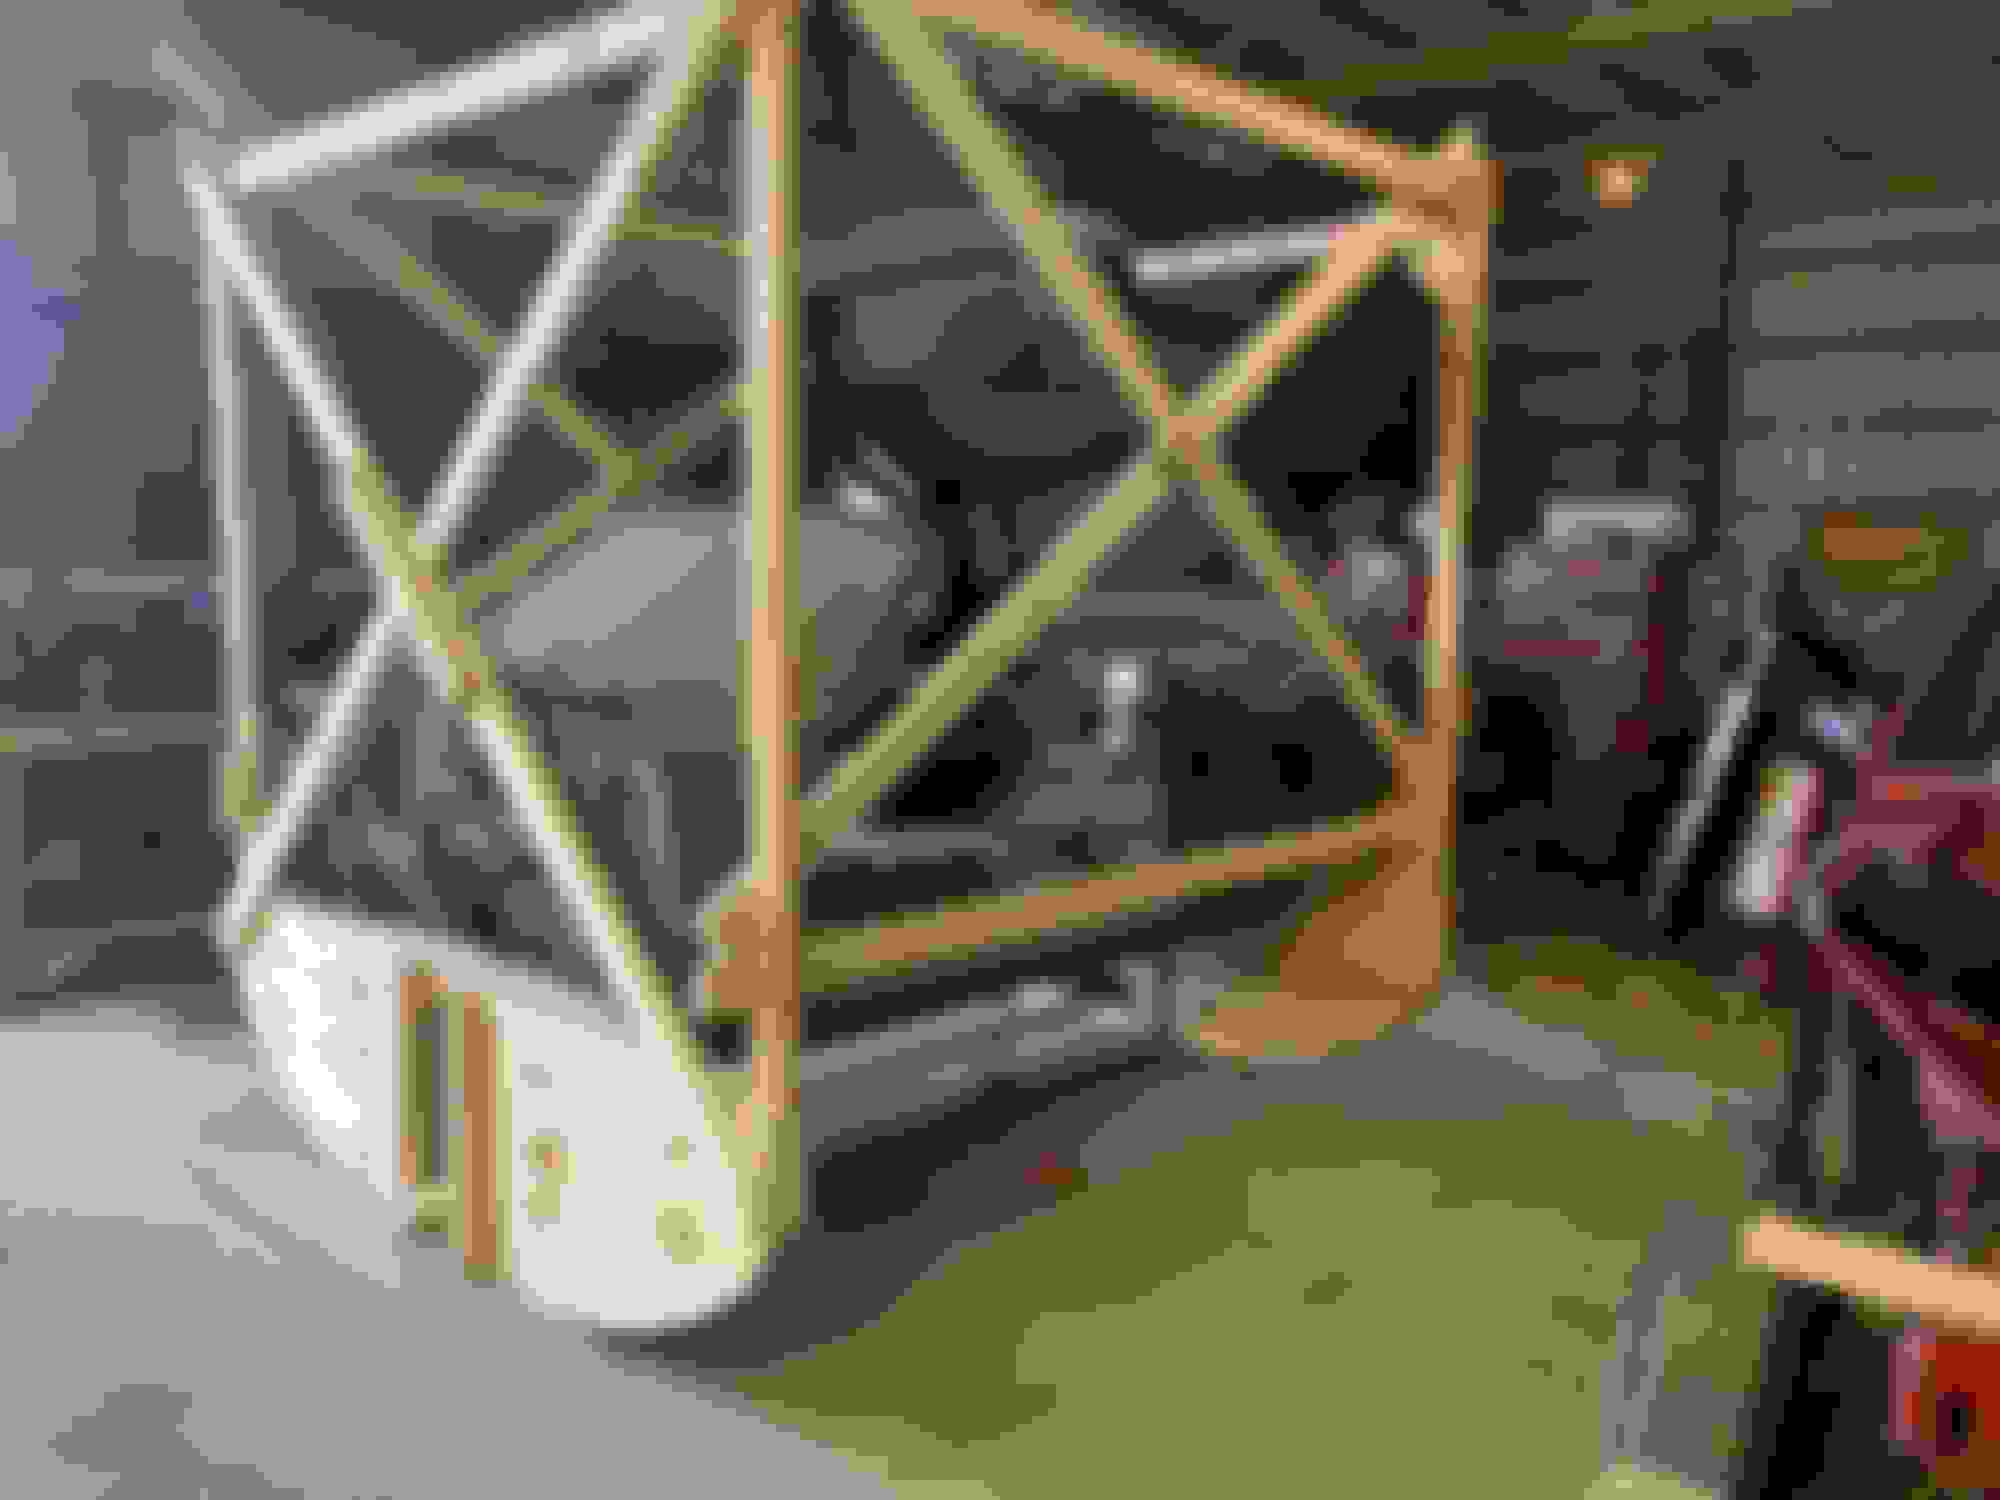
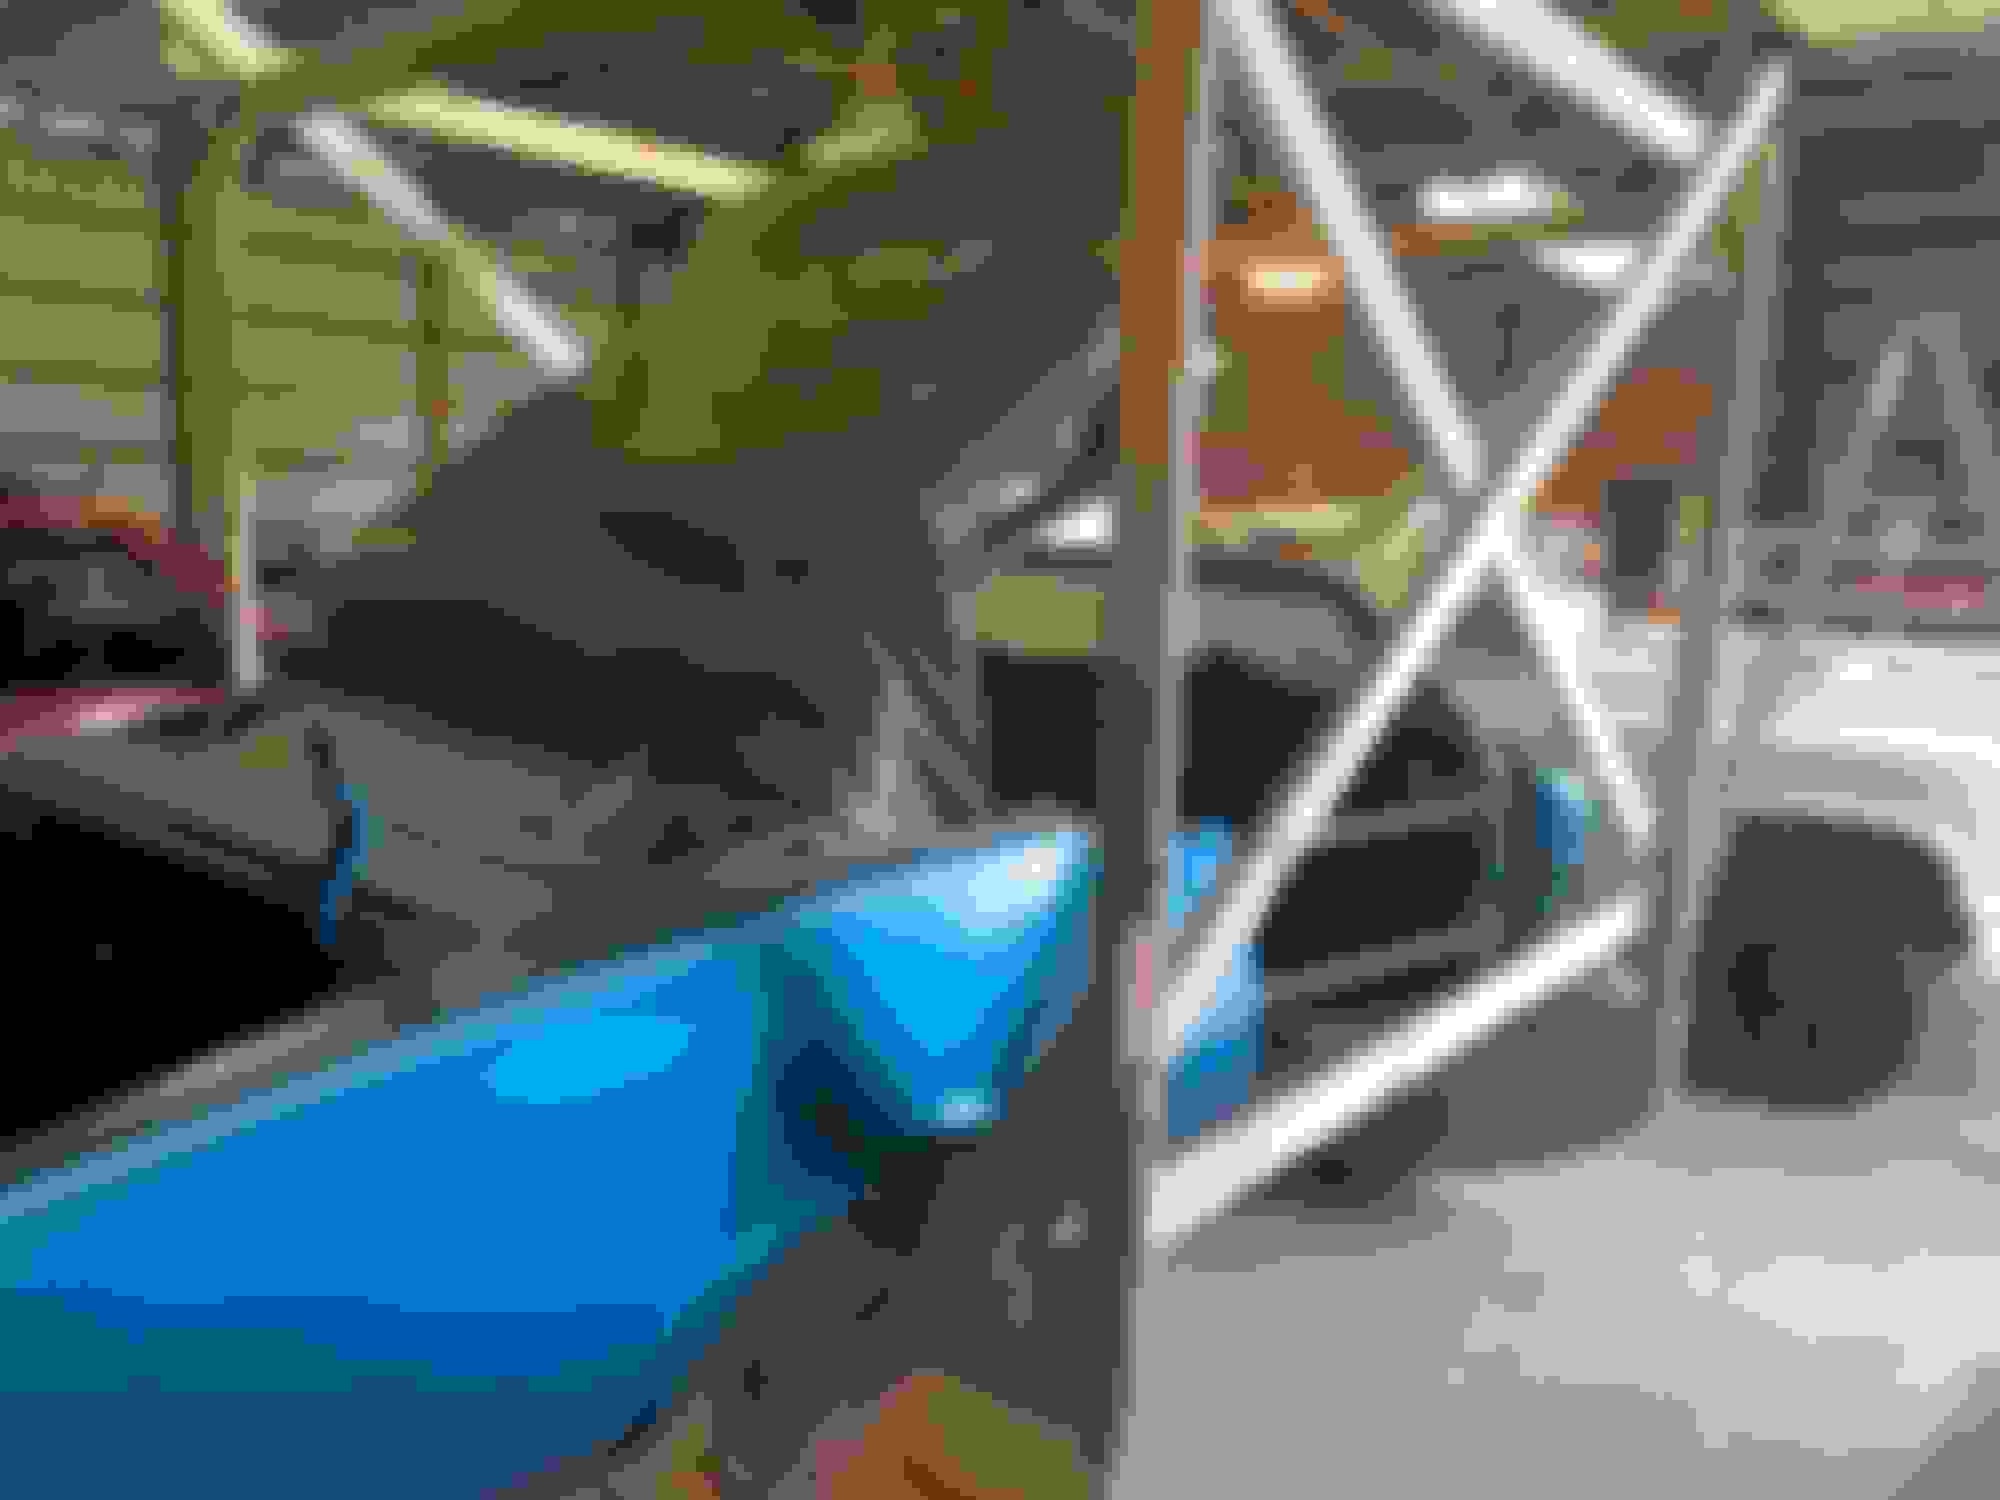
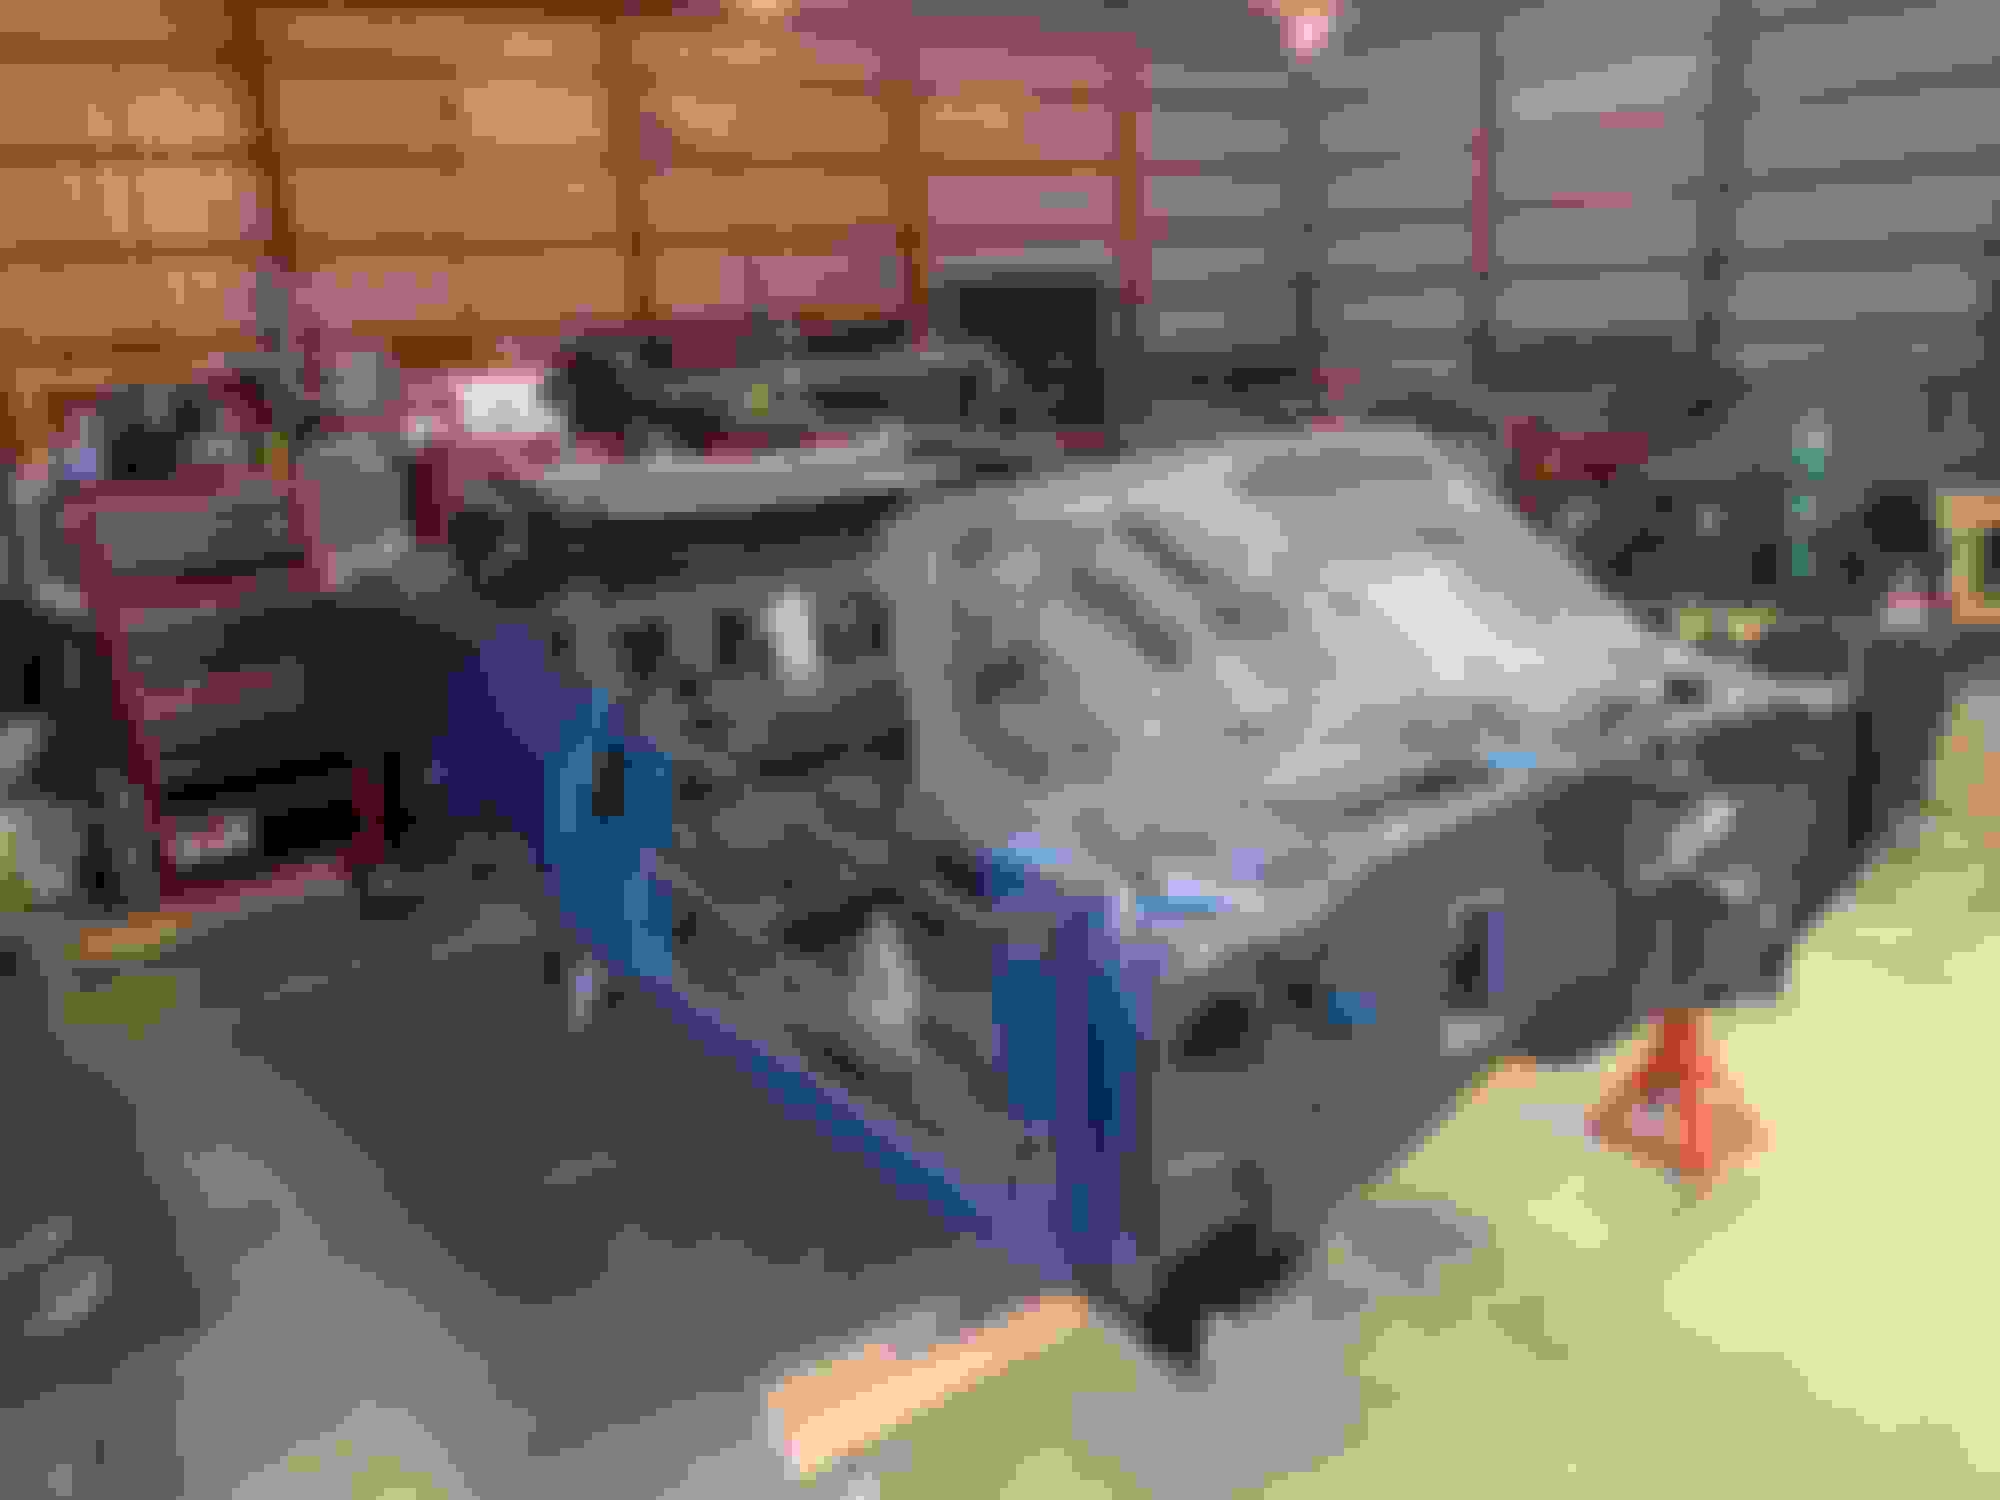
anyway, the big news you can see below. And no, it didn�t cost more than buying a steel rotisserie. This is going to make replacing the trunk floor so much easier. The bottom of the floor looks way better than I expected for us being in Illinois. Other than the area behind the rear axle it pretty dang solid.
I�ve got about $200 in wood plus hardware. The front is bolted to a 4x4 to the front body mounts and then to the wood frame. In the back my son made a bracket out of angle iron. He welded gussets in and made pockets for 2x4s that are part of the support. That�s then welded above where the axle sits.
we wanted the rear roller far enough back for balance, but far enough forward so the entire rear section was accessible for cutting and welding.
it�s a little much for two of us to roll on to the side but back up is easier.
should be able to start making some progress. Once the floor is done we can put the motor and trans on the frame and drip the body on.
no, there are no plans for this, we just made it as we went. Hopefully more posts in the near future.
Looking good i like the wood tisserie, ive seen something similar to that somewhere before, it will make the underside work close to as easy as a rotissiere,
Making progress, slowly but surely. My son cut a section of the trunk floor and patched one area. Meanwhile I�ve been cleaning the underside of the floor to get ready to finish it. I don�t have a heated shop so the plan is to get the underside finished so we can take the frame to the shop and drop the body on and bring it home to my garage where we can work on putting some of it back together and get it ready for the body shop.
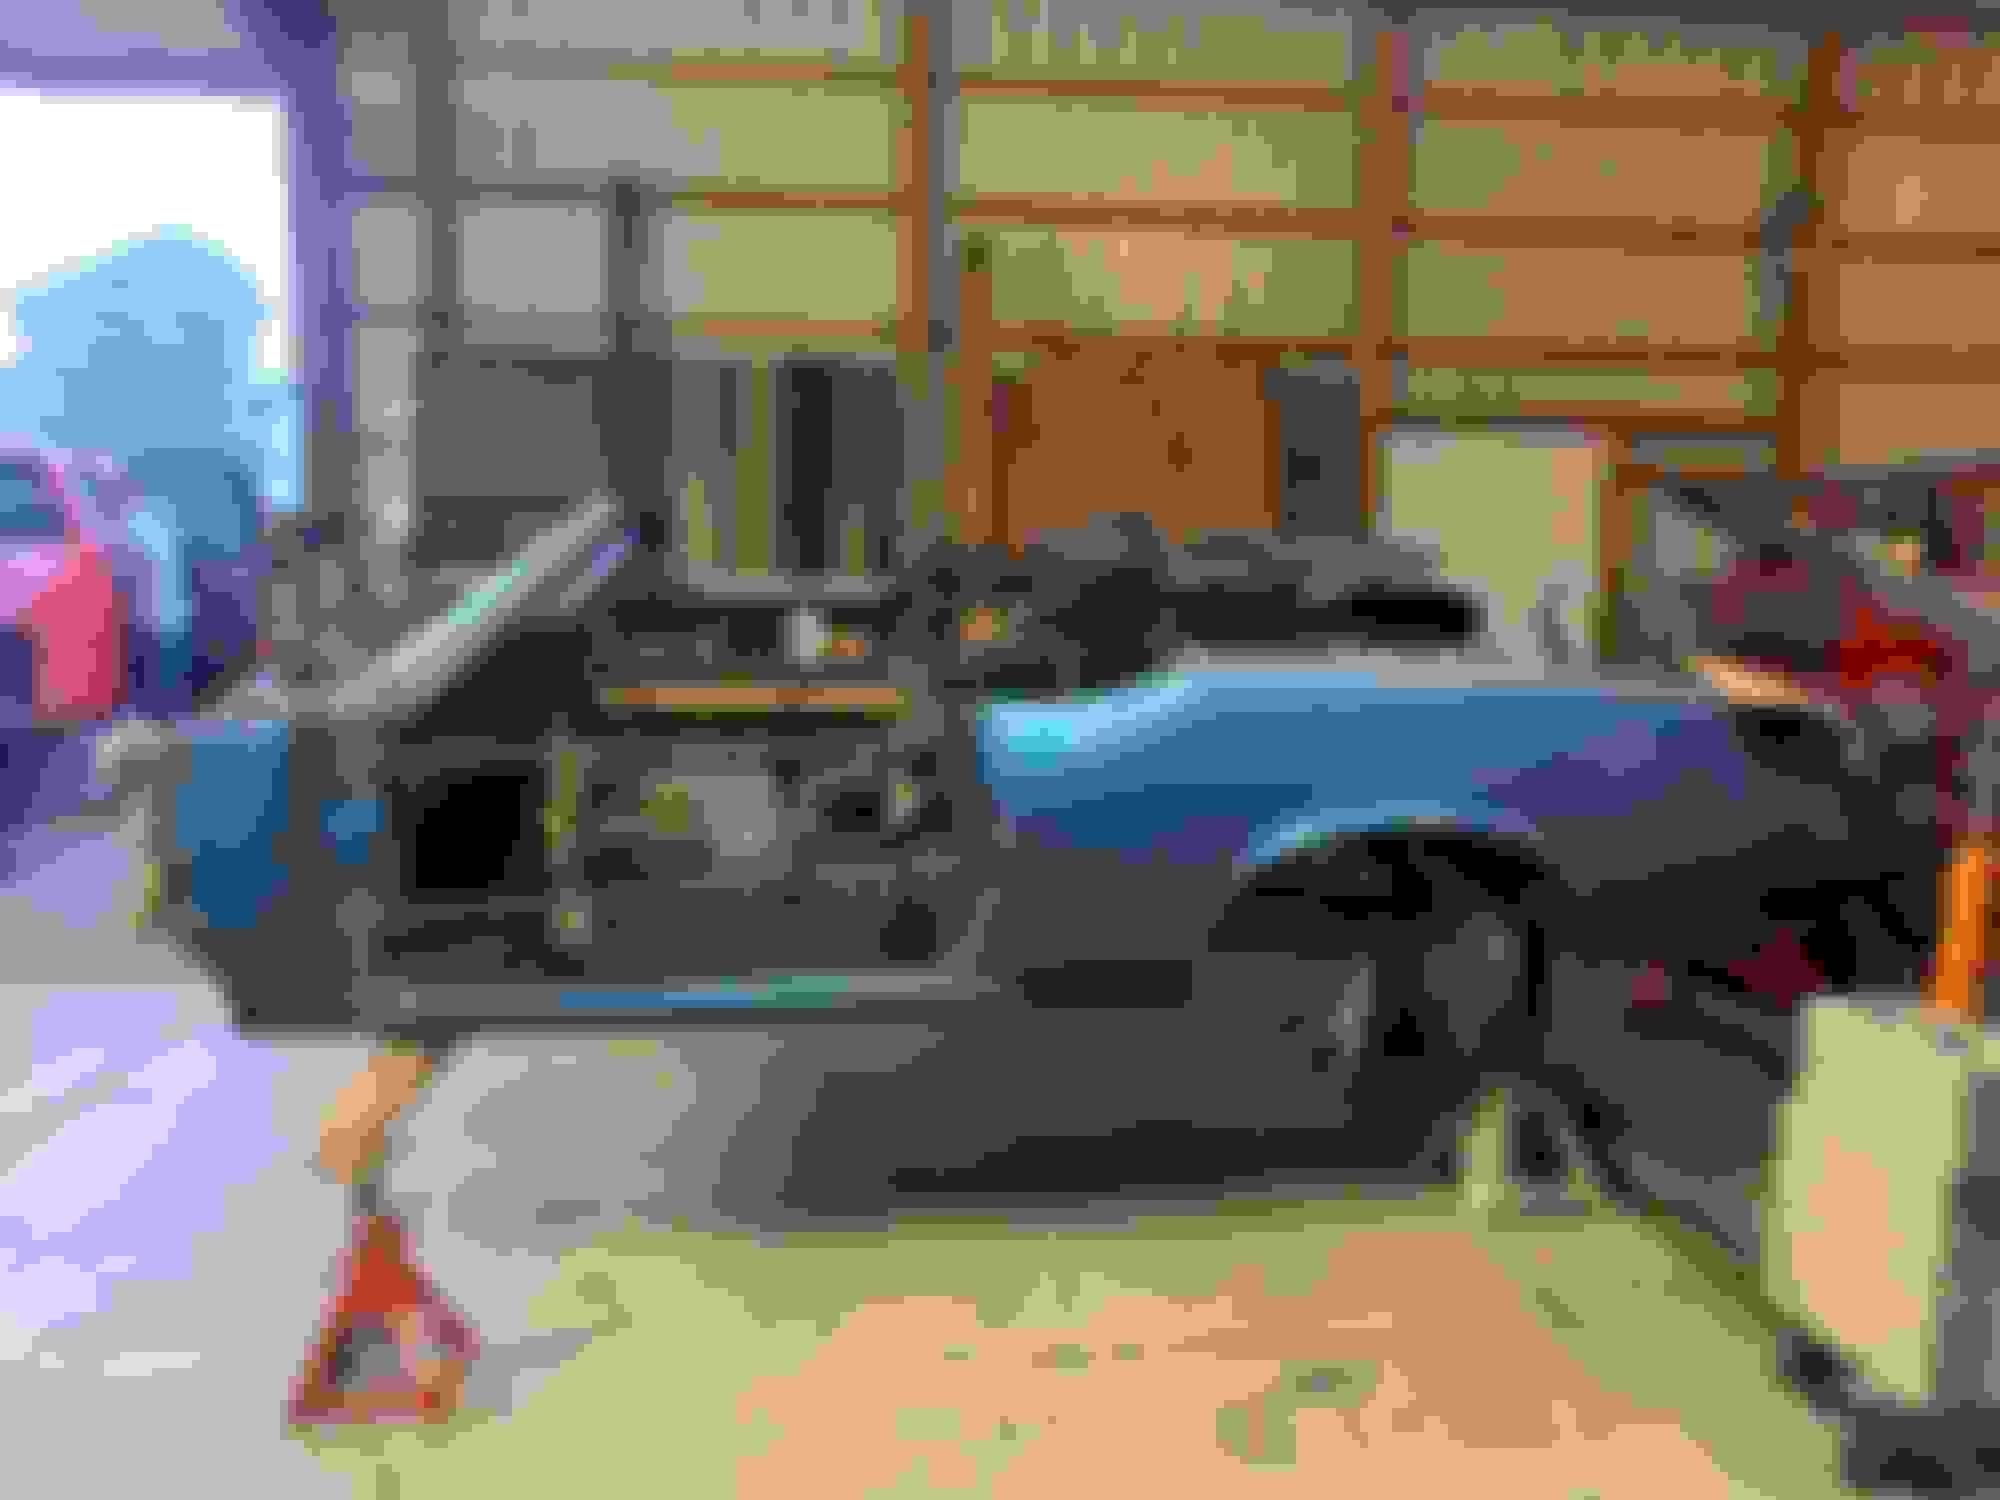
MILESTONE DAY. We pulled the body off the rotisserie today. I just need to paint the areas where it was attached. The floor and trunk are all patched, mostly seam sealed and painted.
next, put a brake line on to the rear and the sheltering and it�s ready to put the frame on.
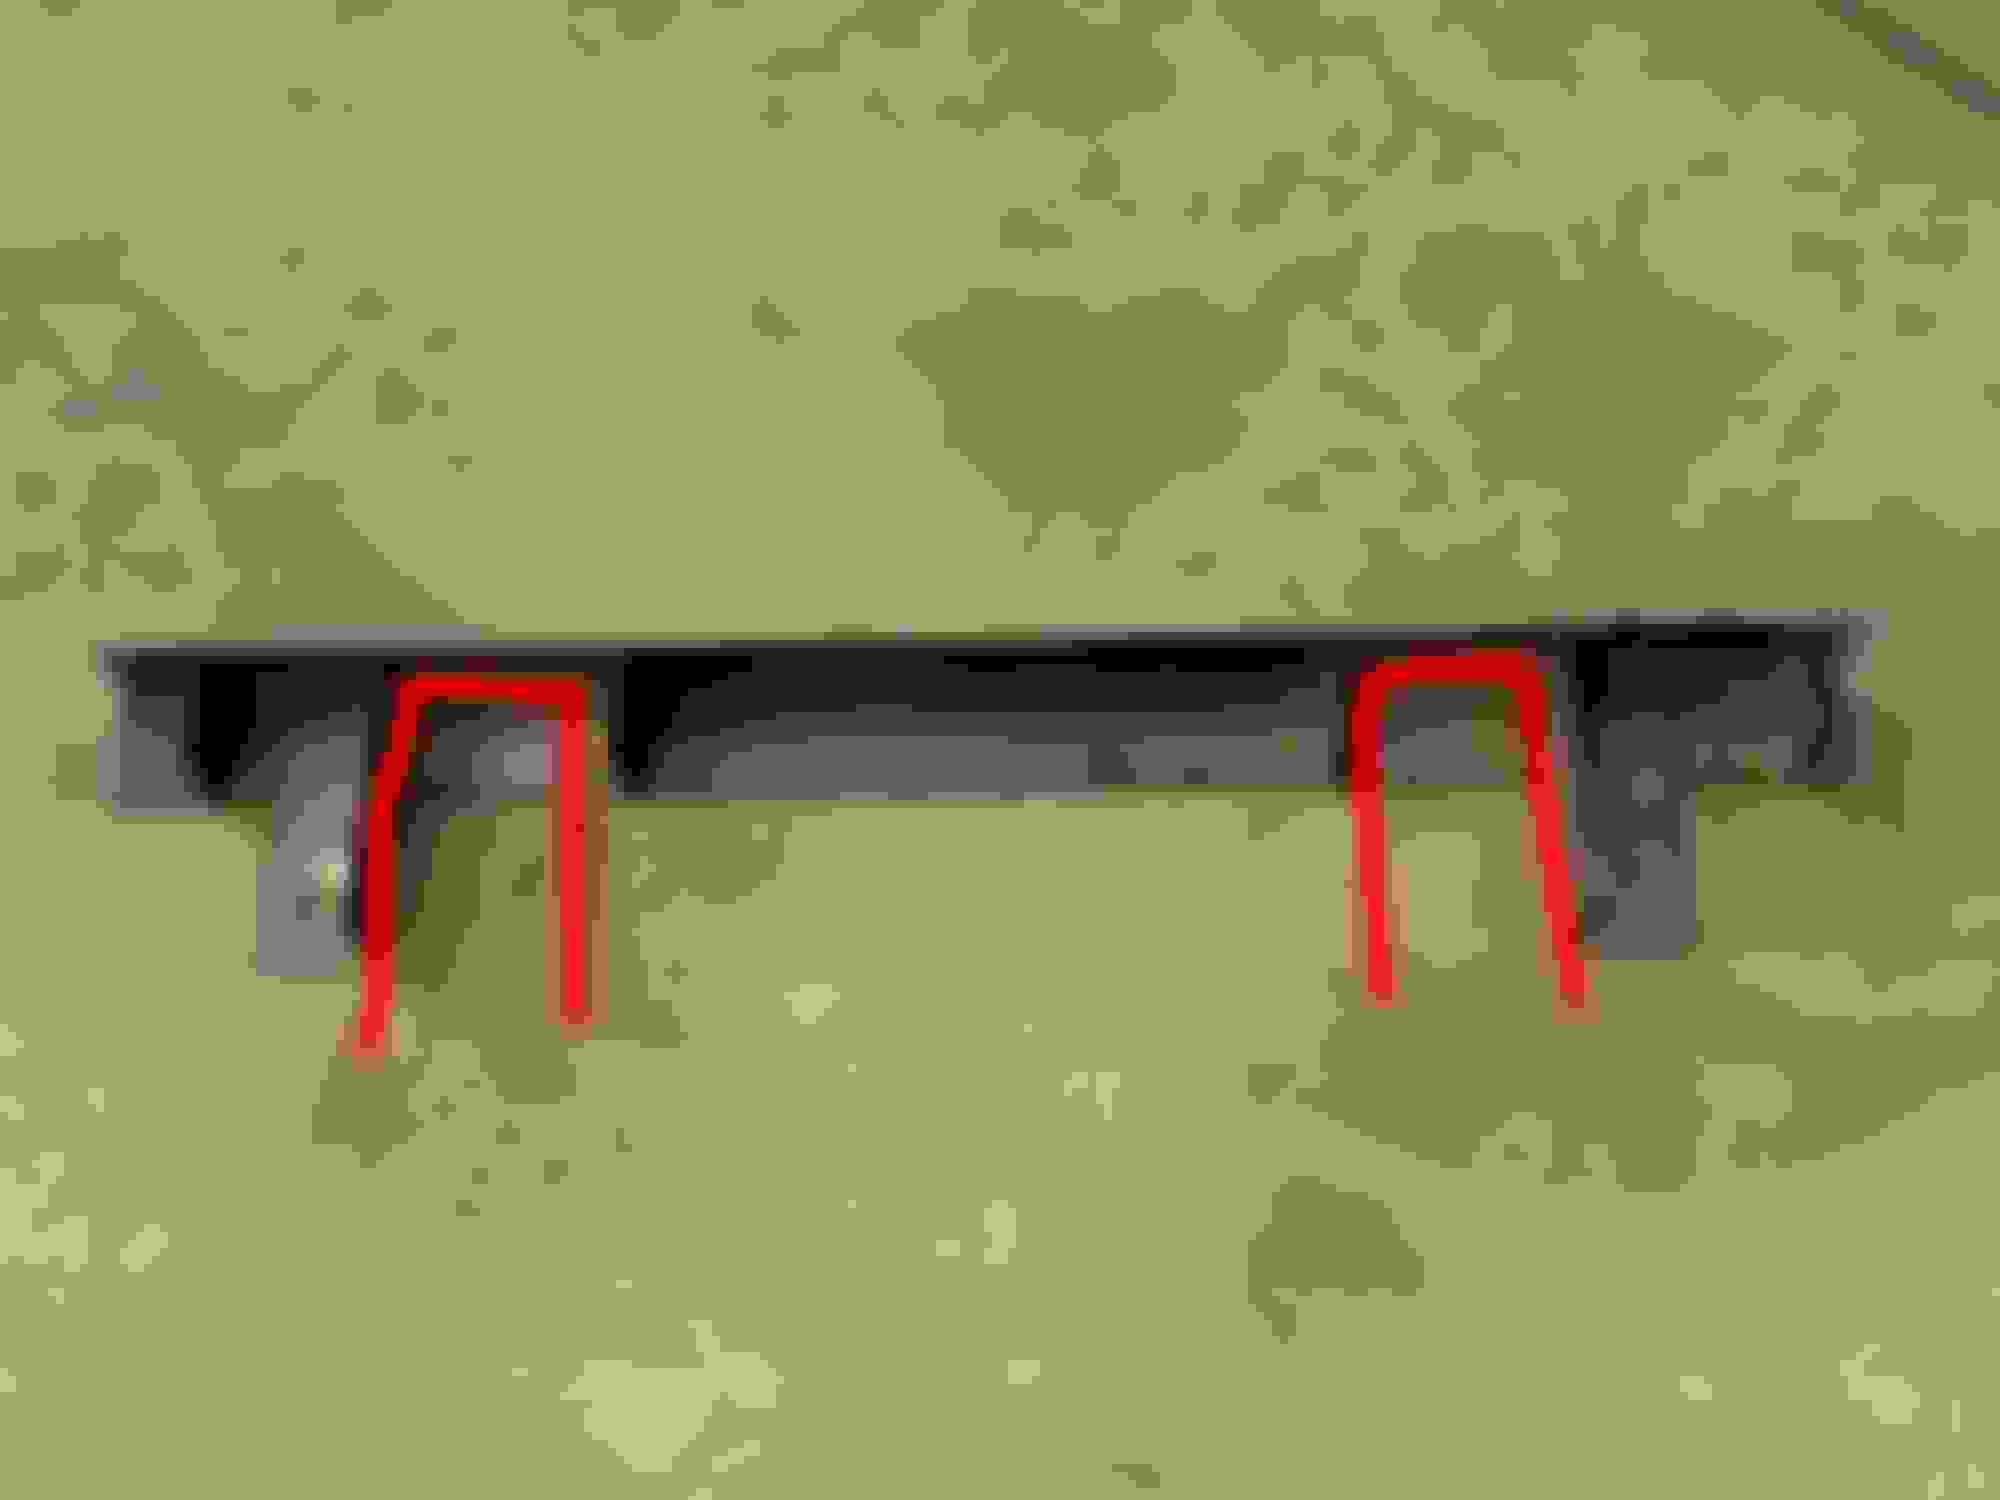
My son made this bracket that he welded to the brace that is at the rear above the axle. It has two pockets (see red) where we slid 2x4s bolted to the front side of the wood rotisserie pictured. It was then bolted through the 4x4, plywood and metal bracket. It probably didn�t shift a 1/4� when it was rolled side to side. He�s pretty smart and can literally do just about anything. Feels like this was a huge step in progress.
Very neat idea for the rollover "cradle".
It will be a great feeling when you finally get the body back on the frame.
You will feel like you have a car again.
On my '63 restoration I was lucky enough to find a used rotisserie for $500 on craigs list.
I used it and sold it for $500 to a member here. After I determined that I was never going to do another body off restoration. (I'm 72)
Funny thing is that the guy I bought it from, after buying it new, sold it to me and swore that he was never going to do another " body-off".
 January 22nd, 2019, 07:09 AM