OLDSmobility '67 442 (clone) buildup...
 September 11th, 2010, 09:34 PM
#1
Registered User
Thread Starter
Join Date: Jul 2008
Location: West Point, NE
Posts: 163
OLDSmobility '67 442 (clone) buildup...
I figured I should start my own build-up thread, since I'm probably going to be hanging out here quite a bit in the future. (I've got a similar thread on another Olds forum, but it was suggested I add my build-up here as well, since many folks can't get registered at the other site.)
This first post will just be a quick flashback, relating how I got involved with my Olds.
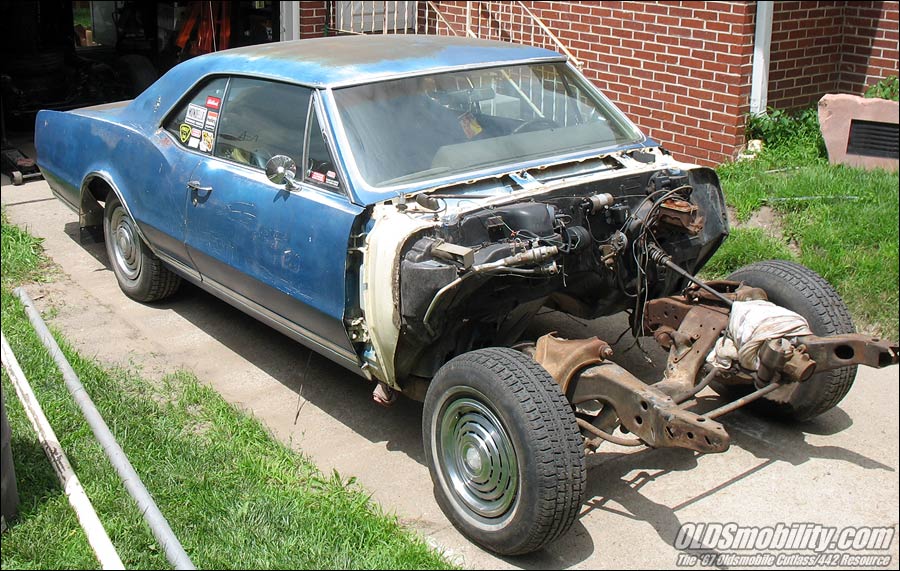
Back in the late '80s I had a friend who wanted to find an old musclecar to restore. I did some looking around and found a '67 Cutlass post in a repo lot which had been abandoned years earlier with a blown-up engine. He bought it for $150, and then after deciding it would be too much work for him, he sold it to me. I dropped a 455 from a '73 wagon into it and drove it around for a couple years.
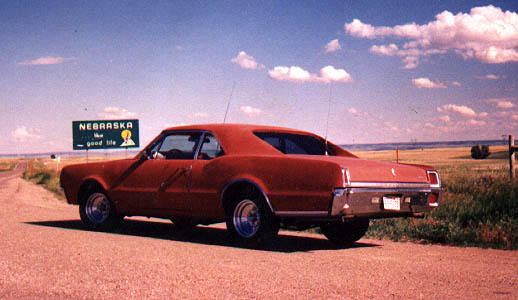
One day while on a roadtrip I drove by a field that had two '67s (a Cutlass and a 442) and a '66 442 shell parked out in it. I tracked down the owner and purchased all three for $1250, figuring to just part them out. Upon getting them home however, I found that the Cutlass body was in much better shape then the one I was driving, so the decision was made to part out my driver instead. The 442 had been rear-ended and needed bodywork that was beyond my capabilities, but donated all the cool parts. Here's a (crappy) shot of the three cars together at one time:

My other driver was a '68 Toronado, and I ended up pulling that 455 to build up for my 442 clone project.

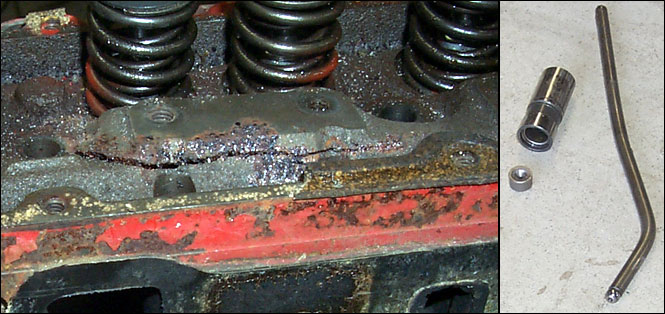
I dropped it in, replaced most of the interior and then got ready to drive this around for a while...but before the motor even got broke in, there was an 'incident' which allowed contact between a piston and a valve, which exploded the lifter, bent a pushrod, and actually ripped the rocker arm pedestal away from the head!
Here's the last time it was roadworthy, back in 1995:
Due to circumstances in my life, I had to put the Olds into storage for a few years. When I got it back out, I decided to redo my amateur resto-mod with a complete body-off. I pulled the body off, scrounged up a '72 Pontiac LeMans chassis to set the body on in the meantime, which allowed me to move it around as needed, and sandblasted and painted the frame (with Dupont single-stage urethane) and got the suspension pieces powdercoated. But then life REALLY got busy...and again it got pushed off to the side, while I got married, had four kids, blah blah....for the next 12 years.
Until June 17, 2010 (my birthday)....
This first post will just be a quick flashback, relating how I got involved with my Olds.
Back in the late '80s I had a friend who wanted to find an old musclecar to restore. I did some looking around and found a '67 Cutlass post in a repo lot which had been abandoned years earlier with a blown-up engine. He bought it for $150, and then after deciding it would be too much work for him, he sold it to me. I dropped a 455 from a '73 wagon into it and drove it around for a couple years.
One day while on a roadtrip I drove by a field that had two '67s (a Cutlass and a 442) and a '66 442 shell parked out in it. I tracked down the owner and purchased all three for $1250, figuring to just part them out. Upon getting them home however, I found that the Cutlass body was in much better shape then the one I was driving, so the decision was made to part out my driver instead. The 442 had been rear-ended and needed bodywork that was beyond my capabilities, but donated all the cool parts. Here's a (crappy) shot of the three cars together at one time:
My other driver was a '68 Toronado, and I ended up pulling that 455 to build up for my 442 clone project.
I dropped it in, replaced most of the interior and then got ready to drive this around for a while...but before the motor even got broke in, there was an 'incident' which allowed contact between a piston and a valve, which exploded the lifter, bent a pushrod, and actually ripped the rocker arm pedestal away from the head!
Here's the last time it was roadworthy, back in 1995:
Due to circumstances in my life, I had to put the Olds into storage for a few years. When I got it back out, I decided to redo my amateur resto-mod with a complete body-off. I pulled the body off, scrounged up a '72 Pontiac LeMans chassis to set the body on in the meantime, which allowed me to move it around as needed, and sandblasted and painted the frame (with Dupont single-stage urethane) and got the suspension pieces powdercoated. But then life REALLY got busy...and again it got pushed off to the side, while I got married, had four kids, blah blah....for the next 12 years.
Until June 17, 2010 (my birthday)....
 September 11th, 2010, 09:35 PM
#2
Registered User
Thread Starter
Join Date: Jul 2008
Location: West Point, NE
Posts: 163
(Friday, June 18, 2010)
(click the images in this post to enlarge)
The painted frame has been stored in our one-car garage for the past couple years, and so last summer I got the PST polygraphite suspension bushings pressed into the front and rear control arms. About a month ago I decided that it was time to get serious, and get the Olds out and get back to work on it. Fortunately it's been in a dry warehouse for the past 12 years, so there was no deterioration of anything. Over the past month I've been slowly accumulating the parts I'd need to get the rolling chassis done. I just installed a pair of Hotchkiss 2" lowering springs and am waiting for a pair of disc-brake backing plate gaskets to arrive before installing the new rotors and calipers and finally getting the front end back onto the ground on it's own feet. Some of the parts that have been steadily arriving include:
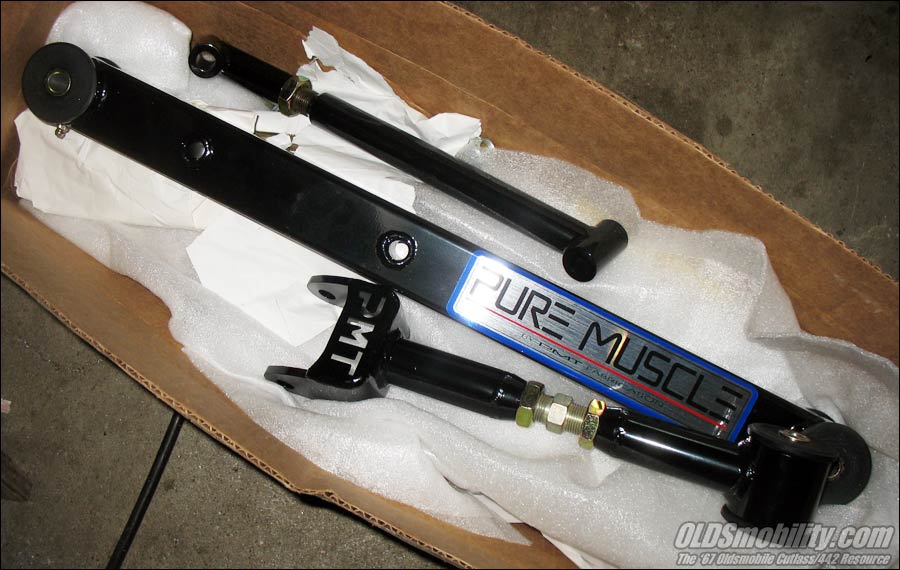
- Rear boxed control arms from PMT, which includes adjustable uppers and the crossmember braces

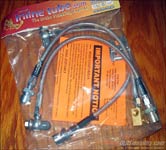
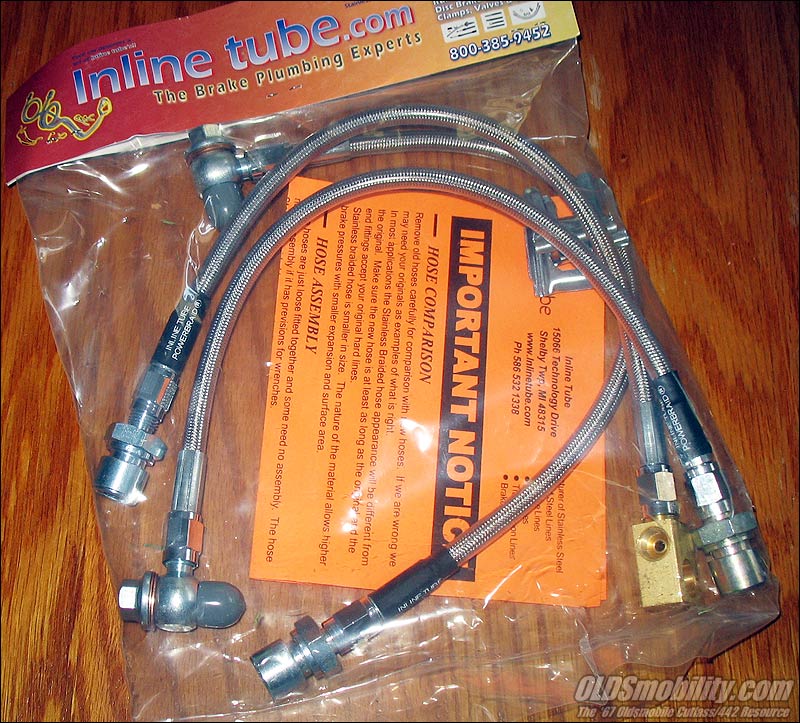
- front/rear braided stainless lines from Inline Tube (I also set another set of Russell lines...I'll compare to see which is better.)
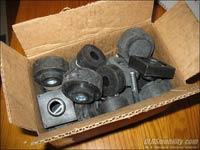
- body bushings from Supercars Unlimited
- new backing plates, rotors, calipers, seals and bearings for the front
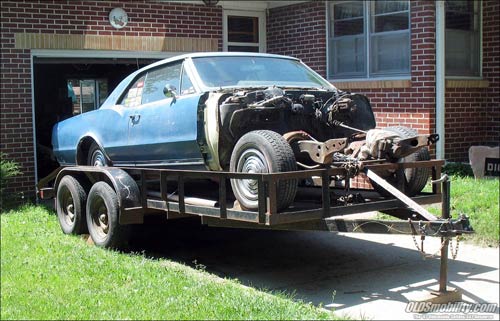
Two days ago I bought a double-axle trailer off Craiglist, and then yesterday (on my birthday!) I pulled the car out of storage, loaded it up onto the trailer and brought it home!
Today I get home after work to find two large packages waiting for me.

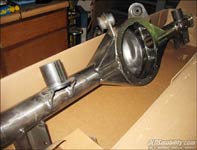
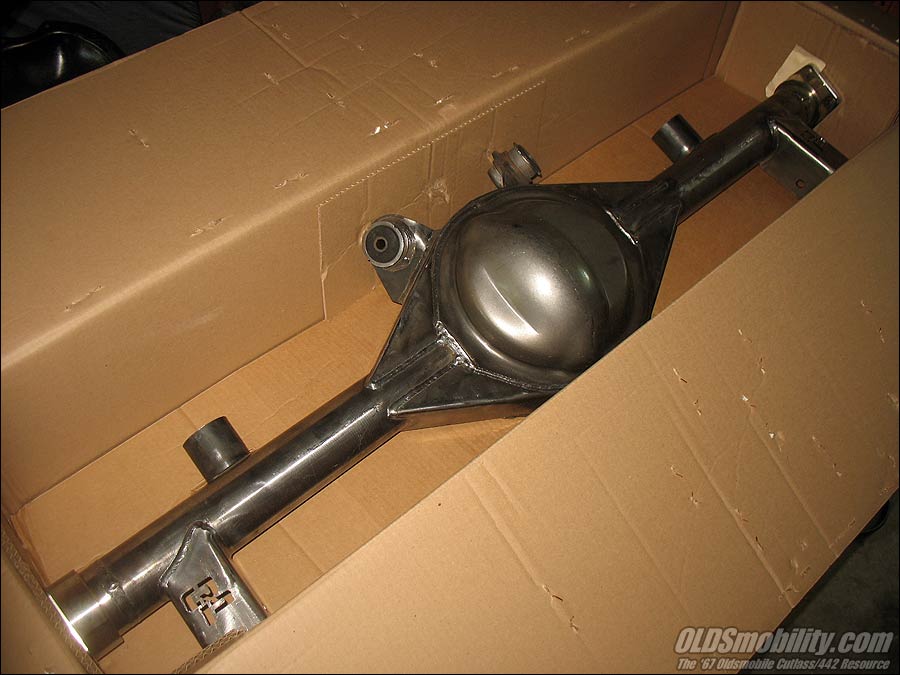
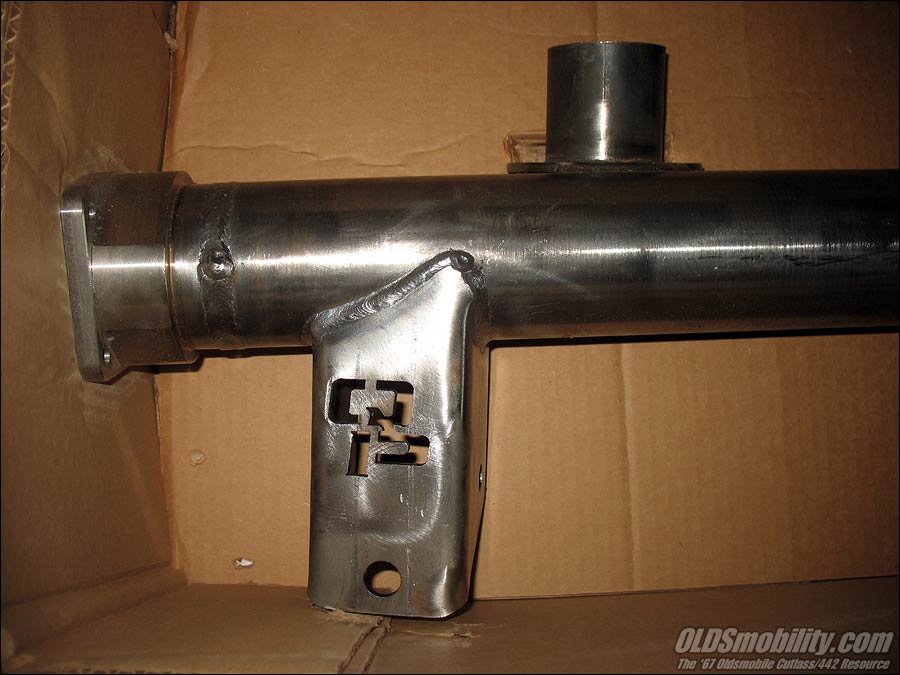
The first package is the 9" Ford rearend housing from Quicker Performance. Any day now I should also be receiving from them a pair of 31-spline Moser axles, complete drum brake setup and an Eaton Tru-Trak center section with 3.50 gears.


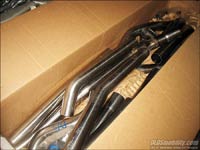
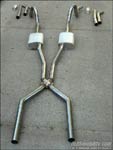
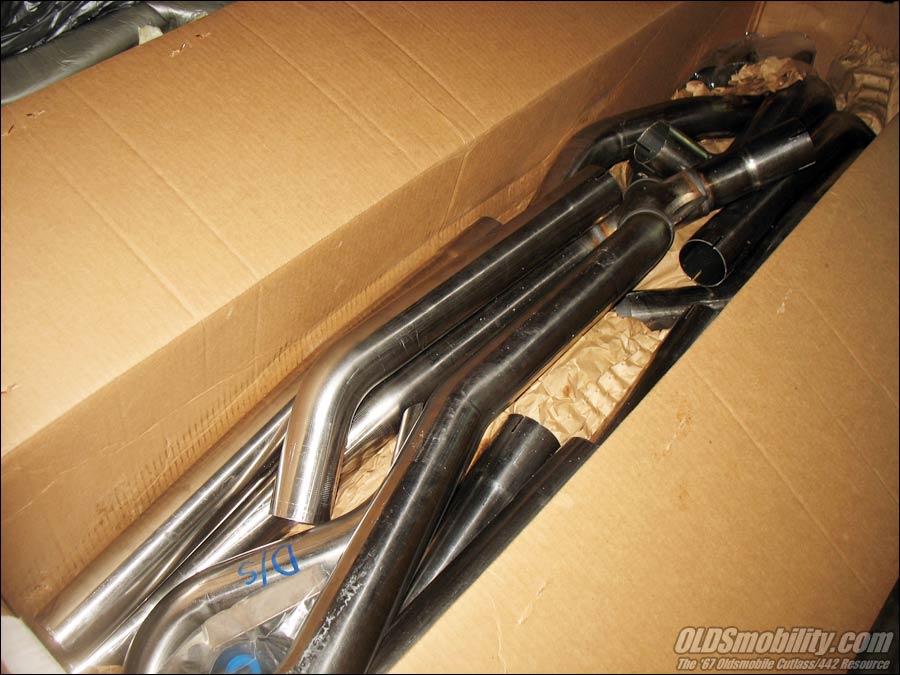
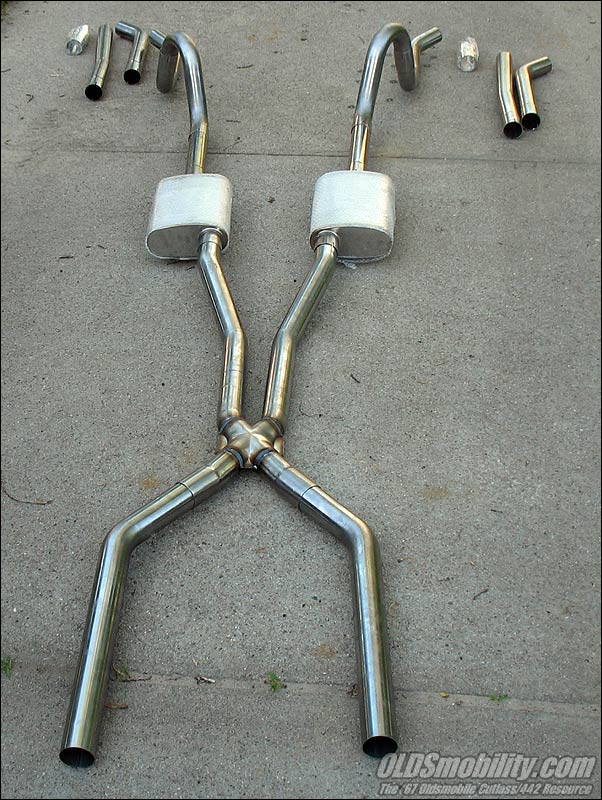
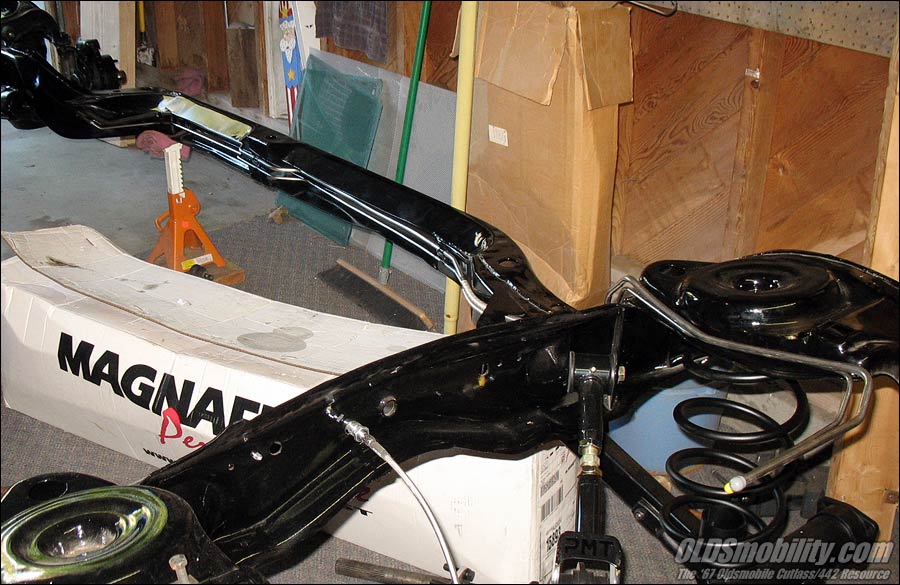
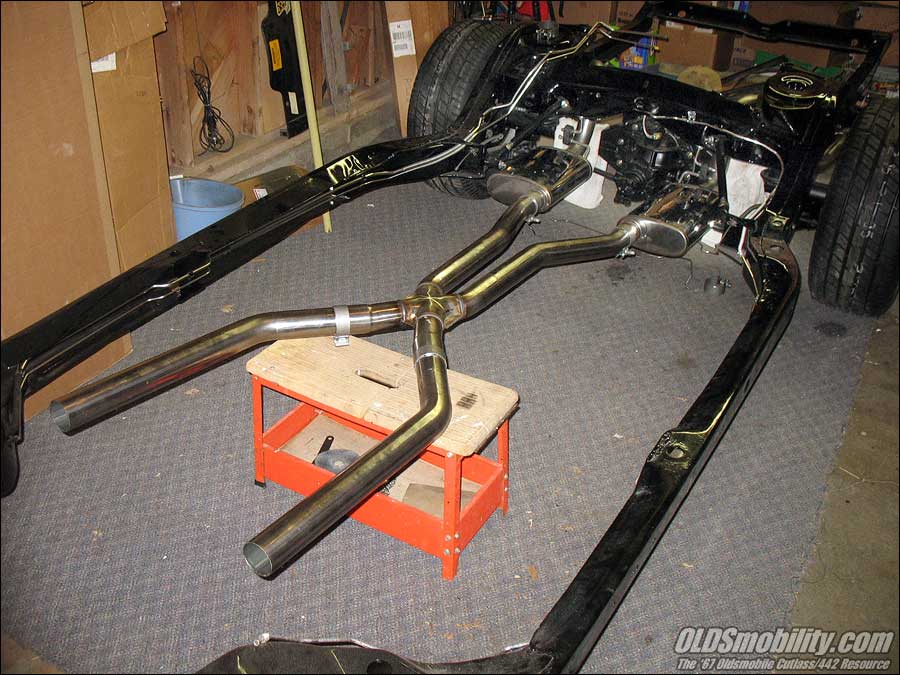
The second package was a complete Magnaflow 2-1/2" stainless dual exhaust system with an X-pipe. I did a quick mock-up in the driveway to make sure I had all the parts.
So...sometime within the next few days I'll be getting started getting the rearend housing painted, and then getting it installed with the PMT control arms and factory rear springs. And as soon as those backing plate gaskets arrive, I can finally get the rest of the front suspension completed. Hopefully the rear axles and center section should arrive within a few days and I can get them installed too...and then the '67 will finally be setting on it's own feet for the first time in 15 years!
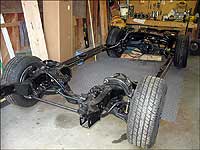
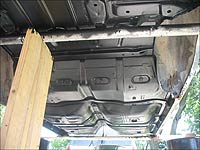
Oh....and I thought I'd share with you guys the place that all this action is going to take place. This is my little one-car garage.
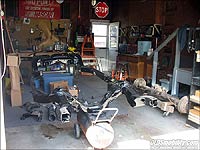
This picture was taken several weeks ago before I started assembling the front suspension. It's getting pretty cluttered in here now, with all the boxes of new parts piling up.
And after the rolling chassis is together and I'm ready to get to work on the body, you guys are gonna get a kick out of how I plan to strip and paint the underside. Stay tuned.
(click the images in this post to enlarge)
The painted frame has been stored in our one-car garage for the past couple years, and so last summer I got the PST polygraphite suspension bushings pressed into the front and rear control arms. About a month ago I decided that it was time to get serious, and get the Olds out and get back to work on it. Fortunately it's been in a dry warehouse for the past 12 years, so there was no deterioration of anything. Over the past month I've been slowly accumulating the parts I'd need to get the rolling chassis done. I just installed a pair of Hotchkiss 2" lowering springs and am waiting for a pair of disc-brake backing plate gaskets to arrive before installing the new rotors and calipers and finally getting the front end back onto the ground on it's own feet. Some of the parts that have been steadily arriving include:
- Rear boxed control arms from PMT, which includes adjustable uppers and the crossmember braces
- front/rear braided stainless lines from Inline Tube (I also set another set of Russell lines...I'll compare to see which is better.)
- body bushings from Supercars Unlimited

- new backing plates, rotors, calipers, seals and bearings for the front
Two days ago I bought a double-axle trailer off Craiglist, and then yesterday (on my birthday!) I pulled the car out of storage, loaded it up onto the trailer and brought it home!

Today I get home after work to find two large packages waiting for me.

The first package is the 9" Ford rearend housing from Quicker Performance. Any day now I should also be receiving from them a pair of 31-spline Moser axles, complete drum brake setup and an Eaton Tru-Trak center section with 3.50 gears.
The second package was a complete Magnaflow 2-1/2" stainless dual exhaust system with an X-pipe. I did a quick mock-up in the driveway to make sure I had all the parts.
So...sometime within the next few days I'll be getting started getting the rearend housing painted, and then getting it installed with the PMT control arms and factory rear springs. And as soon as those backing plate gaskets arrive, I can finally get the rest of the front suspension completed. Hopefully the rear axles and center section should arrive within a few days and I can get them installed too...and then the '67 will finally be setting on it's own feet for the first time in 15 years!
Oh....and I thought I'd share with you guys the place that all this action is going to take place. This is my little one-car garage.
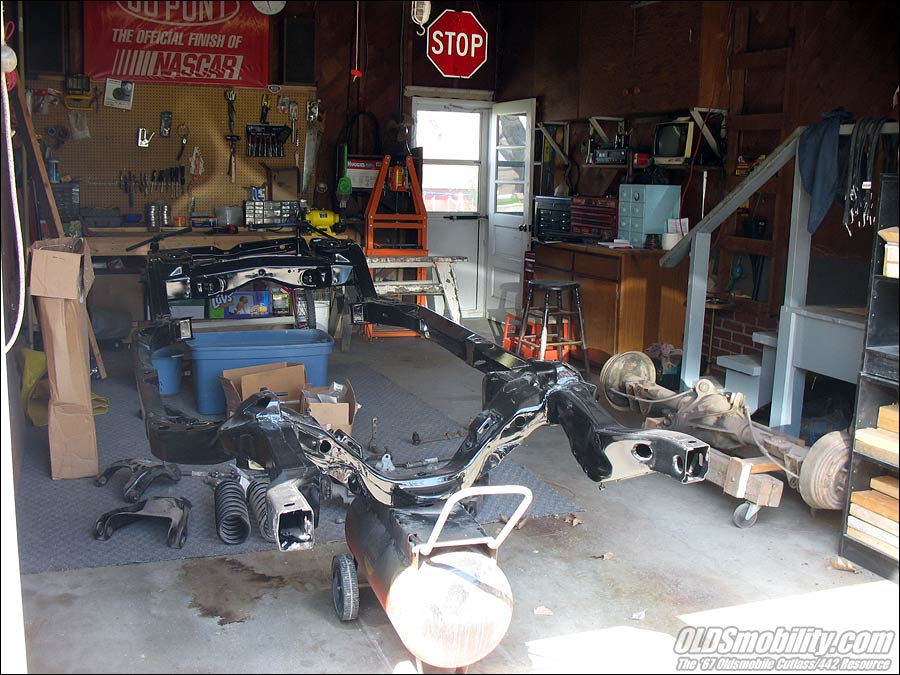
This picture was taken several weeks ago before I started assembling the front suspension. It's getting pretty cluttered in here now, with all the boxes of new parts piling up.
And after the rolling chassis is together and I'm ready to get to work on the body, you guys are gonna get a kick out of how I plan to strip and paint the underside.
Stay tuned.
September 11th, 2010, 09:37 PM
#3
Registered User
Thread Starter
Join Date: Jul 2008
Location: West Point, NE
Posts: 163
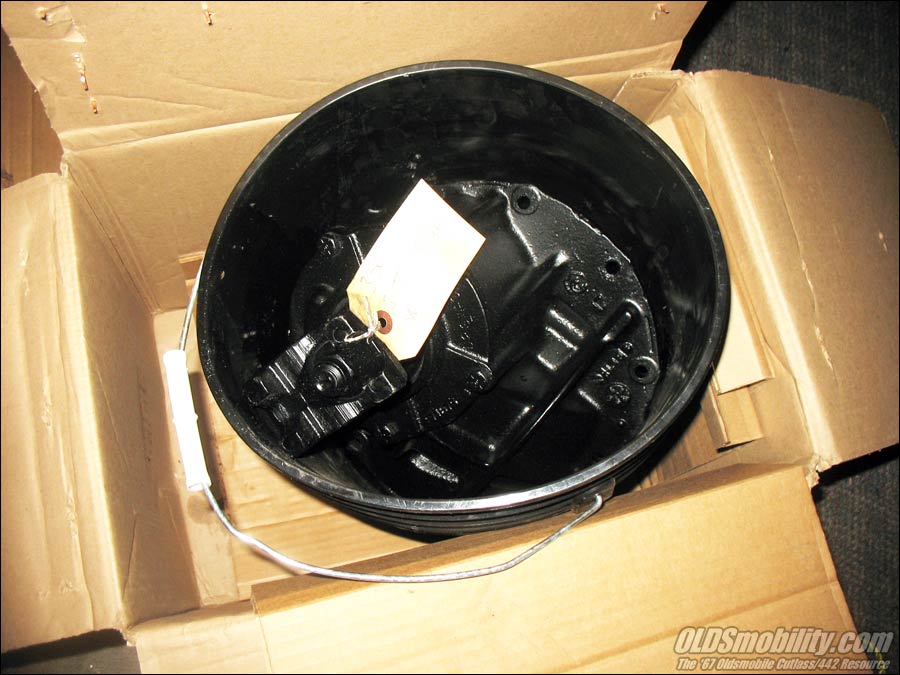
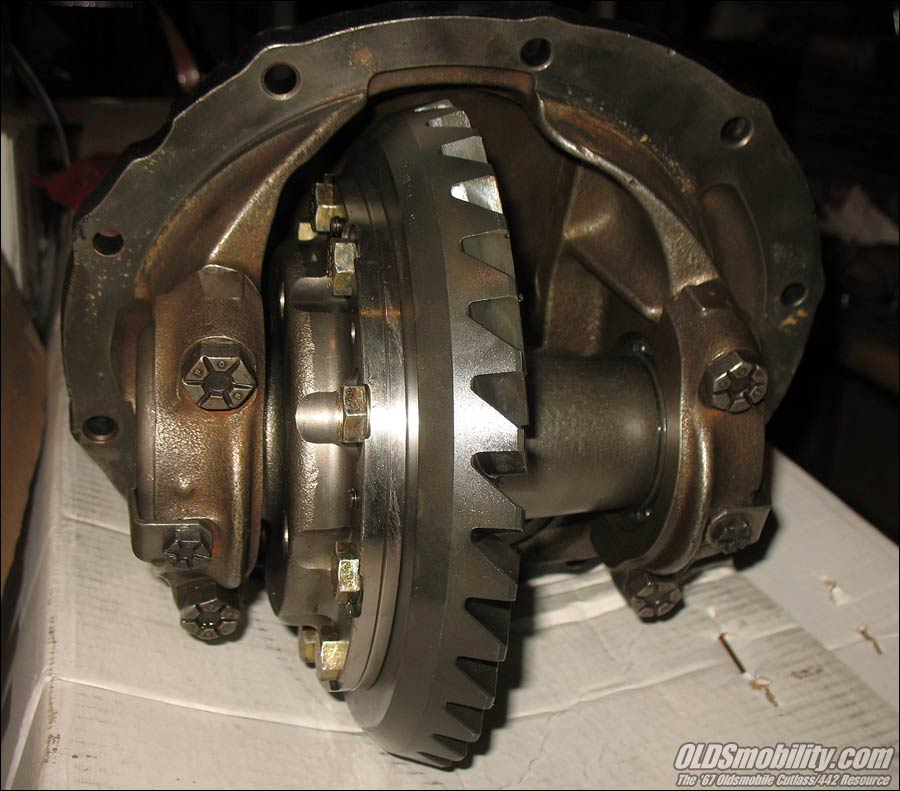
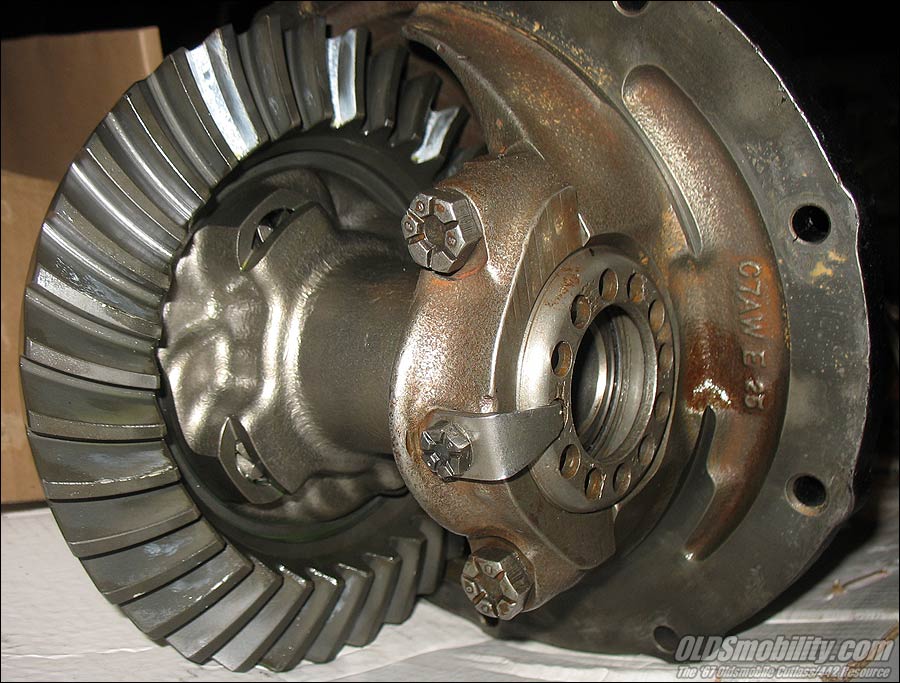
(June 21, 2010)
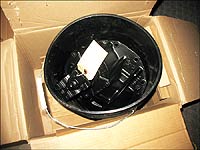
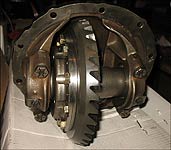
The 3.50 Tru-Track arrived today.

Now I'm just waiting on the axles, and I'll have everything for the rear suspension. I was going to paint the axle housing this weekend, but decided I'd better wait till all the parts are here so I can do a mockup before painting...just in case there's a problem and something needs to be returned.
The 3.50 Tru-Track arrived today.
Now I'm just waiting on the axles, and I'll have everything for the rear suspension. I was going to paint the axle housing this weekend, but decided I'd better wait till all the parts are here so I can do a mockup before painting...just in case there's a problem and something needs to be returned.
September 11th, 2010, 09:37 PM
#4
Registered User
Thread Starter
Join Date: Jul 2008
Location: West Point, NE
Posts: 163
(June 23, 2010)
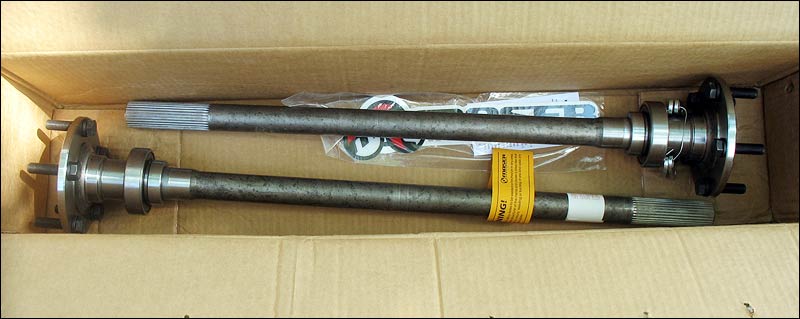
The Moser axles arrived today, as well as the disc brake backing plate gaskets I've been waiting for.

I now have (I believe) everything I need to completely reassemble the front and rear suspension, so I decided I'm taking the day off from work tomorrow to finish up some suspension component painting, and will also be painting the rearend housing....and then the final reassembly begins!
The Moser axles arrived today, as well as the disc brake backing plate gaskets I've been waiting for.
I now have (I believe) everything I need to completely reassemble the front and rear suspension, so I decided I'm taking the day off from work tomorrow to finish up some suspension component painting, and will also be painting the rearend housing....and then the final reassembly begins!
September 11th, 2010, 09:38 PM
#5
Registered User
Thread Starter
Join Date: Jul 2008
Location: West Point, NE
Posts: 163
(June 24, 2010)
I didn't get quite as much done today as I'd hoped, since I got called back into work for a few hours...but I did get a boatload of attaching hardware (bolts, nuts, brackets) cleaned up and painted.
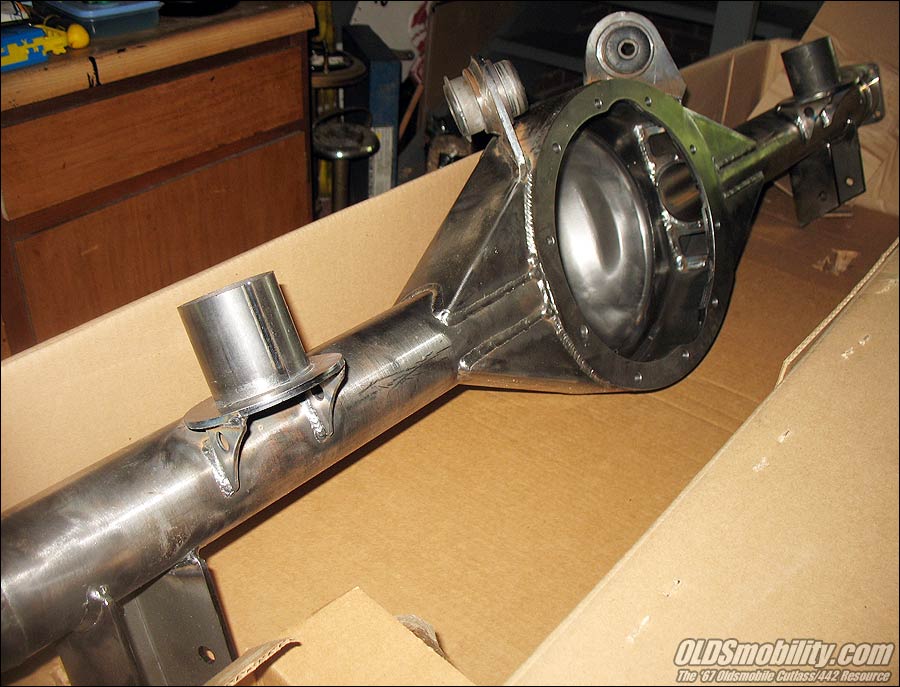
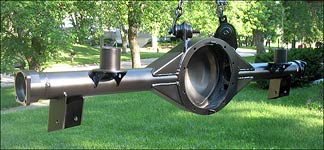
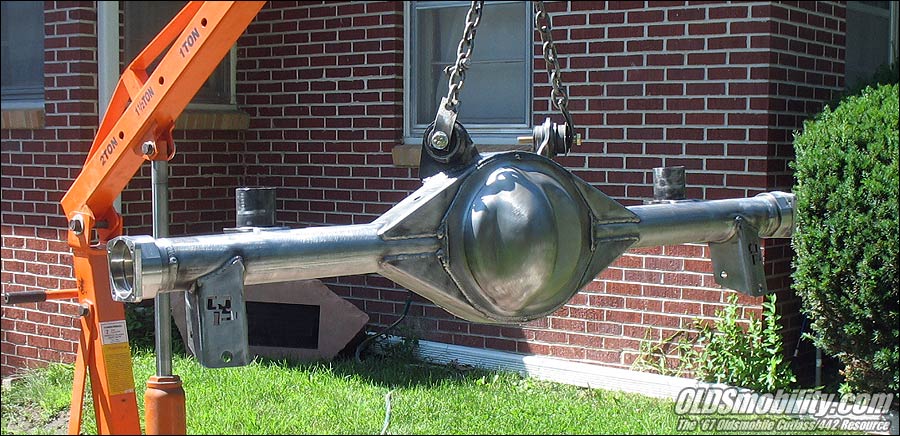
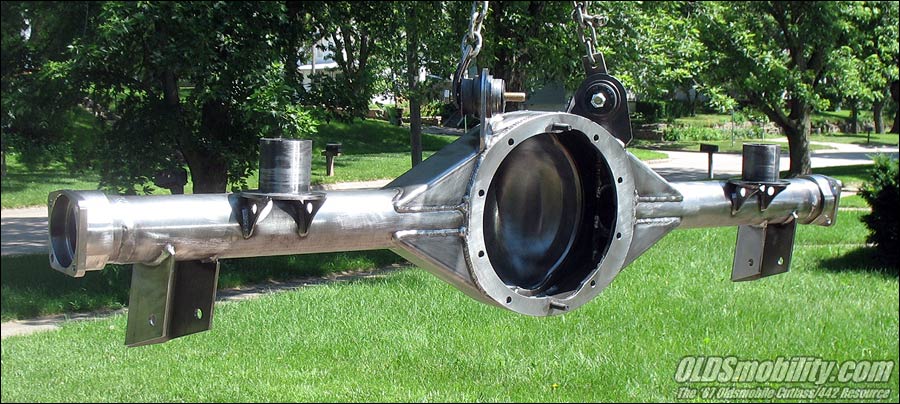
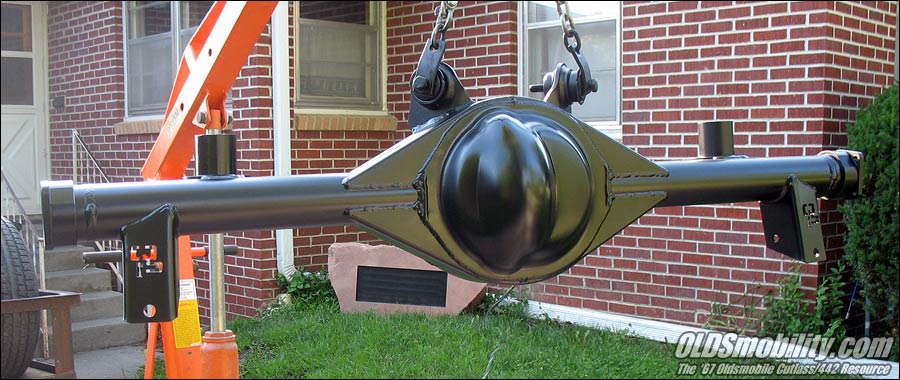
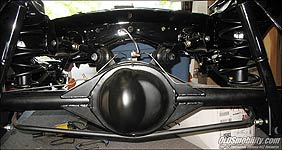
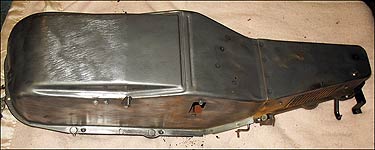
I then assembled the rearend assembly to make sure everything fit properly before painting, and everything looked great, so it got disassembled again and prepped for paint. Here's a couple shots of it just prior to painting, after I'd roughed up the surface and wiped it down with POR-15 MarineClean:

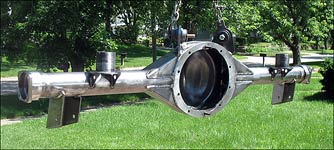
Then I had to apply POR-15 MetalReady to the housing, which etches the metal and gives it a phosphate coating. I had to stand out in the driveway for a full half-hour, spraying it down every 4-5 minutes for a half-hour, making sure to keep it wet....which kept me busy, since it was a little over 90 degrees today with a light breeze.
Then the application of the POR-15:
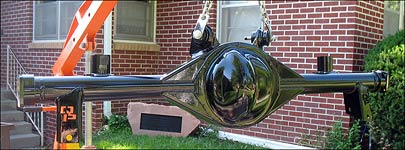
And then after allowing it to set up for about 3 hours, just before it's completely dry (barely tacky to the touch) I gave it 4 good coats of Krylon semi-flat black.
Yeah, I know some of you might be shaking your heads at my choice of paints, but I know from personal experience that as long as the proper prep is done beforehand, this recipe works extremely well and is very durable. Plus it's inexpensive, easy to apply and easy to touch up down the road should the need arise.
I'm going to give the paint another day or two to fully cure and then I'll get this thing reassembled and installed in the chassis.
I didn't get quite as much done today as I'd hoped, since I got called back into work for a few hours...but I did get a boatload of attaching hardware (bolts, nuts, brackets) cleaned up and painted.
I then assembled the rearend assembly to make sure everything fit properly before painting, and everything looked great, so it got disassembled again and prepped for paint. Here's a couple shots of it just prior to painting, after I'd roughed up the surface and wiped it down with POR-15 MarineClean:
Then I had to apply POR-15 MetalReady to the housing, which etches the metal and gives it a phosphate coating. I had to stand out in the driveway for a full half-hour, spraying it down every 4-5 minutes for a half-hour, making sure to keep it wet....which kept me busy, since it was a little over 90 degrees today with a light breeze.
Then the application of the POR-15:
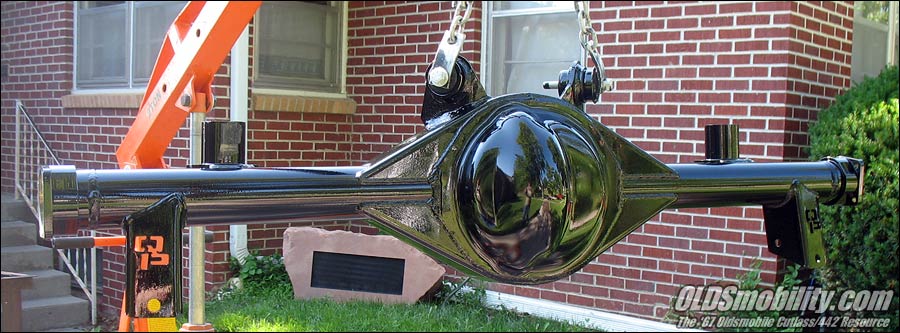
And then after allowing it to set up for about 3 hours, just before it's completely dry (barely tacky to the touch) I gave it 4 good coats of Krylon semi-flat black.

Yeah, I know some of you might be shaking your heads at my choice of paints, but I know from personal experience that as long as the proper prep is done beforehand, this recipe works extremely well and is very durable. Plus it's inexpensive, easy to apply and easy to touch up down the road should the need arise.
I'm going to give the paint another day or two to fully cure and then I'll get this thing reassembled and installed in the chassis.
September 11th, 2010, 09:38 PM
#6
Registered User
Thread Starter
Join Date: Jul 2008
Location: West Point, NE
Posts: 163
(June 25, 2010)
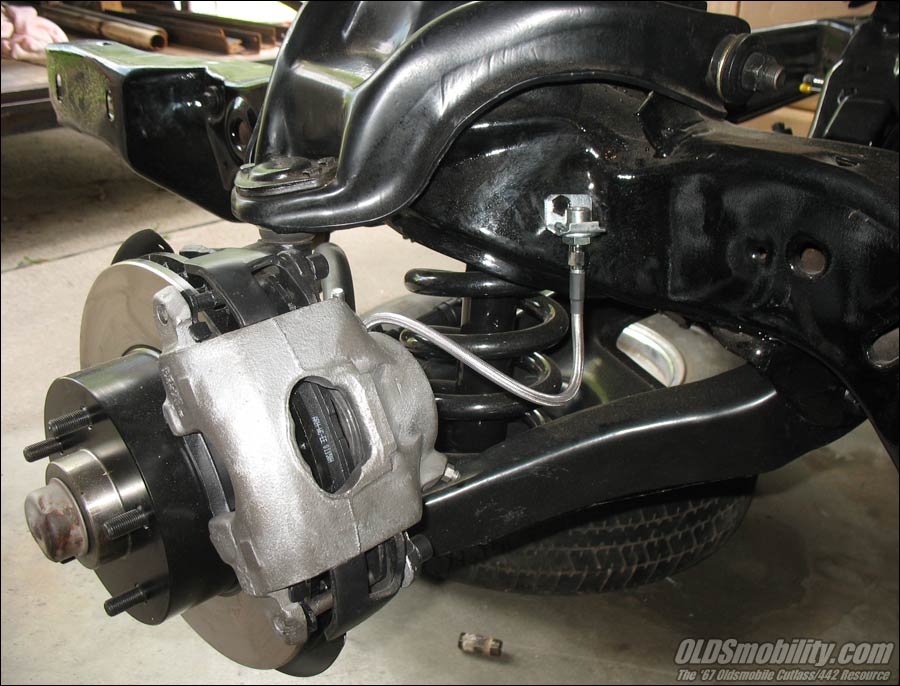
Took another vacation day today and got quite a bit done. The front suspension is done, the front brakes are 98% done....just have to mount the calipers (waiting for some paint from Eastwood) and stainless flexible lines (gotta order some brackets tonight). Oh, and I need to get some new bearing dust caps. (You'll have to excuse the dirty frame...I haven't had a chance to get it outside to hose off a year's worth of dust.) ops:
ops:

I also got the rearend housing 98% mounted, just have to paint the rear springs and install, and then tighten everything down. I'd have assembled the rearend, but I'm still cleaning up the backing plates, and I need to get a gasket for the center section.
Just as a sidenote....I think I lost a few pounds today working in the garage. Even with the front and rear doors open, there was very little moving air, and it was like a freakin' SAUNA! At one point my cigarette got extinguished by sweat dripping from my face. :lol:
I'm hoping to get in some garage time tomorrow too, and will get the steering linkage and front swaybar mounted...and I'd like to get the rearend completely assembled too, but that'll depend on whether I can get the backing plates cleaned off enough to paint, or if I'll have to take them somewhere to get sandblasted. There are just too many nooks and crannies that my wire wheel won't reach.
Since I'm very close to making this a roller, I need to sit down sometime within the next week or so and make a decision on wheels, but I've been searching for several weeks and I really can't find anything I even like! :?
Took another vacation day today and got quite a bit done. The front suspension is done, the front brakes are 98% done....just have to mount the calipers (waiting for some paint from Eastwood) and stainless flexible lines (gotta order some brackets tonight). Oh, and I need to get some new bearing dust caps. (You'll have to excuse the dirty frame...I haven't had a chance to get it outside to hose off a year's worth of dust.)
ops: 
I also got the rearend housing 98% mounted, just have to paint the rear springs and install, and then tighten everything down. I'd have assembled the rearend, but I'm still cleaning up the backing plates, and I need to get a gasket for the center section.

Just as a sidenote....I think I lost a few pounds today working in the garage. Even with the front and rear doors open, there was very little moving air, and it was like a freakin' SAUNA! At one point my cigarette got extinguished by sweat dripping from my face. :lol:
I'm hoping to get in some garage time tomorrow too, and will get the steering linkage and front swaybar mounted...and I'd like to get the rearend completely assembled too, but that'll depend on whether I can get the backing plates cleaned off enough to paint, or if I'll have to take them somewhere to get sandblasted. There are just too many nooks and crannies that my wire wheel won't reach.
Since I'm very close to making this a roller, I need to sit down sometime within the next week or so and make a decision on wheels, but I've been searching for several weeks and I really can't find anything I even like! :?
September 11th, 2010, 09:39 PM
#7
Registered User
Thread Starter
Join Date: Jul 2008
Location: West Point, NE
Posts: 163
(July 2, 2010)
Just a few updates of what I've been up to over the past week:
I got the stainless fuel lines installed, upgrading from the single 5/16" line to a 3/8" line with a return line.

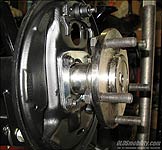
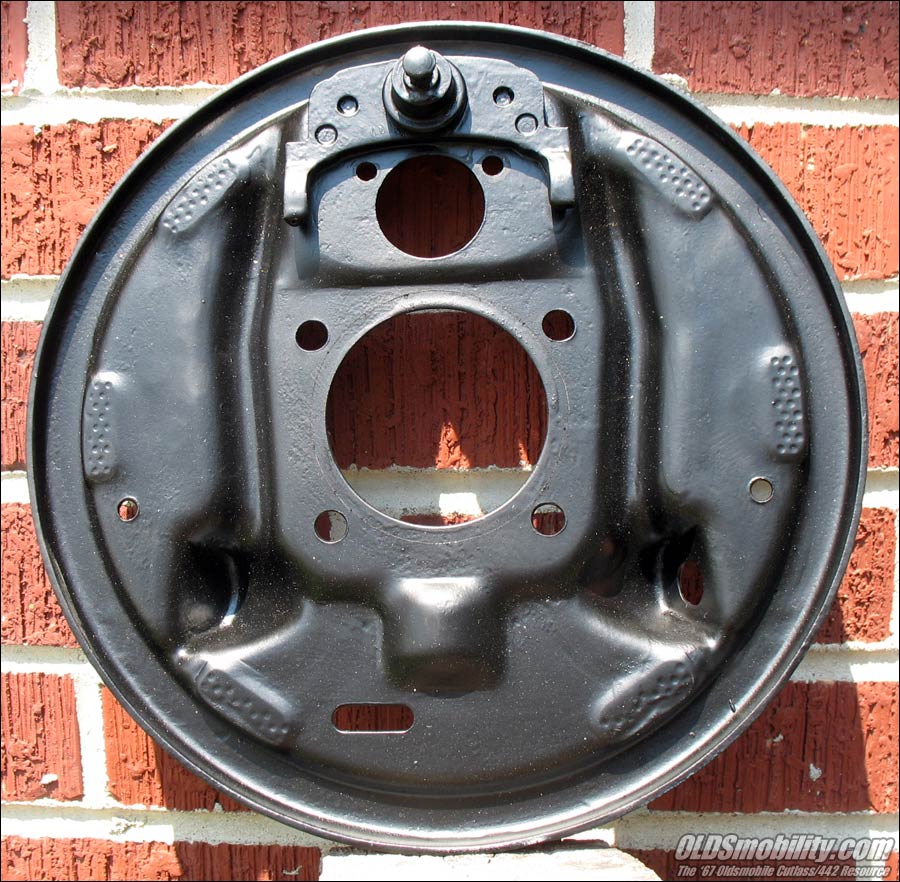
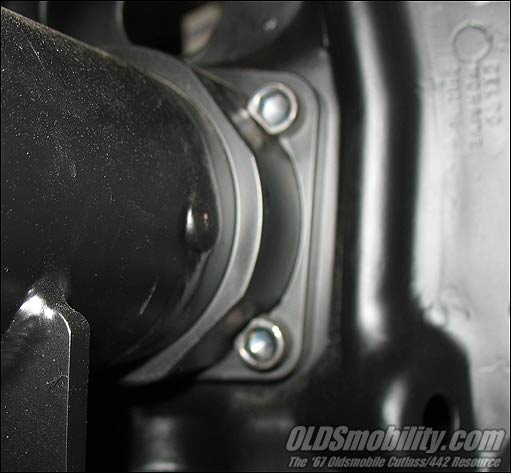
I got the Ford 9" third member installed and the rear brake backing plates cleaned up and painted a couple days ago, and went to install them today, but got a little surprise. When I ordered the rearend I told them to set it up for stock brakes, which they did with the appropriate tube flange, but neglected to tell me that the big-bearing axles wouldn't fit through the standard GM backing plates. In this picture you can see how much I was going to have to enlarge the hole in the backing plate by the scribed line:
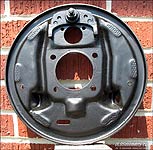
After about 30 minutes each with the die-grinder, the holes were enlarged and trial-fitted...and they fit great:

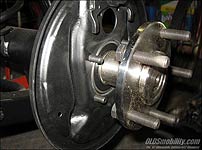
I then installed them and the rear axles. I was told not to install axle seals, since these axles use sealed bearings. Instead, I had to put a thin coat of silicone around the tube flange and on the bearing race before installing:
The axle retainers from GM are T-bolts, but the rearend fabricator uses Allen-head capscrews...which unfortunately wouldn't clear the tube flange without a little grinding on the head of each one:
I got the front end 99% done by installing the front sway bar (with PST polygraphite bushings), the steering box and linkage and shocks (Monroe Sens-a-tracs), and the front calipers and stainless flexible lines. (However, when installing the front control arms, I apparently installed one of the lower control arm bolts backwards, with the nut end protruding out towards and contacting the linkage. So I'm doing to have to do a little disassembly just to turn around a single bolt. &#$%!!!)


I decided to see how the pre-bent stainless brake lines for the stock 10-bolt would fit, and was happy to see that they'll work with some minor rebending.

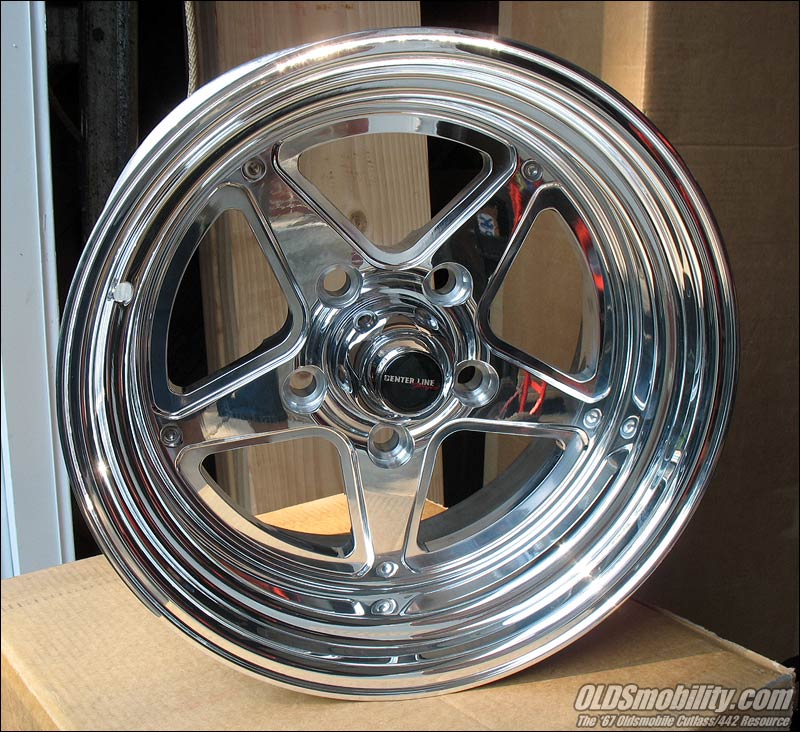
The cool news is my new wheels and tires came in today!
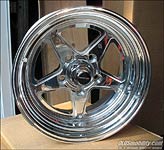

The wheels are Centerline Qualifiers, 15x8 with 4.5" backspacing for the front and 15x8 with 4" backspacing for the rear (since my Ford rearend is 1" narrower than the stock 10-bolt). The tires are Mickey Thompson Sportsman S/T's, P235/60s for the front and P275/60s for the rear. When I ordered these a few days ago I forgot to order lugnuts too, but did that the next evening and they'll be here any day now, along with some chrome Centerline valvestems. When they arrive I'll get the tires mounted, and will be able to roll the chassis outside for a good cleaning.
Just a few updates of what I've been up to over the past week:
I got the stainless fuel lines installed, upgrading from the single 5/16" line to a 3/8" line with a return line.
I got the Ford 9" third member installed and the rear brake backing plates cleaned up and painted a couple days ago, and went to install them today, but got a little surprise. When I ordered the rearend I told them to set it up for stock brakes, which they did with the appropriate tube flange, but neglected to tell me that the big-bearing axles wouldn't fit through the standard GM backing plates. In this picture you can see how much I was going to have to enlarge the hole in the backing plate by the scribed line:
After about 30 minutes each with the die-grinder, the holes were enlarged and trial-fitted...and they fit great:

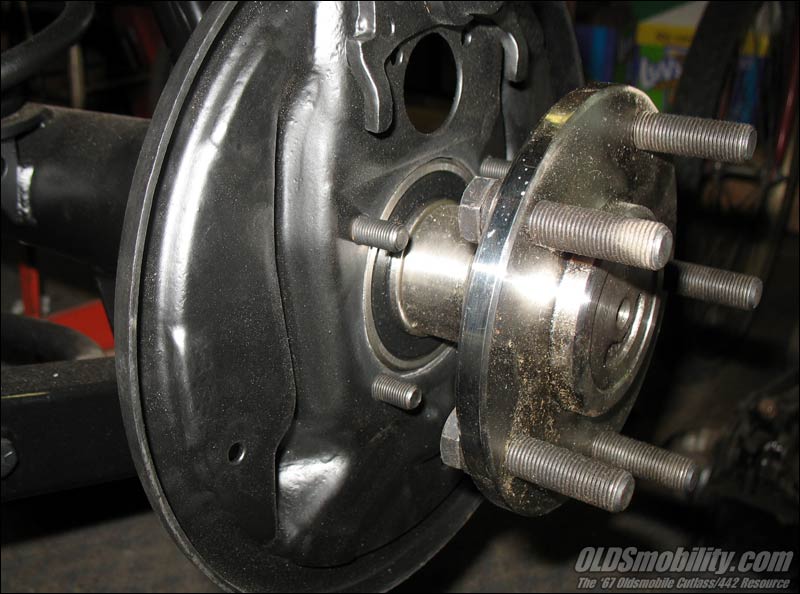
I then installed them and the rear axles. I was told not to install axle seals, since these axles use sealed bearings. Instead, I had to put a thin coat of silicone around the tube flange and on the bearing race before installing:
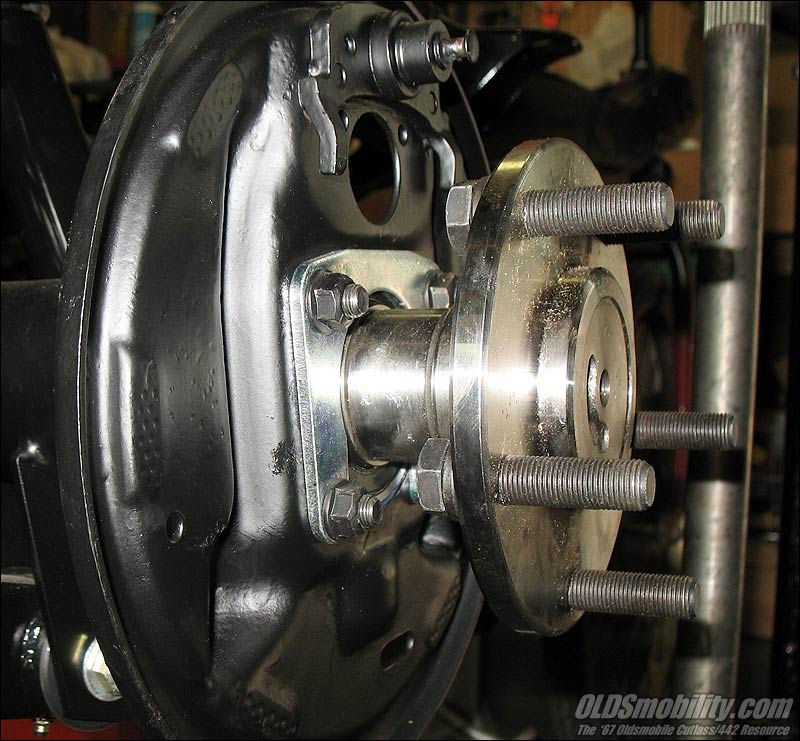
The axle retainers from GM are T-bolts, but the rearend fabricator uses Allen-head capscrews...which unfortunately wouldn't clear the tube flange without a little grinding on the head of each one:
I got the front end 99% done by installing the front sway bar (with PST polygraphite bushings), the steering box and linkage and shocks (Monroe Sens-a-tracs), and the front calipers and stainless flexible lines. (However, when installing the front control arms, I apparently installed one of the lower control arm bolts backwards, with the nut end protruding out towards and contacting the linkage. So I'm doing to have to do a little disassembly just to turn around a single bolt. &#$%!!!)

I decided to see how the pre-bent stainless brake lines for the stock 10-bolt would fit, and was happy to see that they'll work with some minor rebending.

The cool news is my new wheels and tires came in today!

The wheels are Centerline Qualifiers, 15x8 with 4.5" backspacing for the front and 15x8 with 4" backspacing for the rear (since my Ford rearend is 1" narrower than the stock 10-bolt). The tires are Mickey Thompson Sportsman S/T's, P235/60s for the front and P275/60s for the rear. When I ordered these a few days ago I forgot to order lugnuts too, but did that the next evening and they'll be here any day now, along with some chrome Centerline valvestems. When they arrive I'll get the tires mounted, and will be able to roll the chassis outside for a good cleaning.
September 11th, 2010, 09:40 PM
#8
Registered User
Thread Starter
Join Date: Jul 2008
Location: West Point, NE
Posts: 163
(July 3, 2010)
Another busy day today. I finished up 100% with the front suspension/steering brakes, and got a pair of junker wheels/tires bolted on. The rear axles are in, and even though the brakes aren't completed, I was going to bolt on a set of wheels on the back too and then roll the chassis outside today to clean it up with the garden hose, but then discovered another small detail that I'd overlooked....the front wheels studs are 7/16" and the new Moser axles have 1/2" studs, so I don't have lugnuts to use. I wish this fact would've dawned on my a little earlier, so I could have had the front rotors drilled out for 1/2" studs before they were installed. Oh well, it's not a huge deal.
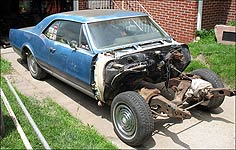
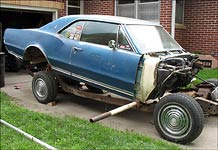
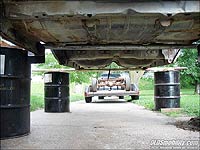
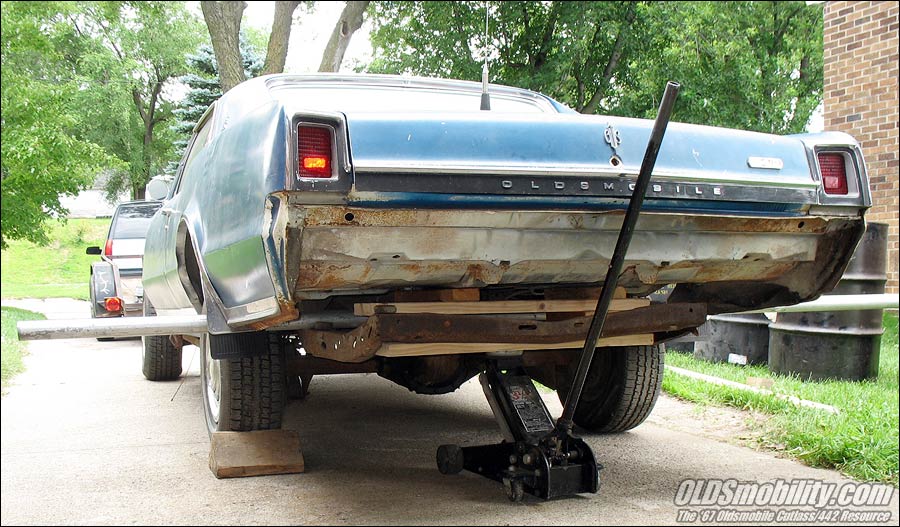
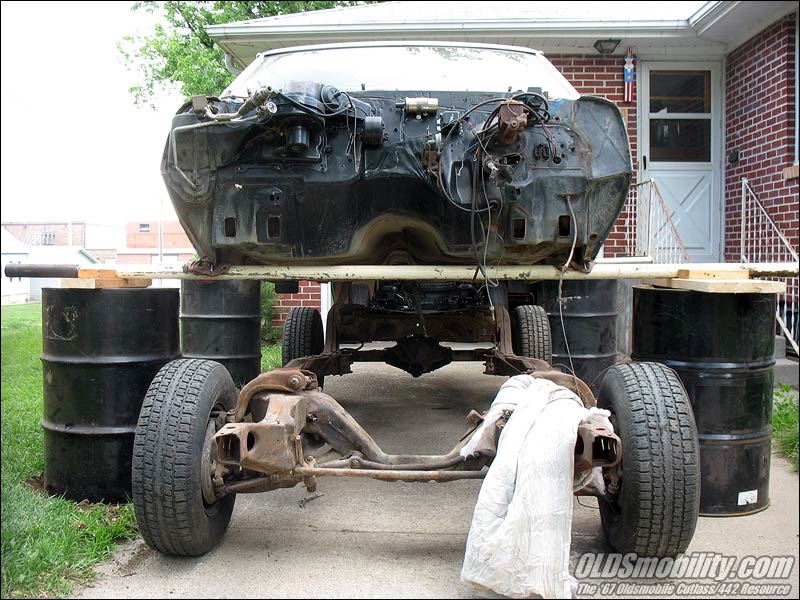
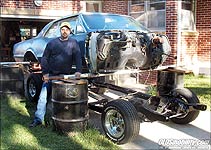
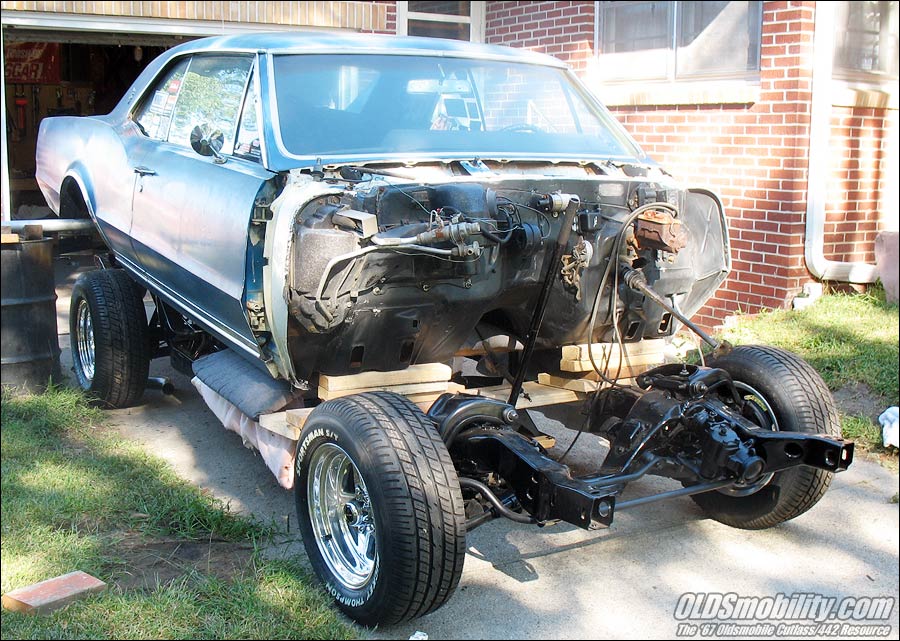
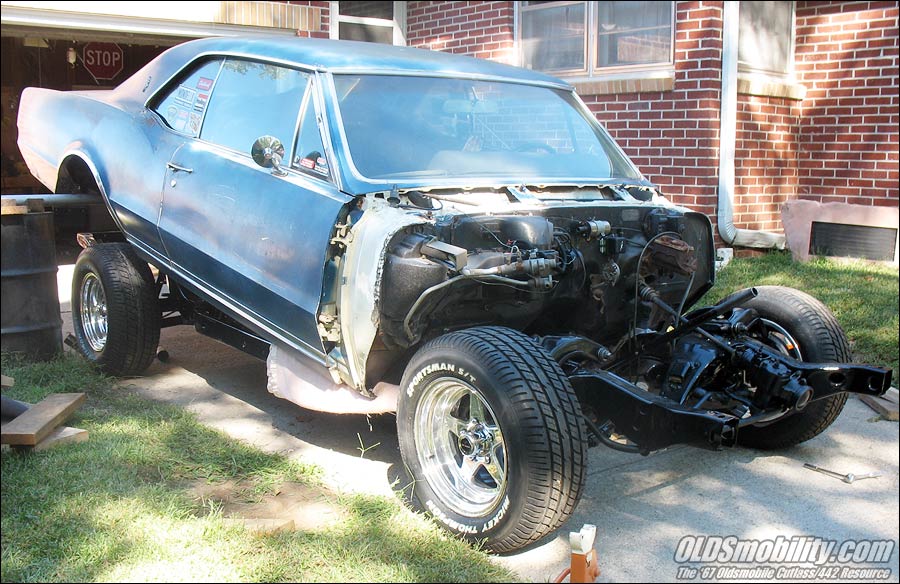
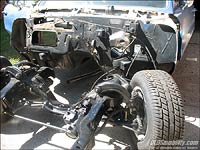
I decided that it was time to get the body off the trailer and then get it lifted off the Pontiac chassis. I need to get the bottom side of the body cleaned up and painted before replacing it on the chassis in the garage. Doing a body-off in a driveway with minimal equipment isn't something that everyone might try, but I've had a little experience doing it, so I knew it would just take a little time. And to say the following procedure is 'red-neckin' it is a major understatement...but it gets the job done.
First, I got the car down off the trailer. (Can you tell how I'm planning on doing this by what you see in the second picture?)

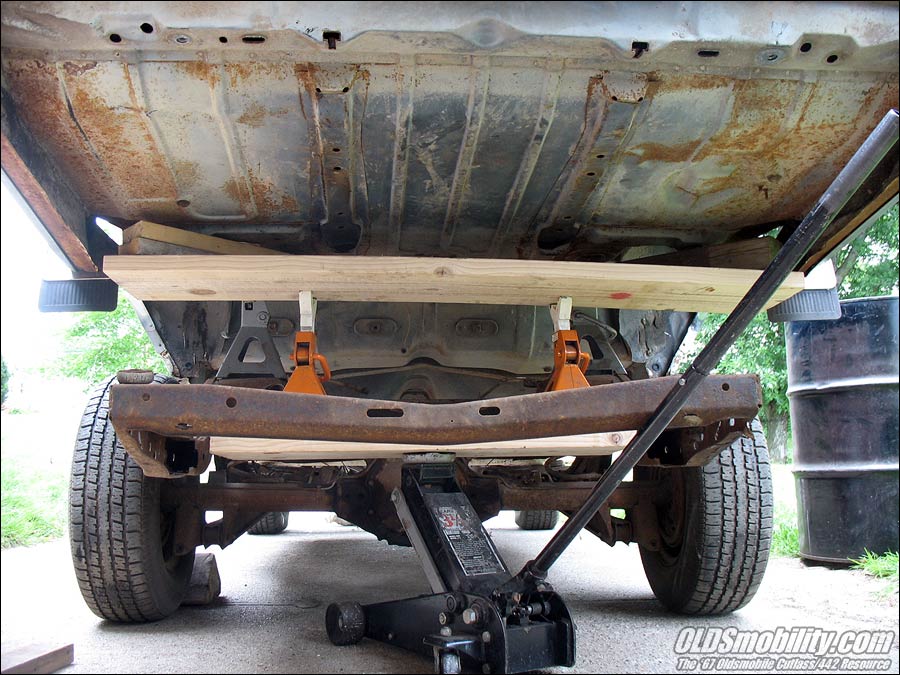
I started with the back end, using nothing more than my 3.5-ton hydraulic jack, four jackstands and a bunch of wood blocks. I'd jack it up as far as I could, block it, lower the jack and add some wood blocks, and jack it up a little more. Needless to say, this is very time-consuming, since I had to take things slowly, making sure that it was steady...I didn't want to damage the car, or me!
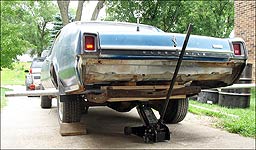
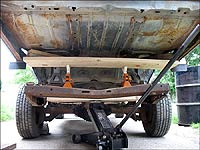
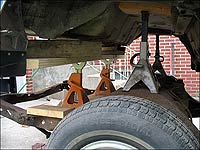
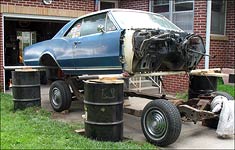
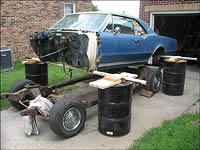
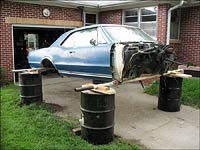
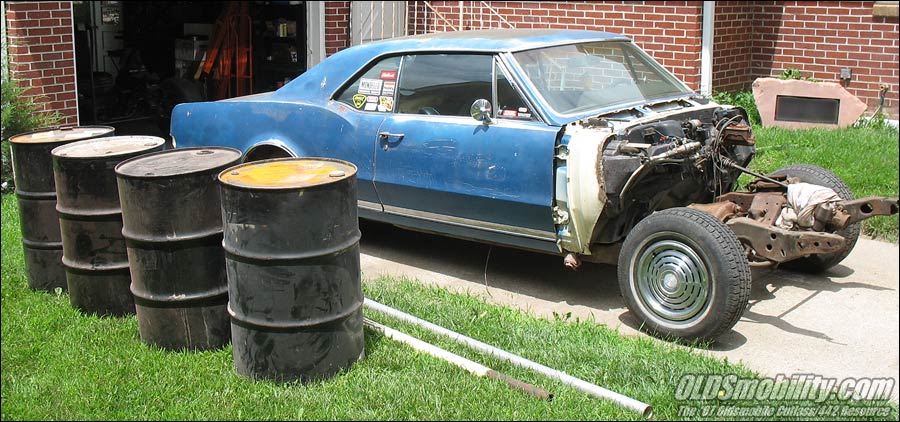
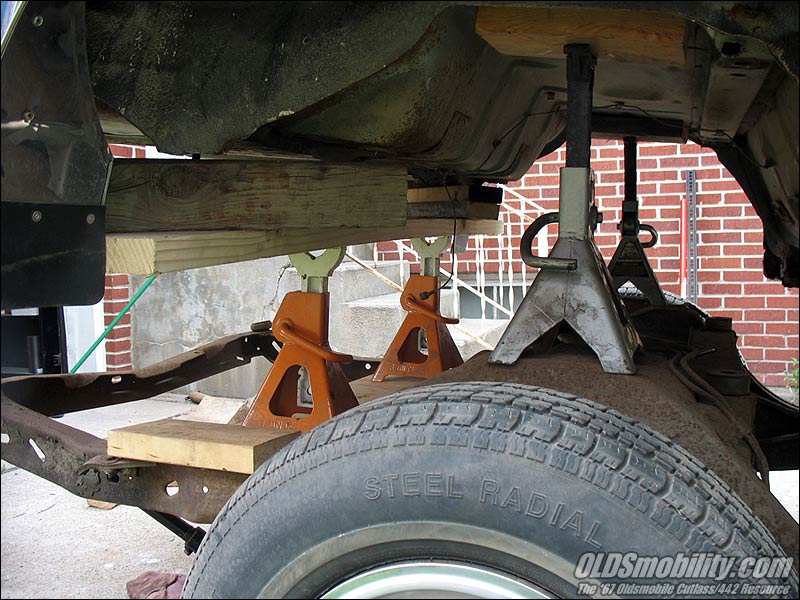
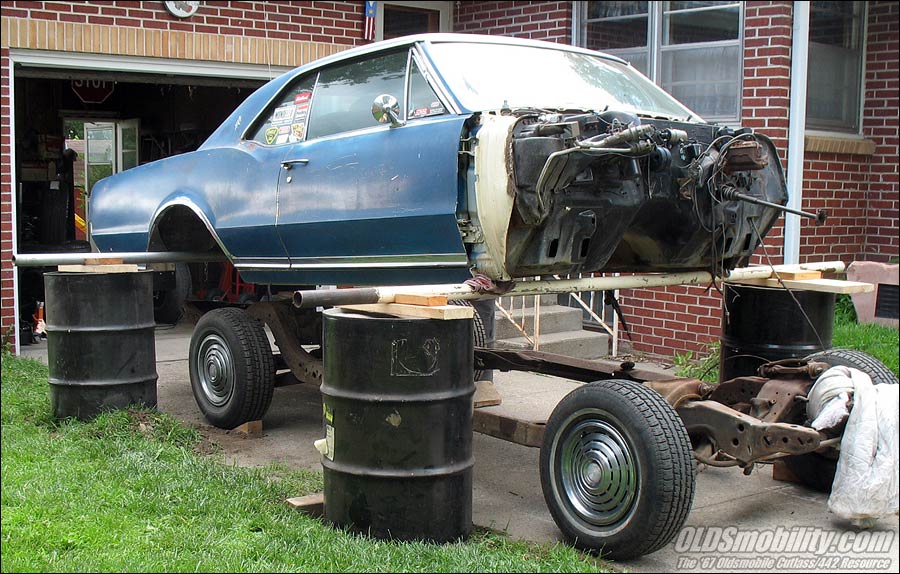
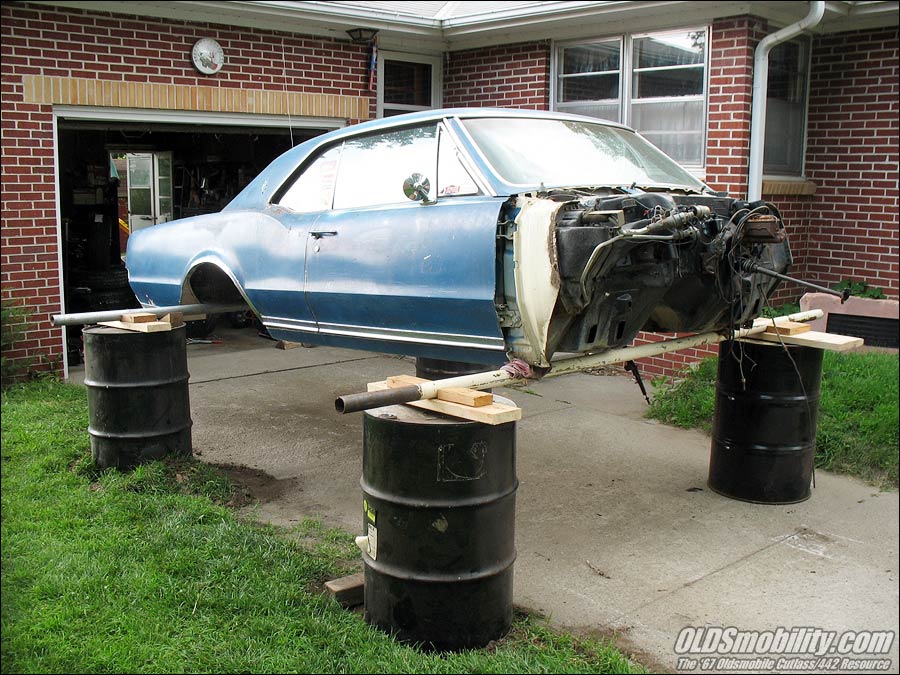
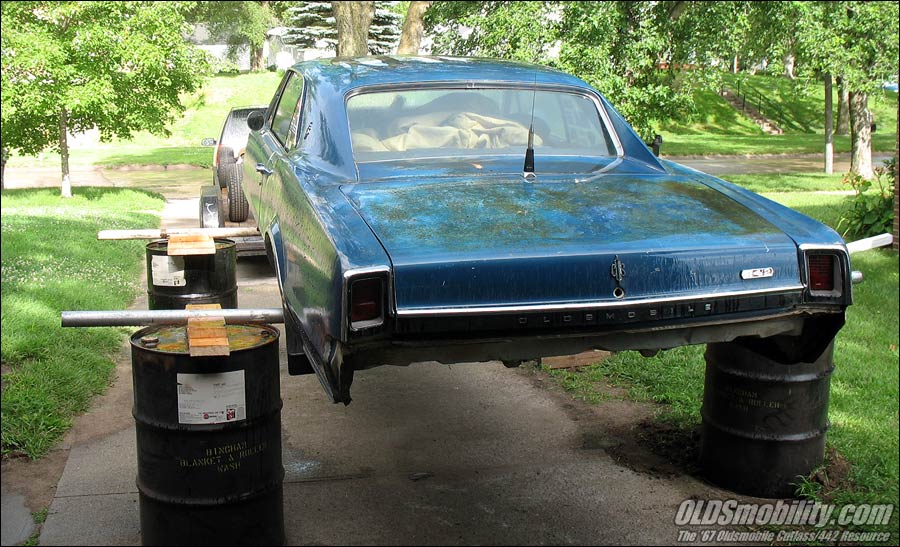
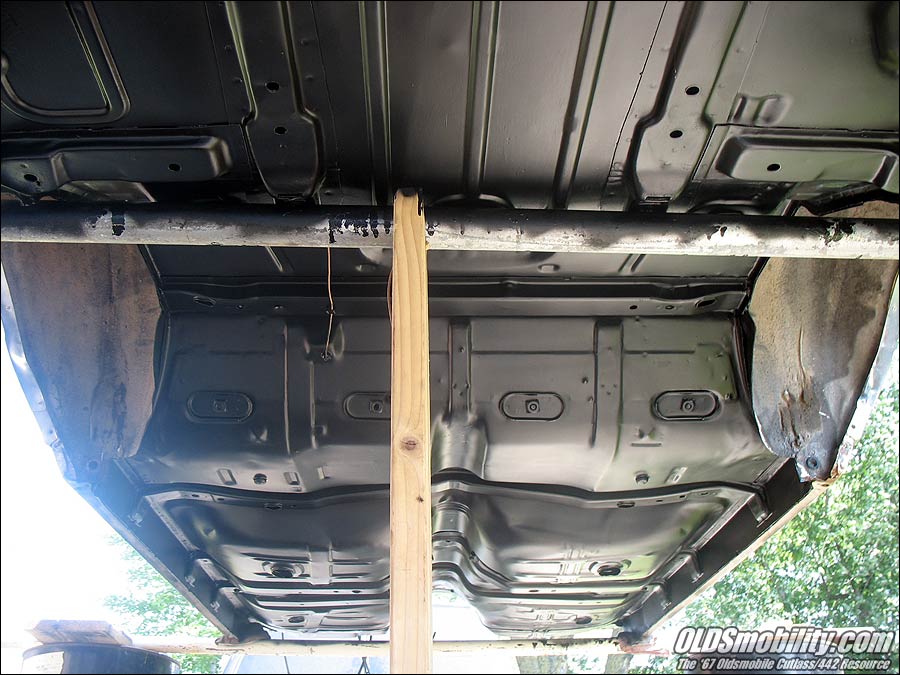
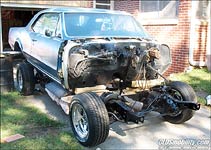
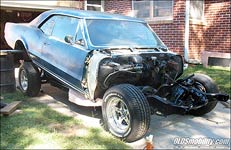
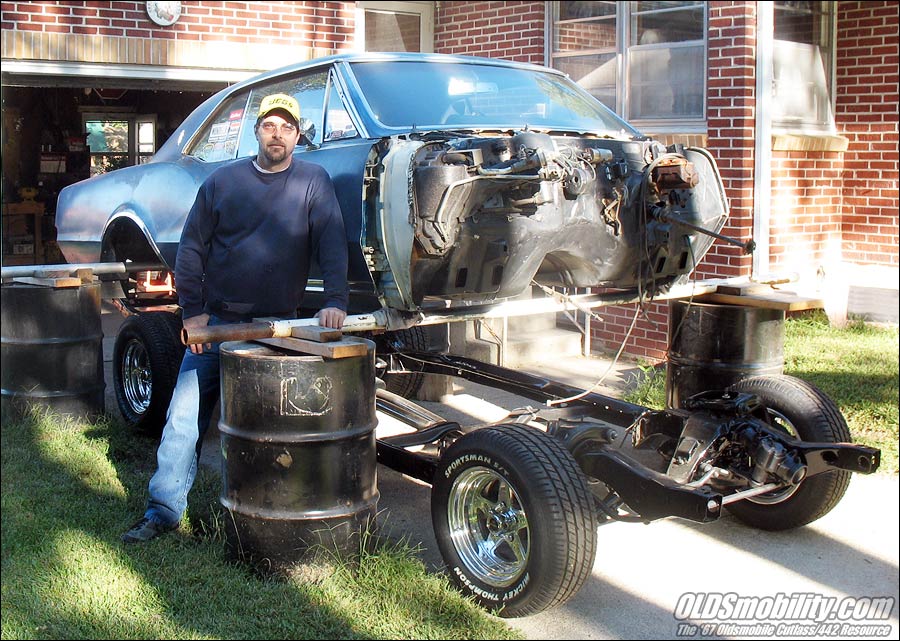
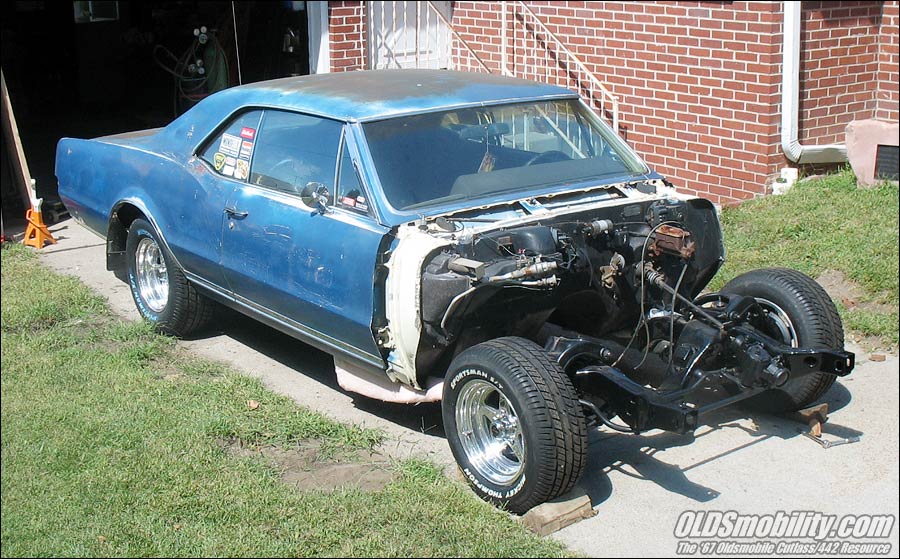
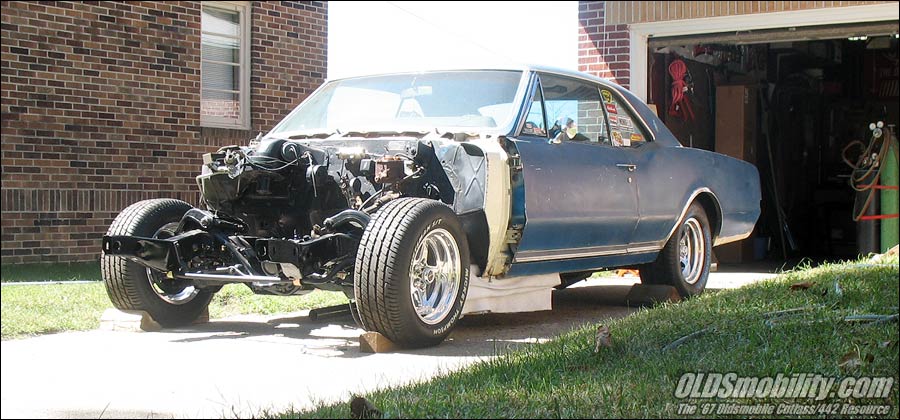
Once the back was high enough, I was able to set up the barrels and string the pipe between them and then remove the jack and blocks. I forgot to take some pictures while lifting the front end, but it was basically more of the same. The front actually went up a lot faster than the rear. Here's a few pics of the completed body lift:

I then rolled the Pontiac chassis out and pushed it up onto the trailer and took a couple more shots:

No more than 60 seconds after taking that final shot, we got hit with a passing rain shower which lasted about 10 minutes. I gave a thumbs-up to the big guy for holding off until I was finished.
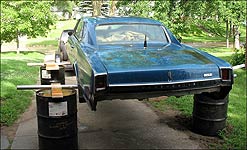
I tried rocking this thing hard and it's rock-solid...however, I am going to add an additional brace in the middle of each length of pipe as a center support, and while I'm up under this thing working on it I'll have a few additional backups as well, just in case.
Anyway, as you can see, the bottom side is actually pretty clean, so it probably won't take me more than a day or two to get it ready for paint. I'll be using my usual recipe of POR-15 and then hitting it with rattlecan paint just before it sets up, while it's still barely tacky.
Stay tuned!
Another busy day today. I finished up 100% with the front suspension/steering brakes, and got a pair of junker wheels/tires bolted on. The rear axles are in, and even though the brakes aren't completed, I was going to bolt on a set of wheels on the back too and then roll the chassis outside today to clean it up with the garden hose, but then discovered another small detail that I'd overlooked....the front wheels studs are 7/16" and the new Moser axles have 1/2" studs, so I don't have lugnuts to use. I wish this fact would've dawned on my a little earlier, so I could have had the front rotors drilled out for 1/2" studs before they were installed. Oh well, it's not a huge deal.
I decided that it was time to get the body off the trailer and then get it lifted off the Pontiac chassis. I need to get the bottom side of the body cleaned up and painted before replacing it on the chassis in the garage. Doing a body-off in a driveway with minimal equipment isn't something that everyone might try, but I've had a little experience doing it, so I knew it would just take a little time. And to say the following procedure is 'red-neckin' it is a major understatement...but it gets the job done.
First, I got the car down off the trailer. (Can you tell how I'm planning on doing this by what you see in the second picture?)
I started with the back end, using nothing more than my 3.5-ton hydraulic jack, four jackstands and a bunch of wood blocks. I'd jack it up as far as I could, block it, lower the jack and add some wood blocks, and jack it up a little more. Needless to say, this is very time-consuming, since I had to take things slowly, making sure that it was steady...I didn't want to damage the car, or me!

Once the back was high enough, I was able to set up the barrels and string the pipe between them and then remove the jack and blocks. I forgot to take some pictures while lifting the front end, but it was basically more of the same. The front actually went up a lot faster than the rear. Here's a few pics of the completed body lift:

I then rolled the Pontiac chassis out and pushed it up onto the trailer and took a couple more shots:


No more than 60 seconds after taking that final shot, we got hit with a passing rain shower which lasted about 10 minutes. I gave a thumbs-up to the big guy for holding off until I was finished.
I tried rocking this thing hard and it's rock-solid...however, I am going to add an additional brace in the middle of each length of pipe as a center support, and while I'm up under this thing working on it I'll have a few additional backups as well, just in case.
Anyway, as you can see, the bottom side is actually pretty clean, so it probably won't take me more than a day or two to get it ready for paint. I'll be using my usual recipe of POR-15 and then hitting it with rattlecan paint just before it sets up, while it's still barely tacky.
Stay tuned!
September 11th, 2010, 09:41 PM
#9
Registered User
Thread Starter
Join Date: Jul 2008
Location: West Point, NE
Posts: 163
(July 18, 2010)
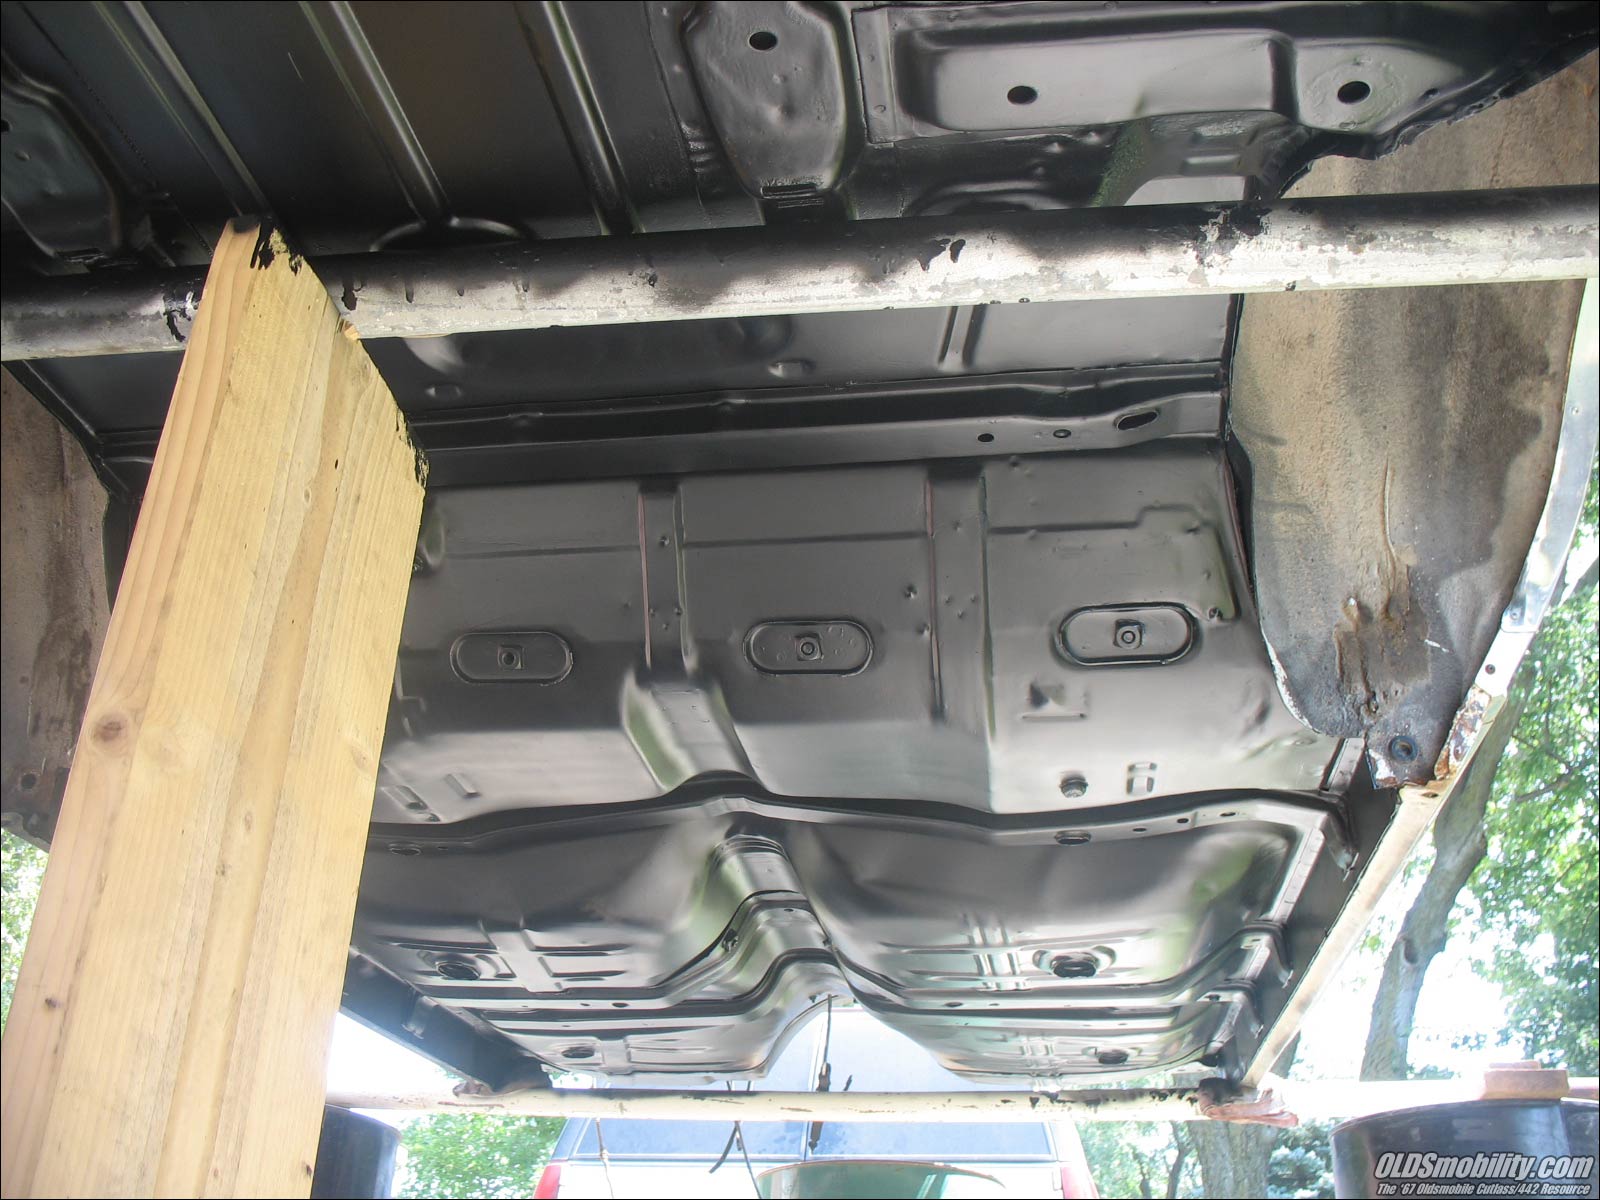
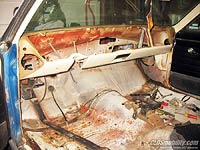
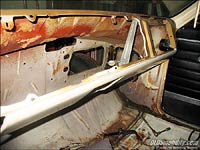
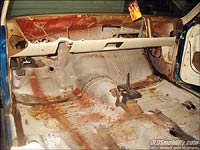
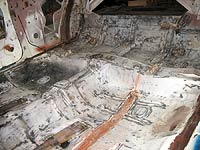
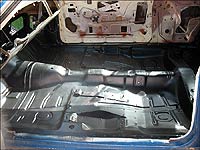
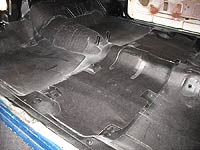
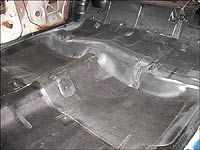
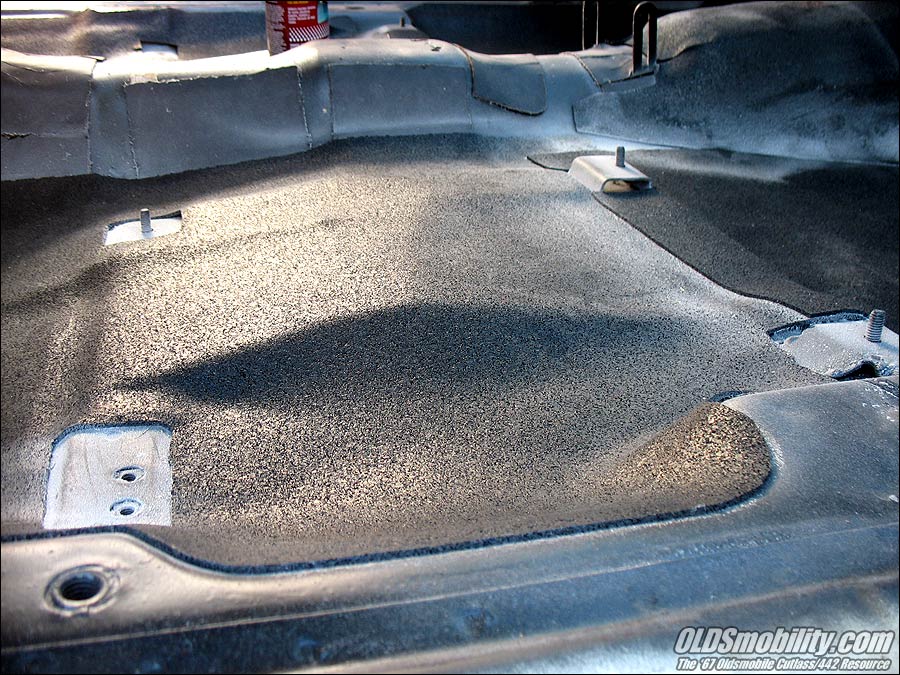
Finally got to spend some time today getting the bottom side of the body cleaned up. Today was the first day in several weeks that it wasn't either pouring rain or 90-95 degrees. I started at the tail end, working my way forward, and made it nearly halfway before having to quit to take care of other afternoon obligations.

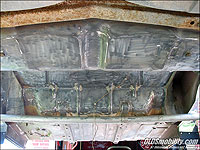
What you see there was just what I was able to get to with my 4.5" angle grinder and wire wheel. After I'm done roughing the cleanup process in with the grinder, I'll have to go back with the drill and small wire cone to hit the nooks and crannies that the grinder couldn't reach.
Finally got to spend some time today getting the bottom side of the body cleaned up. Today was the first day in several weeks that it wasn't either pouring rain or 90-95 degrees. I started at the tail end, working my way forward, and made it nearly halfway before having to quit to take care of other afternoon obligations.
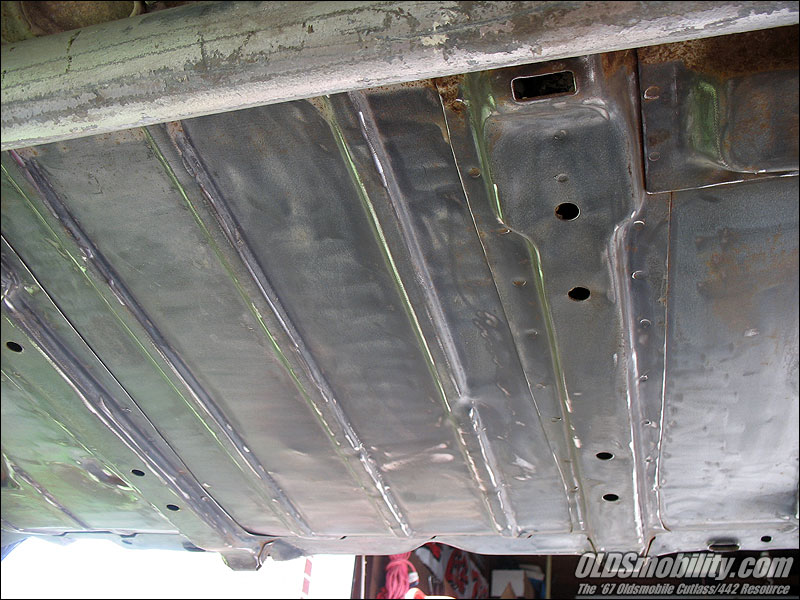

What you see there was just what I was able to get to with my 4.5" angle grinder and wire wheel. After I'm done roughing the cleanup process in with the grinder, I'll have to go back with the drill and small wire cone to hit the nooks and crannies that the grinder couldn't reach.
September 11th, 2010, 09:41 PM
#10
Registered User
Thread Starter
Join Date: Jul 2008
Location: West Point, NE
Posts: 163
(July 28, 2010)
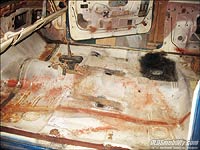
Got a little more floorpan cleaning done a couple days ago, and it's now about 90% done. Another afternoon's worth of work and it'll be ready to paint.
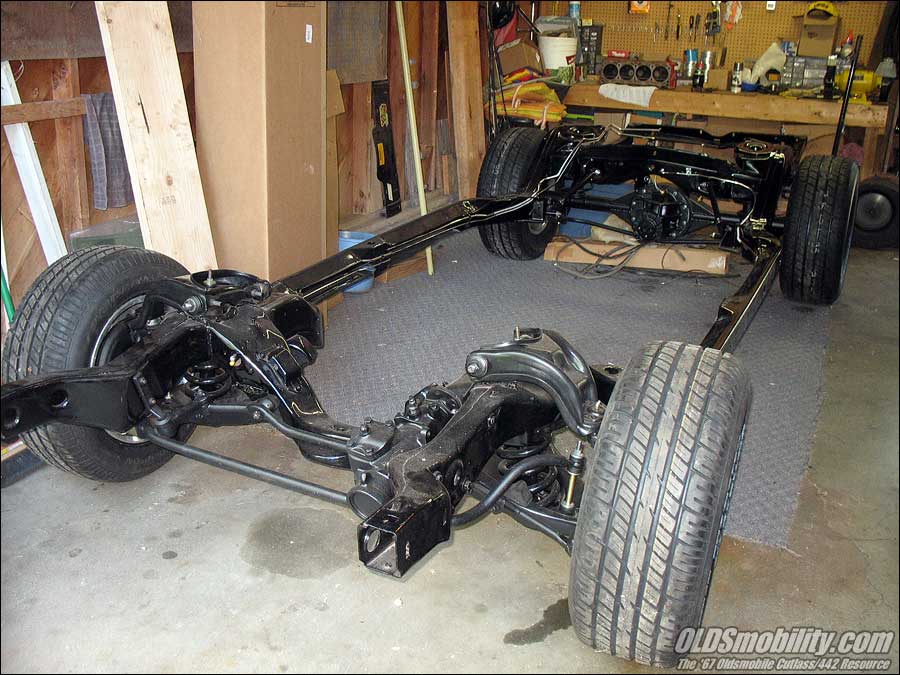
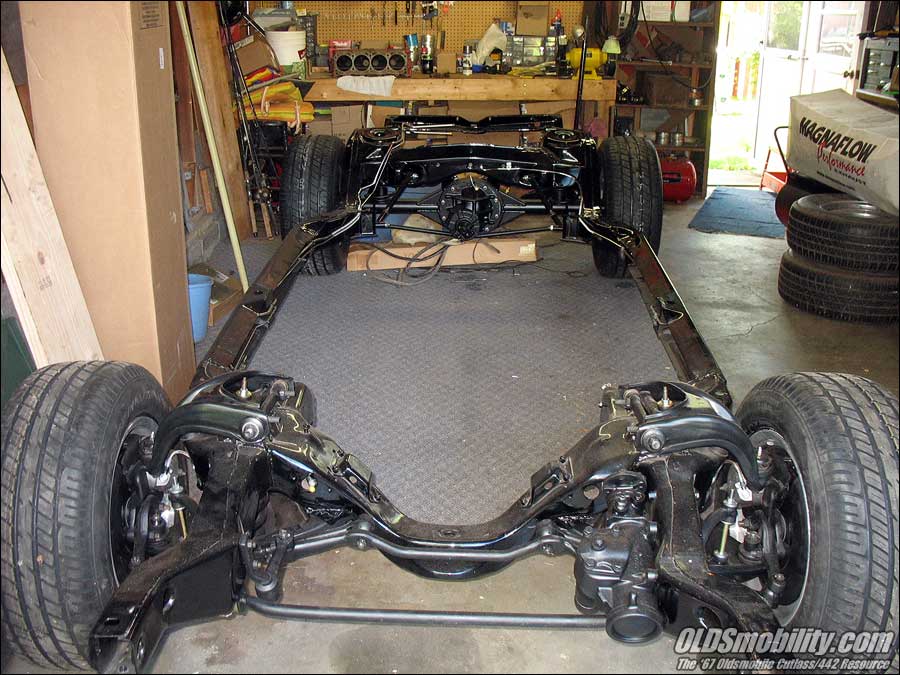
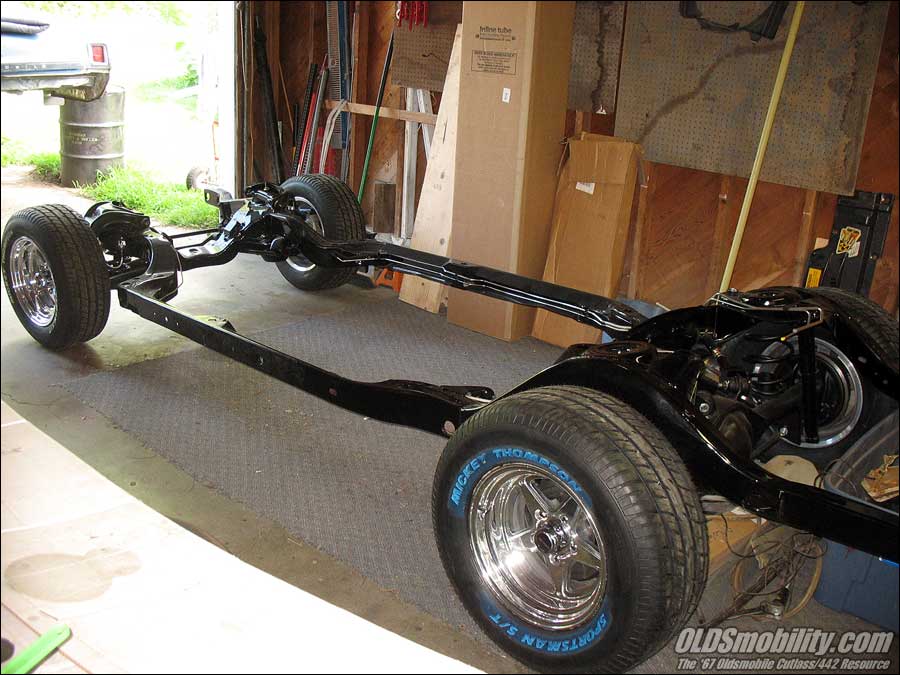
I finally received the (correct) lugnuts today, so I got the wheels and tires mounted up...and so it's now resting on it's own feet for the first time in about 14 years!


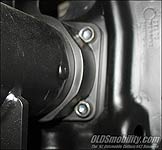
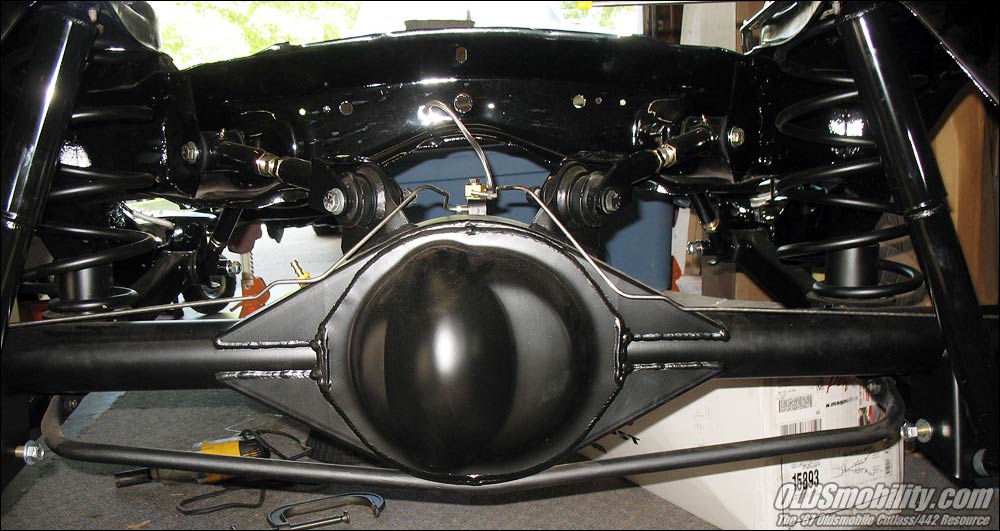
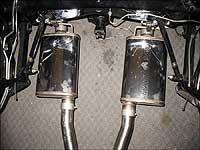
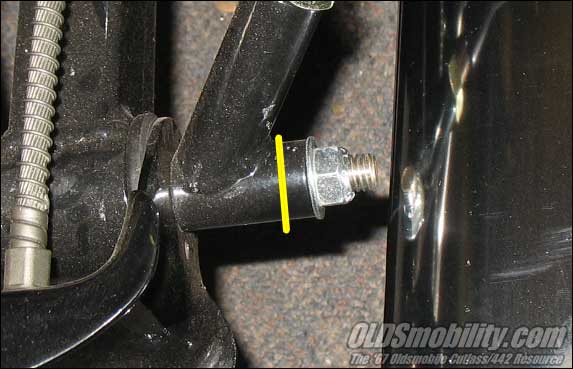
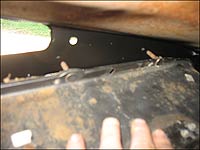
I then got started mocking up the exhaust system. I discovered that the mufflers are going to be sitting way too close to the new rear crossmember braces for comfort:

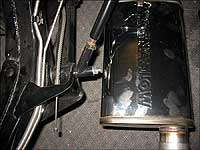
I'm going to have to flip the mounting bolts around so that the bolt head is pointing to the inside, plus shorten the end of the brace a little on each side, like this:
I'm really hoping to finish up getting the bottom of the body cleaned up and painted within the next week or so. I have to schedule a day where I can be at it all day long, so I can get it done in one shot. Then I'll be ready to replace the body onto the chassis.
Got a little more floorpan cleaning done a couple days ago, and it's now about 90% done. Another afternoon's worth of work and it'll be ready to paint.
I finally received the (correct) lugnuts today, so I got the wheels and tires mounted up...and so it's now resting on it's own feet for the first time in about 14 years!
I then got started mocking up the exhaust system. I discovered that the mufflers are going to be sitting way too close to the new rear crossmember braces for comfort:
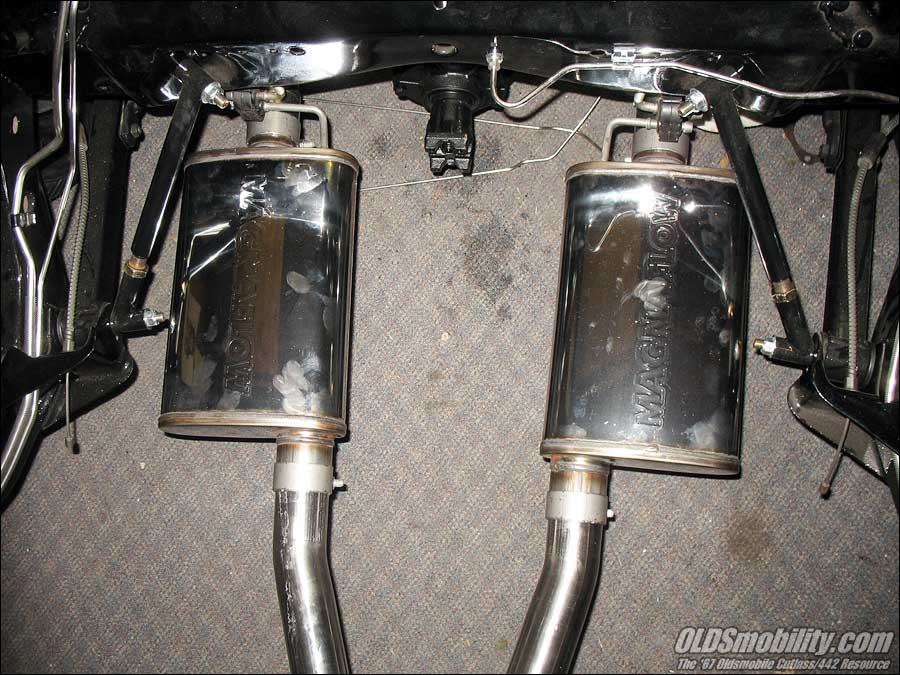

I'm going to have to flip the mounting bolts around so that the bolt head is pointing to the inside, plus shorten the end of the brace a little on each side, like this:
I'm really hoping to finish up getting the bottom of the body cleaned up and painted within the next week or so. I have to schedule a day where I can be at it all day long, so I can get it done in one shot. Then I'll be ready to replace the body onto the chassis.
September 11th, 2010, 09:42 PM
#11
Registered User
Thread Starter
Join Date: Jul 2008
Location: West Point, NE
Posts: 163
(Aug. 29, 2010)
Well, it's been a month since I posted any updates, mainly due to the freakin' heat! For the past three weeks the temperatures outside have been in the upper 90's with 75%-80% humidity, and it was just too darned hot and humid to work out in the driveway. However, the past week the temps dropped considerably, down to the upper 70s to mid 80s, so I was able to get back to work.
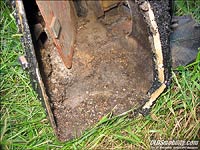
The top priority was getting the bottom of the car's floorpans painted so that I could get the body dropped back onto the chassis. When I removed the body back in 1999 I broke off three of the body mounting bolts...the two directly behind the axle and one under the driver's seat...so I needed to correct those. I tried drilling them out but the cage nuts broke loose on the two rear bolts, so I ended up drilling a pilot hole all the way up through the bolts and through the floorpans, and then using a die grinder was able to open up a hole large enough to remove the broken-off cages. I'll just put a nut on the top side of these bolts and then use a grommet or body plug to seal the holes. For the front bolt I'll still use the existing nut, but will have to add an additional nut on top:


In the second picture there, you can see how I wasn't completely centered with the drill bit, which messed up the nut threads a little. The bolt will still thread in, but I wouldn't want to trust it as-is, so I'll definitely thread a nut down on top for added security. Once the grommet is installed, it'll be hid by the carpeting.
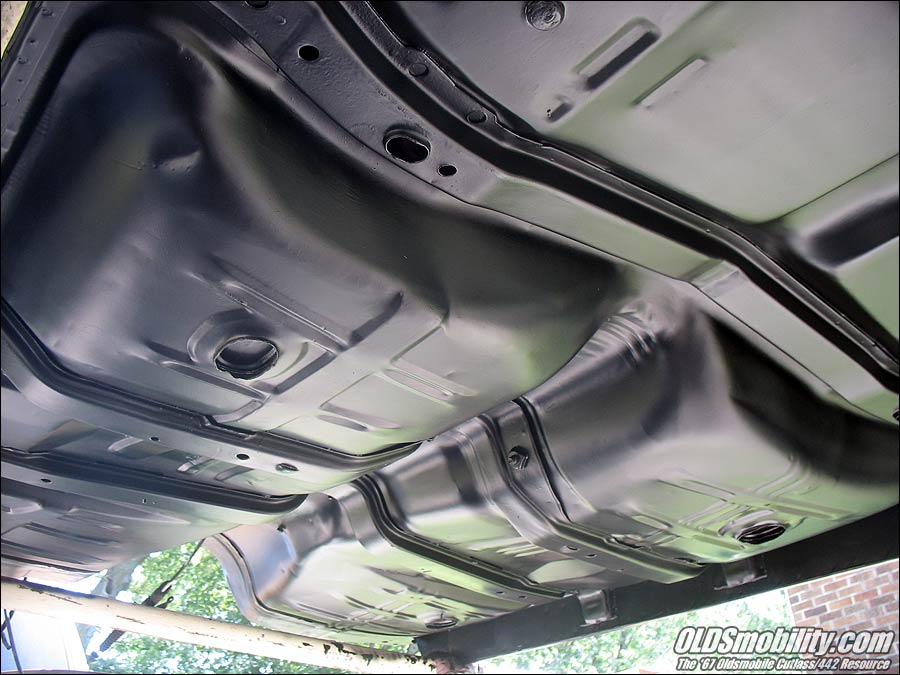
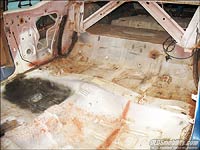
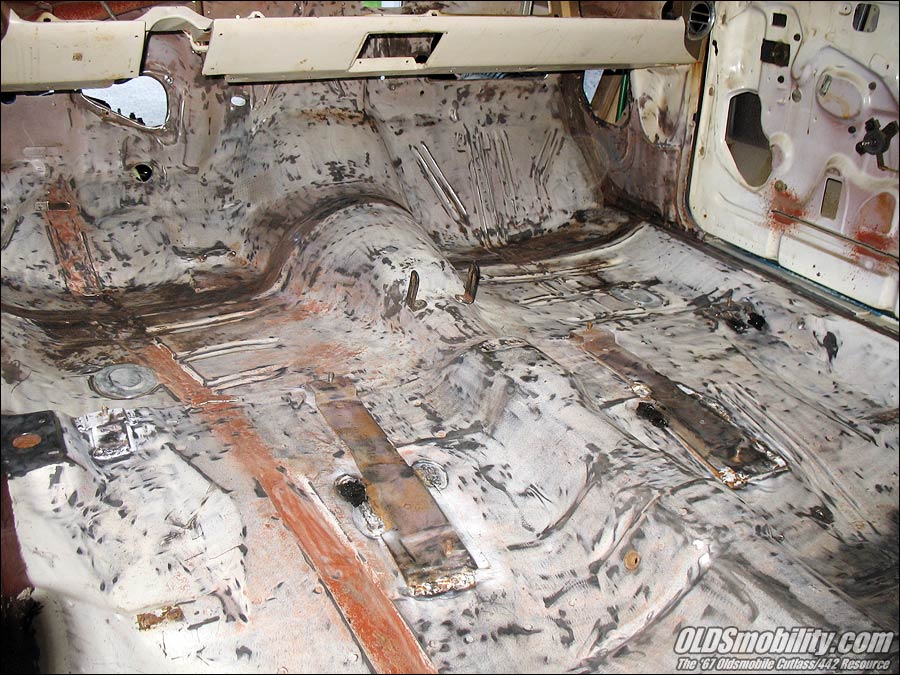
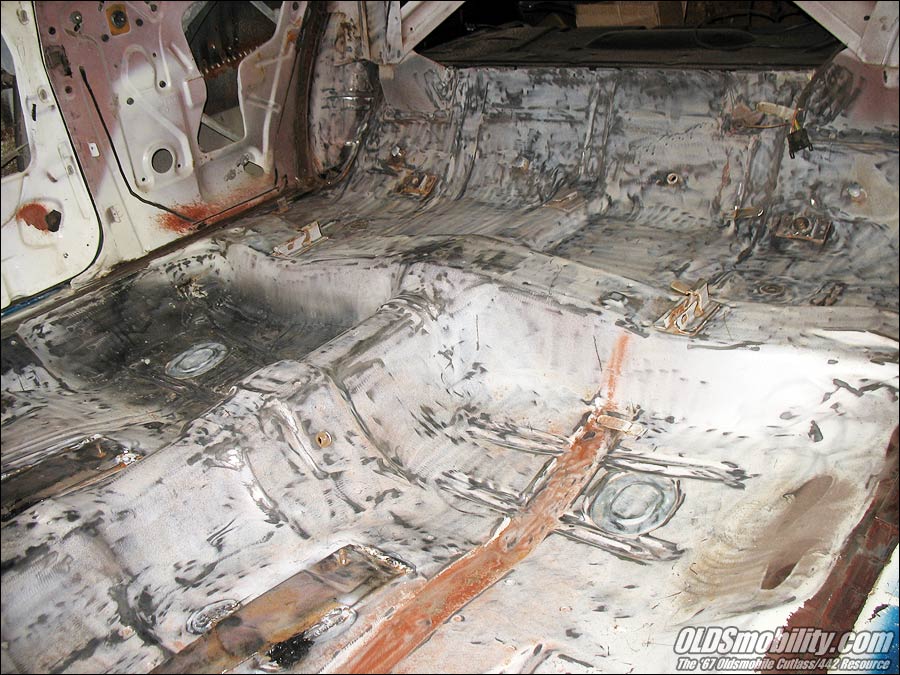
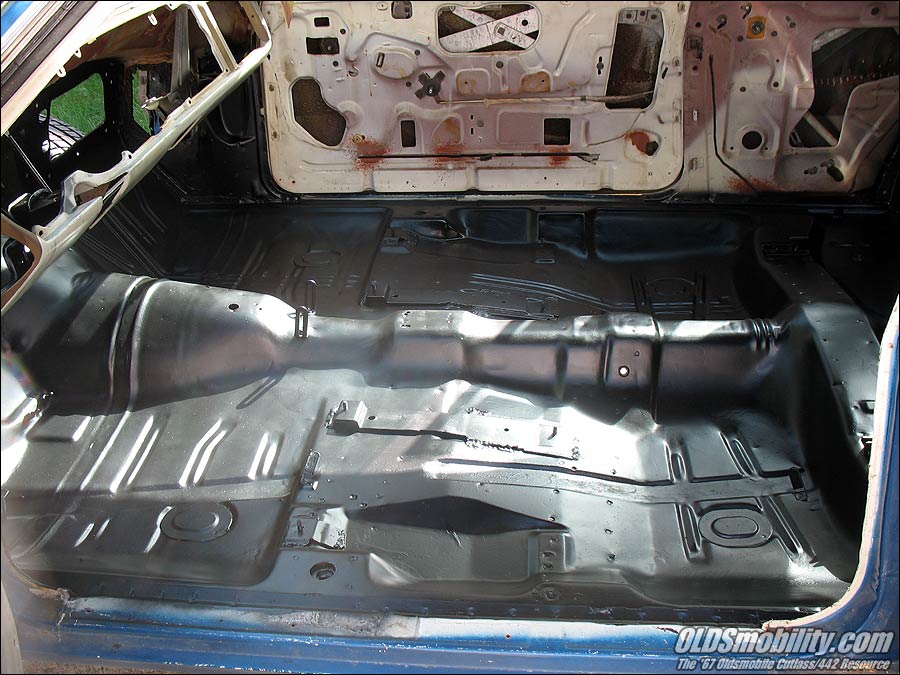
Yesterday I finished up with some last-minute clean-up on the pans, and then hit them with some MetalReady to etch the steel and give it the phosphate coating that will give the POR-15 a good bite. Here's a final picture taken last night of the pans ready to paint:

I wanted to put on two coats of POR-15 and then a topcoat. Typically the POR-15 takes 3-4 hours to set up enough to apply an additional coat, so I gave myself all day to get this done. However the temps were in the upper 80s today with a strong breeze, so drying time was significantly reduced. I started at the front and worked my way back, and found that by the time I was done with the first coat (2 hours work time), the front was already dry enough for the second coat. So...quick smoke break, and then back up under the car to apply coat #2. By the time I'd finished the second coat, the front was again dry enough for the final topcoat, which was my standard recipe of Krylon semi-flat rattlecans. I went ahead and did two topcoat layers just for added insurance. From start to finish this job only took me about four hours. Since this car will be a regular driver with an occasional trip down the strip, I wasn't seeking show-car quality, but I'm still very pleased with how well it looks. I think it turned out great!


The body is now ready to go back onto the chassis! This will tentatively be happening this coming Friday or Saturday, depending on my work schedule. (This will make the wife very happy, since she's tired of having to walk around the car to get into the house!) Once it's properly mounted, I'll be getting started on the interior cabin and trunk floorpans, which will get the same paint treatment as the exterior pans.
Well, it's been a month since I posted any updates, mainly due to the freakin' heat! For the past three weeks the temperatures outside have been in the upper 90's with 75%-80% humidity, and it was just too darned hot and humid to work out in the driveway. However, the past week the temps dropped considerably, down to the upper 70s to mid 80s, so I was able to get back to work.
The top priority was getting the bottom of the car's floorpans painted so that I could get the body dropped back onto the chassis. When I removed the body back in 1999 I broke off three of the body mounting bolts...the two directly behind the axle and one under the driver's seat...so I needed to correct those. I tried drilling them out but the cage nuts broke loose on the two rear bolts, so I ended up drilling a pilot hole all the way up through the bolts and through the floorpans, and then using a die grinder was able to open up a hole large enough to remove the broken-off cages. I'll just put a nut on the top side of these bolts and then use a grommet or body plug to seal the holes. For the front bolt I'll still use the existing nut, but will have to add an additional nut on top:
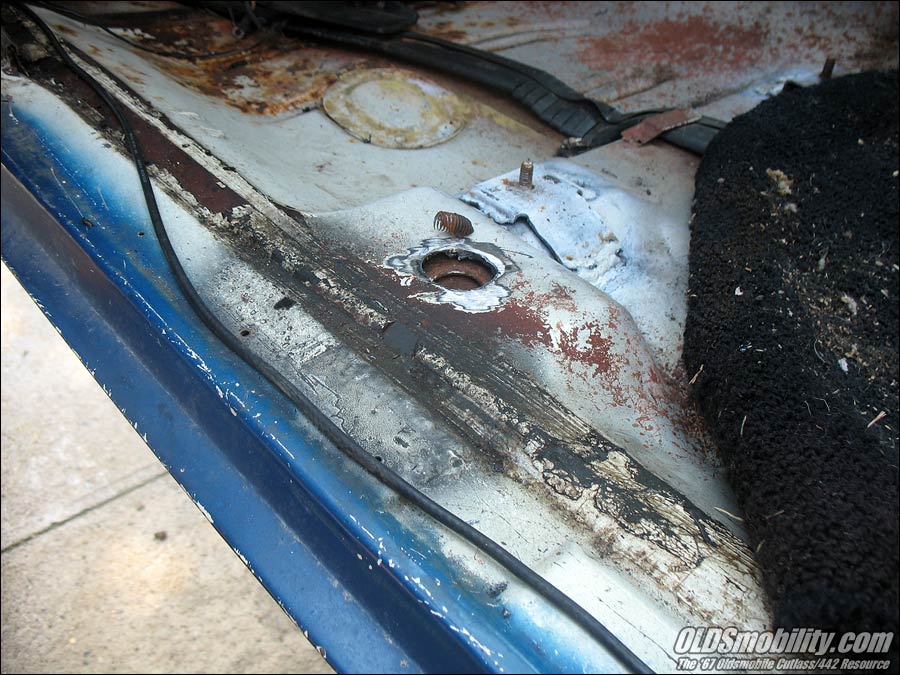
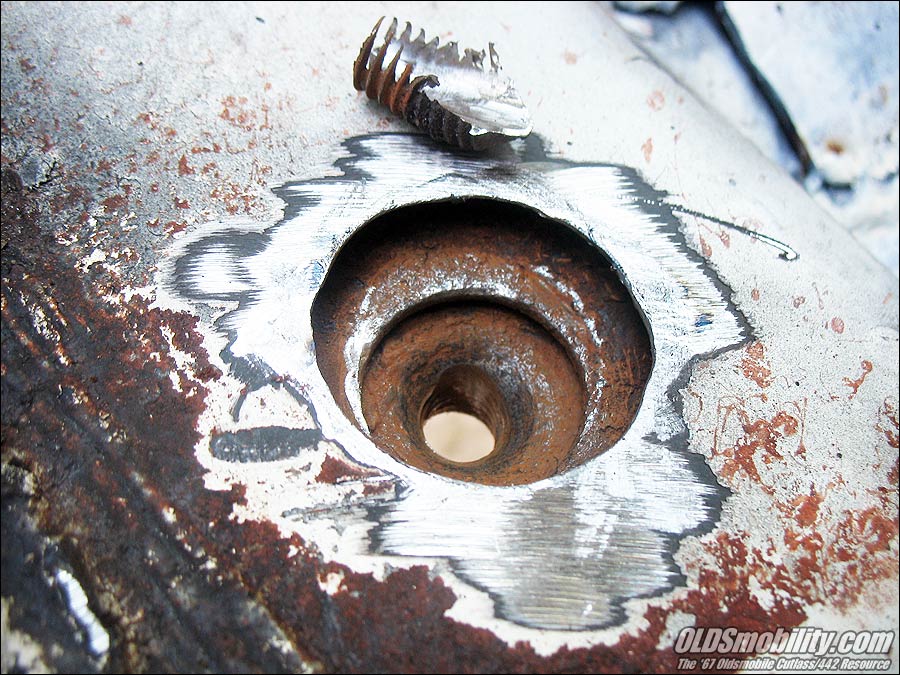
In the second picture there, you can see how I wasn't completely centered with the drill bit, which messed up the nut threads a little. The bolt will still thread in, but I wouldn't want to trust it as-is, so I'll definitely thread a nut down on top for added security. Once the grommet is installed, it'll be hid by the carpeting.
Yesterday I finished up with some last-minute clean-up on the pans, and then hit them with some MetalReady to etch the steel and give it the phosphate coating that will give the POR-15 a good bite. Here's a final picture taken last night of the pans ready to paint:

I wanted to put on two coats of POR-15 and then a topcoat. Typically the POR-15 takes 3-4 hours to set up enough to apply an additional coat, so I gave myself all day to get this done. However the temps were in the upper 80s today with a strong breeze, so drying time was significantly reduced. I started at the front and worked my way back, and found that by the time I was done with the first coat (2 hours work time), the front was already dry enough for the second coat. So...quick smoke break, and then back up under the car to apply coat #2. By the time I'd finished the second coat, the front was again dry enough for the final topcoat, which was my standard recipe of Krylon semi-flat rattlecans. I went ahead and did two topcoat layers just for added insurance. From start to finish this job only took me about four hours. Since this car will be a regular driver with an occasional trip down the strip, I wasn't seeking show-car quality, but I'm still very pleased with how well it looks. I think it turned out great!
The body is now ready to go back onto the chassis! This will tentatively be happening this coming Friday or Saturday, depending on my work schedule. (This will make the wife very happy, since she's tired of having to walk around the car to get into the house!) Once it's properly mounted, I'll be getting started on the interior cabin and trunk floorpans, which will get the same paint treatment as the exterior pans.
September 11th, 2010, 09:43 PM
#12
Registered User
Thread Starter
Join Date: Jul 2008
Location: West Point, NE
Posts: 163
(Sept. 3, 2010)
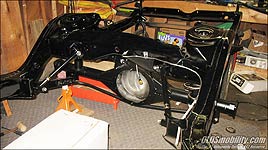
Got the body dropped back onto the chassis today!
Just lots of the same when removing the body. Jack it up a little, remove the bars, then let the jack almost all the way down and block the body. Then jack it back up a little remove some blocks, let it back down. It actually went pretty fast, and I had no problems.
The body is now resting on the frame, without the bushings. Due to the extreme angles at which the body was coming down, I wasn't able to insert the bushings, so I just made sure I had plenty of padding to protect the frame and the floorpans, and set it directly on the frame for now. By the end of this extended Labor Day weekend,though, I'll have it centered and bolted down.


It's actually starting to look like a car again!
Got the body dropped back onto the chassis today!
Just lots of the same when removing the body. Jack it up a little, remove the bars, then let the jack almost all the way down and block the body. Then jack it back up a little remove some blocks, let it back down. It actually went pretty fast, and I had no problems.
The body is now resting on the frame, without the bushings. Due to the extreme angles at which the body was coming down, I wasn't able to insert the bushings, so I just made sure I had plenty of padding to protect the frame and the floorpans, and set it directly on the frame for now. By the end of this extended Labor Day weekend,though, I'll have it centered and bolted down.
It's actually starting to look like a car again!
September 11th, 2010, 09:44 PM
#13
Registered User
Thread Starter
Join Date: Jul 2008
Location: West Point, NE
Posts: 163
(Sept. 5, 2010)
Got started removing the dash last night, and basically finished up the disassembly of the front half of the interior by removing the wiring harness, heater box and all A/C components from the firewall. I'll be deleting the A/C completely and just going with just a standard heater setup. I've got the heater-only dash controls ready to go.


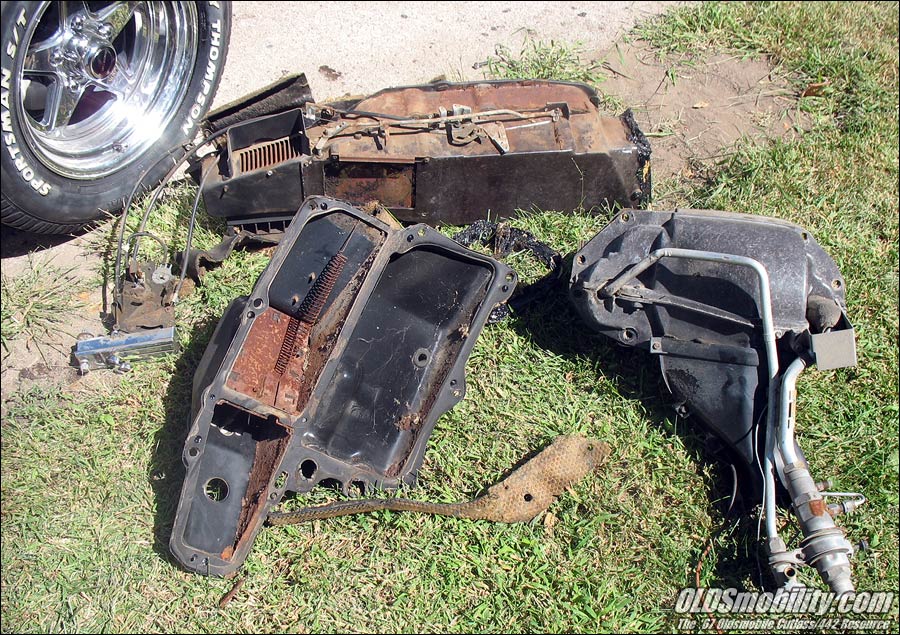
Here's a few shots of the A/C components after removal. Back years ago when I did my first quick 'refurbishing' I never removed the heater-A/C box to clean it, even though I knew it had been a home to field mice for roughly 13 years. Man, I'm glad I never had the need to fire up the heater...I'd have been in for a nasty mess blowing out the vents! :shock:

Got started removing the dash last night, and basically finished up the disassembly of the front half of the interior by removing the wiring harness, heater box and all A/C components from the firewall. I'll be deleting the A/C completely and just going with just a standard heater setup. I've got the heater-only dash controls ready to go.

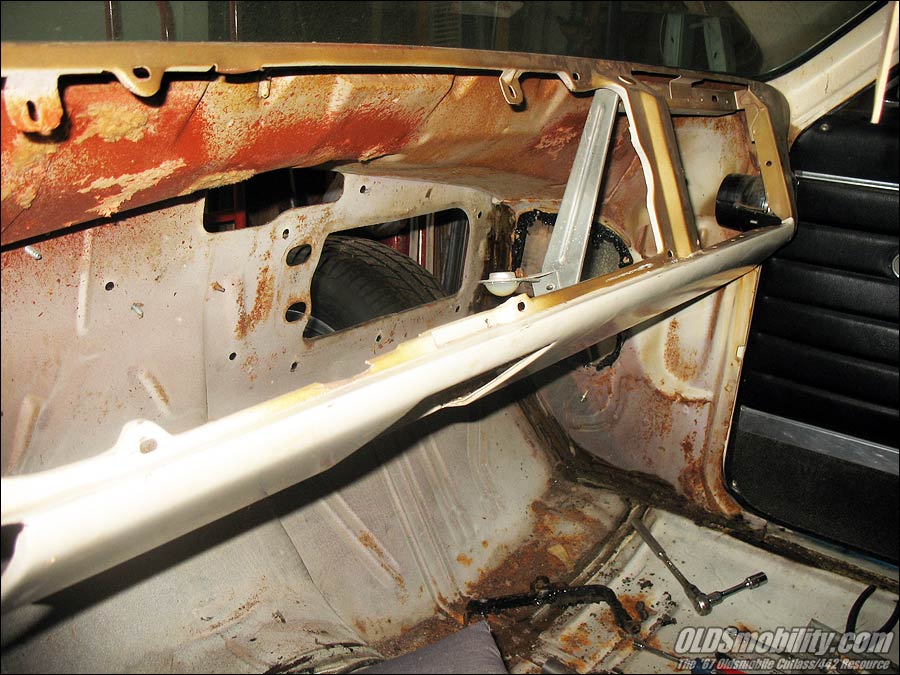
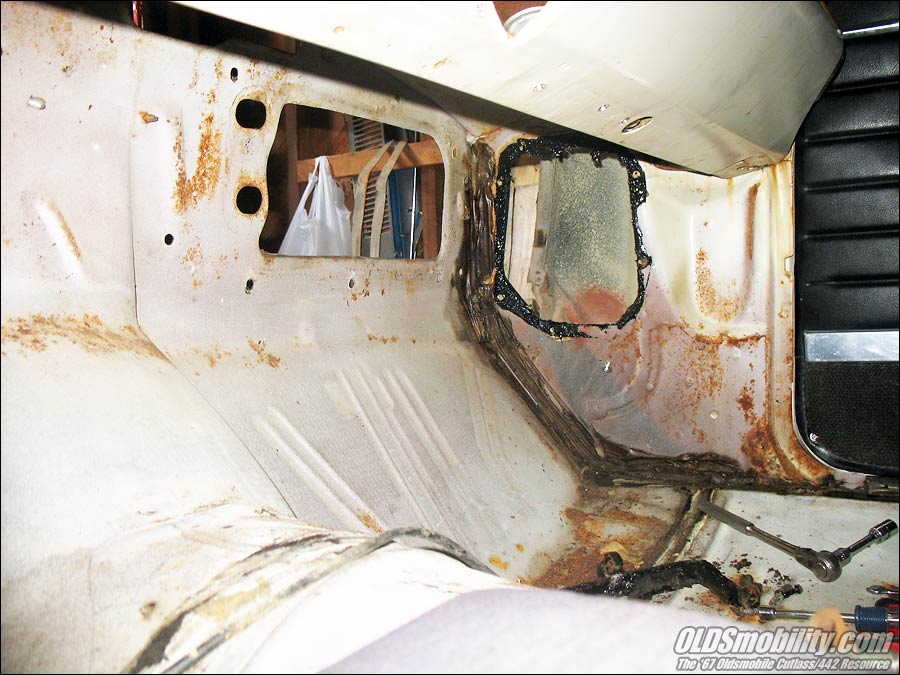
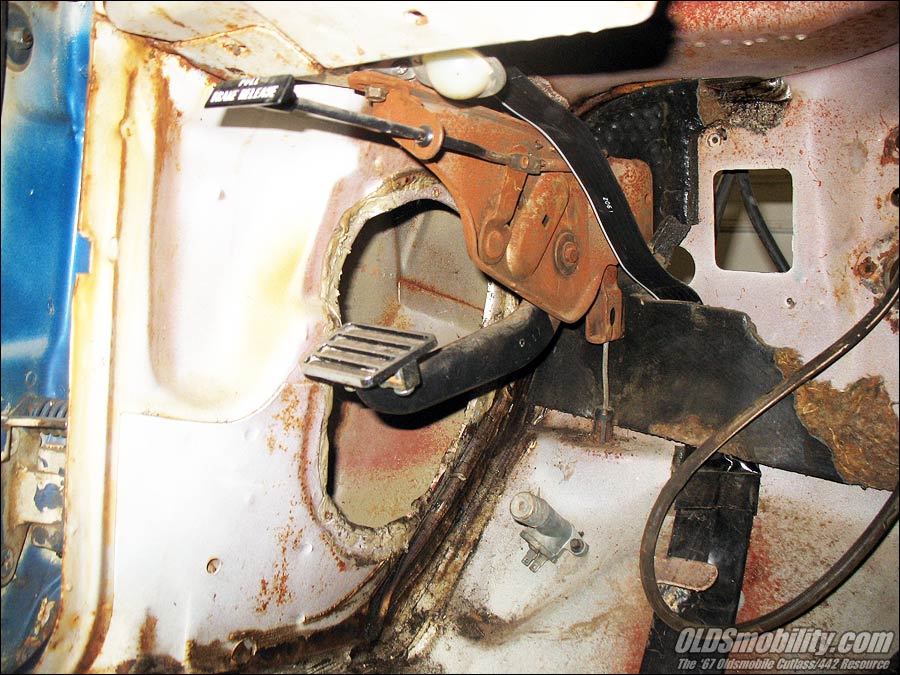
Here's a few shots of the A/C components after removal. Back years ago when I did my first quick 'refurbishing' I never removed the heater-A/C box to clean it, even though I knew it had been a home to field mice for roughly 13 years. Man, I'm glad I never had the need to fire up the heater...I'd have been in for a nasty mess blowing out the vents! :shock:

 September 11th, 2010, 09:44 PM
#14
Registered User
Thread Starter
Join Date: Jul 2008
Location: West Point, NE
Posts: 163
(Sept. 5, 2010)
Pretty much finished gutting the interior this evening. A few more minutes worth of work and I'll be ready to start getting this cleaned up and prepped to paint. Here are a few shots taken after hitting it with the ShopVac:
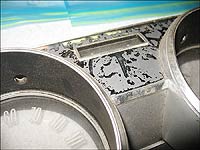
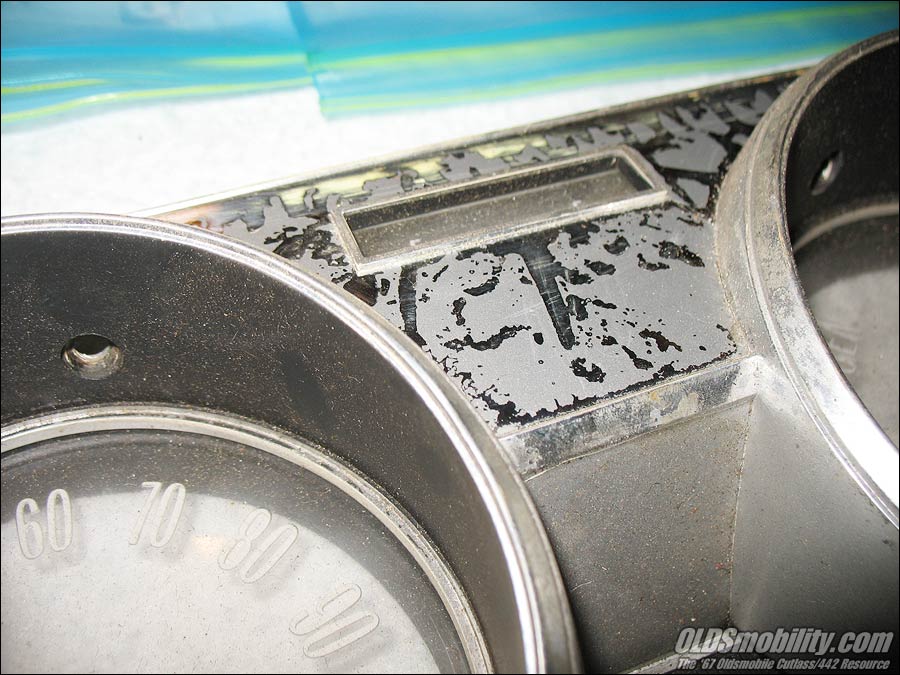
I was pretty disappointed to discover that my instrument panel is garbage. I knew it had a few small cracks in it, but when I pulled it out and removed the pad, the plastic portion of the dash started falling apart. So I guess I'll be looking for a new one, this one's too far gone to save.
Pretty much finished gutting the interior this evening. A few more minutes worth of work and I'll be ready to start getting this cleaned up and prepped to paint. Here are a few shots taken after hitting it with the ShopVac:


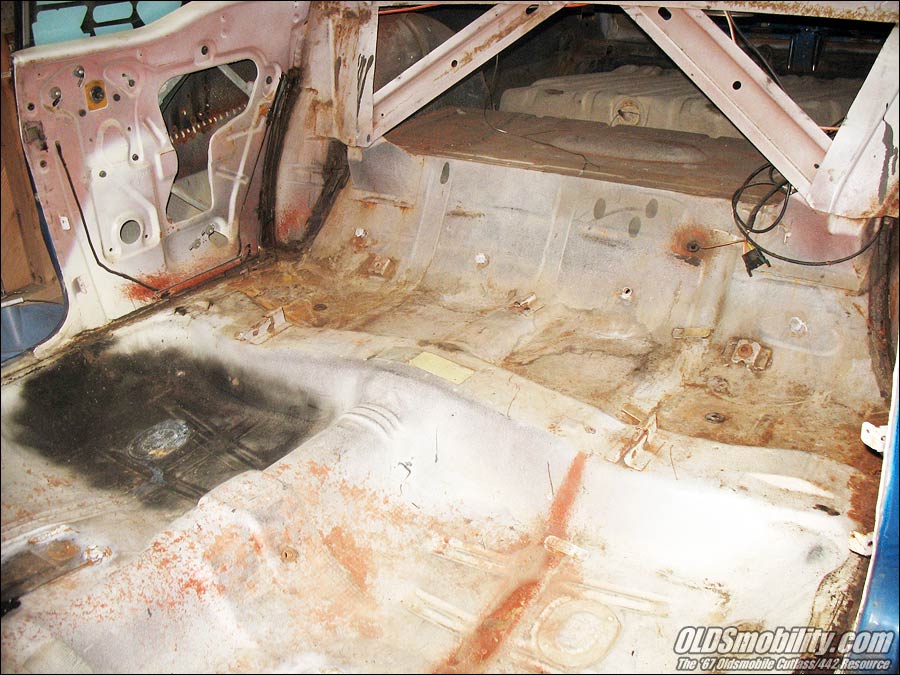
I was pretty disappointed to discover that my instrument panel is garbage. I knew it had a few small cracks in it, but when I pulled it out and removed the pad, the plastic portion of the dash started falling apart. So I guess I'll be looking for a new one, this one's too far gone to save.
September 12th, 2010, 07:50 AM
#16
Registered Luser
Join Date: Aug 2006
Location: LI,NY
Posts: 3,783
Jeez! Did you say you found that car in a field? Where's the rust? I just realized the last year and a half of my life wasted fixing NY rust, and everywhere else, you guys get stuff done in a weekend!
Great job so far! Great detailed thread!
Great job so far! Great detailed thread!
 I`m about 2 weeks out on mine.. have you hung any sheetmetal back on yet?
September 12th, 2010, 07:03 PM
I`m about 2 weeks out on mine.. have you hung any sheetmetal back on yet?
September 12th, 2010, 07:03 PM
#19
Registered User
Thread Starter
Join Date: Jul 2008
Location: West Point, NE
Posts: 163
I haven't made any further progress on the project over the past week or so. I'd just gotten started on lifting the body back up enough to insert the new bushings when my hydraulic jack failed, so I need to pick up another (or maybe try adding some more fluid and bleeding the cylinder). And I WAS planning on spending the afternoon getting the interior floorpans cleaned up, but last night we suddenly lost power in two rooms in our house plus the garage. I tried troubleshooting it without success, so I'm gonna have to call an electrician tomorrow to come fix the problem. (If it's not one thing, it's another!)
I've got my C-type heads at Rocket Racing right now getting the full makeover...street/strip port and polish, conversion to roller rockers, milling the exhaust side (instead of welding up the divider between the two center exhaust ports), competition valve job and the installation of larger valves, as well as all new seals, retainers, springs, etc.. They should be headed back to me sometime next week. Looking forward to getting back to work on the engine!
September 17th, 2010, 09:52 PM
#21
Registered User
Thread Starter
Join Date: Jul 2008
Location: West Point, NE
Posts: 163
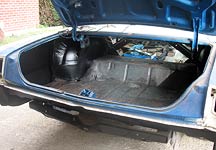
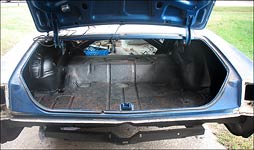
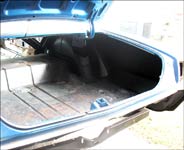
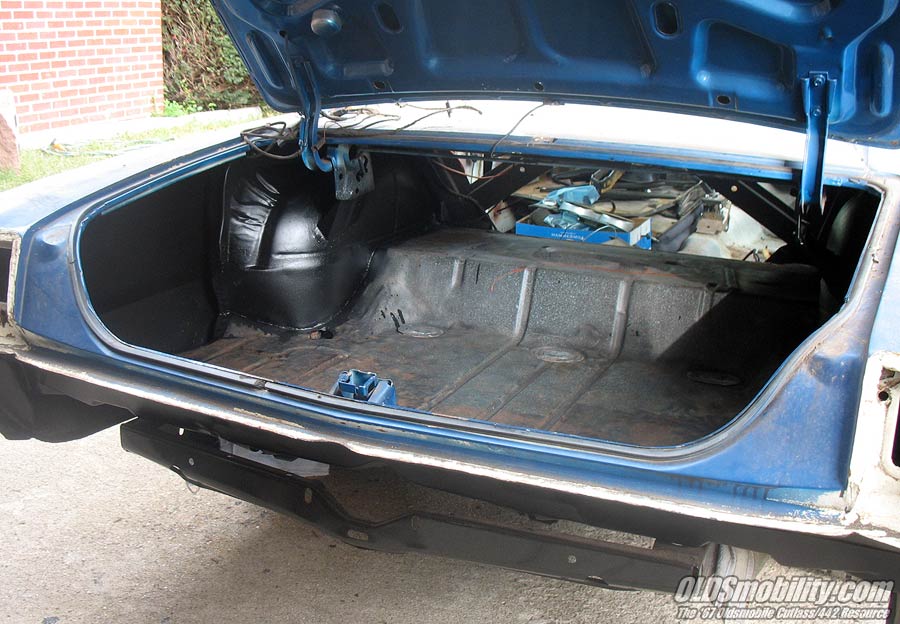
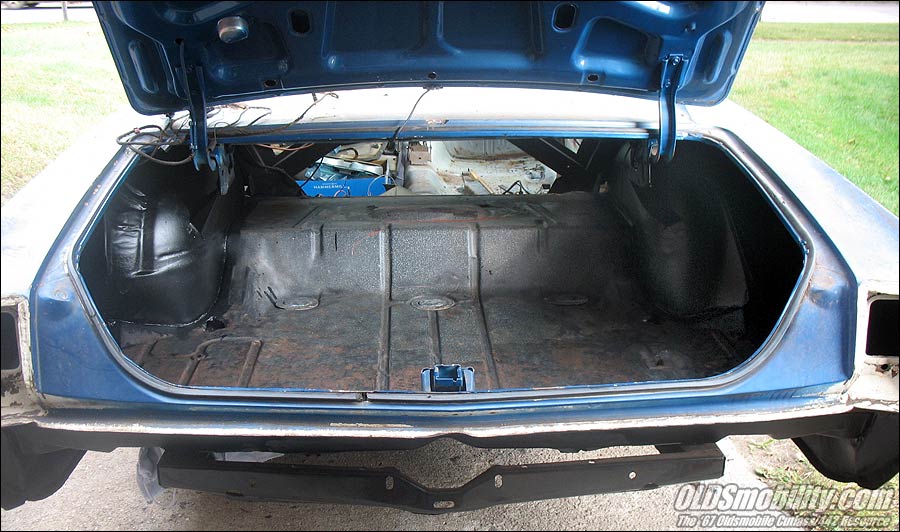
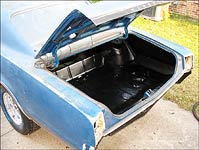
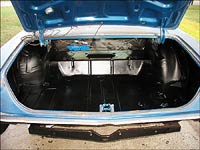
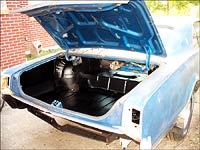
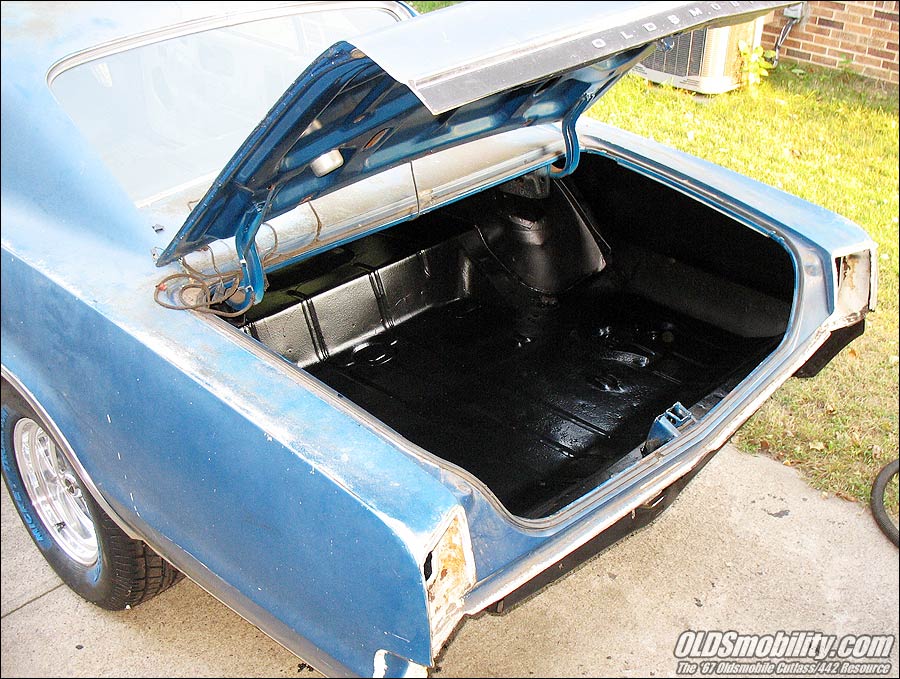
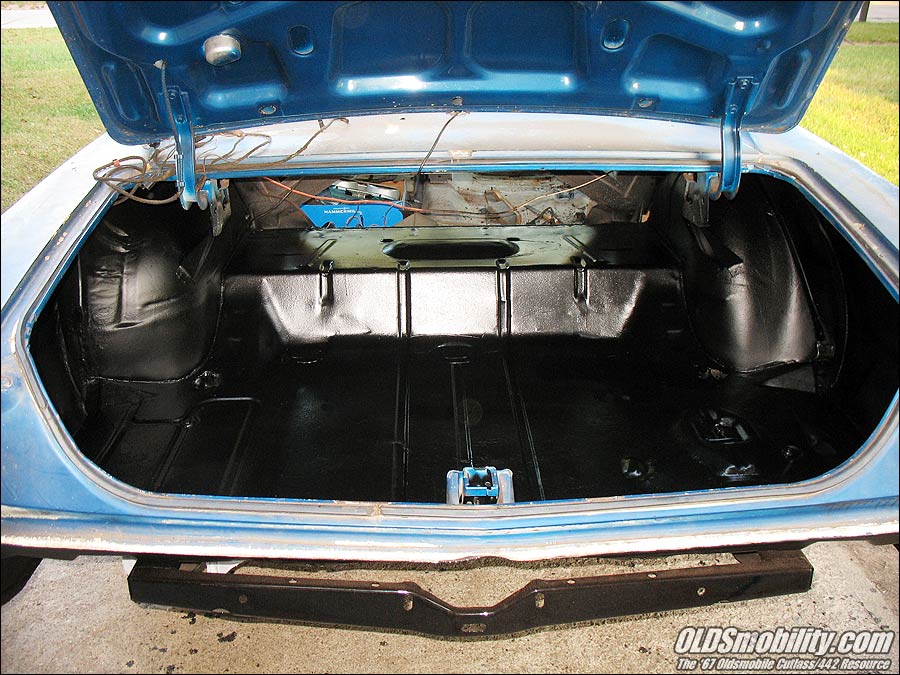
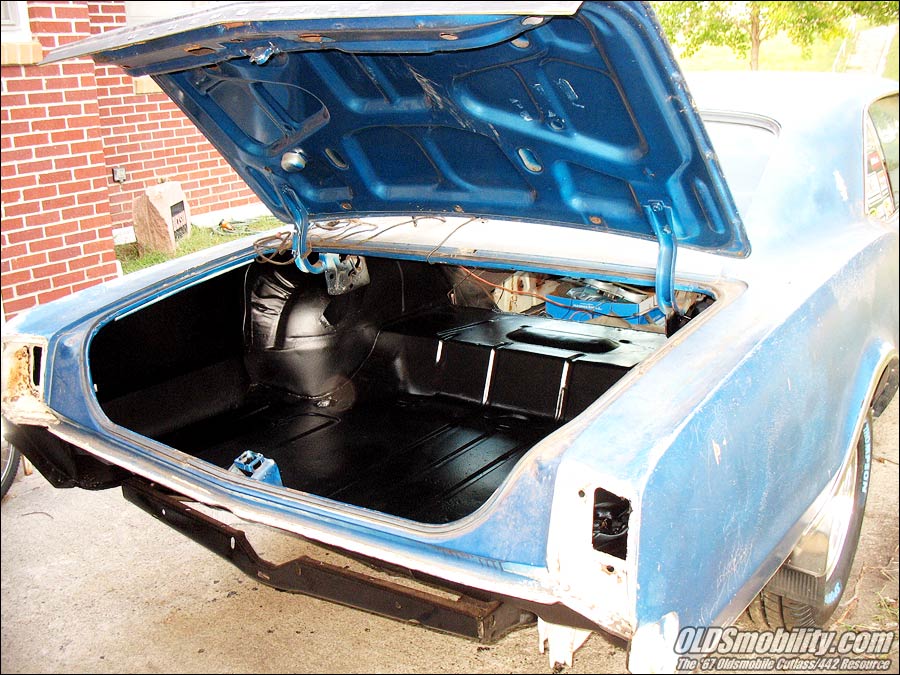
Spent the past few days (a few minutes here and there) getting the trunk cleaned up and ready to paint. Got started on the painting this afternoon. Got both sides (inside quarter-panels and wheelwells) done with two coats of POR-15 and two coats of rattlecan semi-flat. (Had to do just the sides so I'd have a place to lay down!) I'll be finishing the trunk floorpan up tomorrow (except for the correct splatter paint which I'll take care of sometime in the near future to get the OEM look), and then hopefully will be getting started getting the interior floorpans prepped for paint.
Received a non-A/C heater box today, now I just need to locate the correct kickpanel air vents and controls. And on Monday I should also be receiving a tilt column for this project.

Received a non-A/C heater box today, now I just need to locate the correct kickpanel air vents and controls. And on Monday I should also be receiving a tilt column for this project.
 September 20th, 2010, 05:42 PM
#23
Registered User
Thread Starter
Join Date: Jul 2008
Location: West Point, NE
Posts: 163
Finally got the rest of the trunk painted. Was planning on doing it over the weekend, but it was actually too cold outside to paint. Now I'll be attacking the interior floorpans and giving them the same treatment.
...and my new (to me) tilt steering column arrived today!
...and my new (to me) tilt steering column arrived today!
September 27th, 2010, 06:30 PM
#24
Registered User
Thread Starter
Join Date: Jul 2008
Location: West Point, NE
Posts: 163
Took the afternoon off work, fired up the angle grinder and wire wheel and went to town....and got the interior floorpans and firewall about 95% ready for paint. I'm just feeling very fortunate that I don't have the rust to contend with that I've had on other similar projects.
I got the firewall A/C delete covers ordered today, they should be in about the time these floorpans get painted, so I'll be attacking the outer firewall next.
I got the firewall A/C delete covers ordered today, they should be in about the time these floorpans get painted, so I'll be attacking the outer firewall next.
October 1st, 2010, 01:55 PM
#26
Registered User
Thread Starter
Join Date: Jul 2008
Location: West Point, NE
Posts: 163
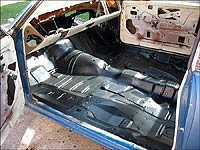
Took the day off from work today specifically to get the interior floorpans painted. Did my usual recipe of one coat of POR-15, followed by several coats of Krylon semi-flat black. It didn't turn out too bad.
Things should start progressing rather rapidly now, since I can now start reassembling the interior. Over the past 3 days I've been ordering a ton of parts, mostly new interior pieces. From Legendary I'm getting front and rear seat covers, front and rear door panels, headliner and rear armrest covers. From various other vendors I'm getting a firewall pad, ACC carpet and sound deadener, front armrest bases and pads, refurbished dash, reproduction dashpad, new console inlays, an Autometer in-dash tach and a B&M Megashifter (which I'm going to incorporate into the '67 GTO console). Oh, and a couple cans of trunk splatter paint. I also got a bunch of parts for the 455 ordered, including a new 7-qt. Moroso oil pan, new lifters, stainless header reducers, ARP main and head bolts, and a Milodon windage tray with studs.
All this stuff should start arriving next week, and once it's all here, I'm probably going to take a couple vacation days and have a marathon interior reassembly session....and then finally get the 455 out of storage for a teardown. It's only got 150 miles on it since it's last rebuild, but it's been sitting for a few years, so it's getting new rings and bearings. I just heard from Rocket Racing, my cylinder heads are almost done...apparently they're just waiting on the correct valve springs.
Last edited by OLDSmobility; October 1st, 2010 at 02:06 PM.
October 7th, 2010, 07:14 PM
#27
Registered User
Thread Starter
Join Date: Jul 2008
Location: West Point, NE
Posts: 163
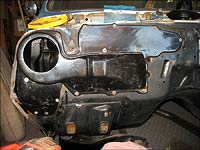
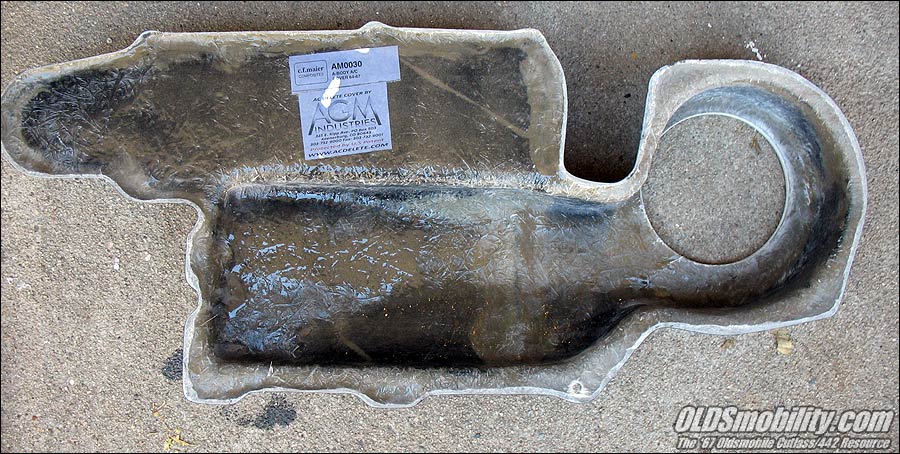
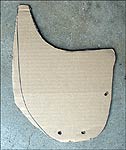
I got the AGM A/C delete plate in the mail a couple days ago, and spent the afternoon getting it mocked up.
There are two pieces to this...the large upper piece which holds the blower motor, and a smaller lower delete plate. The upper piece is pretty thick fiberglass and seems to fit pretty darned good. There are no mounting holes, but there are small indentions where you need to drill, which lined up pretty good with the factory holes.


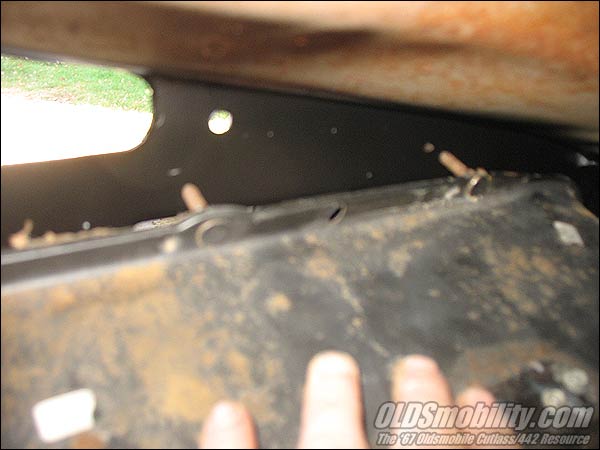
However, I believe this delete plate setup was just to replace the underhood A/C hardware, while still utilizing the A/C heater box for heat. In my case, I removed that and am installing a standard heat-only box. The box is mounted with 2 studs on top and 3 on the bottom. The bottom holes lined up perfectly, but the upper bolt holes had to be drilled in the firewall...and through the center of the delete plate. In this photo I'm holding the heater box up to the inner firewall and marking it where it needs to be drilled.
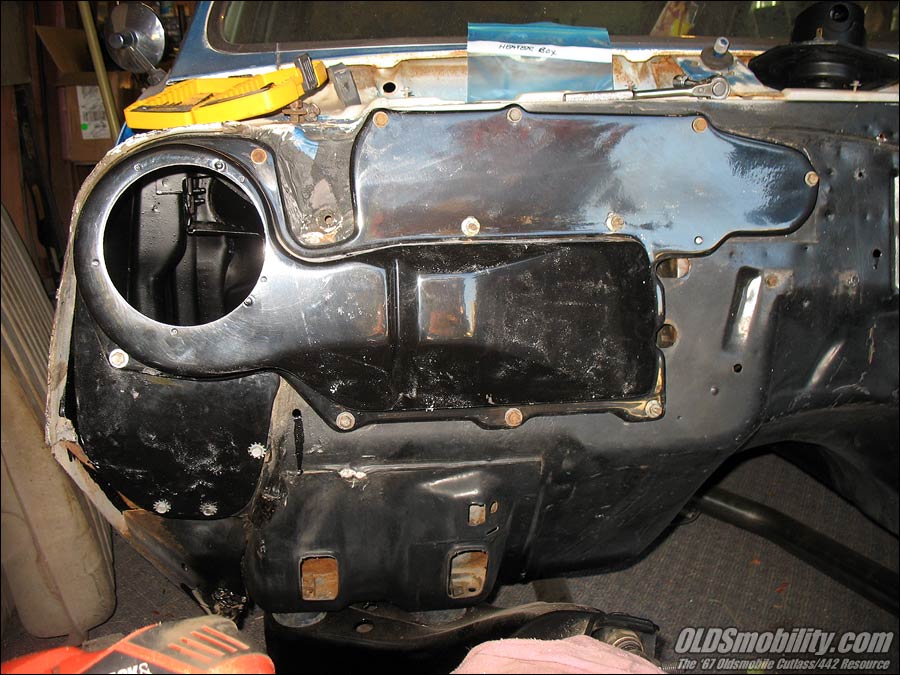
It's fully mounted in this photo, but not sealed up yet.
What I was a little disappointed with was the fitment of the lower delete panel. It wasn't as wide as it needed to be, leaving a fairly large gap along the right side.

I'm still debating on what to do about this. I was thinking at first that it wasn't a huge deal, since it's just open to the cowl area where the blower motor draws air from anyway. I thought I could just goop it up with the caulk...it's not like anyone will ever see it anyway, since it'll be hidden by the fender once it's mounted. However, although nobody would ever see it, just knowing that I haf-ast it will bug me. So the more I'm thinking about it, I think I'm going to go ahead and just cut my own out of some scrap sheetmetal.
Tomorrow I'll be dissassembling this again so I can get the firewall and heater box cleaned up and painted, as well as all the attaching hardware, and roughing up the delete plates' gelcoat finish. I still need to replace the foam on the heater box's flapper doors, and then I can do the final install and painting. The new firewall pad also came in a couple days ago, so I've got everything I need to do the inner and outer firewall.
The carpet and sound deadener came in today, as well as the new steering wheel..and I got a note on the door saying a delivery service tried to drop off a package but needed someone to sign for it. They'll be back tomorrow...I believe this is all the new interior pieces from Legendary.
There are two pieces to this...the large upper piece which holds the blower motor, and a smaller lower delete plate. The upper piece is pretty thick fiberglass and seems to fit pretty darned good. There are no mounting holes, but there are small indentions where you need to drill, which lined up pretty good with the factory holes.

However, I believe this delete plate setup was just to replace the underhood A/C hardware, while still utilizing the A/C heater box for heat. In my case, I removed that and am installing a standard heat-only box. The box is mounted with 2 studs on top and 3 on the bottom. The bottom holes lined up perfectly, but the upper bolt holes had to be drilled in the firewall...and through the center of the delete plate. In this photo I'm holding the heater box up to the inner firewall and marking it where it needs to be drilled.
It's fully mounted in this photo, but not sealed up yet.
What I was a little disappointed with was the fitment of the lower delete panel. It wasn't as wide as it needed to be, leaving a fairly large gap along the right side.
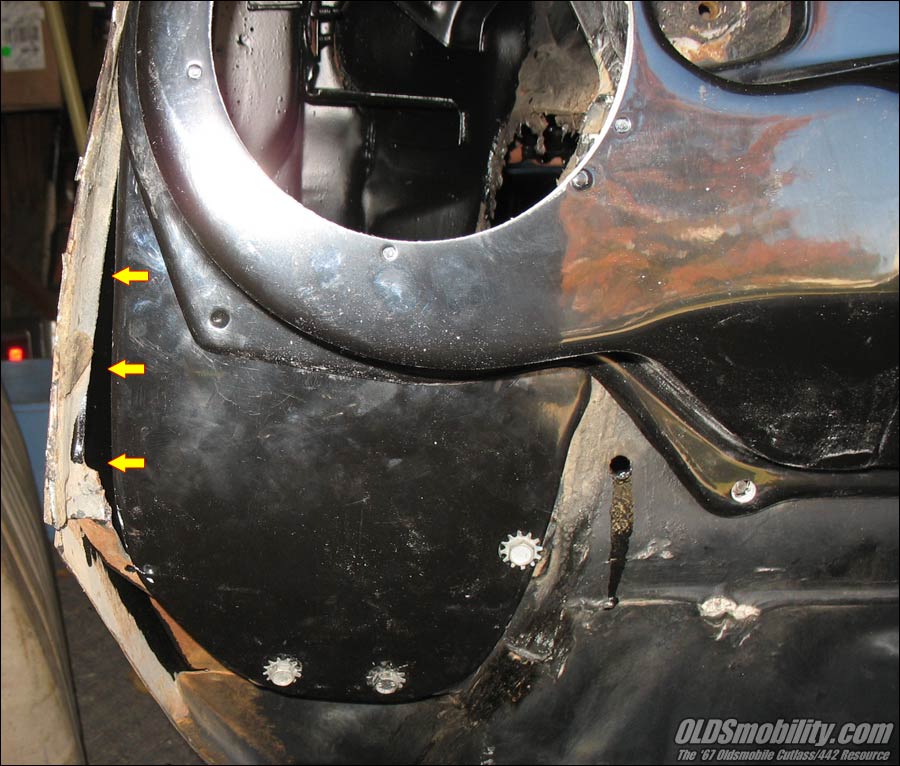
I'm still debating on what to do about this. I was thinking at first that it wasn't a huge deal, since it's just open to the cowl area where the blower motor draws air from anyway. I thought I could just goop it up with the caulk...it's not like anyone will ever see it anyway, since it'll be hidden by the fender once it's mounted. However, although nobody would ever see it, just knowing that I haf-ast it will bug me.
So the more I'm thinking about it, I think I'm going to go ahead and just cut my own out of some scrap sheetmetal. Tomorrow I'll be dissassembling this again so I can get the firewall and heater box cleaned up and painted, as well as all the attaching hardware, and roughing up the delete plates' gelcoat finish. I still need to replace the foam on the heater box's flapper doors, and then I can do the final install and painting. The new firewall pad also came in a couple days ago, so I've got everything I need to do the inner and outer firewall.
The carpet and sound deadener came in today, as well as the new steering wheel..and I got a note on the door saying a delivery service tried to drop off a package but needed someone to sign for it. They'll be back tomorrow...I believe this is all the new interior pieces from Legendary.
October 8th, 2010, 04:57 PM
#28
Registered User
Thread Starter
Join Date: Jul 2008
Location: West Point, NE
Posts: 163
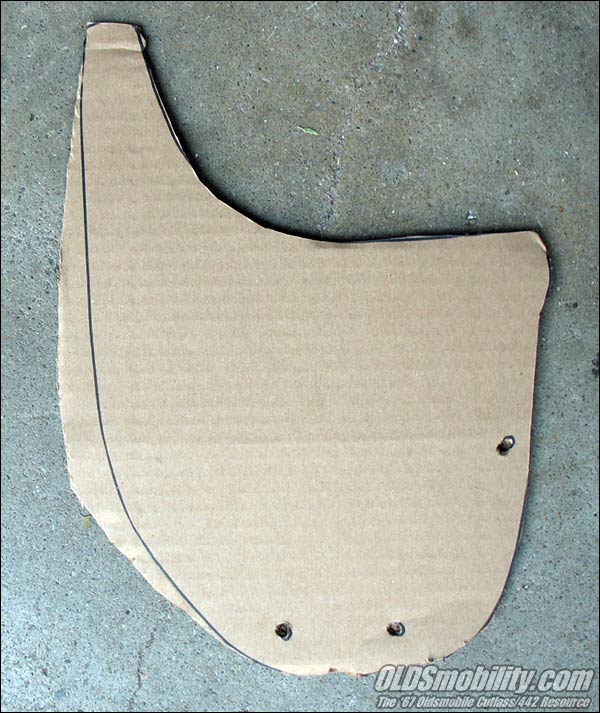
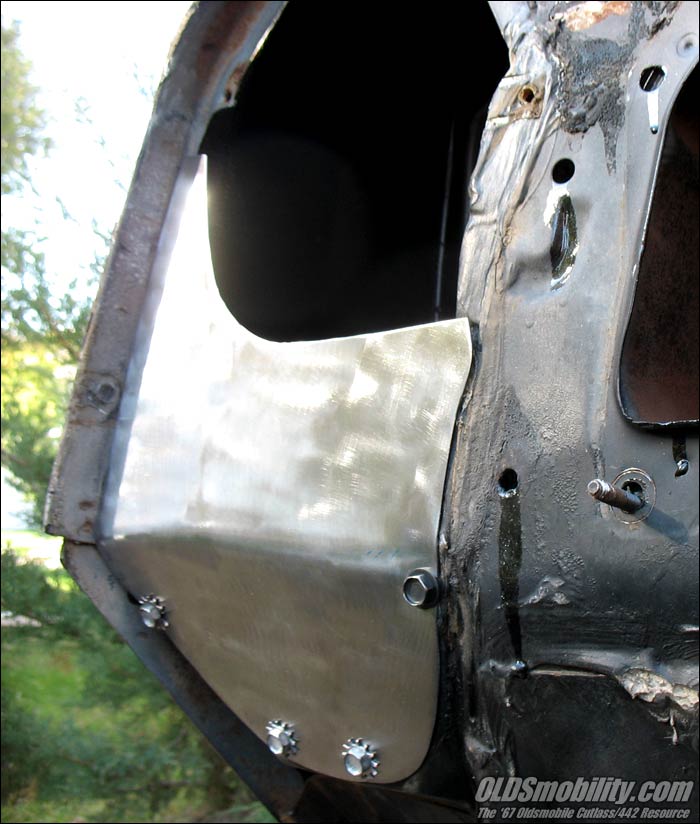
Went ahead and fabbed up a new lower A/C delete plate today. Traced the AGM piece on a piece of cardboard, leaving a little extra along the side, and then trimmed it to fit. Once I thought it looked good, I transferred the template to the sheetmetal and cut it out. The first photo shows the difference between the AGM piece and what I actually needed to fill the gap along the side. The second photo shows it mocked up in place.
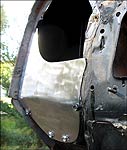
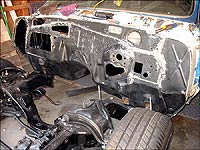
I then got the firewall cleaned up and painted.

Then I got to work on the heater box, getting it cleaned up down to bare metal (as much as possible) and then painted. I forgot to get an after pic, but here's the pre-paint shot:
I went to go install the new firewall pad, and discovered that it was going to fit down tight enough against the floorpan that I'd be better off getting the carpet installed first. I vacuumed off the floorpans so I could get started on the sound deadener, but then decided I was running out of daylight and there wasn't enough time to get it and the carpet in before it got dark. The carpet really needs to sit out in the sunlight for a while to warm up, and there just wasn't time...so that's on the agenda for my next full day in the garage. (Maybe Sunday?)
I then got the firewall cleaned up and painted.


Then I got to work on the heater box, getting it cleaned up down to bare metal (as much as possible) and then painted. I forgot to get an after pic, but here's the pre-paint shot:

I went to go install the new firewall pad, and discovered that it was going to fit down tight enough against the floorpan that I'd be better off getting the carpet installed first. I vacuumed off the floorpans so I could get started on the sound deadener, but then decided I was running out of daylight and there wasn't enough time to get it and the carpet in before it got dark. The carpet really needs to sit out in the sunlight for a while to warm up, and there just wasn't time...so that's on the agenda for my next full day in the garage. (Maybe Sunday?)
October 8th, 2010, 05:40 PM
#30
Registered User
Thread Starter
Join Date: Jul 2008
Location: West Point, NE
Posts: 163
You're doing a great job on yours, I'm enjoying reading your progress reports too.
October 10th, 2010, 09:09 PM
#31
Registered User
Thread Starter
Join Date: Jul 2008
Location: West Point, NE
Posts: 163
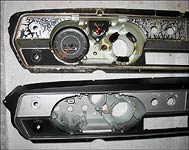
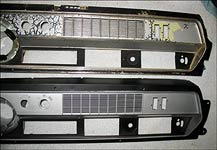
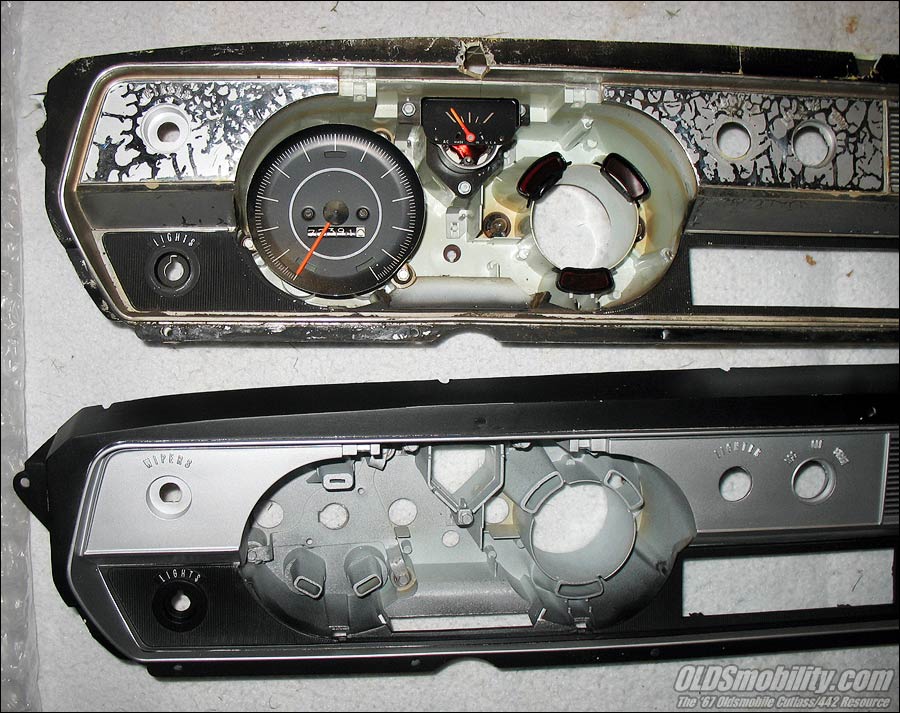
I got the reburbished dash housing a couple days ago, but finally got a chance to get it unpacked for inspection. I got this from an E-bay auction and have to say the seller did a pretty good job overall with cleaning it up and repainting. Obviously the chrome edges aren't there, but I'm not doing a concours restoration, so I'm just fine with that. Here's a couple shots of it next to my beat-up original (which you'll notice is missing ALL the mounting tabs!):
I set up a long folding table covered with a blanket, so I can start transferring all the gauges and accessories from my old dash over to the new. Also, I sent the seller an e-mail asking him the specific brand of argent he used to paint the housing, since I have to restore my existing pod cover, so I need to make sure it matches the housing.
I'm also going to detail this housing just a little more, probably by at least painting the edges (which are chrome on the original) with black, for a little more contrast. I'm also seriously toying around with the idea of getting my hands on a roll of vinyl woodgrain, and cutting the pieces necessary to add some inlays across the top, which will match the new woodgrain inserts in the console.
Also, I'll be following the lead of tampascl (in this thread at ROP), by installing an Autometer tach in the dash where the clock used to be. I've got that on the table too, and will detail it's installation as it gets done. My new dashpad was ordered several weeks ago, but it's on backorder...hopefully it'll be here by the time the dash housing is completed.
This will give me something to do in the evenings after the kids go to bed, when I can't make noise out in the garage.
October 18th, 2010, 04:59 PM
#32
Registered User
Thread Starter
Join Date: Jul 2008
Location: West Point, NE
Posts: 163
Well, I'd been planning on getting the carpeting installed last weekend, but the temps were just a bit on the cool side, so it didn't get done. However, since it's already mid-October, I doubt we're gonna have any more 75-degree days (or better), so I decided to just get it done. I took the afternoon off today and got started on the ACC sound deadener installed onto the floorpans:
I'm taking a couple vacation days this coming Thursday and Friday specifically to get the carpeting and firewall pad installed. With a little luck I'll also get the heater box and A/C delete plates installed.
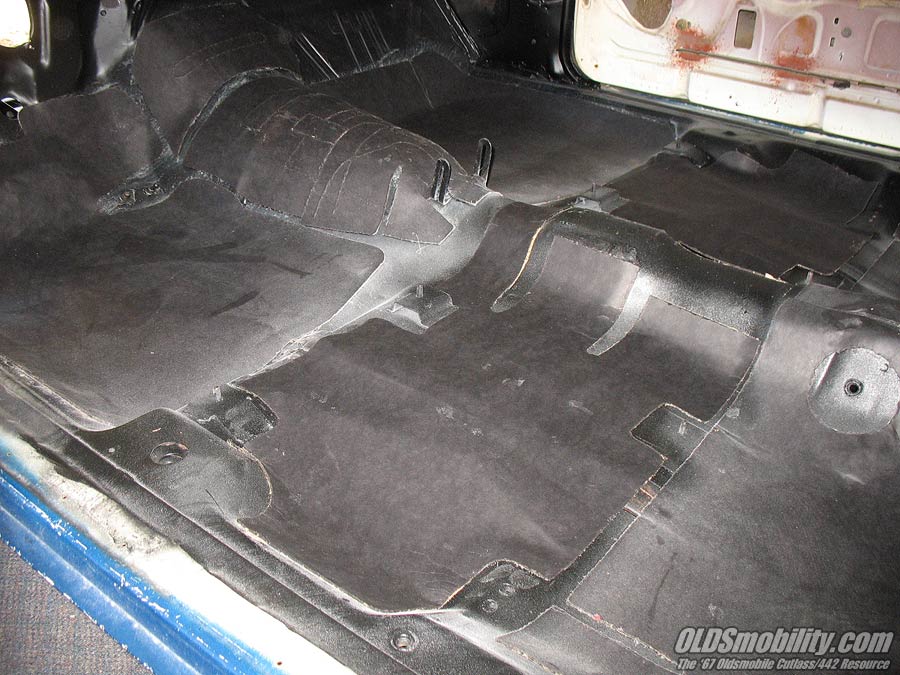
I'm taking a couple vacation days this coming Thursday and Friday specifically to get the carpeting and firewall pad installed. With a little luck I'll also get the heater box and A/C delete plates installed.
October 21st, 2010, 06:15 PM
#34
Registered User
Thread Starter
Join Date: Jul 2008
Location: West Point, NE
Posts: 163
Day one of my four-day weekend:
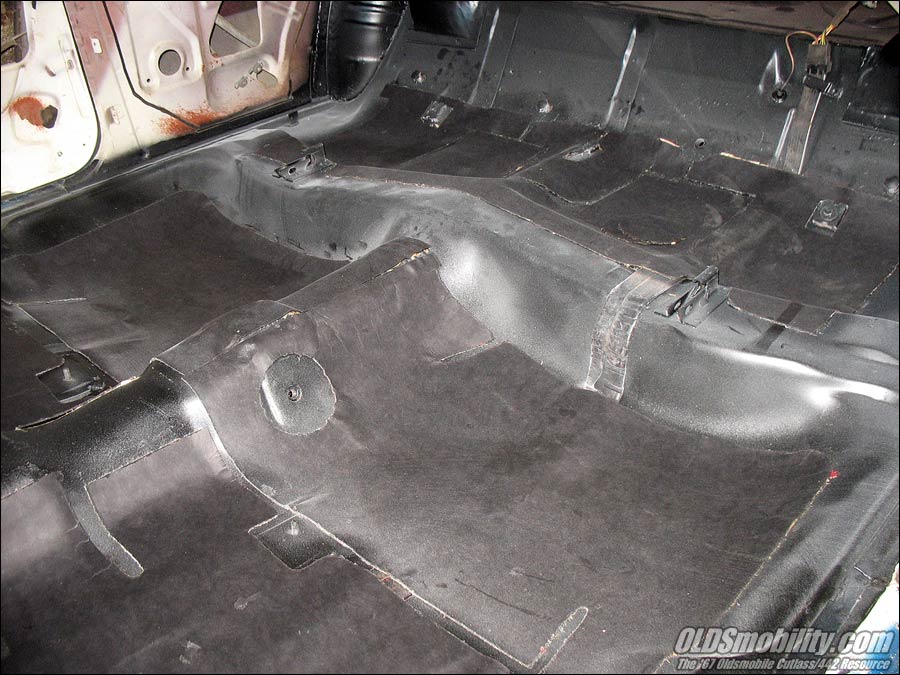
I made a last-minute decision to add a little additional sound deadener to the floorpans before installing the carpeting. I've got a large stack of what appears to be a rubberized cork material, in sheets of roughly 18" x 36" x 1/8" thick. I've collected these over the past few years from shipments that have come in to work by truck, and it's used as an anti-skid sheet. Anyway, these sheets are extremely flexible and I felt they would not only conform to the floorpan well and give a little extra heat protection, but would also enhance the sound deadening a bit. I felt they would also lessen the sharp edges under the carpet of the thick ACC sound deadener sheets already installed. They're not extremely heavy...I used 5 sheets of this to cover the entire floorpan and I'd estimate the combined weight at about 8-10 pounds.
I tried taking some pictures of the installation of these sheets, but I was working in direct sunlight in the driveway and most of the pics didn't turn out very well. But here's one to give you an idea of what the installation looked like. In this shot I hadn't gotten to the driveshaft tunnel yet, but I did get to it later:

By early afternoon the entire floorpan covered with this and glued down and was ready to start installing the carpeting. The November 2008 issue of Musclecar Review had a very good article about installing carpeting in a '66 442 as done by Jeff Lilly Restorations (click here to view scans of the article) and I used some of their tips during my installation. I purchased a heat gun about a week ago and stocked up on 3M spray adhesive.
I got the carpeting from ACC based upon the many favorable recommendations on this and other forums. The back piece fit like a glove, though I did have to trim some of the jute padding in several places to help smooth things out. At first I was worried about the front piece though...when I laid it in and halfway smoothed it out, it sure seemed like there was too much material in the transmission tunnel area. Since I plan to install a full-length console, I almost cut the front piece in half and put each side in individually, since the console would hide the cut. However, I'm glad I didn't, as I found that I just needed to work it a little more to get it to lay down flat. Using the heat gun and a lot of patience, I was able to get it 99% flattened out. Here's a shot taken at the end of the day. The back piece is done, and the front is about 95% done.
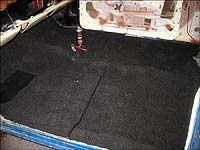
I still need to do a final stretching of the edges and glue them down. I also need to deal with the trailing edge, and I'm thinking of using some heavy-duty double-sided carpet tape there, instead of gluing the trailing edge to the front of the rear piece.
Tomorrow I'll be finishing up the carpet installation, and then getting the firewall pad and heater box installed, as well as the A/C delete plates on the outer firewall.
I made a last-minute decision to add a little additional sound deadener to the floorpans before installing the carpeting. I've got a large stack of what appears to be a rubberized cork material, in sheets of roughly 18" x 36" x 1/8" thick. I've collected these over the past few years from shipments that have come in to work by truck, and it's used as an anti-skid sheet. Anyway, these sheets are extremely flexible and I felt they would not only conform to the floorpan well and give a little extra heat protection, but would also enhance the sound deadening a bit. I felt they would also lessen the sharp edges under the carpet of the thick ACC sound deadener sheets already installed. They're not extremely heavy...I used 5 sheets of this to cover the entire floorpan and I'd estimate the combined weight at about 8-10 pounds.
I tried taking some pictures of the installation of these sheets, but I was working in direct sunlight in the driveway and most of the pics didn't turn out very well. But here's one to give you an idea of what the installation looked like. In this shot I hadn't gotten to the driveshaft tunnel yet, but I did get to it later:
By early afternoon the entire floorpan covered with this and glued down and was ready to start installing the carpeting. The November 2008 issue of Musclecar Review had a very good article about installing carpeting in a '66 442 as done by Jeff Lilly Restorations (click here to view scans of the article) and I used some of their tips during my installation. I purchased a heat gun about a week ago and stocked up on 3M spray adhesive.
I got the carpeting from ACC based upon the many favorable recommendations on this and other forums. The back piece fit like a glove, though I did have to trim some of the jute padding in several places to help smooth things out. At first I was worried about the front piece though...when I laid it in and halfway smoothed it out, it sure seemed like there was too much material in the transmission tunnel area. Since I plan to install a full-length console, I almost cut the front piece in half and put each side in individually, since the console would hide the cut. However, I'm glad I didn't, as I found that I just needed to work it a little more to get it to lay down flat. Using the heat gun and a lot of patience, I was able to get it 99% flattened out. Here's a shot taken at the end of the day. The back piece is done, and the front is about 95% done.

I still need to do a final stretching of the edges and glue them down. I also need to deal with the trailing edge, and I'm thinking of using some heavy-duty double-sided carpet tape there, instead of gluing the trailing edge to the front of the rear piece.
Tomorrow I'll be finishing up the carpet installation, and then getting the firewall pad and heater box installed, as well as the A/C delete plates on the outer firewall.
October 22nd, 2010, 10:10 PM
#35
Registered User
Thread Starter
Join Date: Jul 2008
Location: West Point, NE
Posts: 163
Today was one of those rare days when not much goes right, and I ended up actually calling it quits pretty early, just to prevent some unnecessary BFH dents in the car. 
Spent the morning making phone calls to several vendors to find out the status of backordered parts. The interior pieces from Legendary that I ordered a month ago will be shipped "early next week", but the dashpad (also ordered a month ago) from OPGI won't be shipped until "late January"!
 The console appliques from them will hopefully ship next week. The cowl panels and fresh air vents that I paid for several weeks ago still aren't here. After sending the seller another sternly-worded PM today I received a reply back that the parts are finally on the way. And upon checking the list of ordered parts, it dawned on me that I still hadn't received the new armrest pads I ordered from an E-bay seller more than 3 weeks ago, so I had to fire off an e-mail to him. And I'm still waiting on the argent paint and repro A/C register delete plate to finish the restoration on the dash housing.
Then I got started installing the firewall pad, only to discover that it's just not going to fit. It was too tall and too narrow. I got it to fit top-to-bottom with a bunch of trimming, but when I installed the right side, it turned out to be more than an inch too narrow on the left, and there's no way it'll stretch over that far. I'll probably go ahead and use it, but I'll have to widen out all the mounting holes and just get it centered on the firewall...and hope the gaps along the sides aren't not that noticeable. Or I might just see if I can fabricate my own firewall pad, since it's basically nothing more than some thick cardboard with jute backing. I'll just have to come up with a suitable material to use that's both flexible and durable.
I was really hoping to have the interior done quickly, but it's not looking like that's going to happen. Maybe this weekend I'll go ahead and get the engine out of storage and get started on that, since I've got most of what I'll need to get it done.
Spent the morning making phone calls to several vendors to find out the status of backordered parts. The interior pieces from Legendary that I ordered a month ago will be shipped "early next week", but the dashpad (also ordered a month ago) from OPGI won't be shipped until "late January"!
Then I got started installing the firewall pad, only to discover that it's just not going to fit.
I was really hoping to have the interior done quickly, but it's not looking like that's going to happen.
Maybe this weekend I'll go ahead and get the engine out of storage and get started on that, since I've got most of what I'll need to get it done.
Last edited by OLDSmobility; October 23rd, 2010 at 07:30 AM.
October 23rd, 2010, 12:01 PM
#36
Texas Jim
Join Date: Aug 2009
Location: Killeen, Texas
Posts: 437
What amazes me is that you kept interest in this project. After all the years of storage, etc., and you never lost interest in it. That's great! Good Luck on the project. You set one heck of an example f/ anyone who wants to restore a vehicle.
November 10th, 2010, 03:57 PM
#37
Registered User
Thread Starter
Join Date: Jul 2008
Location: West Point, NE
Posts: 163
Just a quick update...
I haven't done any work on the car for the past couple weeks because it's been getting pretty chilly, and I'm working in an unheated/uninsulated garage. However, I haven't gotten as far into this project as I was hoping before cold weather hit, so after a little research and talking with some friends, I made a trip today to the local farm supply store and picked up a small forced-air propane heater. It's a 35,000 BTU unit that'll run off the same tank that the grill uses, and should work just fine to heat up the garage enough to allow me to get in some work this winter.

I was kinda worried about carbon monoxide fumes, but I've been assured that it'll be OK...but I'm still going to install a CO2 detector, for my own peace of mind.
I've received all the rest of the interior pieces I need, except for the headliner (which I haven't even ordered yet) and the dashpad. When I last talked with OPGI, I was told the dashpad wouldn't ship until January, but I just received an e-mail alert that it was shipped yesterday...so I guess I need to go ahead and get the headliner ordered.
Since I can't work in the driveway anymore this season, I'm now going into 'winter mode', and will have to do a little rearranging in my one-car garage to give me some additional room to work. That's going to involve completely removing one workbench and another small shelving unit and temporarily putting them into a commercial storage unit. Then I'll have room to get the engine out of the storage unit and into the garage. So now that I have heat, I can spend the winter getting the rest of the interior installed and engine reassembled.
I haven't done any work on the car for the past couple weeks because it's been getting pretty chilly, and I'm working in an unheated/uninsulated garage. However, I haven't gotten as far into this project as I was hoping before cold weather hit, so after a little research and talking with some friends, I made a trip today to the local farm supply store and picked up a small forced-air propane heater. It's a 35,000 BTU unit that'll run off the same tank that the grill uses, and should work just fine to heat up the garage enough to allow me to get in some work this winter.
I was kinda worried about carbon monoxide fumes, but I've been assured that it'll be OK...but I'm still going to install a CO2 detector, for my own peace of mind.
I've received all the rest of the interior pieces I need, except for the headliner (which I haven't even ordered yet) and the dashpad. When I last talked with OPGI, I was told the dashpad wouldn't ship until January, but I just received an e-mail alert that it was shipped yesterday...so I guess I need to go ahead and get the headliner ordered.
Since I can't work in the driveway anymore this season, I'm now going into 'winter mode', and will have to do a little rearranging in my one-car garage to give me some additional room to work. That's going to involve completely removing one workbench and another small shelving unit and temporarily putting them into a commercial storage unit. Then I'll have room to get the engine out of the storage unit and into the garage. So now that I have heat, I can spend the winter getting the rest of the interior installed and engine reassembled.
November 10th, 2010, 04:48 PM
#38
Registered User
Join Date: Nov 2007
Location: Rathdrum, Idano
Posts: 9,127
Crack the garage door at least and inch or two you need to vent a propane heater or it will kill you.
Propane Heaters and Safety
by emilyr
When using propane heaters, there are some specific safety precautions to take. First, if you use propane to heat your home, whether it is through a main system or portable space heaters, be sure to have carbon monoxide detectors installed on each floor. The National Fire Protection Association (NFPA) recommends that all homes have carbon monoxide detectors installed, regardless of their heat source.
Although propane heaters have minimal levels of carbon monoxide, especially in comparison to several other fuels, having an early warning system is always prudent with even the smallest amounts. Remember, there does not have to be smoke or a fire for carbon monoxide to be present. You cannot see it, so you need detectors to ensure your safety. It is also recommended to have a good ventilation system in your home.
When it comes to propane heaters, never use unvented heaters indoors. These types of heaters vent their exhaust into the room. This can lead to increased carbon monoxide levels in your home. Unvented heaters are meant for outdoor use for porches, patios, camping etc. They should not be used for enclosed spaces. Indoor propane heaters must be installed so that they are able to vent exhaust outside of your house, and need to be cleaned regularly to make sure fumes are not trapped inside.
Also make sure that all hoses, nozzles and regulators are from the same manufacturer as the heater itself. Compatibility issues with other manufacturers could lead to leaks or damage to the heater and your home.
If you do happen to smell a leak, you should turn off the heater immediately. Make sure there are no open flames near the tank. Some propane heaters have a sensor to alert you if the pilot light goes out as an added convenience and safety measure. Each time you replace the cylinder you can check for leaks by cleaning the heater using warm water with soap. Do not use any corrosive or combustible liquids when cleaning the heater.
Portable propane heaters are commonly used for patio and outdoor heating, grilling, and even for heating pools. You can schedule deliveries from a supplier as needed, but there are also hardware stores, wholesale stores and other businesses that sell or refill propane tanks. It's usually a good idea to have a back-up tank for these devices though, especially if you do a lot of grilling in the summer months.
Propane is considered a safe and efficient energy source, especially for homes that don't have access to natural gas, and was even recognized by the Clean Air Act and the Energy Policy Act of 2005 as an approved alternative fuel. These safety precautions are simply meant to prevent misuse and neglect of propane heating systems.
April 5th, 2011, 08:56 PM
#39
Registered User
Thread Starter
Join Date: Jul 2008
Location: West Point, NE
Posts: 163
Well, it's been a few months since I've gotten any work done to the car, but now that the weather's warming up, I'm getting back to work. I got the short-block torn down, and dropped it and the crankshaft off at the machine shop. The block will get hot-tanked and then get new cam bearings installed, and the crank will get polished.
After work tonight I decided to get started getting the in-dash tach installed, and I took some pics to show how I got it done (click the thumbnails below to enlarge). This was just the mock-up, so ignore the dust and paint imperfections. The dash assembly will be cleaned and detailed prior to installation.
I'll be installing an Autometer 2698 tach in the spot previously used by the clock. Whenever a clock is a factory delete, they used a plastic cup to fill the void. The tach (or any other 2-1/16" gauge) can be installed in this cup.
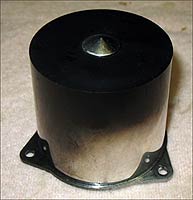

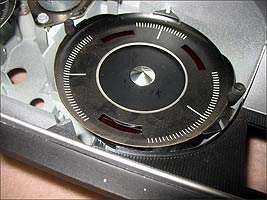
These pics show the cup and how it looks when installed. It fits up against the back side of the black filler plate.
The tach is just the right size to mount in the cup, but the rib on the tach's plastic retainer is just a tiny bit too fat to fit all the way inside and flush to the face of the cup, so I had to file a little off the rib on each side.
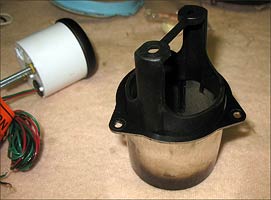
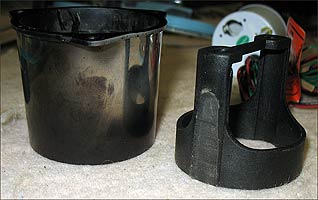
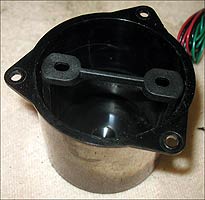
Now I just needed to cut a hole in the face of the cup to insert the tach. I did this with my Dremel.
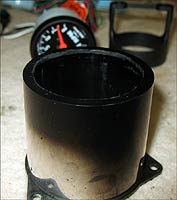

Then I simply had to install the gauge retainer and slide the tach/cup assembly into the back of the instrument panel and secure with three screws.
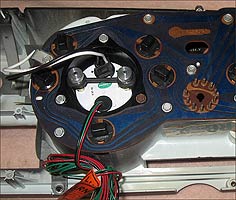
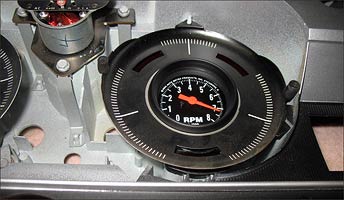
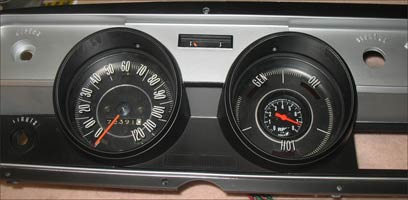
The outside diameter of the tach bezel is exactly the same size of the inside diameter of the hole in the filler plate, so it just protrudes through the plate and looks/fits great. This means that you don't have to remove the dash or instrument panel to install...you simply need to remove the three screws holding the clock (or delete cup) and remove from under the dash, install the tach into the cup, and then slide it back into the back of the instrument panel and secure.
After work tonight I decided to get started getting the in-dash tach installed, and I took some pics to show how I got it done (click the thumbnails below to enlarge). This was just the mock-up, so ignore the dust and paint imperfections. The dash assembly will be cleaned and detailed prior to installation.
I'll be installing an Autometer 2698 tach in the spot previously used by the clock. Whenever a clock is a factory delete, they used a plastic cup to fill the void. The tach (or any other 2-1/16" gauge) can be installed in this cup.
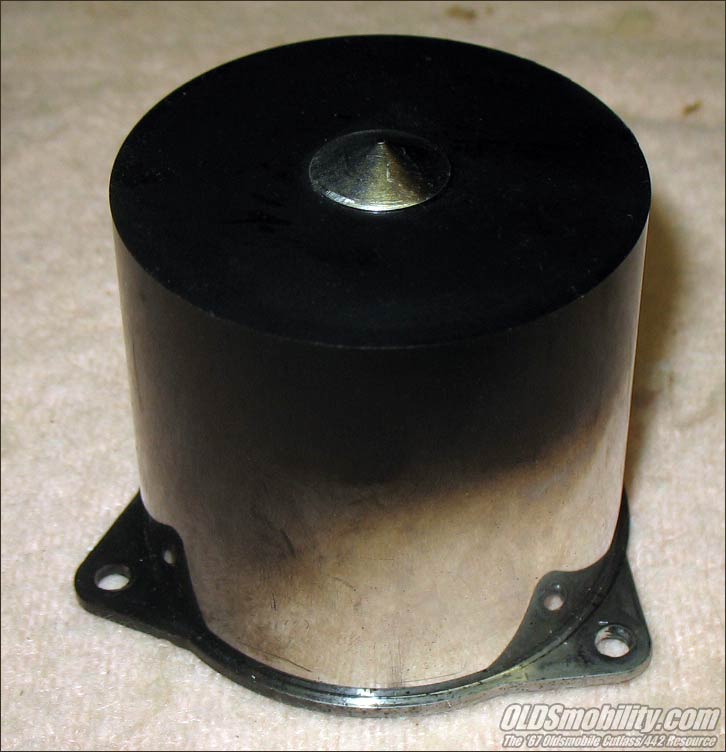


These pics show the cup and how it looks when installed. It fits up against the back side of the black filler plate.
The tach is just the right size to mount in the cup, but the rib on the tach's plastic retainer is just a tiny bit too fat to fit all the way inside and flush to the face of the cup, so I had to file a little off the rib on each side.


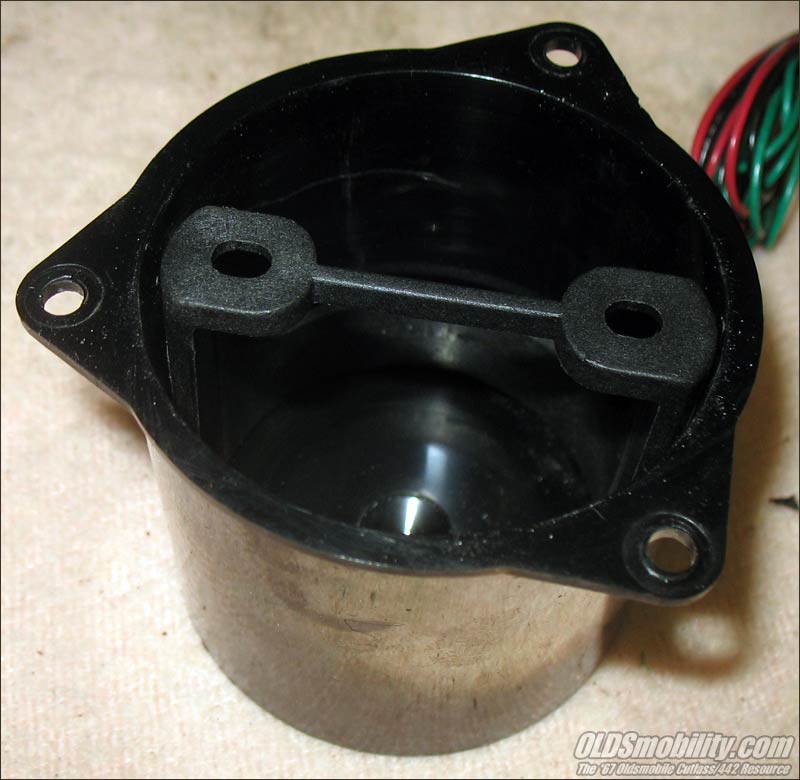
Now I just needed to cut a hole in the face of the cup to insert the tach. I did this with my Dremel.


Then I simply had to install the gauge retainer and slide the tach/cup assembly into the back of the instrument panel and secure with three screws.
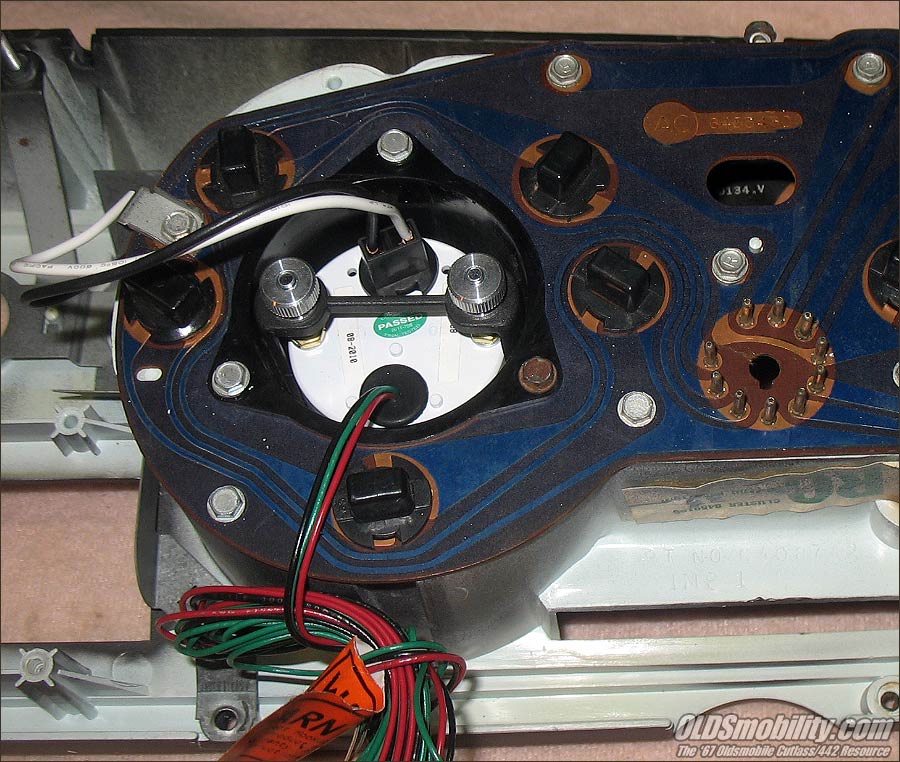
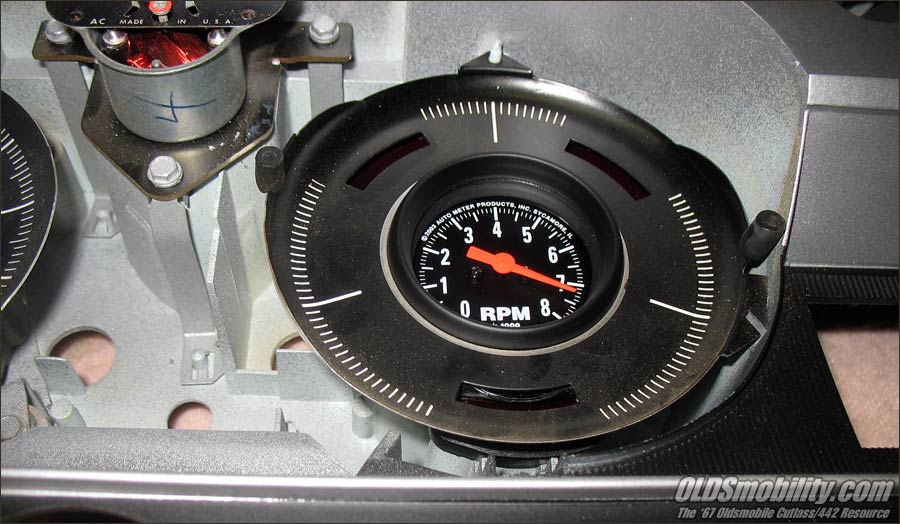

The outside diameter of the tach bezel is exactly the same size of the inside diameter of the hole in the filler plate, so it just protrudes through the plate and looks/fits great. This means that you don't have to remove the dash or instrument panel to install...you simply need to remove the three screws holding the clock (or delete cup) and remove from under the dash, install the tach into the cup, and then slide it back into the back of the instrument panel and secure.


