Eddie Hansen's '69 Cutlass Convertible
 December 15th, 2014, 01:42 PM
#561
Rodney
Join Date: Jun 2011
Location: Houston, TX
Posts: 2,318
Eddie:
That's awesome that you've got your daughter in there working on the body!! How old is she? She looks to be HS age. I started my project about 2 years ago thinking my son would be interested in helping 'ol dad out. He's been into Legos since he was a 5-year old (he just turned 15) and is very good at building things, so i thought naturally he would be into the car build...well, not so much. The big surprise has been my 10-year old daughter who loves working on the car and frequesntly joins me on my Saturday outings to the shop. It's quite the paradox; on one hand she's every bit the girlie-girl all about the hair and clothes, dances Ballet, etc. but on the other hand she's always asking detailed questions about the car and the power of the engine and the size of the wheels and tires, etc. Go figure!
That's awesome that you've got your daughter in there working on the body!! How old is she? She looks to be HS age. I started my project about 2 years ago thinking my son would be interested in helping 'ol dad out. He's been into Legos since he was a 5-year old (he just turned 15) and is very good at building things, so i thought naturally he would be into the car build...well, not so much. The big surprise has been my 10-year old daughter who loves working on the car and frequesntly joins me on my Saturday outings to the shop. It's quite the paradox; on one hand she's every bit the girlie-girl all about the hair and clothes, dances Ballet, etc. but on the other hand she's always asking detailed questions about the car and the power of the engine and the size of the wheels and tires, etc. Go figure!
 December 15th, 2014, 02:15 PM
#562
Registered User
Thread Starter
Join Date: Jan 2008
Location: South River, New Jersey
Posts: 3,515
thanks fellas
Yeah shes a great kid.. however she just graduated college lol... girls tend to be detail oriented, andvshe is a girlie girl too, lol its an adjustment and I traveled a lot for work when she was younger, but when I get the chance I like to be inclusive, she helped build my beer garden deck, and I used a 65 dollar 0000 lettering brush to give her a french nail polish paint job, lol ( dont spread that around lol) she will make someone a very good partner in life , I still remember her calling me when she was in college, and having me talk her through changing a flat, middle of nowhere in pennsylvania, my worst nightmare and a very proud moment, if we dont pass on this stuff who will know how? Her momma used to wade through the mud in carlisle pa looking for bits and bobs when it was our daily driver, before we were married, and 28 years of marriage later, she is still my best friend so apples didnt fall far from the tree thanks again
thanks again
December 16th, 2014, 07:16 PM
#563
Registered User
Join Date: Apr 2011
Location: Erie,PA
Posts: 489
Ill get more pics lol.... thanks for the encouragement, I am getting a little worried though, I was considering asking the wife if I could use the downstairs bath tub so I could soak the door bottoms in evaporust lol.... there are a lot of nooks and crannies you cant get to but decided I like solid food  .
.
.
December 16th, 2014, 09:33 PM
#565
Registered User
Join Date: Aug 2009
Location: Muskegon, Mi.
Posts: 8,597
something like this
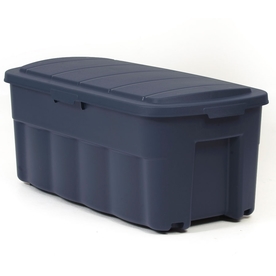 Enlarged Image
 Centrex Plastics, LLC Rugged Tote 50-Gallon Tote with Standard Snap Lid
Item #: 314139 | Model #: 314139


42 reviews
| Write a review
$21.98
December 17th, 2014, 05:14 AM
#566
Registered User
Thread Starter
Join Date: Jan 2008
Location: South River, New Jersey
Posts: 3,515
December 17th, 2014, 06:15 AM
#567
Rodney
Join Date: Jun 2011
Location: Houston, TX
Posts: 2,318
Vinegar in a cardboard box
Eddie:
I don't know why I didn't remember this earlier, but I used a large cardboard box and lined it with heavy mil plastic to do my front lower control arm and the long rear arms. It worked well. After degreasing the parts, I soaked them overnight in white vinegar (buy in the grocery store by the gallon, very inexpensive, works well) to strip paint and the big rust. Wash the parts very well to remove the acid and avoid contaminating the Evaporust, then soak 12-24 hours in Evaporust for fine rust removal. You may not have a problem with flash-rust in your neck of the woods, but here in Houston with 90% humidity most of the year you gotta cover the parts quickly or they start getting surface rust.
At $30 a gallon, the evaporust is expensive and it looses it's potency with repeated use. The vinegar is around $3 a gallon, so using the vinegar to do the heavy rust is much cheaper and helps make the expensive evaporust last much longer. Don't leave parts in the vinegar too long though as it is an acid and will eat away at the part. I left some cast brake caliper brackets in vinegar for 3-4 days (I forgot they were soaking - lol) they were very rough when I removed them, almost like a heavily rusted part looks after you wire brush it. Good luck with the doors.
Rodney
December 26th, 2014, 07:33 PM
#570
Mostly Gristle
Join Date: Mar 2011
Location: Wickford, RI
Posts: 409
Gotta be at the top of my reading list, Eddie.
The work is fantastic!
If you can't find a big enough tub to soak them, how about some of that prep-etch that can be brushed on?
It would de-rust and phosphorize maybe a little faster depending on the strencth you mix it at.
David
The work is fantastic!
If you can't find a big enough tub to soak them, how about some of that prep-etch that can be brushed on?
It would de-rust and phosphorize maybe a little faster depending on the strencth you mix it at.
David
December 26th, 2014, 08:07 PM
#571
Registered User
Thread Starter
Join Date: Jan 2008
Location: South River, New Jersey
Posts: 3,515
thanks david..
Thank you sir, very much appreciated, you may have the better solution, I am taking a few days between the holidays, so I am planning on taking some more bites of this elephant
December 27th, 2014, 08:21 AM
#572
Registered User
Join Date: Nov 2010
Location: treasure coast FL
Posts: 695
I stripped my bumper brackets and rear control arms using one of the big storage tubs from walmart in Muriatic acid... (pool supplies at Home Depot) about 1/2 hour to 45 mins, rinsed off (vapors come off the surface so do it outside with a mask) and then dunked in water with baking soda. for about 1/2 hour, rinsed again. Used POR-15 when dry for primer. Looked brand new when finished... yeah this was the bracket directly under the leaking battery... so you KNOW what that was like!
December 27th, 2014, 02:57 PM
#573
Registered User
Thread Starter
Join Date: Jan 2008
Location: South River, New Jersey
Posts: 3,515
Thanks dave!!!! Going to consider my options, no work on tge car, today, but I did finish a vintage bob-cat snowblower , I inherited it from my uncle when he passed, hadnt run in over 20years I rebuilt the carb, soaked the tank inside with evaporust, then lacquer thinner, upgraded to electronic ignition, and added a cable throttle runs like a champ....
.
December 27th, 2014, 04:51 PM
#574
Registered User
Join Date: Nov 2010
Location: treasure coast FL
Posts: 695
here is the link... https://classicoldsmobile.com/forums...t-removal.html
Mine is post #30
I used vinegar for bolts and very small parts... takes a long time and results are varied... Some good ideas in the linked thread.
My buddy also has a large sandblasting cabinet... 4 feet x 8 feet x 4 feet!
Good to have buddies like that.
Mine is post #30
I used vinegar for bolts and very small parts... takes a long time and results are varied... Some good ideas in the linked thread.
My buddy also has a large sandblasting cabinet... 4 feet x 8 feet x 4 feet!
Good to have buddies like that.
Last edited by kitfoxdave; December 27th, 2014 at 04:54 PM. Reason: Added info...
December 27th, 2014, 05:14 PM
#575
I stripped my bumper brackets and rear control arms using one of the big storage tubs from walmart in Muriatic acid... (pool supplies at Home Depot) about 1/2 hour to 45 mins, rinsed off (vapors come off the surface so do it outside with a mask) and then dunked in water with baking soda. for about 1/2 hour, rinsed again. Used POR-15 when dry for primer. Looked brand new when finished... yeah this was the bracket directly under the leaking battery... so you KNOW what that was like!
December 27th, 2014, 07:23 PM
#576
Registered User
Thread Starter
Join Date: Jan 2008
Location: South River, New Jersey
Posts: 3,515
Ill be careful, hopefully I can come up with something safer we will see I am actually thinking to wrap the bottom of the door with plastic sort of like fold it so no seams etc, then duct tape it to the shell etc then pour in two or 3 gallons of evaporust, then do the other door that will get the areas I cant reach or is covered and inaccessible , ill then pour some thinned por15 down in there just thinking out loud.
December 27th, 2014, 07:37 PM
#577
Mostly Gristle
Join Date: Mar 2011
Location: Wickford, RI
Posts: 409
I had a gallon of muriatic acid in a closed bottle in a cabinet in the garage and discovered that all sorts of things near it were corroding.
That stuff is really strong.
When I need to clean the barnacles off sea strainers on boats just a little mixed in water will set off a vicious chemical boil...
I was not suggesting the use of full strength acid like that, you would need a rubber suit and goggles and gloves and a respirator.
I have this stuff for etching concrete that is not super strong, maybe halfway between the "metal ready" from POR15 and full strength muriatic.
I think it's called "prep etch"
Whatever you do, be careful, watch out for your eyes and skin!
January 5th, 2015, 11:22 AM
#579
Registered User
Thread Starter
Join Date: Jan 2008
Location: South River, New Jersey
Posts: 3,515
Door Repair..
Ok I figured I would add some more progress pics, Plans change, and maybe I should have figured all this out before buying replacement materials.
I have as mentioned attached both quarter panels, and I continue to look for little pinholes, but they are becoming harder and harder to find LOL... still deciding what to use on the seam, and if I want to try non lead body solder, which leadwork is on my bucket list. I have also sut and am finishing the drivers side convertible notch in the rear of the panel where the bumper goes. and I am checking and fixing little dings and dents as I finalize and strip the body in areas that were not replaced.
So On to the doors, I looked at my doors and thought it would be better to replace the door instead of repair, I got a couple of good doors, but as I look into the doors, I realize there is going to be a lot of work to strip the insides and no matter what the door is not perfect like a brand new door so repairs will be necessary. Doors are more than 40 years old so even if there are no holes there will be thin spots.
So to the current status I looked at the original door, it had a BRASS brazed patch on the lower edge by the jamb, and on the inside there was thin metal with a few pinholes.
I looked inside the door and literally it was VERY clean, amazing actually, so I thought as this door is original to the car, why not try to repair it, and use it, nothing to lose as I have a replacement door worse case scenario.
I stripped away the paint on the bottom and looked inside to where any rust might be, I then went a further few inches to be sure I was in perfect metal.
Using a cut off wheel, I cut out the section I marked and crossed my fingers this will work.
IMG_0824.jpg
As you will note in this photo, I then assessed what needs replacement on the inner shell, I cut some new sheetmetal and rough fit it on top of the inner shell area.
Then as before I started to cut a little, and tack a little just like the quarter panels. I found with the curve the body saw was better, but you get the idea, I then ground it down front and back
this was the result
IMG_0825.jpg
January 5th, 2015, 11:33 AM
#580
Registered User
Thread Starter
Join Date: Jan 2008
Location: South River, New Jersey
Posts: 3,515
moving on,
I then cleaned all the metal I could reach, and prepped it much better than I could without this access
I went over to my "donor" Door and cut a very good oversized square with the same contour etc, I managed to open the bottom edge using a chisel and an old paint scraper that I carefully inserted into the crimped seam and carefully pried it up, I was then able to tap out the old door shell that I cut out with my repair piece and cleaned the entire back side down to new shiney metal, sprayed it with weld through primer and fit it to the door.
I clamped this metal in place and as before cut both panels together to get a perfect fit, cut, peel, tack and cool. tack and cool, then repeat. eventually I have cut and tacked the entire piece in except the door edge
IMG_0827.jpg
I continue this process, filling the gaps as I did the quarter panel, tack and cool, tack and cool
IMG_0828.jpg
IMG_0831.jpg
IMG_0830.jpg
January 5th, 2015, 11:44 AM
#581
Registered User
Thread Starter
Join Date: Jan 2008
Location: South River, New Jersey
Posts: 3,515
more work..
eventually it starts to look very good, no warping, and the curve is exact, the metal is 69 metal, same thickness etc
I then trimmed the door jamb side, making a relief cut where the door curves, I then used a pair of pliers and vice grips to gently start making the bend that will form the door edge, I used a straight edge where possible, and got the metal to where it was close to being the correct size, I used a shoe dolly and body hammer to tap it while gauging the door gap with the known good edge.
when the gap looked good, I crimped the end down completely, and used a hammer and dolly to seal the new edge, I also tacked it down with the mig
IMG_0833.jpg
pretty darn seamless
January 5th, 2015, 11:52 AM
#582
Registered User
Thread Starter
Join Date: Jan 2008
Location: South River, New Jersey
Posts: 3,515
I then used chemical stripper and stripped the remainder of the door, I used the klean strip stripper, put some newspaper down to catch and stripper, and waited about 30 minutes, used a sturdy scraper and the paint peeled off easily, then wiped it all down with lacquer thinner.
After that I sanded all the metal with 40 grit on a DA sander and I was impressed with the condition of the door. I also started stripping out the sound deadener on the inside in preparation for treating the inside of the door with por 15 and new sound deadener I hate rust...LOL... more pics to follow.
I will clean the door I purchased, and make any repairs, s as I did this one, and I guess I will sell it. if anybody needs a door let me know LOL....
I will have a hard look at the passenger side and see if that can also be repaired... In for a pinch in for a pound.
January 5th, 2015, 04:30 PM
#583
Registered User
Join Date: Apr 2011
Location: Erie,PA
Posts: 489
Holy cow!
Wow that looks like you didn't do anything to that door. Is it the same door really? I think its trick photography! I wish I had the patience for that. I can do ok, I fix the rust with new metal and live by my Dads favorite saying " little putty , little paint , making it look like what it ain't !"
January 5th, 2015, 05:44 PM
#584
Registered User
Thread Starter
Join Date: Jan 2008
Location: South River, New Jersey
Posts: 3,515
thank you sir
Very much appreciated, especially looking at your own great work, yes that is the same door, no tricks, lol.... I will say I am. Enjoying the work. thanks again
thanks again
January 5th, 2015, 06:43 PM
#587
Awesome. Just awesome. Did you learn your metalworking skills on your own?
Eddie I'm going to be in NJ tomorrow for one night only - going to see a supplier to my biz in Cedar Grove. Wish I had time to stop by and see your work in person!
Eddie I'm going to be in NJ tomorrow for one night only - going to see a supplier to my biz in Cedar Grove. Wish I had time to stop by and see your work in person!
January 5th, 2015, 07:33 PM
#589
Registered User
Thread Starter
Join Date: Jan 2008
Location: South River, New Jersey
Posts: 3,515
now I am blushing....
Wow thanks fellas, I am just trying to live up to all of your builds, you folks inspired me to strive to do itt the best I can. I very much appreciate the kind words.
Joe cedar grove is about 40 miles north of me, i work in manhattan though, welcome any time
Steve, I do work for beer lol.... I have a couple of years left before I retire, when i do we are heading south, the carolinas are on the prospect list lol.... I need more warm weather...
Rod if you have any questions I can answer I will, slow and steady, I can pm you my phone number if you want in casef you need any real time answers I can help with
Let me know
Thanks fellas
Last edited by Eddie Hansen; January 7th, 2015 at 10:49 AM.
January 5th, 2015, 07:34 PM
#590
Registered User
Thread Starter
Join Date: Jan 2008
Location: South River, New Jersey
Posts: 3,515
January 8th, 2015, 09:49 AM
#591
Registered User
Join Date: Sep 2014
Location: Mobile, Alabama
Posts: 79
Looks great Eddie. Keep up the good work. That metal working like that is tedious but when you finish, it makes you feel good when it turns out that way. There is also another way to do the patch pieces. Go to harbor freight or any paint supply shop there is a tool for notching and hole punching sheet metal so you just spot weld everything in and then come back and weld the seam. Its a little more work but when done right, there is very little body filler and most of it can be filed. I think its called a flanging tool.
January 8th, 2015, 10:07 AM
#592
Registered User
Thread Starter
Join Date: Jan 2008
Location: South River, New Jersey
Posts: 3,515
Looks great Eddie. Keep up the good work. That metal working like that is tedious but when you finish, it makes you feel good when it turns out that way. There is also another way to do the patch pieces. Go to harbor freight or any paint supply shop there is a tool for notching and hole punching sheet metal so you just spot weld everything in and then come back and weld the seam. Its a little more work but when done right, there is very little body filler and most of it can be filed. I think its called a flanging tool.
Thank You!!
I do have a flanger, but I wanted to butt weld the pieces. I know there is a lot of discussion, on flanging, butt welding, backing pieces, glue etc etc , Now I am deciding whether to lead ( non lead solder actually) or just use duraglass ( its the only water proof filler) or all metal, but I have time, its cold in the garage so I have to wait to primer etc so I will keep doing the metal work and stripping.
January 8th, 2015, 06:39 PM
#594
Registered User
Thread Starter
Join Date: Jan 2008
Location: South River, New Jersey
Posts: 3,515
very much appreciated, I like how you got full quarters for your project, but I dont envy having to drill out all them spotwelds hope you used a goodc quality cutter, I used a couple from harbor freight and while they worked had to drill pilot holes etc, I tend to over think things and go back and forth one day I am using lead then eead about impurities coming from the flux getting trapped lol then its dura glass lol....I dunno , took a long time to decide to butt weld over flanged .... the next one will be easier lol
if there is one
January 9th, 2015, 05:07 AM
#596
Registered User
Thread Starter
Join Date: Jan 2008
Location: South River, New Jersey
Posts: 3,515
Thanks Ray, I appreciate the kind words, more work tomorrow , its getting a little nippy up here it was 7 degrees yesterday today we are at a balmy 22 lol.... I know that is a heatwave compared to what some folks on here have been hit with.
January 9th, 2015, 10:38 AM
#598
Registered User
Thread Starter
Join Date: Jan 2008
Location: South River, New Jersey
Posts: 3,515
Thanks Tom, I was reading on several other forums regarding filler, most if not all recommended regular filler over lead/leadfree solder unless you have to "show" the work, ie High End Customs etc, and many recommended the duraglass over all metal etc as it is waterproof, some even said that the all metal types were a great marketing scheme.. etc.
As I said I tend to overthink things, and change my mind and then revert back, and do this over and over.. this is why I cant get stuff done LOL... I am leaning on the duraglass now, but it is too cold right now for filler work, and primer, but it is fine for metal work and stripping so that is what I am foucsed on at the moment.
Thanks again for the good encouragement Tom very much appreciated.
January 13th, 2015, 12:11 PM
#599
JC
Join Date: Feb 2012
Location: So Florida
Posts: 1,069
Got caught up on this after holiday break. Yes, it takes time, but I trade most of what I know car wise to work metal like this!
I just dont have it in me. I know my limitations! When I put my mind to it I can do almost everything... except body work!
Ive tried it from time to time, but we're like peanut butter and mayonnaise in this area. That's why when it comes to muscle cars I gotta find cars where the body work is done or has pretty clean metal. No other option for me cuz no way I could afford to pay someone to do what you're doing. I got to do my floorboards which seems fairly easy, and I still afraid to touch them. Oh I can probably pretty easily cut them out decent enough, but that's about it!!
Great work.
Ed, where is the air cleaner setup you told me about? I couldn't find it. Thx.
January 13th, 2015, 12:43 PM
#600
Registered User
Thread Starter
Join Date: Jan 2008
Location: South River, New Jersey
Posts: 3,515


