convertible top well
 April 6th, 2010, 09:53 AM
#1
Car Junkie
Thread Starter
Join Date: Oct 2009
Location: Wakefield, Massachusetts
Posts: 109
convertible top well
Anyone replace their convertible top well? Mine is beat so I wanted to replace it but I'm afraid of messing up the rear window fit. As I recall the top well and rear window section of the top both get sandwiched under multiple pieces of metal that bolt to the body. As I recall my 67 442 had 4 pieces of metal back there. Just wondering what tricks people have used to do this.
 April 6th, 2010, 12:01 PM
#2
Registered User
Join Date: Apr 2007
Location: Emmen Drenthe (Netherlands)
Posts: 586
buy your selve the fisher body manual, if you want to do it your selve.
I did my complete top of my 69'delta 88, but that is differend to yours.
Hell of a work if it's new to you, but take youre time with it
if you do it your selve don't forget to mark the lines of your old top before you remove staples or clamps.
2
Mark it! look good! how it atached now, remove staples/ clamps, atach new one by checking your mark lines.
it is all in the body manual with pictures
April 6th, 2010, 12:10 PM
#3
Car Junkie
Thread Starter
Join Date: Oct 2009
Location: Wakefield, Massachusetts
Posts: 109
I have the book in front of me and I see it has three "trim sticks" holding it all together. I'm only doing the top well though not the whole top. I guess I'll just try to do it one trim stick at a time and hope it stays as taut as it is now. I'm just afraid of the back window getting saggy or wrinkly.
April 7th, 2010, 05:20 AM
#4
Registered User
Join Date: Feb 2008
Location: Plano, TX
Posts: 11,798
I agree it is a lot of work to replace just the well, and there is a risk of messing up the top as well.
What is wrong with the old well? Mine was nasty but it cleaned up on the inside well. The outside visible from the trunk was stained like this...

but I hid it with part of the repro trunk mat set, since the small piece was not too usable anyway.
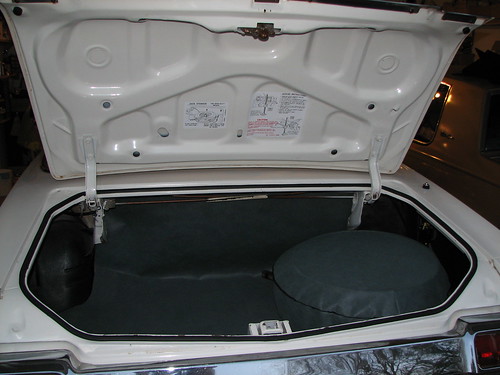
I hung it with velcro on the side of the rain gutter. Not original looking, but I can live with it.
I am not sure why the previous owner had the top replaced but not the well....
At a minimum you will need a factory body manual and a lot of time and patience.
You might see what a trim shop will charge - maybe it will be worth it for them to do it.
What is wrong with the old well? Mine was nasty but it cleaned up on the inside well. The outside visible from the trunk was stained like this...
but I hid it with part of the repro trunk mat set, since the small piece was not too usable anyway.
I hung it with velcro on the side of the rain gutter. Not original looking, but I can live with it.
I am not sure why the previous owner had the top replaced but not the well....
At a minimum you will need a factory body manual and a lot of time and patience.
You might see what a trim shop will charge - maybe it will be worth it for them to do it.
April 7th, 2010, 05:25 AM
#5
Car Junkie
Thread Starter
Join Date: Oct 2009
Location: Wakefield, Massachusetts
Posts: 109
My well is very brittle and torn and frayed in a bunch of spots. If you loook at it the wrong way it rips 
I'm replacing the original rear speaker and adding a second one and since they both fasten through the well liner I figured I'd do it all while I'm back there. I'm hoping I can do an outer trim stick, then do a few bolts at a time on the main one and then do the other trim stick. Crossing my fingers!
I'm replacing the original rear speaker and adding a second one and since they both fasten through the well liner I figured I'd do it all while I'm back there. I'm hoping I can do an outer trim stick, then do a few bolts at a time on the main one and then do the other trim stick. Crossing my fingers!
April 7th, 2010, 08:32 AM
#6
Registered User
Join Date: Apr 2007
Location: Emmen Drenthe (Netherlands)
Posts: 586
you will need the tricks in the book,
so it say's to open your top at a minimum space in inches to releave the tension.
Your top is in good condition, so if you mark it with a pencil or so,
mine was realy pulverd and ripped, so i had my rear tack bow several times out of the well.
Becouse the lines on the new one did'nt mach
so mark it and be werry patience
April 11th, 2010, 07:04 PM
#7
Car Junkie
Thread Starter
Join Date: Oct 2009
Location: Wakefield, Massachusetts
Posts: 109
Surprise! Mine has no trim sticks it has one long metal piece and I had no desire to take that off. The metal piece has a U-shaped groove at it's center and on the other side is a plastic or composite material the top and well liner staple to. So I took some 1/2" flat bar and drilled it every 6" or so, drilled and screwed it into the U groove and fastened the new well liner with that. It worked great and unless you lay on your back in my trunk, push up the well liner and looked up there you'd never know what I did. The only real let down today was the new liner is very thin and cheap compared to the original. The original liner was two layers and there was a thick insulation pad between the layers to dampen noise and insulate the interior. I need to find a way to reinstall that if I can one of these days.
IMG_0001.JPG
IMG_0002.JPG
IMG_0003.JPG
IMG_0001.JPG
IMG_0002.JPG
IMG_0003.JPG
April 12th, 2010, 11:08 AM
#8
Registered User
Join Date: Apr 2007
Location: Emmen Drenthe (Netherlands)
Posts: 586
you mean the rear tack bow, and yes it's a pain ......sss to remove and put it back again.
normal you tack the topwel first than the rear window and than the top.
water from the window get in the plastic rain thing under the rear tack bow,
normal you tack the topwel first than the rear window and than the top.
water from the window get in the plastic rain thing under the rear tack bow,

Thread
Thread Starter
Forum
Replies
Last Post
GoBigRed
Brakes/Hydraulic Systems
15
October 5th, 2015 01:00 PM
jonn
Parts Wanted
3
November 22nd, 2014 06:36 PM


