When you click on links to various merchants on this site and make a purchase, this can result in this site earning a commission. Affiliate programs and affiliations include, but are not limited to, the eBay Partner Network.
I can say with absolute certainty that on my ('69, standard) column the correct slot is the right hand one seen in the photos in post #31. It's right next to the screw boss and not nearly as obvious as the other slot. It's also narrower, a little longer, and set deeper into the casting. As I mentioned previously, if the key buzzer switch is still installed, the (2) contacts will partially cover one end of the slot.
On my column neither slot had previously been broken through. I broke through the left one first and found no joy. As soon as I found the adjacent slot and broke through, I was able to get the cylinder loose.
Success at last! This morning it took me all of 30 seconds to remove my ignition lock and I will confirm that it is Not the slot identified in Eric's post #17 but is the "L" shaped slot in the same pic which is immediately to the right of the identified slot, closest to the screw hole. I used a long,1/8 inch wide .060 thick piece of spring steel to press the "latch" and then pulled the lock from the column with little more than ease of pulling it out. I did find that the "run" position of the lock made the pressing of the latch easier to push the latch to release the cylinder. (Glad that I unlocked the ignition prior to shipping my key off to get replaced)
Also, I must say that the instructions in the CSM were very confusing to find the proper procedure to remove the ignition lock in my NON tilt column.
I hope that others will find the info in this post as helpful as I have
Thanks Leadfoot, your info was what helped me and Eric your pics are great and only about 6 mm off.
Thanks to all for your input(even the one who thought I should not reply to a years old post)
Last edited by My2nd 69 442; August 30th, 2017 at 08:30 AM.
Location: Edmonton, AB. And "I am Can 'eh' jun - eh"
Posts: 24,525
I didn't say you shouldn't reply to a dead thread. I just was questioning whether you in fact knew it was dead.
glad to hear your problem was resolved and there's new better info added to the thread.
It's definitely good to hear you have had success... This is one experience I am sure will be fresh in your mind for a long time to come... As they say, if at first you don't succeed, try and try again...
My success has a whole lot to do with the advise and other help that I have received from you guys on this site.
I really appreciate all of you and this site is great.
Now all I need is my new part which are due to me on Friday
Is anyone still subscribed to this thread? I have a few questions on the key buzzer switch and spring installation order with regards to the ignition cylinder.
Is anyone still subscribed to this thread? I have a few questions on the key buzzer switch and spring installation order with regards to the ignition cylinder.
I have lost the key buzzer switch spring so that's the first problem
Once I locate it how do you properly install it with regards to the actual ignition cylinder, can the ignition cylinder be installed first and than you just slide in the key buzzer switch with its spring?
Also, the lock bolt and slide mechanism with the gears, what is starting point to align the right gear to gear?
Frankly, any time I have the steering wheel off, the first thing I do is to extract and fling that stupid key buzzer switch as far as I can.
In any case, the switch slides in after the lock cylinder is in place. The lock cylinder will be in the LOCK position unless the key is in it, so first use a screwdriver to rotate the pinion gear and move the rack to the LOCK position before inserting the lock cylinder. Basically just use the screwdriver to rotate the pinion all the way counterclockwise to the ACC position, then come one click back to the LOCK position.
Is the ACC position behind the lock position of just forward? or both ?
OK the plastic stationary gear is the pinion gear
OK the metal slide is the rack
the part about "move the rack to the LOCK position", how do you know what that is? I'm unsure about the alignment as ive had the entire thing together and part more than once because the lock bolt appears to be out too much.
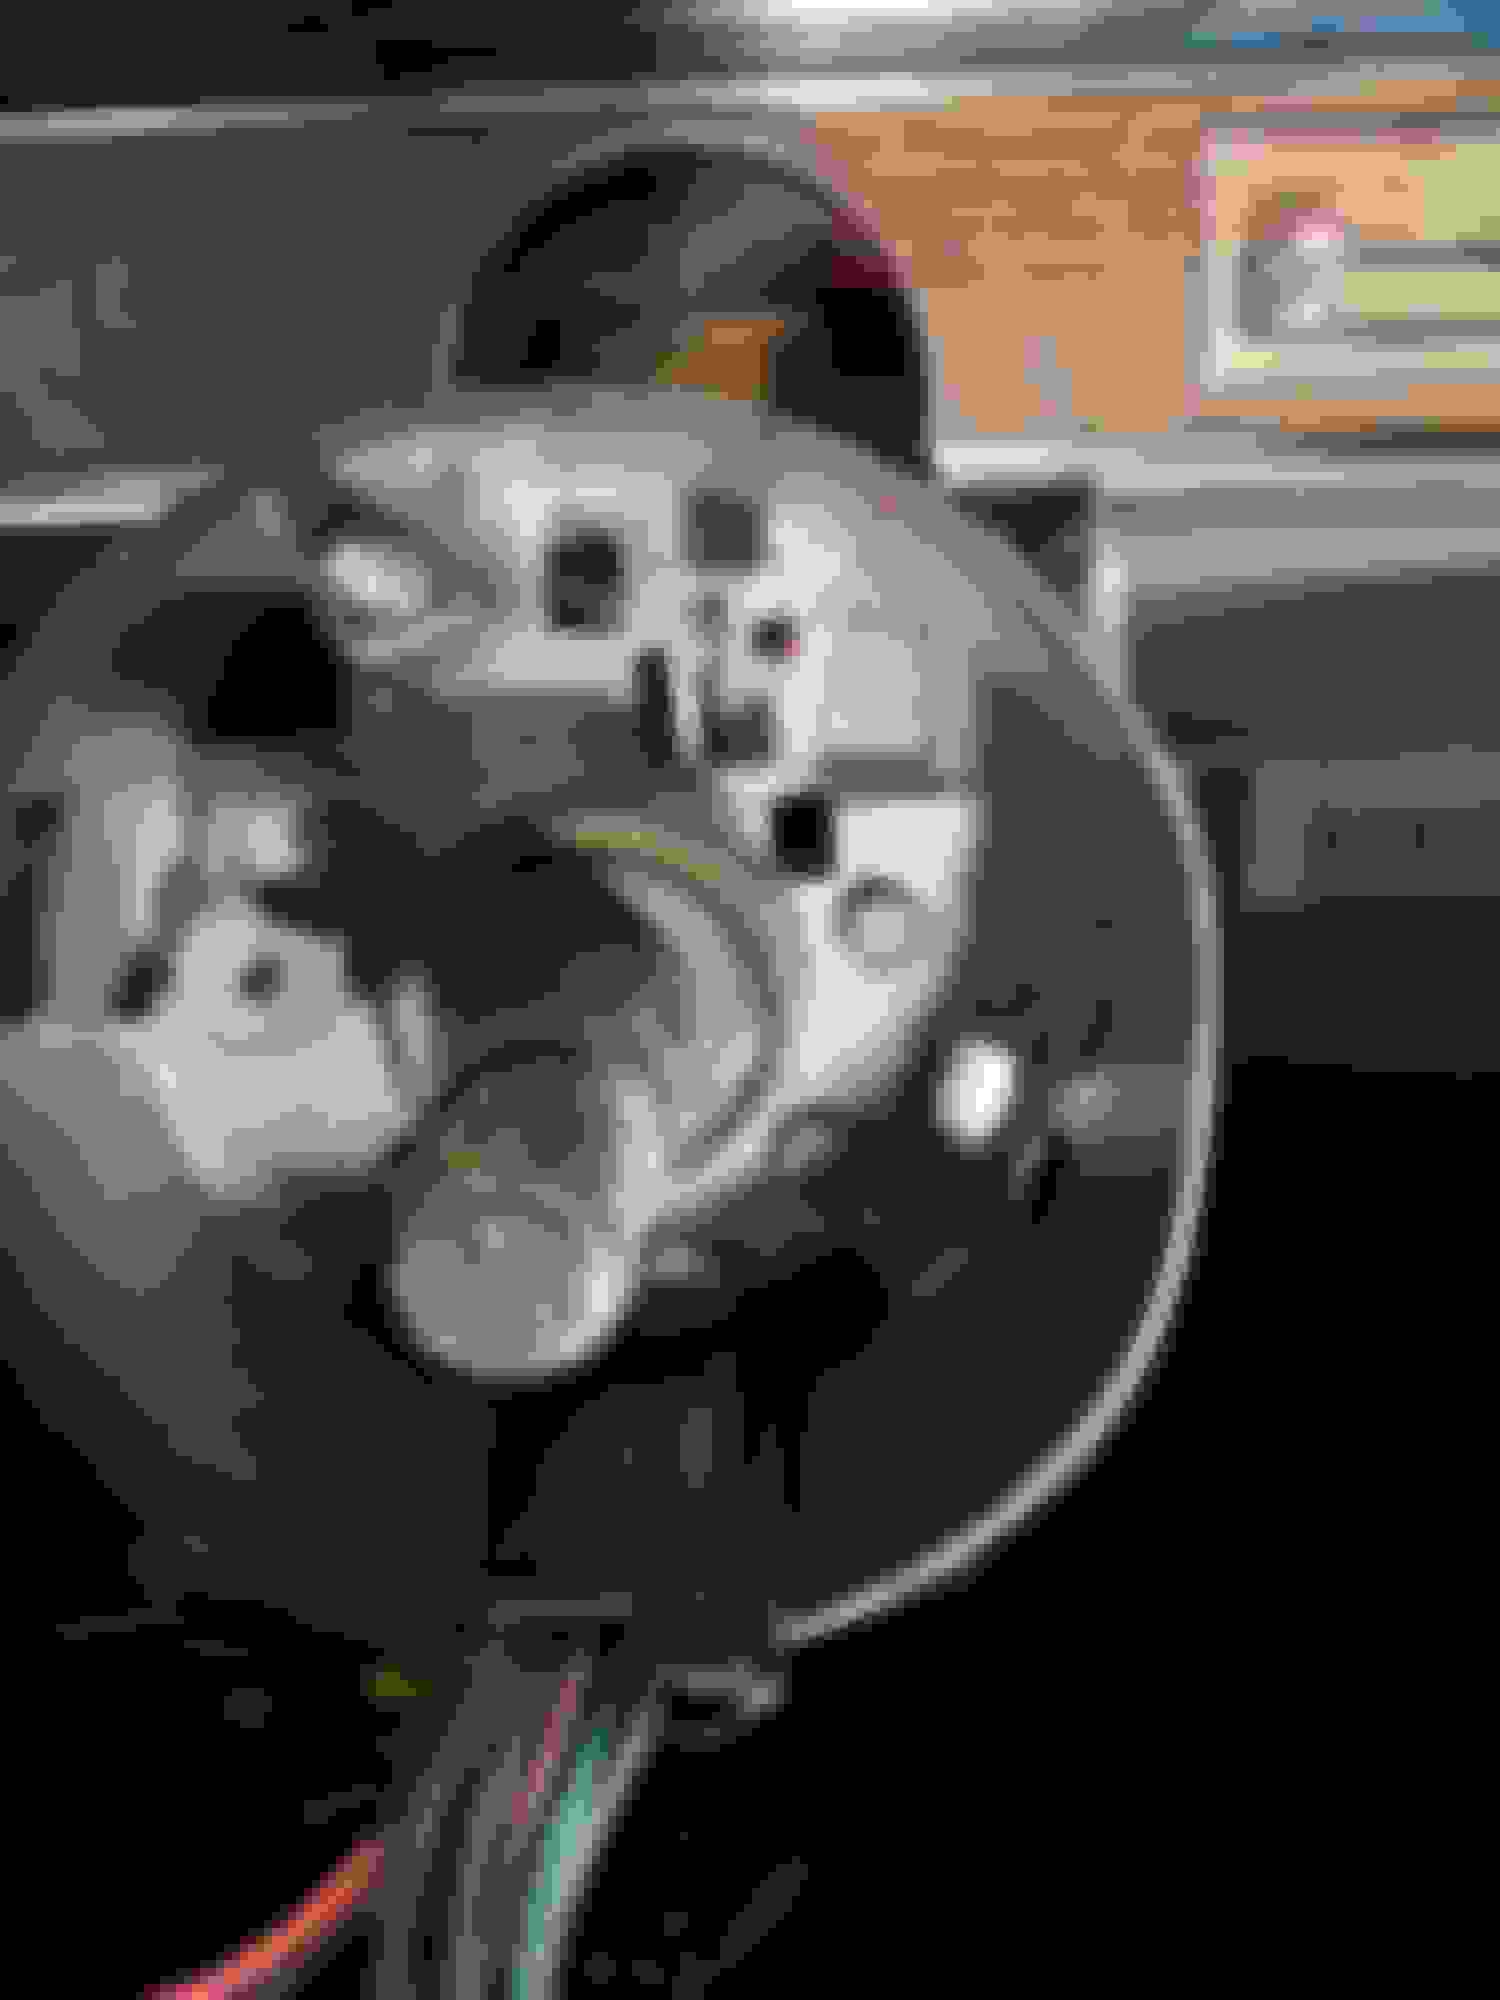
The painful part is how to alight these mechanisms, see below pictures, my car is a 4 speed as well.
The top metal slide with bottom cogs moves to three positions, pushed all the way down which would be start, middle which should be run and all the way up toward the driver which should be lock.
See below pictures to help with everything in this thread with regard to what "flashing" to break away, the key buzzer switch/spring, the plastic pinion gear, the rack gear and installation of the ignition cylinder assembly.
Note the correct section to break away the flashing
Note the alignment of the pinion gear teeth and the rack gear teeth.
The end/nub of the lock bolt MUST be cradled in the opening of the rack gear slot, not resting on front of it.
The key buzzer switch/spring assembly does bottom out in its port, once the ignition cylinder is installed by just sliding it in, you can turn the key forward off the lock position, take a small screwdriver, insert it into the key buzzer port and push up on the ignition cylinder small plastic tab, then slide in the key buzzer switch/spring, turn the key back to the lock position

 August 29th, 2017, 08:22 PM