When you click on links to various merchants on this site and make a purchase, this can result in this site earning a commission. Affiliate programs and affiliations include, but are not limited to, the eBay Partner Network.
I recently bought a one-owner 1978 Oldsmobile Delta 88 four-door sedan. It runs and drives, needs a few things (mostly cosmetic) but I plan on doing a tune-up soon along with a few other things in preparation for California SMOG testing (bought it in Arizona and shipped it over here).
California is stupid strict on their catalytic converters, so I'm going to have to find a state-legal one for this car. Among other things, the fuel gauge doesn't read properly (says full when turned on, goes down to 2/3 when off), shift indicator on dashboard is stuck in Park (though the tranny and shift lever work perfectly fine), drive belts are worn, also I need to replace the ignition lock cylinder (I'm able to start the car without the key!).
While I can find parts of rockauto.com, I'm having a tough time finding a good thorough repair manual for this car. Most ones are generic manuals that cover multiple models over a decade or longer (like 1970-1990 Oldsmobiles/Pontiacs/Buicks/etc) - I'd like to do better and more specific than that if possible (e.g. I was able to find a large repair manual for my 1984 Honda Accord that is for that model year only - can't get anymore specific than that!).
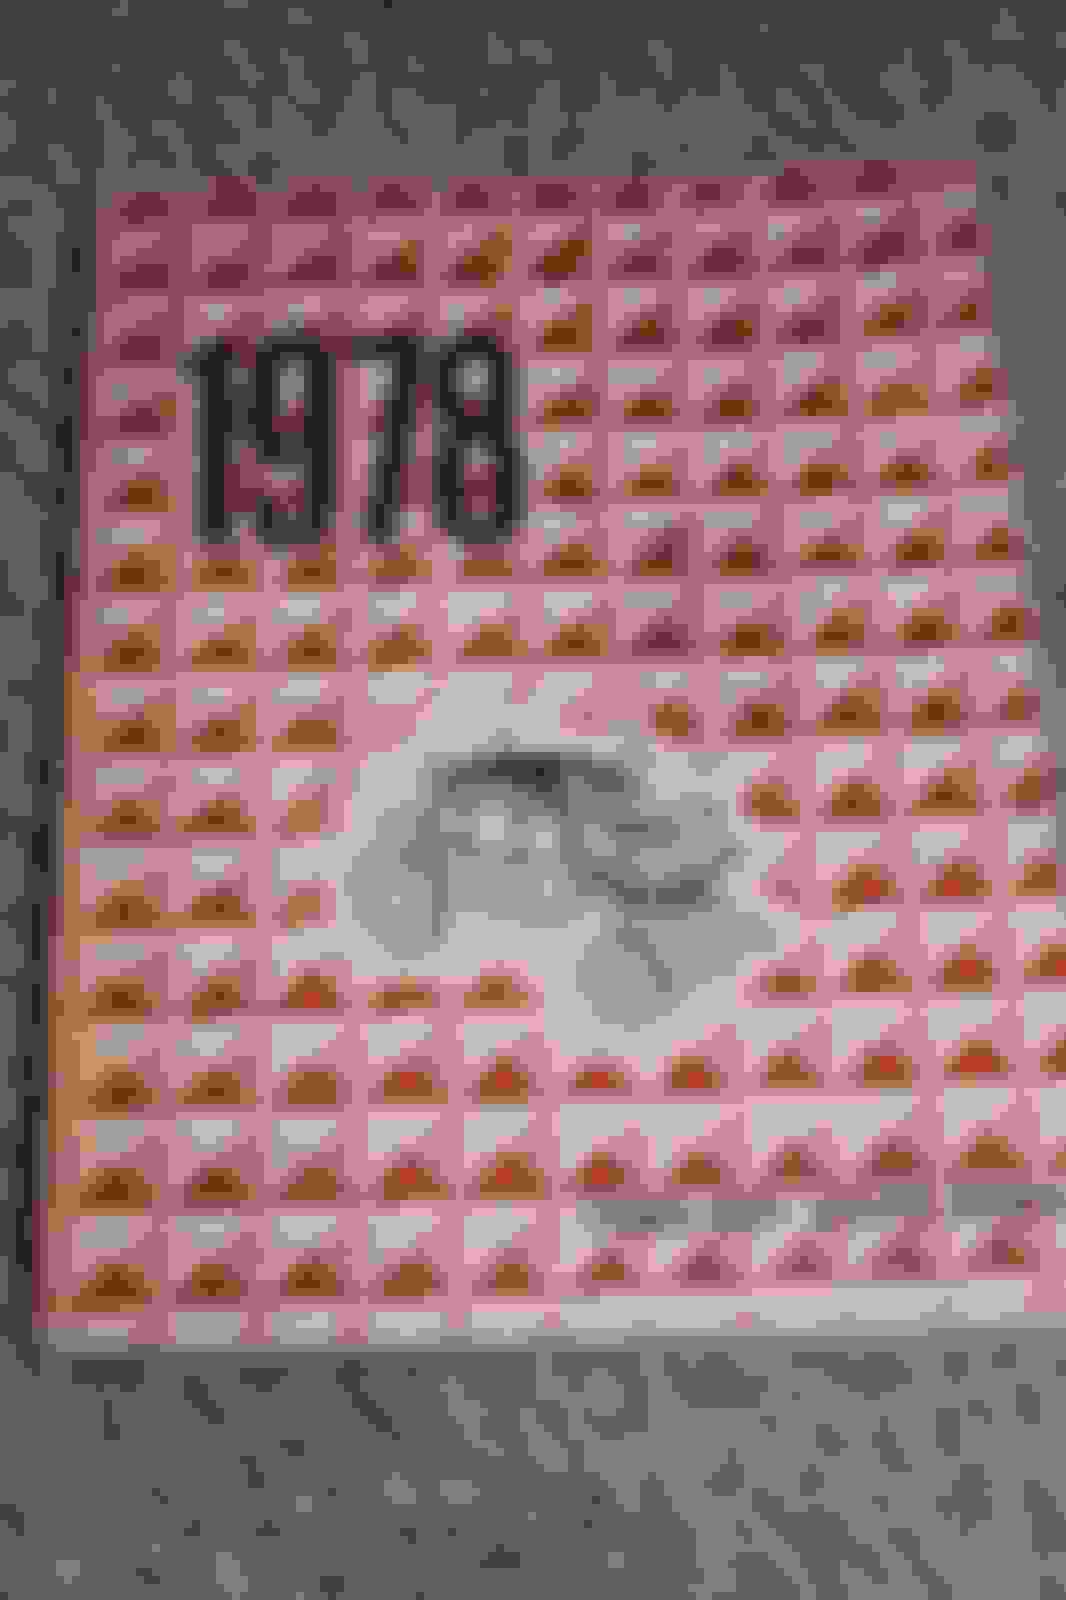
Specifically, the original looks like this. You can find them on ebay for $10-$15. There is also a PDF scanned version on line. I do not know how complete it is or if the resolution is sufficient, but it might be useful until you can find an original.
Welcome to the site... Good luck with your new project... An original chassis service service, as Joe showed in his post, is the best reliable source of factory information...
I have a '78 Toronado, which shares some things with your car. Good luck with it.
Originally Posted by Temeku
the fuel gauge doesn't read properly (says full when turned on, goes down to 2/3 when off)
Where the fuel gauge goes when the key is off is of no relevance as no power is getting to it. Gauge needles can drift and park themselves anywhere.
I completely redid the fuel system on my Toro from front to back. New tank, sending unit, rubber lines, and fuel pump. The fuel gauge circuit is as simple as they come. If the gauge reads full all the time no matter how much fuel is in the tank, you have an open in the fuel gauge circuit. The most likely culprit is a bad ground connection. There are two wires coming off of the sending unit on top of the tank. One goes to the rear of the car and connects to the wire coming from the gauge in the front of the car. The other wire is short and connects to the grounding point which, if it's in the same place as on my car, is just above the tank, forward of it, on the passenger side. You'll have to crawl under the car (having it well supported on jack stands makes this much easier) and look in that area. Once you've found the ground wire, make sure it actually is securely connected under the screw and that there is no corrosion in that area.
If all is good here and the gauge still reads F all the time, then you have to separate the other wire coming off the sending unit where it attaches to the wire from the front of the car (there is usually a plastic connector that pulls apart). Ground the side of the wire coming from the front of the car and turn the key on. The gauge should read E. Remove the wire from ground and it should go to F or perhaps well past it. If it does these things, the gauge is fine and the wiring from the gauge to the rear of the car is fine, and your last resort is the sending unit itself. Both new gas tanks, if needed, and new sending units are available for this car, but, of course, replacing either requires dropping the tank.
And, yes, the very first thing I bought after I bought the car itself was the service manual noted above, on ebay. I bought the '78 Fisher Body manual as well. There are several on ebay right now in the $10 to $15 range, plus shipping.
This one is $8.26 buy-it-now price plus $8 shipping. The whole thing for $16 is pretty good.
I have a '78 Toronado, which shares some things with your car. Good luck with it.
Where the fuel gauge goes when the key is off is of no relevance as no power is getting to it. Gauge needles can drift and park themselves anywhere.
I completely redid the fuel system on my Toro from front to back. New tank, sending unit, rubber lines, and fuel pump. The fuel gauge circuit is as simple as they come. If the gauge reads full all the time no matter how much fuel is in the tank, you have an open in the fuel gauge circuit. The most likely culprit is a bad ground connection. There are two wires coming off of the sending unit on top of the tank. One goes to the rear of the car and connects to the wire coming from the gauge in the front of the car. The other wire is short and connects to the grounding point which, if it's in the same place as on my car, is just above the tank, forward of it, on the passenger side. You'll have to crawl under the car (having it well supported on jack stands makes this much easier) and look in that area. Once you've found the ground wire, make sure it actually is securely connected under the screw and that there is no corrosion in that area.
If all is good here and the gauge still reads F all the time, then you have to separate the other wire coming off the sending unit where it attaches to the wire from the front of the car (there is usually a plastic connector that pulls apart). Ground the side of the wire coming from the front of the car and turn the key on. The gauge should read E. Remove the wire from ground and it should go to F or perhaps well past it. If it does these things, the gauge is fine and the wiring from the gauge to the rear of the car is fine, and your last resort is the sending unit itself. Both new gas tanks, if needed, and new sending units are available for this car, but, of course, replacing either requires dropping the tank.
Thanks. I got under the car and found the wires precisely where you described them.
The ground wire connection was firm on the chassis side, although a bit dirty. I might unscrew it and clean it to see if that makes any difference. However, the part of the ground wire where it connects to the top of the gas tank seemed loose to me when I tugged on it. No way for me to check it without dropping the tank.
The wire going to the front of the car (behind the gas tank) has a type of connector that's "male" coming off the gas tank, and "female" coming from the front of the car. Because of this, I'm not sure how to ground the side of the wire coming from the front?
Thanks for your help though. I have ordered the repair manual mentioned by joe_padavano which should be arriving in a few days. I also plan on tuning up the car before smogging it.
The wire going to the front of the car (behind the gas tank) has a type of connector that's "male" coming off the gas tank, and "female" coming from the front of the car. Because of this, I'm not sure how to ground the side of the wire coming from the front?
This should be the easy part.
Unbend a paper clip and stick one end into the female end while holding the other end against the metal frame of the car. Or stick a screwdriver into the connector and hold the shaft of the screwdriver against the metal. Or get a length of wire, clean both ends, put an alligator clip on one end, stuff the other end into the connector, and clip the other end to a spot on the frame. You're just trying to complete the connection between the female end and ground for a momentary test. It doen't have to be fancy. It doesn't have to be permanent.
The first two methods would probably require a helper as it's probably not possible to hold the paper clip end or screwdriver shaft against metal while also being able to see the gas gauge. So the helper would hold the connection in place while you turn the key ON and look at the gauge, or vice versa.
By the way, that ground connection you show in the first photo looks pretty good. I don't see any rust, but it still wouldn't hurt, since you're under there, anyway, to unscrew it and shine up all the metal-to-metal connections.
I'm going to go out on a limb here and say that there's a 99% chance that your dash gauge is fine and that your problem is either a bad ground or a bad sending unit. I would say that 99% (Joe Padavano would probably say 99.9%) of old car electrical problems are ultimately traceable to bad grounds.
Okay - tried several of those methods, with a helper. Fuel gauge stayed past full no matter what (until I turned it off). Does this mean a problem with the wiring from the gauge to sending unit?
Okay - tried several of those methods, with a helper. Fuel gauge stayed past full no matter what (until I turned it off). Does this mean a problem with the wiring from the gauge to sending unit?
Most likely yes. Either with the gauge or with the wiring between the back of the car and the gauge. The sending unit might be fine. You need to verify that the gauge itself and the wiring between it and the rear of the car are in good shape. The needle pointing past full indicates an open circuit. There is a break in the wire somewhere.
Most likely yes. Either with the gauge or with the wiring between the back of the car and the gauge. The sending unit might be fine. You need to verify that the gauge itself and the wiring between it and the rear of the car are in good shape. The needle pointing past full indicates an open circuit. There is a break in the wire somewhere.
I suppose I have to wait for the repair manual to arrive since I don't have a wiring diagram for this car, nor do I know how to get behind the dash to check the gauge.
If it's relevant at all, the first time I disconnected the sending unit from the wire going to the gauge - there was a loud electrical 'POP' that came from the wire going to the front about one second after I disconnected it. It didn't do it the several times I tested it afterwards, though.
You will definitely want the service manual if you want to get at the fuel gauge. Chapter 8, which deals with the instrument panel, gives step-by-step directions, with diagrams, on removing the gauge cluster and then the fuel gauge. The wiring diagram itself won't be all that helpful to you as it gives a schematic of the wiring, which is fine to know which wire connects to what, but it doesn't give you much indication of where the wires are in the car. But you know what you want to get at, the gauge.
As far as hearing a loud pop, I'm wondering why such a thing would have happened if the ignition was off when you were fiddling with the wires. With the ignition off, there is no power applied to any part of the gauge circuit, so there should be no electricity to cause a pop. But that pop might account for the open circuit. In the end, you may have to trace the wire from the rear of the car through to the front to find the point where it is broken. In fact, you might do that before you start taking the gauge cluster apart because my money is STILL on your gauge being fine and your problem being in the wiring to the gauge. If you can find that break in the wire, you save yourself the issue of having to take apart the instrument panel at all, and you don't really have to wait for the service manual to arrive to start looking for the break in the wire. Just start tracing. It may get annoying at times as you have to peer into nooks and crannies under the car, perhaps pull up carpet or remove trim here and there, but, as they say, life's a bitch, and then you die.
Or you can just temporarily bypass that section of wire with a 14 gauge wire and test if the open is in wire or the sender, use allagator clips The less time under the dash the better..... Tedd
Looks like it goes under the rocker panels on the driver's side. I'll unscrew the "Body by Fisher" trim and look under there later.
I had the Olds smog-tested today just to see where the car stood emissions-wise, before I do a tune-up. Car obviously did not pass, it's running rich. I've known the mechanic for a while and he's honest. Says some vacuum lines are missing (distributor vacuum advance, as well as some EGR and PCV related hoses going into the intake) and the gas cap is bad. I've already ordered another one of those, but I'll have to look into the hoses and verify where everything ought to be once the manual gets here (should be tomorrow). He also mentioned that the timing needs to be adjusted. I do have a timing light, but I haven't actually used it before. Other than all of that he recommended just tuning it up, which I already plan to do.
Something else happened to, while in the parking lot - suddenly I heard hissing and my brakes were horrible. The brake booster went out, and now there's a vacuum leak going through it whenever I hold the pedal down (horrible braking distance, I have to basically stand on the brakes for them to work now). I had the same thing happen in my 1984 Honda Accord a couple of years ago, same exact symptoms, the booster on that car was a major PITA to replace since it was buried under everything. On this car, fortunately, I can see the booster is very easy to access and I have all the working room in the world. I've ordered a reman booster from rockauto for $75.
Dirty carburetor, although it seems to work fine. I believe this is a Rochester 4BBL. Should I need to rebuild it, I know a guy north of me who does it professionally and at good prices and warranties. I had an old Honda Keihin carb rebuilt there.
Also noticed the PCV hose looked old and the valve itself was all grimy. I'll check the EGR valve later for carbon build up and to see if it holds vacuum. The crankcase breather element was all black and oil-fouled (just like it was on my old Honda) so I'll replace it.
I also noticed several of the spark plug wires were loose on the dist. cap. I took them off to find a bunch of funky-looking gunk in the spark plug boots and on the distributor cap studs. Will replace during tune-up.
Unrelated, but the coolant is a murky orange with residue all inside the overflow reservoir and floating at the top of the coolant itself. Suppose I'll flush it? Previous owner says he was using the O'Reilly Auto Parts green coolant, which I did add a little bit of a few days ago since it was low. I suppose the cooling system in this car wasn't maintained all that well. Then again, I bought this car for only $1200
Yes, that's a quadrajet, and they're very easy to rebuild. I did mine for the $20 cost of the rebuild kit. I didn't use a book. Rather, there are several good youtube videos where they take you through it step by step. When I did mine, I had my laptop computer on the bench next to me and followed the bouncing ball. It was nice to be able to pause it or back it up when I needed to.
Here's the video I found most helpful. What's nice about it is that he's rebuilding a quadrajet from a '79 Malibu, which is the same vintage as our cars, and his quadrajet was pretty much an exact match to mine in all the important respects.
One of the joys of the old car hobby is doing things yourself, and there's nothing like the satisfaction of tackling a job like this, getting it done and the carb back on the car, and having it start up and run well.
If you're even semi-mechanically inclined and your carburetor needs a rebuild, I recommend trying it yourself. You'll have fun, you'll learn a lot, and you'll save a ton of money, too.
As far as the radiator fluid, if in doubt, change it. It's neither expensive nor difficult, and if the coolant in there was green when it was poured in and is now orange, you DO have a rust problem. You might pull the radiator while you're doing it and have it checked. Mine looked okay outwardly and didn't leak, but it ended up needing to be recored. New radiators are not available for the '78 Toro, but I think they are available for the '78 Delta 88.
I changed the PCV and EGR valves. Again, they're not much money. I paid $22.54 for an ACDelco brand EGR valve from Amazon. Do shop around, and don't assume your local Autozone, NAPA, or O'Reilly's, or even online vendor Rockauto, will have the best price. Rockauto sells the same exact EGR valve, same part number and brand, for more than three times as much at $73.79. My local Autozone carried a different brand for $46.99.
PCV valves are a few dollars at any auto parts store.
I replaced every vacuum hose, rubber fuel line hose, and rubber brake hose on my car. The vacuum and fuel lines in particularl were old and stiff, and most had a few hairline cracks at the points where they fit over the fittings where they attached to whatever they attach to.
I replaced all the spark plug wires as some had teeth marks on them, and one was broken right off at the point where the wire attaches to the boot at the distributor.
Here's a few before-and-after photos. Maybe they'll inspire you.
Engine compartment photo sent to me by the seller before I bought the car. Some of it is in shadow, so you can't see it all, but it was as dirty as what you can see suggests. Prior to my getting the car this past February, it had not been started since 2004.
Chewed plug wires. In the second photo, you can see, second from the right, the broken off wire.
New fan clutch, water pump, alternator, thermostat housing, fuel pump and rubber lines, and I painted the fan blade blue because I had some blue automotive spray paint laying around and, while the fan was in good shape mechanically, it was dirty and looking every bit its 39 years of age. You can't see them too well, but I replaced the power steering hoses as well.
Engine compartment after I had rebuilt and reinstalled the carburetor (which you can't see, but, trust me, it's there--otherwise, the air cleaner would not have anything to sit on top of nor screw to). I repainted the valve covers, and you can also see the new EGR valve and new upper radiator hose, too.
I repainted the top part of the air cleaner and put an "Oldsmobile 403" decal on it so there would be something there. In the top photo above, you can see the remnants of the original decal, which is blue and says "Toronado - Front Drive". But I cannot find that decal, while the Oldsmobile 403 is readily available. I figured I'd rather have something there, rather than just a plain black air cleaner cover, and it IS a 403. So why not.
Yes, I did use yellow cable ties to hold the fan shroud in place (and the radiator overflow hose in place). The two places where the bolts attach to the plastic shroud had broken off, so the shroud could not be held in place with bolts. Maybe I'll find another shroud someday.
Straight-on view. Overall a mix of old and new, and certainly not a show-quality engine compartment. But one thing at a time. It looks a lot better than it did five months ago, and it actually runs now, too!
So go get 'em. If I can do it, believe me, anyone can.
Last edited by jaunty75; July 12th, 2017 at 09:49 PM.
Love what you did under there. Makes me want to do a bit of cleaning (valve covers, air cleaner assembly) as well. The setup on your Tornado is almost exactly the same arrangement as on my Delta 88. Which prompts a question that I was wondering - most of the spark plugs look reasonably easy to get to, except for one (under the A/C compressor, on the left in your last image). The other three on that side of the engine might not be easy but they look do-able, maybe with an extension and some creativity. But that one under the A/C compressor had me scratching my head. Will I need to remove the compressor to access that spark plug? I mean, I do have to change the drive belts anyway, but...
I'd also like to get a decal for the air filter top like yours, but for Oldsmobile 350 since that's the one in my car.
Your pics do inspire me to do more on my car. I agree about the satisfaction of working on one's own car and keeping it running well. I'm still amazed at all the working room and spaciousness of these cars, I'm used to working on compact/subcompact cars with very little room.
My repair manual arrived today and I spent a long while looking through it. I foudn the wiring diagram and this connector I'm looking at is the "Rear Body Connector" and the tan-colored wire is the fuel sending unit wire.
I pulled up some of the carpeting and interior trim to find the wire bundle does indeed run under the rocker panels on the driver's side, to the instrument cluster. There was also a small lone black wire next to it that I could not trace, it splits off towards the middle of the car somewhere.
The wiring diagram shows two other connectors in addition to the rear one I found in the trunk. An idea: Perhaps I should disconnect the wiring harness at each connector, grounding the fuel sending unit terminal and turning on the ignition (with a helper of course) to help me pin down where the open circuit might be?
Sorry for no posts recently as I was working and didn't have any time to work on the Olds.
I'm off today and got under the hood some more. Found that I needed a deep socket set for removing the 9/16 hex nuts holding the brake booster to the firewall (under the dash), so I went out and bought a set.
Under the hood I found one of the hoses going from the charcoal canister to carburetor was disconnected (capped on the carb end so as to prevent a vacuum leak). I removed the cap and reconnected the hose. I also found the hose that's supposed to connect the distributor vacuum advance to the intake manifold (not to the carburetor on this model), neither end was capped - the hose was just laying way in the back of the engine bay, not connected to anything. I did not reconnect that vacuum hose yet. I had read something about needing to adjust the timing first, or something to that affect? If anyone knows more about that, let me know.
I'll test the fuel sending unit wire at the rear connector once it cools down later this evening.
I bought some replacement vacuum hoses, also bought a pre-heater hose that the SMOG guy said I needed (going from outside the exhaust manifold to air cleaner assembly) and hooked it up. Cleaned the air cleaner assembly itself as well, and threw a new filter in it. Brake booster should be getting here sometime this week. Added power steering fluid since it was low (and yes I know where it's leaking). I'll post pics later.
Later this week, I'm going to buy some spark plugs/wires, dist. cap & rotor, PCV and EGR parts (waiting for pay day).
Also replacing the weather stripping on the driver door since it's in bad shape (fine on all the other doors, though). I can't find the seal (can't tell if it's rubber or plastic) that goes around the window glass on each door? Chunks of it are missing on mine, on a couple of the doors. I want to wash the car soon and get it looking all nice and shiny; don't want water leaking into the car.
Under the hood I found one of the hoses going from the charcoal canister to carburetor was disconnected (capped on the carb end so as to prevent a vacuum leak). I removed the cap and reconnected the hose.
The hoses connected to my charcoal canister were in various states of disarray. I would make sure that all of the hoses to the charcoal canister are in good shape and properly connected at both ends. In my car, there are four hoses of various diameters that connect to the canister. I also replaced the canister filter, which you probably should, too. It's on the bottom end of the canister, and you just slide it out through the center opening and slide the new one in.
Originally Posted by Temeku
I also found the hose that's supposed to connect the distributor vacuum advance to the intake manifold (not to the carburetor on this model), neither end was capped - the hose was just laying way in the back of the engine bay, not connected to anything. I did not reconnect that vacuum hose yet. I had read something about needing to adjust the timing first, or something to that affect? If anyone knows more about that, let me know.
Yes, you typically disconnect the hose to the vacuum advance when setting the timing. Be sure to plug the end, and be sure to reconnect it when you're done.
Originally Posted by Temeku
Also replacing the weather stripping on the driver door since it's in bad shape (fine on all the other doors, though). I can't find the seal (can't tell if it's rubber or plastic) that goes around the window glass on each door? Chunks of it are missing on mine, on a couple of the doors. I want to wash the car soon and get it looking all nice and shiny; don't want water leaking into the car.
Weatherstripping that goes around the doors is typically easy to find from the major rubber suppliers. The stuff that lines window channels and things like that, sometimes called "sweeps" or "felts" or "fuzzies," are difficult to find or not available at all.
Can't finish at the moment. New booster is in the firewall, but the hex nuts refuse to tighten past the ends - they become too hard to tighten any further. All four of them do this. I spent the last two hours straight trying to tighten them further - no dice. Suggestions? Do I need some sort of grease or...? (and yes I made sure I wasn't cross-threading them)
I understand what you mean about working on installing a booster. Getting at the four threaded rods to put the nuts on and tighten them is difficult and often requires bending your arm in ways it was never intended to be bent. I don't know why you should have difficulty reinstalling the nuts onto the threaded rods. I've never had a problem getting them started and then tightening them down. Are the nuts from the old booster? I don't recall if the new booster typically comes with nuts. Maybe they're not the same thread size.
As far as getting the pushrod on, I always have that problem, too. You have to tap it with a hammer or something, and then it pops over the end and slides into place.
The new booster came with two nuts for the master cylinder, but none for the cowl-side. I believe the studs are the same size on both sides of the booster, however...I'll try to use one of those master cylinder bolts on the cowl and see if it fits.
It's worth noting that the studs on the new booster are slightly "narrower" at the ends (where the old hex nuts are able to fit onto), but then become slightly larger at exactly the points where the hex nuts won't tighten any further. Perhaps I need larger hex nuts for the new booster.
I tried the hammer method for the pushrod but there's not a lot of working room, but I didn't try for more than a minute on that one. I'll tackle it again tomorrow, I stopped after I was so drenched in sweat that I could feel it running down my shirt every few seconds
Also, the new weatherstripping is installed on the driver door and it seems to have custom-fit itself quite nicely. I can finally wash the car soon. I've had the battery disconnected to do all of this.
I think the new booster has a different bolt size on the cowl side than the old one does. Heck, it might even be metric?
Success!
The hex nuts were indeed metric - M10x1.50, specifically. Picked up a bag full of them and their flat washers at Home Depot. Threw those on this afternoon and they fit perfectly, got the brake booster secure. Manual says to torque them down but god help me if I can actually get a small torque wrench up in the cowl there, so I just tightened them nice & snug like I did on my old Accord a while back and that worked fine.
A few carefully-positioned blows on the pushrod with a hammer worked, it is fully seated with the brake pedal. Had some trouble getting the cotter pin back on but I figured it out (albeit unconventionally).
There was a slight scare as I had unbolted this unknown device from the steering column yesterday to access one of the bolts, and today I couldn't get it back on at first. I'm not sure what it is, but it looks important and seems to have some function in the steering column. I did eventually get it back on correctly.
After reconnecting the vacuum lines and securing the master cylinder, I reconnected that battery and finally drove the Olds around for the first time in over a week. The new brake booster works wonderfully. No problems at all with it, my brakes are normal again. Drove around the city and stopped at a gas station to find my brake lights were stuck on (d'oh!) and that the brake pedal was a good few millimeters away from the brake light switch under the dash. Drove home and worked up a fast "ghetto" solution
Had a group of young guys come up and ask about the Olds. They seemed really into it. I don't really like or want the attention but it's nice to have the Olds appreciated especially by young folk (I'm 24, they seemed about my age or younger).
The hex nuts were indeed metric - M10x1.50, specifically. Picked up a bag full of them and their flat washers at Home Depot. Threw those on this afternoon and they fit perfectly, got the brake booster secure. Manual says to torque them down but god help me if I can actually get a small torque wrench up in the cowl there, so I just tightened them nice & snug like I did on my old Accord a while back and that worked fine.
Excellent. I know exactly what you mean about getting a torque wrench in there. Forget it. I've never been able to, either, so I just tighten the nuts down to the same level of force as I needed to loosen them.
Originally Posted by Temeku
There was a slight scare as I had unbolted this unknown device from the steering column yesterday to access one of the bolts, and today I couldn't get it back on at first. I'm not sure what it is, but it looks important and seems to have some function in the steering column. I did eventually get it back on correctly.
Good! Because, if I'm not mistaken, that's the neutral safety switch. It's what prevents the car from starting in any gear position but P or N. I don't know what would happen if it's not there. Either the car wouldn't start at all, or it would start in any gear. Neither is a desirable situation!
Originally Posted by Temeku
Yep, pennies and gorilla glue. Just enough to where the brake light switch releases normally as it did before, my brake lights work regularly again.
Yes, a good hillbilly repair! (But true hillbillies wouldn't have used pennies. Too valuable. They'd have used slugs.) It looks like the brake light switch is threaded into that hole on the bracket. Couldn't it be turned in or out as necessary to get it the right distance from the pedal? Then insert that locking washer or whatever it's called to hold it in position. Disconnect the wires so they're not twisted as you turn it, position it properly, and then reconnect.
Had a group of young guys come up and ask about the Olds. They seemed really into it. I don't really like or want the attention but it's nice to have the Olds appreciated especially by young folk (I'm 24, they seemed about my age or younger).
"Young guys." I love it. They're what, 3 or 4 years younger than you? I'm well more than twice your age. As far as I'm concerned, you're a young guy! To me, 40-year-olds are young guys.
Good work getting these repairs done and the car back on the road.
Good! Because, if I'm not mistaken, that's the neutral safety switch. It's what prevents the car from starting in any gear position but P or N. I don't know what would happen if it's not there. Either the car wouldn't start at all, or it would start in any gear. Neither is a desirable situation!
Whoops...good thing I got it back on correctly.
"Young guys." I love it. They're what, 3 or 4 years younger than you? I'm well more than twice your age. As far as I'm concerned, you're a young guy! To me, 40-year-olds are young guys.
Good work getting these repairs done and the car back on the road.
Haha yeah I know I'm "young" especially when most car-guys my age are into rice-rockets and the like. And here I am into an old, huge 70s boulevard-cruiser
I love cars like this. It's even more special to me now after finding that piece of history under the carpets, knowing it's an original L.A. car.
I've ordered some tune-up parts and read up in the manual on how to adjust timing in this motor, among other things. Any recommendation on brand of spark plugs? I haven't pulled the ones currently in the motor yet but I want to choose the spark plugs best made for this engine, like I've done on my Honda.
Good-looking car. My '78 Toro had a trailer hitch on it when I got it. One of the first things I did was remove it. It was rusty. I thought it upset the lines of the car, and I have no plans to ever tow anything with this car.
Good-looking car. My '78 Toro had a trailer hitch on it when I got it. One of the first things I did was remove it. It was rusty. I thought it upset the lines of the car, and I have no plans to ever tow anything with this car.
Good thinking; it hadn't occurred to me to remove it until now. Yeah I suppose someone was towing something at some point.
I never get tired of the wicked suspensions on cars like this. Rides like a cloud down the avenue, gently floating up and down over every bump and crack - I've been in a lot of cars, mostly modern ones, and this is by far the most comfortable car I've ever ridden in. Glad it's mine
The 403 motor in your Tornado runs good? Just wondering about the different Olds motors that year
Yes, the 403 in my car runs pretty good. It has about 85,000 miles on it.
The 403 was the only engine available on the '78 Toronado. But your car was a different story. The standard engine on the '78 Delta 88 was the 231 cubic inch V-6 made by Buick. There were four optional engines, all V-8s, and all produced by Oldsmobile. There was a 260, a 350 gasoline, a 350 (5.7 liter) diesel, and the same 403 as I have.
While waiting for parts to arrive, I've been trying to figure out how to adjust the timing. I have all the tools I need except for a tachometer - suppose I need one of the handheld ones for this job.
Pulled one of the spark plugs yesterday just to take a look at what's going on in there:
The new 50/50 coolant I've been adding is mixing with the old rusty coolant. It looked worse a couple of weeks ago. Car hasn't overheated nor is the coolant leaking into the oil or anything like that.
While waiting for parts to arrive, I've been trying to figure out how to adjust the timing. I have all the tools I need except for a tachometer - suppose I need one of the handheld ones for this job.
You need a tach. Whether it's handheld or the size of a room is not the issue.
Originally Posted by Temeku
Pulled one of the spark plugs yesterday just to take a look at what's going on in there:
I assume they're all in similar condition. Will be replacing after timing is adjusted.
I would replace the spark plugs first, and from the looks of that, I'd do it now. They're cheap (less than $20 for a set of 8). I look at setting the timing as something to do as part of a tune-up after all of the parts I want to replace have been replaced.
Here's a page that can help identify spark plug issues. Yours looks like the one at lower left.
Took of the radiator cap:
The new 50/50 coolant I've been adding is mixing with the old rusty coolant. It looked worse a couple of weeks ago. Car hasn't overheated nor is the coolant leaking into the oil or anything like that.
Why have you been adding coolant? Leak somewhere?
To be honest, that coolant does not look happy. Even if you don't take the radiator out to have it checked, I'd drain out that old coolant, flush the system, and put in new.
Last edited by jaunty75; July 30th, 2017 at 05:43 PM.
You need a tach. Whether it's handheld or the size of a room is not the issue.
I plan on buying multiple gauges for the car - oil pressure, tach, and water temperature.
I would replace the spark plugs first, and from the looks of that, I'd do it now. They're cheap (less than $20 for a set of 8). I look at setting the timing as something to do as part of a tune-up after all of the parts I want to replace have been replaced.
Here's a page that can help identify spark plug issues. Yours looks like the one at lower left.
I already ordered the plugs (8x), as per the emission label and manual for the car. AC Delco, R46SZ, .060 gap. Just waiting for them now.
I'm pretty sure I know why the plugs are ash-fouling. I asked the PO what oil he used, he said 15w40 because it has additives to protect the camshaft/lifters. Those additives are showing up on the plugs. I went to the store to buy some oil for the Olds to carry around in the trunk in case of emergencies (like I do with the 50/50 coolant), and I found that 15w40 is for Diesel engines, despite this 350 being a plain gasoline engine. Since it runs fine currently with said oil, I've been reluctant to change it...
Why have you been adding coolant? Leak somewhere?
To be honest, that coolant does not look happy. Even if you don't take the radiator out to have it checked, I'd drain out that old coolant, flush the system, and put in new.
I haven't been able to find a leak. Driving the Olds around on a hot day makes the coolant gradually disappear. Same happens on my old Honda too. I've read that it may be evaporating somehow.
A coolant flush is planned very soon.
Last edited by Temeku; July 30th, 2017 at 06:05 PM.
I haven't been able to find a leak. Driving the Olds around on a hot day makes the coolant gradually disappear. Same happens on my old Honda too. I've read that it may be evaporating somehow.
It's supposed to be a closed system. That's how it gets pressurized. If it were open enough to allow coolant to evaporate, it would never be able to pressurize.
You might have a slow leak somewhere that you haven't found because it's landing on something and evaporating before enough accumulates to drip to the ground. Again, this is where having the radiator checked might be worth doing while you're changing the coolant since you'll have it drained, anyway.
I did find evidence on one side of the radiator where it had leaked where the upper radiator hose connects to it. The radiator hoses look relatively new to me, though.
Digging under the dash and I finally found the front body connector, matching the wires to the wiring diagram in my manual:
Works. Idles a bit low (400 RPM) in Park, and about the same in Drive. Otherwise the needle is steady, it doesn't fluctuate on it's own at all like I thought it was going to do due to a vacuum leak through the manifold vacuum port.
Another thing about the disappearing coolant. After driving the car around for a while and shutting it off, I always get this gurgling noise (like bubbles popping) around where the upper radiator hose meets the radiator, for a few minutes. No sign of a leak. Maybe air in the system though?
PCV valve was hard to remove because someone painted it (along with the rubber grommet) the same color as the valve cover. I did get it out of there, along with chunks of the now rock-hard grommet:
I tried to carefully chisel the rest of the grommet out of there but it only keeps breaking off into smaller chunks. I made sure nothing fell into the PCV port down there.
Gunk inside the old PCV valve, presumably what made it fail the test. It still rattled when I shook it, though.
I gently pounded the new PCV valve into the old grommet for the time being, until I can figure out what to do about it. The valve moves around if I force it, but I ran the car afterward and it doesn't leak oil or vacuum. It'll have to do for right now. I'm afraid that I might have to remove that entire valve cover to get the rest of the grommet out. Not easy with all the A/C Compressor stuff in the way.
I don't think they were really that old, but I replaced them anyway. They were all coated in carbon, confirming the rich-running conditon. Most of them were otherwise clean, with the exceptions of #3, #5 and #7. Those ones had noticeable ash deposits, with #5 by far being the worst:
Also installed pre-heater hose and air cleaner assembly gasket (not pictured) since those were missing before. Will replace fuel filter (in carburetor) next as well. Still also trying to disconnect the front body connector so I can test the fuel gauge circuit without breaking it.
Put everything back together and drove the Olds around town - runs better already. The constant hesitation/stuttering on acceleration is gone completely. RPM is slightly smoother. Seems to have a little more power than before.
I think you want to concentrate on getting the PCV grommet out of there. It's rock hard due to age and likely isn't sealing the way it should. As annoying as it is to do, it's probably worth taking the valve cover off first both so you don't drop pieces of the grommet inside.
400 RPM seems awfully low at idle. I would think the engine would have difficulty staying running, but maybe not. What is the RPM when you're cruising down the highway at 55 mph?
The gurgling radiator noise could be just the coolant being sucked back into the system from the overflow bottle as the engine cools? But maybe it's what you say, air in the system.
I'm not surprised the car runs better after all you've done. With the way those old spark plugs look, I'm betting the plug change alone would have been enough to make a noticeable difference in how the engine runs.
I'll take the Olds for a drive tomorrow and get back to you with RPM ranges at higher speeds.
So I've determined that my timing pointer is missing, which is why I've been having such a difficult time finding the timing marks. This makes adjusting the timing a lot more complicated, and I can't find replacement pointers for the '78 Olds 350 V8. I see the top-dead-center slot on the harmonic balancer but nothing else...
 July 5th, 2017, 04:04 AM


