When you click on links to various merchants on this site and make a purchase, this can result in this site earning a commission. Affiliate programs and affiliations include, but are not limited to, the eBay Partner Network.
Another thought just came to mind...I have just under 1/4 tank of gas right now. That's about 30 pounds. A full tank is 125 pounds which would add 95 pounds...would that significantly change the stance?
I don't think the front height is that far off. Get the back down and some of the weight will transfer off the front and it may come up a bit.
Here's mine with front Moog 5536 springs and 245-60-15 tires.
That's a sweet ride! I'll look into those springs. Question though..is yours a big block? Also, I do have a lean to the left front, so as I said in a previous post, once get that figured out, I'll have a better idea of where I am.
Last edited by 72455; August 16th, 2018 at 01:51 AM.
Reason: Missed some info
Location: Edmonton, AB. And "I am Can 'eh' jun - eh"
Posts: 24,525
The lean could definitely be caused by a weak spring. It could also be caused if the front springs were already replaced (likely) but the lower end of the spring coil wasn't properly seated in the lower control arm.
The lean could definitely be caused by a weak spring. It could also be caused if the front springs were already replaced (likely) but the lower end of the spring coil wasn't properly seated in the lower control arm.
That's good info Allan, thanks. How can I check that?
Location: Edmonton, AB. And "I am Can 'eh' jun - eh"
Posts: 24,525
You can do a visual inspection of the lower control arm where the spring seats. There is an indent that runs about 3/4 of the way around the lower CA. The end of the spring should be fully seated in that groove. It's an overlooked part of installation by some techs at shops. Of course the upper part of the spring is flat so it fits into the spring pocket in the frame quite bomb proof. Here's a scan from the Assembly Manual. LMK if you have problems with it, I believe I have pictures on file from when I did my front end.
Thanks so much. If everything checks out what's the chances of ons spring being bad and the other good? And, if that's the case, as a temporary fix to level it out, Im thinking of just putting one of those round spring boosters in until I can replace the coils. If I do that, will the rear drop the same amount that I raise the front? And just to get an idea of how much I need to raise the front left, I should be able to jack it up on that side, right?
Location: Edmonton, AB. And "I am Can 'eh' jun - eh"
Posts: 24,525
Hard to say, but springs are metal parts and develop fatigue. It's entirely possible to have one go bad and sag. I measured mine when I had them out of the car and both were spot on around 17 1/2" tall. I have a 350 in my car and the front springs are original. The rear springs are MOOG and have been replaced once back around 1985. I've always replaced things like springs on the same principle as tires - matched sets. Considering springs aren't that expensive it's worth it. Replacing the front springs can be a little dangerous if you don't know what you're doing. I found out it was not that difficult with the car up on jackstands (about 18" off the ground).
When you get to this stage, it's a piece of cake. Note: remove shocks first. That spring will pop right out with a good tug.
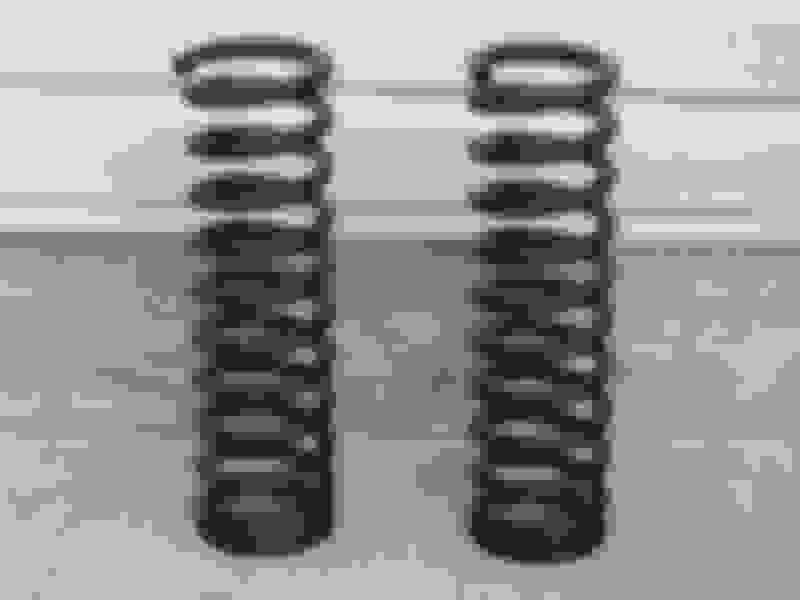
These are my OEM springs sanded and painted. They measure exactly the same height and they balance the car perfectly.
Reinstalled and control arms refinished + all new bushings
If you have a sping that's not in the coil groove it will affect the height about 3/4" on that side (too high). That's not enough to compensate for that excessive height in the back.
Hard to say, but springs are metal parts and develop fatigue. It's entirely possible to have one go bad and sag. I measured mine when I had them out of the car and both were spot on around 17 1/2" tall. I have a 350 in my car and the front springs are original. The rear springs are MOOG and have been replaced once back around 1985. I've always replaced things like springs on the same principle as tires - matched sets. Considering springs aren't that expensive it's worth it. Replacing the front springs can be a little dangerous if you don't know what you're doing. I found out it was not that difficult with the car up on jackstands (about 18" off the ground).
When you get to this stage, it's a piece of cake. Note: remove shocks first. That spring will pop right out with a good tug.
These are my OEM springs sanded and painted. They measure exactly the same height and they balance the car perfectly.
Reinstalled and control arms refinished + all new bushings
If you have a sping that's not in the coil groove it will affect the height about 3/4" on that side (too high). That's not enough to compensate for that excessive height in the back.
Again, thanks for the advice. The left side rear is where I want it . My challenge is getting the right rear down to match the left. That's why I'm thinking (again, temporarily)about using a round booster in the left front to level it out. Plus once I do replace the front coils back to stock the rear will drop even more, right?
Location: Edmonton, AB. And "I am Can 'eh' jun - eh"
Posts: 24,525
Not as much as you'd like. You're going to have to just bite the bullet and get stock height shocks for the back. That will reduce the height on the back dramatically. Note: On Ken's convertible, the shocks are HD IIRC as that was a feature of the convertible. It also has a fully boxed and heavier frame, which you don't.
This could easily turn into a 4 corner spring replacement project. The rear springs are super easy to do. Shouldn't take more than 1/2 hour per side.
I measured mine at the points IDd in the manual pic you posted.
I get about 11 1/4 rear and 10 3/4 front appears to be the same measure side to side
I have the Moog 5450 in front (plan to some day swap for 5536s alleged to be 1" lower in ride height) and moog 5385 in the back (i think i can double check if needed)
I used a 1" spacer under the rear springs to get a slight rear to front rake. I like to think when i put the 5536s in the front i can remove the rear spacer and the car will sit 1" lower than it does now.
I agree w the other posts you probably need new front springs (and rear ones too if theres no spacers under there) to get a better ride height and even side to side
Last edited by RetroRanger; August 16th, 2018 at 04:25 PM.
Location: Edmonton, AB. And "I am Can 'eh' jun - eh"
Posts: 24,525
These are the rear springs on my 72. (Before cleanup and paint)
Installed - lower end
Upper pocket (also use rubber pocket sleeves for top of spring to isolate it from the frame) BTW, the rear spring has an alignment as well. See CSM or AM for that.
I measured mine at the points IDd in the manual pic you posted.
I get about 11 1/4 rear and 10 3/4 front appears to be the same measure side to side
I have the Moog 5450 in front (plan to some day swap for 5536s alleged to be 1" lower in ride height) and moog 5385 (i think i can double check if needed)
I used a 1" spacer under the rear springs to get a slight rear to front rake. I like to think when i put the 5536s in the front i can remove the rear spacer and the car will sit 1" lower than it does now.
I agree w the other posts you probably need new front springs (and rear ones too if theres no spacers under there) to get a better ride height and even side to side
These are the rear springs on my 72. (Before cleanup and paint)
Installed - lower end
Upper pocket (also use rubber pocket sleeves for top of spring to isolate it from the frame) BTW, the rear spring has an alignment as well. See CSM or AM for that.
If I get the same measurements on my rears as you Allan would it be safe to assume my rears are stock?
Location: Edmonton, AB. And "I am Can 'eh' jun - eh"
Posts: 24,525
Judging from this picture you posted in another thread, I'd say the likelihood of the rear springs are not OEM. They appear to have been replaced - still shiny and clean like the coil over shocks.
So what if my thought process is wrong? What if instead of trying to raise the ieft front, I check (as Allan refrenced above) the alignment of the right rear coil Spring? If it is not seated correctly the my excessive lift on the right rear could be from that, right?
Location: Edmonton, AB. And "I am Can 'eh' jun - eh"
Posts: 24,525
No. The rear springs won't cause that kind of excessive lift even if they're not indexed as per the AM. Both rear springs in your car are likely the wrong ones.
So I got up this morning and got busy trying to figure out how to get the tail down some.
First thing was I checked the alignment of the right rear coil, and it was off, so I set that right. Couldn't really tell if it helped, but at least it's right.
Second, I attempted to insert a rubber spacer into the left front coil, but it was too thick, and it wouldn't go.
So, I ended up with a couple of lowering clamps on the right rear coil, and I think it's a lot better...
Location: Edmonton, AB. And "I am Can 'eh' jun - eh"
Posts: 24,525
Although still a bit high in the rear it looks much better. I can't help but wonder if the front springs were replaced with ones intended for a 350 engine. They just look way too low.
Location: Edmonton, AB. And "I am Can 'eh' jun - eh"
Posts: 24,525
I agree. The answer is new replacement (proper) springs. It should improve both stance and handling. Most don't understand that steering and cornering are affected by suspension geometry.
I agree. The answer is new replacement (proper) springs. It should improve both stance and handling. Most don't understand that steering and cornering are affected by suspension geometry.
No worries...I know it's just a band aid, and I will be replacing the front springs in the future, but please understand the rake is where I was looking to go with it, and it looks better in person...trust me😀
I really appreciate everyone's help and advice through this adventure, and I will circle back to this topic when I'm ready to replace the springs.
Lol...thinking about looking for the elusive build sheet but I just filled my tank so that may be a bit
Maybe tackle the driver side quarter window...it likes to be stubborn to roll up.
Location: Edmonton, AB. And "I am Can 'eh' jun - eh"
Posts: 24,525
The grease on the regulator may be dried up. You'll have to take the back seat out to take off the side panel and gain access. When you take out the back seat, check for a build sheet under a spring on the seat or upright.
As far as the regulator goes, you might be able to clean the old grease with some WD 40 and then put some lithium grease on the teeth and slides.
Although still a bit high in the rear it looks much better. I can't help but wonder if the front springs were replaced with ones intended for a 350 engine. They just look way too low.
the BBO is ~50lbs heavier than the SBO. Take out the AC and swap the intake for aluminum and a BBO is 25 lbs lighter than a stock Sbo. Point is there not much difference.....I weigh 50 lbs more now than when I drove my first olds!😕
the BBO is ~50lbs heavier than the SBO. Take out the AC and swap the intake for aluminum and a BBO is 25 lbs lighter than a stock Sbo. Point is there not much difference.....I weigh 50 lbs more now than when I drove my first olds!😕
Hey Retro that's good advice and thanks, but the A/C has already been removed (in one of it's former lives it was built to be a drag car,) and it's got an Edelbrock intake. So I'll just roll (literally ha ha) with what I have until I replace the front springs.
The grease on the regulator may be dried up. You'll have to take the back seat out to take off the side panel and gain access. When you take out the back seat, check for a build sheet under a spring on the seat or upright.
As far as the regulator goes, you might be able to clean the old grease with some WD 40 and then put some lithium grease on the teeth and slides.
Hey Allan I already checked under the seat cushion for the build sheet. Are you thinking it could be behind the seat back, and if so, wouldn't I see it through the trunk?
As far as the window, it goes up pretty smooth...problem is that I have to pull and wiggle it to go up...maybe it's off track or the regulator is whacky?
Location: Edmonton, AB. And "I am Can 'eh' jun - eh"
Posts: 24,525
Or maybe you have a broken tooth on the regulator gear when it's fully down. Who knows? You need to open that up and take a look. How far do you have to pull/wiggle it up before it works normally?
Or maybe you have a broken tooth on the regulator gear when it's fully down. Who knows? You need to open that up and take a look. How far do you have to pull/wiggle it up before it works normally?
I have to work it as I go..roll it up a bit...pull/wiggle...roll it up a bit..pull/wiggle till it's all the way up.
Location: Edmonton, AB. And "I am Can 'eh' jun - eh"
Posts: 24,525
Both - there's a filler panel (attached to the armrest) on the side of the upright that has to come out. it's screwed in place on the front and upright.
Both - there's a filler panel (attached to the armrest) on the side of the upright that has to come out. it's screwed in place on the front and upright.
 August 15th, 2018, 07:26 PM